
Last year, I remember sitting on my bed the night before the 4th of July, staring at my chipped nail polish and thinking… seriously, how did I forget this? I had the outfit ready, snacks planned, even my playlist set—but my nails? Total mess. And somehow, it made me feel incomplete (you know that feeling, right?).
That’s when I realized—little details like nails actually pull the whole vibe together. If you’re here, maybe you’re in the same boat, wondering what cute, easy, or even a little extra designs you can try.
Don’t worry, I’ve got you. In this guide to 4th of July Nails Ideas, you’ll find styles that are fun, creative, and totally doable—even if you’re not a pro. Whether you love bold designs or something simple, there’s something here for you. Let’s make your nails as festive as the fireworks
4th of July Nails Ideas
Getting ready for the 4th of July isn’t complete without fun, festive nails that match the vibe. From bold stars and stripes to simple red, white, and blue looks, these 4th of July Nails Ideas will help you stand out effortlessly.
Classic Red White and Blue Nails
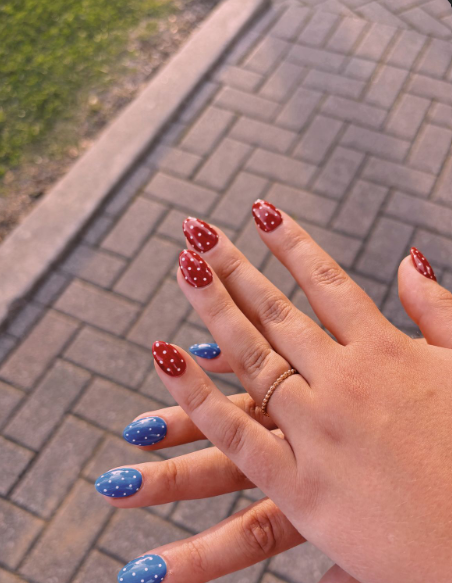
Honestly, this is the style I always come back to when I don’t want to overthink things. Just painting each nail a different shade of red, white, or blue somehow feels instantly festive without trying too hard. I remember one year I did this last-minute before a barbecue, and people kept asking where I got them done… even though I did them in like 20 minutes at home. That’s the charm of it—it looks put-together without needing pro skills.
What I usually do is pick one bold red, one bright white, and one deep navy, then alternate them across both hands. Sometimes I add a glossy top coat to make it pop more. If you want a little extra, you can throw in one accent nail with tiny stars, but honestly, even plain looks good. In my opinion, this is perfect if you’re not super confident with nail art but still want something cute and on-theme.
American Flag Accent Nails
I’ll be real—American flag nails look complicated, but once you try them, they’re not as scary as they seem. I usually keep most nails simple (like solid red or blue), and then do just one or two accent nails with the flag design. The first time I tried it, it was messy… like really messy. But after a couple tries, you start getting the hang of those little stripes and stars.
My trick is to use a thin brush or even a toothpick for the stripes. Paint a blue square in the corner, then dot tiny white stars (they don’t have to be perfect, trust me). The rest is just red and white lines across the nail. I’ve found that doing this on your ring finger only makes the whole look feel balanced without being overwhelming.
Stars and Stripes Nail Art
This one feels a bit more playful to me, like you can mix things up instead of sticking to one design. Some nails can have stripes, others can have stars, and you don’t have to make them match perfectly. I actually prefer when they don’t—it gives that fun, slightly chaotic party vibe.
When I do this, I usually start with a white or blue base, then add stripes using tape or a steady hand. For stars, I either use a dotting tool or just fake it with tiny dots shaped like stars. To be fair, they don’t always look like perfect stars, but from a distance, it totally works. It’s one of those designs where imperfections kind of add to the charm.
Glitter Fireworks Nails
Okay, these are honestly my favorite when I want something that catches attention. There’s just something about glitter that screams celebration, and it really does remind me of fireworks in the night sky. I wore this style once to a night event, and under lights, my nails were literally sparkling nonstop.
What I do is start with a dark base, usually navy or black, and then layer glitter polish on top. You can drag the glitter upward to mimic fireworks bursts. Sometimes I even mix different glitter shades—silver, red, blue—to make it look more dynamic. It’s a bit messy, I won’t lie, but the end result is always worth it.
Patriotic French Tip Nails
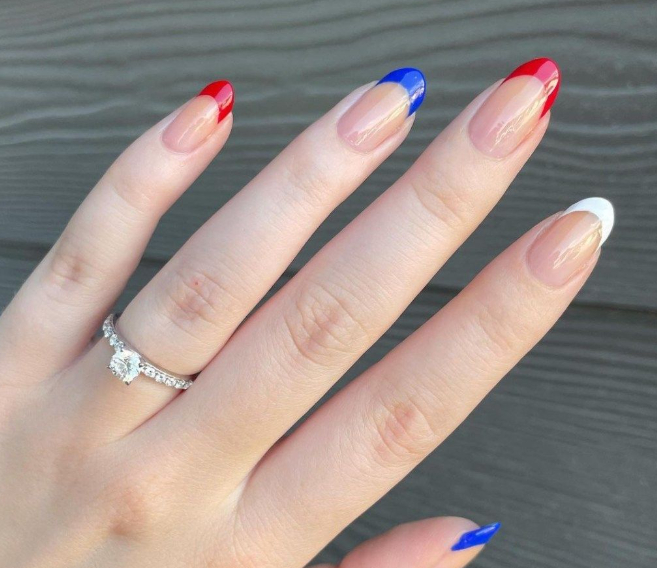
I used to think French tips were boring, but this version completely changed my mind. Instead of the classic white tip, you swap in red and blue, and suddenly it feels fresh and festive. It’s subtle, but still very on-theme, which I personally love.
I usually do a nude or sheer pink base, then alternate red and blue tips on each nail. If I’m feeling extra, I’ll add a tiny white stripe or dot along the edge. The key is to keep the lines clean—so take your time with this one. It’s perfect if you want something cute but not too loud.
Ombre Red White Blue Nails
Ombre nails always look way harder than they actually are. I remember avoiding them for so long, thinking I’d mess it up, but once I tried the sponge technique, it became one of my go-to styles. And for 4th of July, the red-white-blue gradient just looks so smooth and pretty.
I usually dab the three colors onto a makeup sponge and gently press it onto my nails. It might take a couple layers to blend nicely, but that’s normal. Clean-up around the edges is the annoying part, honestly, but once you add a top coat, everything blends beautifully. It gives that soft, blended effect that feels a bit more polished.
Minimalist Star Nails
Not everyone wants bold nails, and I totally get that. Some years, I just want something simple and low-key, and that’s where minimalist star nails come in. It’s basically a clean base with just a few tiny stars—and somehow, it still feels festive.
I usually go for a nude or light pink base, then add small star stickers or hand-drawn stars on one or two nails. Sometimes I place just one star in the center, and that’s it. I’ve found that less really is more with this look. It’s easy, quick, and still gets compliments.
Matte Navy and Red Nails
Matte nails have such a different vibe compared to glossy ones. They feel more modern and a bit edgy, which I didn’t expect to love as much as I do. The first time I tried a matte top coat over navy and red, I was honestly surprised at how classy it looked.
I usually paint my nails in alternating navy and red, then finish with a matte top coat. That’s literally it. Sometimes I’ll add a glossy star or stripe on top for contrast, which looks really cool. It’s a simple twist, but it changes the whole feel of the manicure.
Confetti Party Nails
These nails are just pure fun. They remind me of party decorations and those little paper confetti pieces everywhere. I tried this once for a casual get-together, and it instantly made my nails look more lively without much effort.
All I do is apply a clear or light base, then layer a confetti-style glitter polish on top. You can also use loose glitter pieces if you want more control. I’ve found that spacing them out randomly looks better than trying to place them perfectly. It’s messy in a good way.
Rhinestone 3D Patriotic Nails
Now this one is definitely more extra, and I don’t do it every year, but when I do, it feels like a full-on statement. Rhinestones instantly make your nails stand out, especially in red, white, and blue combos. I wore these once and couldn’t stop staring at my own hands, not gonna lie.
I usually start with a simple base, then use nail glue to place rhinestones in patterns—like stars or lines. The trick is not to overdo it on every nail. Maybe pick one or two accent nails so it doesn’t feel too heavy. Also, be careful because they can snag on things, which I learned the hard way.
Neon Patriotic Nails
Neon shades give a totally different energy to patriotic nails. Instead of the usual deep tones, everything looks brighter and more playful. I tried neon red and blue once, and honestly, it felt more like a summer party vibe than traditional 4th of July—and I loved that.
I usually keep the design simple when using neon colors because they’re already bold. Maybe solid neon nails or a mix with white for contrast. You can also add simple stripes or dots. In my opinion, this is perfect if you want something that stands out in daylight.
Short Simple 4th of July Nails
I’ve had phases where I kept my nails really short, and I used to think nail art wouldn’t look good on them. But honestly, simple designs work even better on short nails sometimes. They look clean, neat, and easy to manage.
I usually go for basic colors or tiny designs like dots, mini stars, or small stripes. Nothing too detailed, because there’s not much space anyway. I’ve found that keeping it simple actually makes it look more polished. Plus, it’s way easier to maintain, which is always a win.
Tips to Make Your Nails Last Longer
Let’s be honest—there’s nothing more annoying than spending time (or money) on your nails, only to see them chip the next day. Whether you’re doing your nails at home or getting them done at a salon, a few simple habits can make a huge difference. With the right care, your 4th of July nails can stay fresh, shiny, and beautiful for much longer.
- Use base coat and top coat
Always start with a base coat to protect your natural nails and help the polish stick better. Finish with a top coat to seal everything in and add shine. It also prevents early chipping. - Avoid chipping
Try not to use your nails as tools (like opening cans or scratching surfaces). Wear gloves while doing household work to protect your manicure and keep it looking new. - Moisturize cuticles
Dry cuticles can make your nails look dull and unhealthy. Apply cuticle oil or moisturizer daily to keep your nails hydrated and neat. - Choose quality nail polish
Good-quality nail polish lasts longer and gives a smoother finish. Cheap products may chip faster and ruin the overall look of your nails.
By following these simple tips, you can enjoy your manicure for days without worrying about constant touch-ups.

Hi, I’m Victoria, an art and craft teacher at Newark City Schools, where I have the joy of working with middle school students to help them explore their creativity and develop their artistic talents. I believe that art is a powerful way for students to express themselves, and I strive to make every lesson a fun, engaging, and inspiring experience.
I created this website to share the art and craft projects, techniques, and resources that I use in my classroom, hoping to inspire both educators and young artists alike. Whether you’re a teacher looking for new ideas or a student eager to try something new, I’m excited to provide creative tools and projects that anyone can enjoy.
When I’m not in the classroom, I love experimenting with different art forms and learning new crafting techniques. My goal is to help others discover the joy of making things with their hands, and I hope my website serves as a space for everyone to explore their creative potential.