The 4th of July Paper Crafts for Kids are a wonderful way to celebrate America’s Independence Day while sparking creativity in young minds. The Fourth of July marks the historic adoption of the Declaration of Independence in 1776, a time when the United States declared freedom from British rule. It’s a holiday full of patriotism, fireworks, parades, and family fun — and what better way to get kids involved than through hands-on, festive crafts?
4th of July Paper Crafts for Kids
Celebrate Independence Day with fun and festive 4th of July Paper Crafts for Kids that spark creativity and patriotic spirit. These easy, mess-free activities are perfect for keeping little hands busy while honoring the red, white, and blue!
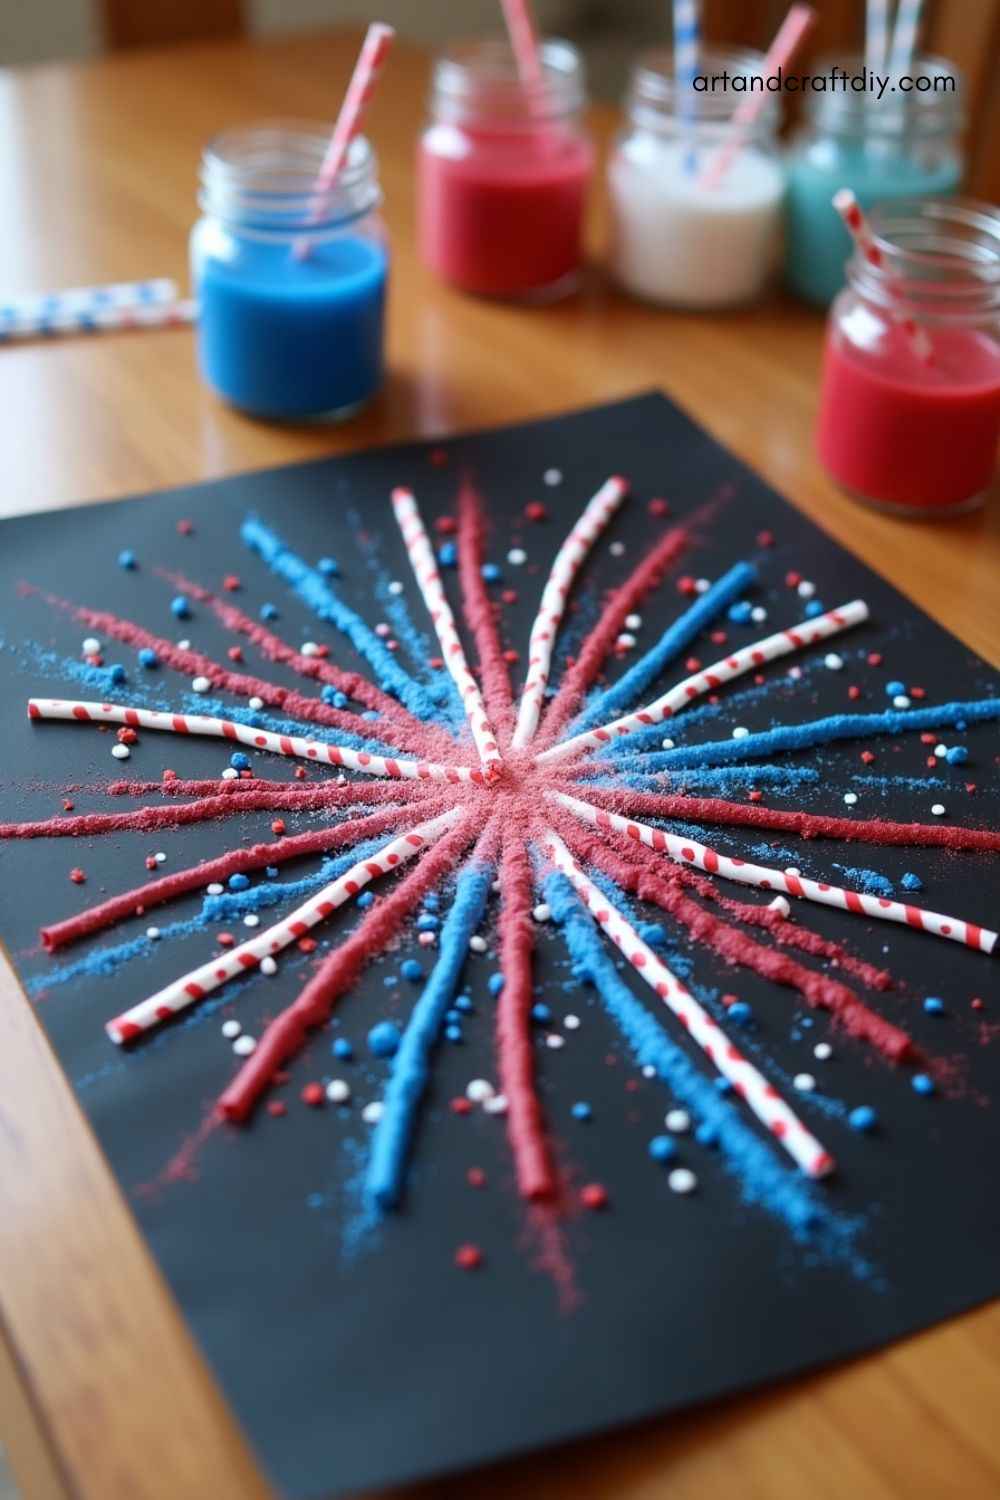
Paper Fireworks Art
Materials:
Black construction paper
Red, white, and blue paint
Drinking straws or cotton swabs
Glitter (optional)
Steps:
Lay the black paper down as your canvas.
Dip a straw or cotton swab into paint.
Blow or dab the paint outward from the center to create “firework bursts.”
Sprinkle glitter while the paint is still wet for extra sparkle.
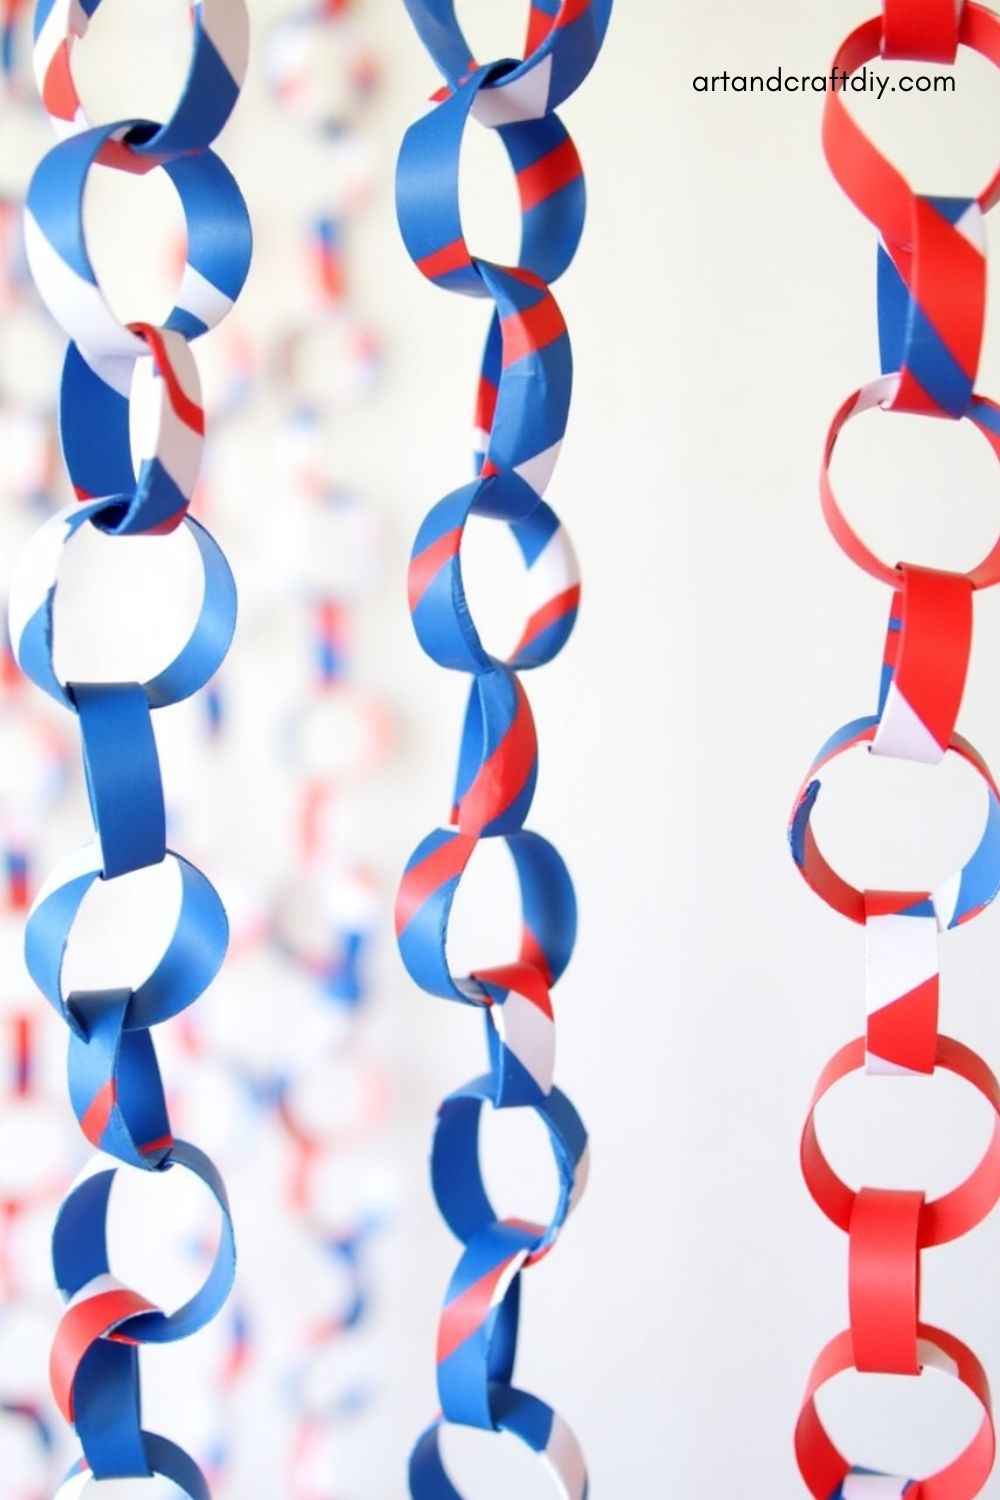
Patriotic Paper Chains
Materials:
Red, white, and blue construction paper
Glue stick or tape
Scissors
Steps:
Cut strips of paper about 1 inch wide and 6 inches long.
Loop the first strip and glue the ends together.
Thread the next strip through and repeat, alternating colors.
Hang your paper chain as a festive garland.
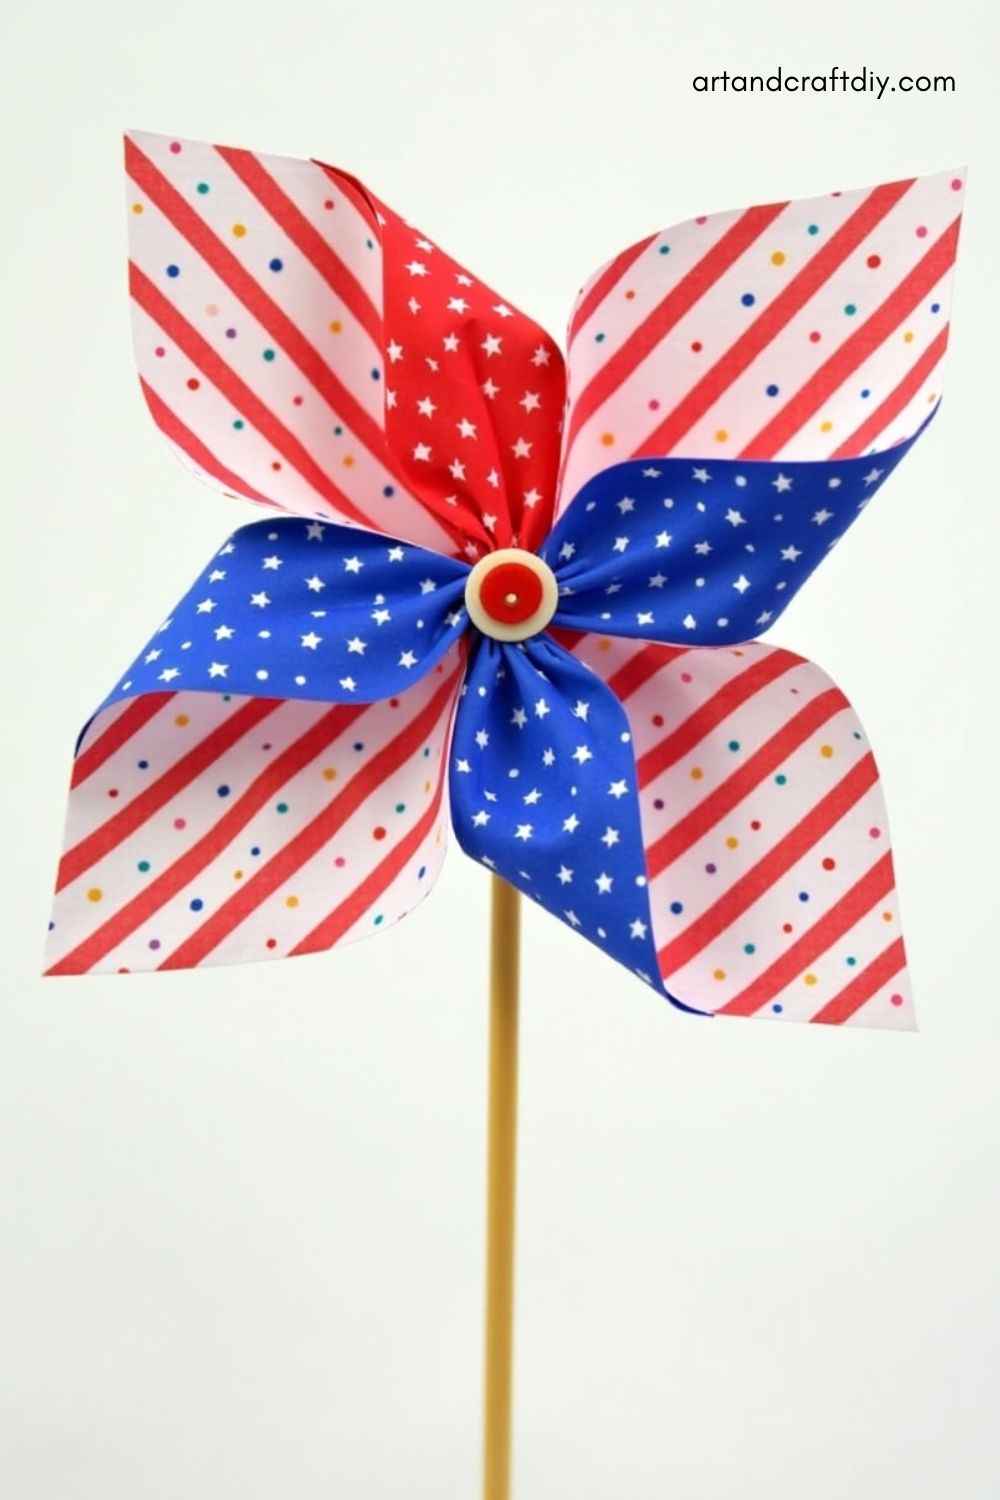
Stars & Stripes Pinwheels
Materials:
Patriotic-patterned paper or red/white/blue paper
Push pin or brad
Straw or pencil
Scissors
Steps:
Cut a square from your paper and snip diagonally from each corner toward the center, stopping short.
Fold every other corner into the center and pin it with a brad.
Attach the brad to the pencil eraser or a straw.
Blow gently and watch it spin!
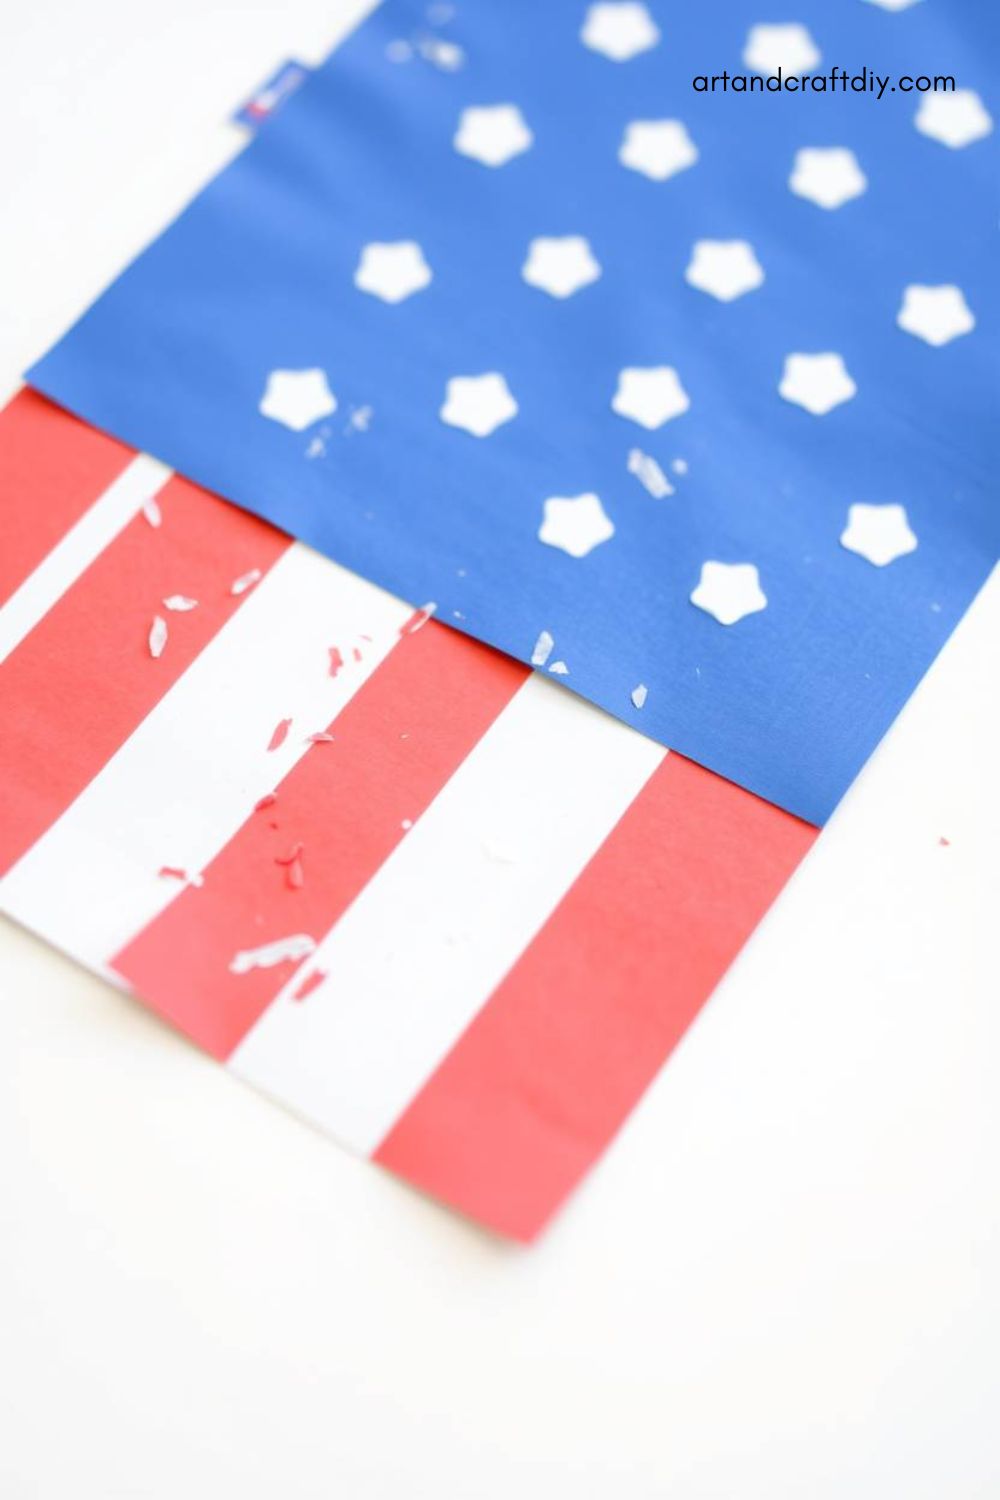
American Flag Collage
Materials:
White paper for base
Red, white, and blue construction paper
Glue
Scissors
Steps:
Cut red stripes and a blue rectangle.
Glue the stripes horizontally and the blue block in the upper corner.
Cut small white stars or use stickers and place them on the blue section.
Let kids personalize it with their names or glitter.
Handprint Bald Eagle
Materials:
Brown, white, and yellow construction paper
Glue
Scissors
Googly eyes
Steps:
Trace and cut out handprints for the wings (brown).
Cut out a white eagle head and a yellow beak.
Assemble the eagle by layering the parts together.
Add googly eyes for a fun touch.
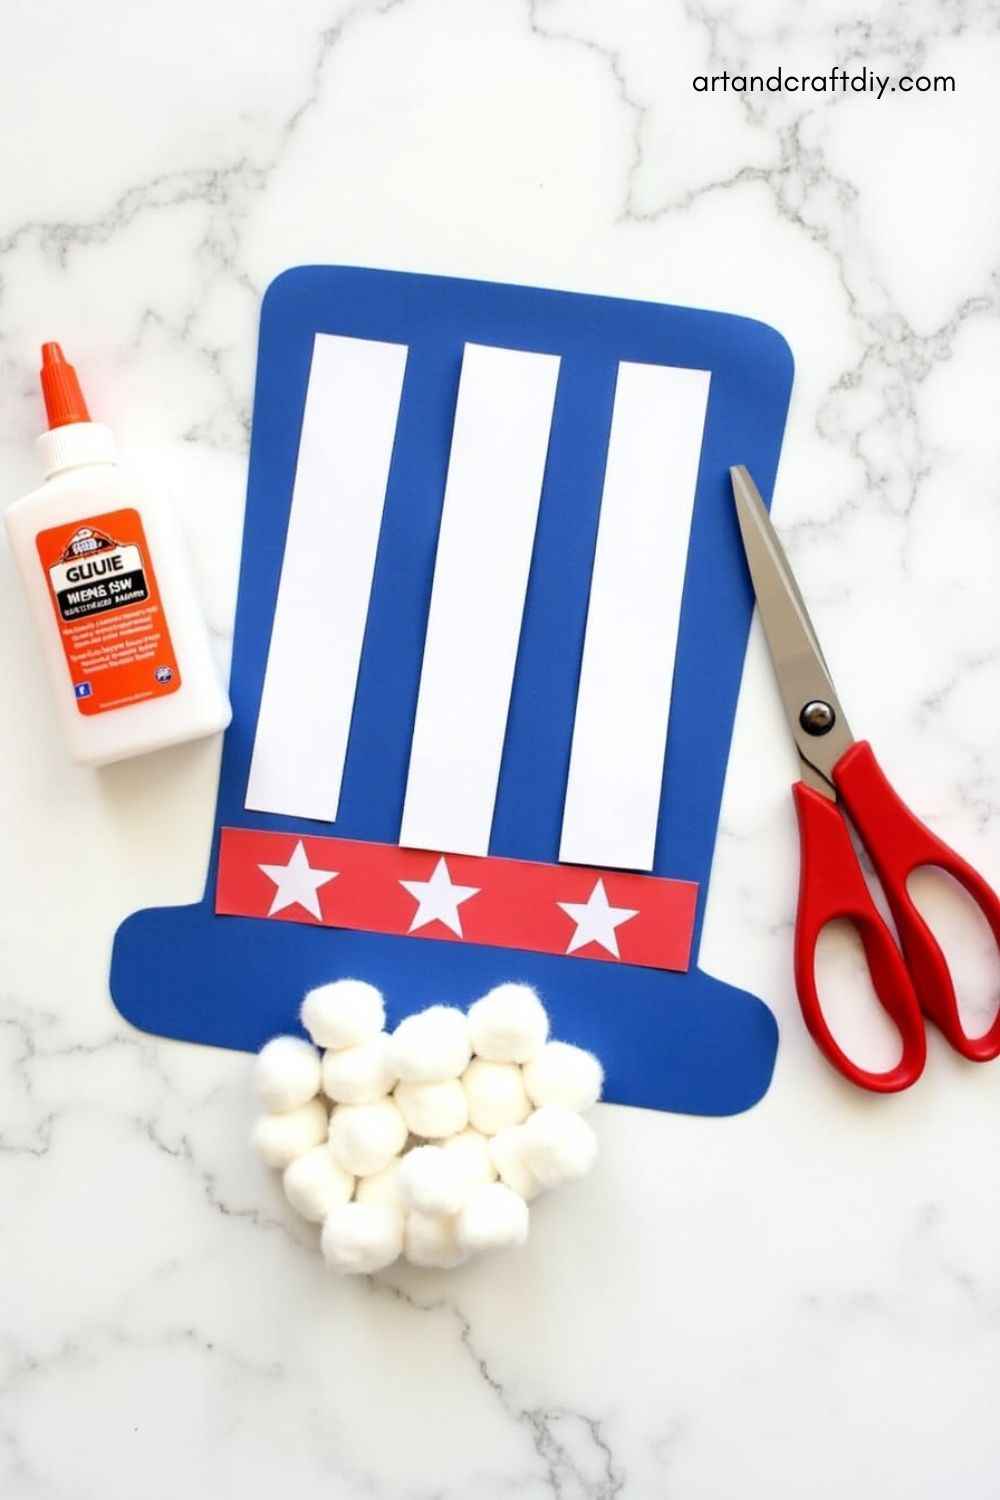
Uncle Sam Hat
Materials:
Red, white, and blue construction paper
Glue
Cotton balls (optional)
Scissors
Steps:
Cut a red band for the base and white strips for the vertical lines.
Glue the stripes on a blue rectangle to form the hat shape.
Attach a brim and add stars if desired.
Use cotton balls to make a fluffy white beard!
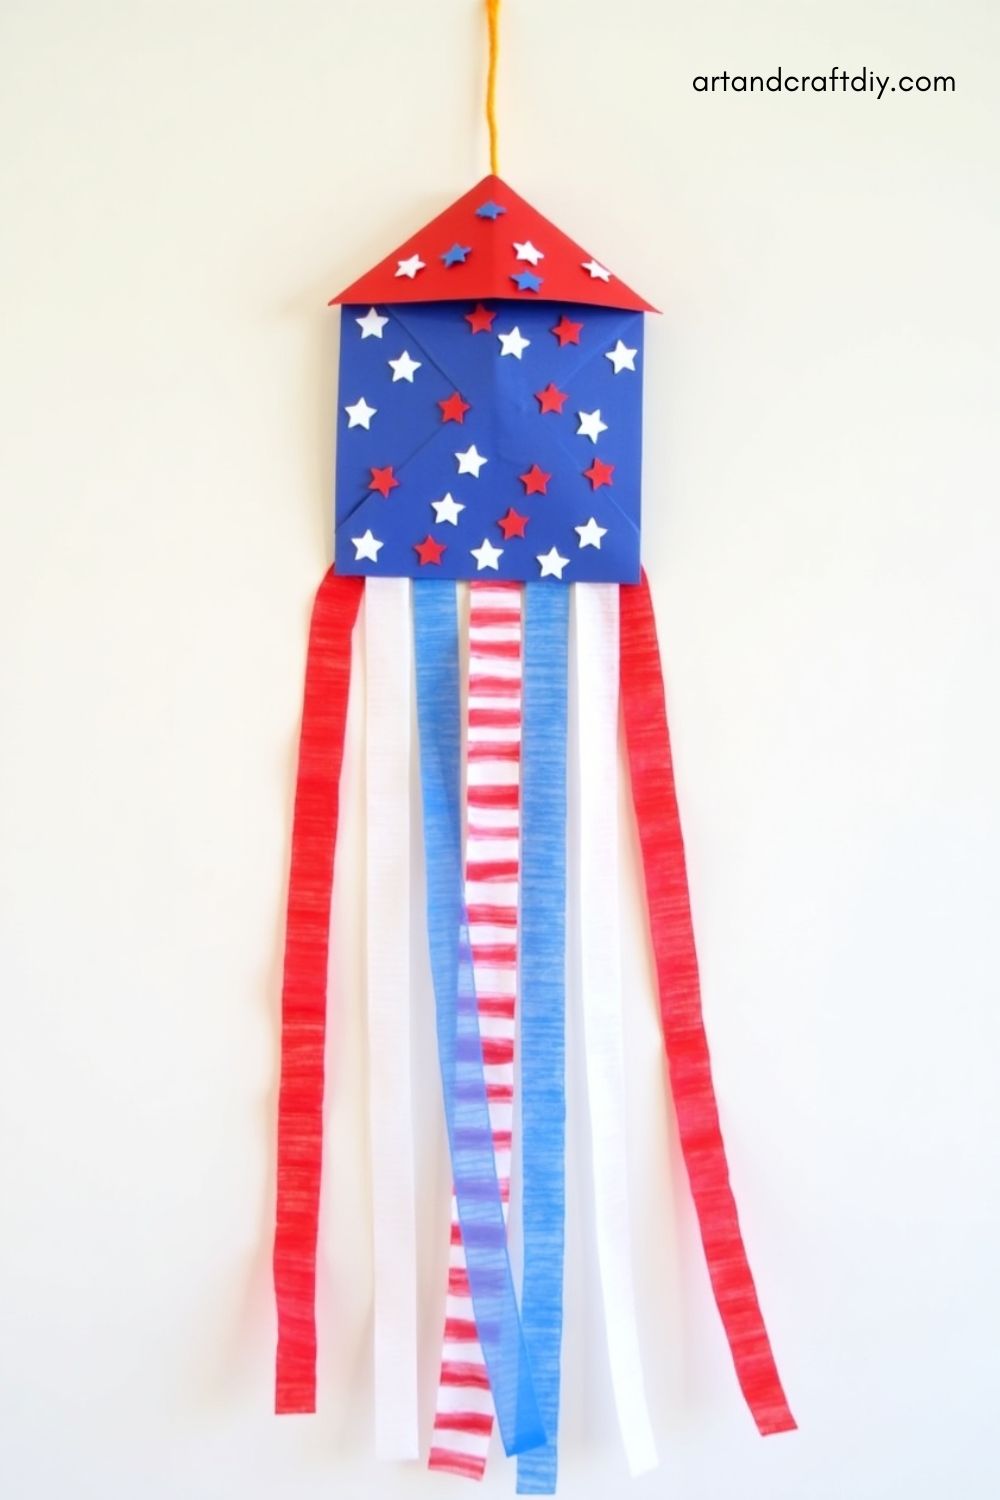
4th of July Windsocks
Materials:
Construction paper or paper cups
Crepe paper streamers
Tape or glue
String
Hole punch
Steps:
Decorate the paper with patriotic colors.
Glue or tape streamers to one edge.
Roll and tape the paper into a cylinder, or use a cup.
Punch holes at the top and tie on a string for hanging.
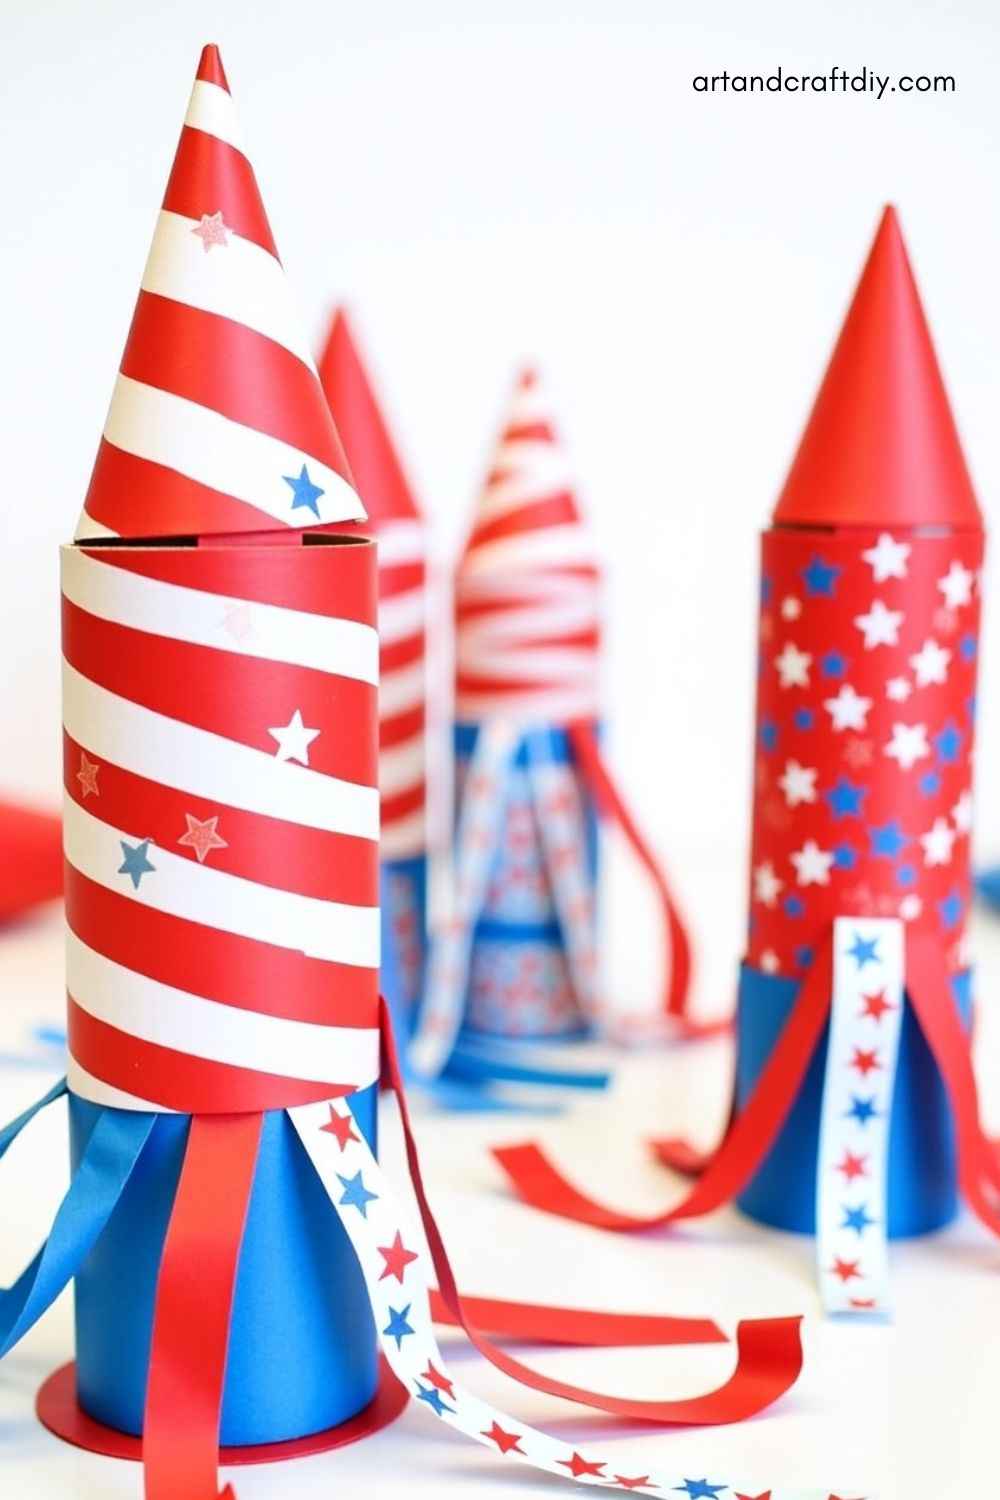
Firecracker Rockets
Materials:
Toilet paper rolls
Construction paper
Tissue paper
Glue or tape
Stickers
Steps:
Cover the roll in colored paper.
Create a cone top with a circle folded into a cone shape.
Tape tissue paper streamers inside one end.
Decorate with stars and stripes.
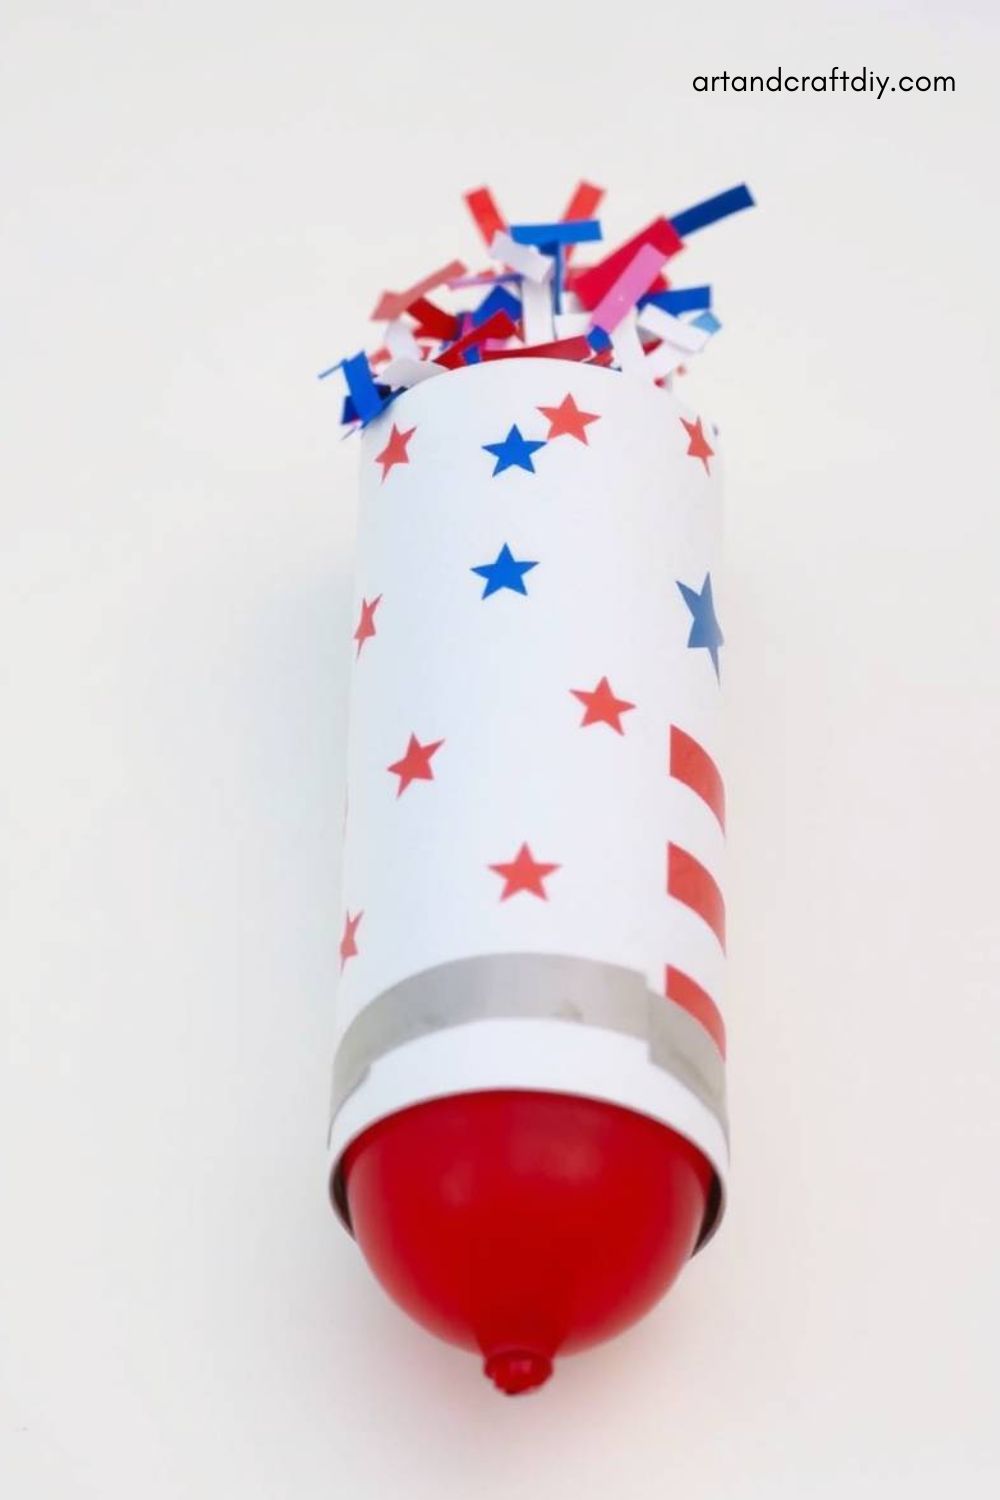
Confetti Poppers
Materials:
Toilet paper roll
Red or blue balloon
Confetti or paper bits
Tape
Paper to decorate
Steps:
Cut the balloon and stretch it over one end of the roll.
Secure with tape.
Decorate the roll with paper or stickers.
Add confetti inside and pull the balloon to launch it!
Paper Plate Flag
Materials:
Paper plate
Red and blue paint or markers
White paper or stickers
Glue
Steps:
Divide the plate into sections for stripes and the blue field.
Color or paint the areas accordingly.
Add stars using paper or stickers.
Let dry and display!
Liberty Crown
Materials:
Green construction paper
Scissors
Tape or glue
Optional: gold star stickers
Steps:
Cut a green band to fit around the head.
Cut triangle spikes and glue them to the band.
Decorate with stars or glitter.
Fit to the child’s head and tape closed.
Star Wands
Materials:
Cardstock or foam stars
Popsicle sticks
Glue
Ribbon
Steps:
Cut out star shapes.
Glue a stick to the back of each.
Add ribbon streamers to the top or base.
Decorate with glitter, sequins, or markers.
Paper Sparklers
Materials:
Metallic or colored paper
Scissors
Glue
Straws or sticks
Steps:
Cut strips into the paper, leaving 1 inch uncut at the base.
Roll and glue around a straw.
Fluff out the strips to look like a sparkler.
Let kids wave them during parades or fireworks.
Flag Fans
Materials:
Red, white, and blue paper
Popsicle sticks
Glue
Scissors
Steps:
Fold the paper accordion-style.
Glue one end shut and attach a stick handle.
Decorate like a flag or with stars.
Use it to stay cool on a hot July day!
USA Banner
Materials:
Paper triangles or rectangles
Markers or stickers
String
Hole punch
Glue
Steps:
Cut out banner shapes and decorate each with letters (U, S, A).
Add stars, stripes, or kid drawings.
Punch holes at the top and thread onto a string.
Hang as a party decoration or in your child’s room.
Tips for Crafting with Kids
Crafting with children is a joyful and rewarding experience — especially when you’re working on fun projects like 4th of July Paper Crafts for Kids. To make the most of craft time (and minimize the mess and stress), a little planning goes a long way. These simple tips will help you create a creative, relaxed, and successful crafting session for kids of all ages.
Set up a craft station or mat Choose a designated area for crafting, whether it’s a kitchen table or a small craft corner. Lay down a plastic tablecloth or a reusable craft mat to protect surfaces and make cleanup easier.
Offer guided instructions but allow creativity Demonstrate the steps and provide visual samples if needed, but let kids add their own twist — whether it’s extra glitter, a different color scheme, or a unique design idea. Creative freedom makes crafting more fun and meaningful.
Encourage teamwork if working with siblings or groups Crafting in a group can teach kids valuable teamwork and sharing skills. Assign small tasks within a bigger project, or let them collaborate on decorating banners, posters, or group displays.
By setting the stage with a positive attitude and a little prep, crafting becomes more than just an activity — it becomes a memory-making moment!
FAQ
What age group are these paper crafts suitable for?
Most of these crafts are great for kids ages 3 and up. Younger children may need a bit of help with cutting and gluing, while older kids can handle more detailed designs and even add their own flair.
Do I need to buy special materials for these crafts?
Not at all! These crafts mainly use basic supplies like construction paper, glue, scissors, markers, and items you probably already have at home. They’re designed to be budget-friendly and low-prep.
Are these crafts safe for toddlers?
Yes — just be sure to supervise closely. Choose simpler projects like flag fans or paper plate crafts, and swap out scissors for pre-cut shapes or safety scissors for little hands.
How can I make cleanup easier after crafting?
Set up a crafting area with a mat or tablecloth to catch messes, and have baby wipes or a damp cloth handy. You can also use washable glue and markers to make clean-up stress-free.
Hi, I’m Victoria, an art and craft teacher at Newark City Schools, where I have the joy of working with middle school students to help them explore their creativity and develop their artistic talents. I believe that art is a powerful way for students to express themselves, and I strive to make every lesson a fun, engaging, and inspiring experience.
I created this website to share the art and craft projects, techniques, and resources that I use in my classroom, hoping to inspire both educators and young artists alike. Whether you’re a teacher looking for new ideas or a student eager to try something new, I’m excited to provide creative tools and projects that anyone can enjoy.
When I’m not in the classroom, I love experimenting with different art forms and learning new crafting techniques. My goal is to help others discover the joy of making things with their hands, and I hope my website serves as a space for everyone to explore their creative potential.