
You know how sometimes you’re digging through your bag, trying to find your keys, and they just disappear into that bottomless pit? Yeah, been there way too many times. That’s actually how I stumbled into making clay keychain crafts—out of pure frustration. I wanted something cute, colorful, and honestly a little me, so I could spot my keys in seconds instead of turning my bag inside out. And let me tell you, once I made my first one, I was hooked. There’s something really calming about shaping clay with your hands, even if you’re not “crafty.” Plus, every little keychain feels like a tiny piece of art you can carry around. If you’ve ever wanted a simple DIY that’s practical but also fun to show off (or even gift), you’re in the right place. I’ll walk you through it step by step—no fancy tools, no stress. Sound good?
Clay Keychain Crafts
Clay keychain crafts are a fun and simple DIY project where you can shape clay into creative designs. They make great personalized gifts, party favors, or everyday accessories.
Mini Donut Keychain
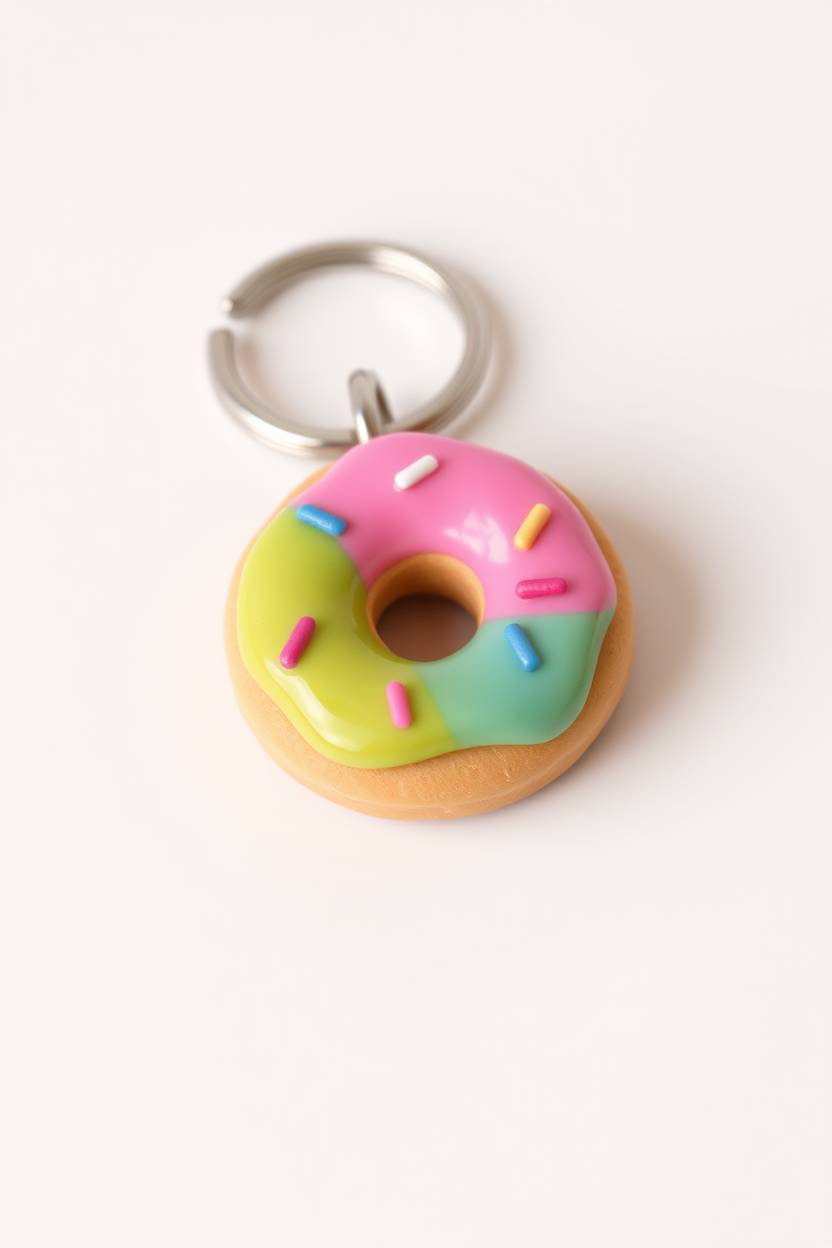
I still remember the first time I tried making a mini donut keychain out of clay—it was a total mess! My donut looked more like a weird potato than a donut. But honestly, once I got the hang of shaping that little ring and smoothing out the edges, it became one of my favorite pieces. The fun part is adding the “frosting” with colorful clay or even a bit of glossy glaze. You can sprinkle tiny dots on top to make it look like sprinkles, and suddenly it looks good enough to eat.
The cool thing about this project is that you don’t need perfect skills. Even a slightly lumpy donut has its own charm. I’ve given these as gifts to friends who love coffee and donuts, and they always smile. If you’re just starting with clay, this is such a low-pressure project—you’ll enjoy the process without stressing about perfection.
Heart Initial Keychain
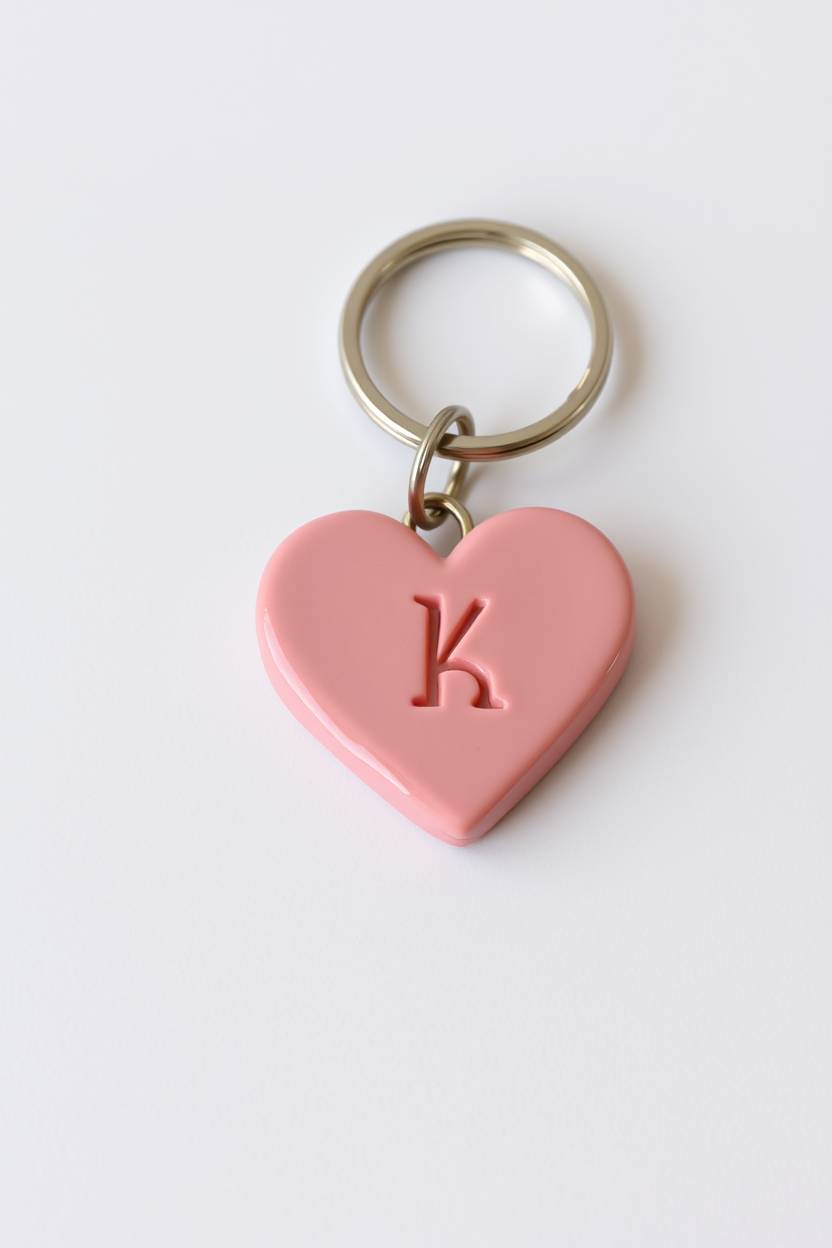
I’m a sucker for anything personalized, so the heart initial keychain has always been close to my heart (pun intended). The idea is simple—shape a heart with clay, flatten it a bit, and then press in or carve the initial of your choice. I once made one for my cousin with her first letter, and she still keeps it on her backpack. Honestly, it’s the easiest way to make someone feel special with something handmade.
You can go classic with red or pink clay, but I’ve also played around with pastel shades and even marbled effects. Adding a little glaze on top makes it look polished and store-bought. The trick, in my opinion, is to keep the design simple. Don’t overthink the lettering—imperfections actually make it look more personal and handmade. Trust me, people appreciate that more than perfection.
Flower Charm Keychain
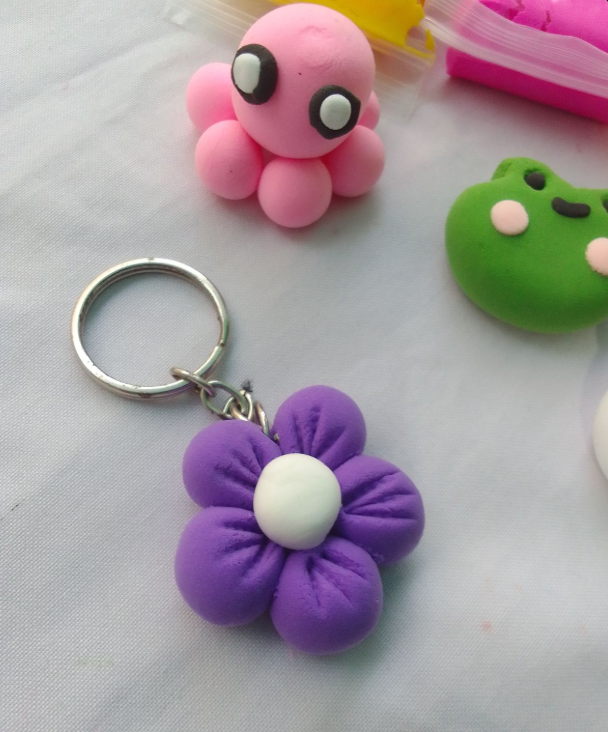
The flower charm keychain is one of those projects that makes me feel like a kid again. Rolling out tiny petals, shaping them, and pressing them together feels almost therapeutic. I usually go for daisies or sunflowers because they’re cheerful, but honestly, you can make any flower you like. Once I made a whole set of different colored roses and gave them away to friends as “friendship charms.”
One thing I’ve learned is that thin petals break easily, so I keep them a bit thicker than you’d think. I love finishing them with a glossy coat so they look shiny and sturdy. The charm looks great on a keyring, but also on zippers or bags. It’s the kind of small project that brightens your mood while you’re making it, and then again every time you see it dangling on your keys.
Cute Animal Keychain
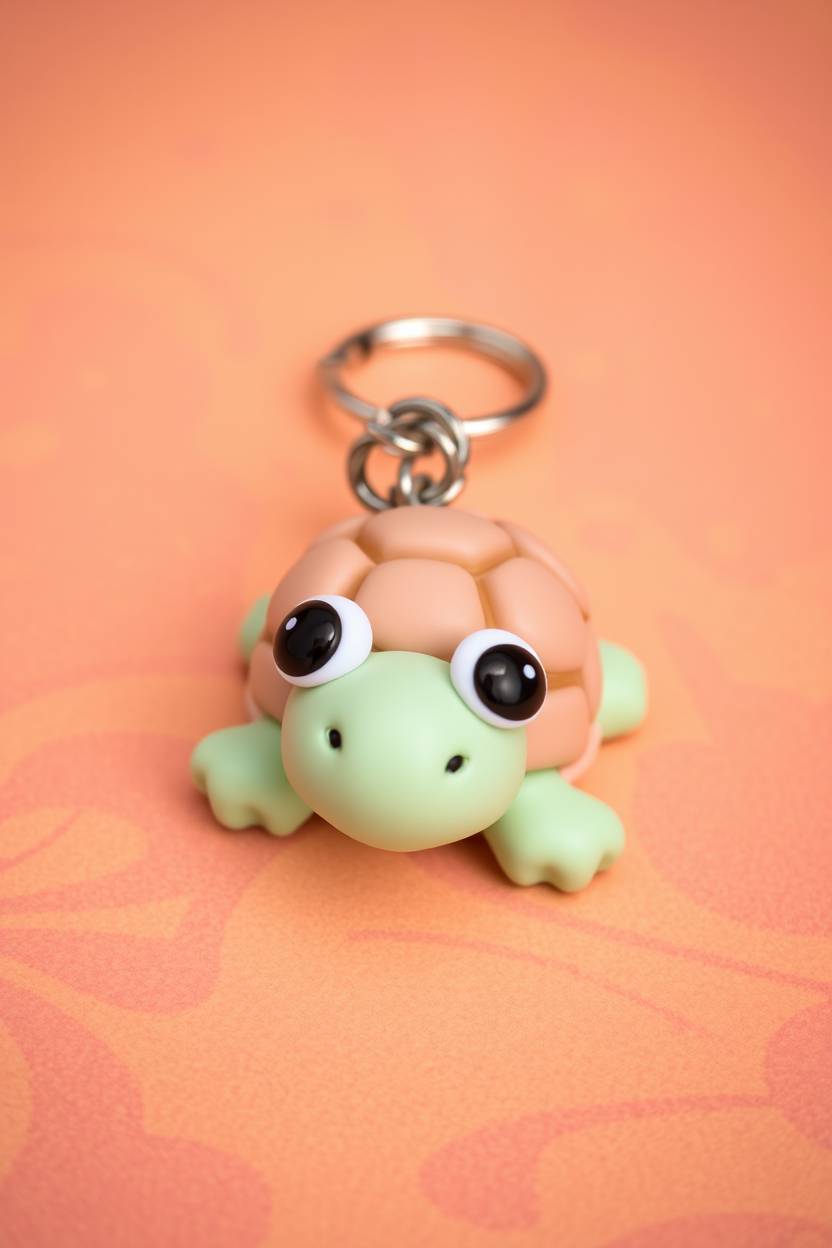
Oh, the cute animal keychains—these always end up stealing the show! I’ve made everything from chubby little cats to quirky pandas, and they always get the most reactions. My nephew once asked me to make him a tiny turtle, and I ended up making a whole “mini zoo” of clay animals. They’re fun because you can exaggerate the features—big eyes, tiny paws—and nobody expects them to be realistic.
When I work on these, I usually stick with softer pastel clays because they make the animals look even cuter. To be fair, they can take a bit longer than simple shapes since you’re adding details like ears or tails, but it’s worth it. Every time I look at one of these keychains, it makes me laugh a little. If you’re into playful crafts, this one will keep you hooked.
Marble Swirl Keychain
The marble swirl design is honestly so satisfying to make—it feels almost like magic. You just roll together two or three clay colors (I usually do white, pink, and blue) and twist them gently until they create a swirled effect. The trick is not to over-mix, otherwise, the colors just blend into a muddy mess. I learned that the hard way!
I usually shape mine into flat circles or chunky beads, and once baked, they look surprisingly professional. I like to wear mine on my keys just to have that little “pop” of color every time I grab them. It’s one of those designs where no two pieces ever look the same, so each one feels special. In my opinion, this is the easiest way to impress people without spending hours on tiny details.
Pizza Slice Keychain
This one makes me hungry every single time! The pizza slice keychain is a personal favorite because you can get as silly and creative as you want. I shape a little triangle for the base, add a thin layer of yellowish “cheese,” and then tiny bits of clay for toppings—pepperoni, mushrooms, peppers, you name it. Once, I even made a “half-eaten” slice with a bite mark just for fun.
The reactions I’ve gotten from this are hilarious—people love pointing it out. It’s a playful project, and you don’t have to be precise. To be fair, the cheesier (pun intended) you make it, the better it looks. Sometimes I glaze it to give the “cheese” a glossy, melty effect. Honestly, if you’re looking for a craft that always gets people talking, this is the one.
Star and Moon Keychain
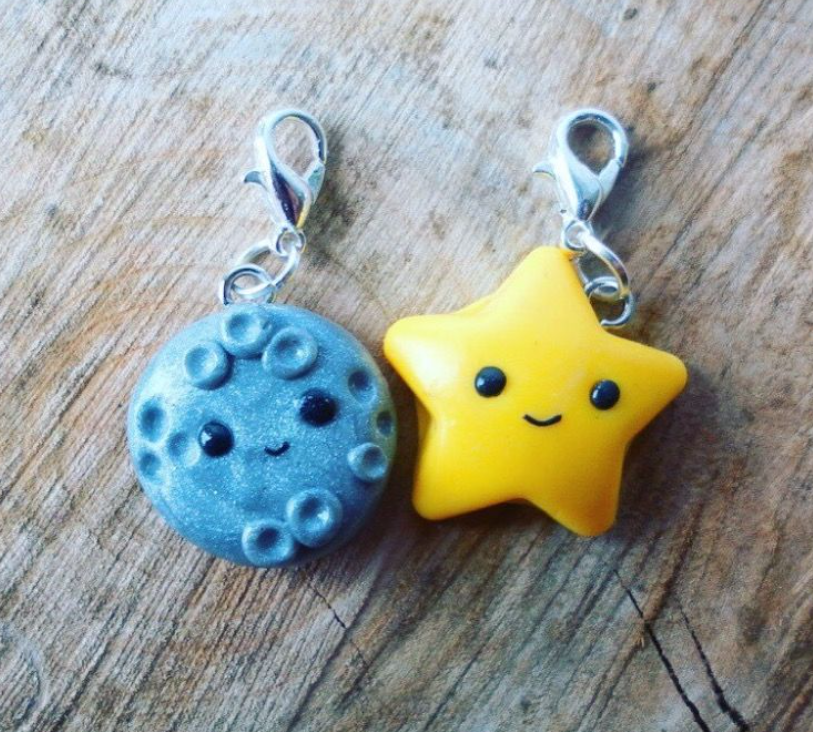
There’s just something dreamy about a star and moon design. I love making these because they feel a little magical. Usually, I go with shimmery or metallic clay, which makes them sparkle under the light. My first one was a tiny crescent moon with a star dangling from it, and I still carry it around—it feels like a lucky charm.
The shapes are simple, but the effect is gorgeous. Sometimes I add texture with a toothpick, making little craters on the moon, or press tiny rhinestones into the star. In my opinion, this is a great beginner project too because the shapes are so basic, yet the final result looks really thoughtful. Plus, they make amazing gifts for anyone who loves celestial vibes.
Personalized Name Tag Keychain
I’m always amazed by how much people love seeing their own names on things. The personalized name tag keychain is exactly that—you roll out a strip of clay, flatten it, and stamp or carve the name onto it. I once made one for my best friend with her nickname, and she laughed so hard because nobody ever gets her nickname right.
It doesn’t take long to make, but it feels super meaningful. I like to use bold colors for these so the letters stand out, and sometimes I press little designs (like stars or dots) around the edges. If you’re making these for gifts, you honestly can’t go wrong. Everyone loves something with their name on it, especially when it’s handmade.
Rainbow Charm Keychain
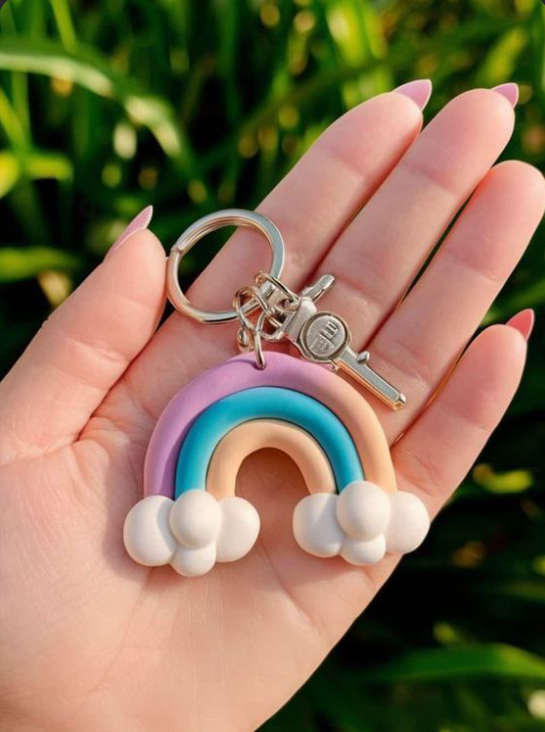
Whenever I make a rainbow charm, I can’t help but smile—it’s just one of those feel-good crafts. I usually roll out thin strips of clay in different colors and curve them into that classic rainbow shape. Sometimes I add fluffy little clouds at the ends, which makes it even cuter.
What’s fun is that you can play with colors—you don’t always need the classic red-to-violet look. I’ve done pastel rainbows, neon rainbows, even metallic ones. Each one has a completely different vibe. To be fair, this one takes a little patience since you’re layering small pieces together, but the end result is totally worth it. I’ve seen kids and adults alike light up when they get one of these keychains—it’s such a cheerful little gift.
Leaf Design Keychain
The leaf design is one of those crafts that feels classy without being complicated. I love shaping a small leaf and then using a toothpick to carve in the veins—it instantly gives it character. The first one I made was a simple green leaf, but then I started experimenting with autumn colors, and they looked so beautiful.
You can keep it natural or go totally abstract with golds, blues, or even glittery shades. In my opinion, the glaze makes a huge difference here because it highlights the carved details. I once gifted a set of these to a friend who loves gardening, and she was obsessed. It’s a simple project, but it always ends up looking elegant and thoughtful.
Cupcake Keychain
Cupcakes in real life are cute, but the clay versions are downright adorable. I usually make a little cupcake base with ridges, then top it with a swirly “frosting” shape. Adding tiny sprinkles or a cherry on top is my favorite part—it makes the charm look so sweet (literally).
I remember making a bunch of these for a bake-sale fundraiser at school, and they sold out in minutes. People just can’t resist them! Honestly, it’s a bit of trial and error to get the frosting swirl right, but even if it looks messy, it’s still cute. This one’s perfect if you love playful crafts that make people smile.
Geometric Shape Keychain
If you’re into clean, modern designs, geometric keychains are so satisfying to make. I like cutting clay into neat triangles, hexagons, or even 3D cube shapes. The simplicity is what makes them look chic.
Sometimes I’ll leave them matte for a minimalist vibe, and other times I’ll paint on metallic accents for extra flair. I once made a set in black-and-gold for a friend who loves anything “sleek,” and she actually thought I’d bought them. In my opinion, this is the perfect craft if you’re not into cute or frilly designs but still want something handmade and stylish.
Butterfly Charm Keychain
Butterflies are one of my go-to clay designs because they’re so pretty and versatile. I usually make them by cutting out two wings and adding details like dots or lines before attaching them together. Once, I made a pastel-colored butterfly for a friend, and she kept it on her purse for years—it became her lucky charm.
What I love most is experimenting with colors—you can go realistic with earthy tones or totally dreamy with glitter and neons. To be fair, the wings can be a little delicate, so I make sure they’re thick enough not to snap. When finished, they always look whimsical and full of life. Honestly, this is one design I never get tired of making.
Seashell Keychain
Seashell keychains remind me of summer vacations by the beach. I love shaping little shells with clay and carving in the grooves. Sometimes I press real shells into the clay to get that authentic texture—it works surprisingly well.
I once made a batch of seashell keychains after a beach trip and handed them out as souvenirs. Everyone loved them! Painting them with pearly or metallic colors makes them look even more realistic. To me, these charms feel like you’re carrying a piece of the ocean around with you. Simple, nostalgic, and just a bit magical.
Holiday Snowflake Keychain
Snowflakes are such a festive design, and they’re honestly fun to make because no two look the same. I usually shape a simple base and then carve in the details with a toothpick. Sometimes I dust on glitter before baking, which gives them that frosty sparkle.
Last Christmas, I made a bunch of these as little stocking stuffers, and people loved the handmade touch. The best part is how versatile they are—you can make them classic white, icy blue, or even bold holiday colors. In my opinion, these are the perfect craft to get you into the holiday spirit, and they make your keys look extra festive.
Tips for Best Results
When making clay keychain crafts, a few simple tips can help your designs look better and last longer. These tricks will make the process easier and give your keychains a neat, professional finish.
-
Work on a clean, non-stick surface – This keeps your clay smooth and free from dust or dirt.
-
Use small amounts of clay to avoid heavy keychains – Lightweight designs are easier to carry and more practical.
-
Mix clay colors for unique effects – Blending colors can create marble, swirl, or ombre patterns.
-
Seal with glaze for shine and durability – A clear coat makes the keychain look polished and protects it from scratches.
-
Store unused clay properly to prevent drying – Keep clay in airtight containers or sealed bags to maintain softness.
FAQ

Hi, I’m Victoria, an art and craft teacher at Newark City Schools, where I have the joy of working with middle school students to help them explore their creativity and develop their artistic talents. I believe that art is a powerful way for students to express themselves, and I strive to make every lesson a fun, engaging, and inspiring experience.
I created this website to share the art and craft projects, techniques, and resources that I use in my classroom, hoping to inspire both educators and young artists alike. Whether you’re a teacher looking for new ideas or a student eager to try something new, I’m excited to provide creative tools and projects that anyone can enjoy.
When I’m not in the classroom, I love experimenting with different art forms and learning new crafting techniques. My goal is to help others discover the joy of making things with their hands, and I hope my website serves as a space for everyone to explore their creative potential.