
I still remember the first time I handed my niece a pile of colorful tissue paper and some glue. Honestly, I thought she’d just make a mess (and yeah, she did at first), but within minutes she was tearing, scrunching, and sticking those pieces together like a little artist on a mission. That’s the magic of tissue paper art crafts for kids—they’re simple, a little chaotic, but so full of joy. If you’ve ever tried to keep kids busy on a rainy afternoon, you know how hard it can be to find something fun that doesn’t require a ton of supplies or cleanup. That’s why I love these crafts so much—they’re inexpensive, easy to set up, and kids can get super creative without needing step-by-step perfection. So if you’ve been searching for a way to spark your child’s imagination (and maybe get a few quiet minutes for yourself), you’re in the right place.
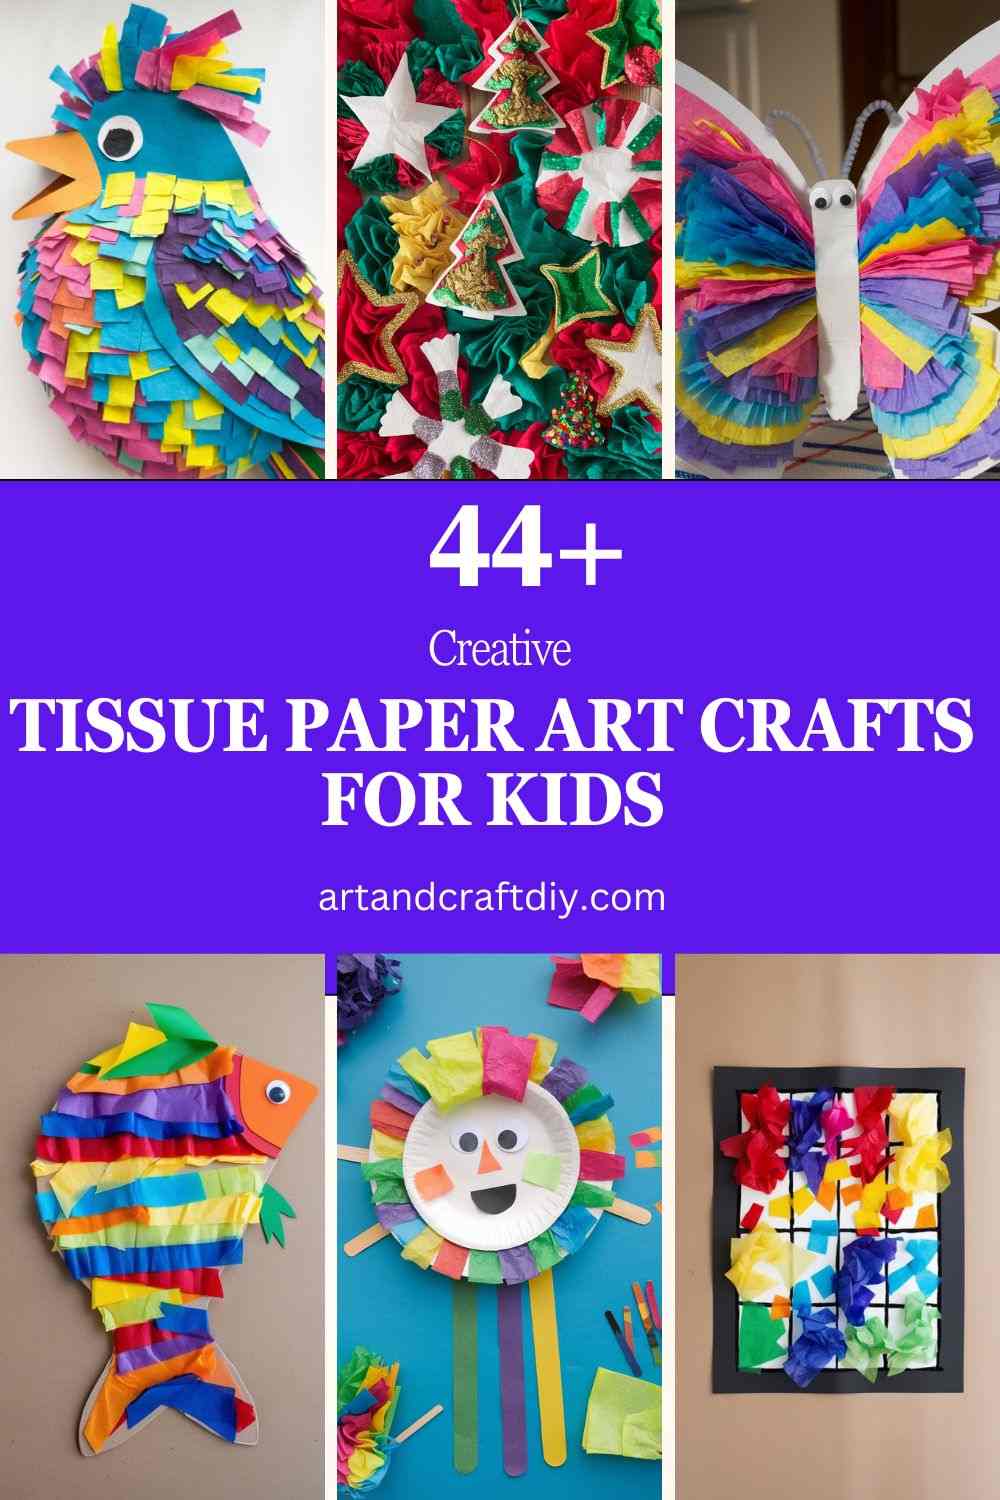
Tissue Paper Art crafts for kids
Tissue paper art crafts for kids are fun, colorful, and easy-to-do projects that allow children to explore their creativity while developing fine motor skills.
Tissue Paper Flowers
There’s just something about making tissue paper flowers that never gets old. I remember the first time I made them with a group of kids at a family gathering—everyone from my little niece to my cousin in college got involved. Honestly, it’s the easiest craft to get kids excited about because the results look so pretty without needing perfect skills. All you really need are bright tissue papers, a pair of scissors, and some pipe cleaners or even just thread. I’ve found that when you layer different colors, the flowers come alive in the most magical way, and kids love choosing “their” colors.
To be fair, some kids get a little frustrated when the petals don’t fluff right, but I always tell them that’s the charm—every flower looks different in nature too! My tip is to show them how to carefully separate the layers without tearing. Once they see that flower bloom in their hands, their faces light up, and that moment is honestly my favorite part.
Tissue Paper Collage

Collage is one of those projects that looks simple at first but always surprises me with how creative kids can get. I once gave a bunch of scrap tissue paper pieces to my neighbor’s twins, and within minutes, they were making “oceans” and “sunsets” on cardboard. It’s so fun because the kids don’t have to be neat—ripping, crumpling, gluing, it’s all part of the art. In my opinion, it’s the perfect rainy-day craft when you just want to keep them busy but still let their imagination run wild.
What I love most is how every child interprets it differently. Some kids create shapes they know, while others just go wild with colors, and both look fantastic. Honestly, don’t overthink the supplies—an old cereal box works as a canvas. To be fair, I sometimes sit and do my own little collage alongside them because it’s oddly relaxing even for adults.
Tissue Paper Butterflies
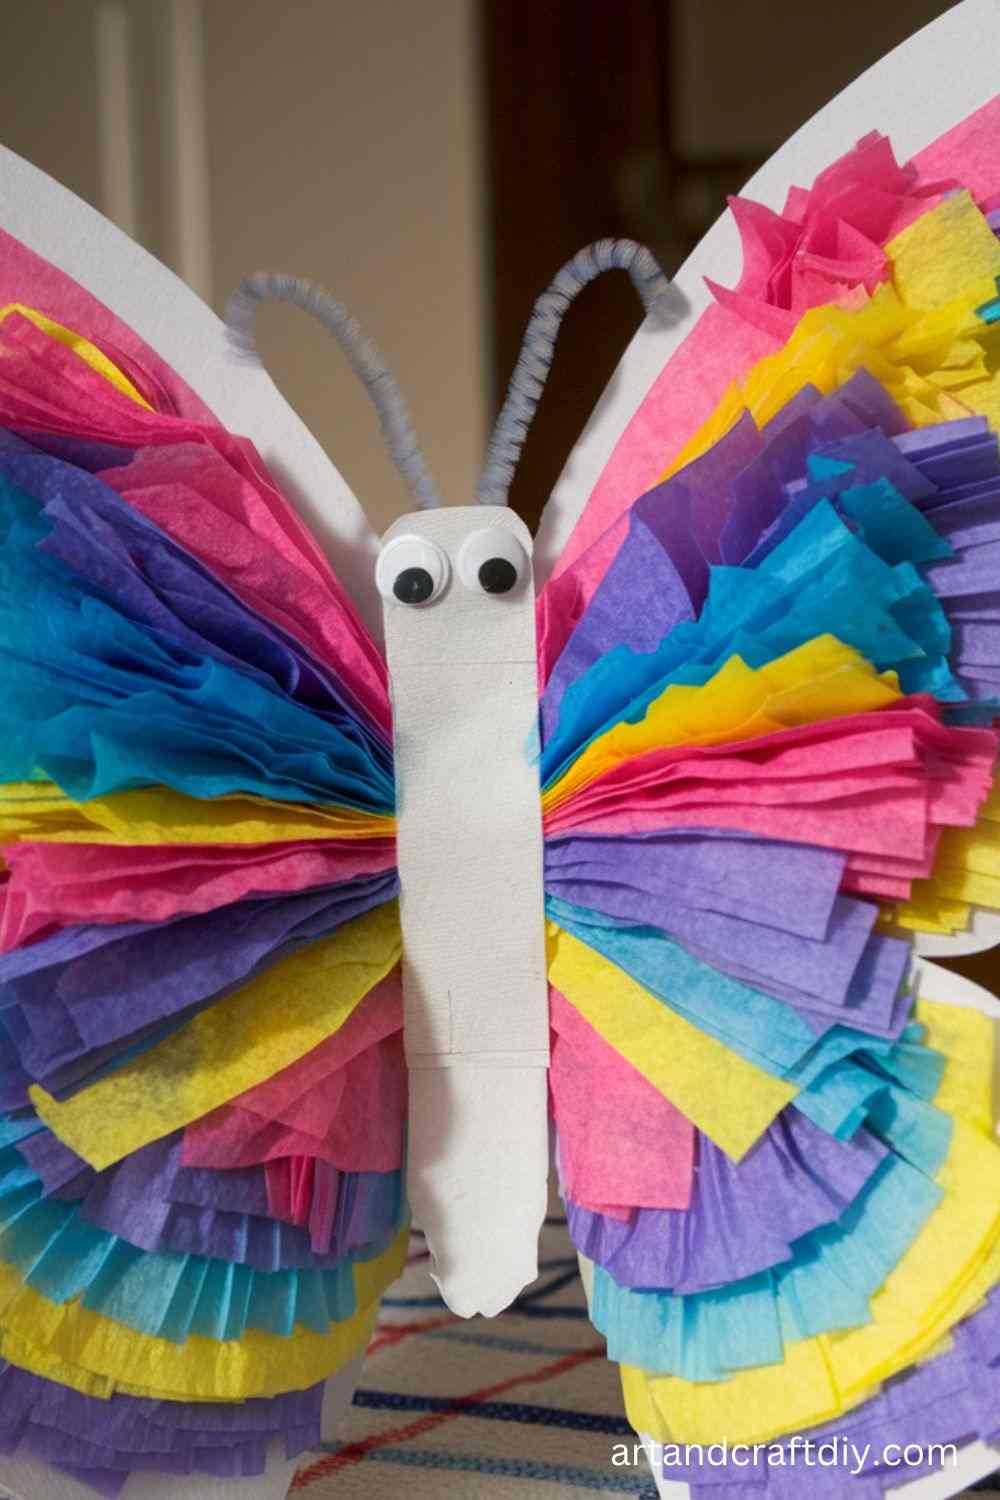
Now, this one always feels magical to me—turning plain tissue paper into butterflies. I’ve made them countless times during summer camps, and no matter how many kids are in the room, there’s always that little “wow” moment when they see their butterfly wings spread out. All you need are small squares of tissue paper, a clothespin, or even a pipe cleaner to pinch the center. Kids get such a kick out of decorating the wings with markers or glitter afterward.
In my experience, younger kids sometimes scrunch the paper too tightly, and the butterfly ends up looking more like a caterpillar—but hey, that’s part of the fun story! Honestly, these butterflies make the cutest decorations. I once strung a bunch across my living room for a birthday party, and people kept asking where I bought them. That’s the charm—simple, homemade, and surprisingly beautiful. Kids feel so proud when they see their butterflies “flying” around the house.
Tissue Paper Stained Glass
Tissue paper stained glass gives children a chance to play with colors and light, making a beautiful effect for windows.
Materials Used:
- Tissue paper (variety of colors)
- Black construction paper
- Scissors
- Glue or contact paper
Steps:
- Cut out a simple shape or design from the black construction paper to use as the frame.
- Cut the tissue paper into small squares or strips.
- Place a sheet of contact paper (sticky side up) on a flat surface.
- Stick the tissue paper pieces on the contact paper inside the frame.
- Once complete, trim any excess tissue paper and hang it up in a window to enjoy the light effect.
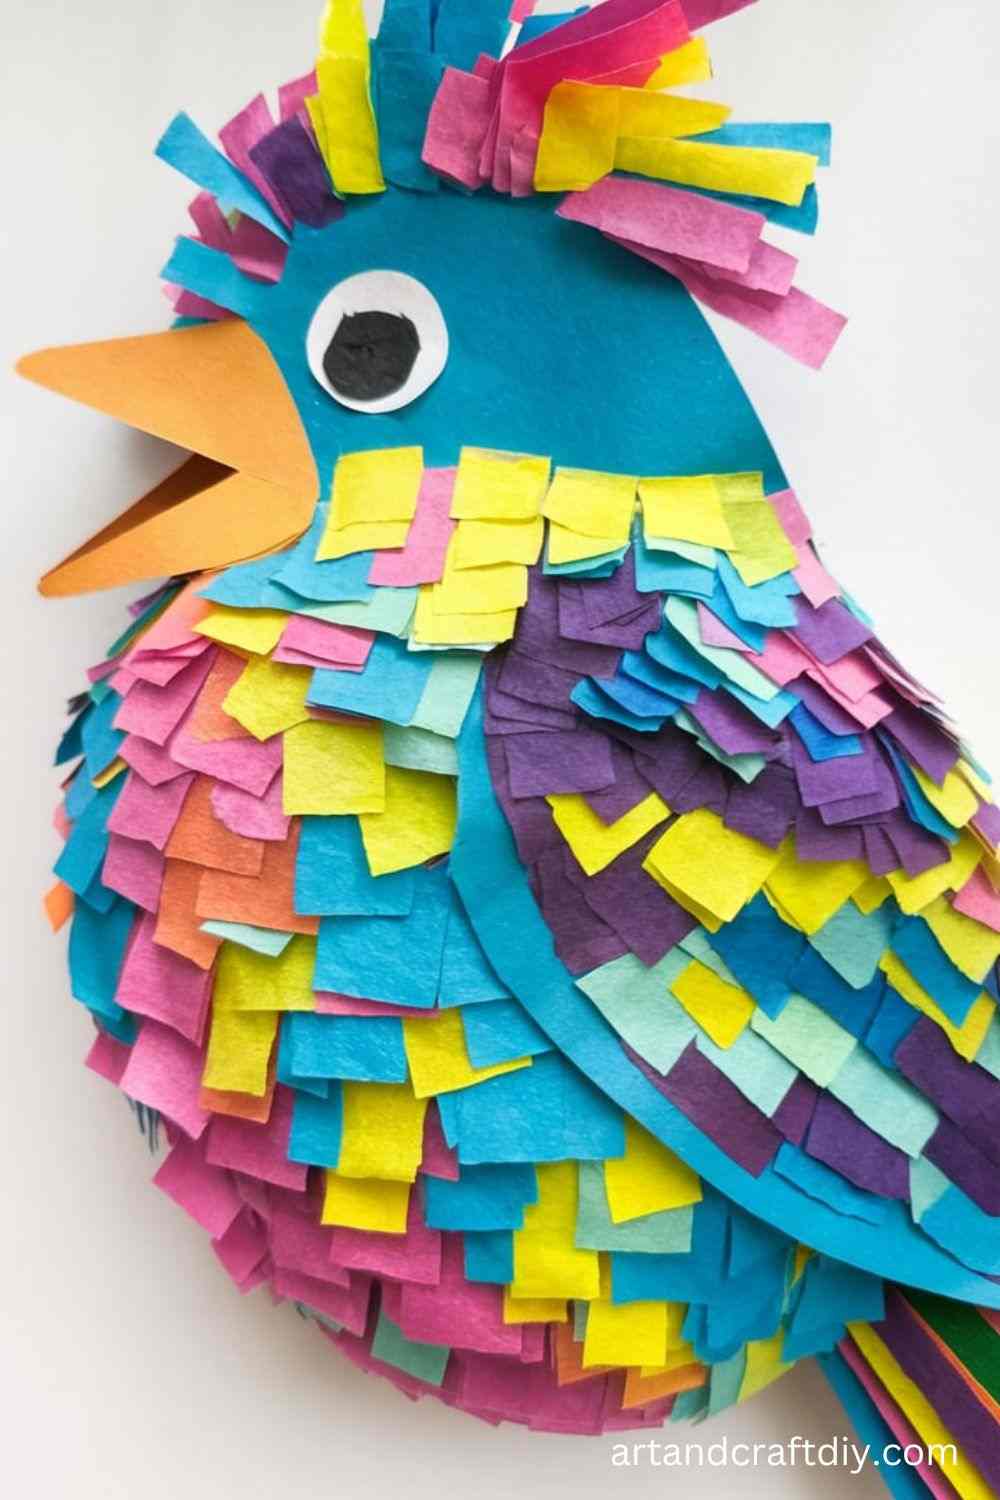
Tissue Paper Birds
Create colorful tissue paper birds for a cheerful display. This craft will engage children in learning about animals while having fun.
Materials Used:
- Tissue paper (variety of colors)
- Construction paper
- Glue
- Scissors
Steps:
- Cut a bird shape from construction paper for the body.
- Cut small pieces of tissue paper in different colors.
- Glue the tissue paper pieces to the bird shape, layering them for texture.
- Cut out wings and a beak from the construction paper, and glue them to the bird.
- Display the birds in a group for a beautiful, colorful scene.
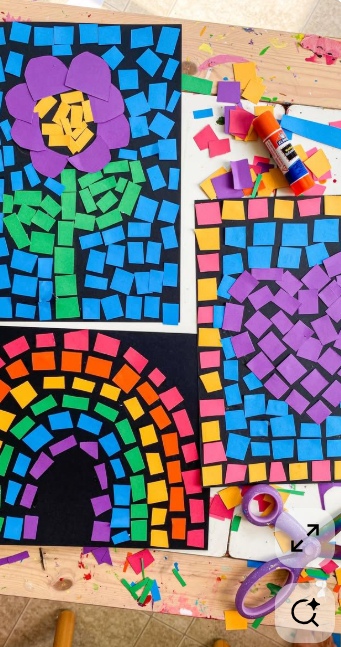
Tissue Paper Mosaics
This simple yet engaging craft lets kids explore the beauty of mosaics using vibrant tissue paper pieces.
Materials Used:
- Tissue paper (variety of colors)
- White construction paper
- Glue
- Pencil
Steps:
- Draw an outline of a picture or design on the white construction paper.
- Cut tissue paper into small squares or rectangles.
- Apply glue to one section of the drawing at a time.
- Place the tissue paper pieces on the glued areas, ensuring they fit together like a mosaic.
- Continue filling the entire image with tissue paper.
Tissue Paper Gift Tags
Tissue paper gift tags make excellent personalized gift accessories, ideal for birthdays or holidays.
Materials Used:
- Tissue paper (variety of colors)
- Scissors
- Cardboard or cardstock
- Ribbon or string
- Glue
Steps:
- Cut the cardboard or cardstock into small rectangles or tags.
- Tear or cut the tissue paper into small pieces.
- Glue the tissue paper pieces to the front of the tag, covering it.
- Punch a hole at the top of the tag and tie a ribbon or string through it.
- Write a message or label on the back of the tag.
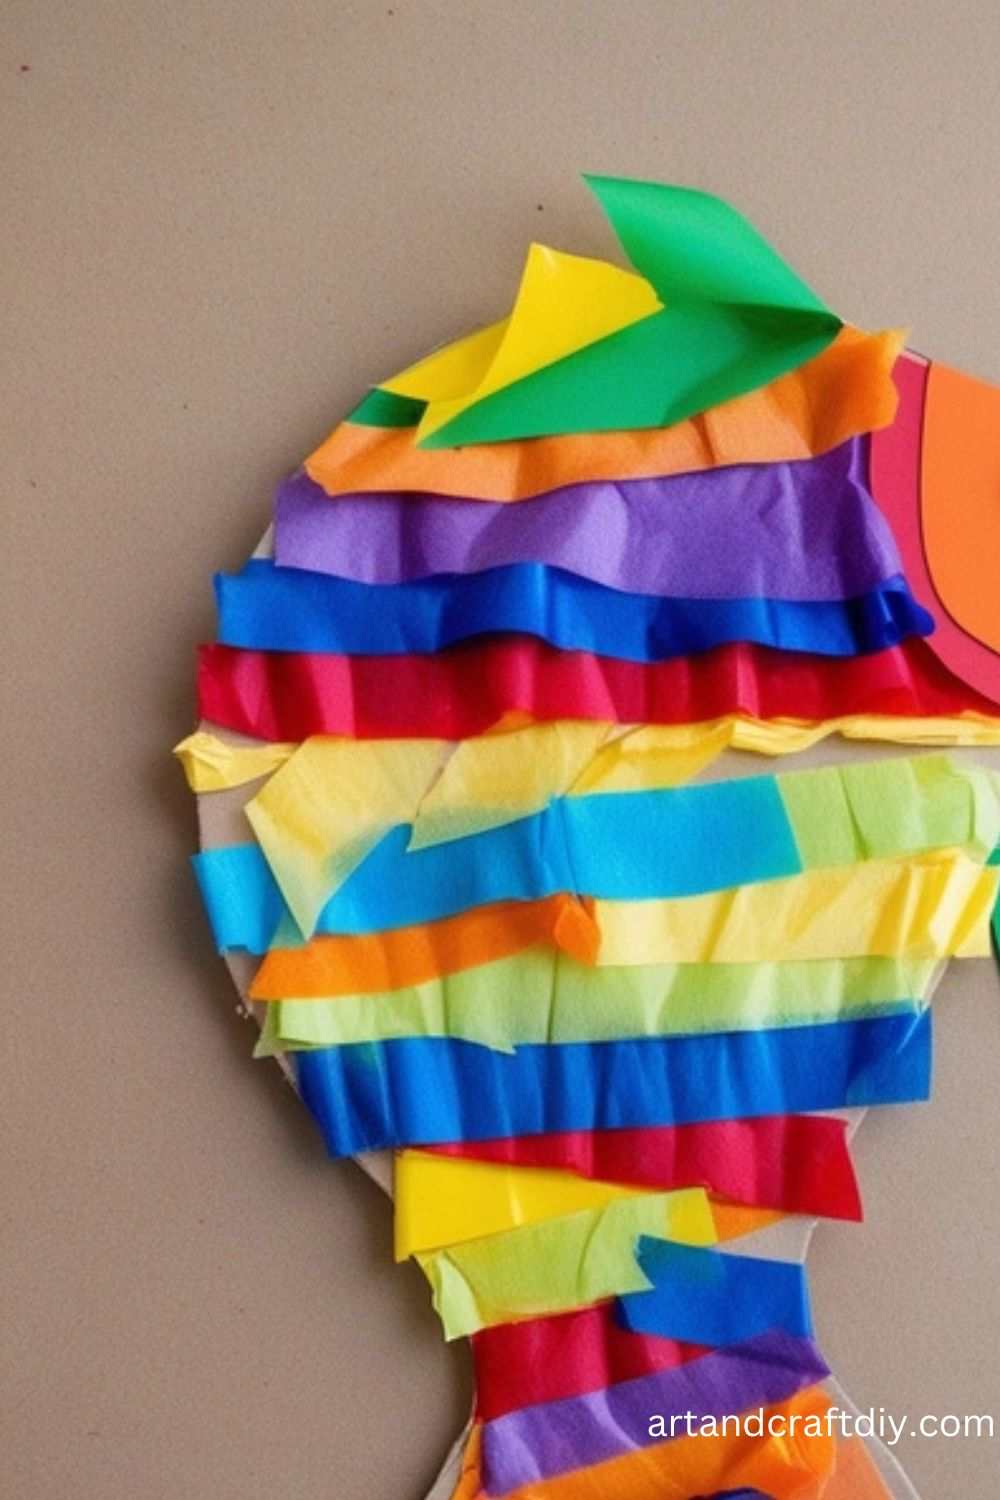
Tissue Paper Fish
Tissue paper fish are fun and colorful, and they provide a great way to explore the marine world.
Materials Used:
- Tissue paper (variety of colors)
- Scissors
- Glue
- Construction paper (for the body)
Steps:
- Cut a fish shape from construction paper.
- Cut the tissue paper into small squares or triangles.
- Glue the tissue paper onto the fish shape, layering them to create scales.
- Add fins and a tail to the fish using construction paper, then glue them in place.
- Allow to dry before hanging or displaying the fish.
Tissue Paper Puppets
Tissue paper puppets are a fun way for kids to create characters and tell stories using their hands.

Materials Used:
- Tissue paper
- Wooden craft sticks
- Glue
- Scissors
- Markers (for details)
Steps:
- Fold tissue paper into a square shape.
- Glue the wooden craft stick to the bottom of the tissue paper.
- Use markers to draw facial features or other details.
- Add decorations like hair or accessories using additional tissue paper.
- Move the puppet with your hand to animate it and tell stories.
Tissue Paper Christmas Ornaments
These tissue paper ornaments make a festive addition to any Christmas tree or holiday decoration.
Materials Used:
- Tissue paper (red, green, and white)
- Scissors
- Glue
- String or ribbon
Steps:
- Cut small squares of tissue paper in festive colors.
- Apply glue to a clear ornament or a cardboard circle.
- Stick the tissue paper squares to the ornament or cardboard, overlapping them to create a textured effect.
- Once dry, add a string or ribbon loop to hang the ornament.
Tissue Paper Fruits
Kids can learn about healthy eating with this fun and colorful tissue paper fruit craft.
Materials Used:
- Tissue paper (variety of colors)
- Construction paper
- Glue
- Scissors
Steps:
- Cut out shapes of various fruits from construction paper (e.g., apples, bananas, strawberries).
- Tear or cut tissue paper into small pieces.
- Glue the tissue paper pieces onto the fruit shapes to create texture.
- Add leaves or stems made from green construction paper to complete the fruits.
- Display your tissue paper fruits as part of a fun, edible-themed decoration.
Tissue Paper Rockets
This project sparks imagination by combining tissue paper with space exploration.
Materials Used:
- Tissue paper (variety of colors)
- Construction paper
- Scissors
- Glue
- Pencil
Steps:
- Draw and cut out a rocket shape from construction paper.
- Cut tissue paper into strips or small squares.
- Glue the tissue paper on the rocket to create a fiery effect at the bottom.
- Add a cone shape to the top of the rocket for the nose.
- Display the rocket and pretend it’s blasting off into space.
Tissue Paper Trees
This craft celebrates nature by creating beautiful trees from colorful tissue paper.
Materials Used:
- Tissue paper (green and brown)
- Scissors
- Glue
- Construction paper
Steps:
- Cut a tree trunk shape from brown construction paper.
- Cut small squares or circles from green tissue paper.
- Glue the tissue paper onto the tree trunk to form the leaves.
- Add texture and dimension by layering tissue paper pieces.
- Display the tree in a craft gallery or decorate your space.
Tissue Paper Cupcake Liner Flowers
This creative craft uses cupcake liners to make unique flowers with tissue paper petals.
Materials Used:
- Tissue paper
- Cupcake liners
- Glue
- Scissors
Steps:
- Flatten a cupcake liner and glue tissue paper petals around the edge.
- Cut small pieces of tissue paper for the flower center and glue them in the middle.
- Allow the flower to dry before displaying it on a card or hanging it.
- These flowers can also be glued to straws for a fun bouquet.
Tissue Paper Hearts
These tissue paper hearts make perfect decorations for Valentine’s Day or any occasion that celebrates love.
Materials Used:
- Tissue paper (red, pink, and white)
- Scissors
- Glue
- Construction paper
Steps:
- Cut a heart shape from construction paper.
- Cut or tear tissue paper into small pieces.
- Glue the tissue paper onto the heart shape, creating layers for texture.
- Allow to dry, then display as a decoration or gift.
Tissue Paper Snowflakes
Creating tissue paper snowflakes is a perfect winter craft for kids to enjoy during the colder months.
Materials Used:
- Tissue paper (white)
- Scissors
- Glue
Steps:
- Fold a square piece of tissue paper into a triangle.
- Fold it again to create smaller sections.
- Cut small shapes along the edges of the folded tissue paper.
- Unfold the tissue paper to reveal a beautiful snowflake shape.
- Display them on windows or walls for a festive winter feel.
Tissue Paper Crown
Create a majestic crown with tissue paper that will make any child feel like royalty.
Materials Used:
- Tissue paper (gold, silver, or any bright colors)
- Scissors
- Glue
- Cardboard strip (for the crown base)
Steps:
- Measure the child’s head and cut a strip of cardboard to fit.
- Cut tissue paper into strips.
- Glue the tissue paper strips along the top edge of the cardboard to form the crown.
- Add extra decorations like jewels or glitter to make the crown sparkle.
- Allow the crown to dry before wearing.
Tissue Paper Dinosaurs
Bring dinosaurs to life using colorful tissue paper in this fun and educational craft.
Materials Used:
- Tissue paper (green, brown, or other dino-inspired colors)
- Scissors
- Construction paper
- Glue
Steps:
- Draw a dinosaur shape on construction paper.
- Cut tissue paper into small pieces or strips.
- Glue the tissue paper onto the dinosaur shape to form scales or skin texture.
- Add extra details like eyes or spikes using construction paper.
- Let the dinosaurs dry before playing with them.
Tissue Paper Picture Frames
Kids can create personalized picture frames with a burst of color using tissue paper.
Materials Used:
- Tissue paper (variety of colors)
- Cardboard
- Glue
- Scissors
Steps:
- Cut a rectangular piece of cardboard for the frame.
- Cut a hole in the center to form the photo space.
- Tear or cut tissue paper into small pieces.
- Glue the tissue paper around the edges of the frame.
- Once dry, insert a photo and display the frame.
Tissue Paper Insects
Make colorful insects like ladybugs and butterflies with tissue paper for a fun and educational craft.
Materials Used:
- Tissue paper (red, black, or other colors)
- Pipe cleaners
- Glue
- Scissors
Steps:
- Cut a basic insect shape from construction paper (like a ladybug or butterfly).
- Cut or tear tissue paper into small pieces and glue it onto the insect shape.
- Use pipe cleaners for antennae and legs.
- Let the insects dry before displaying them in a craft gallery.
Tissue Paper Lanterns
Create glowing tissue paper lanterns to brighten up a room with color and light.
Materials Used:
- Tissue paper (bright colors)
- Glass jars or plastic cups
- Glue
- Scissors
Steps:
- Cut tissue paper into small squares or strips.
- Apply glue to a glass jar or plastic cup.
- Stick the tissue paper on the surface, layering them for a colorful effect.
- Place a battery-operated tea light inside the jar to illuminate the lantern.
- Enjoy the glowing, vibrant effect.
Tissue Paper Stars
Make stars with tissue paper for a dreamy, sparkling decoration perfect for any room.
Materials Used:
- Tissue paper (yellow, gold)
- Scissors
- Glue
- Construction paper (for the background)
Steps:
- Cut out star shapes from construction paper.
- Tear or cut the tissue paper into small pieces.
- Glue the tissue paper onto the star shapes.
- Display the stars on a wall or hang them from the ceiling.
Tissue Paper Ice Cream Cones
Kids can create their own imaginary ice cream cones with colorful tissue paper for a sweet decoration.
Materials Used:
- Tissue paper (pink, brown, and other ice cream colors)
- Cone-shaped construction paper
- Glue
- Scissors
Steps:
- Roll the construction paper into a cone shape and glue it together.
- Cut tissue paper into small pieces for the “ice cream.”
- Glue the tissue paper onto the top of the cone to create the ice cream.
- Add extra details like a cherry or sprinkles for a fun touch.
Tissue Paper Tulips
These colorful tissue paper tulips make a perfect craft for spring and a way to celebrate the flowers of the season.
Materials Used:
- Tissue paper (pink, yellow, red)
- Green construction paper (for stems and leaves)
- Glue
- Scissors
Steps:
- Cut tulip petal shapes from tissue paper.
- Glue the petals together to form a flower.
- Cut a long green strip for the stem and glue it to the base of the flower.
- Add leaves made from green construction paper and glue them to the stem.
- Display your flowers for a springtime decoration.
Tissue Paper Hearts Mobile
Create a beautiful heart mobile to celebrate love and beauty.
Materials Used:
- Tissue paper (red, pink, and white)
- Ribbon or string
- Scissors
- Glue
Steps:
- Cut heart shapes out of tissue paper.
- Glue the hearts to ribbons or strings of varying lengths.
- Hang the hearts from a stick or hanger to create a mobile.
- Display the mobile in a window for a lovely decoration.
Tissue Paper Pinwheels
These spinning tissue paper pinwheels bring a playful touch to outdoor or indoor decorations.
Materials Used:
- Tissue paper (bright colors)
- Wooden stick or straw
- Glue
- Scissors
- Pin (optional)
Steps:
- Cut a square of tissue paper.
- Make four slits from each corner toward the center.
- Fold the corners of the tissue paper toward the center and glue them.
- Attach the center to a stick or straw.
- If using a pin, secure it through the center of the pinwheel to make it spin.
Tissue Paper Party Hats
Make party hats with tissue paper for a festive celebration.
Materials Used:
- Tissue paper (bright colors)
- Cardboard or construction paper
- Glue
- Scissors
Steps:
- Cut a cone shape from the cardboard or construction paper.
- Glue tissue paper to the outside of the cone, layering it for a fun texture.
- Decorate the hat with additional tissue paper, stickers, or glitter.
- Let it dry and wear it for a celebration.
Tissue Paper Rainbows
A simple and colorful craft to make rainbows with tissue paper for a cheerful display.
Materials Used:
- Tissue paper (red, orange, yellow, green, blue, indigo, violet)
- Scissors
- Glue
- Paper or cardboard
Steps:
- Cut tissue paper into small squares of each rainbow color.
- Apply glue to a section of paper and start layering the tissue paper in rainbow order.
- Continue until the rainbow is complete.
- Display it as a cheerful decoration.
Tissue Paper Flowers in a Vase
Create a 3D vase filled with colorful tissue paper flowers.
Materials Used:
- Tissue paper (variety of colors)
- Scissors
- Glue
- Construction paper (for the vase)
Steps:
- Cut out flower shapes from tissue paper.
- Glue the flowers onto a piece of construction paper to form a bouquet.
- Cut a vase shape from construction paper and glue it under the flowers.
- Allow the craft to dry and display as a decoration.
Tissue Paper Fish Aquarium
Create an underwater scene using tissue paper fish for a fun ocean-themed craft.
Materials Used:
- Tissue paper (variety of colors)
- Construction paper
- Glue
- Scissors
Steps:
- Cut out fish shapes from construction paper.
- Glue tissue paper on the fish to add texture and color.
- Cut seaweed, bubbles, and other underwater elements from construction paper.
- Arrange and glue everything onto a blue background to create an aquarium scene.
- Display the finished craft in a window or on a wall.
Tips for Success with Tissue Paper Projects
Tissue paper is a versatile material that can be used for a variety of craft projects, from simple decorations to intricate designs. Whether you’re working on a gift wrap, scrapbooking, or creating a vibrant piece of artwork, knowing how to cut, layer, and store tissue paper effectively is key to achieving professional-looking results. Here are some tips to help you master tissue paper techniques and ensure your projects turn out beautifully.
1. How to Cut Tissue Paper Effectively
Cutting tissue paper can sometimes be tricky, but with the right approach, it’s easy to get clean edges and precise shapes. The method you choose will depend on whether you’re working with simple shapes or more intricate designs.
- For Simple Shapes:
- Use sharp scissors to ensure clean cuts.
- Stack multiple sheets of tissue paper (up to 4-5) to cut several shapes at once.
- If you need uniform shapes, use a template or ruler for measuring before cutting.
- For Intricate Designs:
- Use a craft knife or precision scissors for small, detailed cuts.
- Keep your tissue paper lightly folded to maintain uniformity while cutting intricate patterns.
- If you’re working with small pieces, try a cutting mat to protect your surface and make cutting more accurate.
2. How to Layer Tissue Paper for Vibrant Effects
Layering tissue paper is a great way to create depth and add vibrant effects to your craft projects. The translucent nature of tissue paper allows light to pass through, creating a stunning visual impact when layered correctly.
- Select Complementary Colors:
- Choose colors that blend well together for a smooth gradient effect.
- Experiment with bold contrasts to create eye-catching designs.
- Layering Techniques:
- For a soft, blended effect, layer different colors on top of each other and slightly shift each layer to create a sense of movement.
- For a bold, textured look, cut out shapes or patterns from different colors and layer them in a collage-style arrangement.
- Consider using adhesive spray or glue dots to hold layers in place without making them too sticky.
3. How to Store Leftover Tissue Paper for Future Projects
Tissue paper is lightweight and delicate, so proper storage is essential to keep it in good condition for future use.
- Avoid Creases:
- Store tissue paper flat to prevent creases or folds. You can use a large flat container or even a drawer with ample space.
- If you must fold the paper, do so gently and only once or twice to minimize damage.
- Use a Plastic Bag or Box:
- Place your leftover tissue paper in a plastic bag or airtight box to protect it from dust, dirt, and moisture.
- Label the bags or boxes by color or theme, so you can easily find what you need for your next project.
- Keep in a Cool, Dry Place:
- Avoid storing tissue paper in direct sunlight or humid environments, as this can cause fading or deterioration over time.
FAQ
What is Tissue Paper Art crafts for kids?
Tissue paper art involves using colorful tissue paper to create fun and creative crafts. Kids can tear, cut, and glue pieces of tissue paper onto various surfaces to make pictures, collages, or other fun designs.
What materials do I need for Tissue Paper Art crafts for kids?
You’ll need:
- Colorful tissue paper
- Glue or glue stick
- Scissors (for older kids)
- A surface to work on (like paper, cardboard, or canvas)
- A paintbrush or cotton ball (for applying glue)
Is Tissue Paper Art crafts for kids safe?
Yes, Tissue Paper Art crafts for kids is safe. However, younger children should be supervised, especially when using scissors or glue. Always use non-toxic, kid-friendly materials.
How do I make tissue paper flowers?
To make tissue paper flowers, layer several sheets of tissue paper, fold them like an accordion, and then tie the center with a string or twist tie. Once you’ve shaped the folds, gently pull apart each layer to form a flower.
What age is Tissue Paper Art suitable for?
Tissue paper art is great for children aged 3 and up. Younger kids can work on tearing and gluing pieces, while older kids can practice cutting and creating more complex designs.
Can you use any kind of tissue paper?
You should use soft, colored tissue paper typically found in craft stores. Avoid using facial tissues as they are usually too thin and fragile for crafting.

Hi, I’m Victoria, an art and craft teacher at Newark City Schools, where I have the joy of working with middle school students to help them explore their creativity and develop their artistic talents. I believe that art is a powerful way for students to express themselves, and I strive to make every lesson a fun, engaging, and inspiring experience.
I created this website to share the art and craft projects, techniques, and resources that I use in my classroom, hoping to inspire both educators and young artists alike. Whether you’re a teacher looking for new ideas or a student eager to try something new, I’m excited to provide creative tools and projects that anyone can enjoy.
When I’m not in the classroom, I love experimenting with different art forms and learning new crafting techniques. My goal is to help others discover the joy of making things with their hands, and I hope my website serves as a space for everyone to explore their creative potential.