
Last winter, I was stuck inside with my little niece on one of those long, rainy afternoons where time just crawls. You know the kind—too cold to go out, but way too much energy in the house. I pulled out some paper, googly eyes, and glue, and before I knew it, we were making the silliest little Easy Penguin Crafts For Kids. Honestly, I wasn’t expecting much, but she lit up like we’d just built a whole winter wonderland. And I thought, wow… sometimes it’s the simplest things that feel the most magical.
If you’ve ever tried to keep kids busy when the weather (or their moods) isn’t cooperating, you know how tough it can be. That’s why I put together these easy, fun penguin craft ideas. They’re playful, inexpensive, and best of all—they’ll actually keep kids entertained. So grab the scissors, gather some scraps, and let’s make something cute together.
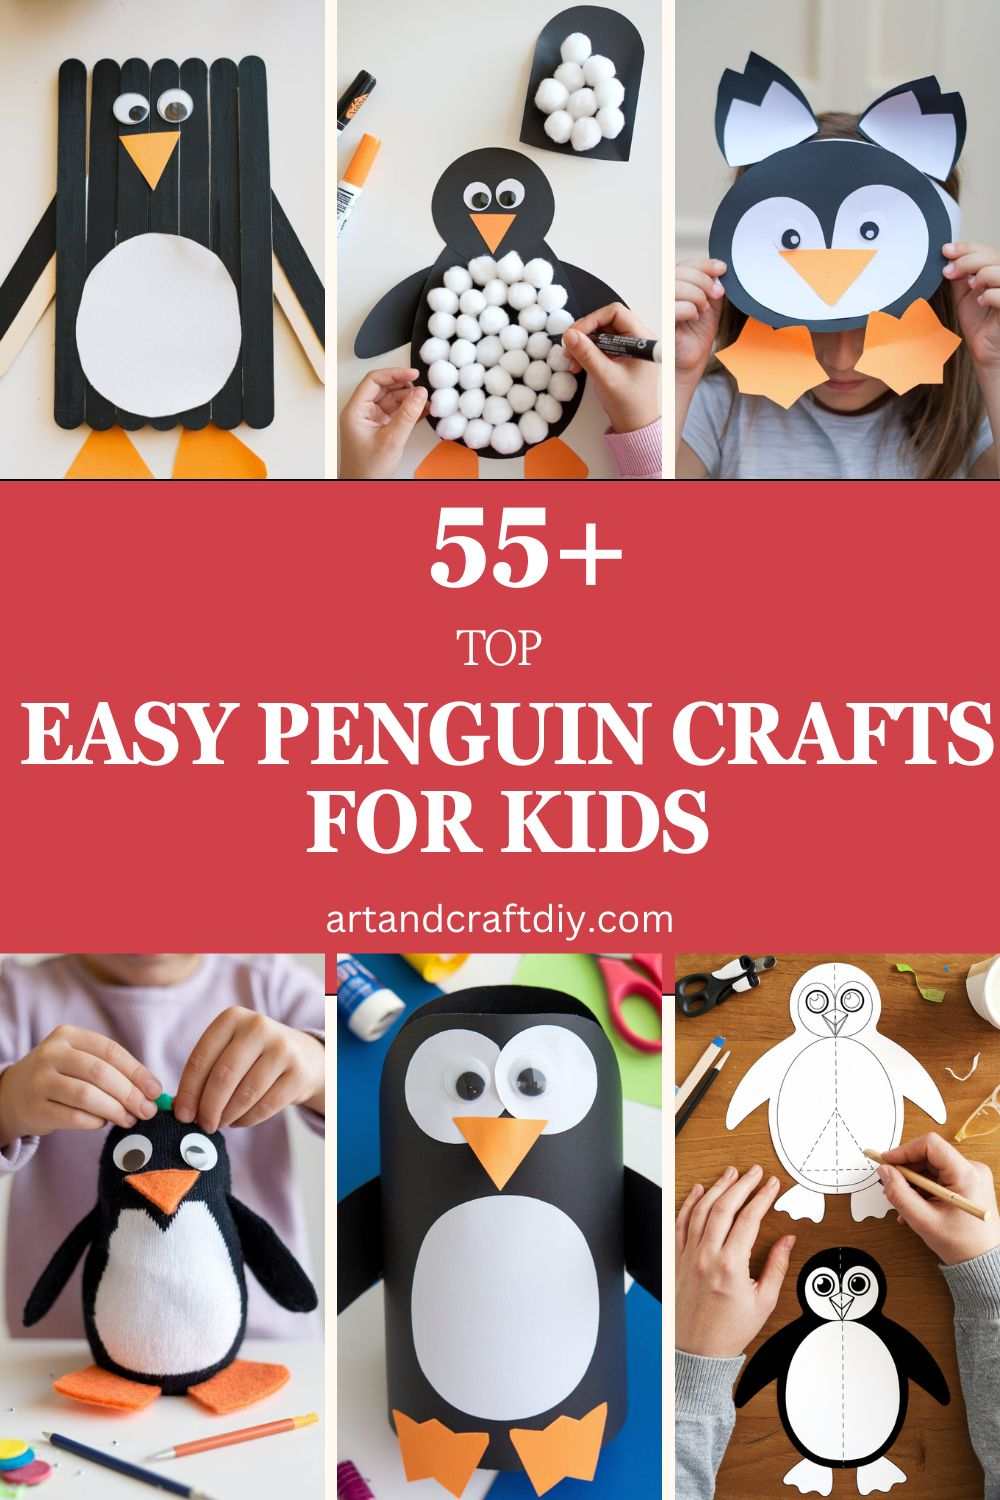
Easy Penguin Crafts For Kids
Easy Penguin Crafts for Kids are a fun and engaging way to spark creativity in children while celebrating these adorable, flightless birds.
Paper Plate Penguin
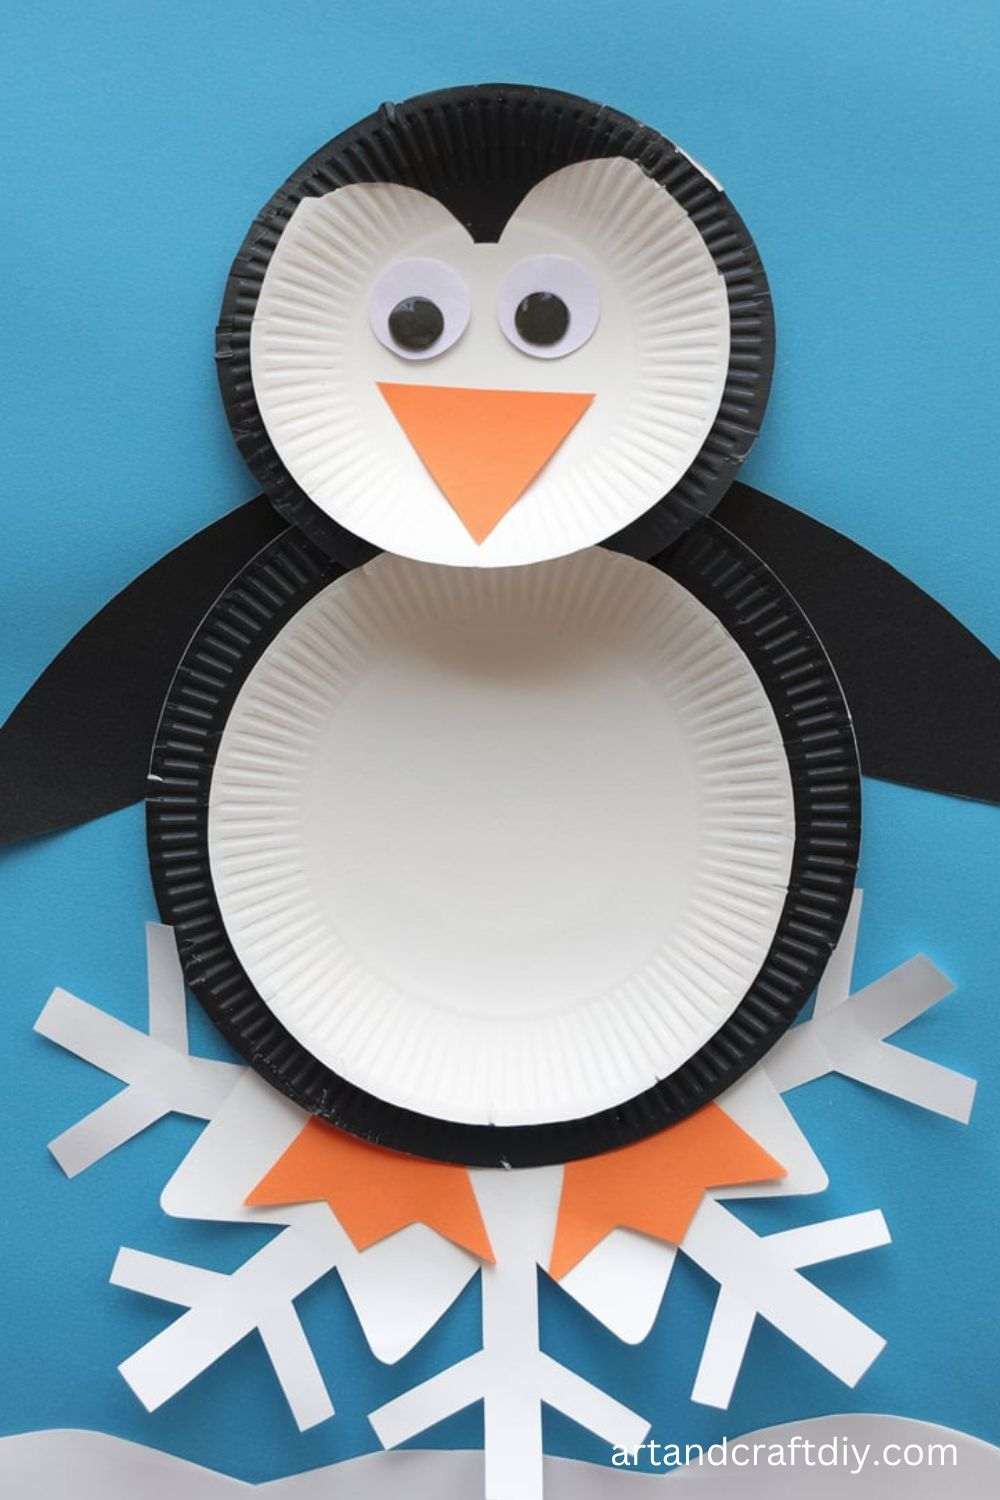
I’ve got to admit, paper plate penguins are one of those crafts I keep coming back to, no matter how many new ideas pop up on Pinterest. They’re cheap, easy, and surprisingly fun to personalize. The first time I did this with a group of kids, we ended up with a whole “penguin colony” on the dining table, each one looking slightly different—one had giant googly eyes that made it look startled, another had a lopsided beak, and one somehow looked like it was laughing. That’s the charm, though. There’s no “perfect” penguin, and the kids love that freedom.
To make them, I usually hand out paper plates and some black paint (though, to be fair, markers work if you’re low on supplies). Then we cut out little flipper shapes from black construction paper, and a triangle beak from orange. Glue it all together, add googly eyes, and bam—you’ve got a penguin. Sometimes I let the kids add scarves or tiny hats cut from colored paper, which honestly makes them ten times cuter.
Handprint Penguin Art
This one is honestly my favorite because it feels more personal—you get the kids’ handprints involved, which always makes me a little sentimental. I remember doing this with my niece, and she couldn’t stop giggling when the paintbrush tickled her palm. The finished penguin had her handprints as wings, spreading out proudly, and it still hangs on my fridge as a winter decoration. In my opinion, crafts that double as keepsakes always hit differently.
The process is pretty simple. I usually paint the kids’ hands with black washable paint (messy but worth it) and press them down on white paper to form the wings. Then, in the middle, we add a penguin body—just a big oval cut out of construction paper. Stick on a beak, some eyes, and little feet, and suddenly it comes to life. Sometimes I let the kids draw silly expressions or backgrounds—snowflakes, igloos, or even sunglasses on their penguin. To be fair, the sillier, the better.
Bottle Cap Penguins
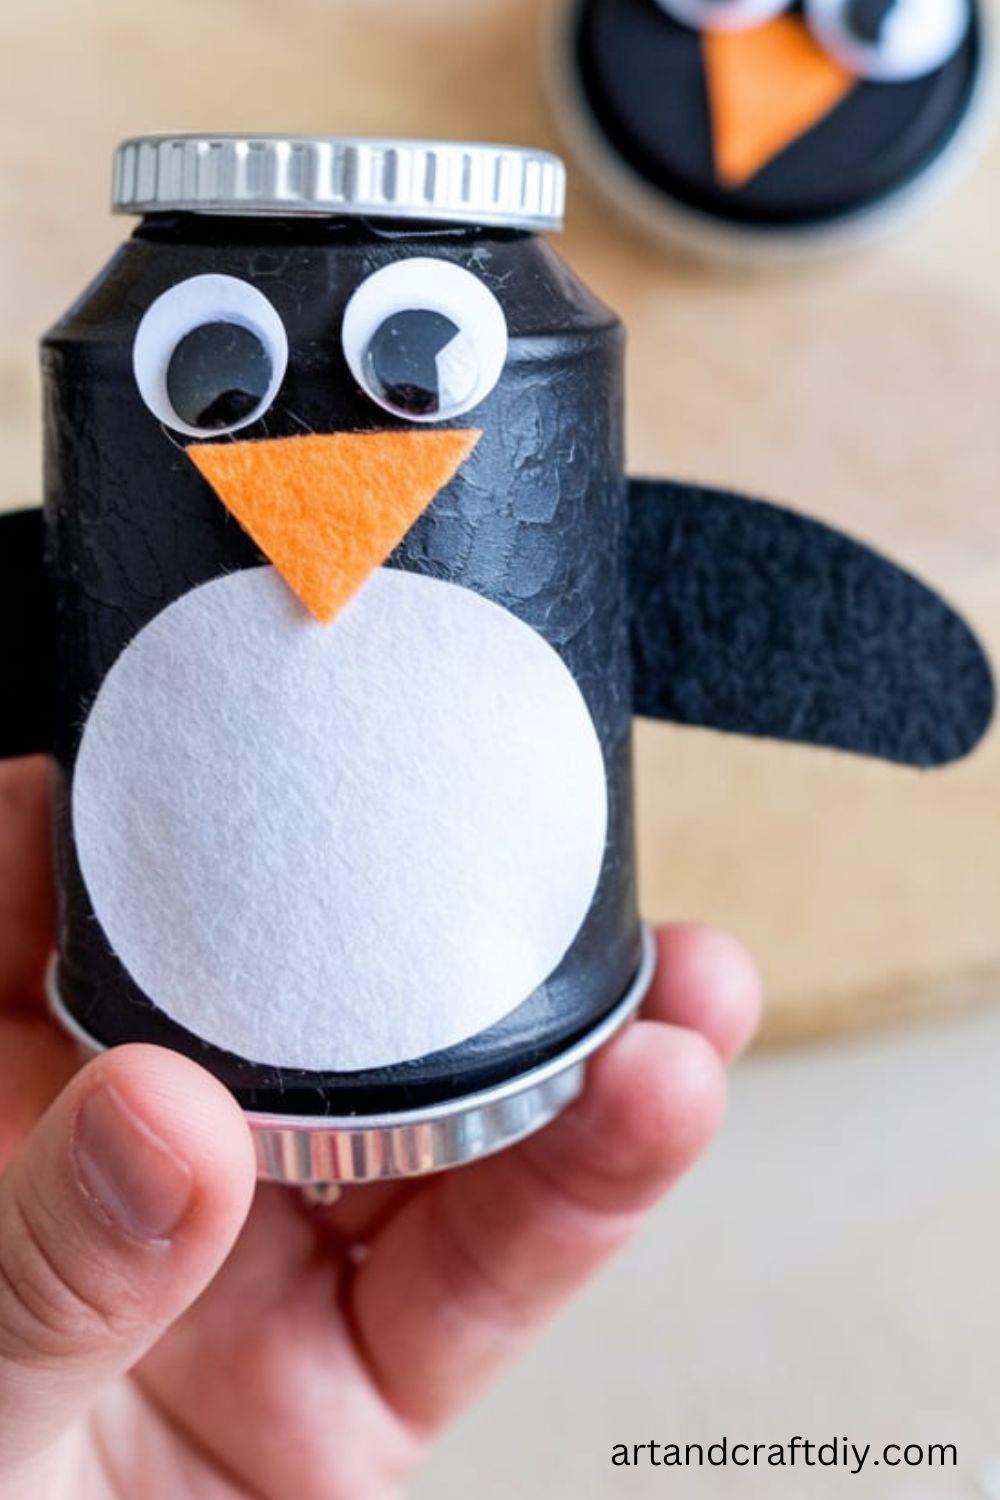
Bottle cap penguins are one of those crafts that sound weird at first, but once you try them, you realize how charming they actually are. The first time I made these, I used a handful of old soda caps I almost threw away, and I’m so glad I didn’t. They make the cutest little mini penguins that are perfect for fridge magnets, keychains, or even tiny party favors. Honestly, every time I see them, I can’t help but smile.
What I do is paint the bottle caps black on the outside, then cut out tiny white ovals for the bellies. I glue those inside the cap, then add tiny beaks and eyes (googly eyes if I have them, dots with a marker if I don’t). For feet, I sometimes use little bits of orange felt or foam. It’s a bit fiddly, I’ll admit, but the results are worth it. The kids usually treat them like mini collectibles—like their own little penguin army. In my opinion, this one’s a hidden gem of penguin crafts.
Sock Penguin
Transform an old sock into a cute, cuddly penguin toy!
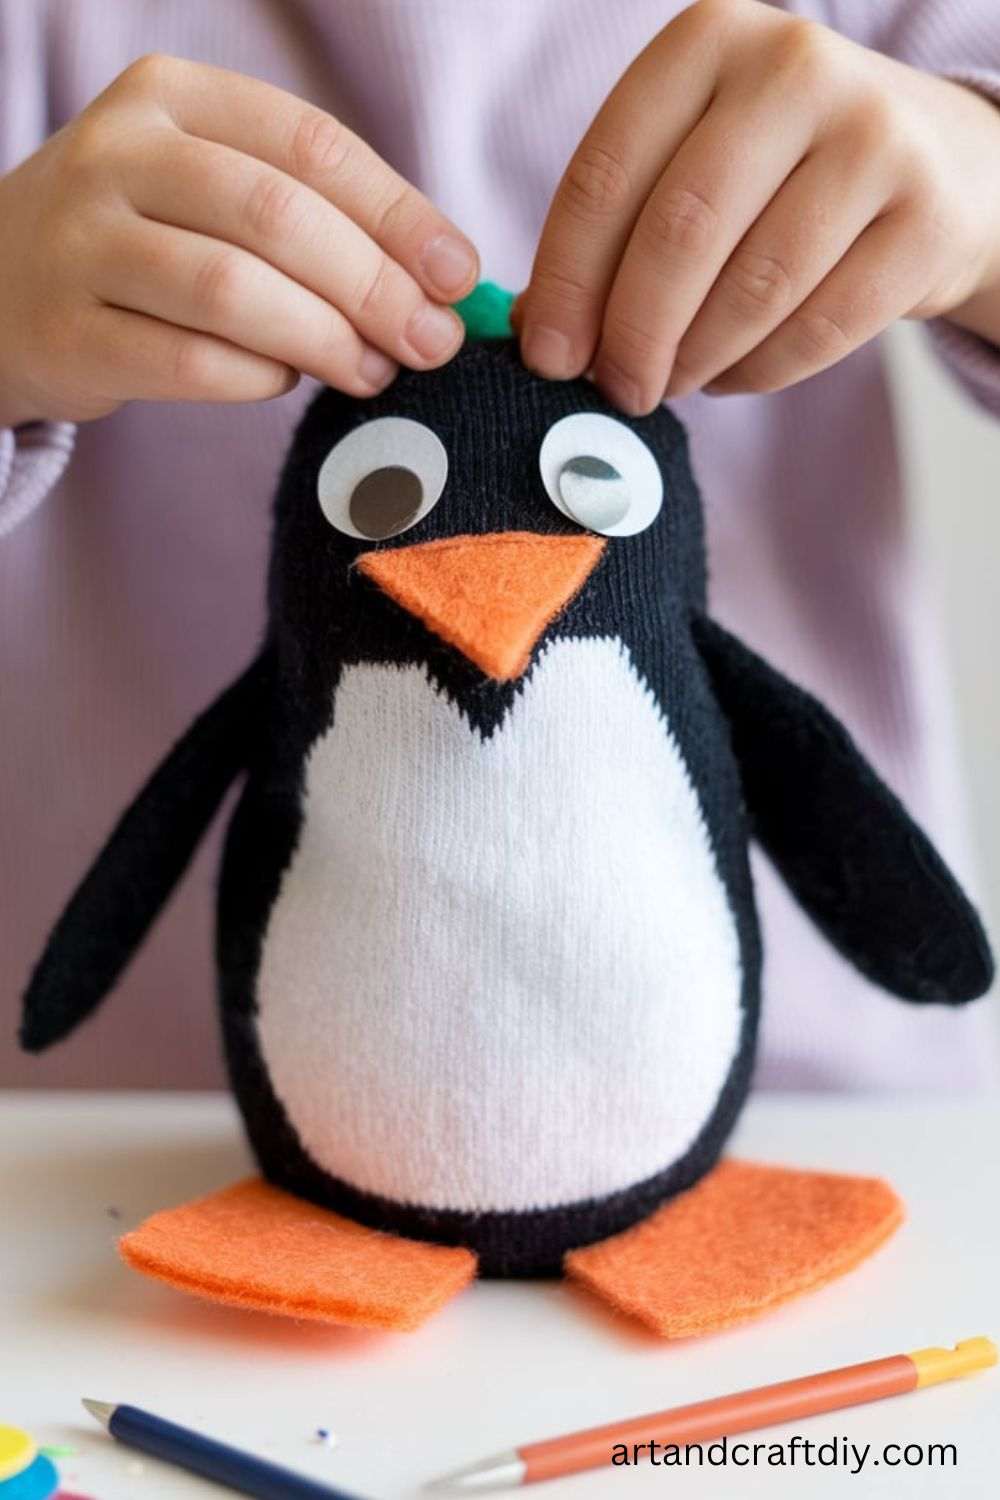
Materials Needed:
- Black sock
- Rice or stuffing
- Felt (white, black, and orange)
- String or rubber bands
- Glue or needle and thread
- Googly eyes
Steps:
- Fill the sock with rice or stuffing, dividing it into two sections using string or rubber bands. The larger section forms the body, and the smaller one is the head.
- Cut and glue a white oval felt piece on the body to create the belly.
- Add orange felt feet and a beak to the penguin.
- Glue or sew on googly eyes.
- Optionally, tie a ribbon around the neck for a scarf.
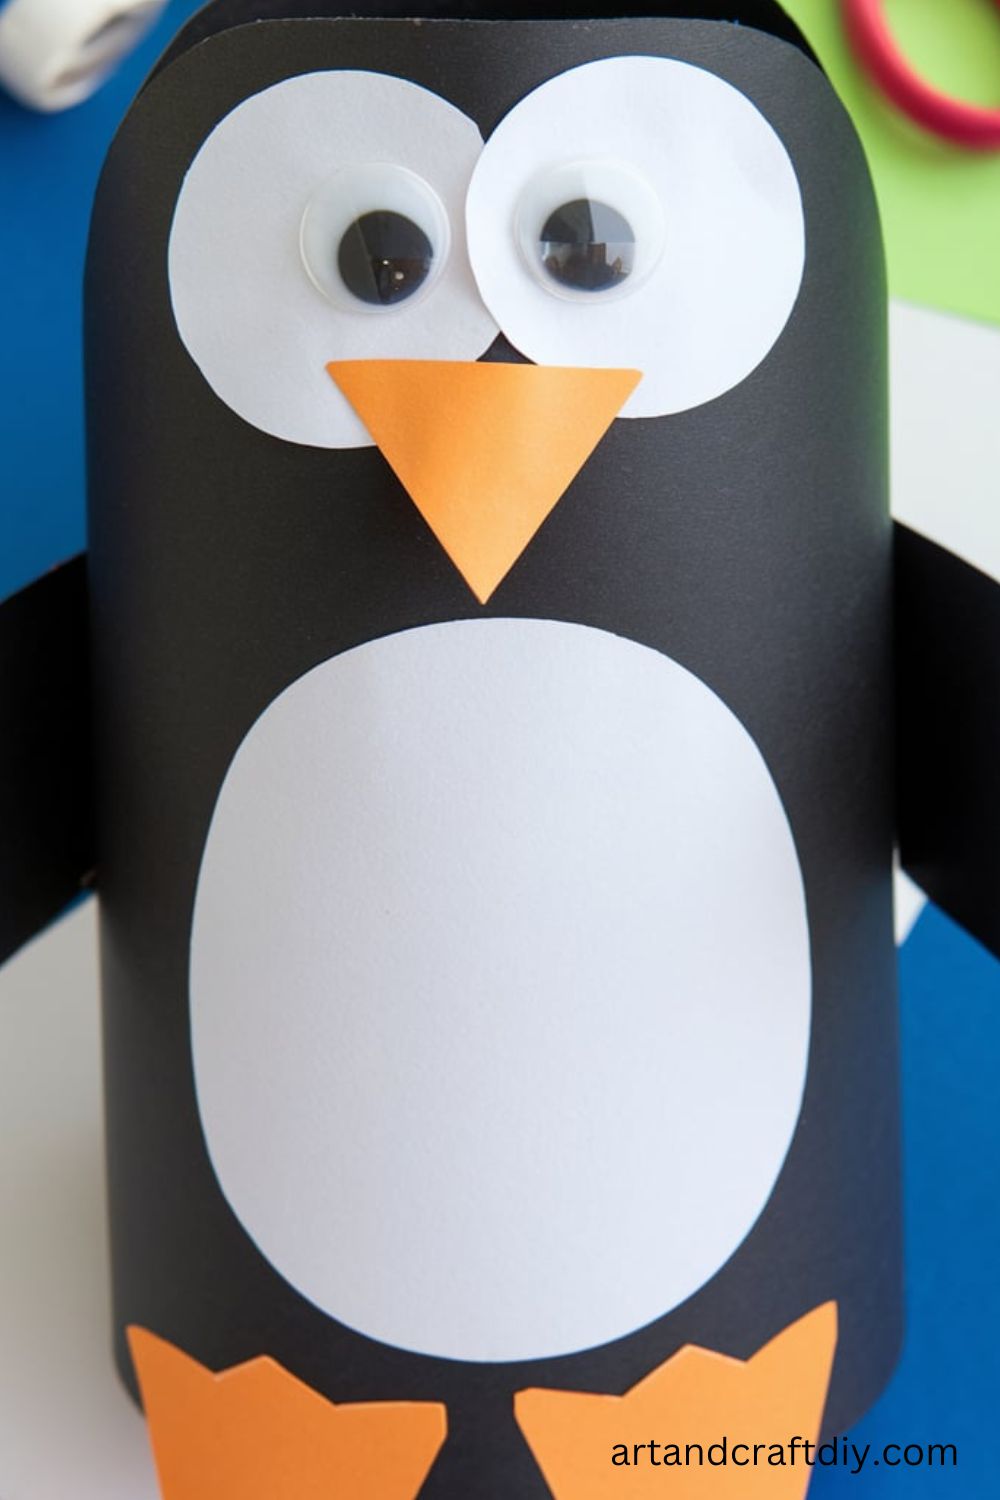
Toilet Paper Roll Penguin
This craft is an excellent way to reuse empty toilet paper rolls.
Materials Needed:
- Empty toilet paper roll
- Black, white, and orange paper
- Glue stick
- Scissors
- Googly eyes
Steps:
- Cover the entire toilet paper roll with black paper.
- Cut an oval from white paper and glue it onto the front for the belly.
- Use orange paper to cut and attach feet and a beak.
- Add googly eyes above the beak to complete your penguin.
Penguin Bookmark
Encourage kids to read with these adorable penguin bookmarks.
Materials Needed:
- Black, white, and orange cardstock
- Glue stick
- Scissors
- Googly eyes
Steps:
- Cut a black triangle and fold the top corners inward to form a square.
- Cut white paper into a smaller square and glue it onto the folded triangle.
- Add orange paper for the beak and black wings.
- Attach googly eyes above the beak.
Felt Penguin Puppets
Kids will love making and playing with these soft penguin puppets.

Materials Needed:
- Black, white, and orange felt
- Scissors
- Needle and thread or glue
- Googly eyes
Steps:
- Cut two identical penguin body shapes from black felt.
- Cut a smaller oval from white felt for the belly and glue or sew it onto one of the black pieces.
- Add orange felt feet and a beak to the white belly.
- Glue or sew the two black pieces together, leaving an opening at the bottom for a finger puppet.
- Attach googly eyes to the face.
Cotton Ball Penguins
Soft and fluffy, these cotton ball penguins are fun to create.
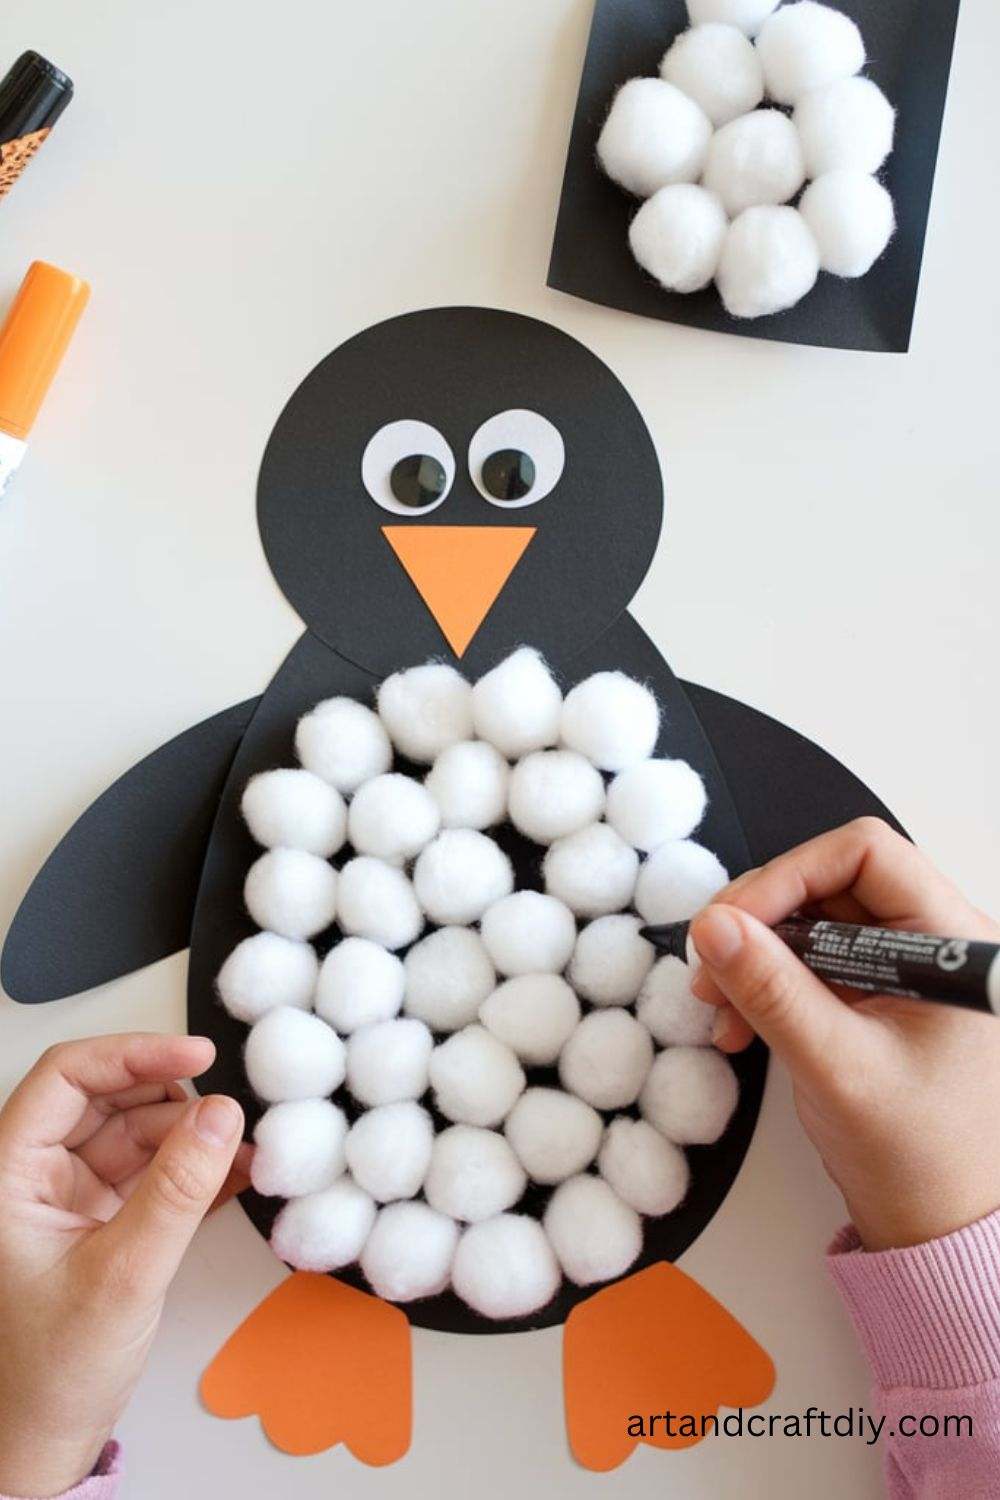
Materials Needed:
- Cotton balls
- Black and orange paper
- Glue
- Googly eyes
Steps:
- Glue cotton balls together to form the penguin’s body and head.
- Use black paper to cut and attach wings.
- Add an orange beak and feet.
- Glue googly eyes to complete the penguin’s face.
Penguin Headband Craft
This penguin-themed headband is perfect for dress-up or fun activities.
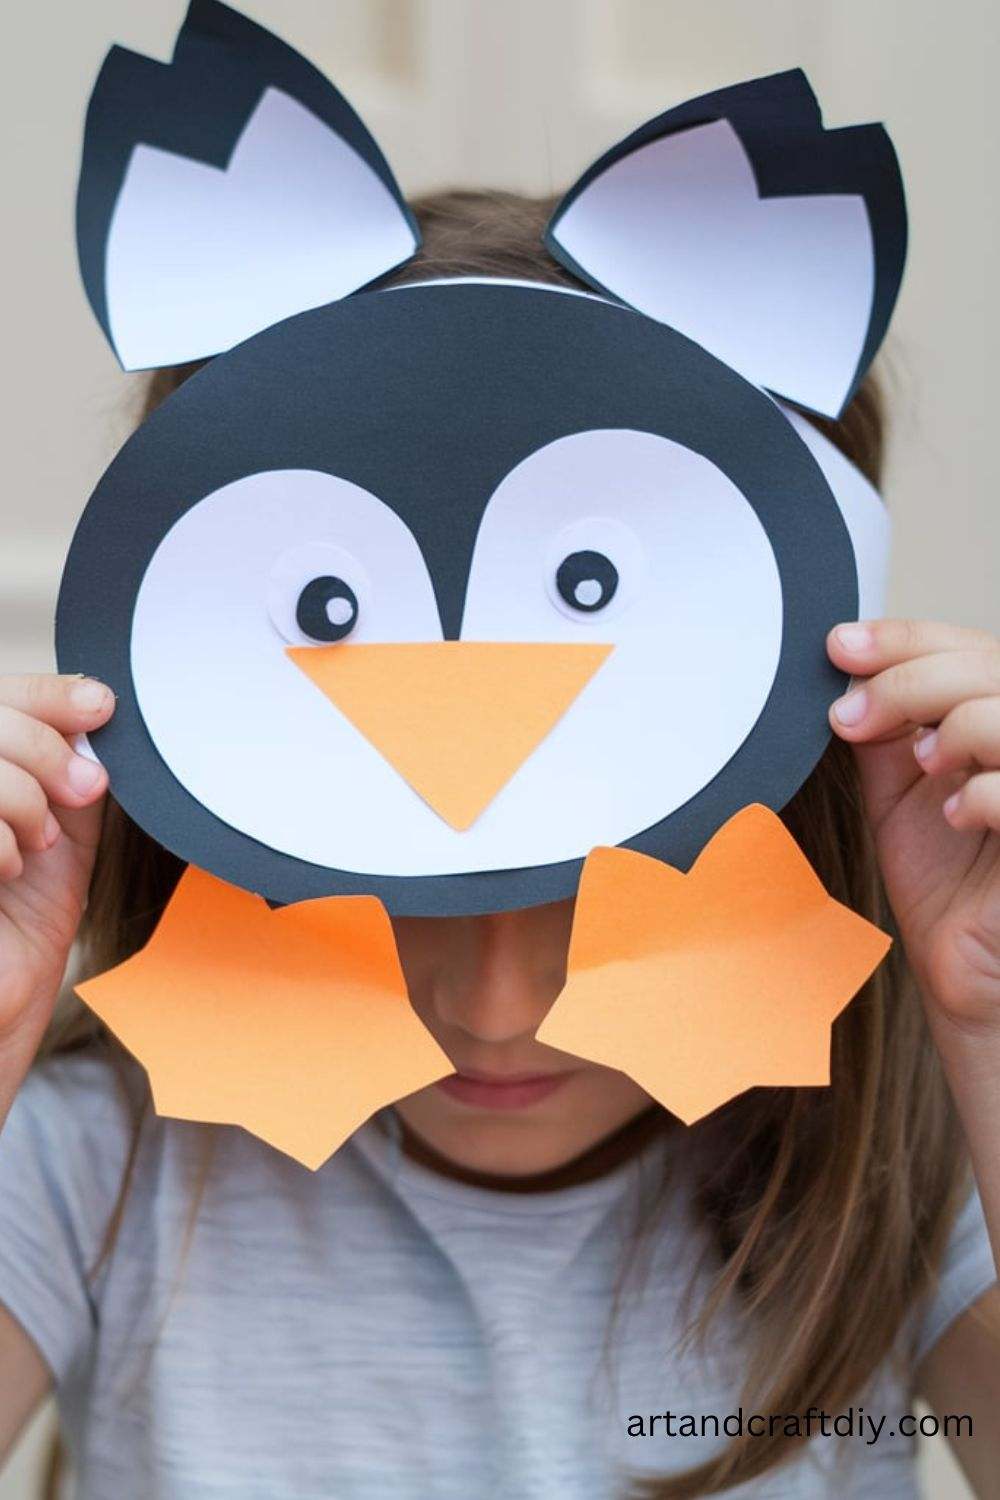
Materials Needed:
- Black, white, and orange cardstock
- Scissors
- Glue or tape
- Googly eyes
Steps:
- Cut a long strip of black cardstock to fit around the child’s head and tape or glue the ends together.
- Cut an oval shape from white cardstock for the penguin’s face and glue it to the front of the headband.
- Add an orange triangle for the beak and googly eyes above it.
- Decorate the sides of the headband with black wings made from cardstock.
Penguin Popsicle Stick Craft
Turn plain popsicle sticks into charming penguin figures.
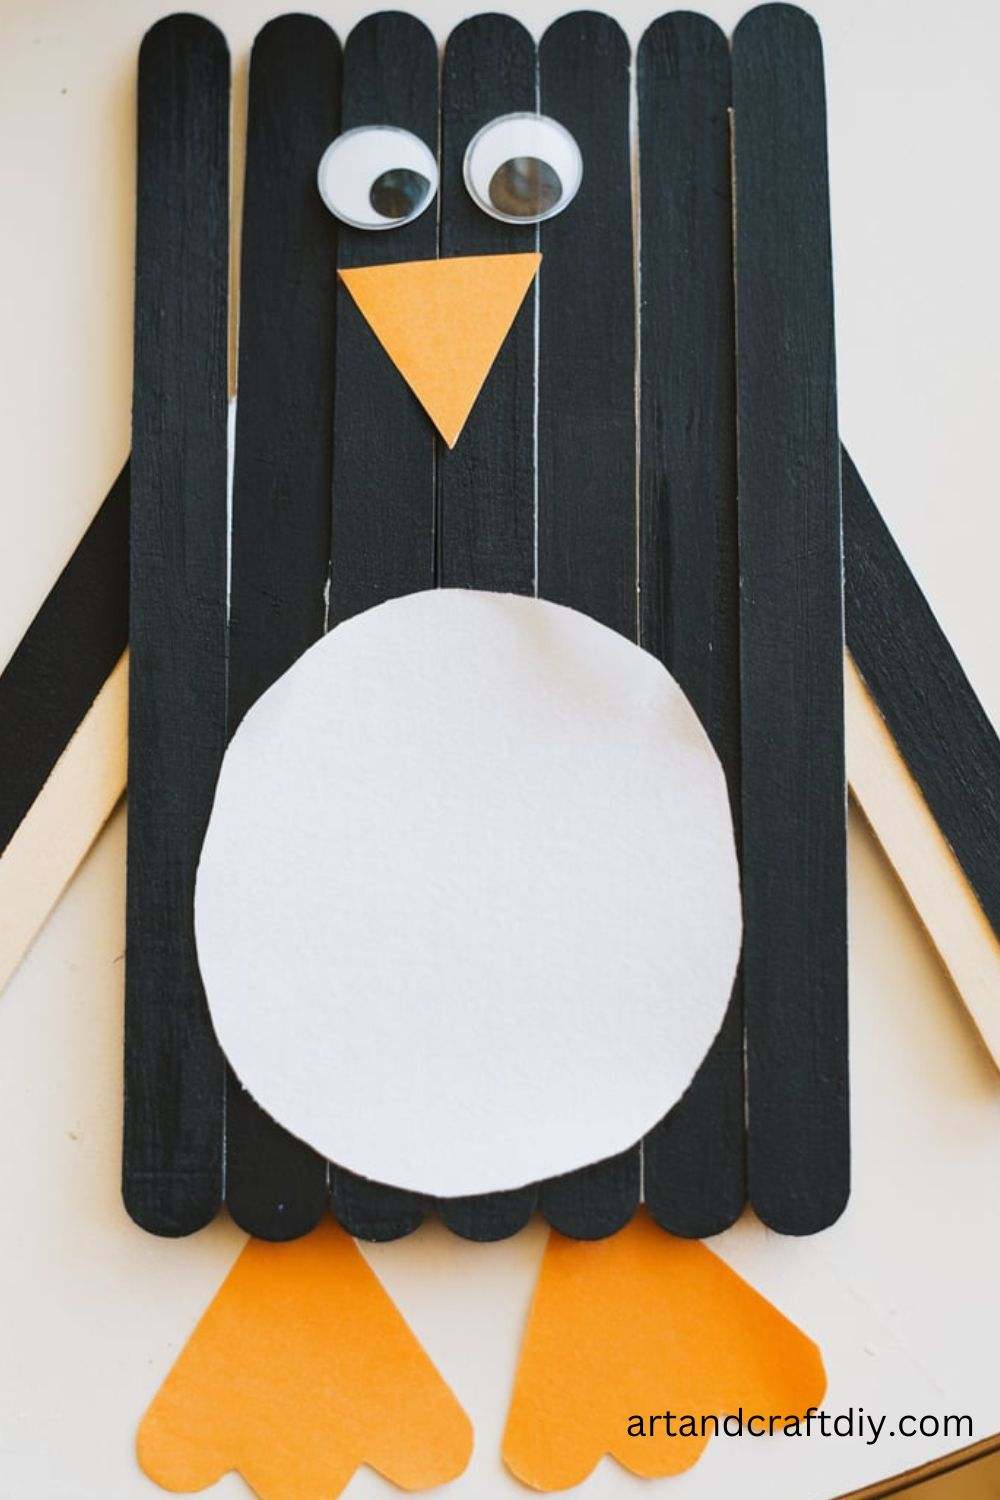
Materials Needed:
- Large popsicle sticks
- Black, white, and orange paint
- Googly eyes
- Glue
Steps:
- Paint the popsicle stick black and let it dry.
- Add a white oval in the middle of the stick for the penguin’s belly.
- Paint an orange beak near the top and add orange feet at the bottom.
- Attach googly eyes above the beak.
Yarn-Wrapped Penguins
This activity enhances motor skills as kids wrap yarn around a penguin template.
Materials Needed:
- Black and white yarn
- Cardboard
- Scissors
- Glue
- Orange and white cardstock
Steps:
- Cut a penguin shape from cardboard.
- Wrap black yarn around the cardboard, leaving an open space for the belly.
- Fill the belly area with white yarn.
- Cut out orange paper for the beak and feet and attach them with glue.
- Add googly eyes to complete the penguin’s face.
Fingerprint Penguins
This simple craft creates adorable penguins using fingerprints.
Materials Needed:
- Black, white, and orange paint
- Blue cardstock
- Paintbrush
Steps:
- Dip a finger in black paint and press it onto the blue cardstock to form the penguin’s body.
- Add a smaller white fingerprint on top of the black print for the belly.
- Use orange paint to add a beak and feet.
- Use a fine brush to add eyes or attach small googly eyes.
Egg Carton Penguins
Transform egg cartons into a colony of penguins with this eco-friendly craft.
Materials Needed:
- Egg carton cups
- Black and white paint
- Orange paper
- Googly eyes
- Glue
Steps:
- Cut out individual cups from an egg carton and paint them black.
- Add a white oval on one side for the penguin’s belly.
- Attach orange paper feet and a beak to the bottom and front of the cup.
- Glue googly eyes above the beak to complete the face.
Penguin Snow Globe
Create a magical snow globe with a penguin inside!
Materials Needed:
- Small plastic jar with a lid
- Miniature penguin figurine or homemade penguin
- Glitter
- Water
- Hot glue
Steps:
- Glue the penguin figurine to the inside of the jar lid.
- Fill the jar with water and add a pinch of glitter for “snow.”
- Screw the lid tightly onto the jar and seal with hot glue if necessary.
- Shake and enjoy your penguin snow globe.
Rock Penguin Painting
Painting on rocks is a wonderful way to create durable penguin decorations.
Materials Needed:
- Smooth rocks
- Black, white, and orange paint
- Paintbrushes
Steps:
- Wash and dry the rocks.
- Paint the entire rock black and let it dry.
- Add a white oval for the belly and orange details for the beak and feet.
- Paint eyes or use small googly eyes to complete the penguin.
Cupcake Liner Penguins
These adorable penguins are made using cupcake liners for a textured effect.
Materials Needed:
- Black, white, and orange cupcake liners
- Glue
- Googly eyes
- Scissors
Steps:
- Flatten a black cupcake liner to create the penguin’s body.
- Add a smaller white cupcake liner on top for the belly.
- Cut and attach an orange beak and feet.
- Glue googly eyes above the beak.
Clay Penguin Models
This craft uses air-dry clay to sculpt penguins that can be painted and displayed.
Materials Needed:
- Air-dry clay
- Black, white, and orange paint
- Paintbrushes
Steps:
- Shape the clay into a penguin body with a rounded head and a wide base.
- Let the clay dry completely.
- Paint the body black, adding white for the belly and orange for the beak and feet.
- Use a fine brush to paint small eyes or attach tiny beads for eyes.
Paper Bag Penguins
Turn ordinary paper lunch bags into cute penguin puppets.
Materials Needed:
- Paper lunch bags
- Black, white, and orange construction paper
- Glue
- Googly eyes
Steps:
- Cover the front of the paper bag with black paper.
- Cut out a white oval for the belly and glue it to the middle.
- Add orange paper feet at the bottom and a beak near the fold of the bag.
- Attach googly eyes above the beak.
Penguin Mask
Kids can transform into penguins with this fun and wearable mask.
Materials Needed:
- Paper plates
- Black, white, and orange paint
- Elastic string
- Scissors
Steps:
- Cut out eye holes in a paper plate.
- Paint the plate black, leaving a white area for the penguin’s face.
- Attach an orange triangle beak in the center.
- Punch holes on either side of the plate and attach the elastic string to create a mask.
Penguin Garland
A penguin garland is a festive decoration perfect for winter-themed parties or to spruce up your home.
Materials Needed:
- Black, white, and orange cardstock
- String or twine
- Scissors
- Glue
- Hole punch
Steps:
- Cut out multiple penguin shapes from black cardstock.
- Add a white belly to each penguin by cutting and gluing white ovals.
- Attach orange feet and beaks to each penguin shape.
- Add googly eyes or draw eyes on each penguin.
- Use a hole punch at the top of each penguin and thread them onto a string or twine to create the garland.
- Hang your penguin garland to enjoy!
Bubble Wrap Penguin Painting
Kids will love using bubble wrap to create a textured penguin painting.
Materials Needed:
- Bubble wrap
- Black, white, and orange paint
- Scissors
- Blue paper
- Paintbrush
Steps:
- Cut a piece of bubble wrap into the shape of a penguin body.
- Paint the bubble side of the wrap black and press it onto blue paper.
- Add a white oval for the belly using white paint and another piece of bubble wrap.
- Use a paintbrush to add orange details for the beak and feet.
- Once dry, add googly eyes or paint eyes onto the penguin.
Foam Cup Penguin
This cute penguin craft uses foam cups as the base.
Materials Needed:
- Foam cups
- Black and white paint
- Orange cardstock
- Googly eyes
- Glue
Steps:
- Paint the foam cup black, leaving an oval area unpainted for the belly. Let it dry.
- Cut and glue orange cardstock feet to the bottom of the cup.
- Add a small orange triangle for the beak.
- Attach googly eyes above the beak.
- Place the cup upside down for display!
Origami Penguin
Teach kids the art of origami with this simple penguin design.
Materials Needed:
- Black origami paper
- White paper
- Glue
- Marker
Steps:
- Fold a black origami paper into a basic bird shape by folding it diagonally and creating a crease down the middle.
- Fold the top point downward to form the penguin’s head.
- Cut a white triangle to create the belly and glue it to the folded paper.
- Use a marker to draw eyes or attach small googly eyes.
Pinecone Penguins
Turn pinecones into adorable penguin decorations!
Materials Needed:
- Pinecones
- Black and white paint
- Orange felt
- Googly eyes
- Glue
Steps:
- Paint the pinecone black, leaving a white section for the penguin’s belly.
- Cut out orange felt for the feet and beak and attach them with glue.
- Add googly eyes above the beak.
- Let it dry completely before displaying.
Sponge Stamp Penguins
Use sponges to create penguin art with a unique texture.
Materials Needed:
- Sponges
- Black, white, and orange paint
- Blue cardstock
- Scissors
Steps:
- Cut a sponge into the shape of a penguin’s body.
- Dip the sponge into black paint and stamp it onto blue cardstock.
- Use smaller sponge pieces to add white for the belly and orange for the feet and beak.
- Add googly eyes or draw eyes to finish the design.
Felt Penguin Ornaments
Create soft penguin ornaments to hang on a tree or display in your room.
Materials Needed:
- Black, white, and orange felt
- Needle and thread or glue
- Ribbon
- Stuffing (optional)
Steps:
- Cut out two identical penguin shapes from black felt.
- Add a white felt belly and orange felt feet and beak to one piece.
- Sew or glue the two pieces together, leaving a small hole for stuffing if desired.
- Attach a loop of ribbon at the top to create a hanging ornament.
Paper Straw Penguins
Paper straws can be turned into charming little penguins for decoration or play.
Materials Needed:
- Black and white paper straws
- Black, white, and orange paper
- Glue
- Scissors
Steps:
- Cut the straws into smaller pieces to serve as the penguin’s body.
- Wrap black paper around the straw pieces and glue in place.
- Add white ovals for the belly and orange paper feet and beaks.
- Attach googly eyes to complete the look.
Button Penguins
This craft turns spare buttons into tiny penguins.
Materials Needed:
- Black, white, and orange buttons
- Glue
- Cardstock
Steps:
- Glue a large black button onto cardstock as the penguin’s body.
- Add a smaller white button on top for the belly.
- Use tiny orange buttons for the feet and beak.
- Add googly eyes or draw eyes with a marker.
Penguin Finger Puppets
Kids can make these simple finger puppets for hours of imaginative play.
Materials Needed:
- Black, white, and orange felt
- Scissors
- Glue or needle and thread
Steps:
- Cut two identical penguin shapes from black felt.
- Add a white felt belly and an orange felt beak to one piece.
- Glue or sew the two black pieces together, leaving an opening at the bottom for fingers.
- Add small googly eyes or sew on tiny buttons for eyes.
Penguin Gift Wrap
Transform plain wrapping paper into a penguin-themed design.
Materials Needed:
- Black, white, and orange wrapping paper
- Scissors
- Glue
Steps:
- Wrap a gift in black wrapping paper.
- Cut and attach a white paper oval for the belly.
- Use orange paper to create feet and a beak.
- Add googly eyes or draw eyes with a marker for the face.
Safety Tips for Crafting with Kids
Crafting with kids can be a fun and creative way to spend time together, allowing children to explore their imaginations and develop important skills. However, it’s essential to ensure their safety during these activities. Here are some safety tips to keep in mind when crafting with kids:
- Use Age-Appropriate Materials
- Always choose craft supplies that are suitable for your child’s age and developmental level. Avoid small parts for younger children that could be a choking hazard.
- Supervise at All Times
- Even when using non-toxic materials, young children should always be supervised while crafting. Keep a close eye on their actions to prevent accidents.
- Ensure Proper Scissors Use
- For older kids learning to use scissors, make sure they are using safety scissors or blunt-tip scissors. Teach them the correct way to hold and cut with scissors.
- Avoid Sharp Objects
- Tools like needles, pins, and craft knives should only be used by older children under close supervision. Consider using child-safe alternatives for younger crafters.
- Choose Non-Toxic Supplies
- Opt for non-toxic paints, glue, markers, and other supplies. Always check for a “non-toxic” label to ensure that the materials are safe for children to handle.
- Keep Crafting Areas Clean
- Crafting can get messy, but keeping the area tidy will reduce the risk of slips and spills. Ensure that the work surface is stable, and any potentially hazardous materials are put away when not in use.
- Wear Protective Gear
- Depending on the craft, consider having your child wear protective gear such as an apron, goggles, or gloves. This is particularly useful for messy activities like painting or working with glue.
- Avoid Flammable Materials
- Keep flammable materials, such as certain paints or glue, away from open flames or heat sources. Always craft in well-ventilated areas when working with such materials.
- Teach Proper Clean-Up Habits
- Encourage kids to clean up after themselves, including washing hands after handling craft supplies. Dispose of waste materials like sharp objects and broken items properly.
- Know the Crafting Tools You’re Using
- Familiarize yourself with the craft materials and tools before beginning a project. Understanding their potential risks helps you guide your child through safe usage.
By following these safety tips, crafting can be an enjoyable and safe activity for kids, helping to foster their creativity while keeping them protected.
FAQ
What materials do I need for Easy Penguin Crafts for Kids ?
For simple Easy Penguin Crafts for Kids , you’ll need basic supplies like construction paper, glue, scissors, markers or crayons, googly eyes, cotton balls, and possibly paper plates or black foam sheets. Some crafts may also require items like popsicle sticks or pipe cleaners.
Are Easy Penguin Crafts for Kids suitable for all age groups?
Yes, Easy Penguin Crafts for Kids can be adapted for various age groups. Younger children can focus on simple cutting and gluing, while older kids can add more intricate details or use additional materials for a more advanced design.
How do I make a penguin with a paper plate?
To make a paper plate penguin, start by painting the plate black. Once it dries, cut out white shapes for the belly and eyes. Glue them to the plate, and add a small orange triangle for the beak. Use black paper for the flippers, and you can also attach cotton balls for a snowy effect.
Can I use Easy Penguin Crafts for Kids for a classroom activity?
Absolutely! Easy Penguin Crafts for Kids are great for classroom activities, especially around winter or during themed lessons. You can create a crafting station where children can make their own penguins and even learn fun facts about penguins as they work.

Hi, I’m Victoria, an art and craft teacher at Newark City Schools, where I have the joy of working with middle school students to help them explore their creativity and develop their artistic talents. I believe that art is a powerful way for students to express themselves, and I strive to make every lesson a fun, engaging, and inspiring experience.
I created this website to share the art and craft projects, techniques, and resources that I use in my classroom, hoping to inspire both educators and young artists alike. Whether you’re a teacher looking for new ideas or a student eager to try something new, I’m excited to provide creative tools and projects that anyone can enjoy.
When I’m not in the classroom, I love experimenting with different art forms and learning new crafting techniques. My goal is to help others discover the joy of making things with their hands, and I hope my website serves as a space for everyone to explore their creative potential.