
I still remember the first baby shower I went to—I was standing there with a store-bought blanket, feeling a little guilty because everyone else seemed to have these thoughtful, handmade things. You know that awkward moment when you’re like, “Uh oh… did I totally miss the memo?” Yeah, that was me. The truth is, DIY baby shower gifts aren’t just about saving money (though, let’s be real, that part is nice). They’re about showing love in a way that feels personal and special. And honestly, you don’t have to be super crafty or own a fancy glue gun to pull it off. Even simple touches can make a huge impact. If you’ve ever wondered, “What can I make that’s both cute and useful?”—I’ve got you. In this article, I’ll walk you through DIY baby shower gifts that are fun, practical, and guaranteed to make the mama-to-be smile.
DIY Baby Shower Gifts
DIY Baby Shower Gifts are personalized and heartfelt creations that can make a baby shower extra special.
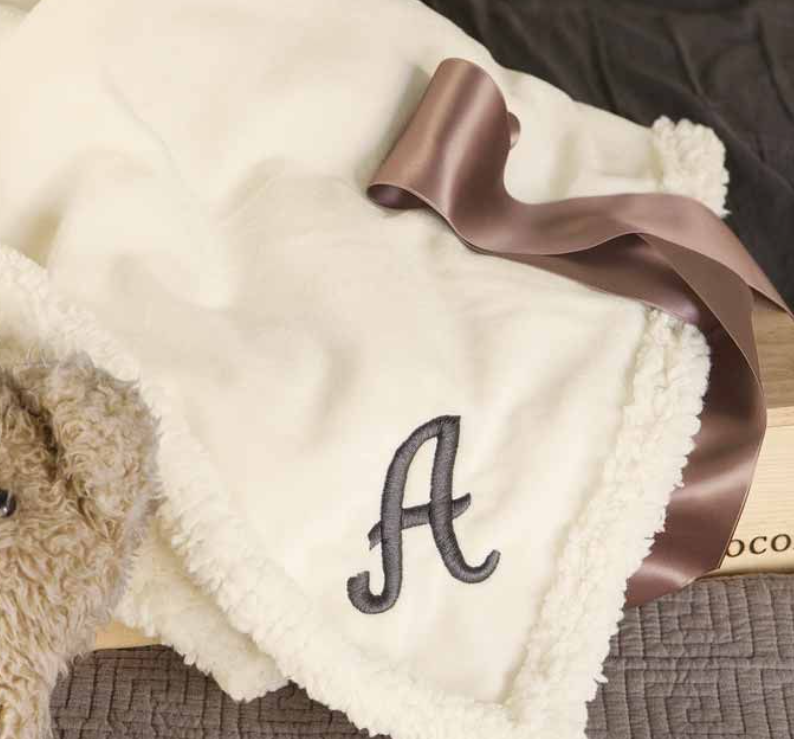
Personalized Baby Blanket
I have to admit, penguins always make me smile, and when I was planning a baby shower one winter, I couldn’t resist making a little penguin-themed gift. Honestly, it’s simpler than people think. I just grabbed some black and white felt, googly eyes, and orange scraps for the beak and feet. I stitched a few together into soft little penguin plushies, and they were such a hit. Everyone kept picking them up, saying, “Oh my gosh, this is adorable!” To be fair, they didn’t look perfect—one had a slightly crooked belly—but that almost made them cuter in my opinion. If you’re not into sewing, you can hot glue the pieces, and it still works fine.
The best part is that it doesn’t feel like just another baby shower gift—it feels personal. I once tucked one inside a basket with baby socks and mittens, and the mom-to-be laughed because it looked like the penguin was babysitting. It’s little touches like that that make people remember your gift.
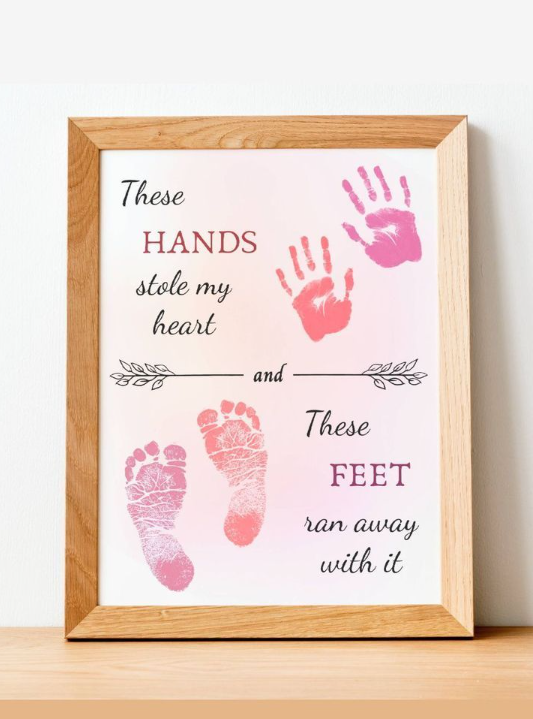
Baby Handprint Frame
I’ll be honest, DIY snow globes are one of those crafts I thought would be way harder than they actually are. But once I made one, I got hooked. I usually start with a clean mason jar, add a cute little figurine (baby animals are my favorite), glue it down to the lid, then fill the jar with water, glitter, and a splash of glycerin. When you shake it, it looks like a tiny winter wonderland. I’ve found that using chunky glitter instead of the super fine stuff makes it more magical because it falls slower.
One time, I made a snow globe with a tiny rubber duck inside for a baby shower, and honestly, it was the star of the gift table. Everyone wanted to shake it. If you’re giving it as a gift, you can even paint the lid or tie a ribbon around it to match the shower theme. It’s such a thoughtful, fun piece that doubles as décor and a keepsake.
Custom Baby Onesies
Now, this one is very close to my heart because it’s ridiculously cozy and surprisingly easy. A felt mitten garland sounds fancy, but really it’s just cutting mitten shapes out of colorful felt and stringing them along with twine. I once made a garland in soft pastels for a baby girl’s shower, and the mom actually used it to decorate the nursery afterward. That’s what I love about it—it’s not just for the party, it can live on in the baby’s room. Honestly, I think it’s more special than store-bought banners.
To be fair, the first time I tried, my mittens weren’t the same size at all, but it didn’t matter. It gave the whole thing a handmade charm that people appreciate. If you want to take it up a notch, you can tuck little notes, candies, or tiny socks inside the mittens. I’ve found that when guests see something interactive like that, they light up. It’s simple, sweet, and feels like a hug in decoration form.
DIY Baby Mobile
A baby mobile is a lovely addition to a nursery. This DIY version allows you to choose colors and shapes that will match the room’s décor.
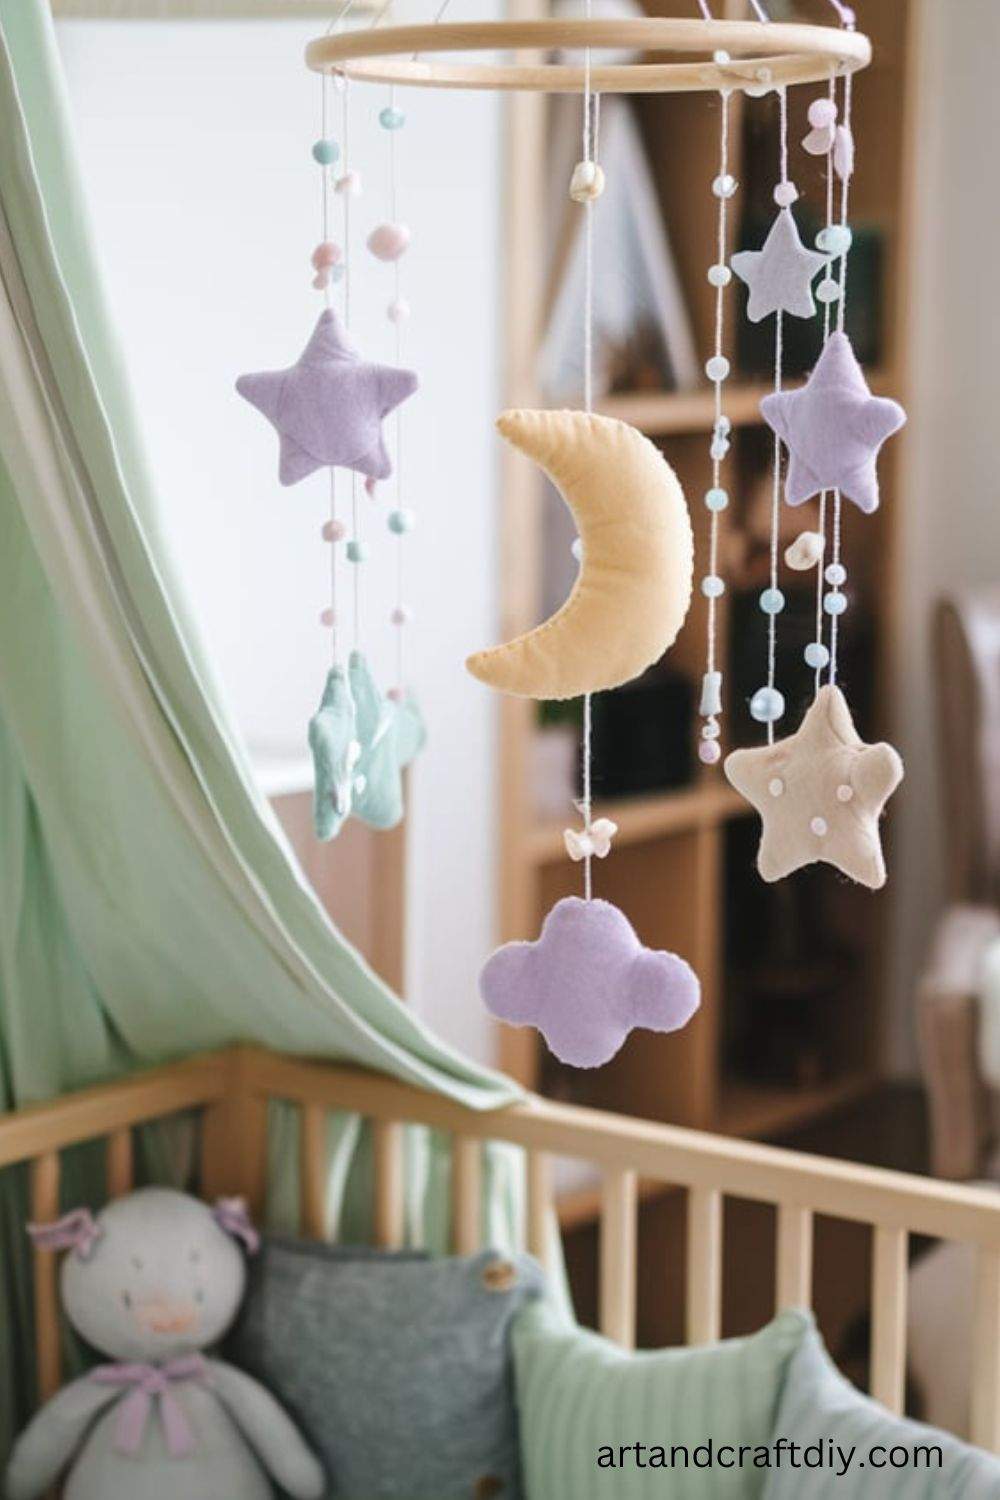
Materials Used:
- Embroidery hoop
- Yarn
- Felt or fabric
- Scissors
- Needle and thread
- Wooden dowel or a sturdy wire for hanging
Steps:
- Cut a piece of yarn and tie it around the embroidery hoop to create the base for your mobile.
- Cut out shapes from felt or fabric, such as stars, moons, or animals.
- Attach the shapes to the yarn using needle and thread.
- Attach the other end of the yarn to the embroidery hoop, making sure they’re evenly spaced.
- Hang the mobile from a wooden dowel or sturdy wire.
- Check the balance of the mobile and adjust as necessary before hanging it in the nursery.
Crochet Baby Booties
Crocheted baby booties are a classic gift for any new arrival. They’re not only cute but also keep the baby’s feet warm and cozy.
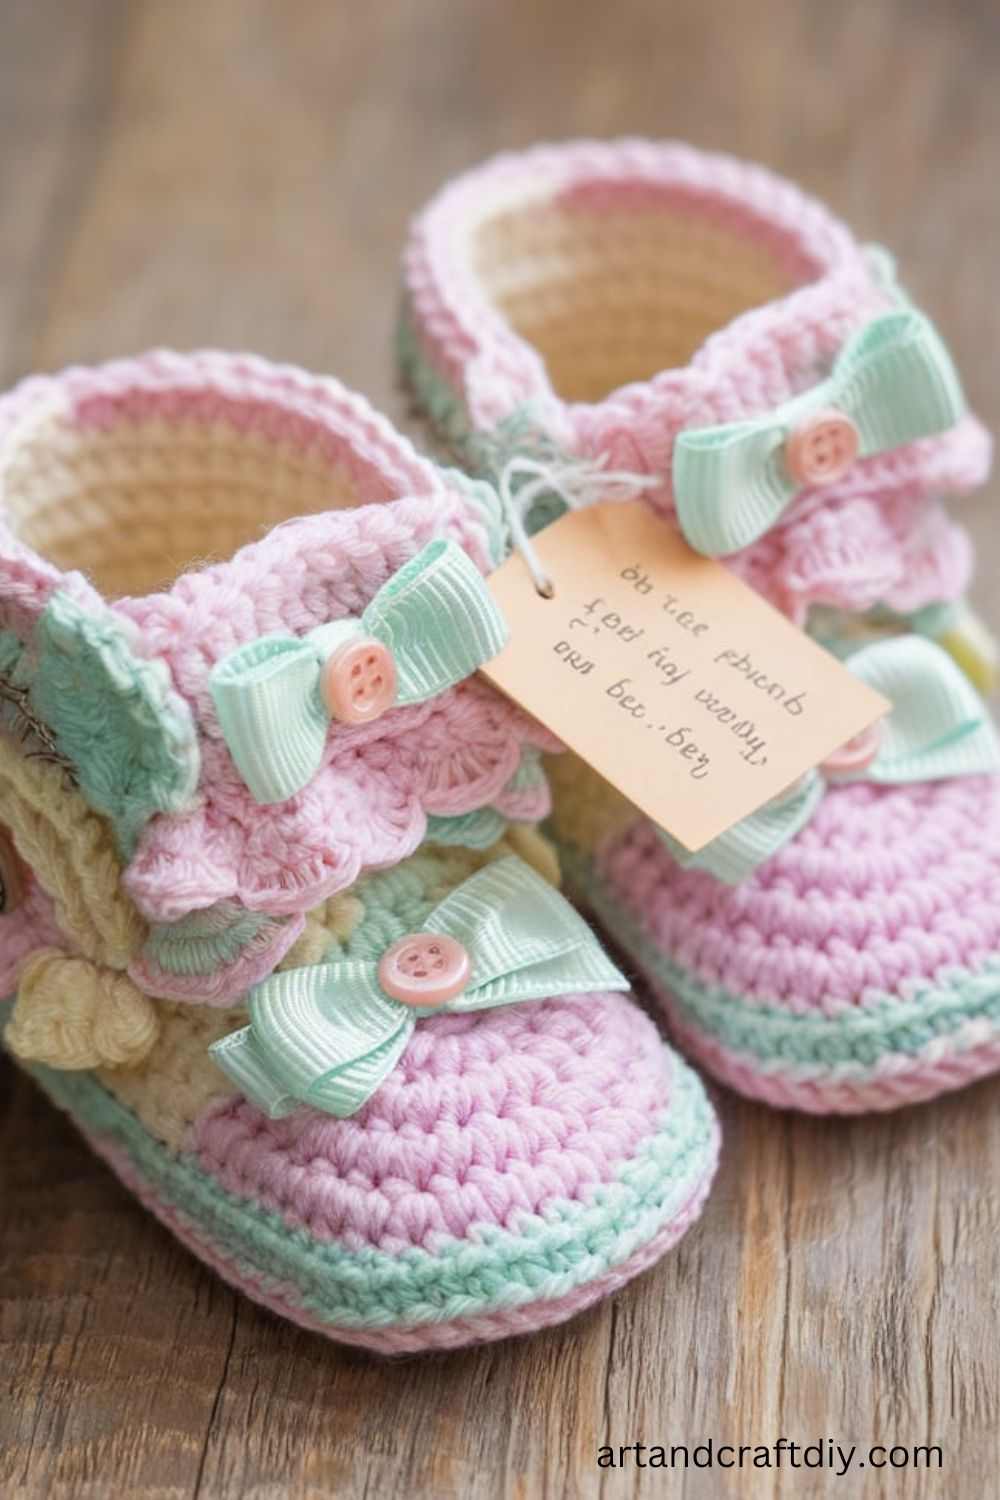
Materials Used:
- Soft yarn (baby-friendly)
- Crochet hook (appropriate size for the yarn)
- Scissors
- Needle for weaving in ends
Steps:
- Start by crocheting a small base for the booties, following a pattern if necessary.
- Crochet in the round to create the sole of the bootie, making it slightly larger than the baby’s foot.
- Once the sole is completed, continue to crochet upwards to form the sides of the bootie.
- Add a cuff at the top of the bootie by crocheting a few rows of stitches.
- Finish off the bootie by weaving in any loose ends.
- Make a second bootie to match, and gift them to the parents.
Baby Memory Box
A baby memory box is a wonderful way to help new parents store keepsakes, like the baby’s first shoes or favorite blanket.
Materials Used:
- Wooden box or storage container
- Paint or decorative paper
- Glue
- Stickers or embellishments
- Ribbon (optional)
Steps:
- Paint or cover the outside of the wooden box with decorative paper or fabric.
- Add embellishments such as stickers or personalized labels to the front of the box.
- Inside the box, line it with a soft fabric to keep items from being damaged.
- Once decorated, add a ribbon to the box for a finishing touch.
- Encourage the parents to fill it with special memories as the baby grows.
Baby’s First Book
A personalized baby book is a thoughtful gift that can be treasured for years to come. It allows the parents to document milestones and memories as the baby grows.
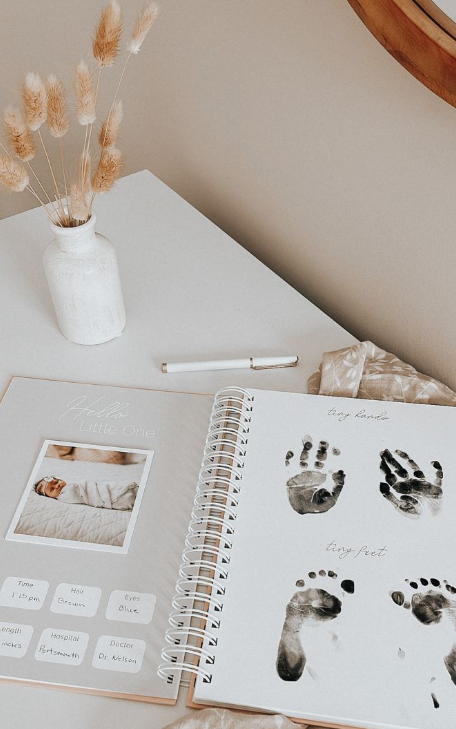
Materials Used:
- Blank scrapbook or photo album
- Stickers or stamps
- Paper
- Glue
- Markers
Steps:
- Choose a blank scrapbook or photo album to serve as the base for the book.
- Decorate the cover with stickers, stamps, or the baby’s name.
- Add pages for special moments like “First Smile” or “First Words,” leaving space for photos and written memories.
- Use markers to write the prompts and include fun designs around each section.
- Gift the book with a few pictures already placed inside, leaving the rest for the parents to fill.
Handmade Baby Quilt
A baby quilt is a cherished gift that will keep the baby warm and cozy while adding a touch of charm to their nursery.
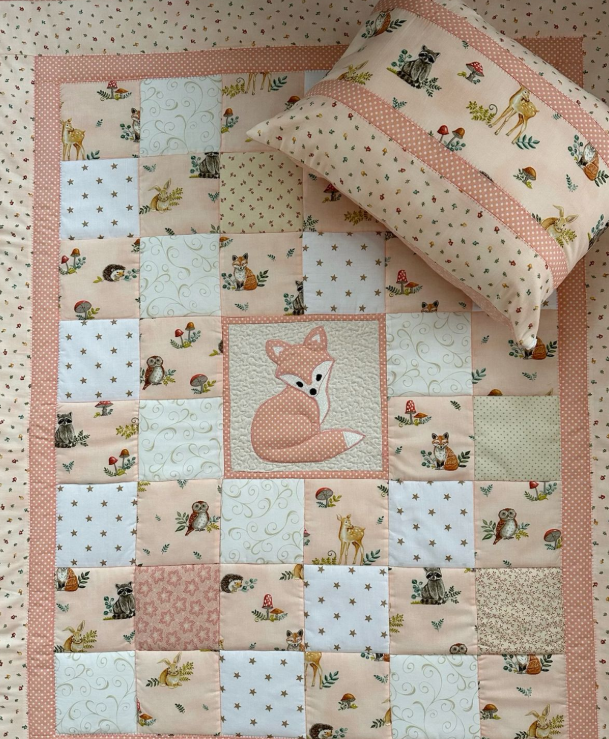
Materials Used:
- Soft cotton fabric (variety of patterns)
- Batting
- Thread
- Sewing machine or hand stitching supplies
Steps:
- Cut the fabric into small squares (the size of each square depends on your preferred design).
- Arrange the squares in a pattern on the floor until you’re satisfied with the layout.
- Sew the squares together to form the quilt top.
- Layer the quilt top with batting and the quilt backing fabric.
- Sew all layers together, either by hand or using a sewing machine.
- Add a border around the quilt for a polished finish.
- Wash the quilt to soften it before gifting.
DIY Baby Diaper Cake
A diaper cake is a creative and functional gift for parents-to-be. It’s made entirely of diapers and can be decorated with baby essentials.
Materials Used:
- Diapers (around 40-60)
- Ribbon
- Baby bottles
- Baby socks or mittens
- Small baby toys or other accessories
- Rubber bands
- Decorative accents like flowers or stuffed animals
Steps:
- Roll each diaper tightly and secure it with a rubber band.
- Create the base layer by arranging the rolled diapers in a circular shape and securing them with a rubber band.
- Add another layer of diapers on top of the base, securing them in place.
- Continue stacking layers until the diaper cake reaches the desired height.
- Decorate the outside with ribbons, baby bottles, socks, and other accessories.
- Add a stuffed animal or other decorations to the top for a cute touch.
- Present the diaper cake at the baby shower for a functional and adorable gift.
DIY Baby Bath Kit
A homemade baby bath kit is a practical and thoughtful gift. It’s easy to personalize with the baby’s favorite products and some homemade touches.
Materials Used:
- Baby shampoo and lotion
- Soft washcloths
- Baby towel
- Bath toys
- Decorative basket or container
- Ribbon
Steps:
- Arrange the baby’s bath essentials, such as shampoo, lotion, and washcloths, in a basket.
- Add a soft baby towel to the kit.
- Include some bath toys to make bath time more fun.
- Wrap the entire kit in a ribbon and attach a small card with the baby’s name.
- Present the bath kit to the parents-to-be as a practical gift they will use daily.
Baby Sweater Set
A hand-knitted or crocheted baby sweater set is a heartwarming gift that the baby will be able to wear while staying cozy in style.
Materials Used:
- Baby-friendly yarn
- Knitting needles or crochet hook
- Pattern for baby sweater (knitted or crocheted)
Steps:
- Choose a soft yarn and knitting needles or crochet hook that matches the pattern you’ve selected.
- Follow a baby sweater pattern, either knitting or crocheting the pieces.
- Once the pieces are complete, sew them together to form the sweater.
- If desired, create matching booties or a hat for the set.
- Gift the sweater set in a cute box, ready for the baby to wear.
Custom Baby Name Sign
A personalized baby name sign is a perfect addition to any nursery, giving the baby’s room a personal touch.
Materials Used:
- Wood plaque or canvas
- Paint
- Stencils or freehand designs
- Paintbrushes
Steps:
- Choose a wood plaque or canvas to serve as the base for the name sign.
- Paint the base with a soft color that will complement the nursery’s decor.
- Using stencils or freehand, paint the baby’s name on the sign.
- Add decorative elements like hearts, stars, or animals around the name.
- Allow the paint to dry completely before hanging the sign in the nursery.
Baby Bathrobe Set
A personalized baby bathrobe set is a luxurious gift that’s perfect for bath time. It’s also easy to customize for the new baby.
Materials Used:
- Soft fabric (cotton or fleece)
- Ribbon or belt
- Embroidery thread (optional)
Steps:
- Choose a soft fabric and cut it into the appropriate shapes for the bathrobe.
- Sew the pieces together to form the bathrobe, ensuring it fits the baby’s size.
- Add a belt or ribbon to tie around the bathrobe’s waist.
- Optionally, embroider the baby’s name or initials on the robe for a personalized touch.
- Finish the bathrobe and wrap it up for gifting.
Baby’s First Christmas Ornament
A personalized baby Christmas ornament is a lovely gift to commemorate the baby’s first holiday season. It can be cherished for years to come.
Materials Used:
- Clear ornament (glass or plastic)
- Paint or markers
- Glitter (optional)
- Ribbon
Steps:
- Take a clear ornament and carefully open it.
- Use paint, markers, or glitter to decorate the ornament. You can write the baby’s name and the year on it to make it special.
- Allow the ornament to dry completely.
- Attach a ribbon to the top of the ornament for hanging on the Christmas tree.
- Gift the ornament to the new parents as a meaningful keepsake.
DIY Baby Hair Accessories Set
A DIY baby hair accessories set is an adorable and practical gift for parents with a baby girl. You can make headbands, clips, or bows in a variety of styles.
Materials Used:
- Soft fabric (cotton or velvet)
- Hair clips or headbands
- Hot glue gun
- Decorative embellishments (buttons, pearls, etc.)
Steps:
- Cut the fabric into strips to create headbands or bows.
- Use a hot glue gun to attach the fabric to the headbands or clips.
- Add embellishments like pearls or buttons for added cuteness.
- Allow the glue to dry completely before gifting.
- Present the hair accessories in a cute bag or box.
DIY Baby Growth Chart
A baby growth chart is a great way to track the baby’s growth over the years. It also serves as a lovely wall decoration.
Materials Used:
- Wooden board or canvas
- Paint or markers
- Ruler
- Decorative elements (stickers or stencils)
Steps:
- Take a wooden board or canvas and measure it to the desired size for the growth chart.
- Mark off inches or centimeters along one side of the board using a ruler.
- Paint or draw the growth chart with fun colors and patterns.
- Add decorative elements around the growth chart.
- Hang the growth chart on the nursery wall and encourage the parents to mark the baby’s growth over time.
DIY Baby Play Mat
A DIY baby play mat provides a safe space for the baby to play. You can add fun colors and patterns that the baby will love.
Materials Used:
- Soft fabric (flannel or cotton)
- Batting
- Sewing machine or hand stitching supplies
- Thread
Steps:
- Cut the fabric into large squares or rectangles for the play mat.
- Layer the fabric with batting to make the mat soft and cushioned.
- Sew the layers together around the edges, leaving an opening to stuff the mat.
- Once stuffed, sew the opening closed and add decorative stitching if desired.
- Gift the play mat for hours of safe and fun playtime.
Personalized Baby Tote Bag
A personalized baby tote bag is both practical and stylish. It can be used for carrying baby essentials when the family is on the go.
Materials Used:
- Plain canvas tote bag
- Fabric paint or markers
- Embroidery thread or iron-on transfers
Steps:
- Choose a plain canvas tote bag as the base.
- Personalize the bag by painting the baby’s name, a cute design, or adding embroidered elements.
- Allow the paint to dry completely if using fabric paint.
- Use the tote bag as a gift for the parents, filled with baby essentials.
Winter Animal Masks
Turn your favorite winter animals into fun masks that you can wear and play with!
Materials Used:
- Construction paper (brown, white, black)
- Glue
- Scissors
- Popsicle sticks
- Markers
Steps:
- Cut a large circle out of construction paper to serve as the base of the mask.
- Draw and cut out animal features (ears, eyes, nose, etc.) from other colored paper.
- Glue the features onto the base of the mask.
- Punch two holes on either side of the mask, then attach a popsicle stick to the bottom to create a handle.
- Decorate the mask with markers and wear it as you play!
Cotton Ball Snowman
Create a fluffy and fun snowman using cotton balls! This is a great craft for younger kids who enjoy tactile activities.
Materials Used:
- Cotton balls
- Glue
- Construction paper
- Black marker
- Orange construction paper
Steps:
- Glue three cotton balls in a vertical stack on a piece of construction paper.
- Draw or cut out a small top hat and buttons from black paper, and glue them to your snowman.
- Cut out a small carrot shape from orange paper and glue it as the snowman’s nose.
- Draw eyes and a mouth with a black marker.
- Allow the snowman to dry before displaying.
Ice Lanterns
Make beautiful ice lanterns to brighten your winter nights. These glowing creations are easy to make and look stunning outdoors.
Materials Used:
- Balloons
- Water
- Glitter or food coloring (optional)
- Tea lights
Steps:
- Fill a balloon with water, leaving some room for expansion.
- Tie the balloon tightly and place it outside to freeze overnight.
- Once frozen, pop the balloon and carefully peel it away, leaving a hollow ice lantern.
- Decorate the lantern with glitter or food coloring if desired.
- Place a small tea light inside the lantern to light it up.
Snowy Pinecone Ornaments
These pinecone ornaments bring a touch of the outdoors inside, adding rustic charm to your winter decor.
Materials Used:
- Pinecones
- White paint
- Glitter
- String or ribbon
Steps:
- Collect pinecones from outside and clean them to remove any dirt.
- Paint the tips of the pinecones with white paint to simulate snow.
- Sprinkle glitter over the paint while it’s still wet to add sparkle.
- Allow the pinecones to dry completely.
- Attach a piece of ribbon or string to the top for hanging.
Snowman Handprint Art
Capture the moment with a cute snowman handprint art that serves as a memory of the season.
Materials Used:
- White paint
- Black and orange markers
- Construction paper
Steps:
- Dip your child’s hand in white paint and press it onto a piece of construction paper to make a handprint.
- Once the paint is dry, use black markers to add buttons, eyes, and a mouth to the palm area.
- Use an orange marker to draw a carrot-shaped nose on the handprint.
- Add a scarf and a hat using colored markers.
- Frame the artwork as a keepsake.
Snowstorm in a Jar
Create your own little winter wonderland in a jar with this simple snowstorm craft that’s mesmerizing to watch.
Materials Used:
- Clear jar or bottle
- Water
- Glycerin or baby oil
- Glitter or fake snow
- Glue
Steps:
- Fill the jar about 3/4 full with water.
- Add a few drops of glycerin or baby oil to make the “snow” fall slowly.
- Sprinkle in glitter or fake snow.
- Close the jar tightly and glue the lid shut.
- Shake the jar to see your homemade snowstorm in action!
DIY Snow Globes
Make your own snow globe with a personal touch. These little glass treasures make great gifts too!
Materials Used:
- Small plastic figurines
- A jar with a tight-fitting lid
- Glitter
- Glycerin or baby oil
- Hot glue gun
Steps:
- Attach a small figurine to the inside of the jar lid using hot glue.
- Fill the jar with water, glycerin, and glitter.
- Screw the lid onto the jar tightly, ensuring the figurine stays in place.
- Shake the jar to watch the snow fall around the figurine.
Salt Dough Ornaments
Salt dough ornaments are a classic craft and can be personalized with handprints or painted designs for a cherished holiday keepsake.
Materials Used:
- 1 cup of salt
- 2 cups of flour
- 1/2 cup of water
- Rolling pin
- Cookie cutters
- Paint
Steps:
- Mix salt, flour, and water to create a dough.
- Roll the dough out to about 1/4 inch thick using a rolling pin.
- Use cookie cutters to cut out shapes like stars, hearts, or snowflakes.
- Use a straw to punch a hole at the top of each ornament for hanging.
- Bake the ornaments in a preheated oven at 200°F for 2 hours.
- Once cooled, paint and decorate your ornaments.
Snowy Sensory Bin
A sensory bin filled with snowy materials can keep kids engaged while letting them explore textures and patterns during winter.
Materials Used:
- Fake snow (or cotton balls)
- Small winter-themed toys (animals, figurines)
- Small containers or scoops
Steps:
- Fill a large bin with fake snow or cotton balls.
- Add small winter-themed toys and figurines for imaginative play.
- Let the kids explore the textures of the snow, hiding and discovering the toys within it.
- Add small containers or scoops for kids to use to move the “snow” around.
Melted Crayon Winter Art
This craft uses old crayon pieces to create colorful winter-themed art that resembles a winter landscape.
Materials Used:
- Old crayon pieces
- A canvas or heavy paper
- Hairdryer
Steps:
- Peel the paper off old crayon pieces and break them into small chunks.
- Arrange the crayon pieces on the canvas in a wintery design, such as snowflakes or trees.
- Use a hairdryer to melt the crayons, allowing the melted wax to drip down the canvas.
- Let the wax harden, and display the artwork.
Paper Plate Penguins
Penguins are a favorite winter animal, and creating them with paper plates makes a fun craft for young children.
Materials Used:
- Paper plates
- Black and white construction paper
- Orange construction paper
- Glue and scissors
Steps:
- Cut a paper plate in half and paint the back black.
- Cut out an oval shape from white paper and glue it in the center to form the penguin’s belly.
- Cut out wings from black paper and glue them to either side of the penguin.
- Cut a triangle shape for the beak and glue it to the face, along with small circle eyes.
- Add feet using orange paper.
How to Package DIY Gifts Beautifully
Packaging DIY gifts beautifully is a thoughtful way to elevate the experience for the recipient. It adds an extra layer of care and attention to detail that shows how much you value them. Whether it’s for a birthday, holiday, or just because, presenting a DIY gift in a creative and elegant manner can make it even more special. Here are some tips for wrapping and presenting DIY gifts beautifully:
1. Choose a Theme
- Start by choosing a theme that reflects the recipient’s personality or the occasion. Whether it’s a rustic, vintage, or modern look, having a theme in mind will help you pick the right materials and create a cohesive presentation.
2. Use Quality Wrapping Paper or Fabric
- Opt for high-quality wrapping paper or fabric like burlap, linen, or cotton. If you prefer something more eco-friendly, you can use reusable materials such as scarves or dish towels. The texture and material of the wrap can make the gift feel more luxurious.
3. Add a Personal Touch with Handmade Elements
- Create a personalized touch by adding handmade elements such as a hand-painted tag, calligraphy, or a small handmade ornament. These details give the gift an extra layer of thoughtfulness and show the effort you put into the gift.
4. Incorporate Natural Elements
- Incorporating nature-inspired items like twine, dried flowers, pine cones, or fresh herbs can give the packaging a warm, rustic charm. A sprig of rosemary, lavender, or eucalyptus adds a fragrant touch that enhances the overall sensory experience.
5. Choose a Creative Gift Box or Bag
- Instead of the usual wrapping paper, consider using a beautiful gift box or bag. Vintage wooden crates, decorative tin boxes, or fabric pouches can turn even a simple DIY gift into a stunning presentation. Personalize the box with paint, stamps, or decals.
FAQ
What are some popular DIY baby shower gift ideas?
Popular DIY baby shower gift ideas include handmade baby blankets, knitted or crocheted baby clothes, personalized baby onesies, homemade baby wipes, and hand-painted picture frames. You can also create a baby gift basket with small essentials like lotions, pacifiers, and toys.
How do I make a DIY Baby Shower Gifts?
To make a DIY baby shower gift, consider the recipient’s preferences and needs. Start by choosing a project that fits your skill level, such as sewing, knitting, or crafting. Gather materials, follow instructions or patterns, and add personal touches like embroidery or custom designs to make the gift unique.
Are DIY Baby Shower Gifts more affordable than store-bought ones?
Yes, DIY Baby Shower Gifts can often be more affordable, especially when using materials you already have at home. DIY Baby Shower Gifts allow you to be more creative with your budget by prioritizing the most meaningful elements and personalizing the gift, which adds value.
What supplies do I need for DIY Baby Shower Gifts?
The supplies you’ll need depend on the DIY Baby Shower Gifts you’re creating. For example, for knitted baby clothes, you’ll need yarn and knitting needles. For a homemade baby blanket, you’ll need fabric, sewing notions, and thread. Be sure to check the specific instructions for the project you’re interested in.

Hi, I’m Victoria, an art and craft teacher at Newark City Schools, where I have the joy of working with middle school students to help them explore their creativity and develop their artistic talents. I believe that art is a powerful way for students to express themselves, and I strive to make every lesson a fun, engaging, and inspiring experience.
I created this website to share the art and craft projects, techniques, and resources that I use in my classroom, hoping to inspire both educators and young artists alike. Whether you’re a teacher looking for new ideas or a student eager to try something new, I’m excited to provide creative tools and projects that anyone can enjoy.
When I’m not in the classroom, I love experimenting with different art forms and learning new crafting techniques. My goal is to help others discover the joy of making things with their hands, and I hope my website serves as a space for everyone to explore their creative potential.