
You know, the other day I was staring at a store shelf packed with fancy candles and mugs, trying to pick something “special” for my mom. And honestly? Everything just felt… generic. I mean, how many “World’s Best Mom” cups does she really need, right? That’s when it hit me—sometimes the most meaningful gifts aren’t the pricey ones, but the ones we actually make with our own hands. DIY gifts for mom have this way of carrying a little piece of you in them, whether it’s a simple handwritten note tucked inside a photo frame or a batch of cookies baked with love (and maybe a little too much sugar). If you’ve ever struggled with what to give your mom that truly shows how much she means to you, I get it—I’ve been there. Stick with me, because I’ve got some creative, thoughtful, and doable ideas you’ll actually enjoy making.
DIY Gifts For Mom
DIY gifts for mom are thoughtful, personal, and meaningful presents that you can create with your own hands.
Personalized Handprint Mug

One of my favorite gifts I’ve ever made for my mom was a handprint mug. It’s such a simple idea, but it feels ridiculously meaningful. I remember the first time I did this, I grabbed a plain white mug from a local store, some ceramic paint pens, and literally just pressed my hand on it. It looked messy at first, but that’s what made it feel so real. When Mom saw it, she laughed at the smudge on the side, but then she held it like it was some rare treasure. Honestly, that reaction made the whole project worth it.
If you’re thinking of making one, here’s what I’ve learned: don’t worry about it being perfect. That’s the beauty of it. Use bright colors, add little doodles or even write a note on the handle. I once wrote “Best Mom Ever” around the rim, and every time she drinks coffee, she reads it. To be fair, it’s the kind of gift that ages with memories—every crack or faded color just adds more charm.
DIY Knitted Scarf
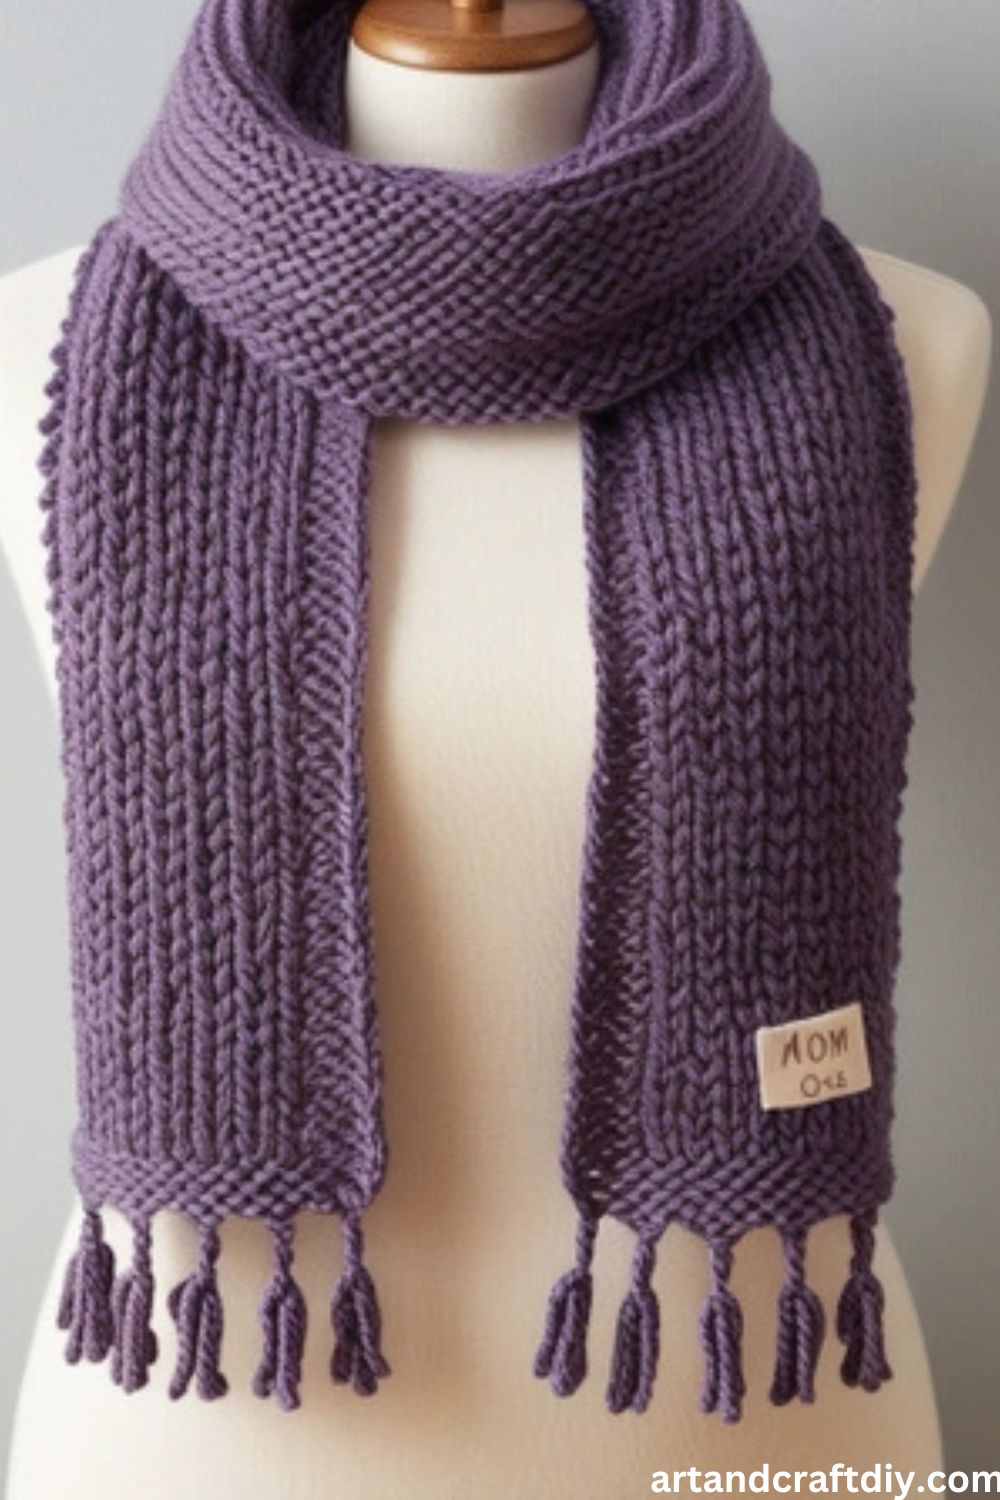
Now, I’m not exactly a knitting pro, but I did manage to pull together a scarf for my mom one winter. I won’t lie—it took forever and half the stitches looked wonky, but she wore it like it was some luxury brand. That’s the thing about moms, right? They don’t see the flaws; they see the effort. I’d sit curled up on the couch in the evenings, dropping stitches left and right, muttering under my breath, but imagining her face kept me going.
If you’re tempted to try this, my advice is: start with thick yarn and chunky needles. It works up faster and hides mistakes better. Also, pick a color your mom loves. I went with a warm mustard shade because it felt cozy. Honestly, she still pulls it out every winter, and every time I see it around her neck, I think, “Wow, I actually made that.” It’s one of those gifts where the process is just as memorable as the result.
Custom Photo Album
This one is extra special to me because it feels like bottling up time. I once gathered all these old photos—some printed ones stuffed in drawers, others I quickly ordered online—and made a photo album for Mom’s birthday. I didn’t just stick them in randomly; I arranged them like a little story, with notes scribbled on the side and tiny doodles here and there. When she opened it, she flipped through slowly, smiling at each page, and by the end she actually teared up. To be fair, I did too.
The fun part is you don’t need to make it fancy. Use a blank scrapbook or even a binder, print photos at home if you have to, and let your personality show through. I added ticket stubs and a pressed flower from our garden—it turned into more than just a photo album, it became a keepsake. In my opinion, gifts like this remind moms that their everyday moments with us really mattered. And that’s priceless.
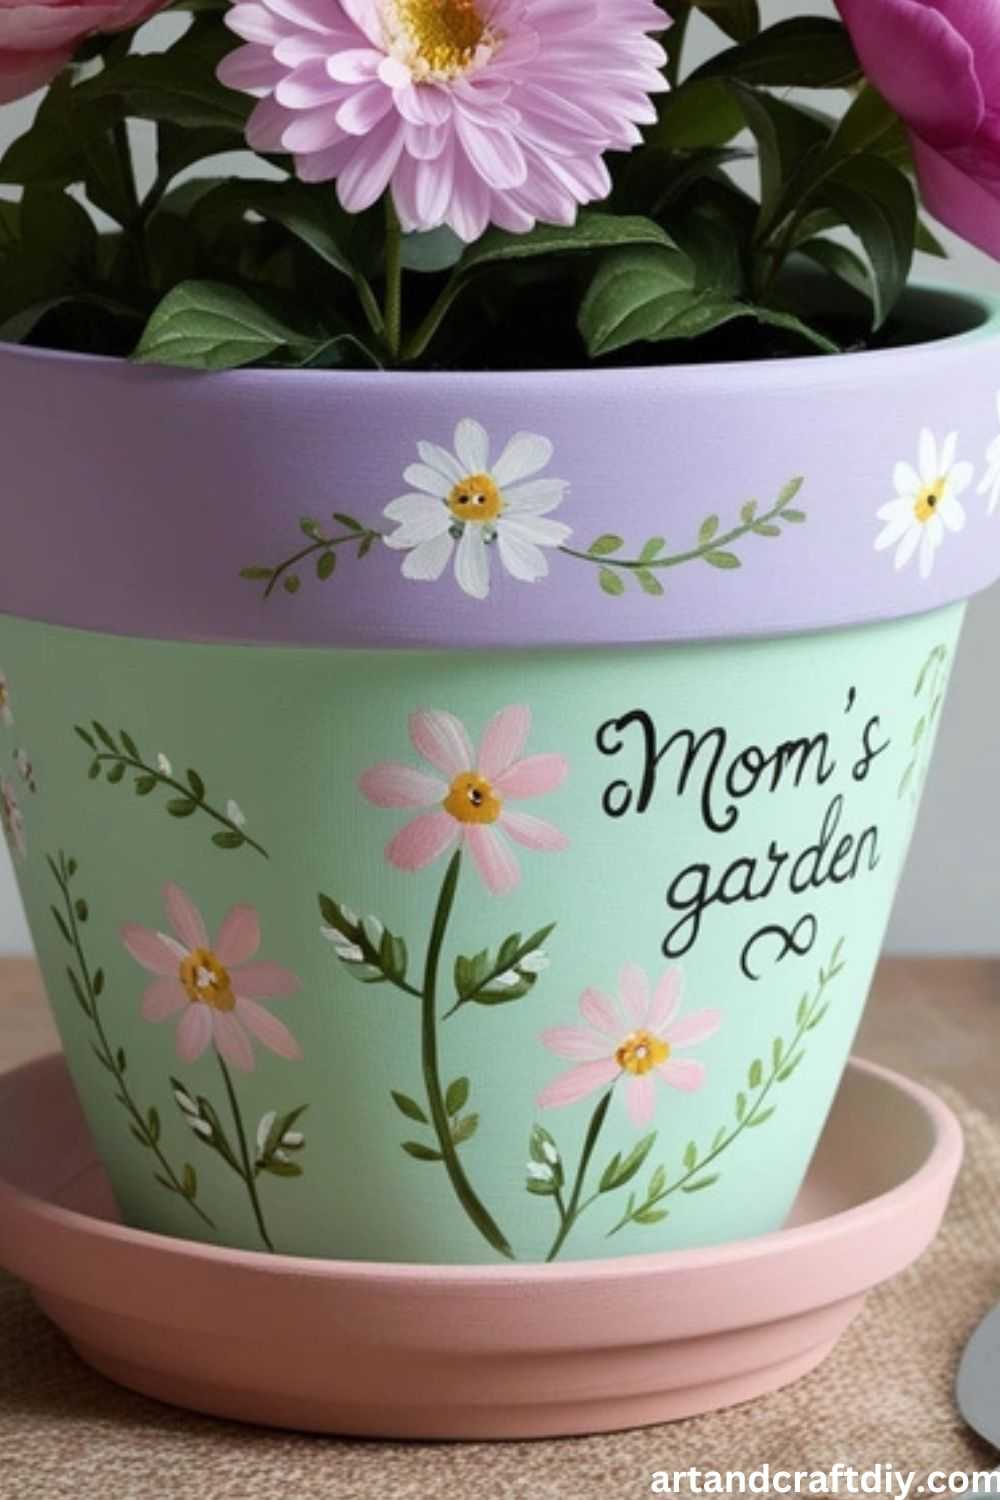
Hand-Painted Flower Pot
A painted flower pot adds a burst of color to any room or garden, making it a perfect DIY gift for moms who love plants.
Materials Used:
- Terracotta flower pot
- Acrylic paints
- Paintbrushes
- Clear acrylic sealer (optional)
Steps:
- Clean the flower pot thoroughly to remove any dust or dirt.
- Paint the pot with your desired colors or patterns.
- Once dry, apply a clear acrylic sealer to protect the paint.
- Plant your mom’s favorite flowers or a small plant in the pot to complete the gift.
Handmade Personalized Soap Bars
Handmade soap bars are a luxurious and pampering gift. You can customize the fragrance, color, and ingredients according to your mom’s preferences.
Materials Used:
- Soap base (glycerin, shea butter, etc.)
- Essential oils (lavender, rose, etc.)
- Soap molds
- Colorants (optional)
- Dried flowers or herbs (optional)
Steps:
- Cut the soap base into small cubes and melt it in a microwave or double boiler.
- Add a few drops of essential oils to give the soap a pleasant fragrance.
- If you want to add color, mix in a small amount of soap colorant.
- Pour the melted soap into the molds and let it set for a few hours until it hardens.
- If you want to add extra touches, sprinkle dried flowers or herbs into the soap before it hardens completely.
- Remove the soap from the molds and wrap it in a nice package to present to your mom.
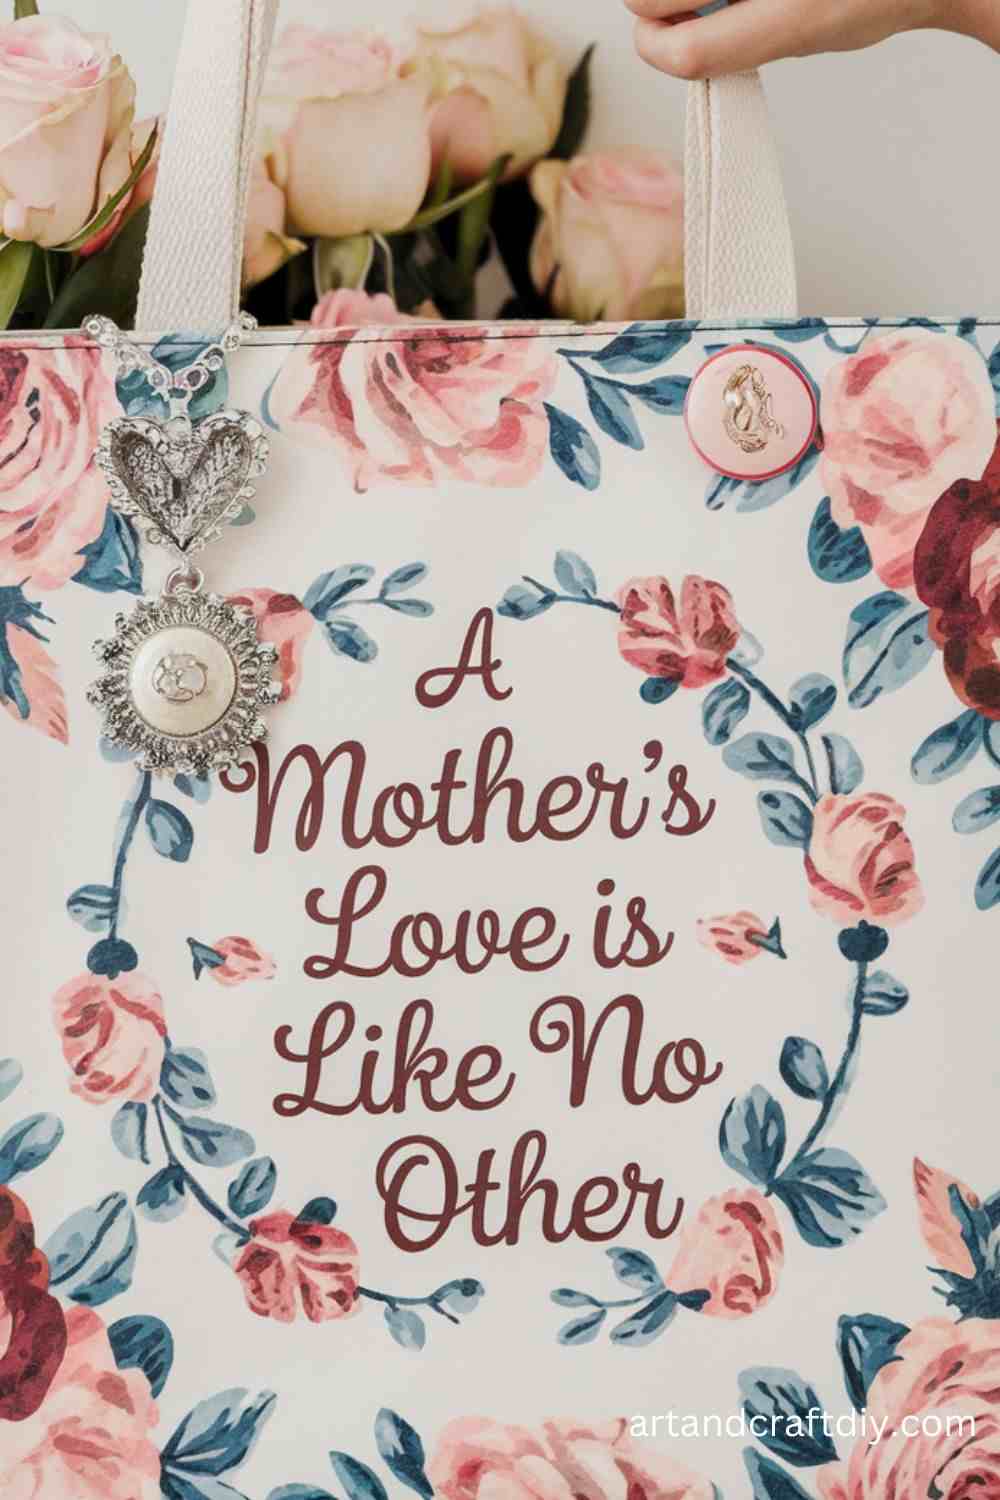
Mom Customizable Tote Bag
A custom tote bag is a stylish and functional gift that your mom can use for shopping, carrying books, or going to the beach. You can personalize the design to fit her style.
Explore more: Best Winter Crafts for kids
Materials Used:
- Plain canvas tote bag
- Fabric paint or markers
- Paintbrushes
- Stencils (optional)
- Iron-on transfers (optional)
Steps:
- Lay the tote bag flat and decide on a design for the bag.
- Use fabric paints or markers to draw or paint your design. You can create abstract art, add a quote, or even personalize it with her name.
- If you want more precision, use stencils for intricate designs.
- Let the paint dry completely, and if you used fabric paint, iron the design to set it according to the manufacturer’s instructions.
- Once it’s dry and set, you have a unique tote bag that’s ready for gifting.
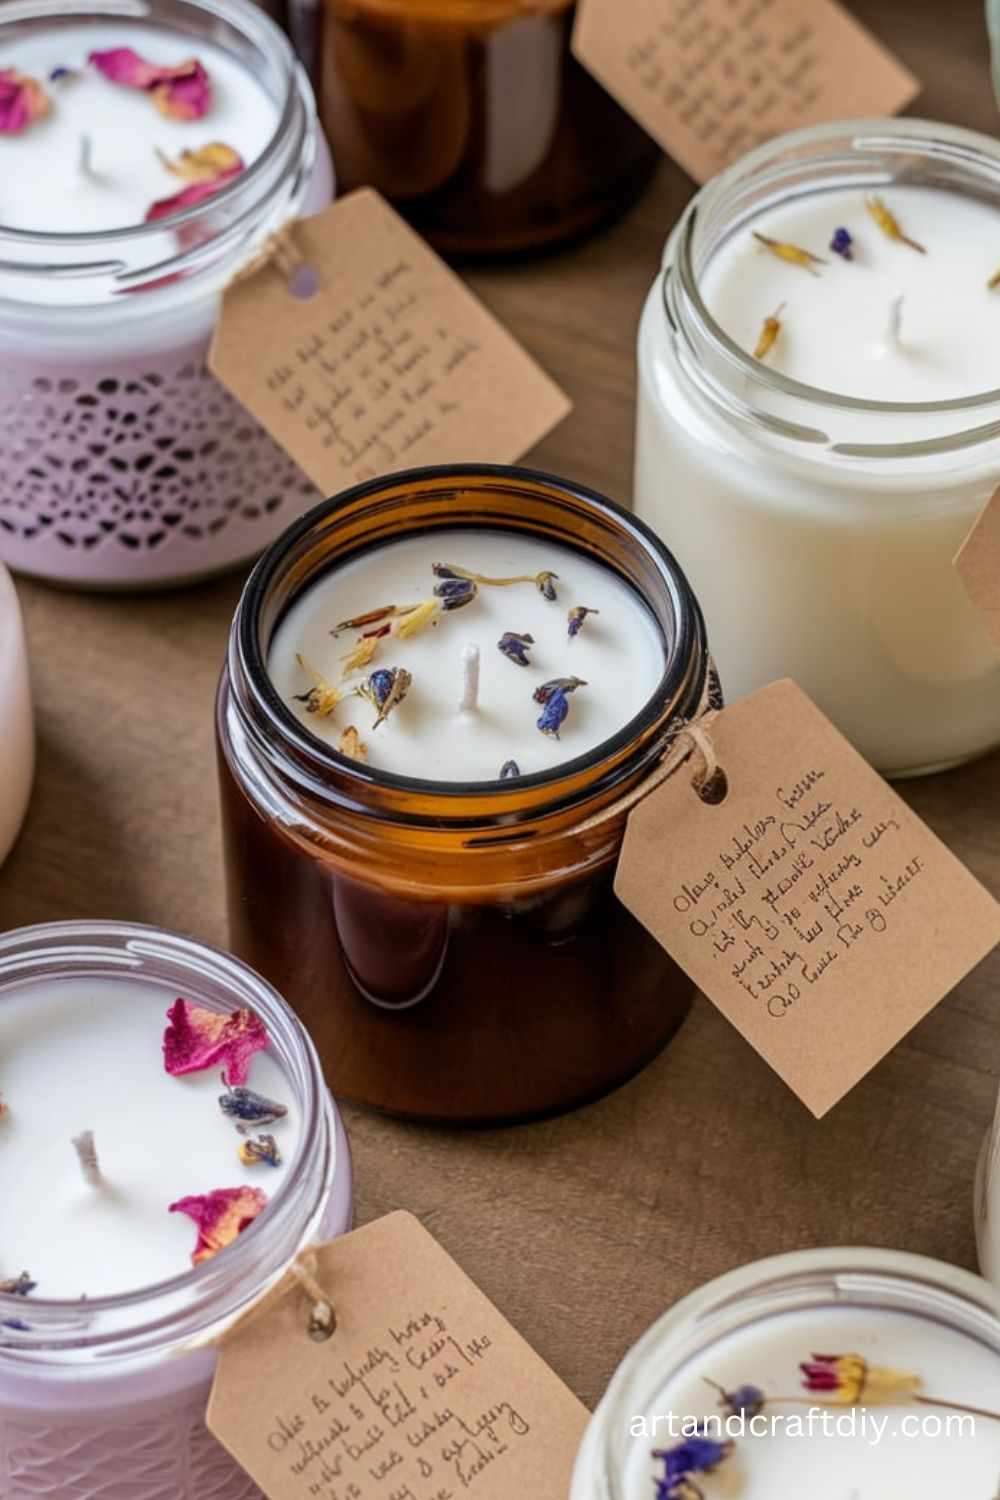
DIY Scented Candles
Making scented candles can be a relaxing and thoughtful gift. You can select your mom’s favorite scent and create a cozy ambiance with a personalized touch.
Materials Used:
- Soy wax
- Candle wicks
- Fragrance oils (lavender, vanilla, etc.)
- Glass jars or molds
- Dye (optional)
Steps:
- Melt the soy wax in a double boiler until it becomes liquid.
- Add a few drops of your chosen fragrance oil and mix it thoroughly.
- If desired, add a small amount of dye to color the wax.
- Attach the wick to the bottom of your jar or mold using glue or a wick holder.
- Pour the melted wax into the container and let it set for a few hours.
- Trim the wick to the desired length and present the candle as a sweet, aromatic gift.
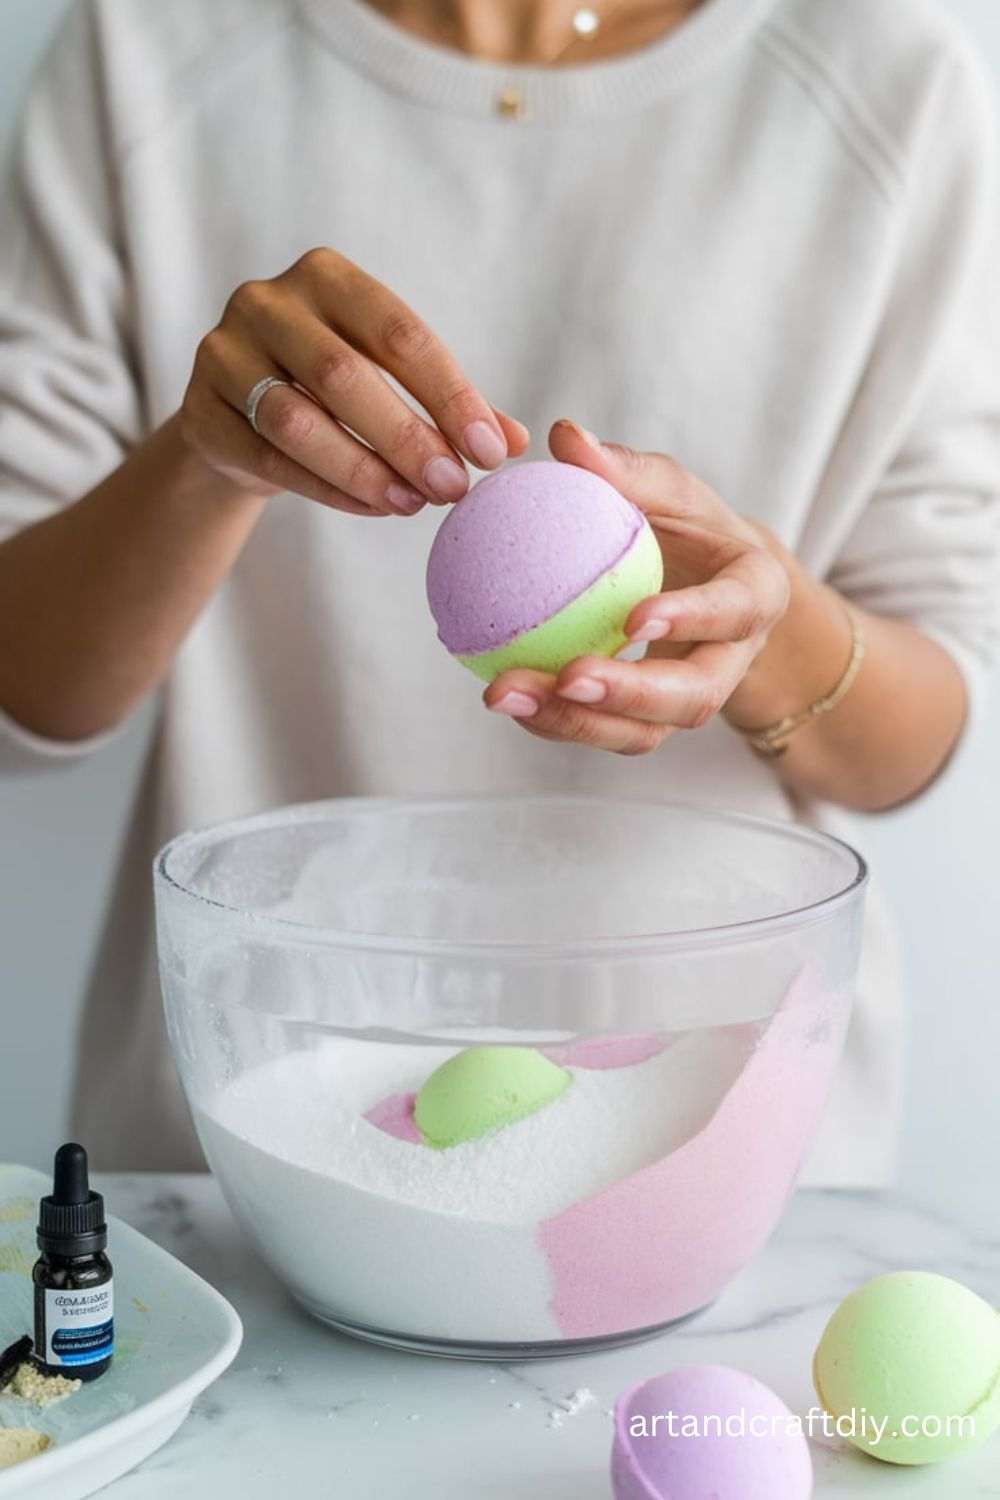
DIY Bath Bombs
Bath bombs are a fun and luxurious gift that will make your mom’s bath time extra special. You can create bath bombs in various colors, scents, and shapes.
Materials Used:
- Baking soda
- Citric acid
- Epsom salt
- Cornstarch
- Essential oils (eucalyptus, lavender, etc.)
- Water
- Molds (silicone molds or ice cube trays)
Steps:
- In a large bowl, mix 1 cup of baking soda, 1/2 cup of citric acid, 1/2 cup of Epsom salt, and 1/2 cup of cornstarch.
- Slowly add 2 teaspoons of essential oils to the dry ingredients and stir well.
- In a separate spray bottle, mix a little water with a few drops of food coloring (if desired).
- Slowly mist the water onto the dry mixture, stirring constantly to avoid activating the citric acid.
- Once the mixture feels like damp sand, press it into your molds.
- Let the bath bombs dry for 24 hours before removing them from the molds. Wrap them in a pretty gift box or bag.
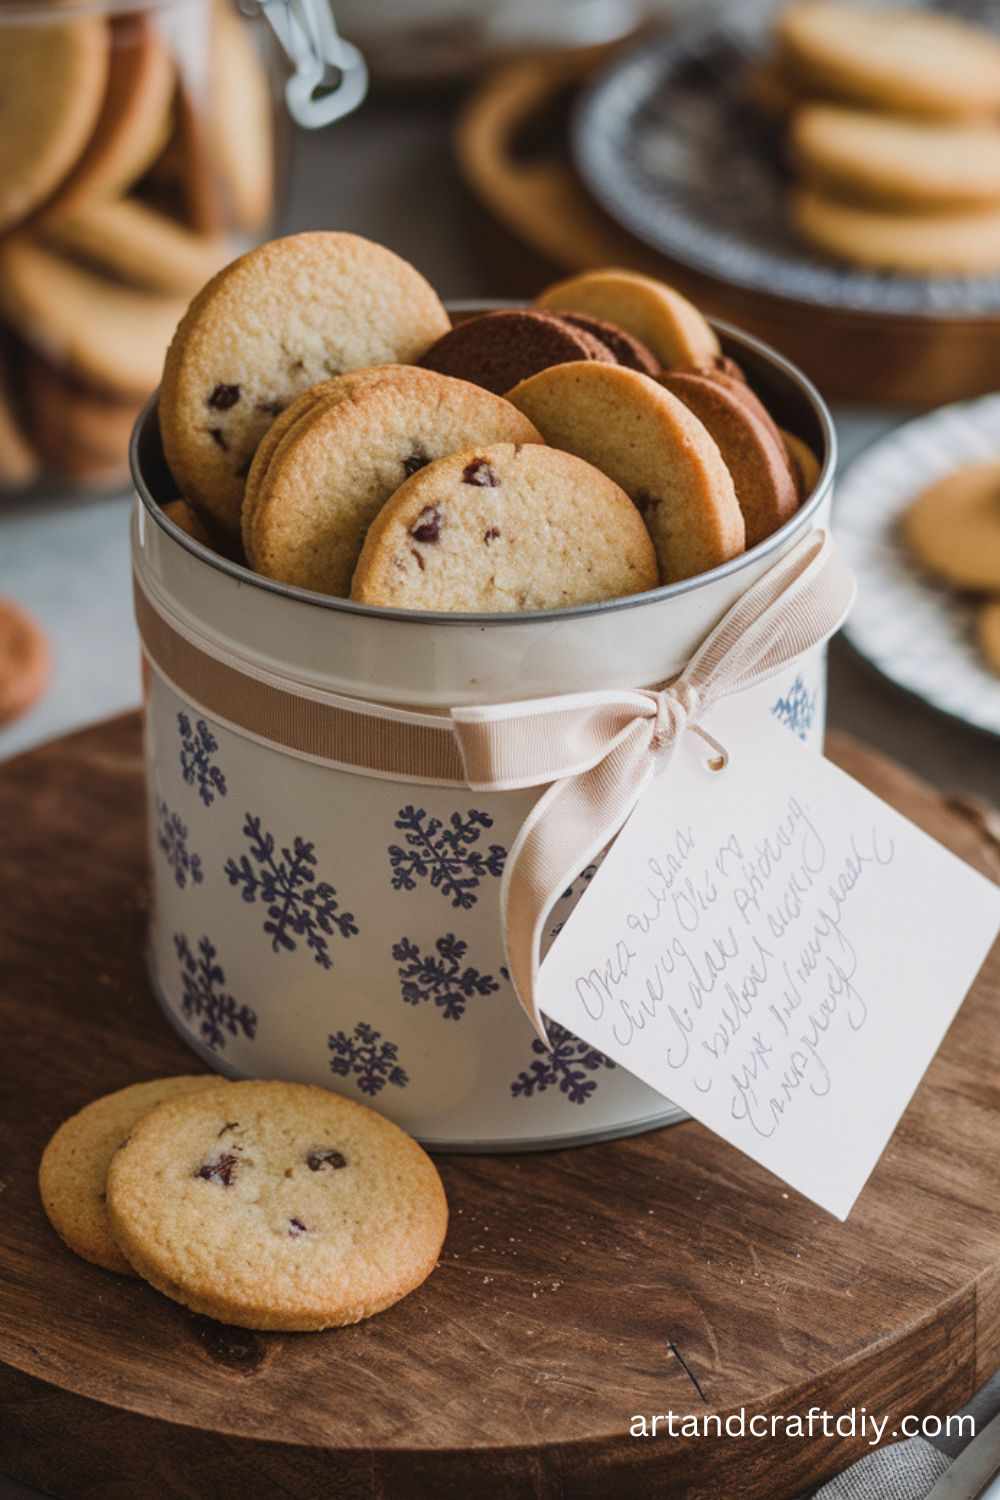
Handmade Cookies
Baking homemade cookies is a sweet way to show appreciation for your mom. You can bake her favorite kind of cookie or try a new recipe together.
Materials Used:
- All-purpose flour
- Sugar
- Butter
- Eggs
- Chocolate chips (optional)
- Baking soda
- Vanilla extract
Steps:
- Preheat your oven to 350°F (175°C).
- In a large bowl, cream together butter and sugar until smooth.
- Beat in the eggs and vanilla extract.
- Gradually add the flour and baking soda to form a dough.
- Fold in any optional ingredients like chocolate chips or nuts.
- Drop spoonfuls of dough onto a baking sheet and bake for 10-12 minutes, or until golden brown.
- Let the cookies cool, then pack them in a nice container and present them to your mom as a delicious treat.
DIY Memory Jar
A memory jar is a heartfelt gift where you write down special memories or reasons why you love your mom. She can read them whenever she needs a reminder of your love.
Materials Used:
- A glass jar or container
- Small pieces of paper or note cards
- Pen
- Ribbon or decorations
Steps:
- Write down memories, quotes, or reasons why you love your mom on small pieces of paper.
- Fold each piece and place them in the jar.
- Decorate the jar with a ribbon or label it with something like “Mom’s Memory Jar.”
- Encourage your mom to read one note each day or whenever she needs a little boost of love.
- This gift is a constant reminder of your appreciation and love for her.
Handcrafted Bath Bombs
Bath bombs are a luxurious treat for moms who love to unwind. They are easy to make and can be customized with scents and colors.
Materials Used:
- Baking soda
- Citric acid
- Epsom salts
- Essential oils (lavender, peppermint, etc.)
- Food coloring (optional)
- Water
- Molds
Steps:
- Mix 1 cup of baking soda, 1/2 cup of citric acid, and 1/2 cup of Epsom salts in a bowl.
- Add a few drops of essential oils and food coloring (optional) to the dry ingredients.
- Slowly add water, one teaspoon at a time, until the mixture sticks together when pressed.
- Press the mixture into molds (silicone molds work well) and let them dry for at least 24 hours.
- Once dry, remove the bath bombs from the molds and wrap them in plastic or a gift bag.
Embroidered Handkerchief
A beautifully embroidered handkerchief is a delicate and meaningful gift that can be cherished for years.
Materials Used:
- Plain white handkerchief
- Embroidery floss
- Embroidery needle
Steps:
- Choose a design for the handkerchief, such as initials, a flower, or a simple pattern.
- Use the embroidery floss to stitch the design onto the handkerchief, following a pattern or freehand.
- Once finished, carefully trim any loose threads and iron the handkerchief to smooth out wrinkles.
Homemade Jewelry Dish
A handmade jewelry dish is a beautiful and practical gift for storing rings, earrings, or other small trinkets.
Materials Used:
- Air-dry clay or oven-bake clay
- Rolling pin
- Cookie cutter (optional)
- Paint (optional)
Steps:
- Roll out the clay with a rolling pin to about 1/4 inch thickness.
- Use a cookie cutter to cut out a circle or shape of your choice.
- Gently shape the edges of the dish, creating a slight curve to hold jewelry.
- Let the clay dry completely or bake it according to the manufacturer’s instructions.
- Paint the dish with your desired colors once it’s dry.
Personalized Calendar
A personalized calendar featuring family photos is a practical and thoughtful gift that your mom can enjoy all year long.
Materials Used:
- Printed family photos
- Blank calendar template
- Glue or double-sided tape
Steps:
- Select 12 favorite family photos for each month.
- Print the photos and trim them to fit the calendar template.
- Attach each photo to the corresponding month of the calendar.
- Add any important dates or special memories to make it even more personal.
Hand-Poured Lip Balm
Lip balm is an essential item, and making it yourself allows you to customize the scent and ingredients.
Materials Used:
- Beeswax
- Coconut oil
- Essential oils
- Empty lip balm containers
Steps:
- Melt 1 tablespoon of beeswax and 2 tablespoons of coconut oil together in a double boiler.
- Once melted, add a few drops of your favorite essential oil.
- Pour the mixture into empty lip balm containers and let them cool until solid.
DIY Memory Jar
Introduction: A memory jar is a fun and thoughtful way to remind your mom of special moments throughout the year.
Materials Used:
- A large jar
- Small pieces of paper
- Pens
Steps:
- Write down memorable moments, quotes, or things you love about your mom on small pieces of paper.
- Fold the pieces and place them in the jar.
- Decorate the jar with ribbon or a label that reads “Mom’s Memory Jar.”
Hand-Painted Picture Frame
Introduction: A personalized picture frame is an easy DIY project that can hold your favorite photos of your mom and family.
Materials Used:
- Wooden photo frame
- Acrylic paints
- Paintbrushes
Steps:
- Paint the wooden frame in your chosen color or design.
- Allow the paint to dry completely.
- Insert a cherished photograph into the frame and present it to your mom.
Customized T-Shirt
Introduction: A personalized t-shirt with a fun design or message is a stylish and thoughtful gift.
Materials Used:
- Plain t-shirt
- Fabric paint or iron-on transfer paper
- Stencils (optional)
Steps:
- Use fabric paint or iron-on transfer paper to create a design or message on the t-shirt.
- If using fabric paint, use a stencil for neat lettering or designs.
- Let the paint dry completely before wearing or gifting the shirt.
Personalized Tote Bag
Introduction: A tote bag is both practical and personal. You can design it to reflect your mom’s style.
Materials Used:
- Plain canvas tote bag
- Fabric paint or markers
- Stencils (optional)
Steps:
- Use fabric markers or paint to add a design or message to the tote bag.
- If you want, use stencils to help create a neat design.
- Let the paint dry completely before using or gifting.
Tea Blending Kit
Introduction: A tea blending kit is a perfect gift for moms who enjoy trying different flavors of tea.
Materials Used:
- Loose leaf teas (green, black, herbal)
- Small containers or jars
- Dried herbs or spices (like chamomile, mint, etc.)
Steps:
- Select a variety of loose-leaf teas and dried herbs or spices.
- Package them into small jars or containers.
- Include a note with instructions on how to blend different teas for unique flavors.
Handmade Soap Bars
Introduction: Handmade soap bars are a lovely way to pamper your mom with a luxurious, personalized gift.
Materials Used:
- Soap base (glycerin or shea butter)
- Essential oils
- Soap molds
- Dried flowers or herbs (optional)
Steps:
- Melt the soap base in the microwave or double boiler.
- Add essential oils and dried flowers or herbs for a personalized touch.
- Pour the mixture into soap molds and let it cool and harden for several hours.
- Once solid, remove from the molds and wrap the soaps in decorative paper.
Herb Garden Kit
Introduction: An herb garden kit is a fun and useful gift for moms who enjoy cooking with fresh herbs.
Materials Used:
- Small pots
- Potting soil
- Herb seeds (basil, mint, thyme, etc.)
- Labels or plant markers
Steps:
- Fill the small pots with potting soil.
- Plant the herb seeds according to package instructions.
- Label each pot with the name of the herb.
- Place the pots in a sunny area and water them regularly.
Painted Rock Garden Markers
Introduction: Painted rock garden markers are a fun way to personalize your mom’s garden while helping her keep track of plants.
Materials Used:
- Smooth rocks
- Acrylic paint
- Paintbrushes
- Permanent markers
Steps:
- Wash and dry the rocks thoroughly.
- Paint the rocks with the names or illustrations of various plants.
- Once the paint is dry, use a permanent marker to label the plants.
DIY Coasters
Introduction: Personalized coasters add a touch of style and functionality to any home.
Materials Used:
- Cork coasters
- Decorative paper or fabric
- Mod Podge
- Scissors
Steps:
- Cut the decorative paper or fabric to fit the coasters.
- Apply Mod Podge to the top of the coaster and stick the paper or fabric onto it.
- Smooth out any air bubbles and let it dry.
- Apply a final layer of Mod Podge over the top to seal and protect the design.
Decorative Throw Pillow
Introduction: A custom throw pillow is a cozy and personal gift for any home.
Materials Used:
- Plain pillow cover
- Fabric paint or fabric markers
- Stencils or freehand design
Steps:
- Use fabric paint or fabric markers to create a design on the pillow cover.
- If you’re using stencils, place them on the pillow cover and paint over them.
- Let the design dry completely before inserting the pillow.
Quilted Pot Holders
Introduction: Quilted pot holders are both functional and decorative for moms who love to cook.
Materials Used:
- Fabric (for the front and back)
- Batting (for the insulation)
- Sewing machine and thread
- Pins
Steps:
- Cut two squares of fabric for the front and back of the pot holder.
- Cut a piece of batting slightly smaller than the fabric.
- Sandwich the batting between the fabric squares and pin them in place.
- Sew around the edges, leaving a small gap for turning the pot holder inside out.
- Turn it inside out and sew the gap closed.
Custom Candle Holder
Introduction: A unique candle holder can create ambiance and is a great way to personalize a gift.
Materials Used:
- Glass jar
- Decorative elements (ribbons, lace, beads)
- Hot glue gun
Steps:
- Take a glass jar and clean it thoroughly.
- Use a hot glue gun to attach decorative elements like lace, beads, or ribbons to the outside of the jar.
- Place a small candle inside and wrap it up nicely.
Tips for Creating the Perfect DIY Gift
Creating a DIY gift can be an incredibly thoughtful and meaningful way to show someone you care. Whether it’s for a birthday, anniversary, or just because, a handmade present carries a personal touch that store-bought gifts often lack. Here are some essential tips to help you craft the perfect DIY gift:
1. Plan Ahead: Budget and Time Management
- Budget: Decide how much you’re willing to spend on materials. A well-planned budget ensures you don’t overspend and helps you select affordable supplies.
- Time Management: Set aside enough time to create the gift. Rushed projects often don’t turn out as planned, so it’s crucial to start early enough to perfect your creation.
2. Keep It Personal: Incorporate Her Favorite Colors, Scents, or Hobbies
- Consider the recipient’s personal preferences, such as their favorite colors, scents, or activities. For example, if they love gardening, a DIY plant pot or seed kit would be ideal. Personalizing the gift makes it feel extra special and shows you’ve put thought into it.
3. Add a Personal Note: A Heartfelt Message to Accompany the Gift
- A handwritten note or a small card can make the gift even more meaningful. Share why you made this particular gift, or recount a special memory you’ve shared. A personal note adds warmth and shows that you care deeply.
FAQ
What are some easy DIY Gifts For Mom?
Some easy DIY Gifts For Mom ideas include homemade candles, personalized photo frames, hand-painted mugs, a custom recipe book, or a knitted scarf. DIY Gifts For Mom require minimal materials and can be done in a few hours, making them perfect for last-minute gifts.
What materials do I need to make DIY Gifts For Mom?
The materials you’ll need depend on the project you choose. Common supplies for DIY gifts include craft paper, glue, scissors, fabric, yarn, paints, wooden frames, beads, and candles. Many DIY gifts can be made using everyday items you already have at home.
How do I personalize a DIY Gifts For Mom?
Personalizing a gift can be done by adding her favorite colors, initials, or a meaningful message. You can also incorporate photos, memorable quotes, or hand-drawn designs that hold sentimental value. Customizing DIY gifts makes them even more special and thoughtful.
Can kids help with making DIY gifts for Mom?
Absolutely! Many DIY Gifts For Mom are kid-friendly and fun to create together. Children can help by painting, decorating, or assembling simple crafts like cards, handprints, or collages. It’s a great way to bond and create something memorable.

Hi, I’m Victoria, an art and craft teacher at Newark City Schools, where I have the joy of working with middle school students to help them explore their creativity and develop their artistic talents. I believe that art is a powerful way for students to express themselves, and I strive to make every lesson a fun, engaging, and inspiring experience.
I created this website to share the art and craft projects, techniques, and resources that I use in my classroom, hoping to inspire both educators and young artists alike. Whether you’re a teacher looking for new ideas or a student eager to try something new, I’m excited to provide creative tools and projects that anyone can enjoy.
When I’m not in the classroom, I love experimenting with different art forms and learning new crafting techniques. My goal is to help others discover the joy of making things with their hands, and I hope my website serves as a space for everyone to explore their creative potential.