
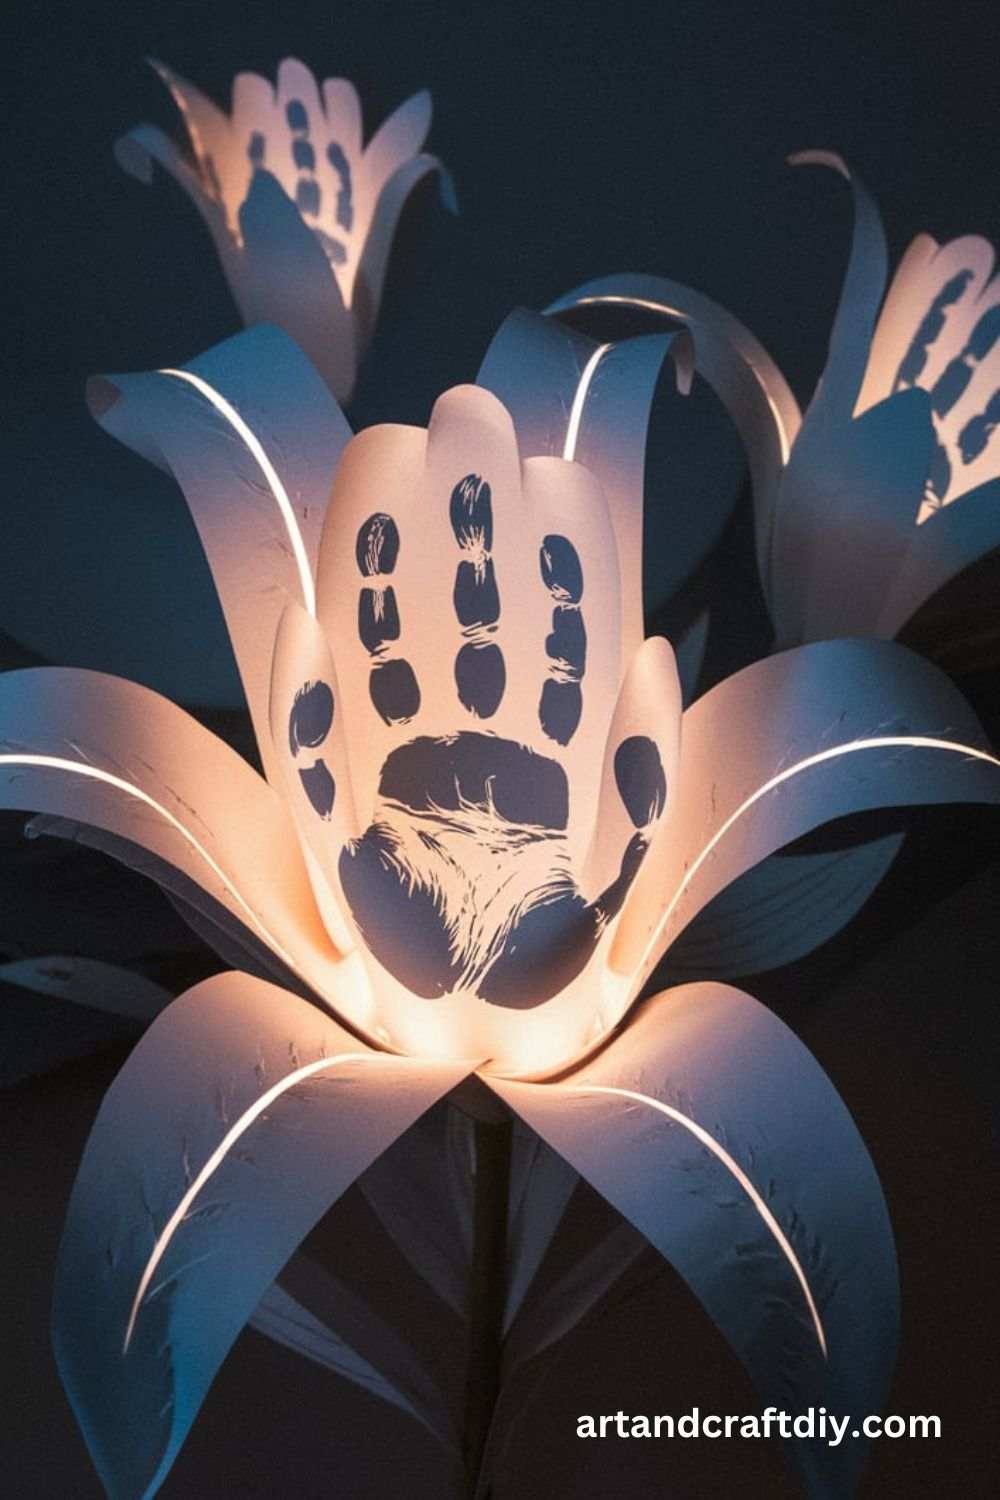
Last spring, I was helping my little cousin make a Mother’s Day gift, and—honestly—we were both a mess. Glue on our sleeves, paper everywhere, and zero idea what we were doing. But then we made these Handprint Paper Lilies, and something just clicked. You know that feeling when a simple craft suddenly turns into a sweet little memory? Yeah, that.
If you’ve ever wanted to create something meaningful without spending hours or buying fancy supplies, you’re in the right place. These lilies are cute, super personal, and surprisingly easy (even if you think you’re “not a crafty person”—I get it). Plus, they make perfect gifts for moms, teachers, or anyone who loves homemade things.
Stick around, because I’ll walk you through everything step by step—no stress, no complicated tools, just a fun, heartwarming project you’ll actually enjoy making.
Handprint Paper Lilies
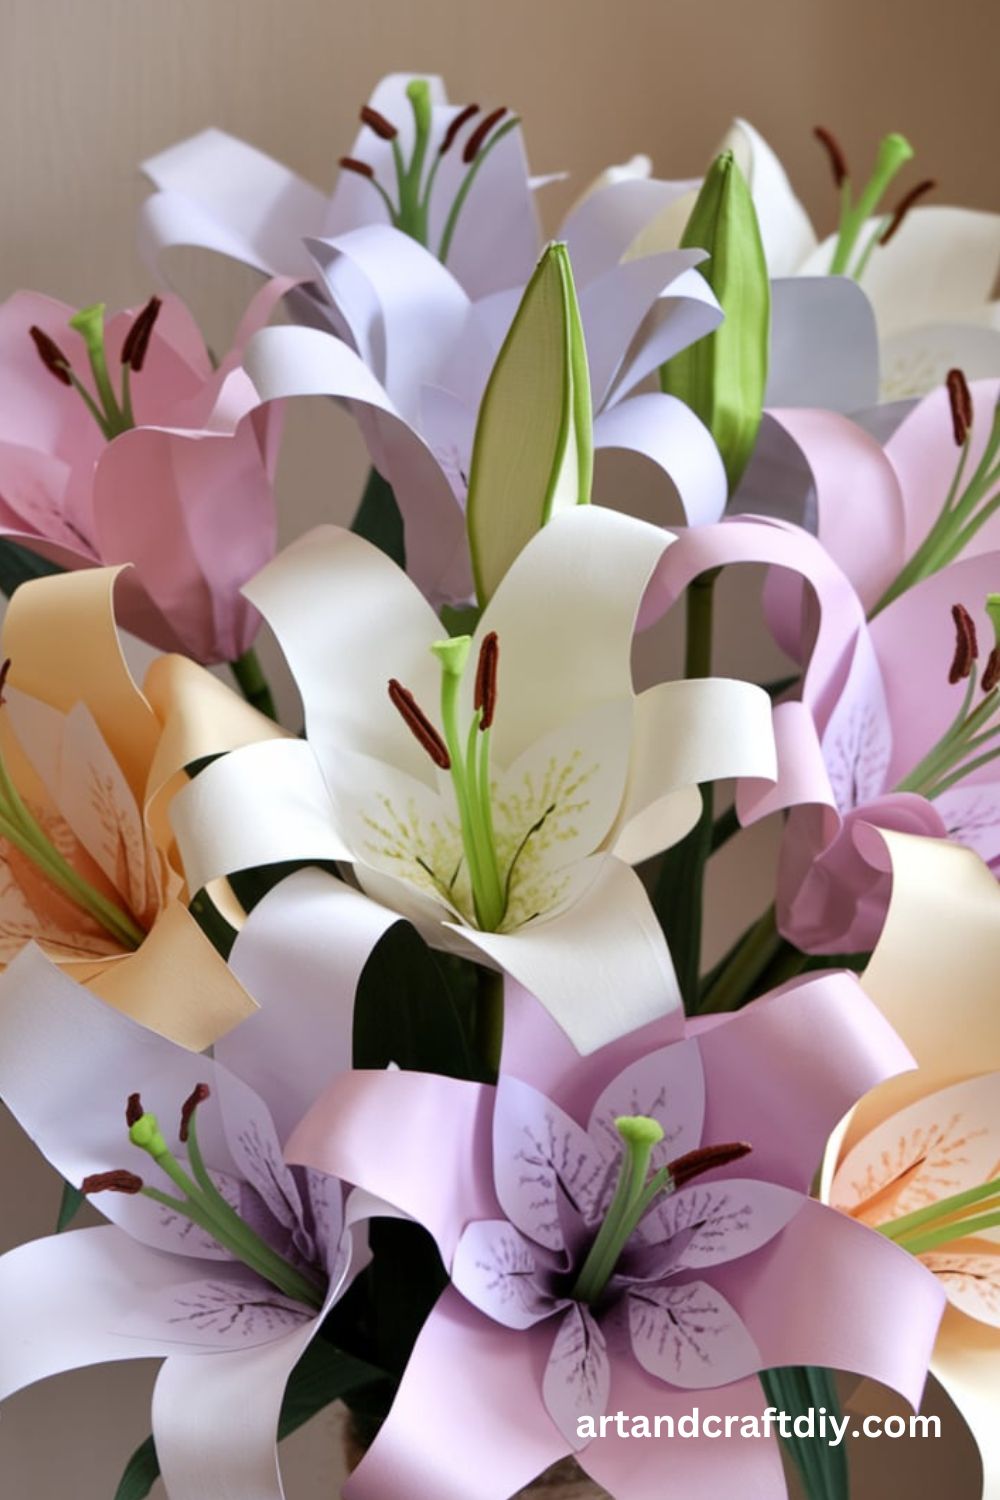
Handprint Paper Lilies are a delightful and meaningful DIY craft that transforms simple materials into elegant floral creations.

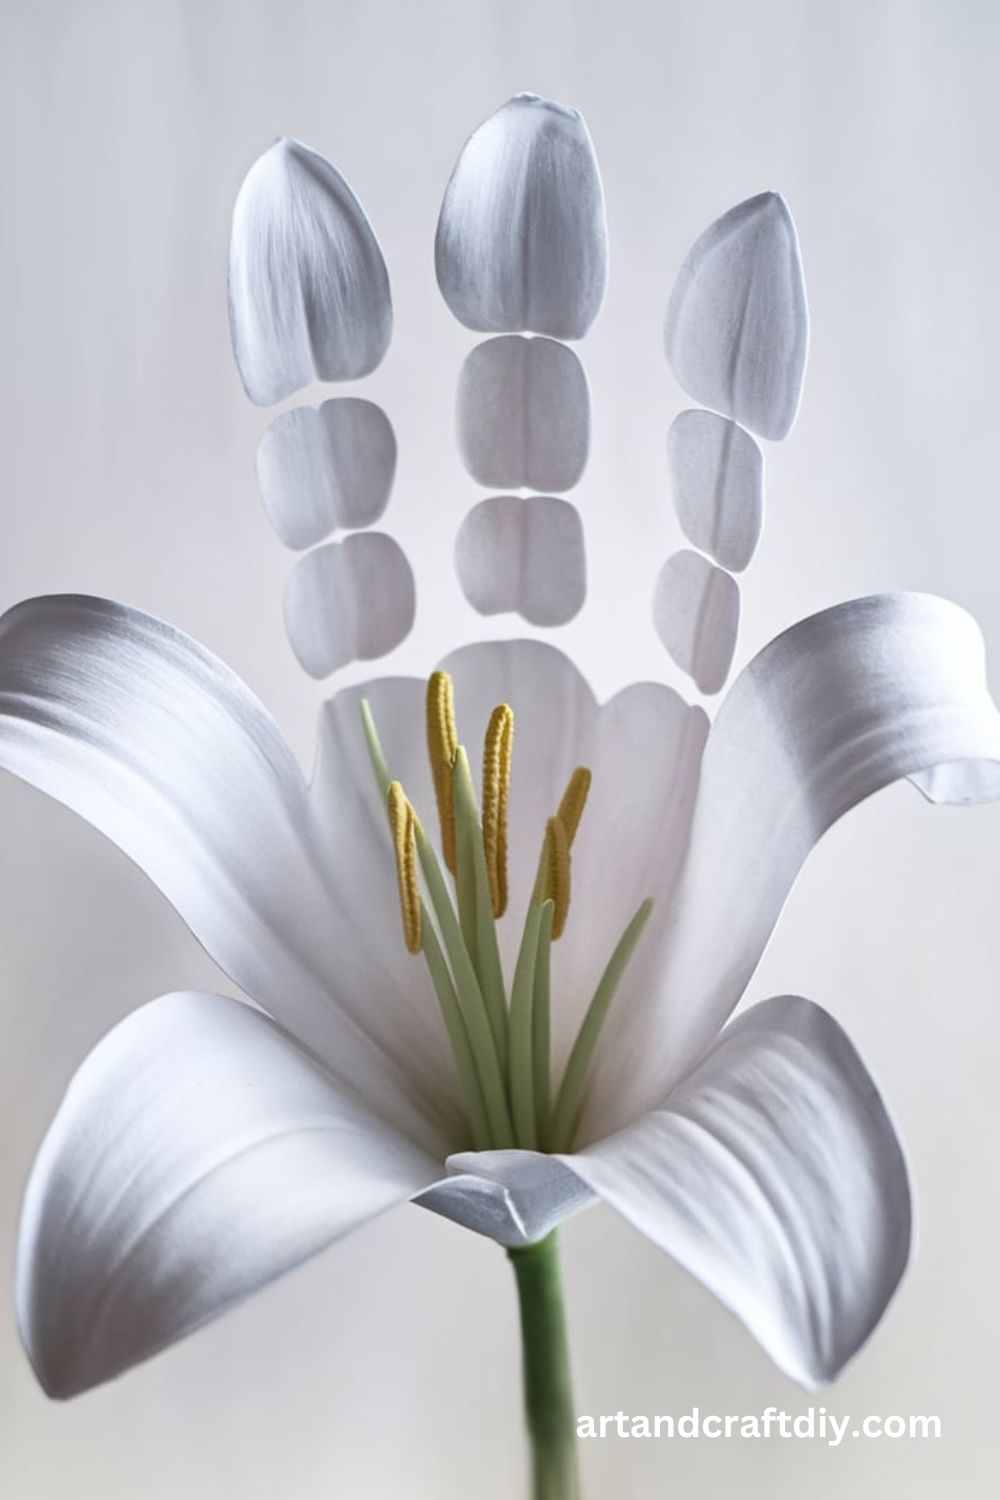
Classic White Handprint Lily
This timeless lily design is simple and elegant, making it perfect for any occasion.
Materials:
- White construction paper
- Green pipe cleaner
- Yellow pom-poms
- Scissors
- Glue
Steps:
- Trace and cut out a handprint from white construction paper.
- Curl each finger slightly to resemble flower petals.
- Attach a yellow pom-pom in the center using glue.
- Wrap the base of the handprint around a green pipe cleaner to form the stem.
- Secure with glue and let it dry.
Watercolor Handprint Lily
Add a splash of color with a watercolor effect to make a vibrant lily.

Materials:
- White cardstock
- Watercolor paints
- Paintbrush
- Green straw
- Tape
Steps:
- Paint a piece of white cardstock using watercolor shades. Let it dry.
- Trace and cut out a handprint from the painted paper.
- Curl the fingers slightly and attach them around a green straw.
- Secure the base with tape and adjust the shape.
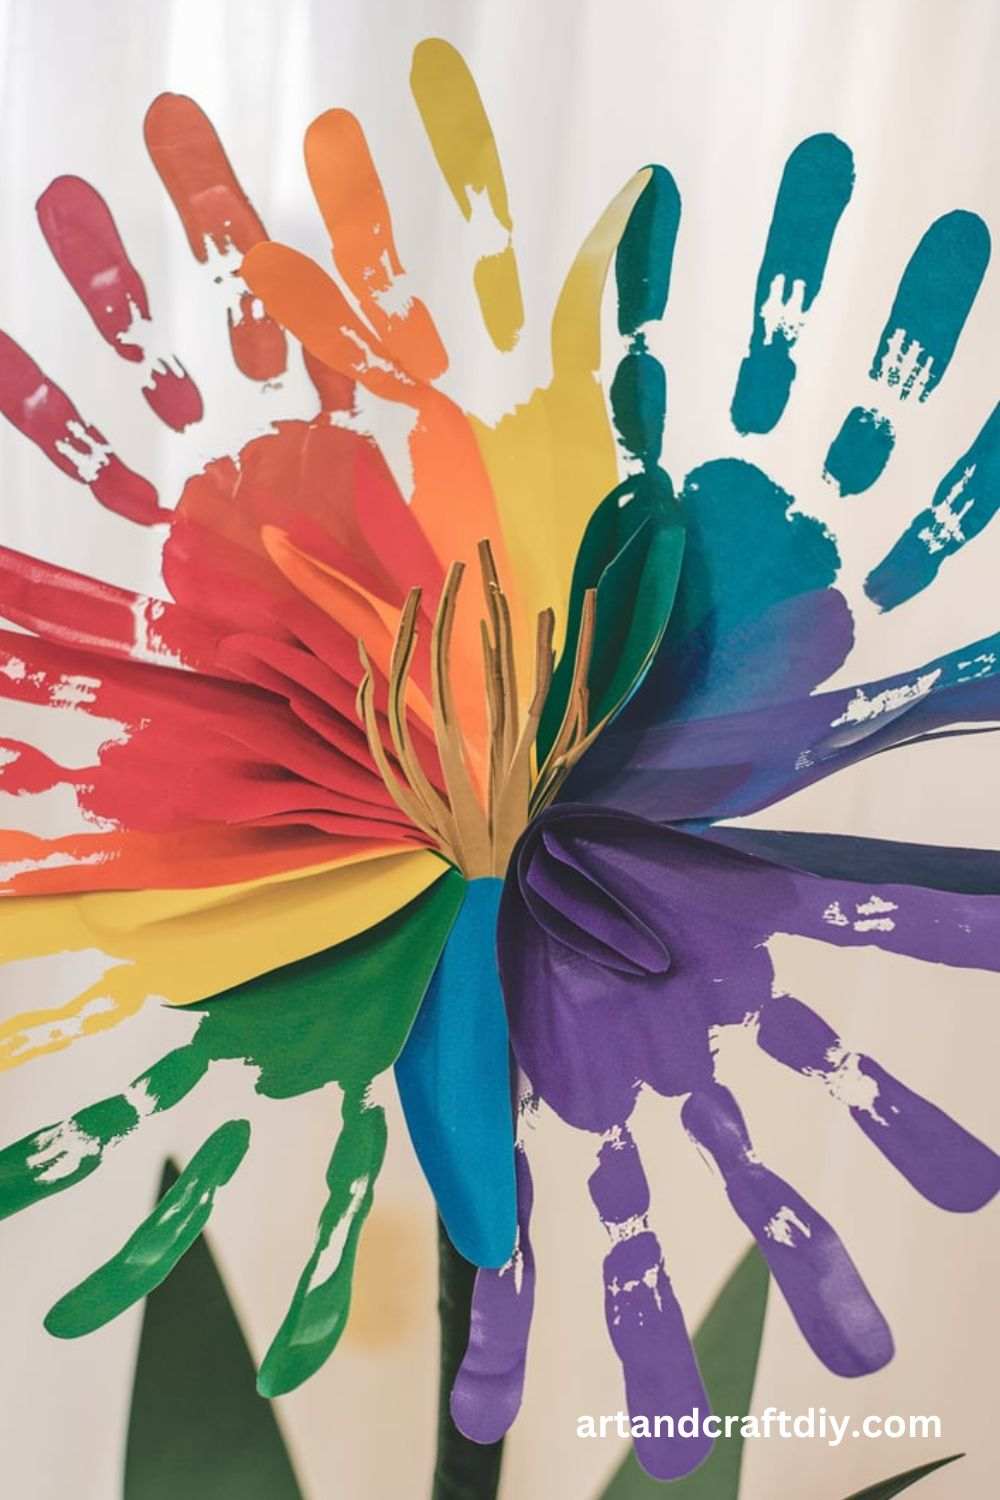
Rainbow Handprint Lily
Brighten up the room with a rainbow-colored handprint lily.
Materials:
- White paper
- Markers or crayons
- Green pipe cleaner
- Glue
Steps:
- Color a white sheet of paper with rainbow shades using markers or crayons.
- Trace and cut out a handprint from the colorful sheet.
- Shape the petals by curling the fingers slightly.
- Attach the handprint around a green pipe cleaner and glue in place.
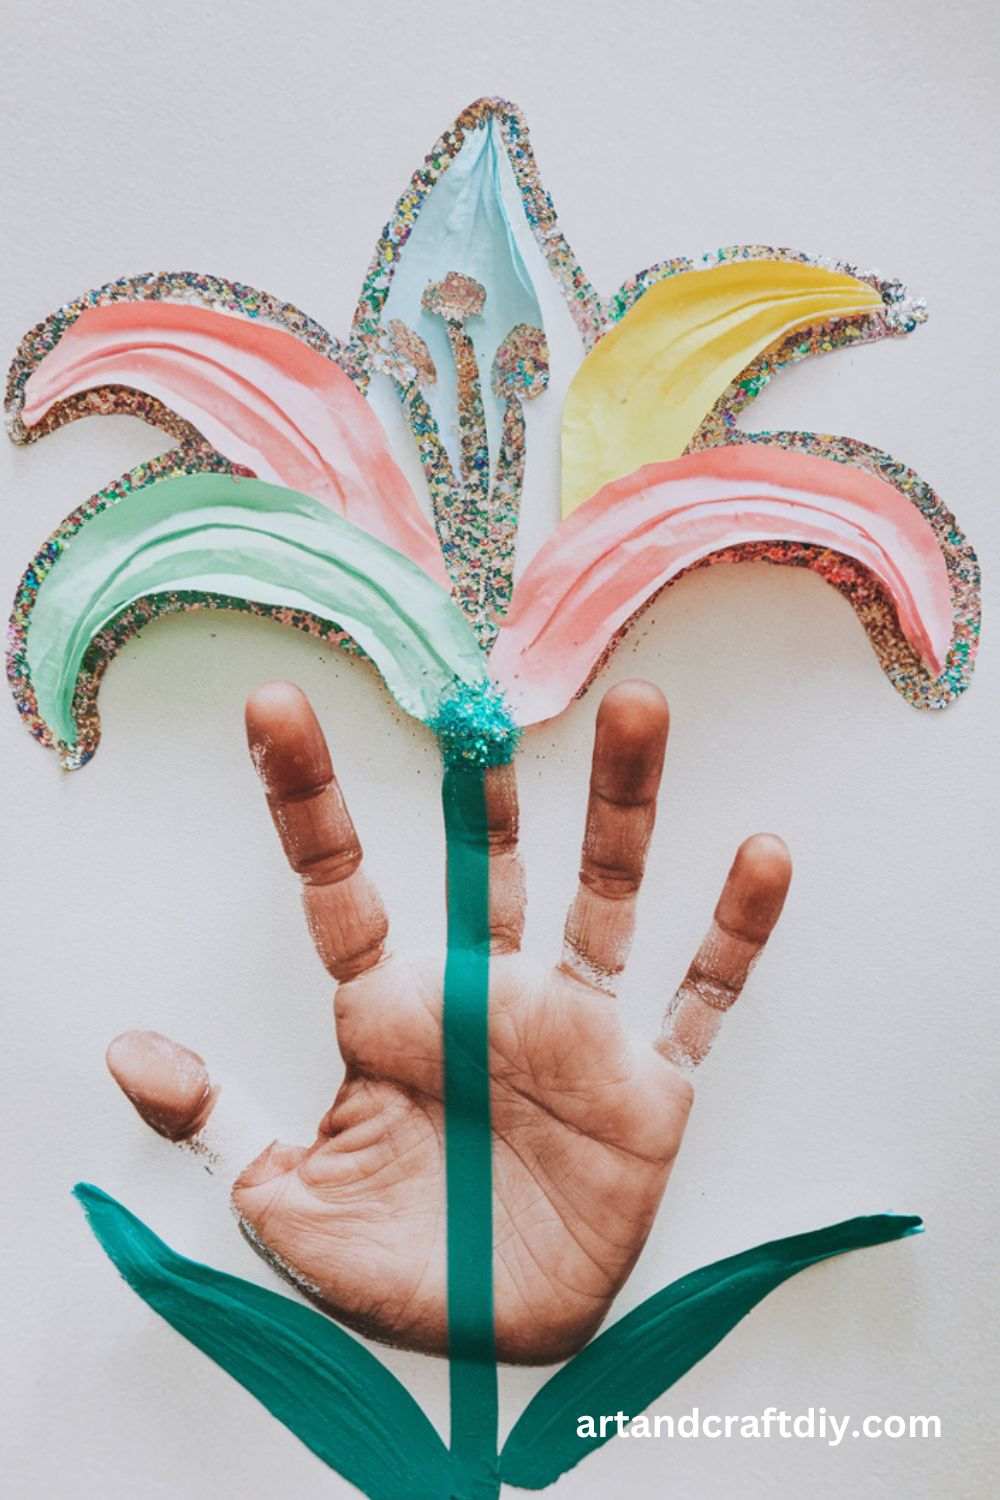
Glitter Handprint Lily
A sparkling lily that adds a touch of glam!
Materials:
- White paper
- Glitter glue or loose glitter
- Green pipe cleaner
- Scissors
- Glue
Steps:
- Trace and cut out a handprint from white paper.
- Apply glitter glue to the edges of the fingers and let it dry.
- Attach the handprint to a green pipe cleaner.
Origami Handprint Lily
Combine origami and handprint art for a unique twist!

Materials:
- Origami paper
- Green craft stick
- Tape
Steps:
- Fold origami paper into a fan-like shape.
- Trace and cut out a handprint from the folded paper.
- Open the folds slightly to give the petals a layered effect.
- Attach to a green craft stick with tape.
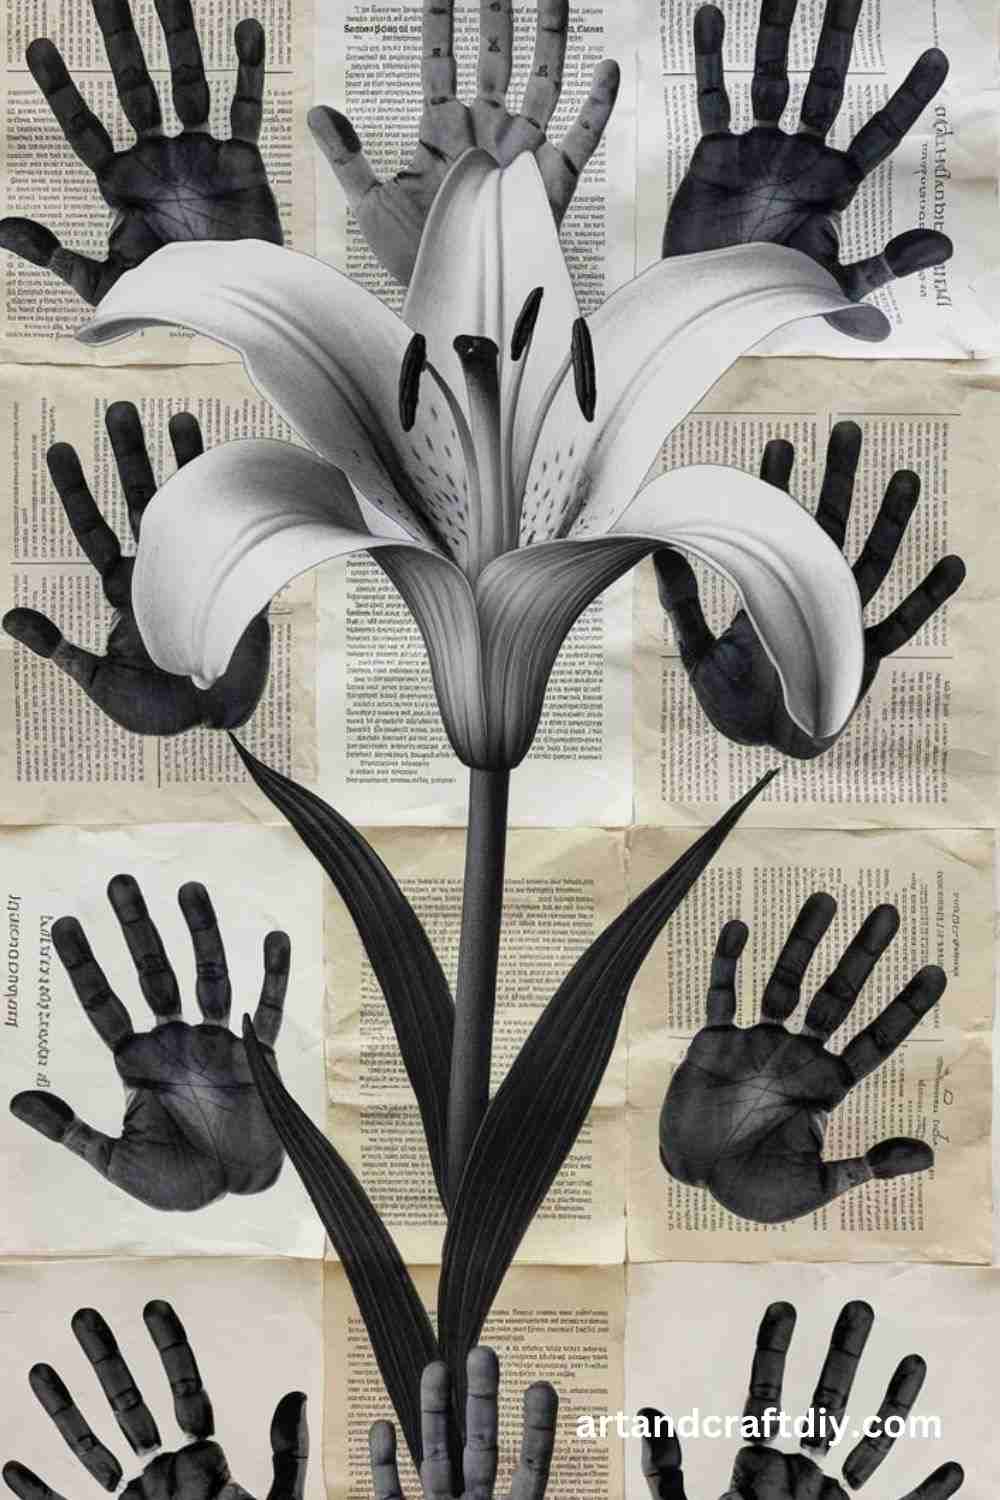
Newspaper Handprint Lily
A recycled newspaper lily gives a vintage touch.
Materials:
- Old newspaper
- Green wire
- Scissors
- Glue
Steps:
- Trace and cut out a handprint from newspaper.
- Curl the fingers slightly and attach them to green wire.
- Shape the petals and secure them with glue.
Handprint Lily Bouquet
Create an entire bouquet of lilies for decoration!
Materials:
- Various colored paper
- Green straws
- Ribbon
Steps:
- Make multiple handprint lilies in different colors.
- Attach them to green straws.
- Tie them together with a ribbon for a bouquet effect.
Glow-in-the-Dark Handprint Lily
Perfect for night-time fun!
Materials:
- Glow-in-the-dark paint
- White paper
- Green pipe cleaner
Steps:
- Paint white paper with glow-in-the-dark paint.
- Cut out a handprint and shape it into a lily.
- Attach it to a green pipe cleaner.
Fabric Handprint Lily
A long-lasting fabric version of the lily.

Materials:
- White fabric
- Fabric paint
- Green ribbon
- Hot glue
Steps:
- Trace a handprint on fabric and cut it out.
- Paint designs on it using fabric paint.
- Attach to a green ribbon stem.
Coffee Filter Handprint Lily
Soft and delicate lilies made with coffee filters.
Materials:
- Coffee filters
- Food coloring
- Green pipe cleaner
Steps:
- Dip coffee filters in food coloring and let them dry.
- Trace and cut out a handprint.
- Shape into a lily and attach it to a green pipe cleaner.
Button Center Handprint Lily
Add a button center for a cute look!
Materials:
- Paper
- Buttons
- Glue
- Green straw
Steps:
- Cut out a handprint and curl the petals.
- Glue a button in the center.
- Attach to a green straw.
Tissue Paper Handprint Lily
A fluffy and delicate version using tissue paper.
Materials:
- Tissue paper
- Green straw
- Tape
Steps:
- Trace and cut out a handprint from tissue paper.
- Gently shape the petals.
- Attach it to a green straw with tape.
Foil Handprint Lily
A shiny, metallic lily using foil paper.
Materials:
- Aluminum foil
- Green wire
- Scissors
Steps:
- Cut a handprint from aluminum foil.
- Carefully shape it into a lily.
- Attach it to green wire for a stem.
Lace Handprint Lily
Elegant and decorative!
Materials:
- Lace fabric
- Green pipe cleaner
- Glue
Steps:
- Cut out a handprint from lace.
- Attach to a green pipe cleaner.
- Shape it into a lily.
Nature-Inspired Handprint Lily
Use real leaves for added beauty.
Materials:
- Paper
- Real leaves
- Glue
- Green stick
Steps:
- Trace a handprint on paper.
- Glue real leaves onto the petals.
- Attach to a green stick
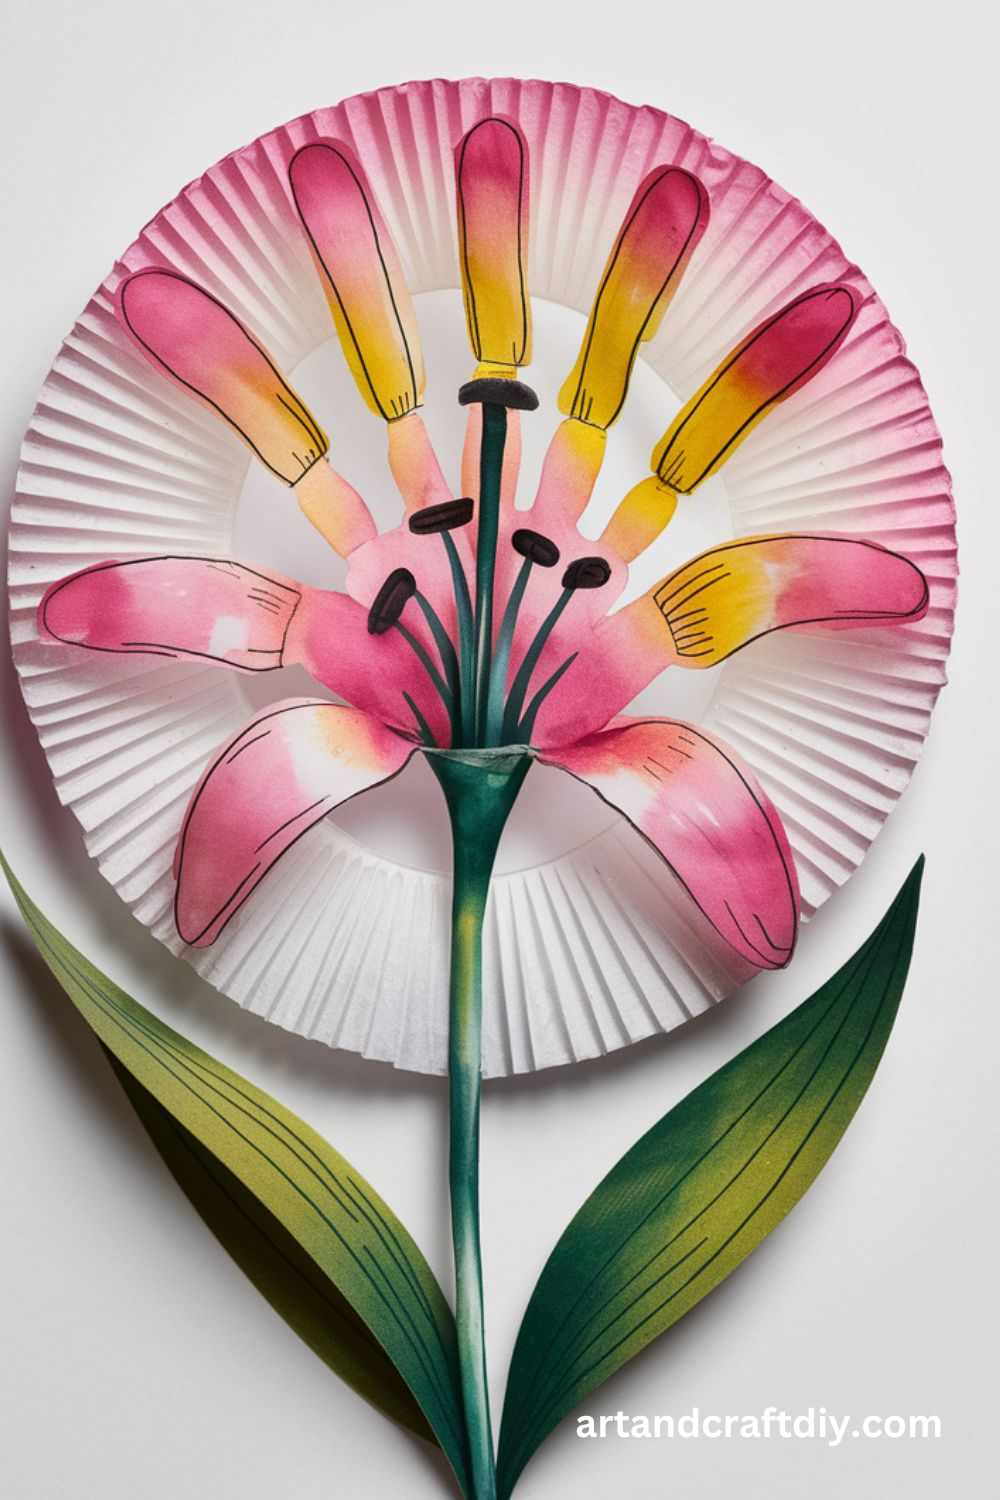
Fingerprint Handprint Lily
A personalized lily with fingerprint details on the petals.
Materials:
- White cardstock
- Washable paint
- Green straw
Steps:
- Trace and cut out a handprint from white cardstock.
- Dip fingertips in paint and press onto the petals for texture.
- Attach the handprint to a green straw as the stem.
Pastel Chalk Handprint Lily
Soft, dreamy, and colorful!
Materials:
- White paper
- Pastel chalk
- Green pipe cleaner
Steps:
- Use pastel chalk to color a white sheet of paper.
- Trace and cut out a handprint from the paper.
- Shape it into a lily and attach it to a green pipe cleaner.
Puffy Paint Handprint Lily
A textured lily using puffy paint.
Materials:
- White paper
- Puffy paint
- Green craft stick
Steps:
- Trace and cut out a handprint from white paper.
- Decorate the petals with puffy paint and let them dry.
- Attach to a green craft stick for the stem.
Button-Stem Handprint Lily
Instead of a plain stem, add colorful buttons!
Materials:
- Paper
- Buttons
- Pipe cleaner
Steps:
- Cut a handprint from paper and shape it into a flower.
- Thread buttons onto a pipe cleaner and attach them as the stem.
Handprint Lily with Beaded Stamen
Add beads to make the center stand out.
Materials:
- Paper
- Beads
- Wire
Steps:
- Cut a handprint from paper and curl the petals.
- Thread beads onto a wire and attach them to the center.
Gradient Handprint Lily
A beautiful ombre effect.
Materials:
- White paper
- Gradient markers
Steps:
- Use gradient markers to color a white sheet of paper.
- Trace and cut out a handprint.
- Shape it into a lily and attach it to a stem.
Handprint Lily with Paper Straw Stem
Eco-friendly and sturdy!
Materials:
- Paper straws
- Paper
- Glue
Steps:
- Cut out a handprint and shape it into a flower.
- Attach to a paper straw for the stem.
Polka Dot Handprint Lily
A fun and playful design!
Materials:
- White paper
- Dot markers
Steps:
- Cut a handprint from white paper.
- Use dot markers to create polka dots.
- Attach it to a stem.
Striped Handprint Lily
A modern, striped design.
Materials:
- White paper
- Colored tape
Steps:
- Cut a handprint from paper.
- Apply colored tape in stripes.
- Shape it into a lily and attach it to a stem.
Stained Glass Handprint Lily
A see-through, colorful craft.
Materials:
- Transparent paper
- Markers
Steps:
- Trace and cut out a handprint from transparent paper.
- Color it with markers for a stained-glass effect.
Wax Crayon Resist Handprint Lily
A cool crayon and watercolor mix!
Materials:
- White paper
- White crayon
- Watercolor paint
Steps:
- Draw designs on paper with a white crayon.
- Paint over it with watercolors to reveal the design.
- Cut out a handprint and shape it into a lily.
Autumn-Themed Handprint Lily
Warm, fall-inspired colors.
Materials:
- Orange, red, and yellow paper
- Green craft stick
Steps:
- Use autumn-colored paper for the handprint.
- Curl the fingers slightly and attach them to a craft stick.
Magazine Cutout Handprint Lily
A collage-style lily using magazine pages.
Materials:
- Magazines
- Scissors
Steps:
- Cut colorful sections from magazines.
- Trace and cut out a handprint.
- Shape it into a lily and attach it to a stem.
Handprint Lily with Twine-Wrapped Stem
A rustic touch with twine.
Materials:
- Twine
- Green stick
Steps:
- Cut out a handprint and shape it into a flower.
- Wrap twine around the stem for a natural look.
Handprint Lily in a Pot
A cute tabletop decoration.
Materials:
- Paper
- Mini flower pot
Steps:
- Make a handprint lily.
- Place it in a mini pot with paper leaves.
Creative Variations for Paper Lilies
Creating paper lilies offers endless possibilities for customization and creativity. Whether you’re making them for decoration, gifts, or special events, you can elevate their beauty with these unique variations:
1. Using Patterned or Textured Paper for a Unique Look
- Instead of plain paper, use patterned, marbled, or embossed paper to add depth and personality.
- Textured papers, like handmade or watercolor paper, give lilies a more natural and artistic feel.
- Experiment with metallic, glitter, or pearlescent finishes for an elegant touch.
2. Adding a Paper Stamen for Realism
- A simple paper stamen can enhance the authenticity of your lilies.
- Use thin strips of yellow, orange, or brown paper to create the central filaments.
- For added detail, curl the tips or brush them with paint or ink for a pollen-like effect.
3. Arranging Lilies into a Bouquet, Wreath, or Centerpiece
- Combine multiple paper lilies into a stunning bouquet with coordinating greenery.
- Attach lilies to a wreath base for a seasonal or event-themed decoration.
- Use lilies as a table centerpiece, pairing them with candles, ribbons, or other floral elements.
The Fun and Creativity of Making Handprint Paper Lilies
Crafting handprint paper lilies is a delightful and imaginative activity that combines creativity, personalization, and a touch of nature-inspired art. This simple yet engaging DIY project is perfect for kids and adults alike, offering a wonderful way to celebrate spring, Mother’s Day, or just a fun afternoon of crafting.
Why Making Handprint Paper Lilies is Fun and Creative
🖐 Personalized Art – Using your own handprint as the base of the lily makes each flower unique and special.
🎨 Encourages Creativity – From choosing colors to decorating petals, there’s endless room for artistic expression.
✂️ Easy and Accessible – Requires only basic supplies like paper, scissors, glue, and markers, making it a budget-friendly activity.
🌸 Perfect for All Ages – Whether it’s a kid’s craft project or an adult’s DIY décor, handprint lilies are fun for everyone.
🎁 Great for Gifting – Handmade flowers make thoughtful and heartfelt gifts for parents, teachers, or friends.
🌟 Educational Value – Helps improve fine motor skills in kids while teaching them about flowers and nature.
💡 Endless Variations – Experiment with different paper textures, colors, and embellishments to create a bouquet of diverse, artistic lilies.
FAQ
What are Handprint Paper Lilies?
Handprint Paper Lilies are DIY craft flowers made by tracing and cutting out handprints from paper to form the petals of a lily. They are popular for kids’ crafts, gifts, and decorations.
What materials do I need to make Handprint Paper Lilies?
You will need:
- Colored craft paper or cardstock
- Scissors
- Glue or tape
- A straw or pipe cleaner (for the stem)
- A pencil (for tracing)
- Optional decorations like glitter, stickers, or markers
How do I make Handprint Paper Lilies?
- Trace your hand on a sheet of paper.
- Cut out the handprint carefully.
- Curl each finger slightly to form petals.
- Roll the base of the handprint into a cone shape and glue or tape it.
- Attach a straw or pipe cleaner to the base as the stem.
- Decorate as desired.
What type of paper works best?
Cardstock or construction paper works best as it holds shape well, but standard printer paper can also be used.

Hi, I’m Victoria, an art and craft teacher at Newark City Schools, where I have the joy of working with middle school students to help them explore their creativity and develop their artistic talents. I believe that art is a powerful way for students to express themselves, and I strive to make every lesson a fun, engaging, and inspiring experience.
I created this website to share the art and craft projects, techniques, and resources that I use in my classroom, hoping to inspire both educators and young artists alike. Whether you’re a teacher looking for new ideas or a student eager to try something new, I’m excited to provide creative tools and projects that anyone can enjoy.
When I’m not in the classroom, I love experimenting with different art forms and learning new crafting techniques. My goal is to help others discover the joy of making things with their hands, and I hope my website serves as a space for everyone to explore their creative potential.