
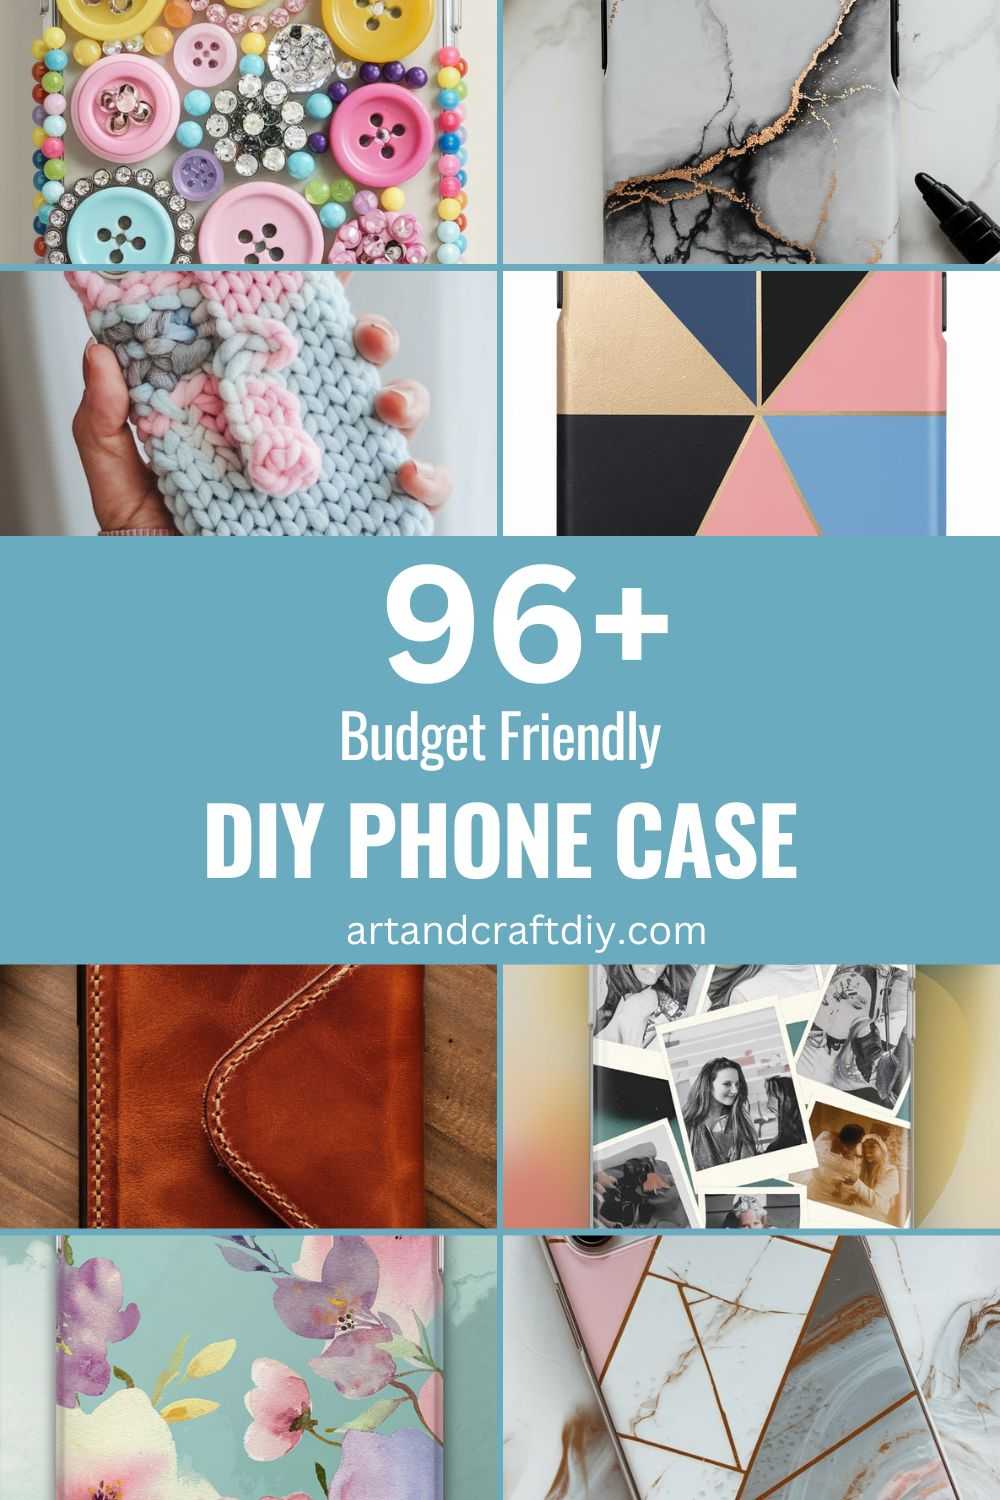
Creating a custom phone case is a fun and practical way to express your unique style while keeping your device safe. Designing your own phone case allows for endless possibilities—whether you want to add a personal touch with photos, create a design that matches your aesthetic, or just have fun with creative patterns. The beauty of a DIY phone case lies in the customization: you get to choose the materials, colors, and designs that speak to you. Beyond just looks, crafting your own phone case also provides a sense of protection, as you can select durable materials that safeguard your phone from scratches, drops, and daily wear.
In addition to offering a personal touch, making your own phone case gives you the opportunity to showcase your creativity. You can experiment with different techniques, from painting and drawing to using stickers or decals, allowing for a truly one-of-a-kind accessory. Whether you opt for bold, eye-catching designs or subtle, minimalist art, the possibilities are limited only by your imagination. Plus, DIY phone cases can be a great conversation starter, as they reflect your personality and style in a way that mass-produced cases can’t.
DIY Phone Case
A DIY phone case is a personalized, handmade protective cover for your phone that you can create using various materials and designs. Crafting your own phone case allows you to showcase your creativity and style while offering the advantage of custom-fit protection. You can use materials like silicone, fabric, wood, or even recycled items to create a unique case. DIY phone cases are a fun, cost-effective way to express individuality and protect your device from scratches and drops.
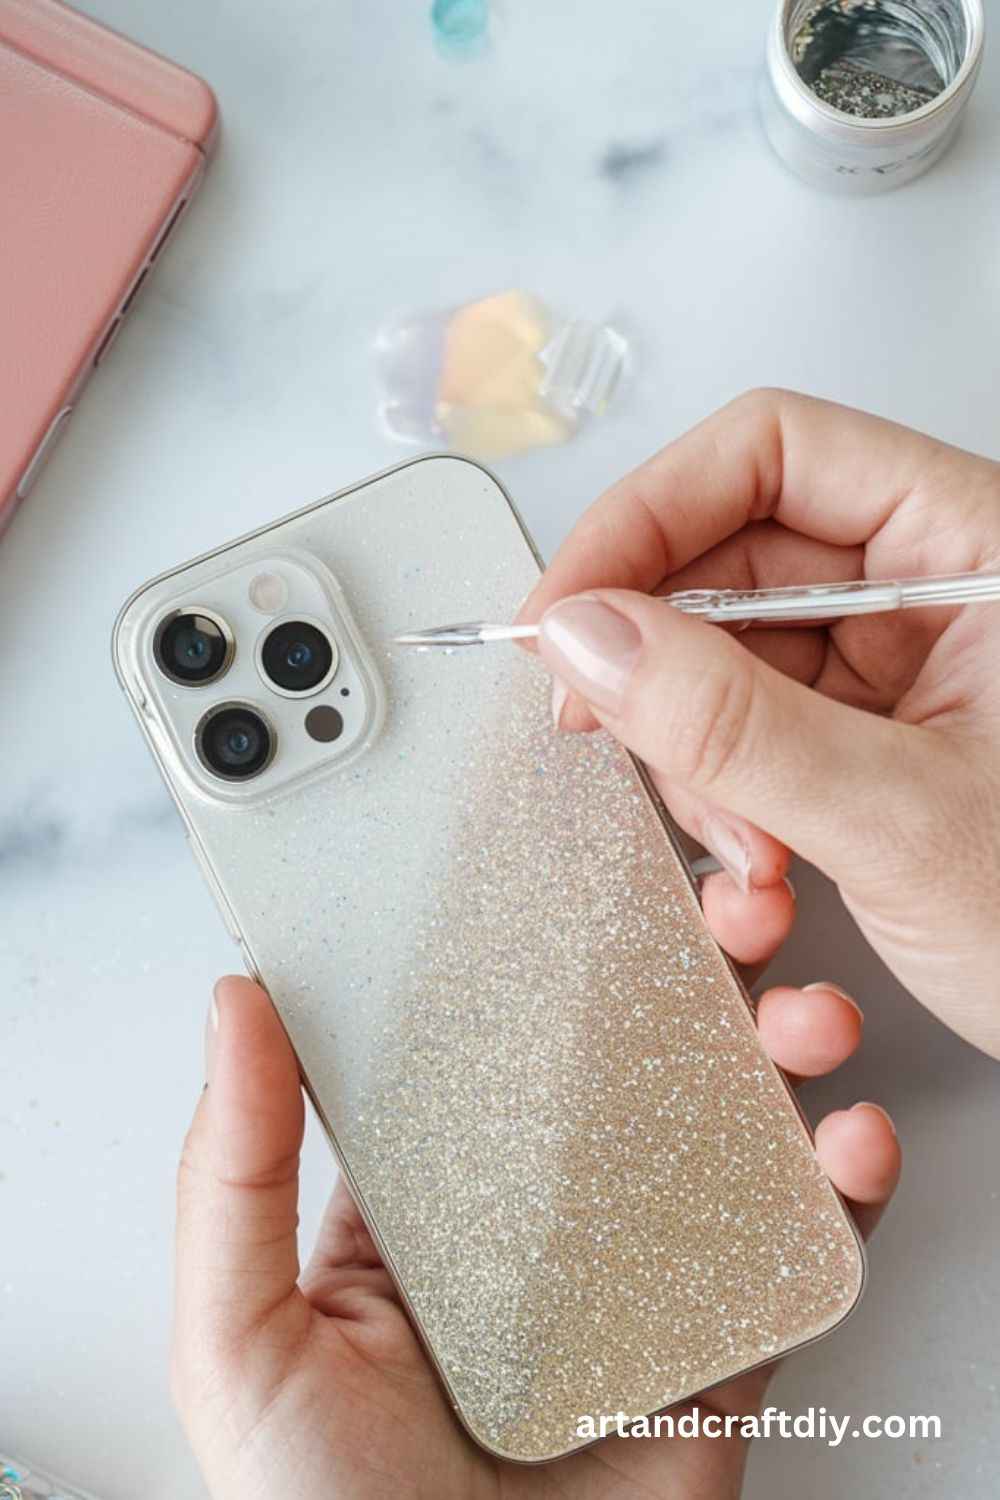
Glitter Phone Case
A glitter phone case gives your phone a sparkling, fun look while still providing protection. You can create a customized one with just a few supplies.
Materials Needed:
- Clear phone case
- Glitter (loose or fine)
- Mod Podge (or any clear adhesive)
- Small paintbrush
- Wax paper
Steps:
- Place the phone case on wax paper to protect your work surface.
- Apply a thin layer of Mod Podge to the back of the phone case using a small paintbrush.
- Sprinkle glitter generously over the adhesive, ensuring it’s evenly spread.
- Let it dry completely, then shake off any excess glitter.
- Seal with another layer of Mod Podge to ensure durability.
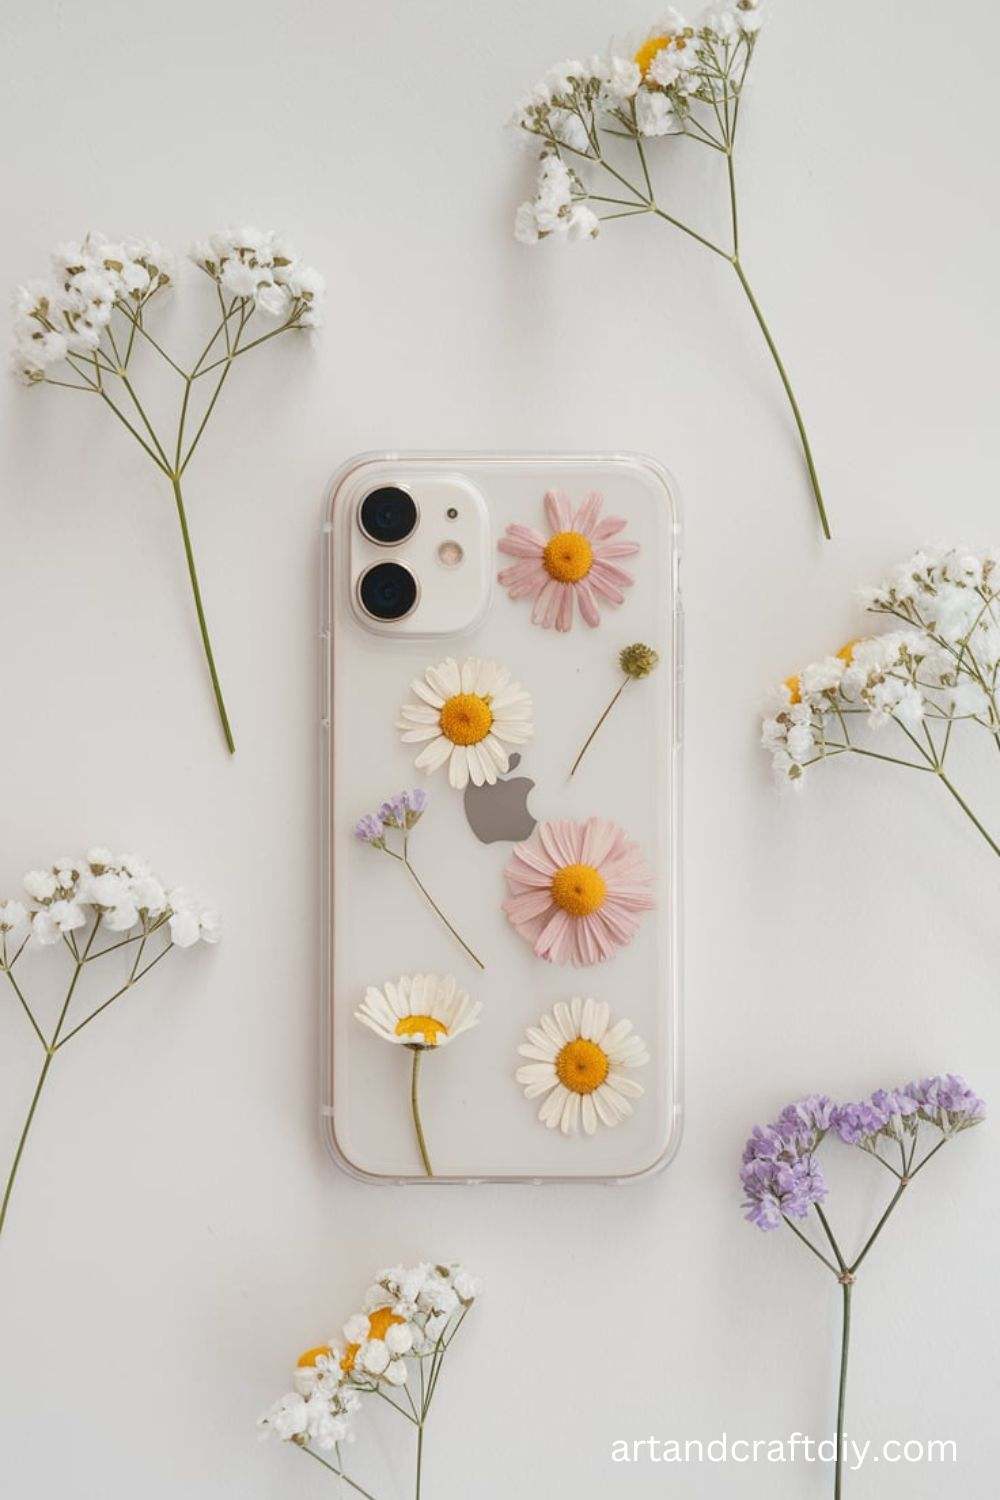
Pressed Flower Phone Case
Add a touch of nature to your phone case by pressing beautiful flowers in between a clear case.
Materials Needed:
- Clear phone case
- Fresh flowers (pressed flat)
- Mod Podge or epoxy resin
- Small paintbrush
Steps:
- Carefully press flowers using wax paper and a heavy book.
- Once flattened, arrange the flowers on the back of the clear case.
- Apply a thin coat of Mod Podge over the flowers to secure them.
- Allow the flowers to set for a few hours before sealing them with more Mod Podge or a coat of epoxy resin for a shiny finish.
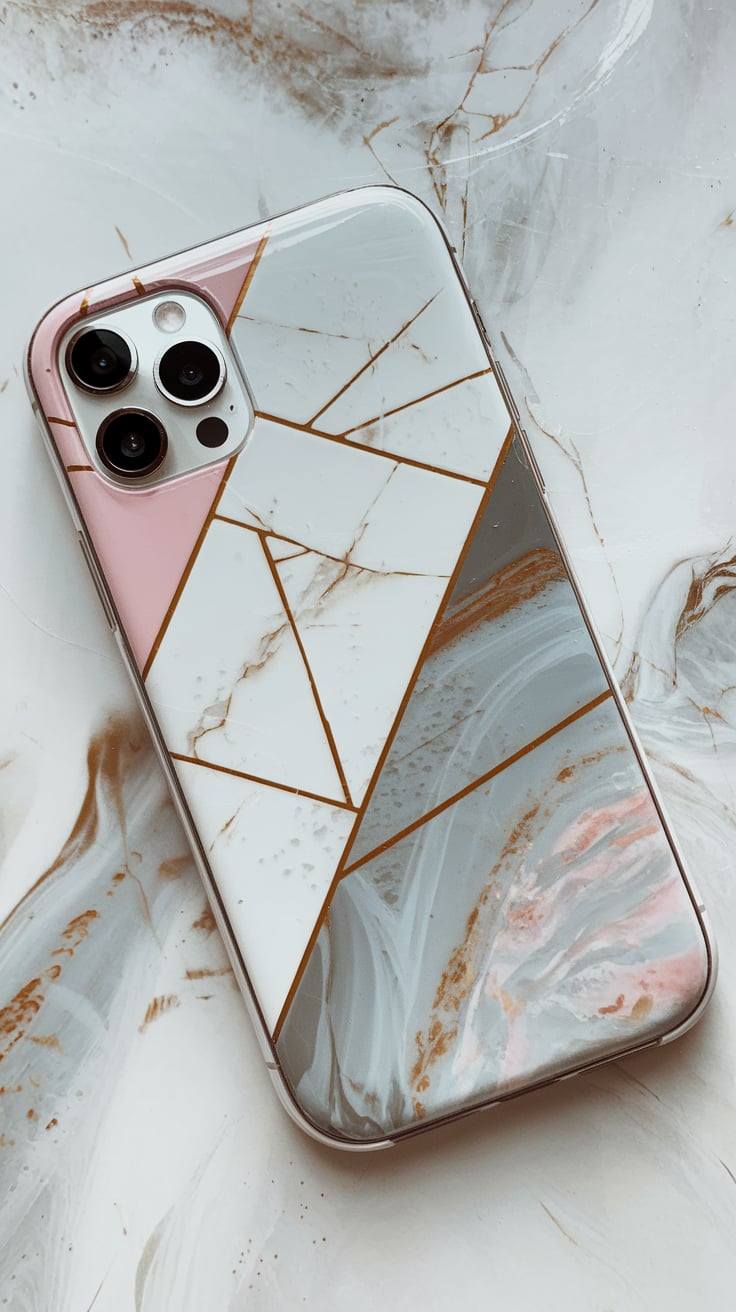
Marble Effect Phone Case
Create a luxurious marble effect on your phone case with paint and water.
Materials Needed:
- White phone case
- Nail polish (in multiple colors like black, white, grey)
- Water
- Toothpicks
Steps:
- Fill a small container with water.
- Drop several colors of nail polish onto the surface of the water.
- Use a toothpick to swirl the colors into a marble design.
- Dip the phone case into the water, ensuring it’s fully submerged to pick up the marble pattern.
- Let the case dry completely before using it.
Photo Collage Phone Case
Display your favorite photos on your phone case with a personalized collage design.

Materials Needed:
- Clear phone case
- Printed photos
- Mod Podge or clear glue
- Scissors
Steps:
- Print out small photos that you want to use.
- Cut the photos into shapes or sizes that will fit the case.
- Arrange them on the back of the case in a collage style.
- Apply Mod Podge or glue to stick the photos in place.
- Once the photos are secured, coat the entire case with Mod Podge for a glossy finish.
Leather Wrap Phone Case
A sleek, stylish leather wrap case adds elegance and durability to your phone.

Materials Needed:
- Leather or faux leather sheet
- Clear phone case
- Scissors
- Hot glue gun
Steps:
- Cut a piece of leather that will wrap around the back of the phone case.
- Use a hot glue gun to attach the leather to the phone case, trimming off any excess.
- Let the glue set for a few minutes before using the case.
Watercolor Painted Phone Case
Add an artistic flair to your phone case with a watercolor paint effect.

Materials Needed:
- White phone case
- Watercolor paints
- Paintbrushes
- Water
Steps:
- Paint a base layer of watercolors on the phone case, using the colors you prefer.
- While the paint is still wet, add more colors to blend and create a gradient effect.
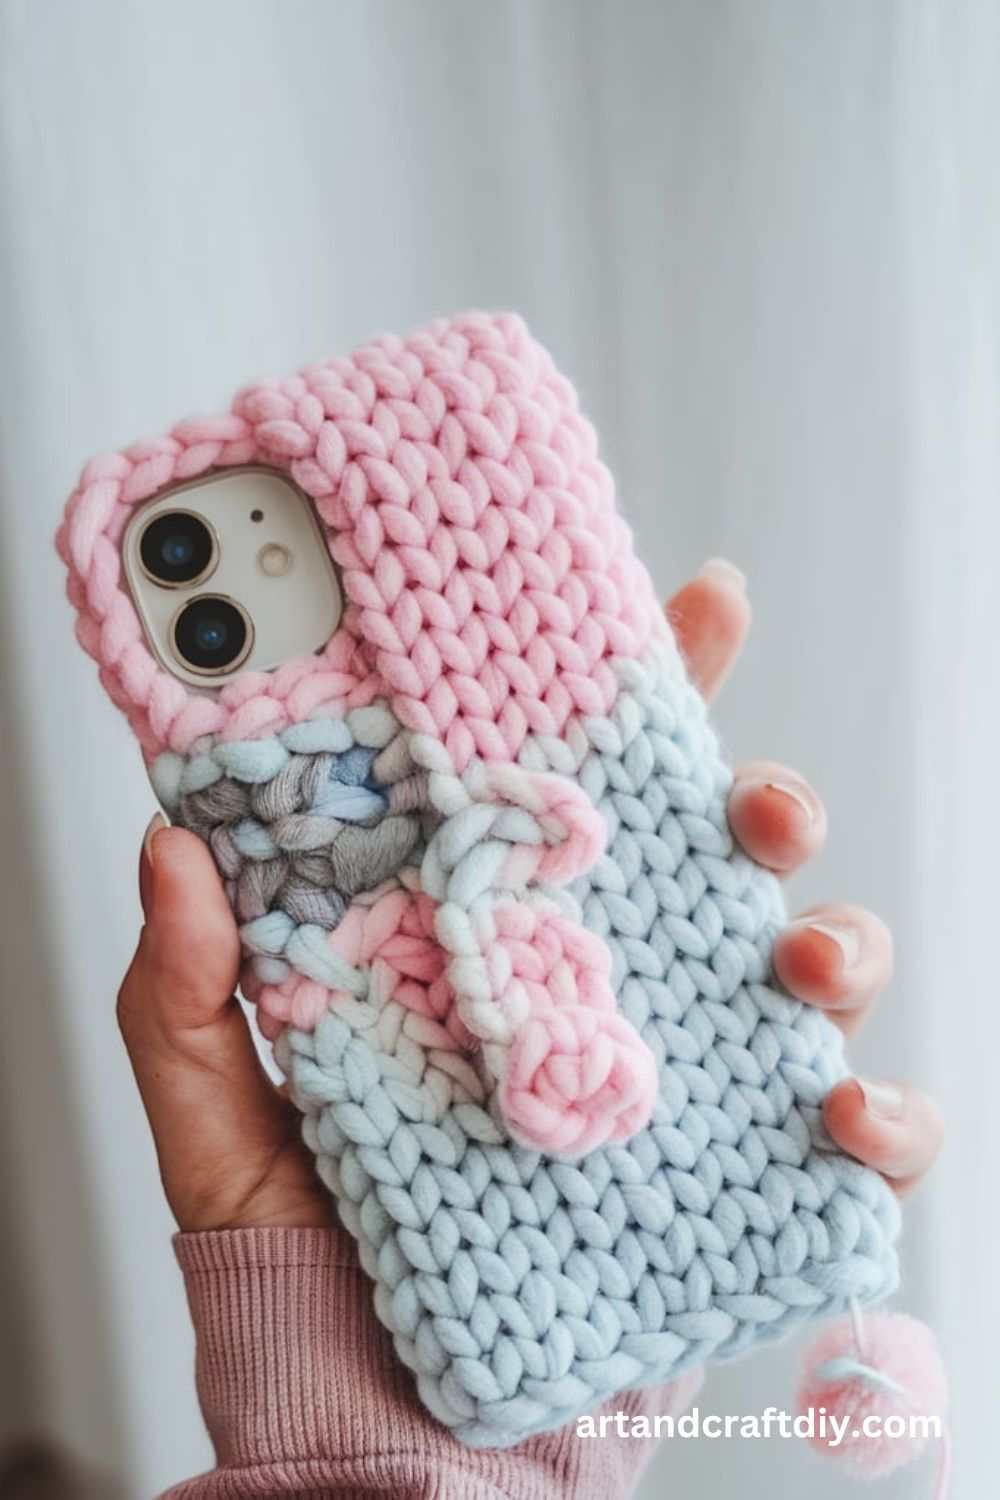
Knitted or Crocheted Phone Case
Make your phone cozy and cute with a handmade knitted or crocheted case.
Materials Needed:
- Yarn
- Knitting needles or crochet hook
- Clear phone case
Steps:
- Measure the dimensions of your phone to know how much yarn to use.
- Knit or crochet a rectangular piece that fits the size of your phone.
- Wrap the knitted/crocheted piece around the phone case and secure it with glue.
- Trim any excess yarn and weave in the ends.
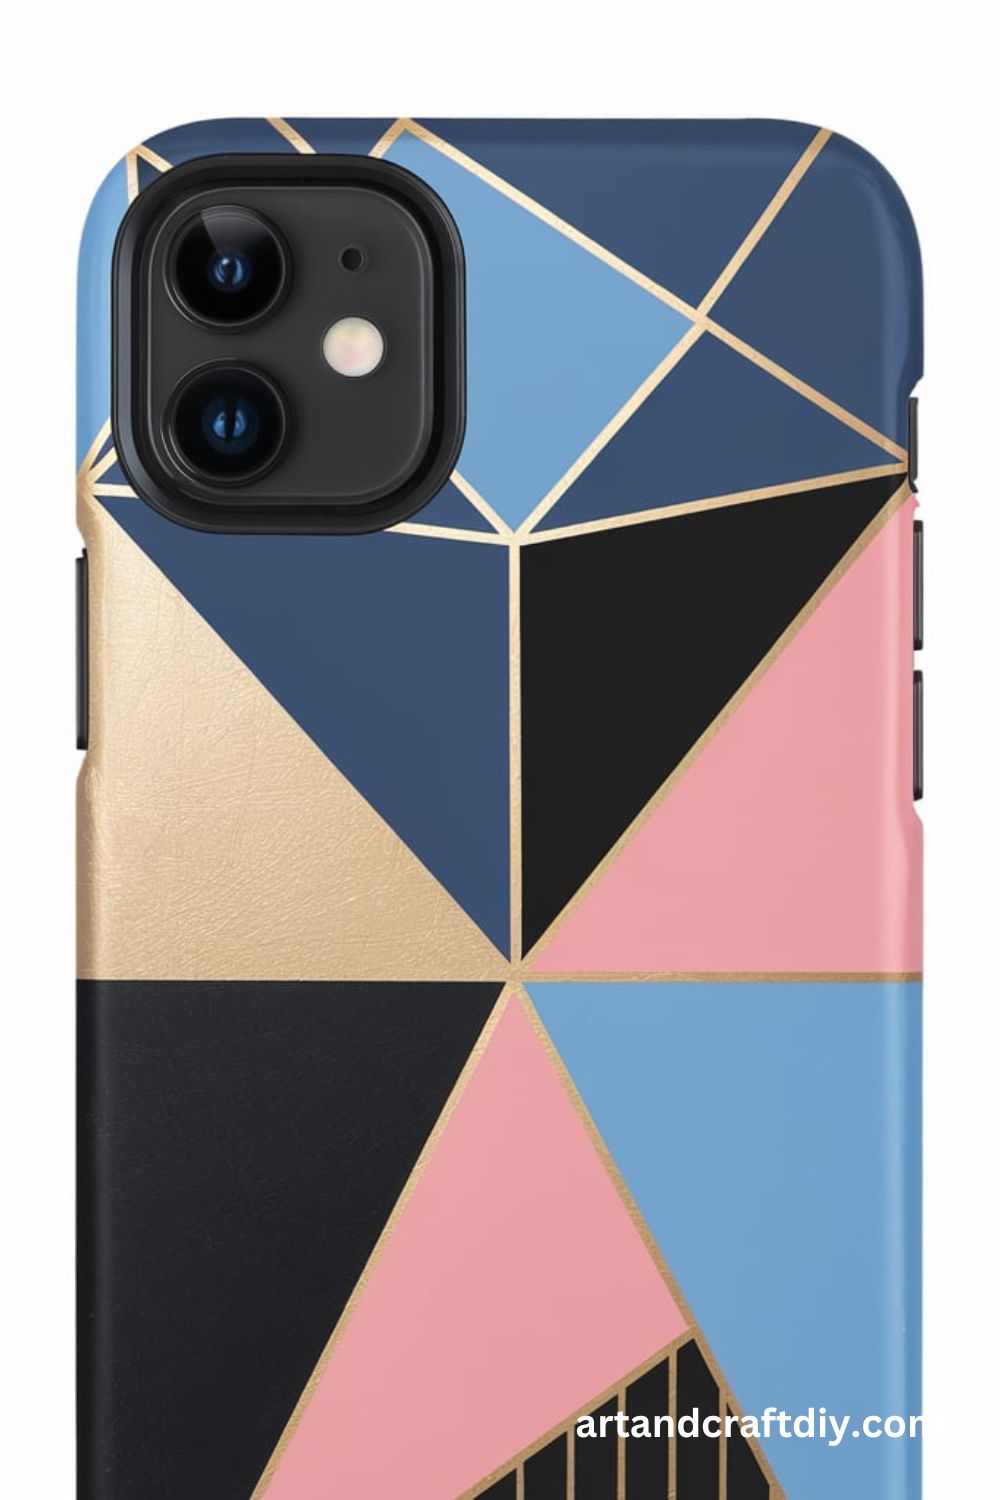
Geometric Tape Phone Case
Use washi tape or masking tape to create geometric shapes on your phone case.
Materials Needed:
- Clear phone case
- Washi tape or masking tape
- Scissors
Steps:
- Cut the tape into various shapes (triangles, squares, or stripes).
- Arrange the tape on the back of the clear case in your desired design.
- Once satisfied with the layout, press the tape down securely.
- Optionally, coat with a clear sealant for durability.
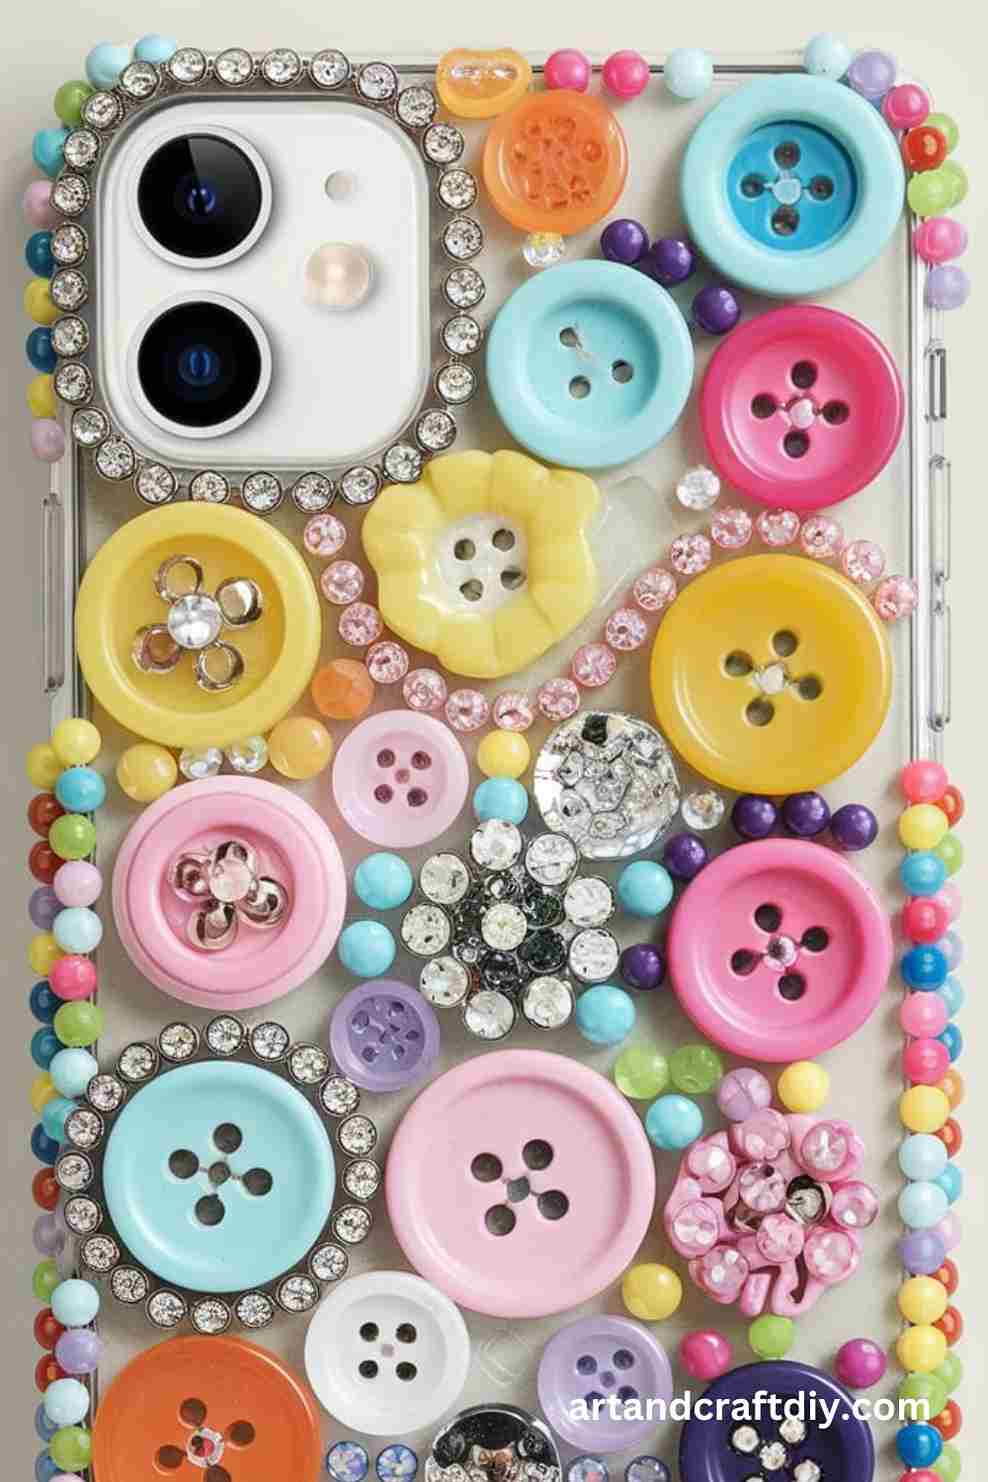
Button Decorated Phone Case
Repurpose old buttons to create a unique and textured phone case.
Materials Needed:
- Clear phone case
- Assorted buttons
- Hot glue gun
Steps:
- Select a variety of buttons with different colors and sizes.
- Use a hot glue gun to attach the buttons to the phone case in a random or organized pattern.
- Let the glue dry completely before using the case.
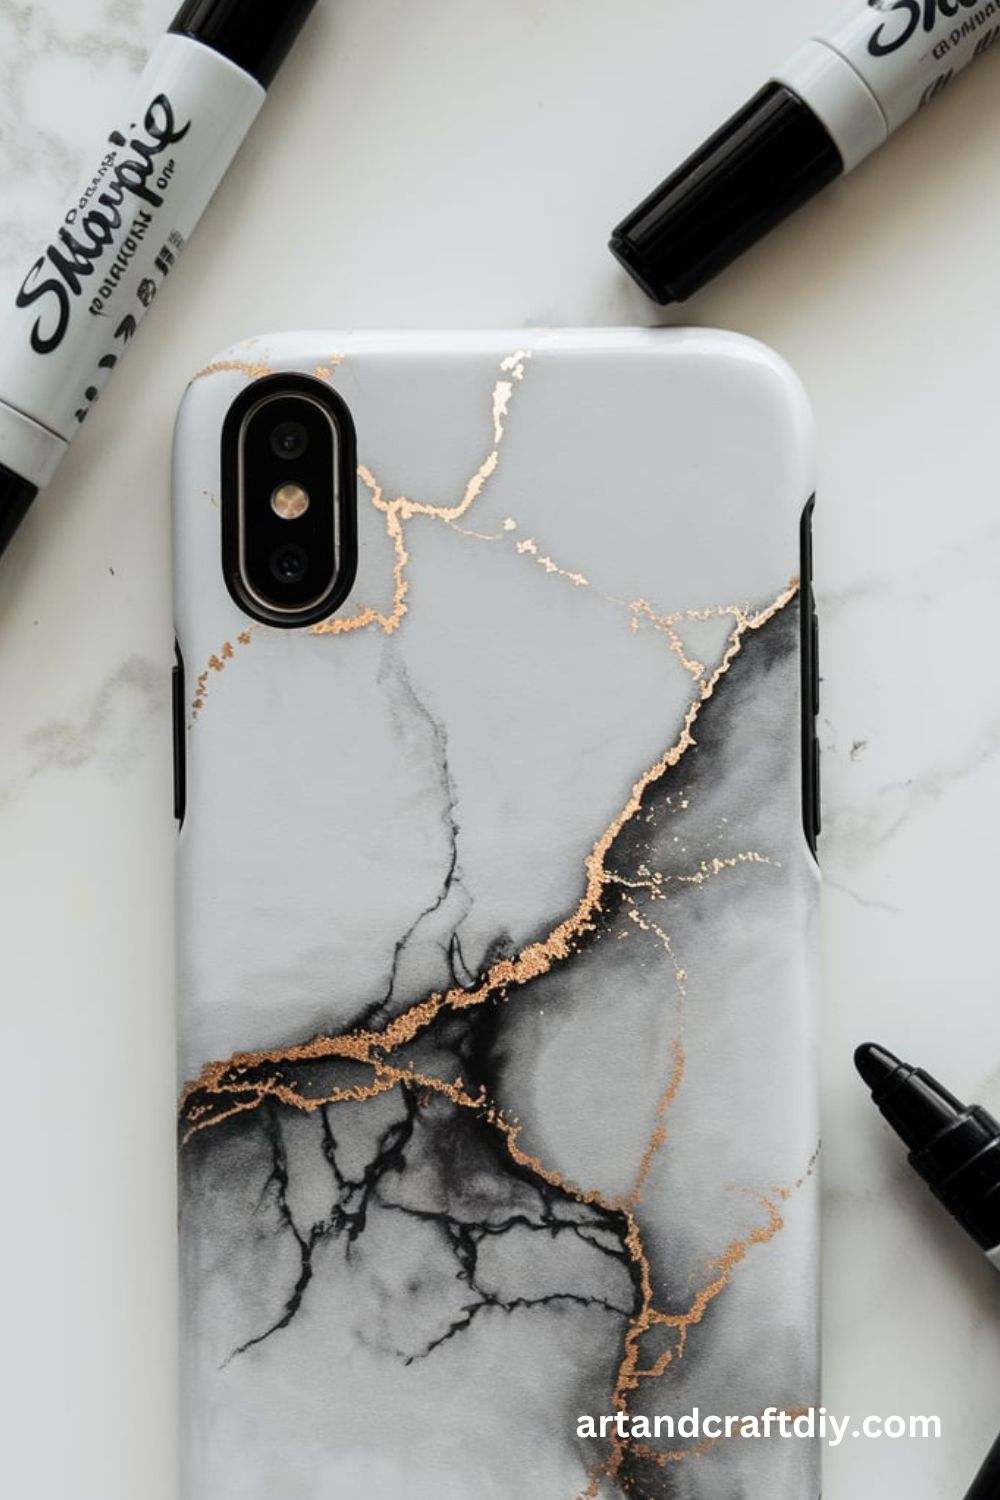
Faux Marble with Sharpies
Create a faux marble look on your phone case using just Sharpie markers.
Materials Needed:
- White phone case
- Black and grey Sharpie markers
- Rubbing alcohol
- Cotton swabs
Steps:
- Use the Sharpie markers to draw marble veins onto the case.
- Dip a cotton swab into rubbing alcohol and gently rub it over the lines to blur them and create a marble effect.
- Allow it to dry completely.
Pom-Pom Decor Phone Case
Make your phone case fun and fluffy with colorful pom-poms.
Materials Needed:
- Clear phone case
- Pom-poms
- Hot glue gun
Steps:
- Arrange the pom-poms on the back of the phone case in a pattern you like.
- Use the hot glue gun to attach each pom-pom to the case.
- Allow the glue to dry before using your new case.
Tape and Paint Stripes Phone Case
Give your phone a chic, modern look by combining tape and paint for striped designs.
Materials Needed:
- Clear phone case
- Painter’s tape or masking tape
- Acrylic paint
- Paintbrush
Steps:
- Apply strips of tape to the back of the phone case in the pattern you want.
- Paint between the tape strips with your chosen colors.
- After the paint has dried, peel off the tape to reveal clean lines.
Succulent Phone Case
Bring a touch of greenery to your phone case by designing it with mini succulent patterns.
Materials Needed:
- Clear phone case
- Green paint or markers
- Fine-tip paintbrushes
- Succulent stickers (optional)
Steps:
- Draw small succulent plants or cacti using green paint or markers.
- Use a fine brush to add tiny details like spines and texture to the plants.
- Optionally, add a few succulent stickers for added charm.
Confetti Phone Case
A fun and colorful way to personalize your case, using colorful confetti inside.
Materials Needed:
- Clear phone case
- Confetti or small beads
- Mod Podge
- Plastic sheet
Steps:
- Fill the back of the case with colorful confetti or beads.
- Apply Mod Podge over the confetti to keep it in place.
- Allow it to dry and cover the case with a plastic sheet to hold everything inside.
Fabric Covered Phone Case
Create a soft and textured phone case by covering it with fabric.
Materials Needed:
- Fabric of your choice
- Clear phone case
- Scissors
- Hot glue gun
Steps:
- Cut a piece of fabric that’s slightly larger than the back of the case.
- Apply a thin layer of glue to the back of the case.
- Press the fabric onto the case and trim any excess fabric around the edges.
Personalized Initials Phone Case
Personalize your phone case with your initials or name for a unique touch.
Materials Needed:
- Clear phone case
- Alphabet stickers or decals
- Acrylic paint (optional)
Steps:
- Apply your initials or name to the back of the case using the stickers or decals.
- If you want to add more detail, paint around the letters with your preferred colors.
- Let it dry and apply a clear coat for extra protection.
Pineapple Phone Case
Design a fun tropical-themed phone case with pineapples.
Materials Needed:
- Yellow phone case
- Green felt or paper
- Black marker
- Glue
Steps:
- Cut a green crown shape out of felt or paper for the pineapple’s leaves.
- Glue the leaves to the top of the phone case.
- Use a black marker to draw the pattern of the pineapple on the yellow surface.
Rhinestone Phone Case
Make your phone sparkle by attaching rhinestones to the case for a glamorous look.
Materials Needed:
- Clear phone case
- Rhinestones (variety of sizes)
- Hot glue gun
Steps:
- Arrange rhinestones on the case to form a pattern or cover the entire surface.
- Use a hot glue gun to affix each rhinestone securely.
- Allow the glue to dry completely.
Emoji Design Phone Case
Express yourself with fun and colorful emoji designs on your phone case.
Materials Needed:
- Clear phone case
- Paint markers or acrylic paint
- Small paintbrush
Steps:
- Draw emoji faces on the back of your clear phone case using paint markers.
- Use small paintbrushes to add details and color.
- Let it dry, then apply a clear coat to protect your design.
Fabric & Lace Phone Case
Combine fabric and lace for a delicate, vintage-inspired phone case.
Materials Needed:
- Lace trim
- Fabric (such as cotton or linen)
- Clear phone case
- Scissors
- Hot glue gun
Steps:
- Cut the fabric to fit the back of the phone case.
- Attach the fabric to the case with glue, smoothing it down.
- Add a strip of lace along the edges or as a border for a romantic touch.
Beaded Phone Case
Create a phone case with beautiful beaded designs for a luxurious look.
Materials Needed:
- Clear phone case
- Beads (of different sizes and colors)
- Needle and thread or hot glue gun
Steps:
- Arrange beads on the phone case in the pattern or design of your choice.
- Either sew them onto the case using needle and thread or glue them in place.
- Allow the glue to dry thoroughly if using the hot glue method.
Tropical Beach Phone Case
Bring the beach to your phone with a tropical design.
Materials Needed:
- Clear phone case
- Sand (small amount)
- Miniature shells or beads
- Mod Podge
Steps:
- Apply a thin layer of Mod Podge to the back of the phone case.
- Sprinkle the sand on top, followed by small shells or beads.
- Seal everything with another layer of Mod Podge and let it dry.
Polka Dots Phone Case
Simple and stylish, a polka dot phone case is both easy and fun to make.
Materials Needed:
- Clear phone case
- Circular stickers or dot decals
- Acrylic paint (optional)
Steps:
- Place the polka dot stickers or decals on the back of the case in any pattern you like.
- Alternatively, use acrylic paint to create your own polka dots with a paintbrush.
- Let it dry and seal with a clear coat if necessary.
Galaxy Phone Case
Create your own galaxy design on your phone with paint.
Materials Needed:
- Black phone case
- Acrylic paints (blue, purple, black, white)
- Sponges or brushes
- Paint palette
Steps:
- Paint the case with black acrylic paint as the base color.
- Using sponges or brushes, dab on blue, purple, and white paints to create the galaxy effect.
- Add splatters of white paint to represent stars.
- Let the case dry completely.
Washi Tape Phone Case
An easy and customizable way to decorate your phone case is by using washi tape.
Materials Needed:
- Clear phone case
- Washi tape in different patterns and colors
- Scissors
Steps:
- Cut strips of washi tape and place them in a pattern or design on the case.
- Overlap or arrange the strips to create the look you want.
- Trim the excess tape around the edges of the case.
Tie-Dye Phone Case
Go retro with a bright tie-dye design on your phone case.
Materials Needed:
- White phone case
- Fabric dye or tie-dye kit
- Rubber bands
- Plastic bags or plastic wrap
Steps:
- Wet the phone case and tie it with rubber bands in different sections.
- Apply different colors of fabric dye to each section of the case.
- Wrap the case in plastic to set the dye, and let it dry completely.
Faux Fur Phone Case
Add luxury to your phone with a faux fur phone case.
Materials Needed:
- Faux fur fabric
- Clear phone case
- Hot glue gun
- Scissors
Steps:
- Cut the faux fur to fit the back of the case.
- Attach the faux fur to the case using hot glue, ensuring it sticks securely.
- Trim any excess fabric and let the glue dry.
Holographic Phone Case
Create a futuristic look with holographic film.
Materials Needed:
- Holographic film or paper
- Clear phone case
- Scissors
- Hot glue gun
Steps:
- Cut a piece of holographic film to fit the back of your phone case.
- Attach the film to the case with hot glue.
- Let it dry before using your case.
Wooden Phone Case
For a rustic or minimalist style, you can create a wooden phone case.
Materials Needed:
- Thin wooden veneer
- Clear phone case
- Scissors or craft knife
- Hot glue gun
Steps:
- Cut the wooden veneer to fit the back of the phone case.
- Use the glue gun to attach the wood securely.
- Trim off any excess wood and let the glue set.
Patchwork Phone Case
Repurpose old fabric scraps and create a patchwork design on your phone case.
Materials Needed:
- Fabric scraps
- Clear phone case
- Scissors
- Hot glue gun
Steps:
- Cut the fabric scraps into small squares or shapes.
- Arrange the pieces on the back of the case in a patchwork design.
- Use the hot glue gun to attach each piece to the case.
Tips for a Professional Finish
Achieving a polished, professional finish on your project requires attention to detail and the right techniques. Whether you’re painting furniture, touching up walls, or adding embellishments, these tips will help you avoid common mistakes and ensure your work looks flawless.
1. How to Avoid Smudges and Fingerprints
- Use Clean Tools: Make sure your brushes, rollers, or sponges are free from debris before you start.
- Wear Gloves: This will prevent oils from your hands from transferring to the surface, especially on delicate or glossy finishes.
- Work in a Clean Environment: Dust or grime can leave marks on freshly painted surfaces, so ensure the area is free from dust and dirt.
- Allow Paint to Dry Properly: Give each layer enough time to dry before handling, especially with glossy finishes that show fingerprints easily.
2. Ideas for Smoothing Out Rough Paint Lines
- Use a High-Quality Brush or Roller: A good brush or roller ensures an even finish without streaks or uneven paint distribution.
- Feather the Edges: When painting edges or trim, gently feather the paint at the borders to create a smooth transition from wall to trim.
- Sand Between Coats: Lightly sand between layers of paint to eliminate bumps and rough spots, creating a flawless surface.
- Try a Paint Edger Tool: These tools are designed to help you achieve sharp lines without the mess of masking tape.
3. Making Sure the Embellishments Stay in Place
- Use Strong Adhesives: Choose the right adhesive for your embellishments (e.g., wood glue, super glue, or heavy-duty craft glue) to ensure they stay securely in place.
- Secure with Painter’s Tape: Temporarily tape down embellishments until the glue sets for a secure hold without shifting.
- Seal the Embellishments: After attaching the embellishments, apply a clear sealant to protect them and keep them intact.
Final Tips and Care Instructions for Your DIY Phone Case
Congratulations on completing your DIY phone case! To keep your creation looking great and lasting longer, here are some essential care tips, along with ideas for future projects.
1. Cleaning Your Phone Case:
- Regularly wipe the surface with a soft, damp cloth to remove dust, dirt, and fingerprints. Avoid abrasive materials that could scratch the design.
- For tougher stains, use a mild soap solution and gently scrub with a soft brush or cloth.
- Always dry the case completely before placing it back on your phone to prevent moisture damage.
2. Protecting from Wear and Tear:
- If your design involves paint or markers, consider sealing it with a clear acrylic spray or resin to add an extra layer of protection against scratches and fading.
- Keep your phone away from sharp objects or rough surfaces that could damage your case.
- Avoid dropping your phone to prevent physical damage to both the case and your phone.
3. Ideas for Future DIY Projects:
- Adding Texture: Experiment with materials like fabric, leather, or even textured paints to create more tactile designs. Try incorporating 3D elements for a unique feel!
- Color Exploration: Try blending different colors using techniques like marbling, ombre, or gradient effects to make your phone case even more vibrant and eye-catching.
- Personalization: Add stickers, charms, or even small pieces of your favorite quotes or artwork to make your case truly unique.
4. Ensuring Functionality:
- Be mindful of phone buttons, charging ports, and speakers when designing your case. Make sure that the case doesn’t cover these areas, as it could impact the usability of your phone.
- Avoid making any design elements that could interfere with wireless charging capabilities or the phone’s camera lens.
- Double-check that your case fits securely and doesn’t add too much bulk, which could make the phone difficult to hold or operate.
FAQ
What materials do I need to make a DIY phone case?
To create a DIY phone case, you will need a blank phone case (either plastic, silicone, or leather), craft supplies like paints, markers, stickers, fabric, hot glue gun, rhinestones, or even washi tape. It depends on the style you’re aiming for!
How do I measure my phone to get the right case size?
Measure your phone’s length, width, and height to ensure you buy a case that fits perfectly. You can also find cases specifically made for your phone model, which can simplify this process.
Can I use fabric to make a DIY phone case?
Yes, fabric is a great option for a DIY phone case. You can cut and sew the fabric to fit the case, or you can even glue it on. Make sure to choose a sturdy fabric to offer enough protection.
What paint works best for decorating a DIY Phone Case?
Acrylic paint works best for decorating phone cases because it’s durable, flexible, and dries quickly. For more intricate designs, you may want to use fabric paints or special markers designed for plastic.

Hi, I’m Victoria, an art and craft teacher at Newark City Schools, where I have the joy of working with middle school students to help them explore their creativity and develop their artistic talents. I believe that art is a powerful way for students to express themselves, and I strive to make every lesson a fun, engaging, and inspiring experience.
I created this website to share the art and craft projects, techniques, and resources that I use in my classroom, hoping to inspire both educators and young artists alike. Whether you’re a teacher looking for new ideas or a student eager to try something new, I’m excited to provide creative tools and projects that anyone can enjoy.
When I’m not in the classroom, I love experimenting with different art forms and learning new crafting techniques. My goal is to help others discover the joy of making things with their hands, and I hope my website serves as a space for everyone to explore their creative potential.