
Clay accessories for kids are fun, versatile, and educational tools that allow children to express their creativity and engage in hands-on activities. These accessories range from simple clay sets to intricate molds and tools that help kids shape and sculpt various objects. Clay play is more than just a pastime; it is a valuable learning experience that nurtures a child’s imagination and enhances their fine motor skills. By using their hands to mold and manipulate the clay, children improve their hand-eye coordination and dexterity, while also fostering problem-solving abilities. This type of creative play supports cognitive development and helps kids build confidence in their own artistic abilities.
The importance of creative play in child development cannot be overstated. It allows children to step away from structured activities and engage in unstructured exploration. This freedom fosters a sense of independence and self-expression, as well as promoting emotional well-being. When children work with clay, they not only tap into their imaginative abilities but also develop problem-solving skills as they figure out how to manipulate the material into the desired shape.
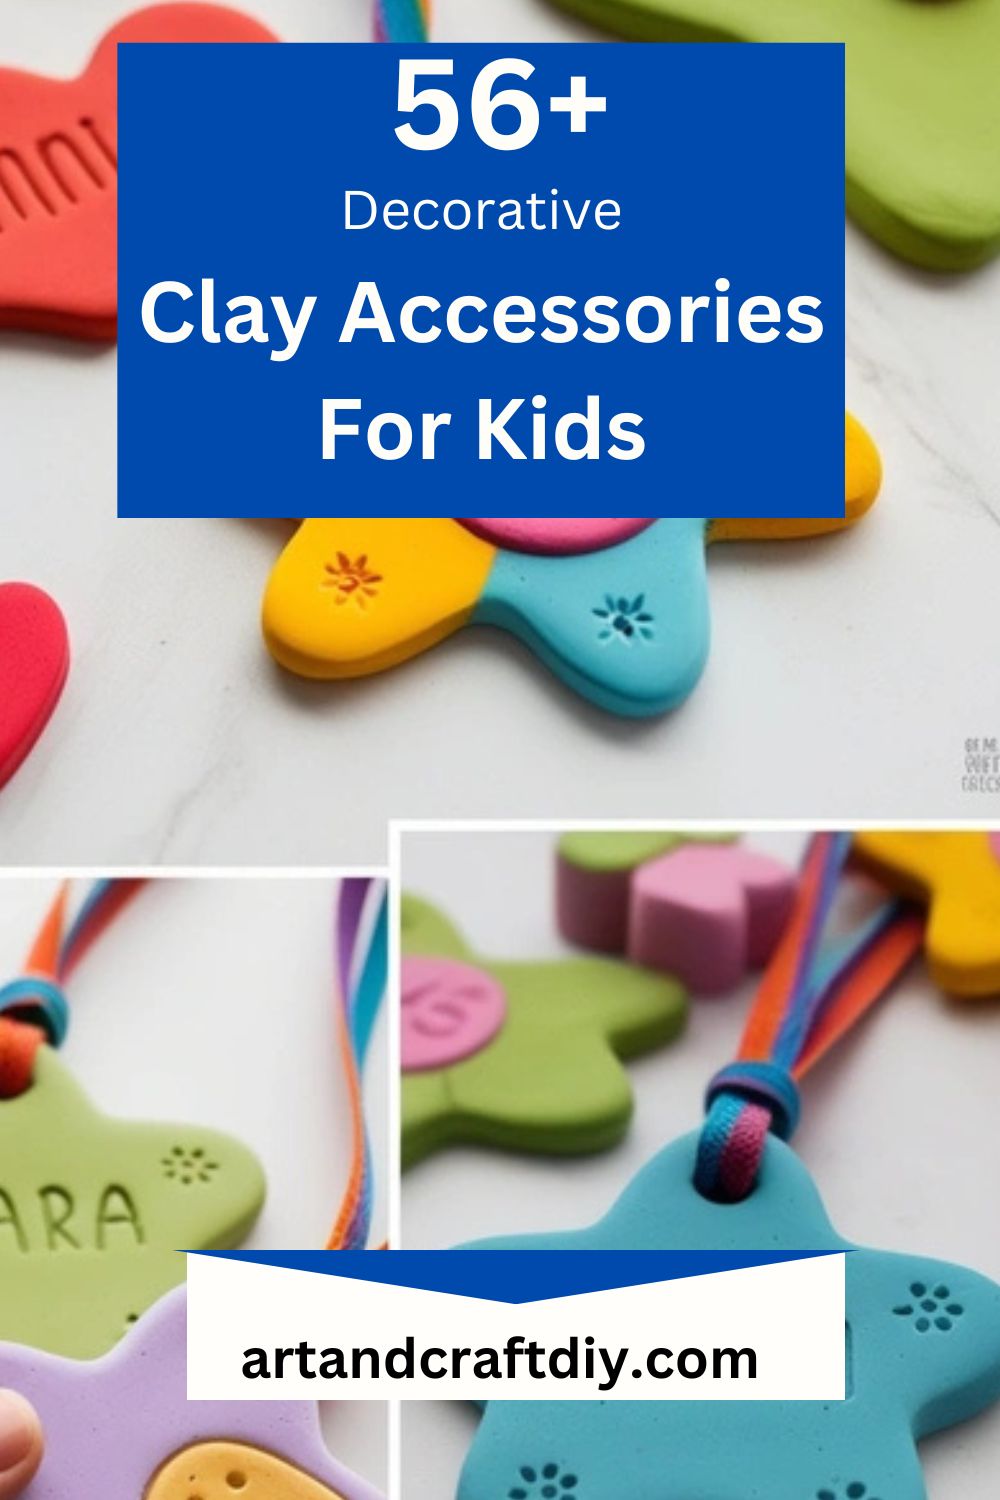
Clay Accessories For Kids
Clay accessories for kids offer an exciting way for children to explore their creativity and enhance essential skills while having fun. Whether it’s colorful modeling clay, texture rollers, or shape-cutting tools, these accessories provide endless opportunities for artistic expression. Kids can create everything from simple shapes to complex figures, encouraging them to think outside the box and experiment with different textures and designs.
Clay Animal Figurines
Introduce kids to the wonderful world of animals by making cute animal figurines. This activity helps with creativity and motor skills.
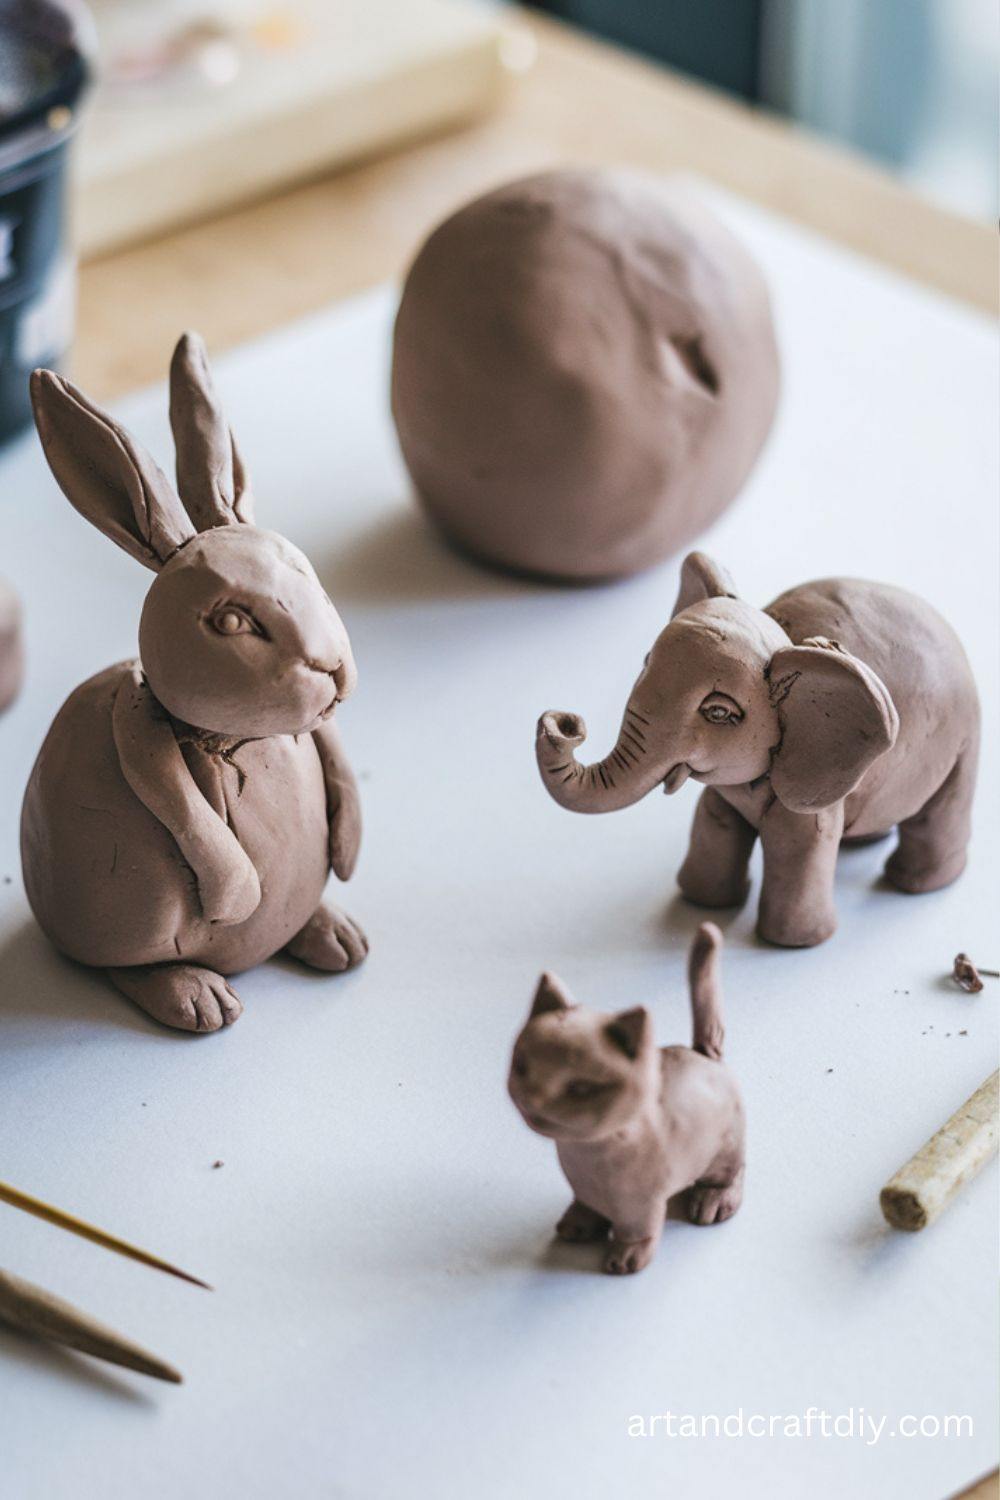
- Materials: Air-dry clay, sculpting tools, acrylic paints.
- Steps:
- Roll the clay into small balls for the head and body.
- Shape the body and attach the head using water to blend the seams.
- Add smaller pieces for legs, ears, and tails.
- Use sculpting tools to add details like eyes and fur texture.
- Let the figurine dry and paint it to bring your animal to life.
Clay Bracelets
Making clay bracelets is a fun and personal way to wear your art.
- Materials: Polymer clay, rolling pin, cookie cutters, clay tools, bracelet mold.
- Steps:
- Roll out the clay to a flat surface with a rolling pin.
- Use a cookie cutter or bracelet mold to cut out the clay.
- Create designs like hearts, stars, or swirls by shaping small clay pieces.
- Let the bracelet dry (if air-dry) or bake (if polymer clay).
- Assemble the clay pieces onto a bracelet form.
Clay Name Tags
A personalized name tag using clay can be a fun craft for kids to make at home or school.
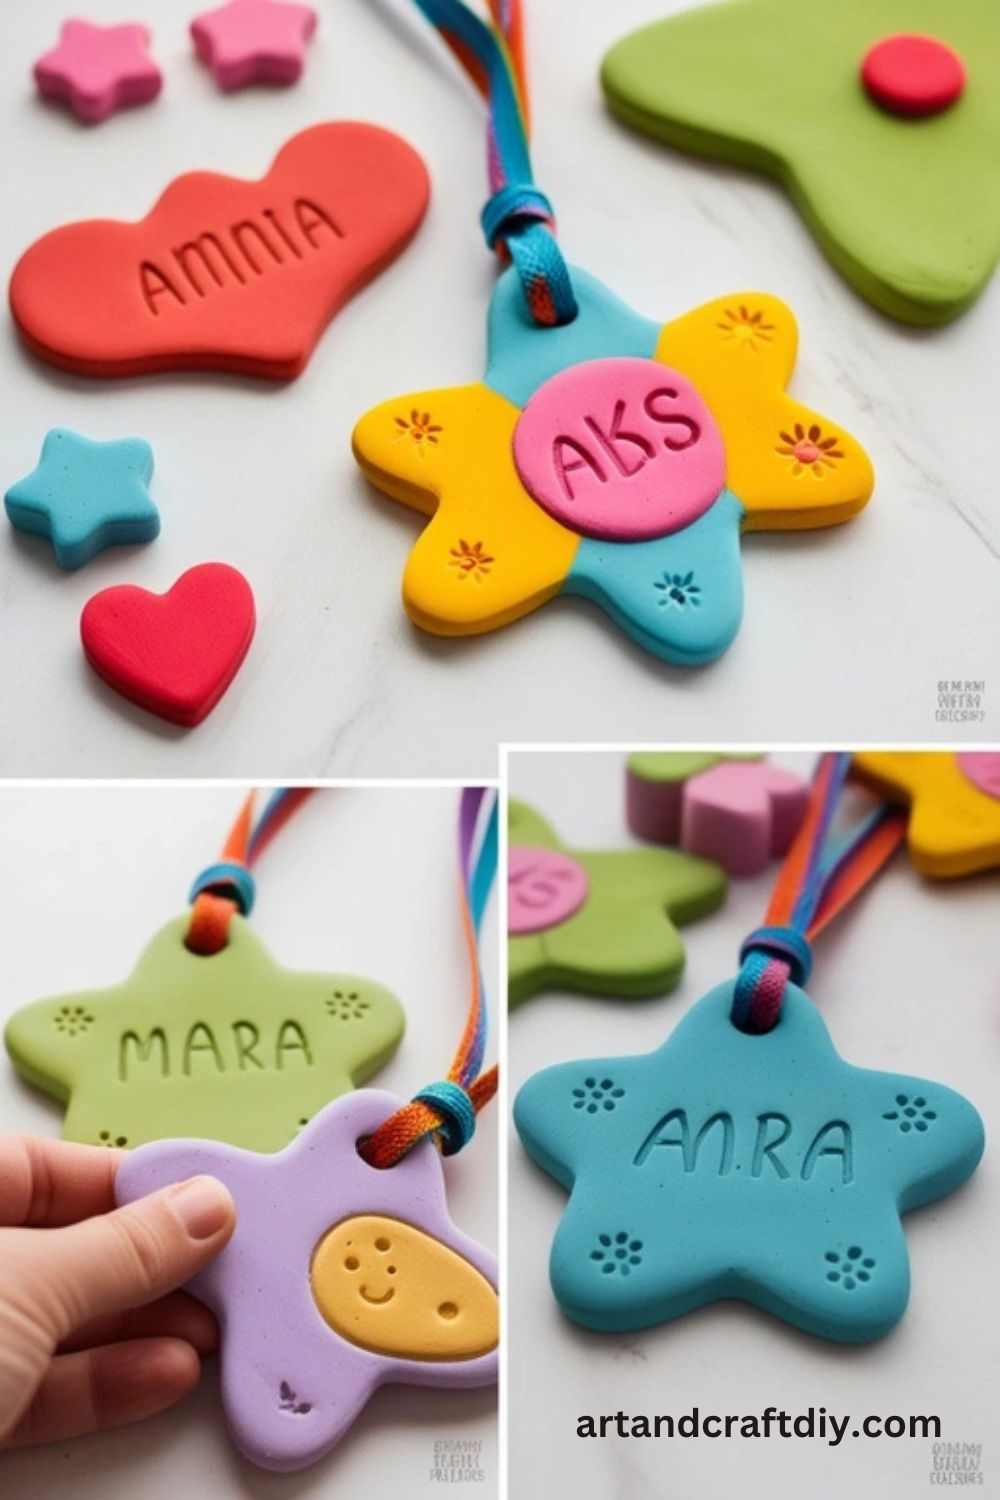
- Materials: Air-dry clay, alphabet stamps, acrylic paints, varnish.
- Steps:
- Roll a piece of clay into a flat shape to form a name tag.
- Use alphabet stamps to imprint the child’s name on the clay.
- Decorate the edges with different shapes or patterns.
- Let the clay dry completely and paint the name tag.
- Seal with a varnish for a shiny finish.
DIY Clay Flower Pots
Kids can make their own flower pots to decorate and plant small plants.

- Materials: Air-dry clay, rolling pin, cookie cutters, paint.
- Steps:
- Roll the clay into a thick slab and cut it into a circle for the base.
- Roll another slab into a long strip to form the sides of the pot.
- Attach the sides to the base using water to smooth the seam.
- Let the pot dry and then paint it with vibrant colors.
- Add a plant once it’s completely dry.
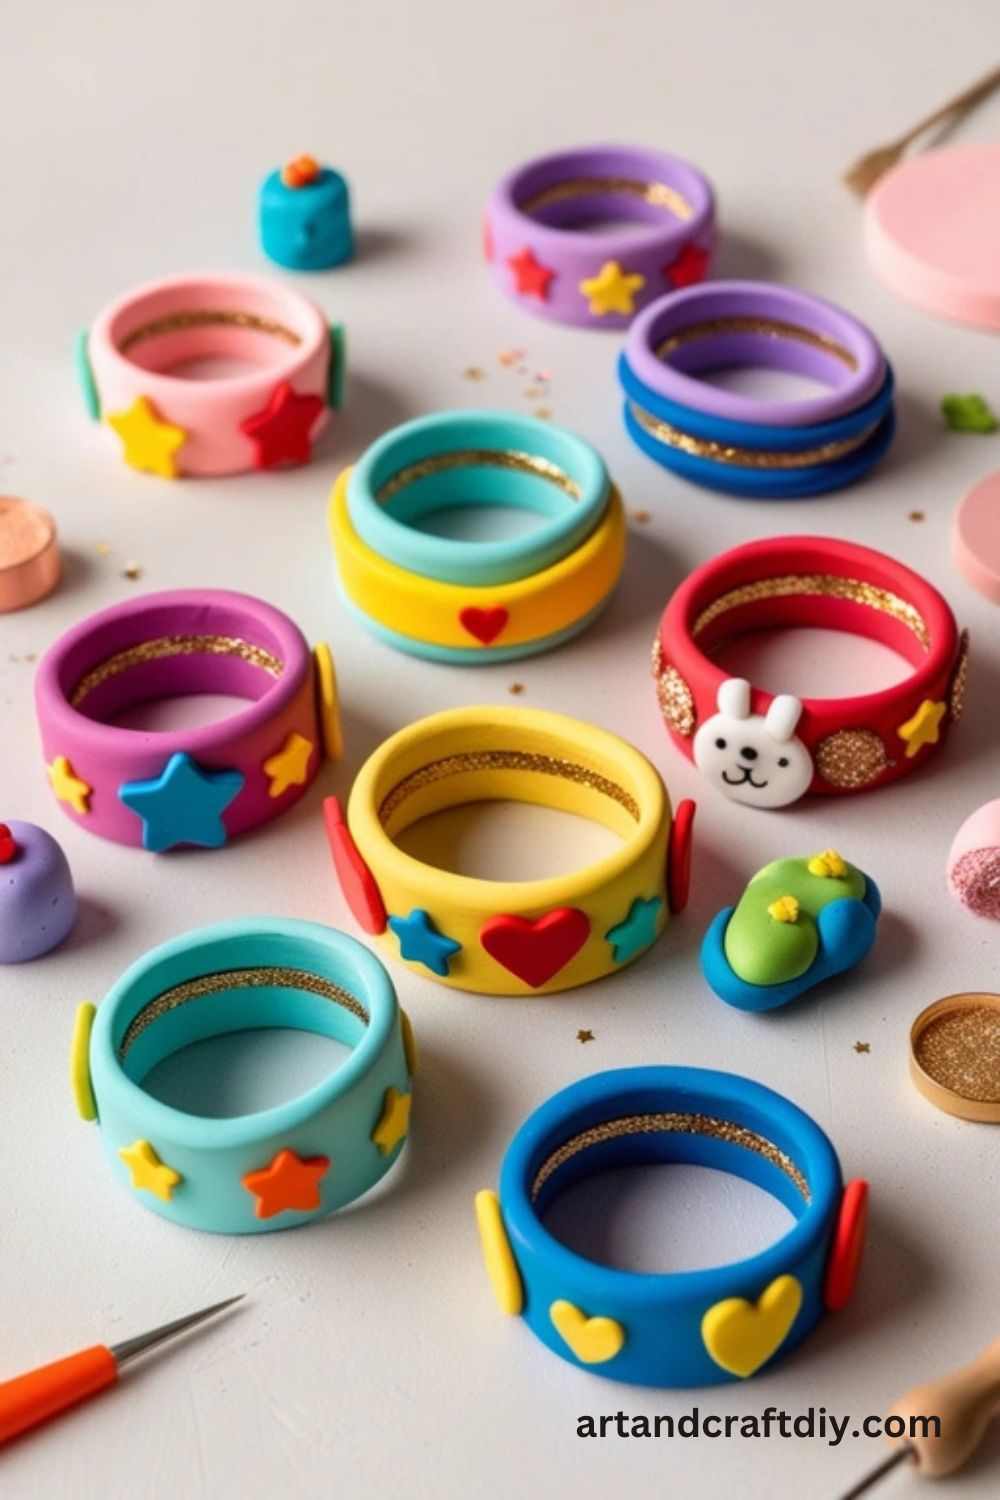
Clay Rings
Creating clay rings gives kids a chance to design their own wearable accessories.
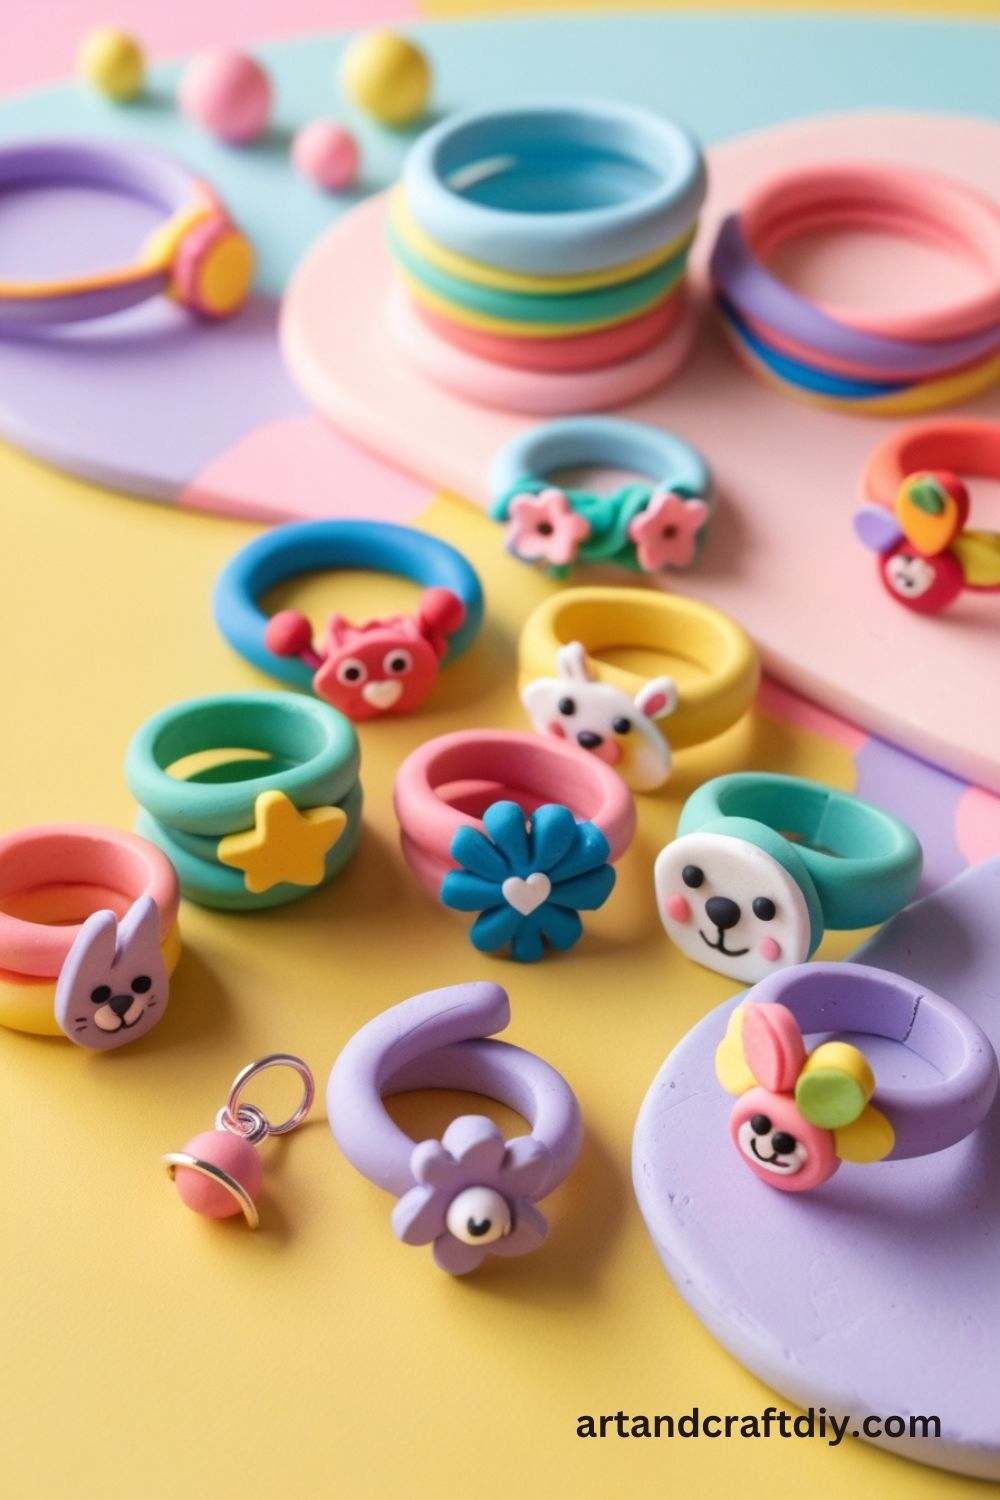
- Materials: Polymer clay, rolling pin, ring molds, clay tools.
- Steps:
- Roll a small piece of clay into a ball.
- Flatten it using a rolling pin, then cut into a small circle.
- Shape it around a ring mold or a round object to make a ring.
- Use sculpting tools to add designs or patterns.
- Bake the ring if using polymer clay, then let it cool and wear it.
Colorful Clay Keychains
Kids can make their own keychains, which are fun to give as gifts or keep for themselves.
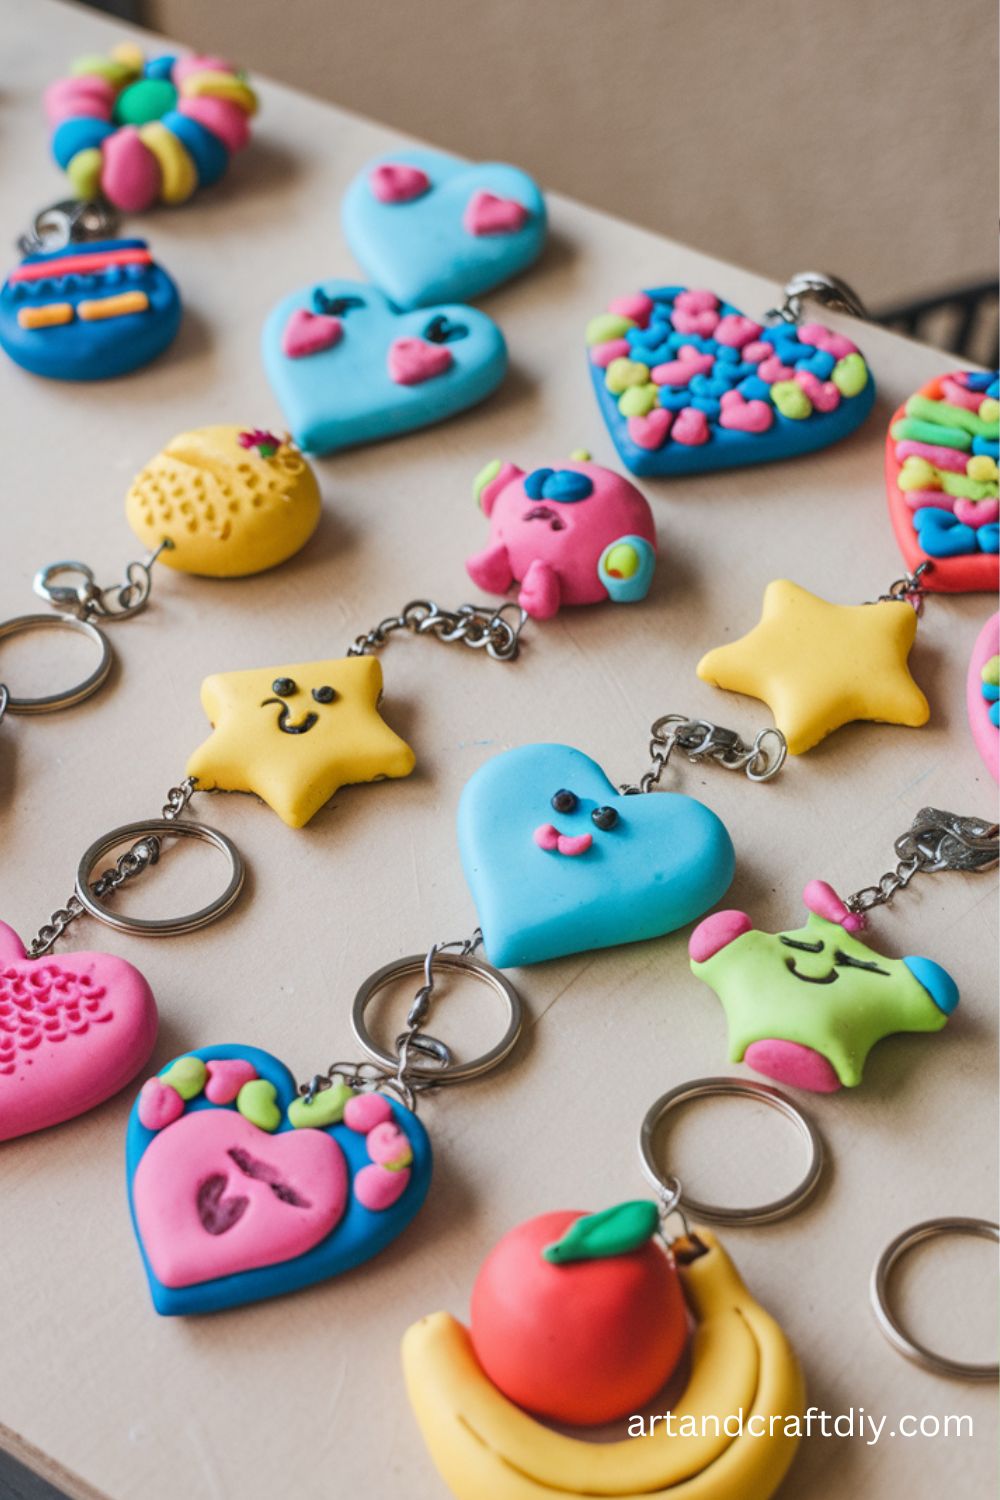
- Materials: Polymer clay, keychain rings, rolling pin, clay tools.
- Steps:
- Roll out a small piece of clay into a flat shape.
- Cut the clay into the desired shape (heart, star, or animal).
- Poke a small hole at the top for the keychain ring.
- Bake the keychain if using polymer clay.
- Attach the keychain ring once it’s cool.
DIY Clay Magnets
Kids can create their own colorful magnets to decorate their fridge or magnetic boards.
- Materials: Air-dry clay, magnets, acrylic paints, hot glue.
- Steps:
- Roll clay into small shapes, such as circles, squares, or animals.
- Use sculpting tools to add details.
- Paint the clay pieces with bright colors.
- Attach a magnet to the back of each piece using hot glue.
- Let dry before sticking them to a metal surface.
Clay Cupcake Toppers
Miniature clay cupcakes make perfect decorations for birthday cakes or cupcakes.

- Materials: Polymer clay, rolling pin, sculpting tools, oven.
- Steps:
- Roll small pieces of clay into tiny balls for the cupcake base and top.
- Shape the base into a rounded shape.
- Add a swirl on top to form the frosting.
- Use tools to add extra details like sprinkles.
- Bake in the oven and let them cool before using as cake toppers.
Clay Earrings Set
Creating custom clay earrings lets kids design their own fashion accessories.
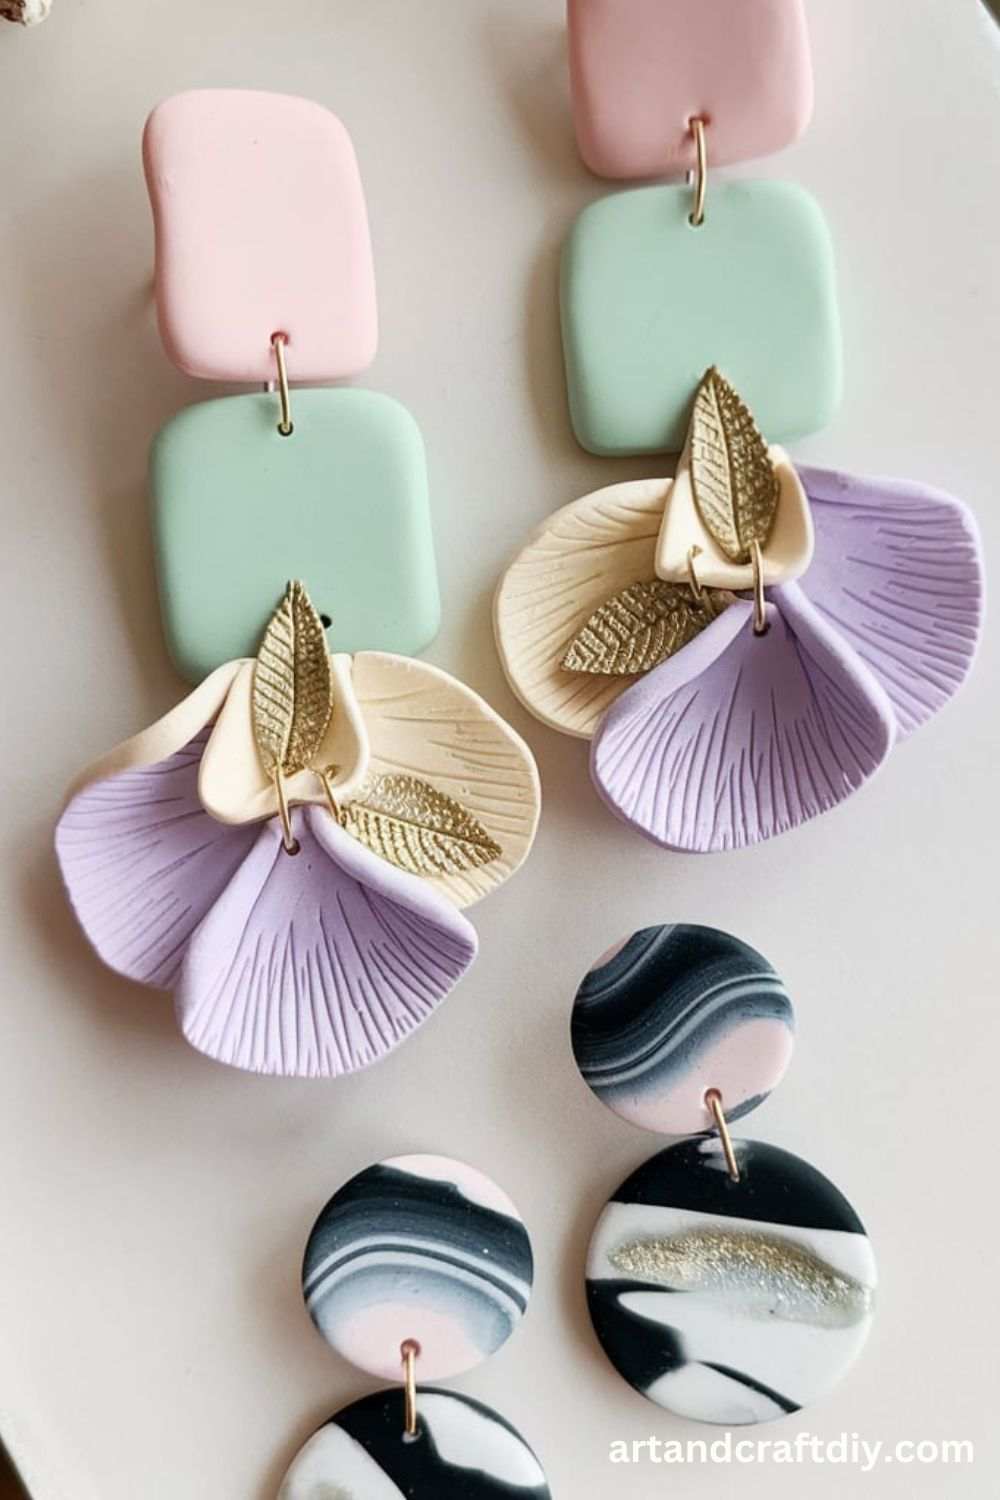
- Materials: Polymer clay, earring hooks, clay tools, acrylic paints.
- Steps:
- Roll the clay into small shapes such as circles, hearts, or geometric patterns.
- Use sculpting tools to add texture or designs to the surface.
- Make a small hole at the top for the earring hook.
- Bake the clay in the oven to set the design.
- Attach earring hooks once the clay is cooled.
Clay Coasters
Kids can make their own personalized coasters to use around the house.
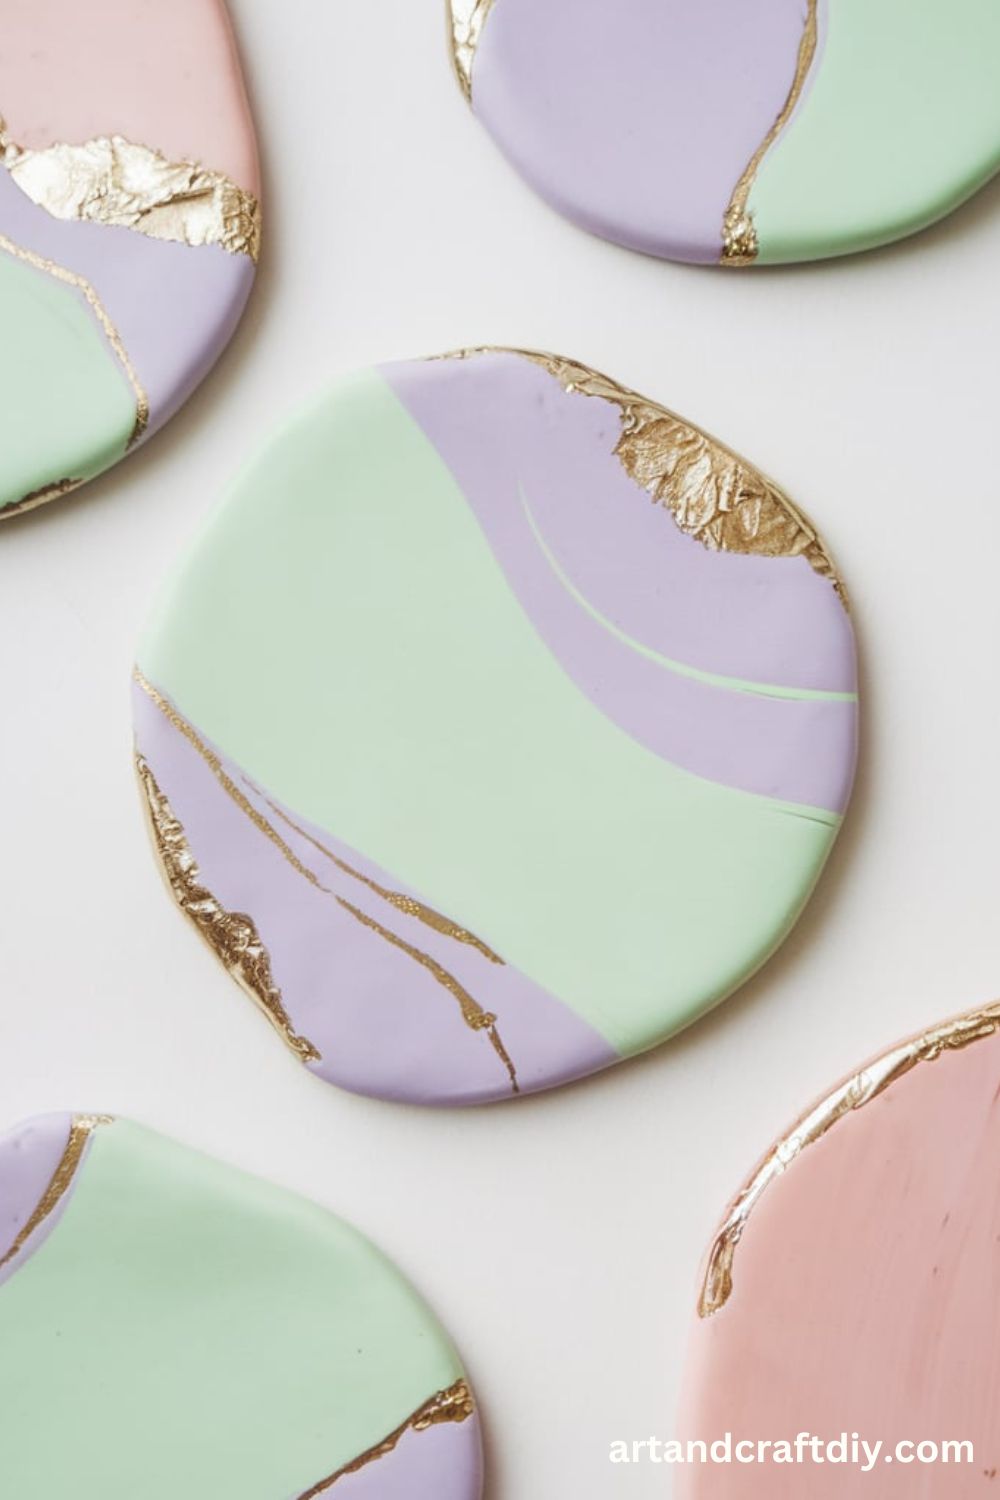
- Materials: Air-dry clay, rolling pin, acrylic paints, varnish.
- Steps:
- Roll out the clay into a flat circle or square shape.
- Use sculpting tools to add designs or patterns on top.
- Let the coasters dry completely before painting them.
- Paint the coasters with fun designs or patterns.
- Apply a varnish to protect the paint and make it durable.
Clay Pencil Holders
A simple craft that allows kids to organize their pencils and pens in a cute way.
- Materials: Air-dry clay, acrylic paints, sculpting tools.
- Steps:
- Roll out a piece of clay into a cylinder shape.
- Join the ends to form a tube for holding pencils.
- Use sculpting tools to add fun details or textures around the holder.
- Let the clay dry, then paint it with your favorite colors.
- Decorate with stickers or stamps.
Clay Pinch Pots
Making pinch pots is a classic and easy clay activity for young kids.
- Materials: Air-dry clay, paint, brushes.
- Steps:
- Roll a piece of clay into a ball.
- Pinch the sides with fingers to create a bowl shape.
- Smooth out any rough edges and allow the pot to dry.
- Once dry, paint the pot with bright colors.
- Let the paint dry and use it as a small holder for trinkets.
Clay Snowflakes
Perfect for winter-themed crafts, these snowflakes are beautiful and easy to make.
- Materials: Air-dry clay, cookie cutters, glitter, paint.
- Steps:
- Roll the clay into a flat sheet.
- Use a snowflake cookie cutter to cut out the shape.
- Add texture or additional designs using sculpting tools.
- Let dry completely before painting.
- Add glitter for extra sparkle, then allow it to dry.
Clay Dinosaurs
Bring dinosaurs to life with colorful clay figurines.
- Materials: Air-dry clay, sculpting tools, acrylic paints.
- Steps:
- Roll out clay into different sizes for the dinosaur’s body, head, and tail.
- Shape the pieces to resemble a dinosaur shape.
- Attach the pieces together using a little water.
- Add details like scales or spikes using sculpting tools.
- Let dry and paint the dinosaur in vibrant colors.
Clay Butterflies
Colorful butterflies made from clay are an easy and fun craft for kids.
- Materials: Air-dry clay, rolling pin, sculpting tools, acrylic paints.
- Steps:
- Roll out a piece of clay and flatten it with a rolling pin.
- Cut out two symmetrical butterfly wings using a template or freehand.
- Shape a small body for the center of the butterfly.
- Attach the wings and body together, smoothing the edges.
- Paint the butterfly in beautiful colors and designs.
Clay Photo Frames
Let kids create their own frames to display their favorite photos.
- Materials: Air-dry clay, acrylic paints, photo frame backing, glue.
- Steps:
- Roll the clay into a flat sheet and cut out a frame shape.
- Cut out a hole in the center for the photo.
- Decorate the frame with colorful clay flowers, hearts, or patterns.
- Allow the frame to dry completely before painting.
- Attach a photo frame backing to hold the photo in place.
Clay Stars
Create magical star-shaped decorations with bright colors.
- Materials: Air-dry clay, star cookie cutter, glitter, paint.
- Steps:
- Roll out a flat piece of clay and cut out star shapes using a cookie cutter.
- Add textures or patterns to the stars using tools or stamps.
- Let the clay dry completely before painting.
- Paint the stars with bold colors or add glitter for extra sparkle.
- Once dry, they can be hung or used as decorations.
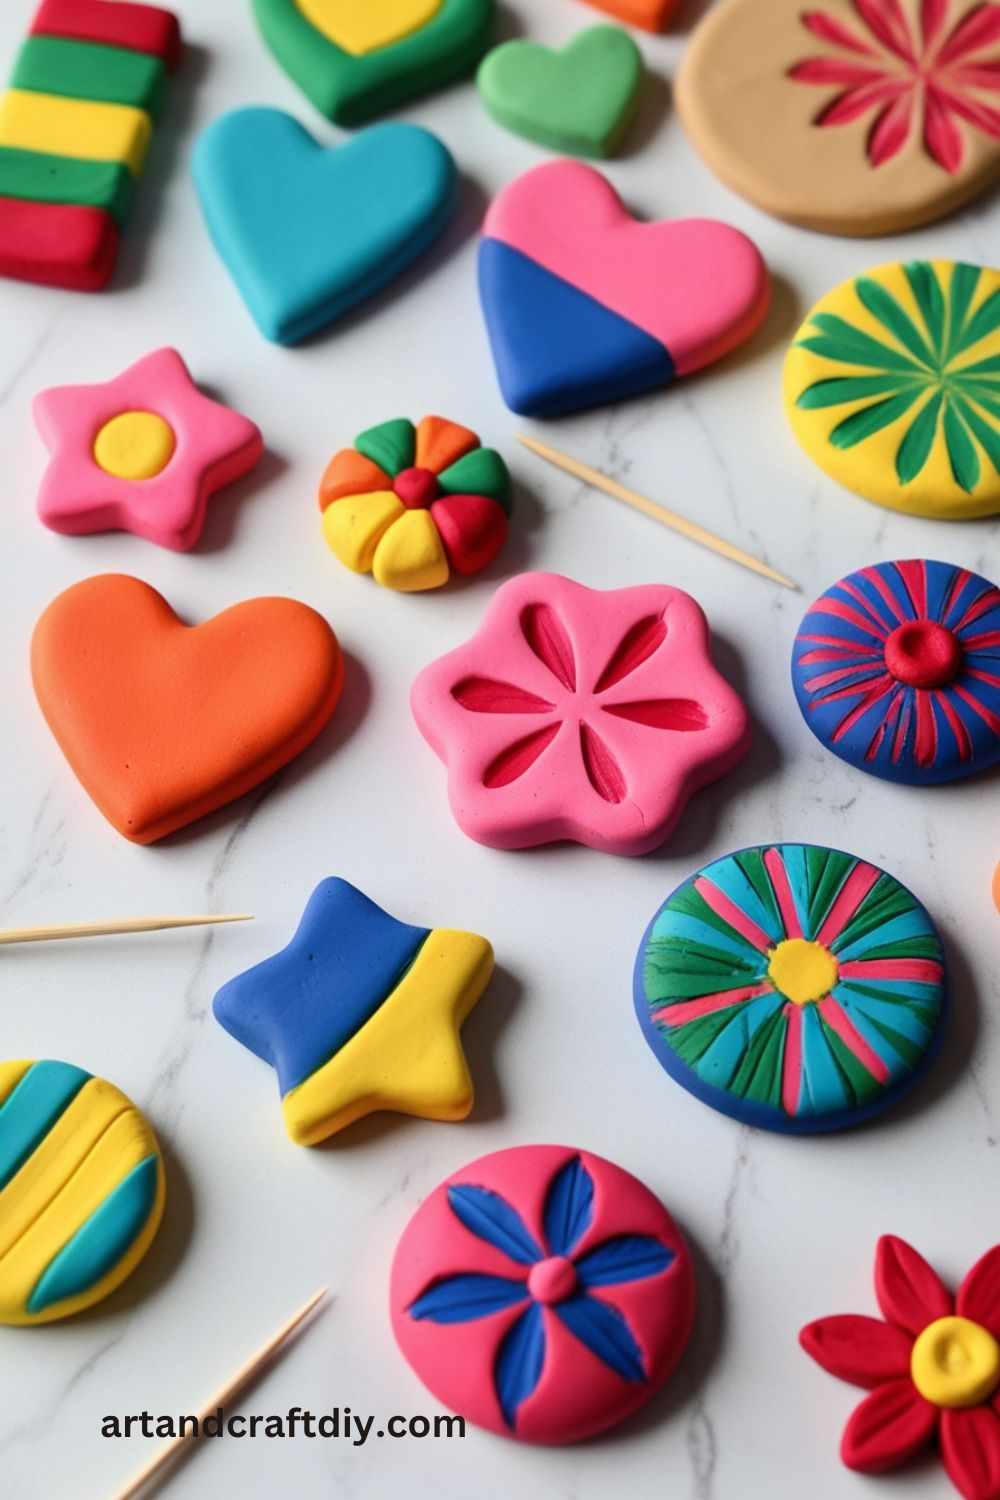
Clay Hearts
A simple yet heartfelt craft for making clay hearts for any occasion.
- Materials: Air-dry clay, sculpting tools, paint, glitter.
- Steps:
- Roll out a piece of clay and shape it into a heart.
- Add details like texture, dots, or swirls using sculpting tools.
- Allow the heart to dry and then paint it with your favorite colors.
- Add glitter or paint the edges for a unique touch.
- Display or give away as a special gift.
Clay Ice Cream Cones
Deliciously cute, these clay ice cream cones can be made in various colors.
- Materials: Air-dry clay, paint, small cone shapes.
- Steps:
- Roll a small cone shape from clay for the base.
- Roll different colors of clay into scoops and stack them on top of the cone.
- Use sculpting tools to add details like texture for the ice cream.
- Allow to dry, then paint the cones and scoops with realistic colors.
- Decorate with fake sprinkles if desired.
Clay Butterflies on Sticks
Kids can make their own butterfly decoration on sticks to place in their gardens or rooms.
- Materials: Air-dry clay, wooden sticks, paint.
- Steps:
- Roll the clay into a butterfly shape.
- Attach a wooden stick to the bottom of the butterfly.
- Paint the butterfly with bright colors and patterns.
- Allow to dry, and then place the butterflies outside or around the room.
Clay Stars on Sticks
Create star decorations on sticks for a dreamy effect.
- Materials: Air-dry clay, wooden sticks, paint.
- Steps:
- Roll clay into small star shapes.
- Attach wooden sticks to the stars.
- Paint them in bright colors or add glitter for a magical effect.
- Let the stars dry and stick them in flower pots or vases.
Clay Owls
Create cute and quirky clay owls as a decoration or gift.
- Materials: Air-dry clay, sculpting tools, paint.
- Steps:
- Roll the clay into an owl shape with a round body and a smaller head.
- Add wings, eyes, and a beak using sculpting tools.
- Let the owl dry, then paint it in natural or whimsical colors.
- Display it as an adorable desk or shelf decoration.
Clay Sun Catchers
Make colorful sun catchers from clay to hang in windows.
- Materials: Air-dry clay, cookie cutters, string, paint.
- Steps:
- Roll out the clay and cut shapes like circles, hearts, or stars.
- Poke a hole at the top for the string.
- Let the clay dry, then paint it with bright, translucent colors.
- Hang the sun catchers in windows where sunlight can shine through them.
Clay Frogs
Fun and whimsical frogs made from clay are a hit with young kids.
- Materials: Air-dry clay, sculpting tools, paint.
- Steps:
- Roll out clay into two spheres for the body and head.
- Attach the body to the head and create legs using smaller pieces of clay.
- Use sculpting tools to add details like eyes and mouth.
- Let dry, then paint the frog in bright green or colorful patterns.
Clay Fish
Create underwater friends with these colorful clay fish.
- Materials: Air-dry clay, sculpting tools, paint.
- Steps:
- Roll a small ball of clay for the fish’s body.
- Shape the fins and tail and attach them to the body.
- Use sculpting tools to add gills, eyes, and other details.
- Let dry and paint the fish in vibrant colors.
Clay Ballerinas
Create a graceful clay ballerina figurine for display.
- Materials: Air-dry clay, sculpting tools, acrylic paints.
- Steps:
- Roll the clay into a small body shape and form legs and arms.
- Add a tutu or skirt around the body using thin layers of clay.
- Sculpt the head and hair into a ballerina style.
- Let the figurine dry and paint the details of the ballerina.
Clay Cupcake Rings
Small cupcake designs make cute and sweet rings for kids.
- Materials: Polymer clay, ring bases, sculpting tools.
- Steps:
- Shape a small piece of clay into a cupcake base.
- Create a swirl of clay for the frosting.
- Attach the pieces together and add tiny details like sprinkles.
- Let the cupcake ring dry, then attach it to a ring base.
Clay Handprints
Capture a memory by creating a clay handprint for keepsakes.
- Materials: Air-dry clay, rolling pin, paints.
- Steps:
- Roll out a piece of clay into a flat sheet.
- Gently press the child’s hand into the clay to make a handprint.
- Smooth the edges and let the clay dry.
- Paint the handprint and add the child’s name or date.
Clay Birds
Kids can craft cute little birds with air-dry clay for decoration or play.
- Materials: Air-dry clay, sculpting tools, paint.
- Steps:
- Shape the body of the bird using a small ball of clay.
- Form the wings and attach them to the bird’s body.
- Sculpt a small beak and eyes.
- Let the bird dry, then paint it in bright colors.
Clay Jellyfish
This whimsical craft brings an underwater creature to life.
- Materials: Air-dry clay, paint, yarn or string.
- Steps:
- Roll a small ball of clay for the body.
- Shape the tentacles and attach them to the body.
- Let the jellyfish dry and then paint it in fun colors.
- Add yarn or string to hang it as a mobile or decoration.
Caring for Clay Accessories: A Guide to Preserving Your Pieces
Clay accessories, whether they are jewelry, home decor items, or other artistic creations, can add a unique touch to any outfit or space. These handmade pieces are often delicate and need proper care to maintain their beauty over time. With the right storage, cleaning, and preservation practices, you can ensure your clay accessories stay in great shape. Here are some essential tips for storing, preserving, and cleaning your clay items:
Tips on Storing and Preserving Clay Accessories:
- Store in a Cool, Dry Place: Avoid direct sunlight and extreme heat, as this can cause the clay to fade or crack over time. Keep your accessories in a cool, dry location to maintain their quality.
- Use Soft Pouches or Boxes: For jewelry or smaller accessories, store them in fabric pouches or cushioned boxes to protect them from scratches and damage.
- Avoid Heavy Pressure: When storing multiple items, make sure they are not stacked too tightly or with heavy objects on top. This can cause cracks or dents in the clay.
- Keep Away from Water: Prolonged exposure to moisture can damage clay accessories, so it’s important to keep them dry. Avoid wearing them in the shower or during heavy physical activity that might cause them to get wet.
Cleaning Instructions for Different Types of Clay Accessories:
- Polymer Clay:
- Gentle Wipe: Use a soft cloth or microfiber towel to gently wipe away dust or dirt. Avoid using abrasive materials that could scratch the surface.
- Mild Soap Solution: If more cleaning is needed, dip a cloth in a mixture of mild soap and water. Gently clean the surface, then dry with a clean cloth.
- Avoid Harsh Chemicals: Never use harsh cleaning agents or solvents, as these can damage the finish.
- Air-Dried Clay:
- Dry Dusting: Air-dried clay accessories are more delicate than polymer clay, so it’s best to dust them off with a soft brush or cloth to avoid damaging the surface.
- Spot Cleaning: If necessary, use a damp cloth for spot cleaning, but make sure to dry the item thoroughly after.
- Avoid Soaking: Air-dried clay should never be submerged in water, as it can weaken and lose its shape.
- Ceramic Clay:
- Soft Cloth Cleaning: For ceramic accessories, use a soft cloth or sponge dampened with water to clean the surface. Avoid scrubbing too hard.
- Avoid Abrasive Cleaners: Like other clay types, avoid using any abrasive or chemical cleaners on ceramic pieces to preserve the texture and color.
By following these simple tips for storage and cleaning, your clay accessories can maintain their charm and last for years to come!
FAQ
What are clay accessories for kids?
Clay accessories for kids are decorative items or tools made from clay, such as bracelets, necklaces, keychains, and charms, designed for creative activities and play.
Are clay accessories safe for kids?
Yes, most clay accessories for kids are made from non-toxic, child-safe materials. It’s important to check the packaging for safety information, especially when it comes to small parts or components.
What type of clay is used for kids’ accessories?
Polymer clay is commonly used for kids’ accessories because it’s safe, easy to mold, and hardens when baked. Air-dry clay is also popular for its convenience as it doesn’t require baking.
Can kids make their own clay accessories?
Absolutely! Kids can create their own clay accessories using molds, cookie cutters, or simply by shaping the clay by hand. Craft kits are available to help guide the creative process.

Hi, I’m Victoria, an art and craft teacher at Newark City Schools, where I have the joy of working with middle school students to help them explore their creativity and develop their artistic talents. I believe that art is a powerful way for students to express themselves, and I strive to make every lesson a fun, engaging, and inspiring experience.
I created this website to share the art and craft projects, techniques, and resources that I use in my classroom, hoping to inspire both educators and young artists alike. Whether you’re a teacher looking for new ideas or a student eager to try something new, I’m excited to provide creative tools and projects that anyone can enjoy.
When I’m not in the classroom, I love experimenting with different art forms and learning new crafting techniques. My goal is to help others discover the joy of making things with their hands, and I hope my website serves as a space for everyone to explore their creative potential.