
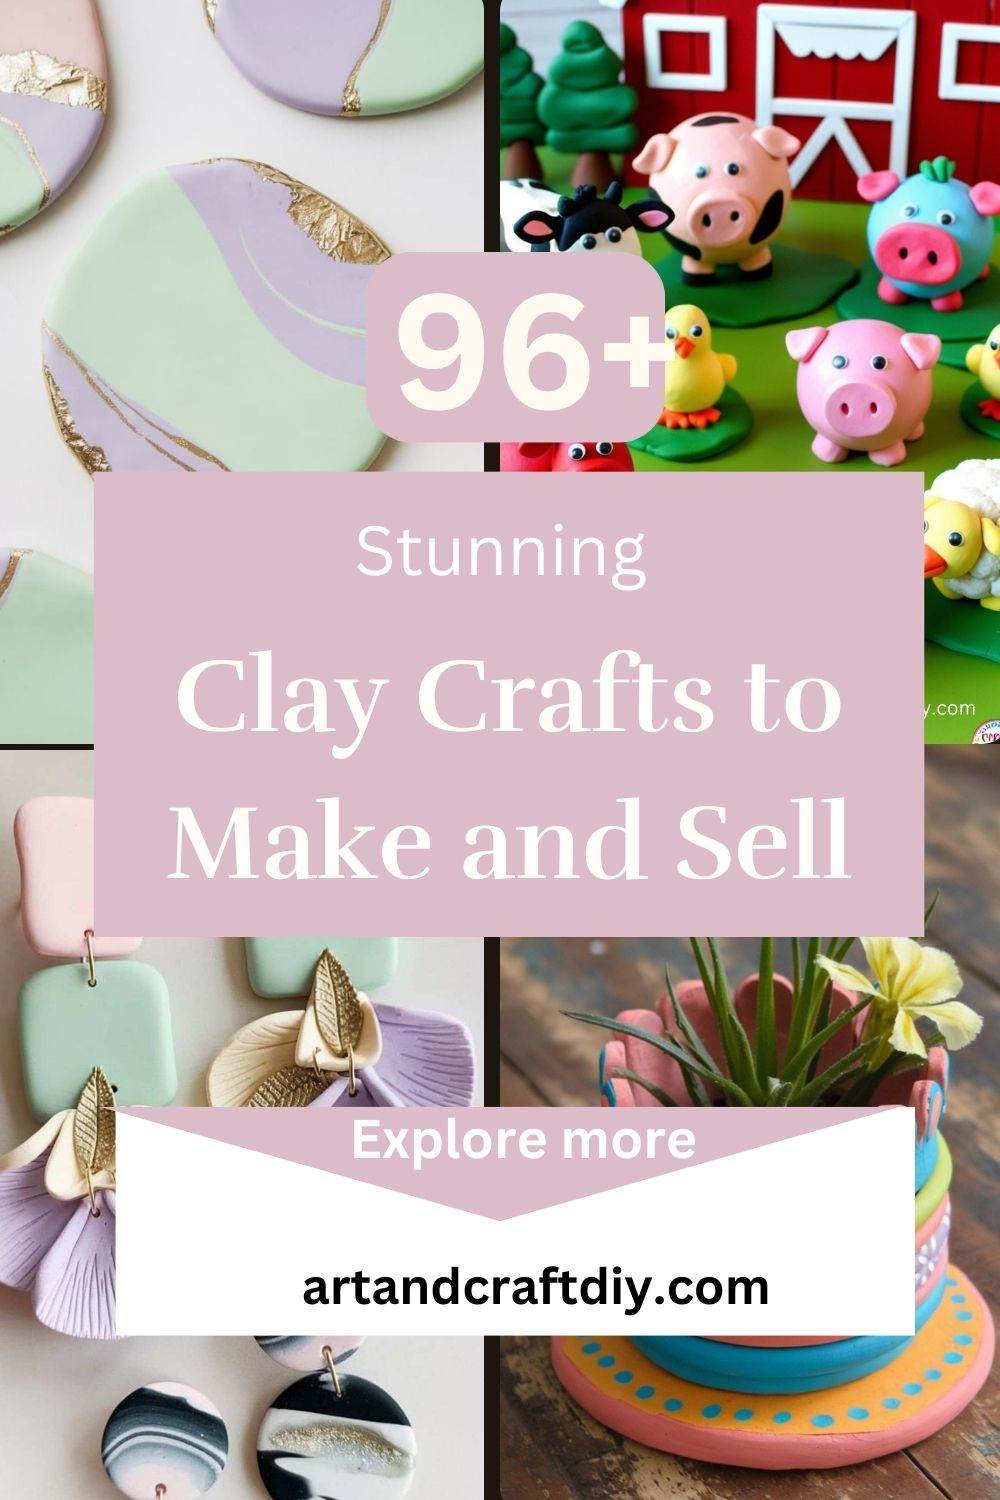
Clay Crafts to Make and Sell offer a creative and profitable avenue for hobbyists and artisans alike. Whether you’re molding intricate sculptures or designing functional pottery, the versatility of clay allows for endless possibilities. From decorative pieces to useful household items, working with clay can appeal to a broad audience. The increasing popularity of handmade goods, as people seek unique and personalized items, has further fueled the demand for clay crafts. As a result, this craft not only provides an outlet for artistic expression but also presents a great opportunity for turning creativity into income.
Working with clay offers numerous benefits, including its versatility, durability, and broad appeal. It can be shaped into practically anything—from delicate jewelry to sturdy planters—giving creators the freedom to explore different styles and techniques. Clay is also known for its durability, ensuring that items crafted from it will stand the test of time. Moreover, handmade clay products have a timeless charm, attracting buyers who appreciate craftsmanship, individuality, and sustainability. As a result, the market for handmade clay goods continues to expand, with people seeking one-of-a-kind creations that add personality and value to their lives.
Clay Crafts to Make and Sell
Clay Crafts to Make and Sell are a popular and versatile form of handmade art that can be shaped and molded into various forms, making them ideal for creative expression and small businesses. You can create a wide range of products, such as jewelry, decorative items, functional pieces like bowls or mugs, and even custom sculptures. The beauty of clay crafts is that they can be both unique and personalized, allowing artists to explore different techniques, like polymer clay, air-dry clay, or ceramic clay. With a little skill and creativity, these pieces can be sold locally, online, or at craft fairs, offering a profitable venture for those interested in handmade goods.
DIY Clay Flower Pot
Create a small decorative flower pot with clay, perfect for a mini plant or succulent.
Materials Used:
- Air-dry clay
- Rolling pin
- Sculpting tools
- Paint (optional)
Steps:
- Roll a ball of clay and flatten it into a thick disk.
- Form the edges of the disk into a circular shape.
- Carefully mold the clay into a bowl shape by pinching the sides.
- Once shaped, let the clay dry completely.
- Once dry, paint and decorate as desired.
- Place a small plant or succulent inside.
Handmade Clay Earrings Set
Make lightweight, custom earrings that are perfect for adding a personal touch to any outfit.
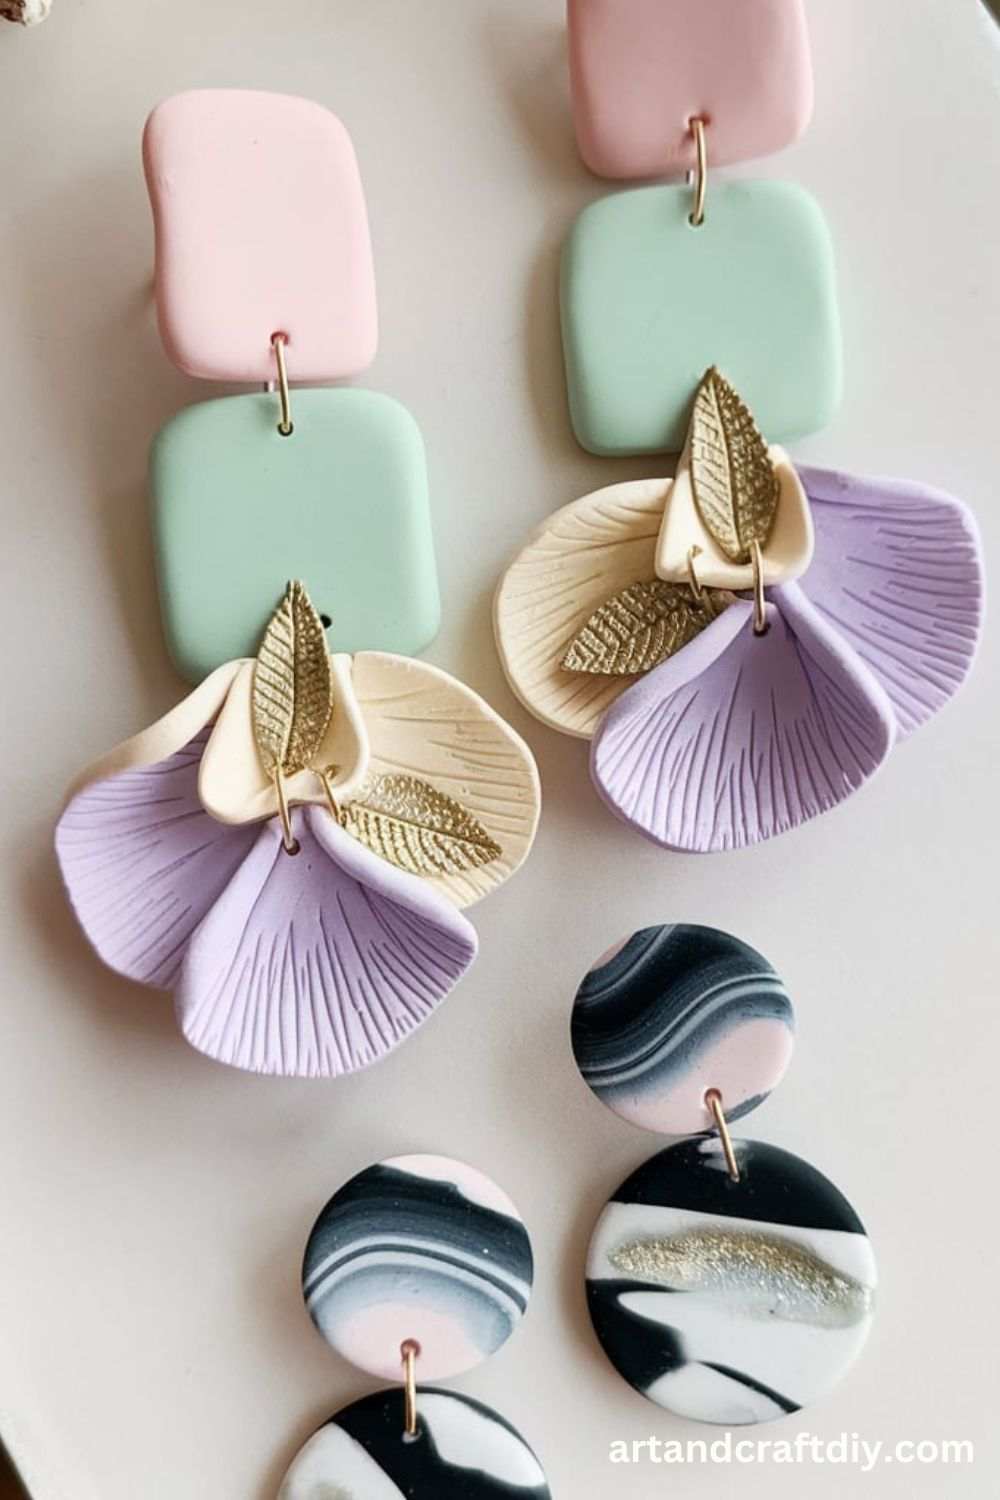
Materials Used:
- Polymer clay
- Earring hooks
- Rolling pin
- Sculpting tools
- Parchment paper
Steps:
- Roll out the polymer clay into a flat sheet.
- Use cookie cutters or a knife to cut out shapes for your earrings.
- Add any designs or textures using sculpting tools.
- Pierce holes at the top of each shape for the earring hooks.
- Bake according to clay instructions.
- Once cooled, attach earring hooks and wear your new creation!
DIY Clay Animal Figurines
Create cute miniature animals out of clay for decoration or play.
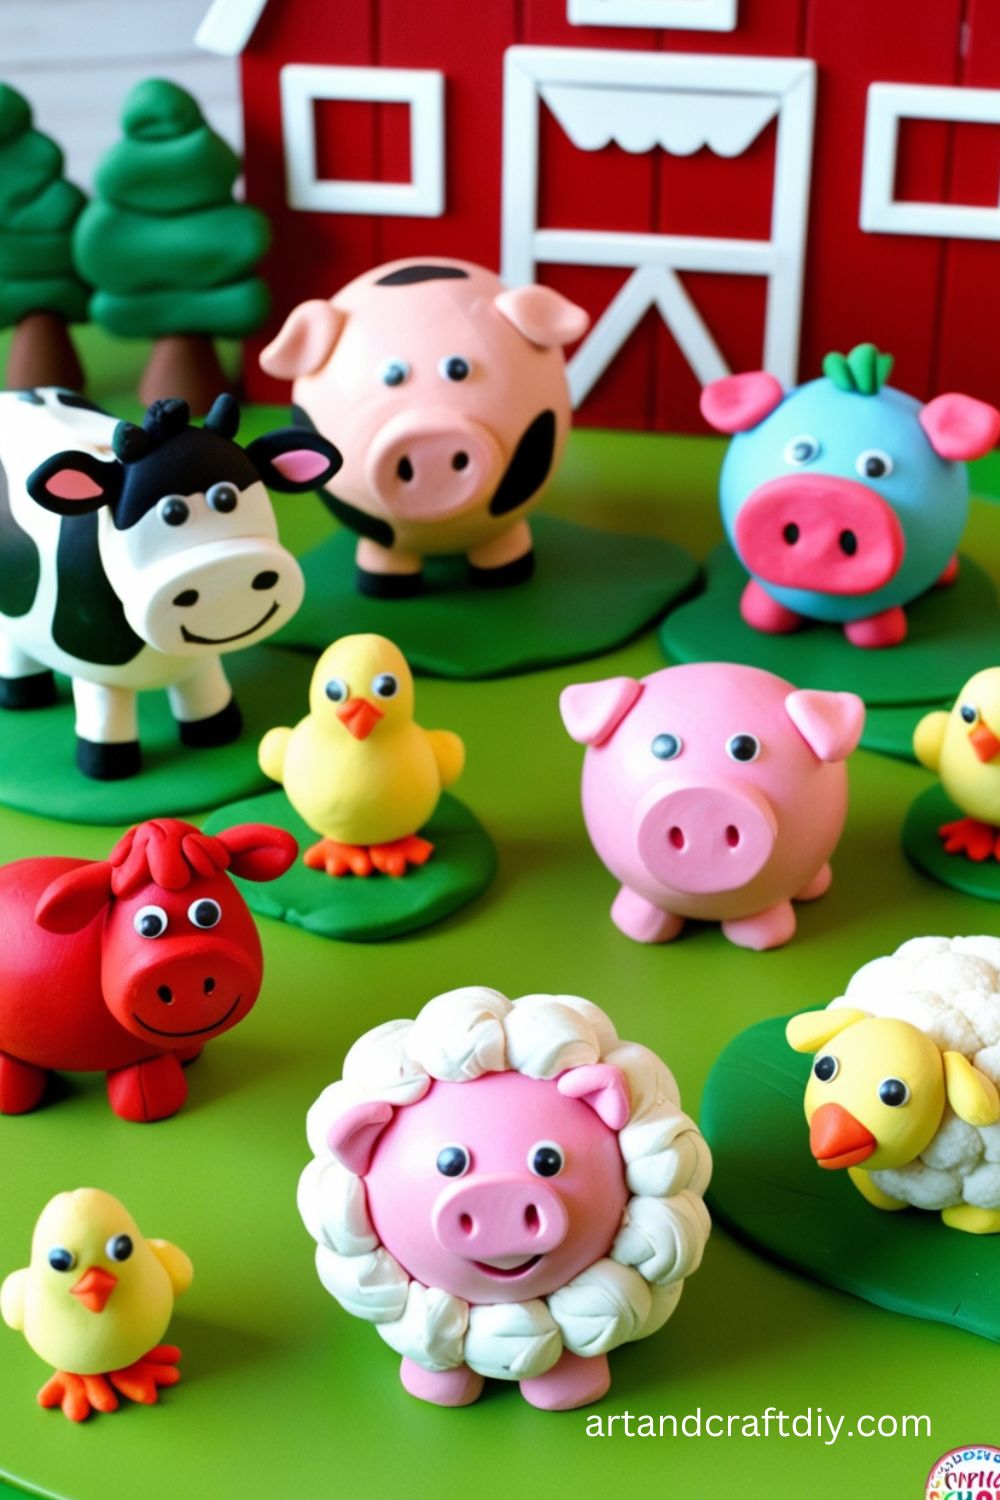
Materials Used:
- Air-dry or polymer clay
- Sculpting tools
- Paint (optional)
Steps:
- Roll clay into balls for the body and head of the animal.
- Shape the clay into the desired animal form (cat, dog, etc.).
- Use tools to add features like eyes, ears, and limbs.
- Let the clay dry completely.
- Paint your animal with details like eyes, noses, or patterns.
Clay Coasters DIY
Make colorful and functional coasters for your drinks with clay.
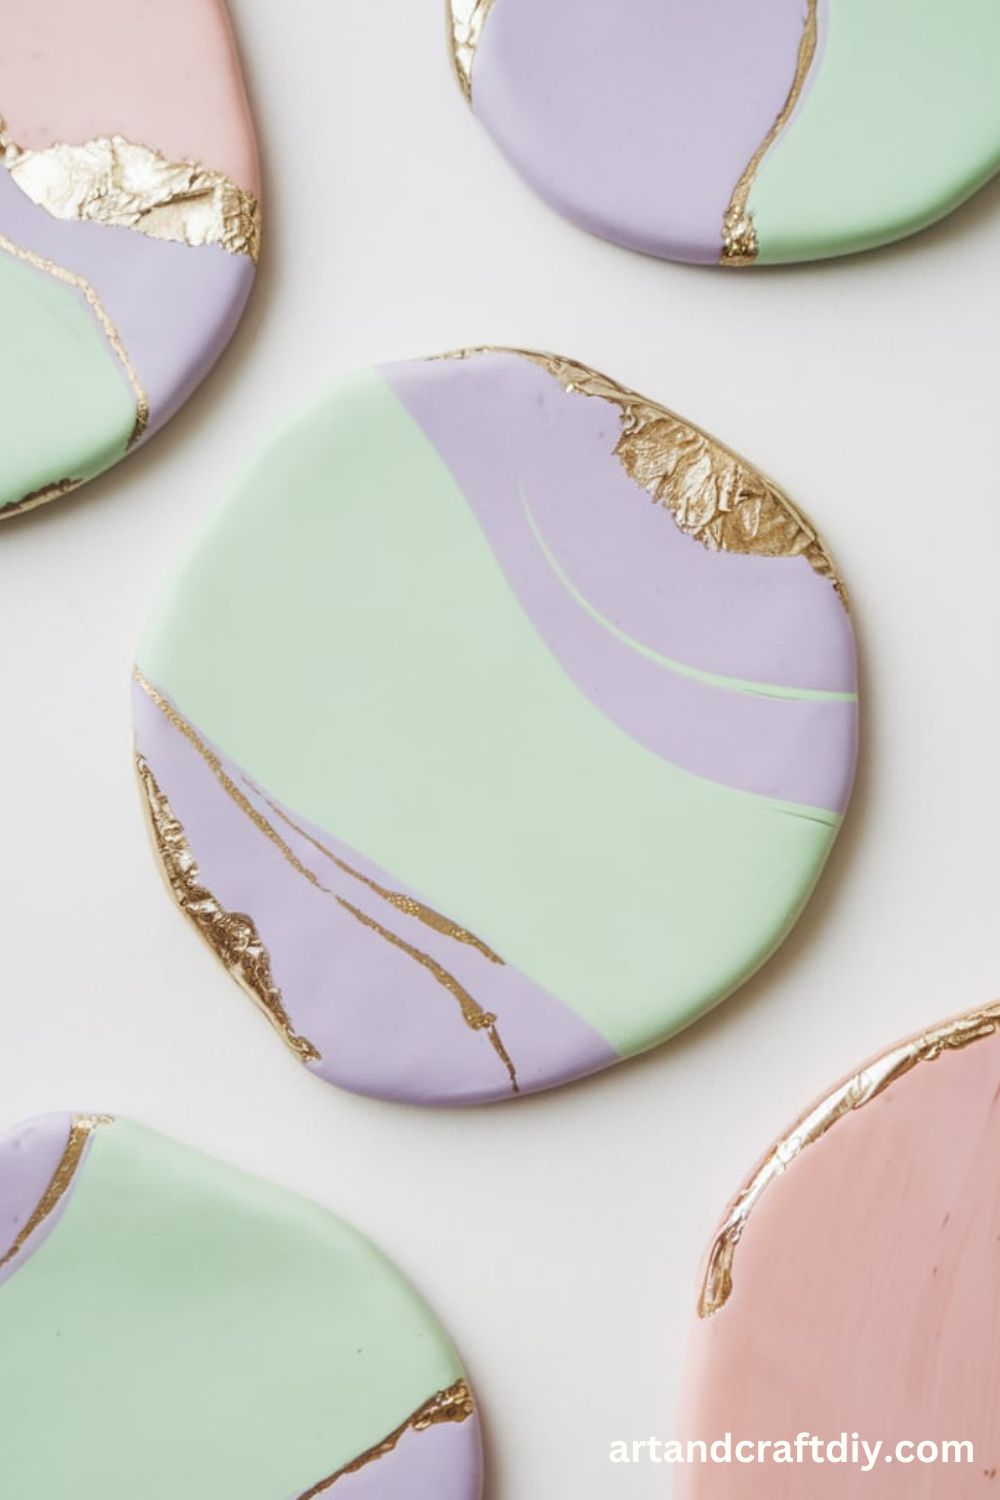
Materials Used:
- Air-dry or polymer clay
- Rolling pin
- Cookie cutters or stencil
- Sealant (optional)
Steps:
- Roll out clay to about 1/4 inch thickness.
- Use a cookie cutter to shape the clay into circles or squares.
- Let the coasters dry, then decorate with additional clay or textures.
- Apply a sealant if desired to protect from moisture.
- Allow everything to fully set before using.
Clay Pendant Necklace DIY
Create a custom pendant necklace by shaping clay into your favorite designs.
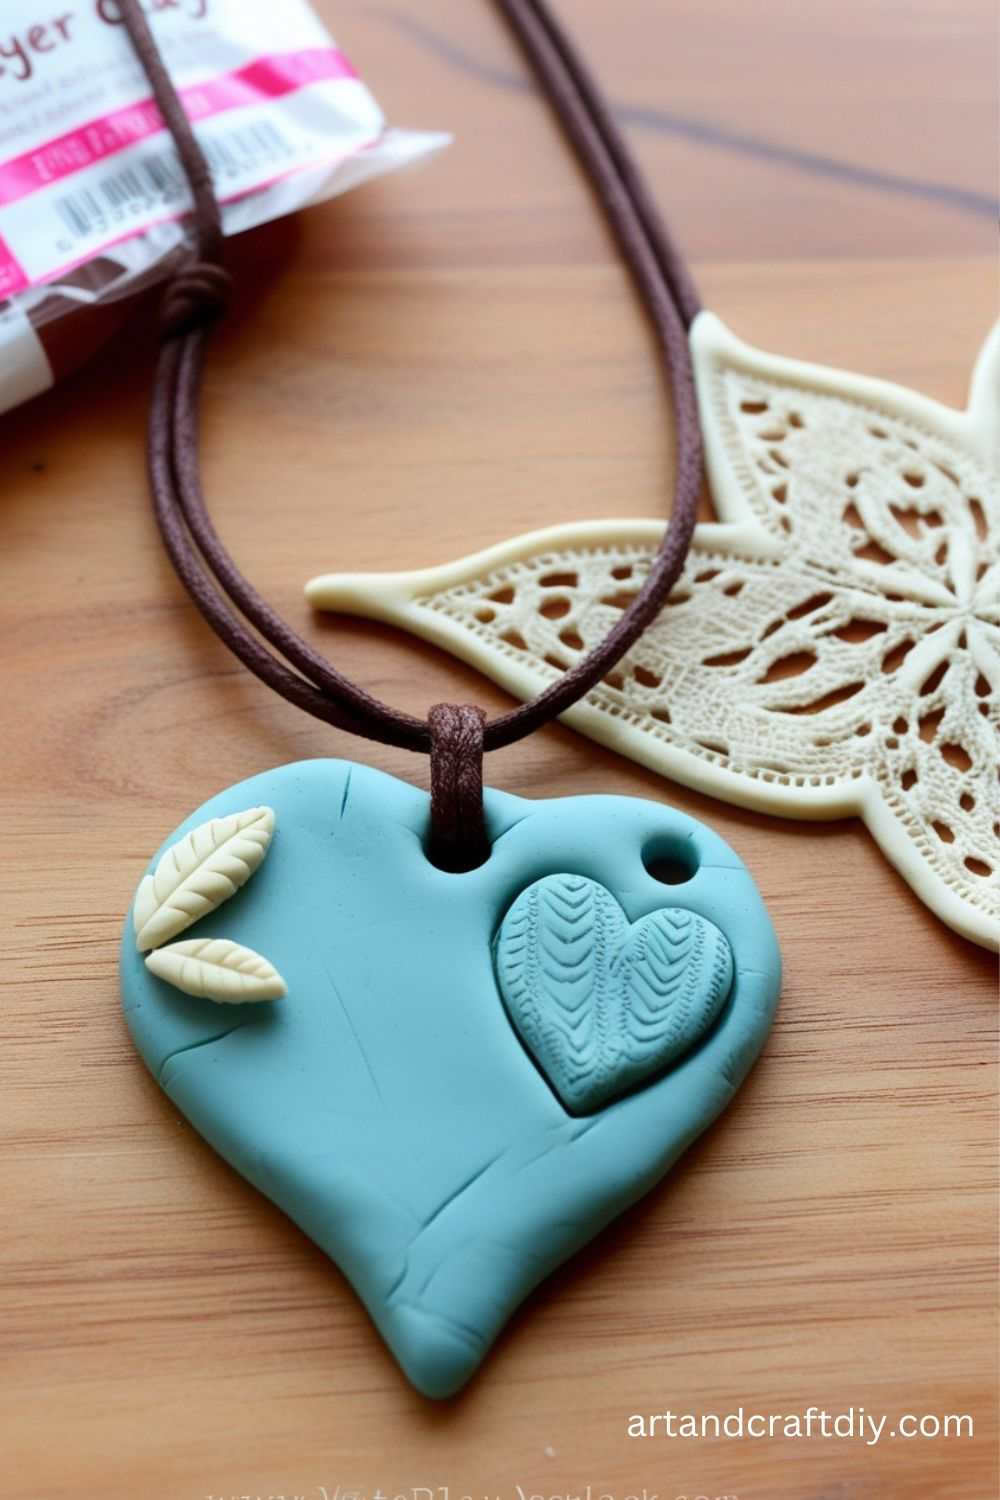
Materials Used:
- Polymer clay
- Necklace chain
- Jump rings
- Sculpting tools
Steps:
- Roll out a thin sheet of polymer clay.
- Cut out your pendant shape, such as a heart, circle, or custom design.
- Add any patterns or textures to the surface.
- Bake the clay as per the instructions.
- Once cooled, attach a jump ring and thread the pendant onto a necklace chain.
Marbled Stud Earrings DIY
Marbling is a simple yet elegant technique that creates a swirling blend of colors.
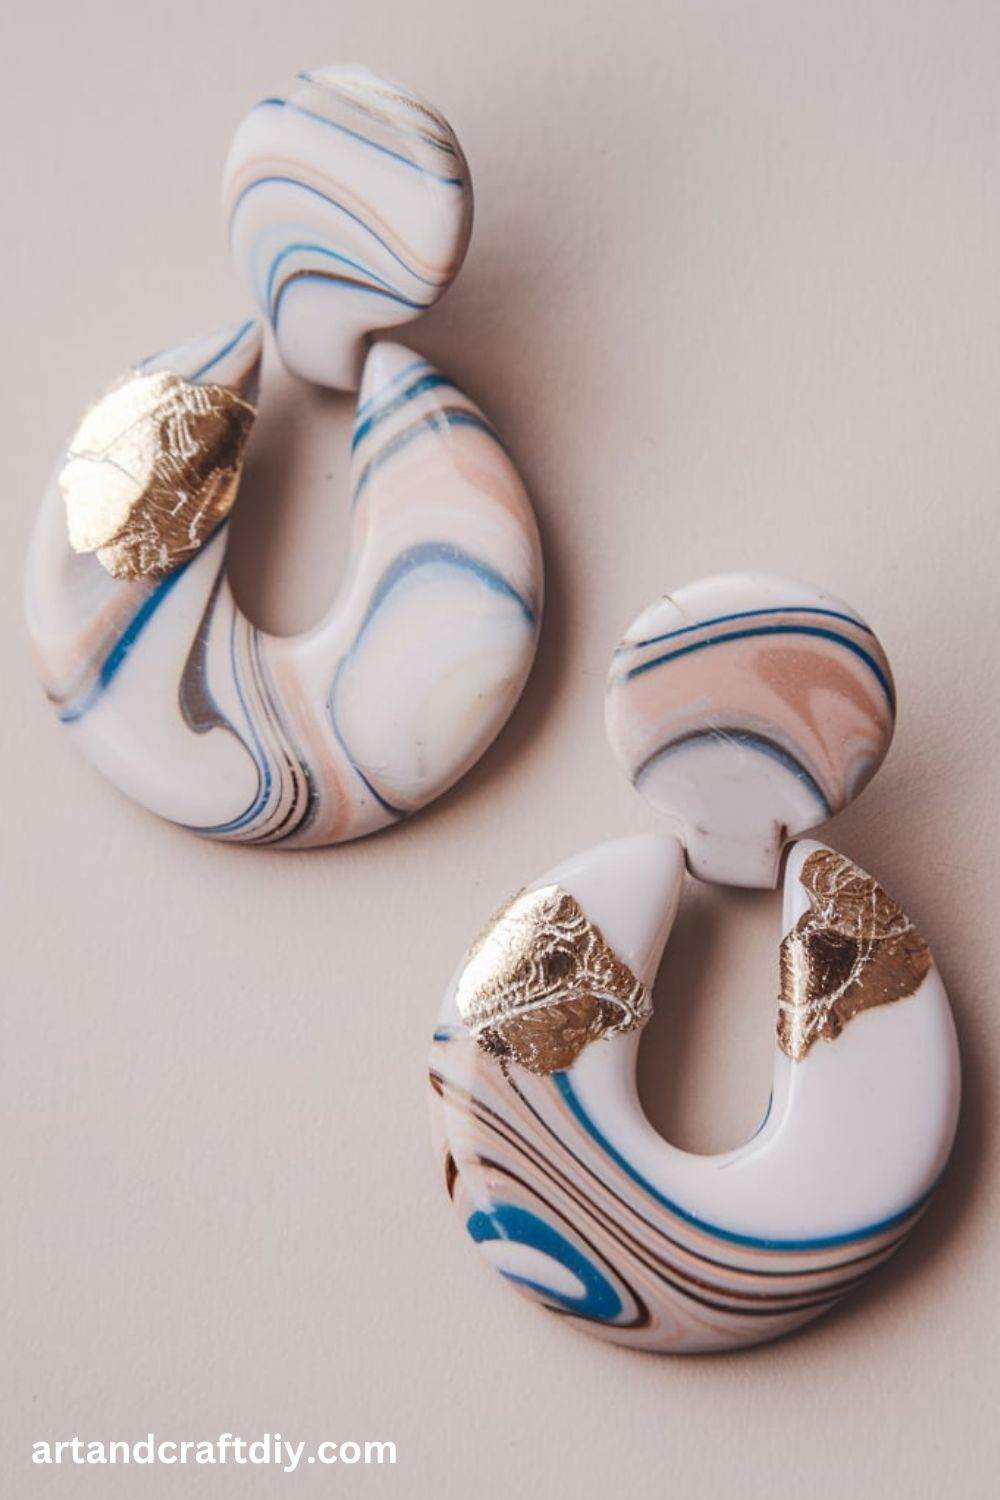
Materials:
- Polymer clay in two or more colors
- Earring posts and backings
- Roller or acrylic rolling pin
- Craft knife or clay cutter
- E6000 glue or liquid polymer clay
Steps:
- Roll out two or more clay colors into thin logs and twist them together.
- Fold and twist the clay multiple times to create a marbled effect.
- Roll into a smooth sheet and cut small circles using a cutter or bottle cap.
- Bake according to package instructions.
- Once cooled, attach earring posts using E6000 glue or bake with liquid clay.
Faux Terrazzo Earrings DIY
Inspired by terrazzo flooring, these earrings mimic the colorful speckled look.
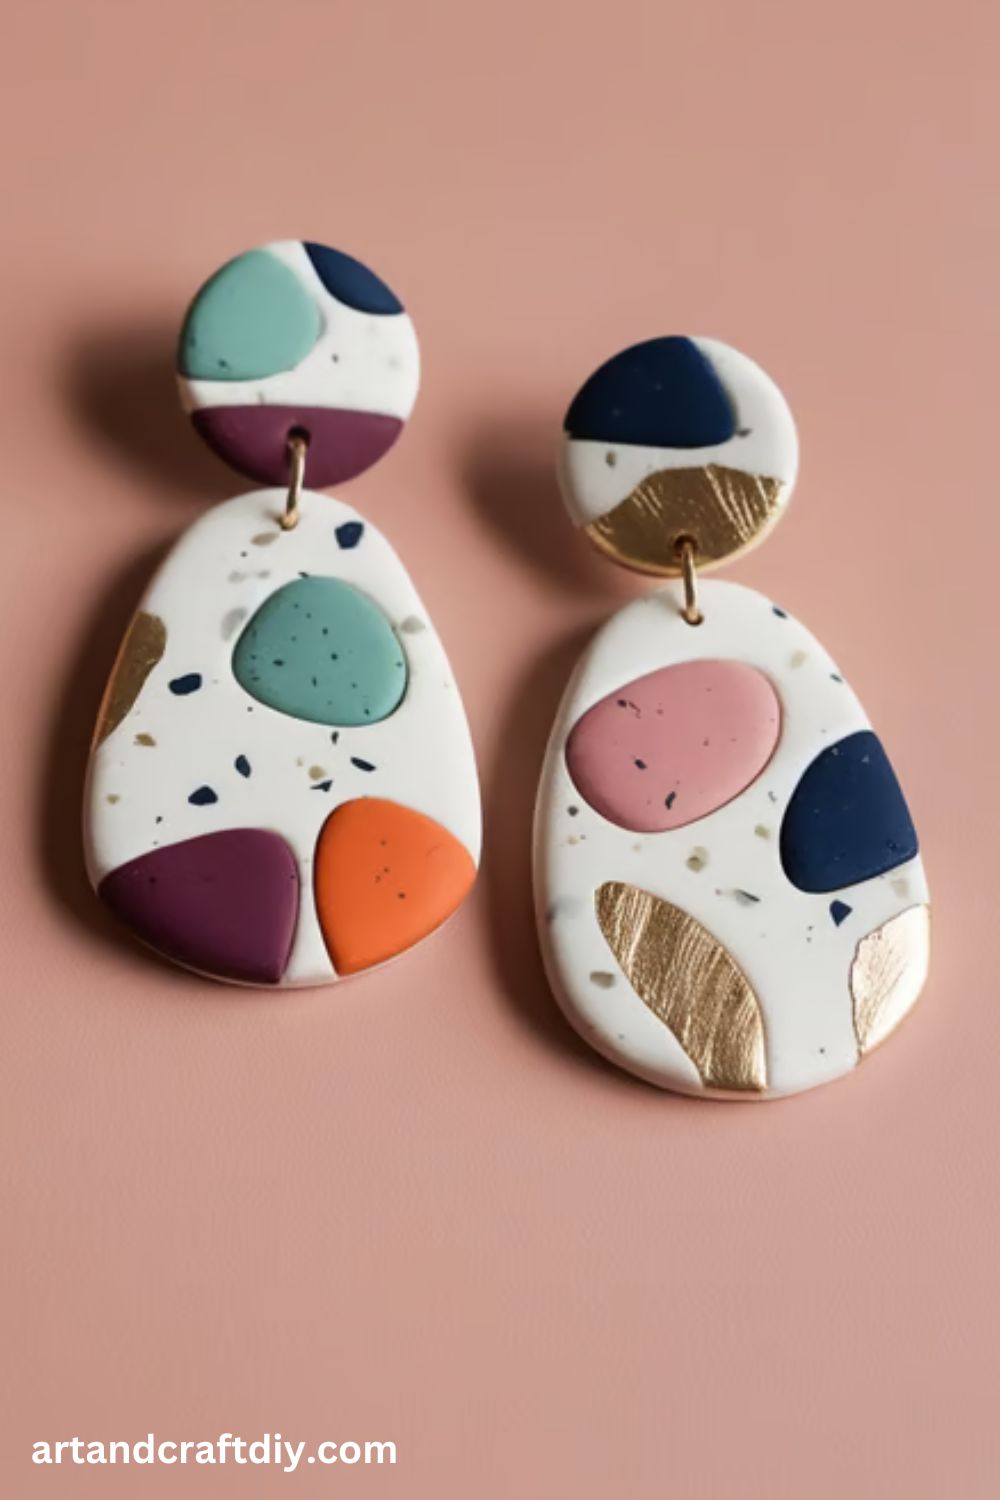
Materials:
- White polymer clay (base)
- Colored polymer clay scraps
- Roller
- Clay cutter
- Sandpaper
- Earring hooks
Steps:
- Roll out white clay as the base layer.
- Take small bits of colored clay and press them onto the base.
- Roll over to flatten and blend the pieces.
- Cut into desired shapes and bake.
- Once cooled, sand lightly for a polished terrazzo effect and attach hooks.
Embossed Floral Pendant DIY
Create intricate floral textures on a pendant using stamps or lace.
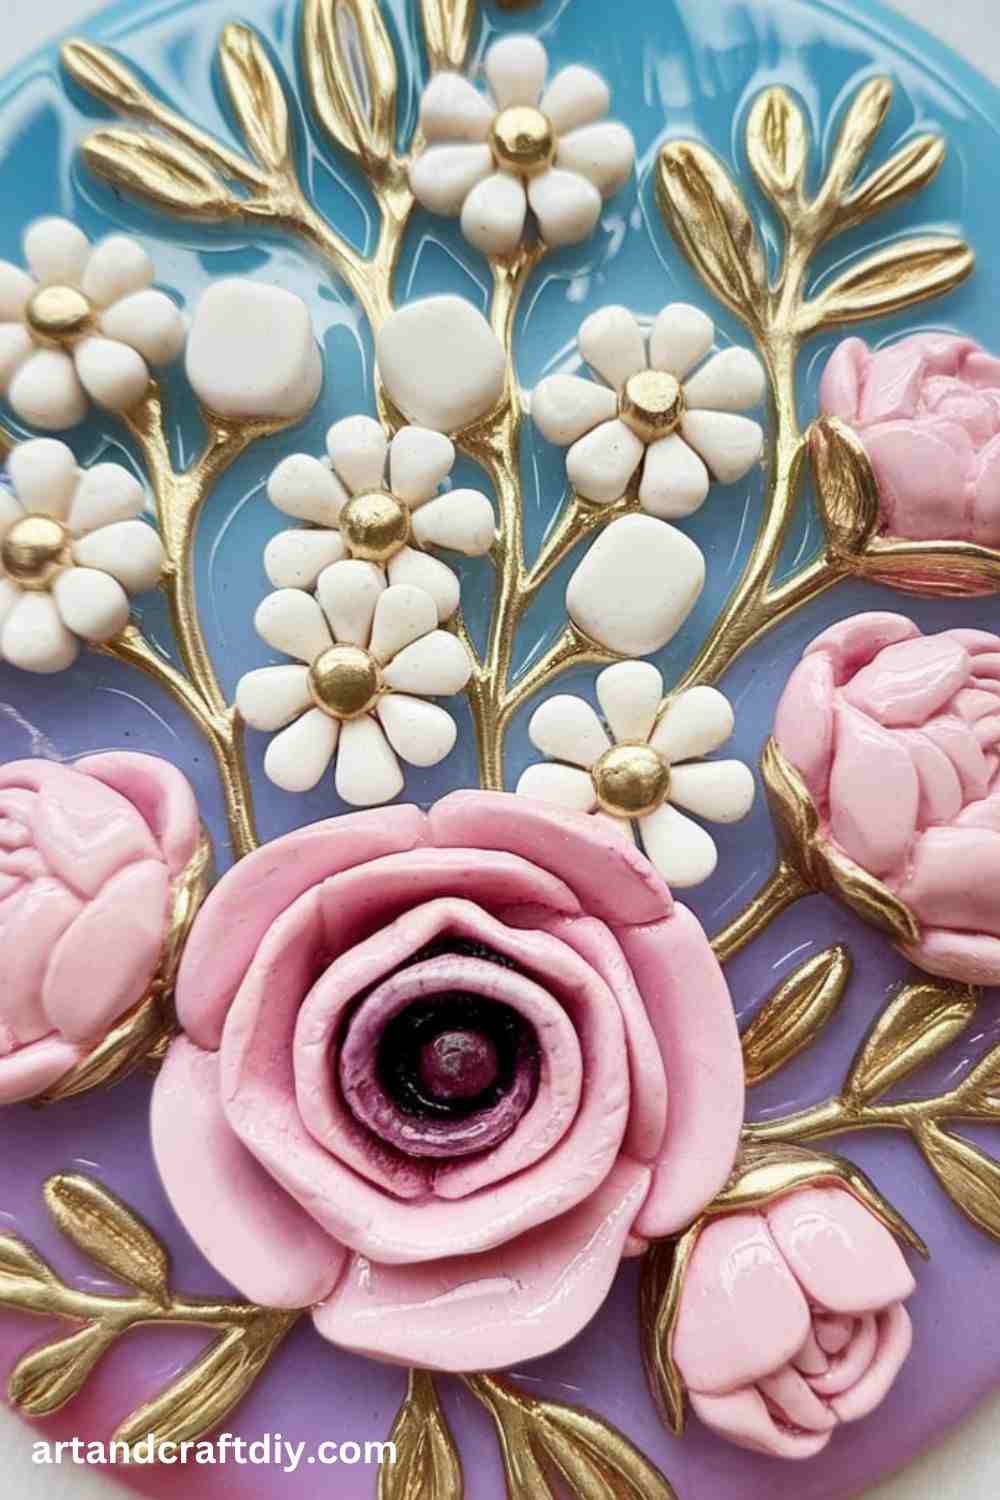
Materials:
- Polymer clay in your preferred color
- Roller
- Flower stamps or lace fabric
- Circle cutter
- Jump rings and chain
Steps:
- Roll out the clay to a medium thickness.
- Press stamps or lace onto the clay to imprint the texture.
- Cut out a circular or oval pendant shape.
- Make a small hole for the jump ring.
- Bake and attach to a necklace chain.
DIY Clay Animals on a Stick
Make a cute animal design on a wooden stick for a whimsical décor.
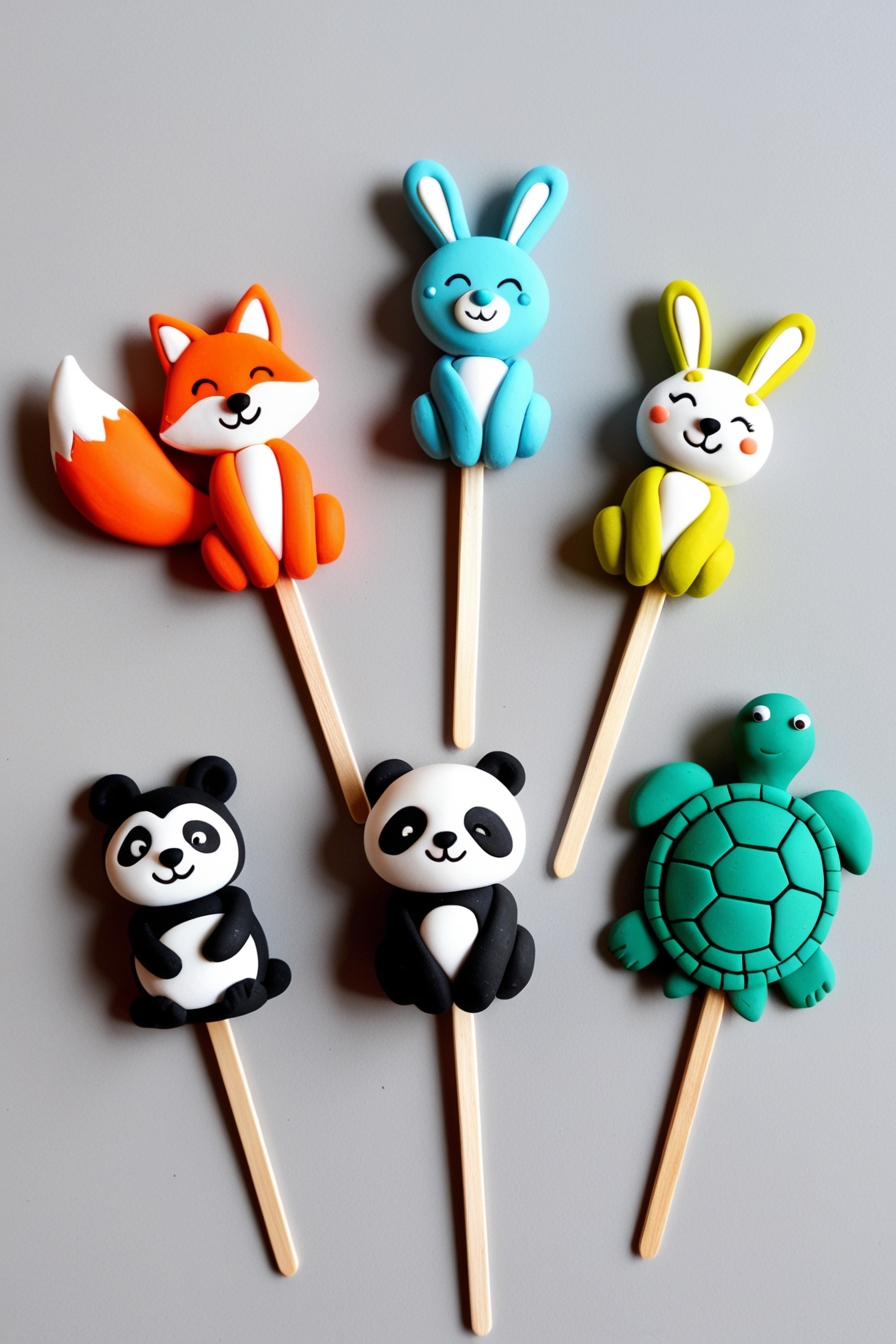
Materials Used:
- Polymer clay
- Wooden sticks
- Sculpting tools
Steps:
- Sculpt animals (e.g., birds, owls, etc.) onto the end of the wooden stick.
- Attach the clay securely to the stick by blending the edges.
- Bake according to the clay instructions.
- Once cooled, display them in a vase or as garden stakes.
DIY Clay Cupcake Toppers
Design edible-looking clay cupcake toppers for cake decoration.

Materials Used:
- Air-dry clay
- Sculpting tools
- Paint (optional)
Steps:
- Sculpt small decorative items like flowers, animals, or food designs out of clay.
- Let them dry and paint if desired.
- Place the toppers gently on cupcakes as decorations.
Clay Snowman Figurine
Craft a cute clay snowman for the winter season.
Materials Used:
- Air-dry or polymer clay
- Sculpting tools
- Paint
Steps:
- Roll the clay into three balls of different sizes for the snowman’s body.
- Shape and stack the balls, smoothing them together.
- Add a small ball for the head and add features like eyes, a nose, and buttons.
- Decorate with tiny accessories like hats and scarves.
- Let the clay dry completely before displaying.
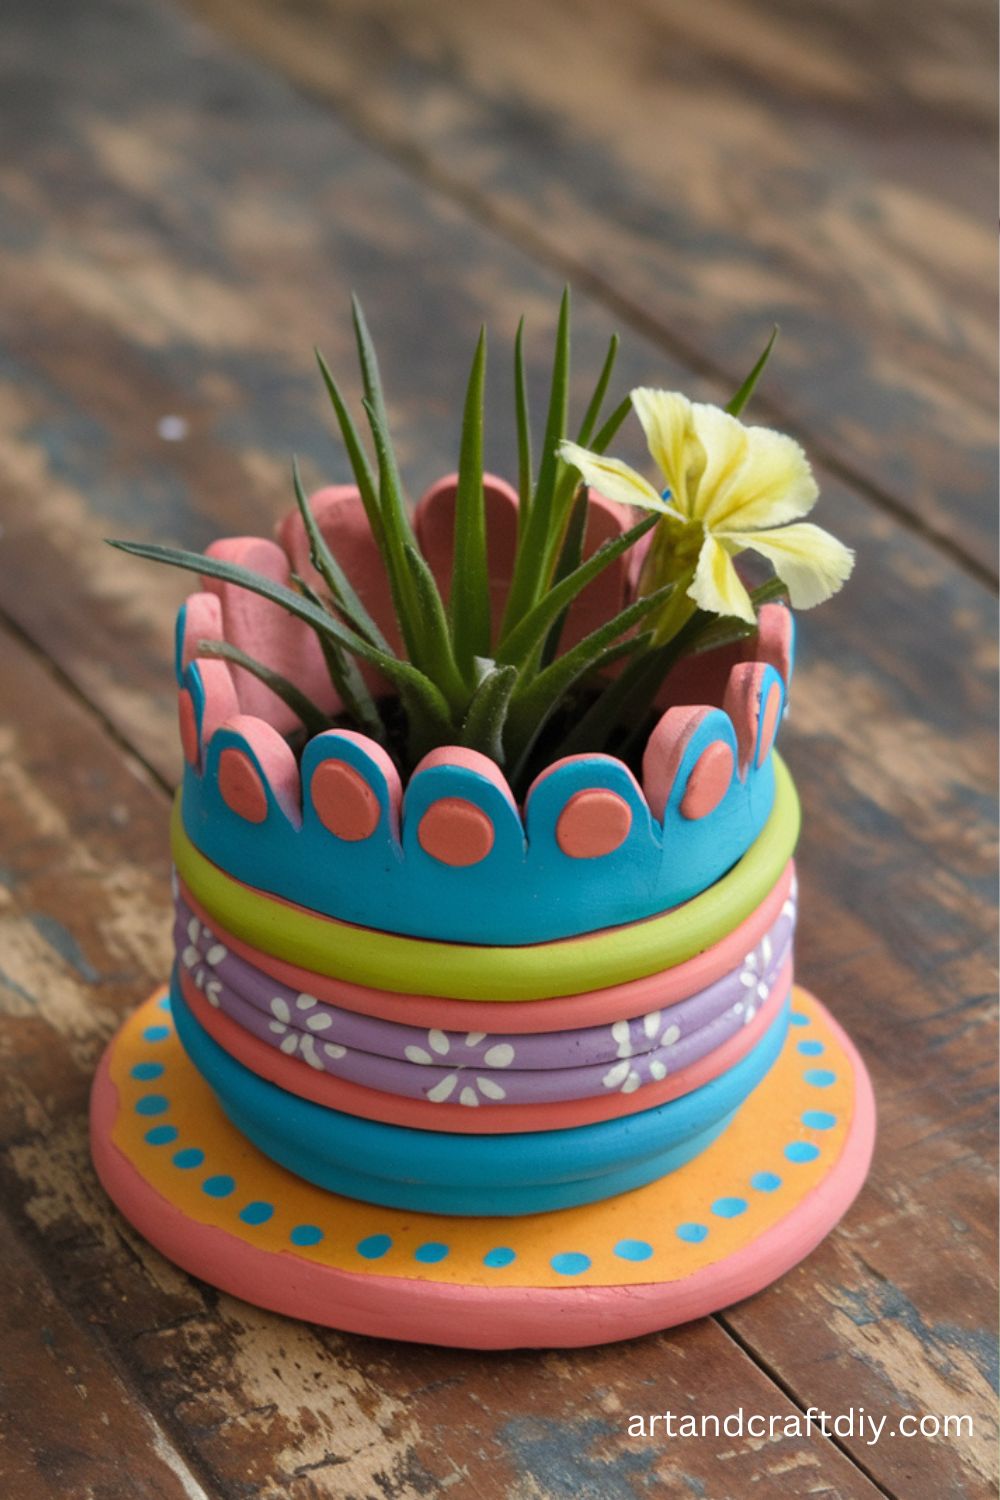
Clay Planter
Create a custom planter with a unique design.
Materials Used:
- Air-dry clay
- Sculpting tools
- Paint
Steps:
- Roll out the clay and create a small pot shape.
- Use tools to add textures or patterns to the surface.
- Allow the clay to dry completely.
- Paint your planter and let it dry again.
- Fill with soil and a small plant.
Clay Candlestick Holder
Design a clay candlestick holder for a rustic look.
Materials Used:
- Air-dry clay
- Rolling pin
- Sculpting tools
Steps:
- Roll out a slab of clay and form it into a flat base.
- Create a small cone shape for the candle holder.
- Attach the cone to the base, blending the edges.
- Let the clay dry completely.
- Once dry, paint or glaze it to add finishing touches.
Clay Donuts
Craft cute, miniature donuts out of clay for display or as charms.
Materials Used:
- Polymer clay
- Sculpting tools
- Paint (optional)
Steps:
- Roll clay into small balls and flatten them to form donut shapes.
- Use a tool to create the hole in the center.
- Add icing details using different colors of clay.
- Bake according to clay instructions.
- Paint or decorate the donuts as desired.
Clay Bowls
Create small, personalized bowls for storing jewelry, keys, or other small items.
Materials Used:
- Air-dry clay
- Rolling pin
- Sculpting tools
Steps:
- Roll out a slab of clay to a uniform thickness.
- Shape it into a bowl using your hands or a mold.
- Let the clay dry completely.
- Paint or decorate your bowl once dry.
Clay Butterflies
Craft delicate butterfly shapes to display or use as wall décor.
Materials Used:
- Air-dry clay
- Sculpting tools
- Paint
Steps:
- Roll the clay into a small ball and flatten it into a rounded shape for the butterfly’s wings.
- Shape and texture the wings with sculpting tools.
- Roll a small ball for the body.
- Attach the body to the wings and let everything dry.
- Paint with vibrant colors.
Clay Dinosaur Figurine
Create a fun, custom dinosaur figurine for kids or collectors.
Materials Used:
- Polymer clay
- Sculpting tools
Steps:
- Roll the clay into shapes for the dinosaur’s body, head, legs, and tail.
- Sculpt details like spikes, eyes, and textures on the body.
- Bake the clay according to instructions.
- Once cooled, paint any details.
Clay Rings
Design custom rings with clay for a personal and trendy accessory.
Materials Used:
- Polymer clay
- Ring blanks
- Sculpting tools
Steps:
- Roll out small pieces of clay into flat shapes.
- Shape them into rings by wrapping them around the ring blank.
- Bake the clay according to package instructions.
- Once cool, wear your new, handmade ring!
Clay Picture Frame
Create a decorative photo frame out of clay to hold a favorite picture.
Materials Used:
- Air-dry clay
- Sculpting tools
- Glue
Steps:
- Roll out the clay and cut it into the shape of a frame.
- Add any designs or textures to the surface.
- Allow the frame to dry completely.
- Attach a photo to the back of the frame with glue.
Clay Christmas Ornaments
Make custom ornaments for your holiday tree with clay.
Materials Used:
- Air-dry or polymer clay
- Sculpting tools
- Ribbon
Steps:
- Roll the clay into a ball and flatten it to form the base shape (e.g., stars, hearts).
- Add holiday-themed decorations like holly leaves or reindeer.
- Pierce a hole at the top for a ribbon loop.
- Let the clay dry completely and hang on your tree!
Clay Bookmark
Create unique, personalized bookmarks from clay for a functional craft.
Materials Used:
- Polymer clay
- Sculpting tools
Steps:
- Roll a thin sheet of clay into a long strip.
- Sculpt small designs or patterns along the length of the bookmark.
- Bake according to clay instructions.
- Let it cool, and your bookmark is ready for use!
Clay Cups
Create a set of miniature cups for decorative purposes.
Materials Used:
- Air-dry clay
- Sculpting tools
Steps:
- Roll out a small piece of clay into a disk.
- Shape it into a cup by curving the edges upward.
- Sculpt a handle and attach it to the cup.
- Let it dry completely before using.
Clay Phone Stand
Design a small, functional phone stand out of clay.
Materials Used:
- Air-dry clay
- Sculpting tools
Steps:
- Roll out clay and create a base that can hold the phone at an angle.
- Shape the stand to have a slight incline.
- Allow the clay to dry completely before using.
Clay Seashells
Craft detailed seashells for use in coastal-themed décor.
Materials Used:
- Polymer clay
- Sculpting tools
Steps:
- Roll out small pieces of clay into oval shapes.
- Use sculpting tools to create ridges and textures resembling seashells.
- Bake according to clay instructions.
- Paint the shells to add realistic details.
Clay Slime
Make a squishy, stress-relieving slime with clay.
Materials Used:
- Polymer clay
- Baking soda
- Contact lens solution
Steps:
- Mix the clay with baking soda and knead until smooth.
- Add contact lens solution to activate the slime.
- Knead until it reaches the desired texture.
Clay Fruit Slices
Design small, realistic fruit slices that can be used as décor or jewelry.
Materials Used:
- Polymer clay
- Sculpting tools
Steps:
- Roll out different colored clay for each fruit type (e.g., orange, strawberry).
- Cut the clay into thin slices and layer them to form fruit pieces.
- Bake and paint for added realism.
Clay Wind Chimes
Create a beautiful wind chime using clay shapes and string.
Materials Used:
- Polymer clay
- String or wire
- Beads or bells
Steps:
- Sculpt clay shapes like flowers, stars, or animals.
- Attach them to string or wire.
- Add beads or bells for added sound.
- Hang the chimes in a breezy spot.
Clay Lace Flowers
Make delicate lace-like flowers out of clay for embellishing crafts.
Materials Used:
- Polymer clay
- Lace fabric
- Rolling pin
Steps:
- Roll out clay to a thin sheet.
- Press lace fabric onto the clay for a textured effect.
- Cut out flower shapes and bake.
- Paint the flowers for added detail.
Clay Robot Figurine
Create a fun, futuristic robot figurine with clay.
Materials Used:
- Polymer clay
- Sculpting tools
Steps:
- Shape a robot’s body by molding rectangles and circles out of clay.
- Attach the limbs and head.
- Use sculpting tools to add details like buttons or metallic textures.
- Bake and paint the robot to finish
Practical and Fun Clay Crafts
Easy Clay Crafts Ideas are an exciting and versatile way to add a personal touch to everyday items. Whether you’re a seasoned crafter or a beginner, clay offers endless possibilities for creating beautiful, functional objects. From decorative magnets to custom drawer pulls, working with clay can be a fun, creative outlet. Here are some simple clay projects that combine both practicality and fun.
1. Clay Magnets
- Simple Steps for Creating Fridge Magnets Using Small Clay Shapes:
- Start with polymer clay or air-dry clay in your favorite colors.
- Roll the clay into small balls or shapes (hearts, stars, animals, etc.).
- Flatten each piece slightly and bake according to the clay’s instructions if you’re using polymer clay.
- After baking, glue a small magnet to the back using strong adhesive.
- Painting and Finishing Techniques:
- Once the clay pieces are baked and cooled, you can paint them with acrylic paints for added detail or design.
- Seal your painted magnets with a clear acrylic sealer to protect the colors and finish.
2. Clay Buttons
- Crafting Custom Clay Buttons for Sewing Projects:
- Choose your clay and roll it out to a smooth, even thickness.
- Use a cookie cutter or a round object to cut out button shapes.
- Use a needle or small tool to make holes in the center for sewing.
- If desired, imprint patterns or textures onto the surface using stamps or carving tools.
- How to Bake and Harden Clay Buttons for Durability:
- Bake your clay buttons according to the manufacturer’s instructions, typically at 275°F (130°C) for 15-30 minutes, depending on size.
- Allow the buttons to cool completely before attaching them to fabric, ensuring they harden fully for durability.
Clay Crafts to Make and Sell offer an easy and creative way to personalize your home or create unique gifts for loved ones. Clay Crafts to Make and Sell combine the joy of crafting with practicality, making them perfect for adding a handmade touch to everyday objects!
Tips and Tricks for Successful Clay Crafting
Clay crafting is a rewarding and creative hobby, allowing you to shape and mold your ideas into tangible works of art. Whether you are working with polymer clay, air-dry clay, or modeling clay, achieving the best results requires a few essential techniques and tricks. Below are some helpful tips for smoothing, perfecting, coloring, and sealing your clay crafts to ensure they turn out beautifully every time.
1. How to Smooth and Perfect Your Clay Surfaces
Achieving a smooth, flawless surface is key to making your clay creations look professional. Here are a few tips:
- Use a Clay Roller or Pasta Machine: To avoid fingerprints and imperfections, roll your clay out evenly with a clay roller or pasta machine.
- Water and Cornstarch: Use a small amount of water or cornstarch to smooth out rough areas. Be cautious not to add too much moisture to avoid altering the texture.
- Clay Tools: Invest in a set of clay tools, such as ball tools, needle tools, and rubber-tipped sculpting tools, to help refine details and smooth edges.
- Finger Smoothing: For small projects or final touch-ups, use your fingers with a gentle, circular motion to smooth out any uneven patches.
2. Baking or Air-Drying Tips for Different Types of Clay
Different types of clay require specific drying or baking techniques to achieve the best results:
- Polymer Clay: Follow the manufacturer’s instructions for temperature and time (typically 265°F-275°F for 15-30 minutes). Avoid overheating, as this can cause discoloration or burning.
- Air-Dry Clay: Allow air-dry clay pieces to dry naturally at room temperature. Thicker pieces can take up to 24-48 hours to dry completely. If you’re in a hurry, you can speed up drying with a fan, but avoid direct heat, as it can cause cracking.
- Pre-Bake Before Assembling: If you’re creating intricate multi-piece projects, bake smaller components first to ensure they stay intact while working on the rest of the design.
By following these tips, you’ll be able to create beautiful, long-lasting Clay Crafts to Make and Sell that look polished and professional. Whether you’re crafting for fun or for sale, these techniques will help you elevate your skills and achieve your desired results. Happy crafting!
FAQ
What are the most popular clay crafts to make and sell?
Some of the most popular Clay Crafts to Make and Sell include handmade earrings, jewelry, home decor items like vases or planters, clay magnets, sculptures, and personalized gifts such as keychains or custom figurines.
What type of clay should I use for Clay Crafts to Make and Sell?
Polymer clay is a great option for beginners and professionals alike because it’s versatile and easy to work with. Air-dry clay is another option, especially for larger items or those requiring more texture. Ceramic clay can be used for pottery or high-fired pieces.
How do I price my clay crafts?
When pricing your clay crafts, consider the cost of materials, time spent making the item, market trends, and the competition. Add a markup to cover overhead costs like packaging and shipping, and ensure you’re still making a profit.
How do I get started Clay Crafts to Make and Sell?
To start selling, you can set up an online shop on platforms like Etsy or Shopify, or sell locally through markets, craft fairs, or consignment in stores. Promoting your products on social media is also key to reaching a wider audience.

Hi, I’m Victoria, an art and craft teacher at Newark City Schools, where I have the joy of working with middle school students to help them explore their creativity and develop their artistic talents. I believe that art is a powerful way for students to express themselves, and I strive to make every lesson a fun, engaging, and inspiring experience.
I created this website to share the art and craft projects, techniques, and resources that I use in my classroom, hoping to inspire both educators and young artists alike. Whether you’re a teacher looking for new ideas or a student eager to try something new, I’m excited to provide creative tools and projects that anyone can enjoy.
When I’m not in the classroom, I love experimenting with different art forms and learning new crafting techniques. My goal is to help others discover the joy of making things with their hands, and I hope my website serves as a space for everyone to explore their creative potential.