
Last year, when I was planning my niece’s birthday, I realized something funny—kids love the cake, sure, but what really stuck with them were the little crafts they got to bring home. You know that moment when the party’s winding down and parents are corralling kids at the door? Instead of handing over a random goodie bag, we had a “make & take birthday party craft” table.
The kids were so proud of what they made, and honestly, it kept them happily occupied (which, let’s be real, is every parent’s dream during a birthday party). I get it—planning parties can feel overwhelming, and sometimes the last thing you want is more chaos, right? That’s why I put together these simple, fun craft ideas that double as party favors. Less stress for you, more joy for the kids, and memories that last longer than a sugar rush. Sound good? Let’s dive in.
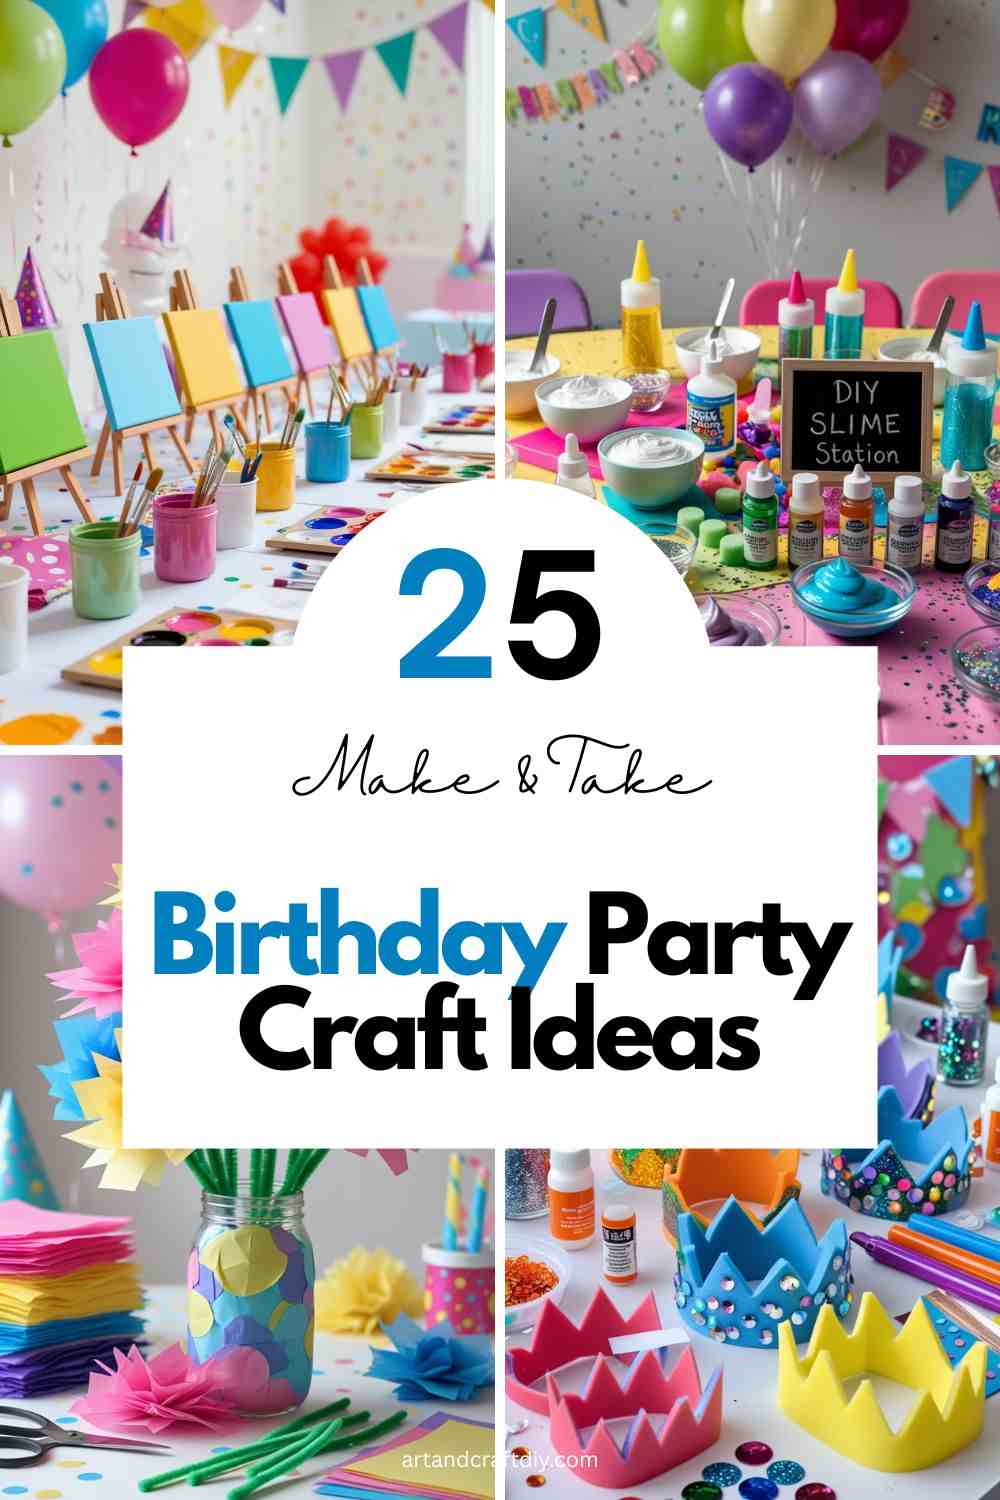
Birthday Party Craft Ideas
Birthday party craft ideas add a creative twist to any celebration, keeping kids engaged and entertained. They’re fun, age-appropriate, and let guests take home a special handmade keepsake!
Paper Plate Animal Faces
I swear, paper plate crafts have saved me more times than I can count. Kids love them because they’re simple, silly, and they can finish one in minutes. The last time I tried this at a birthday party, the room turned into a mini zoo — lions with yarn manes, bunnies with cotton ball cheeks, even a unicorn with glittery ears (that one was my favorite). All you need is a stack of sturdy plates, some markers, glue, and a mix of craft supplies like googly eyes, feathers, or pipe cleaners.
The fun part is letting kids pick their “animal identity.” Honestly, half the fun for me is watching how creative they get when no one is telling them there’s a “right” way. One kid made a dragon face with way too many eyes, and you know what? It was brilliant. If you’re hosting, keep extra glue sticks on hand because those plates soak it up fast.
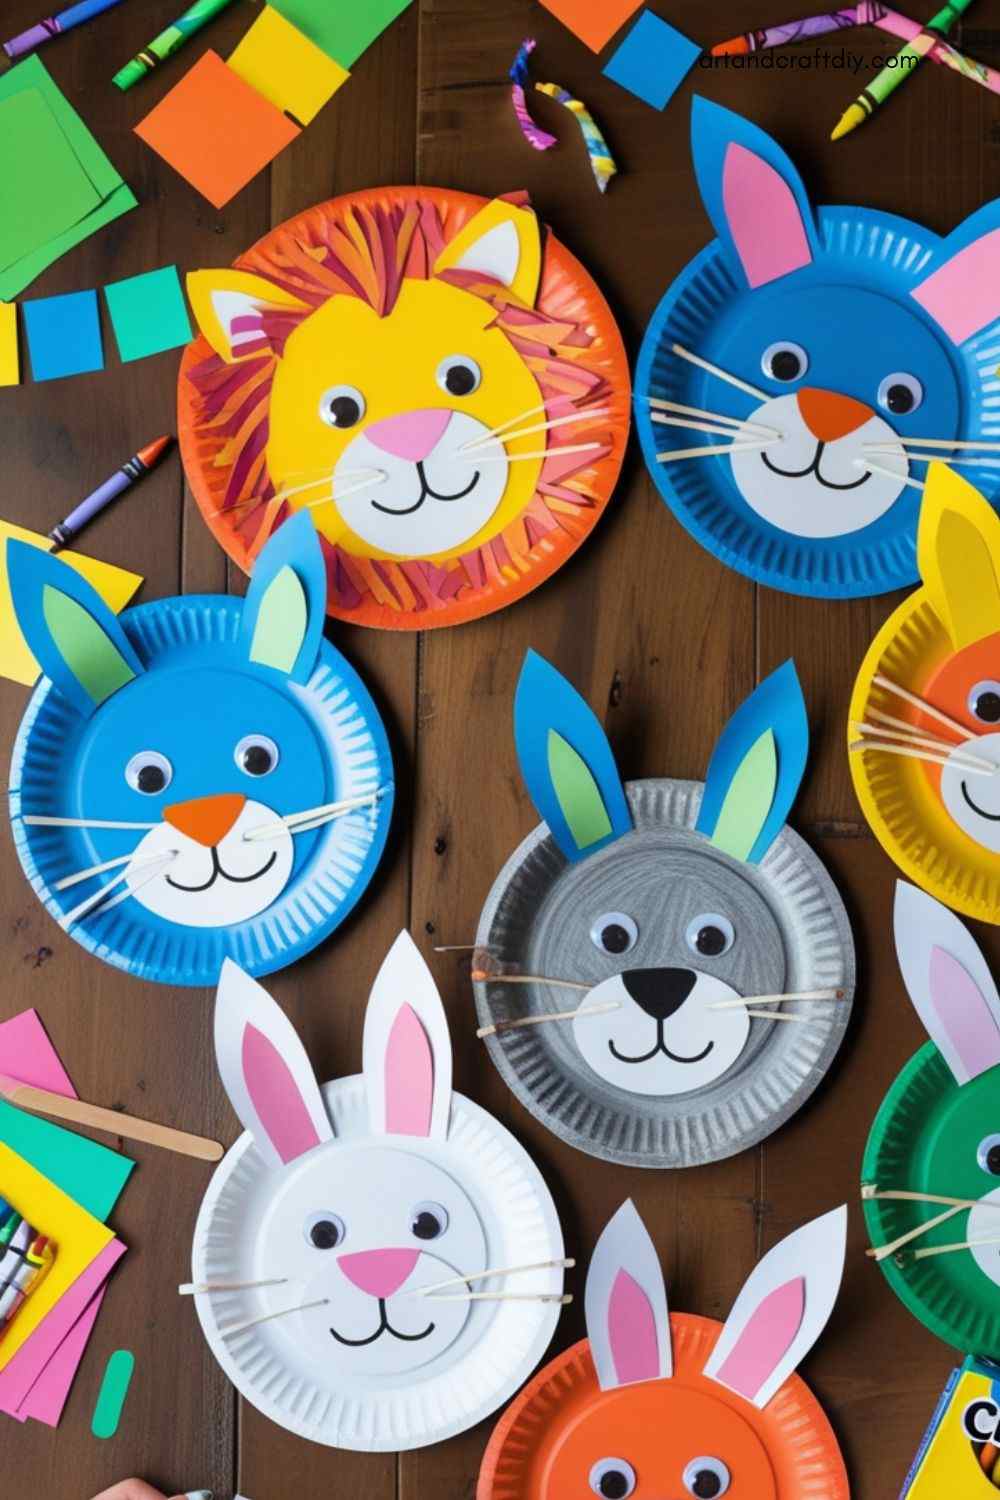
Materials:
-
Paper plates
-
Crayons, markers, or paint
-
Construction paper
-
Glue sticks
-
Safety scissors
-
Popsicle sticks (optional)
Steps:
-
Give each child a paper plate as their base.
-
Let them color or paint the plate to look like an animal’s face.
-
Cut out ears, eyes, whiskers, and other details from construction paper.
-
Glue the pieces onto the plate.
-
Optional: Attach a popsicle stick at the bottom to hold like a mask.
DIY Bead Bracelets
Now, I’ll admit — beads rolling all over the floor drives me a little nuts, but it’s worth it. Kids sit down, and suddenly they’re completely zoned in. It’s like instant calm. I usually set out bowls of colorful beads (plastic, wooden, metallic, whatever you’ve got) and stretchy string so they can size it themselves.
Here’s my tip: tie one end of the string to a paperclip or tape it down to the table. Saves you from picking beads out of carpet later! And, to be fair, kids love having something wearable at the end of a party. I once had a group of boys who made “warrior” bead bracelets, while the girls did rainbow patterns. They even traded bracelets like baseball cards. Honestly, it turned into its own little activity swap, which was kind of adorable.
Materials:
-
Elastic cord or string
-
Assorted beads
-
Scissors
-
Small bowls for bead sorting
Steps:
-
Cut a length of elastic cord to fit around each child’s wrist.
-
Let kids pick their favorite beads and string them on.
-
Once finished, tie the ends securely with a double knot.
-
Trim any excess string and admire their new accessory!
Foam Crown Decorating
Every child gets to feel like royalty by designing their own unique foam crown.
Materials:
-
Pre-cut foam crown shapes
-
Foam stickers, gems, sequins
-
Glue
-
Markers or glitter pens
-
Velcro dots or tape for fastening
Steps:
-
Hand each child a foam crown base.
-
Lay out a variety of decorating supplies on the table.
-
Let kids personalize their crowns using stickers, gems, and glitter pens.
-
Use velcro or tape to adjust and close the crown around their head.
Tissue Paper Flowers
I’ve been doing tissue paper flowers since my own school days, and they’re still just as magical. It’s basically folding, twisting, and fluffing — kids love that “reveal” moment when the flat paper suddenly becomes a flower. I like to pre-stack tissue sheets in fun color combos so kids don’t stress about choosing.
The flowers make great party favors too. One parent told me she put hers in a vase at home, and her daughter was so proud every time she walked by it. To be fair, tissue paper tears if kids get too rough, so I always keep extras ready. But honestly, watching kids wave their handmade “bouquets” around the room is just the sweetest thing.
Materials:
-
Tissue paper in various colors
-
Green pipe cleaners
-
Safety scissors
Steps:
-
Stack 5–8 sheets of tissue paper together.
-
Accordion-fold the stack back and forth.
-
Twist a pipe cleaner around the center of the fold.
-
Gently separate each layer of tissue to fluff up the flower.
-
Shape the petals as desired.
Decorate Your Own Cupcake (Craft Version)
Okay, this one always makes people chuckle because no, it’s not edible. Instead, you give the kids paper cupcake cutouts, pom-poms for “frosting,” and sequins for sprinkles. It’s zero-sugar chaos, which parents secretly thank you for.
Last time I did this, one boy made a “chili cupcake” with red pom-poms and black beads. Not gonna lie, it looked cooler than mine. Kids get so creative when food is turned into art. And if you’ve got the budget, hand them little cupcake boxes to store their creation — it feels like a real take-home treat, minus the sugar crash later.
Materials:
-
Cupcake liners
-
Cotton balls or pom-poms
-
Felt or construction paper “sprinkles”
-
Glue
-
Glitter or sticker embellishments
Steps:
-
Fill each cupcake liner with cotton balls or pom-poms.
-
Glue on paper “sprinkles” and decorations.
-
Add glitter or stickers for extra fun.
-
Let them pretend-play with their sweet treat creations!
Paint-a-Pot & Plant a Seed
This one’s my personal favorite because it mixes art with a little life lesson. Hand out small terra-cotta pots, a few brushes, and paint, and let the kids decorate. After they’re done, they plant a seed inside — sunflower, bean, even herbs work great.
I still remember one girl telling me she checked her pot every morning before school, just waiting for her seed to sprout. It’s one of those crafts that doesn’t end when the party does, and that makes it extra special. Pro tip: put down a plastic tablecloth unless you want rainbow-painted tables. Honestly, messy hands are part of the fun, but keep wet wipes close.
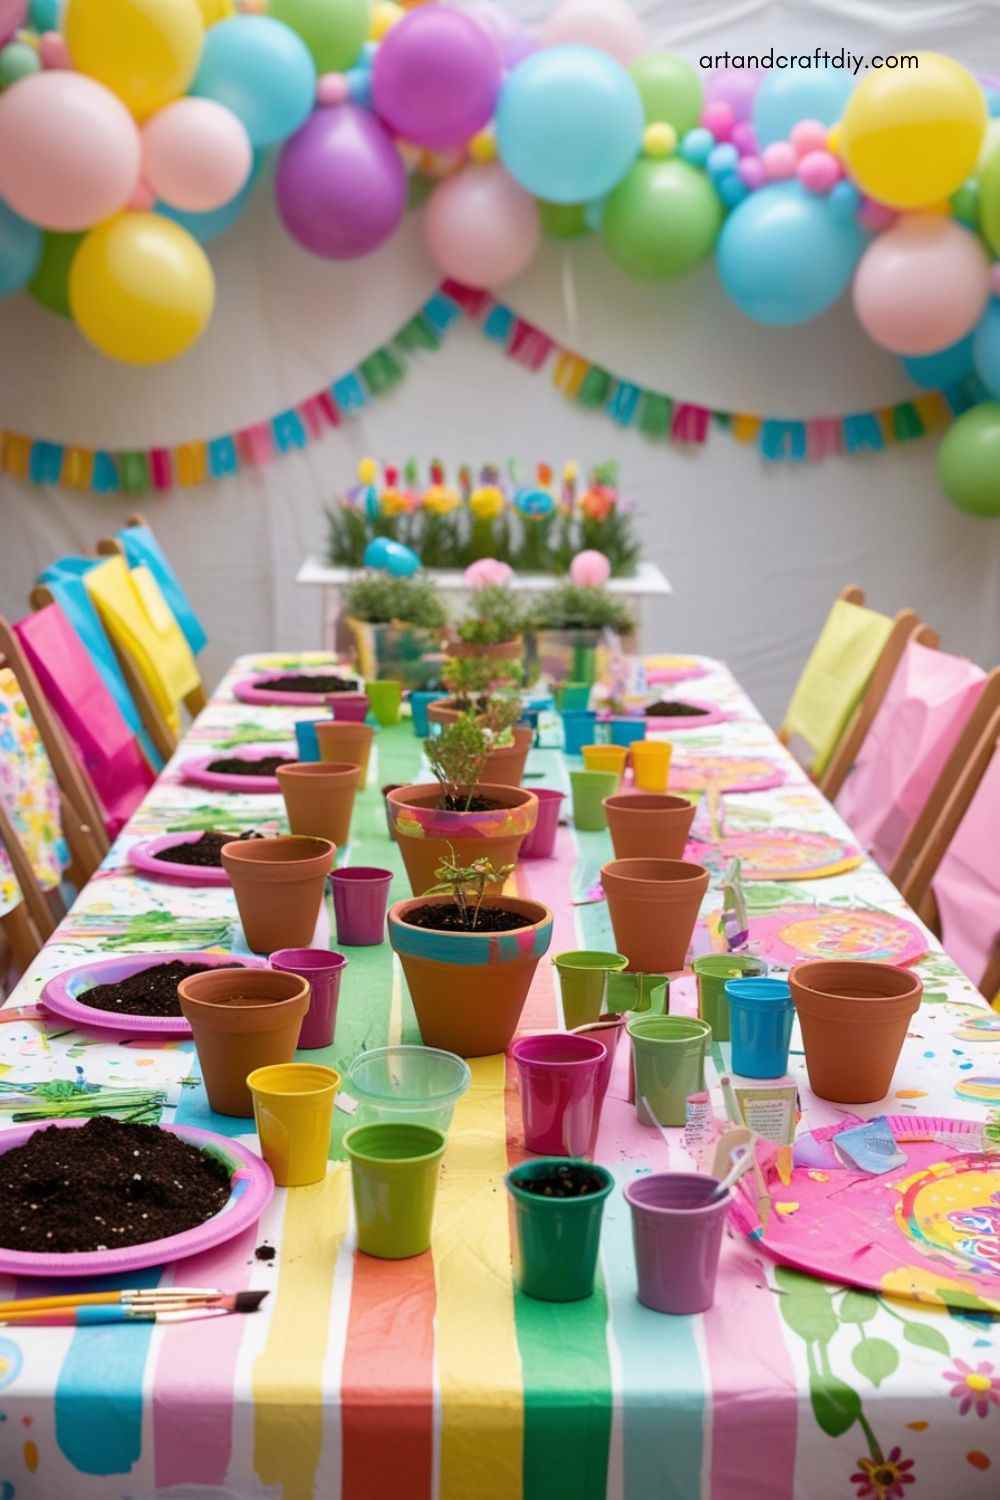
Materials:
-
Small terra cotta pots
-
Acrylic paint and brushes
-
Soil
-
Flower or herb seeds
-
Aprons or smocks
Steps:
-
Have kids paint and decorate their pots however they like.
-
Once dry, help them fill the pot with soil.
-
Let them plant a seed and gently water it.
-
Kids can take their pot home and watch their plant grow!
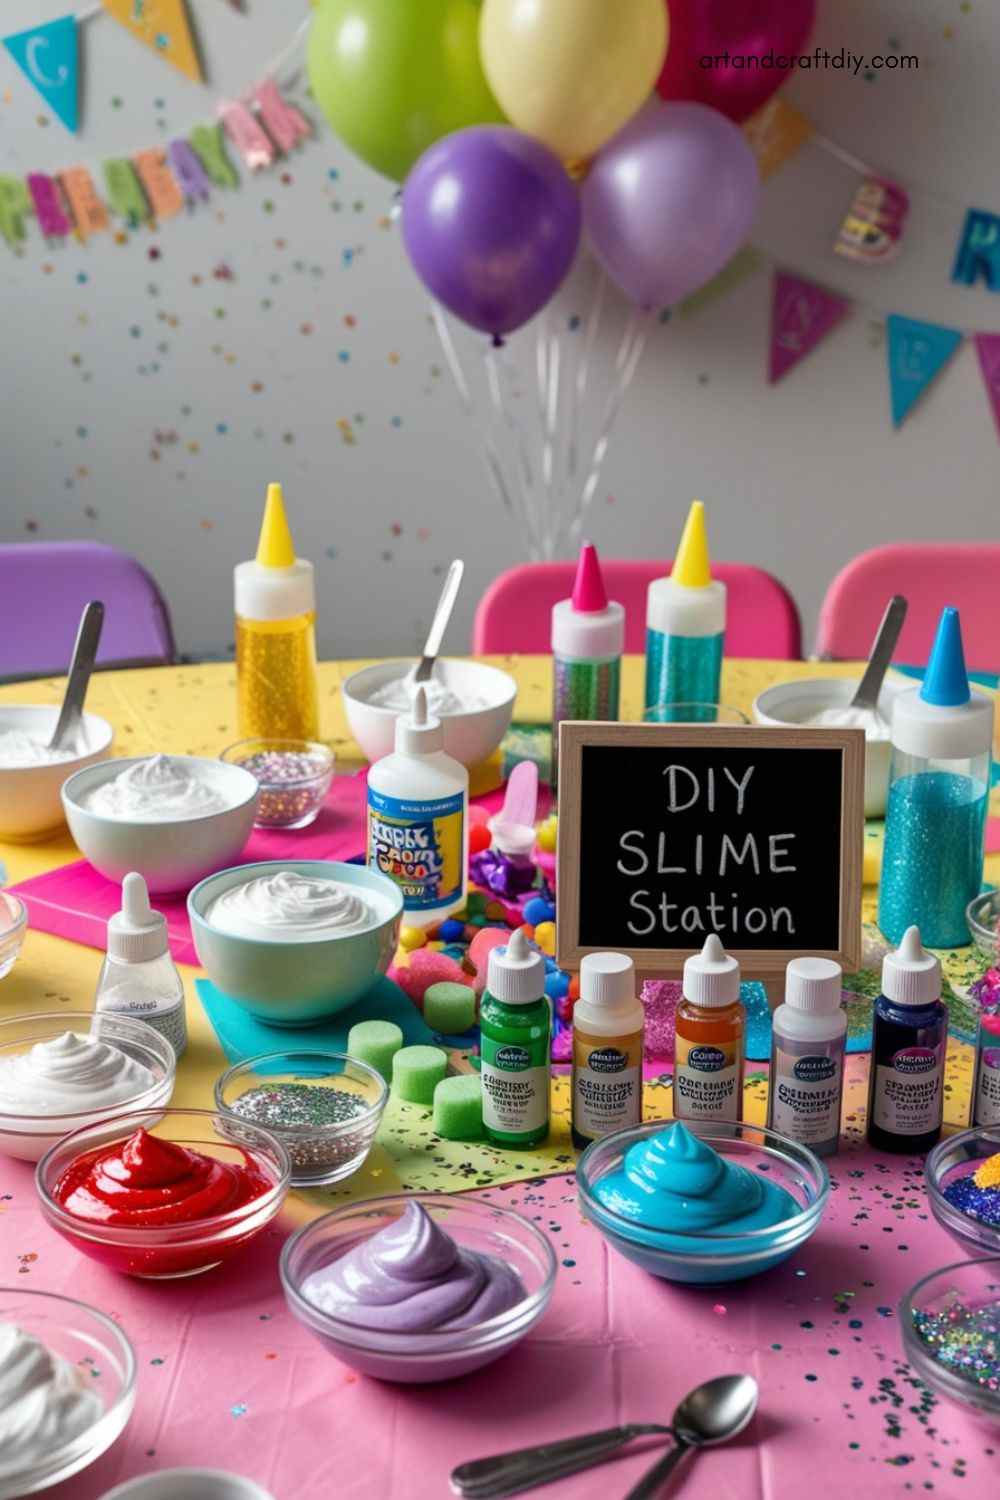
DIY Slime Station
Slime is messy, but hear me out: kids go absolutely wild for it. I usually set up a “slime bar” with bowls of glue, food coloring, glitter, and mix-ins like beads or sequins. Each kid gets their own little container, so they can take it home.
To be fair, the first time I tried this, I underestimated how long kids would want to mix and squish. They were so absorbed I had to delay cake cutting. And yes, you’ll hear parents groan about slime in the car, but honestly, it’s worth it for the giggles and “look at mine!” shouts.
Materials:
-
White glue
-
Baking soda
-
Contact lens solution
-
Food coloring
-
Glitter or foam beads (optional)
-
Bowls and mixing spoons
Steps:
-
In a bowl, mix ½ cup glue with a few drops of food coloring.
-
Add 1 tbsp baking soda and stir.
-
Slowly add contact solution while stirring until slime forms.
-
Knead with hands and add glitter or beads if desired.
Rainbow Sand Art Bottles
Sand art feels a little retro, but kids don’t care. They just see the rainbow magic. All you need are clear plastic bottles or little jars and colored sand. I like to use funnels (or paper rolled into a funnel shape) so it’s not pure chaos.
I’ll never forget one boy who layered his sand to look like a sunset — orange, pink, purple — it was gorgeous. Of course, others just dumped it in like soup, but that’s half the fun. Tip from experience: seal those bottles with a dab of hot glue before sending them home, unless you want rainbow sand covering someone’s car.

Source: Pinterest
Materials:
-
Clear plastic bottles or jars
-
Colored sand
-
Funnels or paper cones
-
Spoons
Steps:
-
Set up a station with bottles and sand in different colors.
-
Use a funnel or cone to pour layers of sand into the bottles.
-
Alternate colors to make stripes.
-
Fill to the top and seal the lid.
DIY Photo Frames
Photo frame crafts are fun because they double as a keepsake. I usually buy plain wooden frames and let the kids go wild with paint, stickers, and gems. Sometimes I snap a quick party photo, print it, and stick it in before the kids leave. Parents LOVE that.
Honestly, the frames turn out so different every time. I once had a kid cover the entire frame in googly eyes — slightly creepy, but unforgettable. The best part is when kids actually use them at home. One parent told me it’s still on their fridge years later, which made me ridiculously happy.
Materials:
-
Cardboard or foam photo frames
-
Stickers, buttons, gems
-
Paint or markers
-
Glue
Steps:
-
Hand out blank frames to each child.
-
Let them paint, draw, or glue on decorations.
-
Once dry, insert a party photo or let them take the frame home to fill.
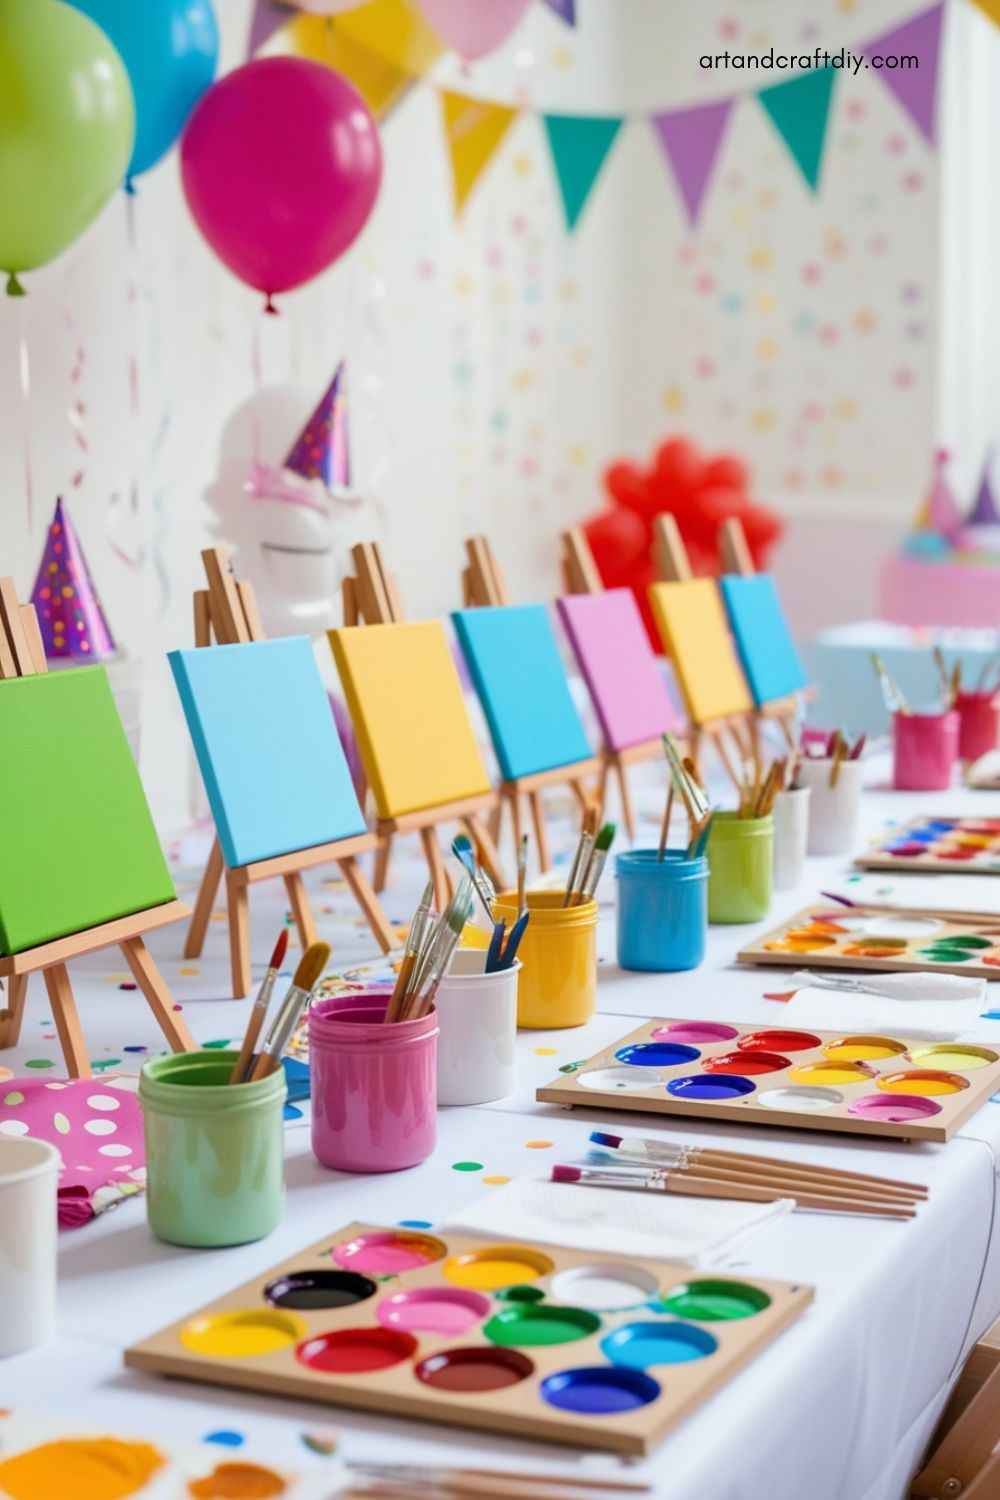
Mini Canvas Painting
This one makes me feel like I’m hosting a mini art studio. Hand each child a small canvas and paint set, and just let them create whatever’s in their heads. It’s quieter than most activities, which is a blessing after the sugar rush kicks in.
One time, the birthday girl painted her dog, and the pride on her face when she showed everyone was priceless. In my opinion, this is one of those crafts where parents get secretly competitive too. Don’t be surprised if you end up with a whole gallery wall by the end of the party.
Materials:
-
Mini canvases or canvas boards
-
Acrylic paint
-
Paintbrushes
-
Water cups and paper towels
-
Aprons or smocks
Steps:
-
Give each child a canvas and brush.
-
Set out paint in small palettes.
-
Let kids paint freely or suggest a simple theme (like balloons or rainbows).
-
Allow to dry and send them home with their artwork.
DIY Paper Kites
Paper kites are such an underrated craft. They’re lightweight, easy, and the kids actually get to run outside and test them out afterward. I usually pre-cut diamond shapes out of cardstock, hand out markers and stickers for decorating, and then attach a wooden dowel with string.
The best memory I have is of kids running across the yard with their homemade kites flying behind them — pure joy. Some worked, some didn’t, but honestly, no one cared. Pro tip: use ribbon or streamers for tails because they look amazing when the wind catches them. It’s the perfect way to end a party on an energetic note.
Materials:
-
Construction paper
-
Wooden skewers or craft sticks
-
Tape or glue
-
Yarn or string
-
Markers and stickers for decorating
Steps:
-
Cut paper into diamond or triangle kite shapes.
-
Tape skewers in a cross shape on the back for support.
-
Attach a string to the center.
-
Decorate with colors, stickers, and streamers.
Popsicle Stick Picture Frames
An easy and colorful craft that’s great for little hands.
Materials:
-
Popsicle sticks
-
Glue
-
Paint or markers
-
Stickers, buttons, and embellishments
-
String or magnet strips (optional)
Steps:
-
Glue four sticks into a square shape.
-
Let kids paint and decorate their frame.
-
Attach a photo or drawing to the back.
-
Add a magnet or string to hang it.
Button Art on Canvas
Kids love picking out fun, colorful buttons and turning them into creative shapes.
Materials:
-
Small canvases or cardstock
-
Assorted buttons
-
Glue
-
Pencils (for sketching designs)
Steps:
-
Sketch a simple shape or letter on the canvas.
-
Fill in the shape by gluing buttons inside the outline.
-
Let dry and display the finished piece!
DIY Superhero Masks
Perfect for a superhero-themed party, these masks let kids become their own heroes.
Materials:
-
Foam or felt mask templates
-
Elastic cord
-
Markers or fabric paint
-
Glue
-
Sequins, stars, and lightning bolt cutouts
Steps:
-
Give each child a mask template.
-
Let them decorate with their superhero colors and designs.
-
Attach elastic cords to wear.
-
Have a superhero photo shoot afterward!
Friendship Keychains
These are easy, personal, and make a great party favor too.
Materials:
-
Key rings
-
Embroidery floss or colorful yarn
-
Beads
-
Scissors
Steps:
-
Tie several strands of floss to the key ring.
-
Braid or twist them together, adding beads along the way.
-
Tie off the end and trim excess.
-
Each child has a colorful, custom keychain to take home.
Tips for Success
Planning craft activities for a birthday party can be so much fun—but a little preparation goes a long way in keeping things smooth, stress-free, and enjoyable for everyone involved. Here are a few simple tips to help you set up a creative space that’s both kid-friendly and organized:
-
Pre-cut and portion supplies for easy setup
Before the party starts, cut out shapes, portion materials into small containers or zip-top bags, and set up craft kits in advance. This keeps things moving quickly and avoids long wait times. -
Provide aprons or smocks
Crafting can get messy! Protect kids’ clothes by offering aprons or smocks. Disposable ones work great and can even be part of the fun if they’re colorful or themed. -
Use disposable tablecloths for easier cleanup
Cover tables with disposable or plastic tablecloths to catch paint, glue, or glitter. When the party’s over, cleanup is as simple as folding everything up and tossing it out. -
Display finished crafts on a “gallery wall” at the party
Dedicate a wall or bulletin board to show off the kids’ completed masterpieces. It builds excitement and gives everyone a chance to admire each other’s work. -
Include instructions or example craft at the table
Set out a simple sample of the finished craft along with easy-to-follow instructions. It helps guide the kids (and any assisting adults) and keeps the activity flowing smoothly.
These thoughtful touches make a big difference in making your craft station a hit at the birthday bash!
FAQ
What age group are these Birthday party craft ideas suitable for?
Most of these Birthday party craft ideas work well for ages 3 and up, with adult supervision for younger kids. Simpler crafts like paper plate animals and tissue paper flowers are great for preschoolers, while older kids (ages 6–12) will enjoy more detailed projects like bead bracelets or slime making.
How many craft activities should I plan for one party?
One or two craft activities are usually perfect for a birthday party. It’s enough to keep the kids engaged without overwhelming them—or the schedule!
How long does each craft activity take?
Most crafts take about 15 to 30 minutes, depending on complexity and the age of the children. Always plan for a little extra time, especially if kids are decorating or waiting for paint/glue to dry.
What should I do to prepare for the craft station?
Pre-cut materials, portion supplies into kits or bowls, and lay down disposable tablecloths. Having aprons, wipes, and trash bins nearby also makes the station easier to manage.

Hi, I’m Victoria, an art and craft teacher at Newark City Schools, where I have the joy of working with middle school students to help them explore their creativity and develop their artistic talents. I believe that art is a powerful way for students to express themselves, and I strive to make every lesson a fun, engaging, and inspiring experience.
I created this website to share the art and craft projects, techniques, and resources that I use in my classroom, hoping to inspire both educators and young artists alike. Whether you’re a teacher looking for new ideas or a student eager to try something new, I’m excited to provide creative tools and projects that anyone can enjoy.
When I’m not in the classroom, I love experimenting with different art forms and learning new crafting techniques. My goal is to help others discover the joy of making things with their hands, and I hope my website serves as a space for everyone to explore their creative potential.