
The start of a new school year is very exciting. Back to School Party Decoration Ideas can make this time even more special and fun. A happy and welcoming party place helps students feel calm, excited, and ready for new things. Decorations do more than look nice — they make the room lively, give everyone motivation, and turn the day into a real celebration
Back to School Party Decoration Ideas
Back to School Party Decoration Ideas make the first day of school fun and special. Simple, colorful decorations welcome students, lift their mood, and start the year with excitement.
Chalkboard Welcome Wall
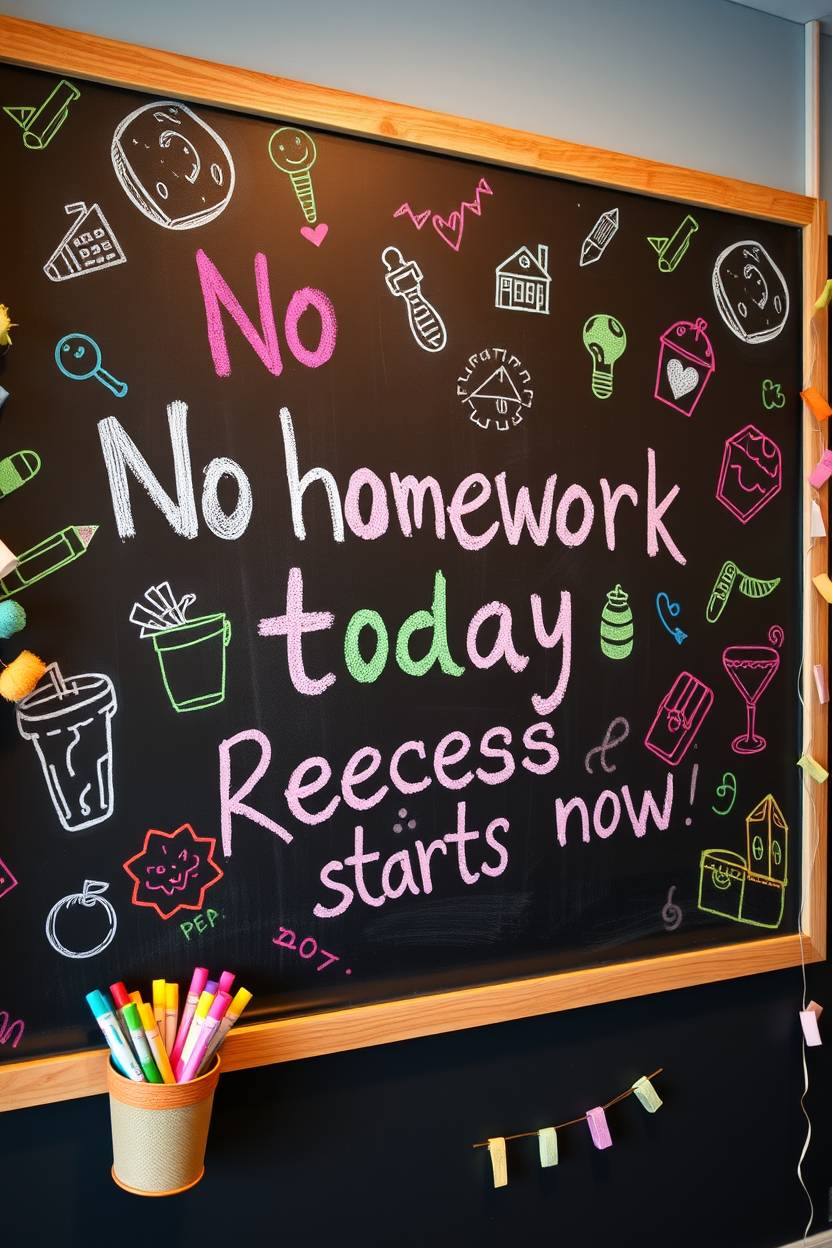
I’ve always believed that the first thing guests see sets the mood for the entire party. A chalkboard welcome wall is my absolute favorite for back-to-school events. I once set one up in my living room with colorful chalks and doodles, and kids went wild adding their own little drawings before the party even began. It’s such a warm, interactive way to say, “You’re in for a fun time!”
If you can’t find a big chalkboard, don’t panic. Honestly, I’ve cheated before by using black chart paper taped neatly on the wall. It still gives that school vibe. Add a few cheeky quotes like “No homework today!” or “Recess starts now!” and trust me, people will smile the second they walk in. Just make sure to keep chalks in a cute tin so it feels more intentional than messy.
Balloon Apple Arch
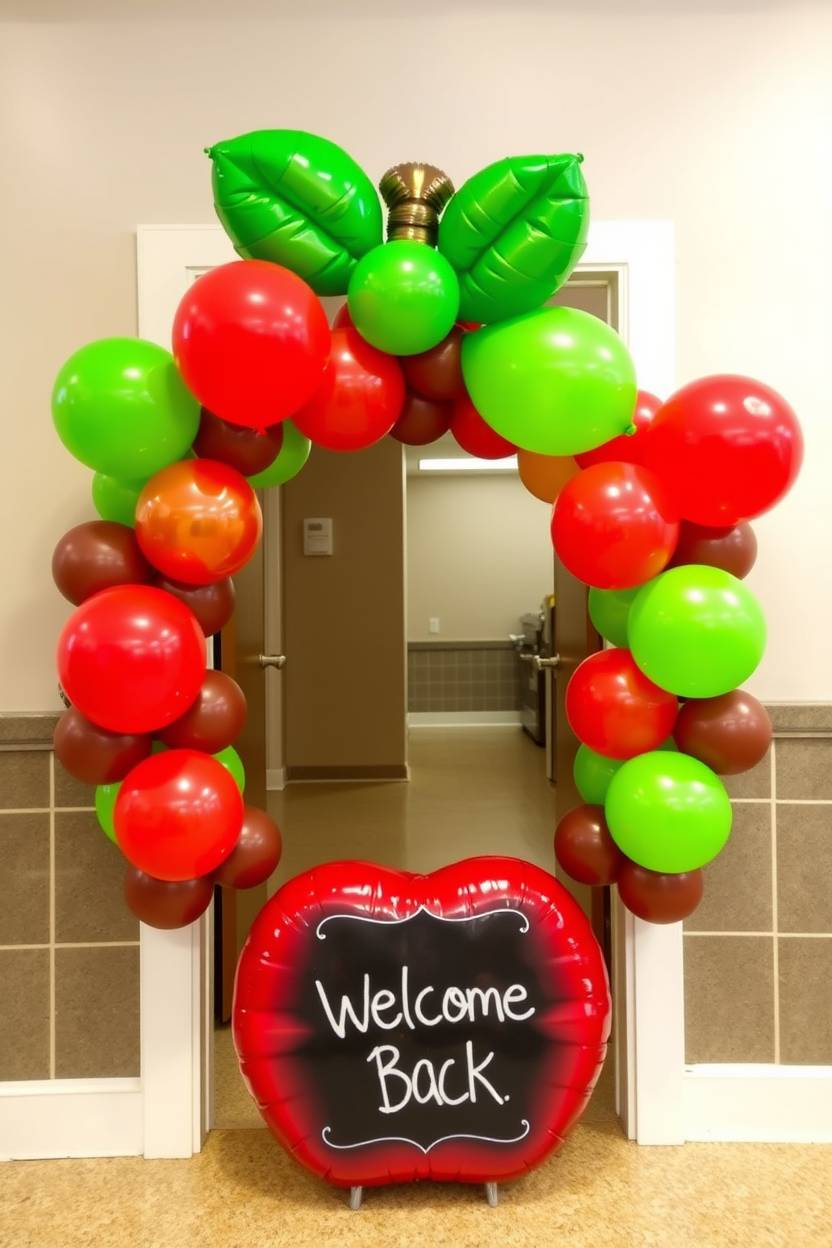
Nothing screams “school is back” like a big, juicy red apple — well, balloon version at least! I once made a balloon apple arch right at my doorway, and let me tell you, parents were just as obsessed as the kids. You’ll need lots of red balloons, a few green ones for the leaves, and some brown for the stem. It’s surprisingly easy once you get into the rhythm of tying them together.
To be fair, I’ve also had a moment where my arch collapsed halfway through the party — lesson learned: always secure it to something sturdy. You can even place a small chalkboard sign under it saying “Welcome Back” for extra charm. The pop of color makes it impossible not to stop for a picture, so be ready for that mini photo shoot chaos. In my opinion, this decoration alone is worth the effort just for the reactions you’ll get.
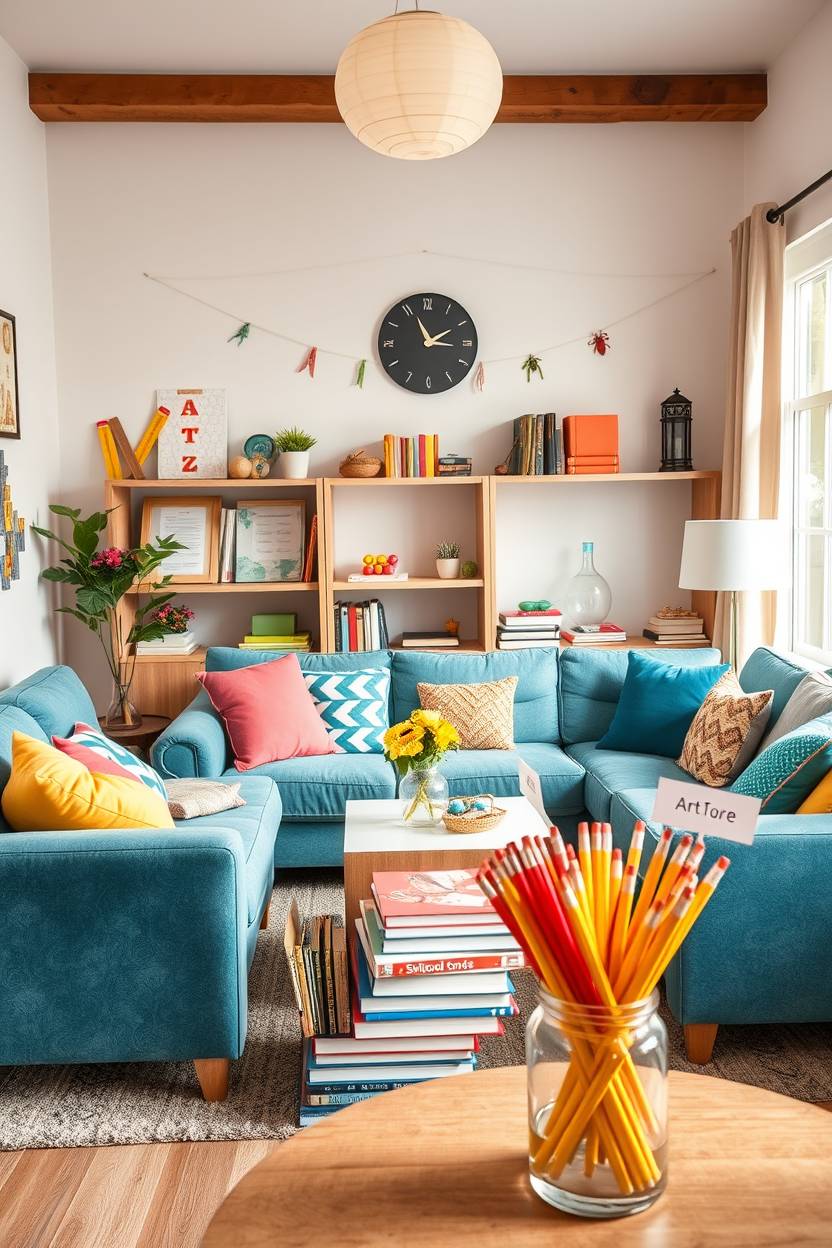
Pencil Centerpieces
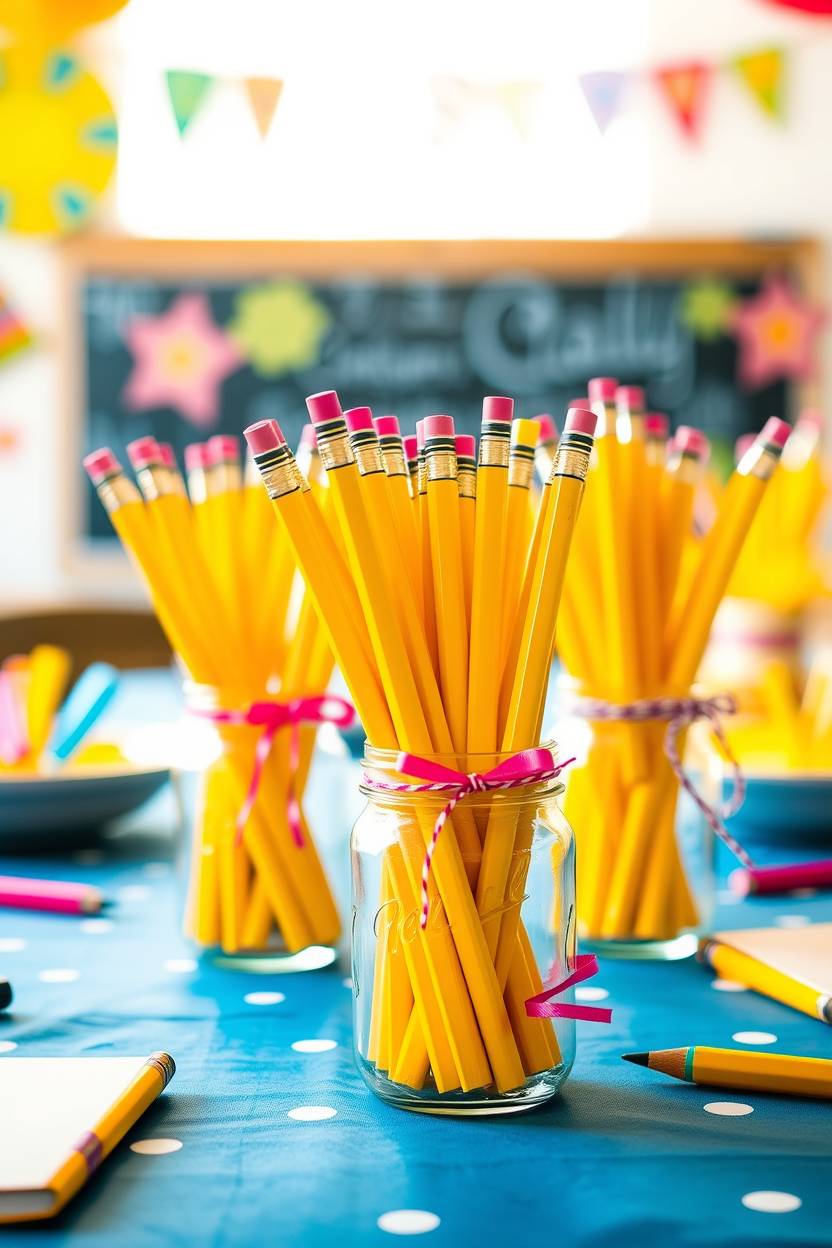
In my opinion, pencil centerpieces are the most underrated back-to-school party décor. I did this once for my niece’s party, and everyone kept asking where I bought them — spoiler: I made them myself! I just bundled a handful of sharpened pencils with a bright ribbon and popped them into mason jars. Instant classroom chic.
For extra flair, I tucked in a few fake daisies so it didn’t feel too plain. Honestly, I think the mix of bright yellow pencils and fresh blooms made it so photogenic. You can also wrap the jars in colorful washi tape or even pages from an old notebook for a crafty touch. Plus, guests can take the pencils home, which is a sweet little bonus. It’s one of those decorations that doubles as a gift — a win-win in my book.
Colorful Book Stack Display

Books aren’t just for reading — they’re amazing for décor too. I once raided my own bookshelf and stacked a bunch of colorful hardcovers on a table, then topped them with a small globe. It instantly screamed “school vibes” without me spending a rupee. Guests loved flipping through the books while sipping on juice, which honestly was adorable to watch.
If you want to go the extra mile, tie each stack with a ribbon in bright colors — yellow, blue, or red look the best in my opinion. You can even add a little chalkboard label in front saying “Math Zone” or “Reading Nook” to make it feel more themed. The best part? It’s so easy to pack away afterward, unlike those giant props that take up storage forever.
School Bus Photo Booth
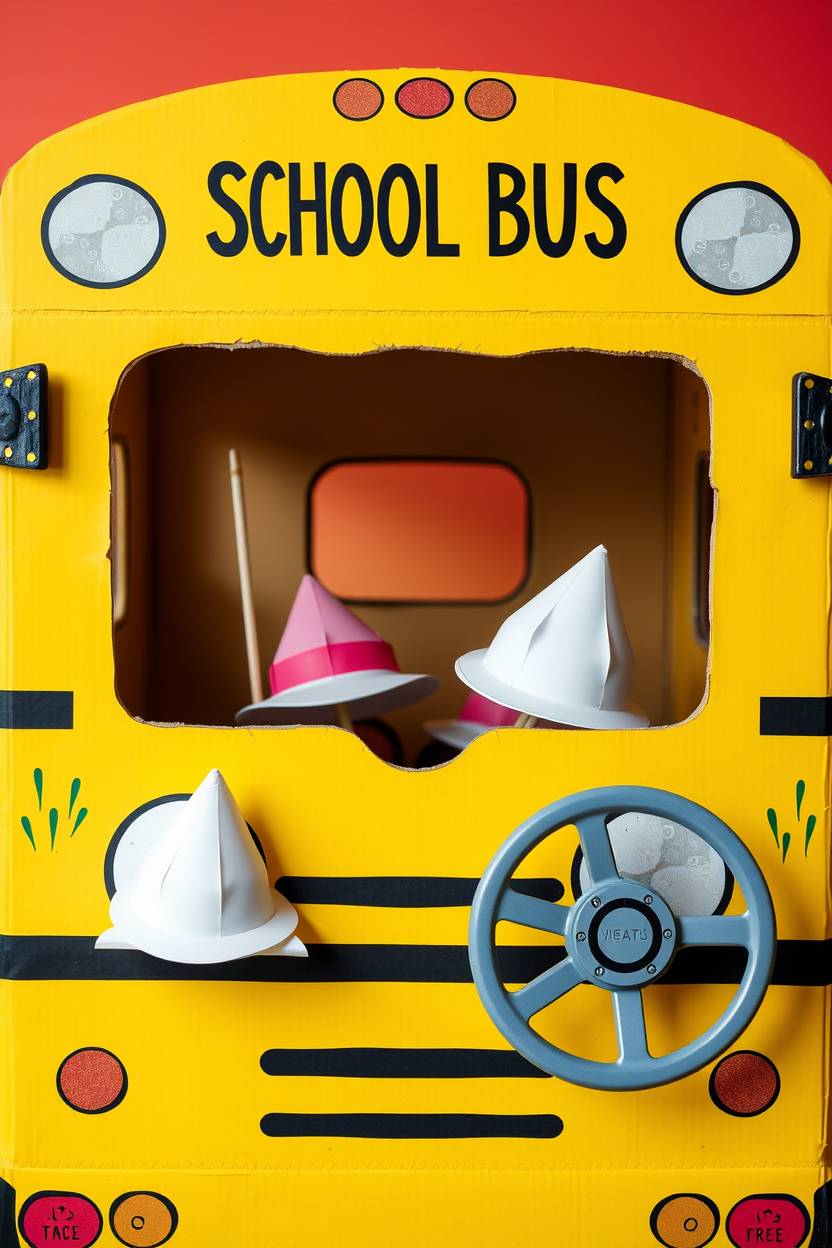
A school photo booth will always get the loudest laughs. I once made one from a giant piece of cardboard, cut out windows, and painted it bright yellow. By the end of the day, we had a stack of the silliest pictures — even my uncle, who never poses for anything, jumped in. To be fair, the secret is to keep props handy, like paper hats or fake driving wheels.
If painting isn’t your thing, print a big school bus image and mount it on foam board. Then place it in a spot with good lighting — trust me, you’ll thank yourself later when you see the photos. I think it’s one of those back-to-school decorations that instantly turns into an activity, so it’s a win for entertainment too.
Subject-Themed Corners
I’m a sucker for themed spaces, so I once divided my living room into little “subject corners” — Math had rulers and puzzles, Science had beakers and fake bugs, and English had a mini library. It gave the kids so much to explore instead of just sitting around. Honestly, the adults were just as curious!
You don’t need to go overboard buying props. In my opinion, half the fun is improvising — a vase of pencils can be “Art Class,” an old measuring tape becomes “Math Tools.” Put a small sign in each corner so people know where they are. It makes the whole party feel like a mini school tour, minus the boring lectures.
Name Tag Garland
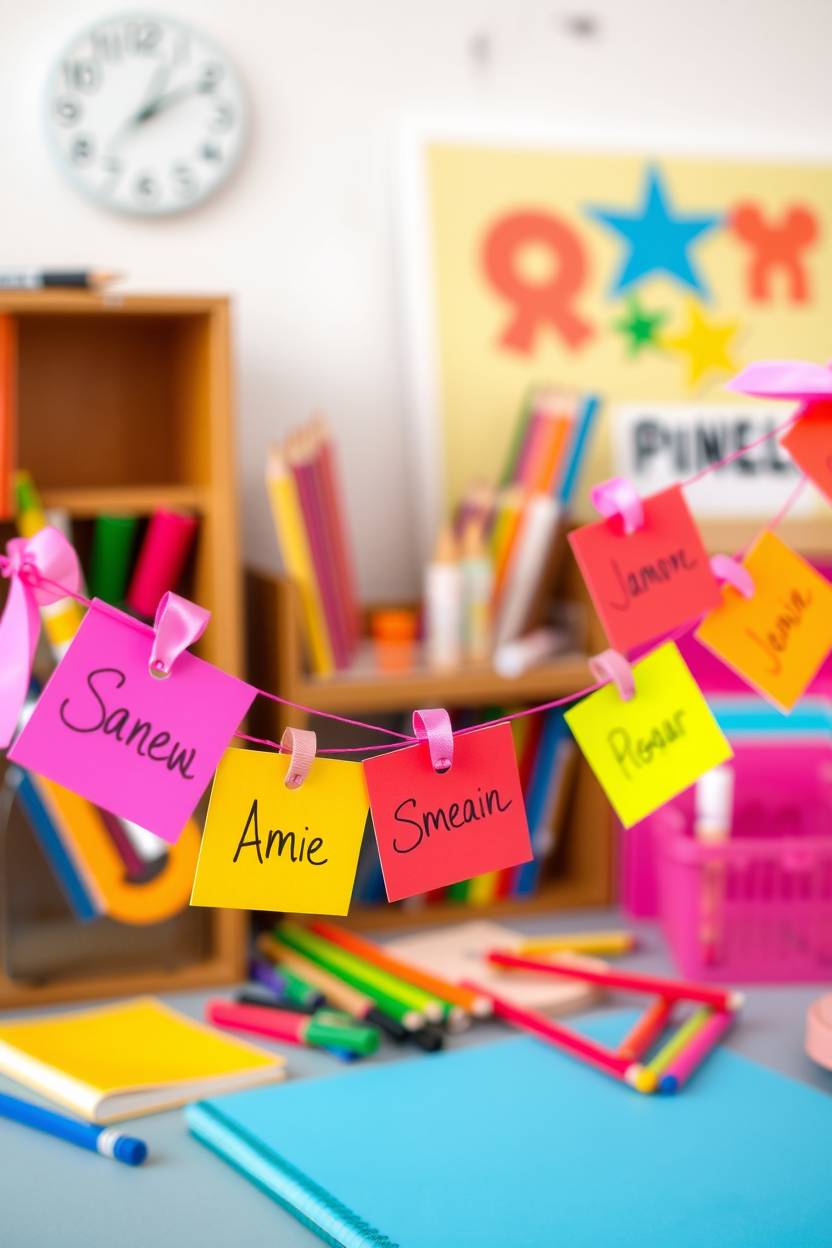
Once, I decided to skip plain old bunting and made a name tag garland instead — and it turned into such a cute icebreaker. I cut out colorful rectangles, wrote each guest’s name in bold marker, and strung them across the entryway. People spotted their names instantly and it made them feel special.
To be fair, handwriting each name does take time, but it’s so worth it. You can let guests take their tags home as a keepsake or pin them to their shirts during the party. I’ve found that it makes introductions way less awkward — no more “uh, what was your name again?” moments. Plus, it’s inexpensive and easy to switch up every year.
Ruler Table Runner
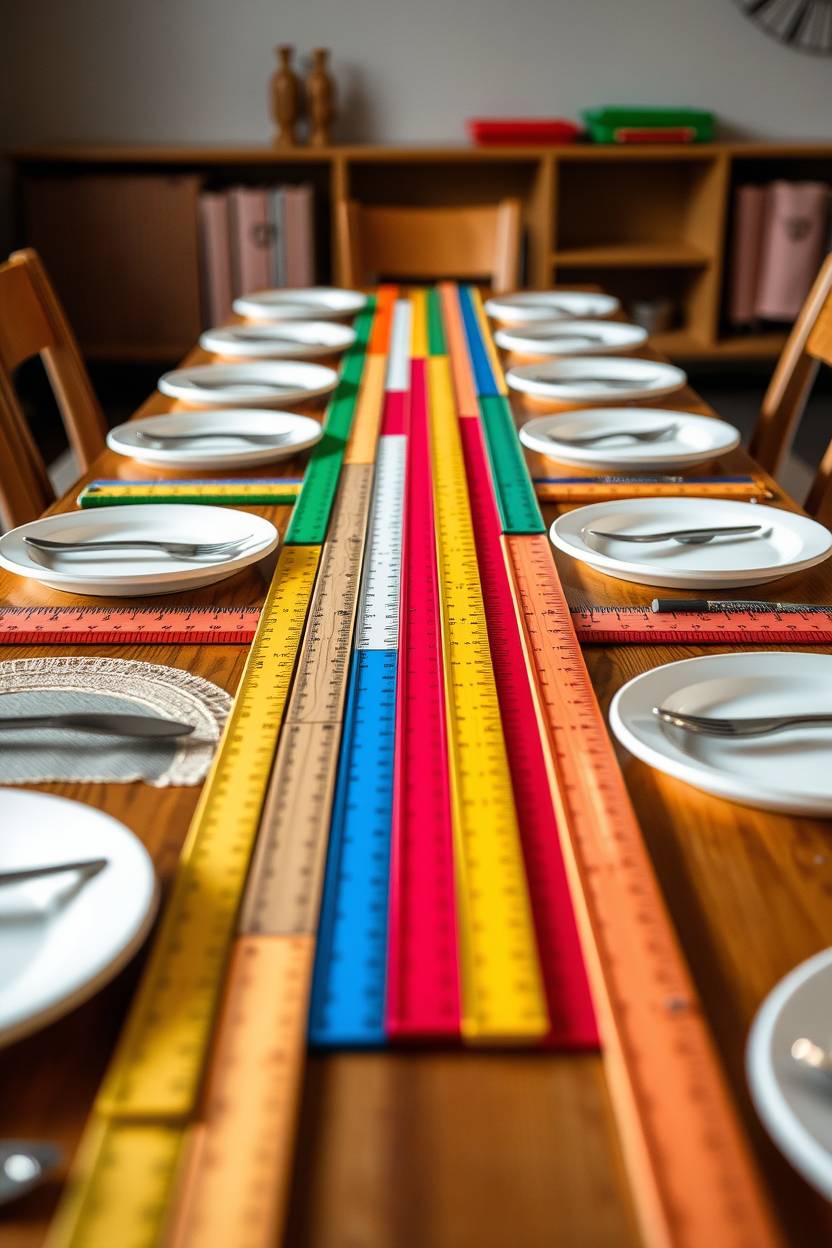
I once saw a table runner made entirely from wooden rulers, and it stuck in my brain until I finally made my own. It’s surprisingly simple — just line up rulers side by side and secure them with tape underneath. The look is so charming and instantly recognizable as “school.”
You can even mix in colorful plastic rulers for a more playful vibe. In my opinion, it’s best paired with plain white plates so the table doesn’t look too busy. And if you’re anything like me, you’ll get way too much satisfaction from guests suddenly realizing what the “runner” actually is.
Notebook Paper Bunting
This is probably the cheapest décor I’ve ever done, but it still got so many compliments. I just tore out sheets from an old notebook, cut them into triangles, and strung them up with twine. The faint blue lines and red margin just screamed “school days” to me.
If you want to get creative, write little welcome messages or doodles on each triangle. Honestly, I think this is a great project to do with kids — they’ll love decorating each piece. Plus, it’s so easy to store for next year if you’re careful when packing it away.
Backpack Gift Table
Instead of regular gift bags, I once used mini backpacks as party favors — and it turned into a décor piece all by itself. I lined them up on a table, each one stuffed with stationery and candy, and guests kept snapping photos before even touching them.
The best part is that the backpacks are reusable, so parents loved the practicality. To be fair, it can get pricey depending on your guest list, so I’d say this works best for smaller gatherings. But the wow factor? Totally worth it.
First-Day Memory Wall
One of my favorite touches ever was a “First-Day Memory Wall.” I set up a corkboard and asked guests to pin photos from their own first days of school — some were black-and-white from decades ago, others were fresh from last year. The mix was hilarious and heartwarming.
I’ve found that it’s a great conversation starter. People linger in front of the board, pointing and laughing at the hairstyles and outfits. You can even keep the wall up for a few days after the party as a cute family display.
Cupcake Pencil Toppers
I once baked simple vanilla cupcakes and stuck pencil-shaped toppers into each one — they were gone in minutes. Honestly, it’s the fastest way to tie food into your décor without overcomplicating things.
You can buy toppers online or make your own with colored paper and toothpicks. I like mixing in a few with tiny erasers glued on top just for fun. Guests love the little details, even if they pretend not to notice.
DIY Crayon Lanterns
Crayon lanterns are magical — when the light shines through, the colors melt into each other beautifully. I made mine by gluing old crayons to the outside of plain glass jars and popping in LED candles. The glow was so warm and cheerful.
To be fair, the hot glue can get messy, but it’s nothing a little patience can’t fix. I’ve found they work best as table accents rather than big centerpieces. Kids especially love picking out which “their” crayon is in the mix.
Goal-Setting Message Board
One year, I decided to mix décor with a little positivity by putting up a “Goal-Setting Board.” Guests could write one thing they wanted to achieve that school year — from “learn to bake” to “make the basketball team.”
Honestly, it became a surprisingly deep moment in the middle of all the fun. People still talk about the goals they wrote that day. In my opinion, it’s the kind of decoration that makes a party truly memorable.
Bus Stop Entrance Sign
Instead of a plain “Welcome” sign, I made a “Bus Stop” sign and placed it right outside my door. I even set a little bench under it so guests could “wait for the bus” before entering. It was silly but so on-theme.
You can make it from cardboard, a wooden post, or even an old umbrella stand as the base. The moment people spot it, they instantly get that school feeling — it’s a tiny touch that makes a big impact.
DIY & Budget-Friendly Ideas
You can make great party decorations without spending much money. Use things you already have and do simple crafts with kids. These ideas are easy, fun, and low cost.
-
Reuse old school supplies for decoration — put pencils in jars, stack old books as a display, and make pen holders from tin cans.
-
Printable back-to-school banners — find free templates online, print at home, cut, and string them with rope or ribbon.
-
Paper crafts with kids — make paper chains, paper apples, and pencil cutouts together; it is fun and everyone helps.
-
Turn used notebooks into bunting — cut the pages into triangles, write names or messages, and hang them.
-
Mason jars or glass bottles as vases — paint or wrap them with colored paper to match your theme.
-
Use leftover fabric or old t-shirts for table runners or pennants.
-
Thrift shop finds — look for cheap frames, baskets, or school props you can repaint or decorate.
-
Easy tape and ribbon hacks — use washi tape, ribbons, or string to create borders, gift wraps, and photo-frame edges.
-
Snack labels from recycled paper — cut old cards into small tags and write fun names for snacks.
These ideas save money and make the party look warm and creative.
FAQ
What is a good theme for a back-to-school party?
Pick simple themes like chalkboard, school supplies, school colours, or a subject theme (math, art). Choose what students will like.
How much time do I need to decorate?
For basic decorations, 1–3 hours. If you make many DIY items, plan 1–2 days in advance.
Can I make decorations on a small budget?
Yes. Reuse old supplies, print free banners, and do paper crafts with kids to save money.
What materials do I need for DIY decorations?
Basic items: paper, glue, scissors, string, tape, markers, jars, and old school supplies (pencils, notebooks).

Hi, I’m Victoria, an art and craft teacher at Newark City Schools, where I have the joy of working with middle school students to help them explore their creativity and develop their artistic talents. I believe that art is a powerful way for students to express themselves, and I strive to make every lesson a fun, engaging, and inspiring experience.
I created this website to share the art and craft projects, techniques, and resources that I use in my classroom, hoping to inspire both educators and young artists alike. Whether you’re a teacher looking for new ideas or a student eager to try something new, I’m excited to provide creative tools and projects that anyone can enjoy.
When I’m not in the classroom, I love experimenting with different art forms and learning new crafting techniques. My goal is to help others discover the joy of making things with their hands, and I hope my website serves as a space for everyone to explore their creative potential.