
Air Dry Clay Crafts for Kids are a fun and creative way to keep little hands busy. Air dry clay is a soft, moldable material that hardens on its own when left out in the open—no oven or baking needed! This makes it perfect for children, as it’s non-toxic, easy to use, and safe for home or classroom projects.
These crafts aren’t just entertaining—they’re educational too. Kids get to express themselves while boosting creativity and improving motor skills. Whether they’re shaping animals, beads, or handprints, air dry clay opens up endless possibilities for young imaginations.
Air Dry Clay Crafts for Kids
Air Dry Clay Crafts for Kids are fun, mess-free activities that let children shape, create, and explore. This non-toxic, no-bake clay helps boost creativity and develop fine motor skills.
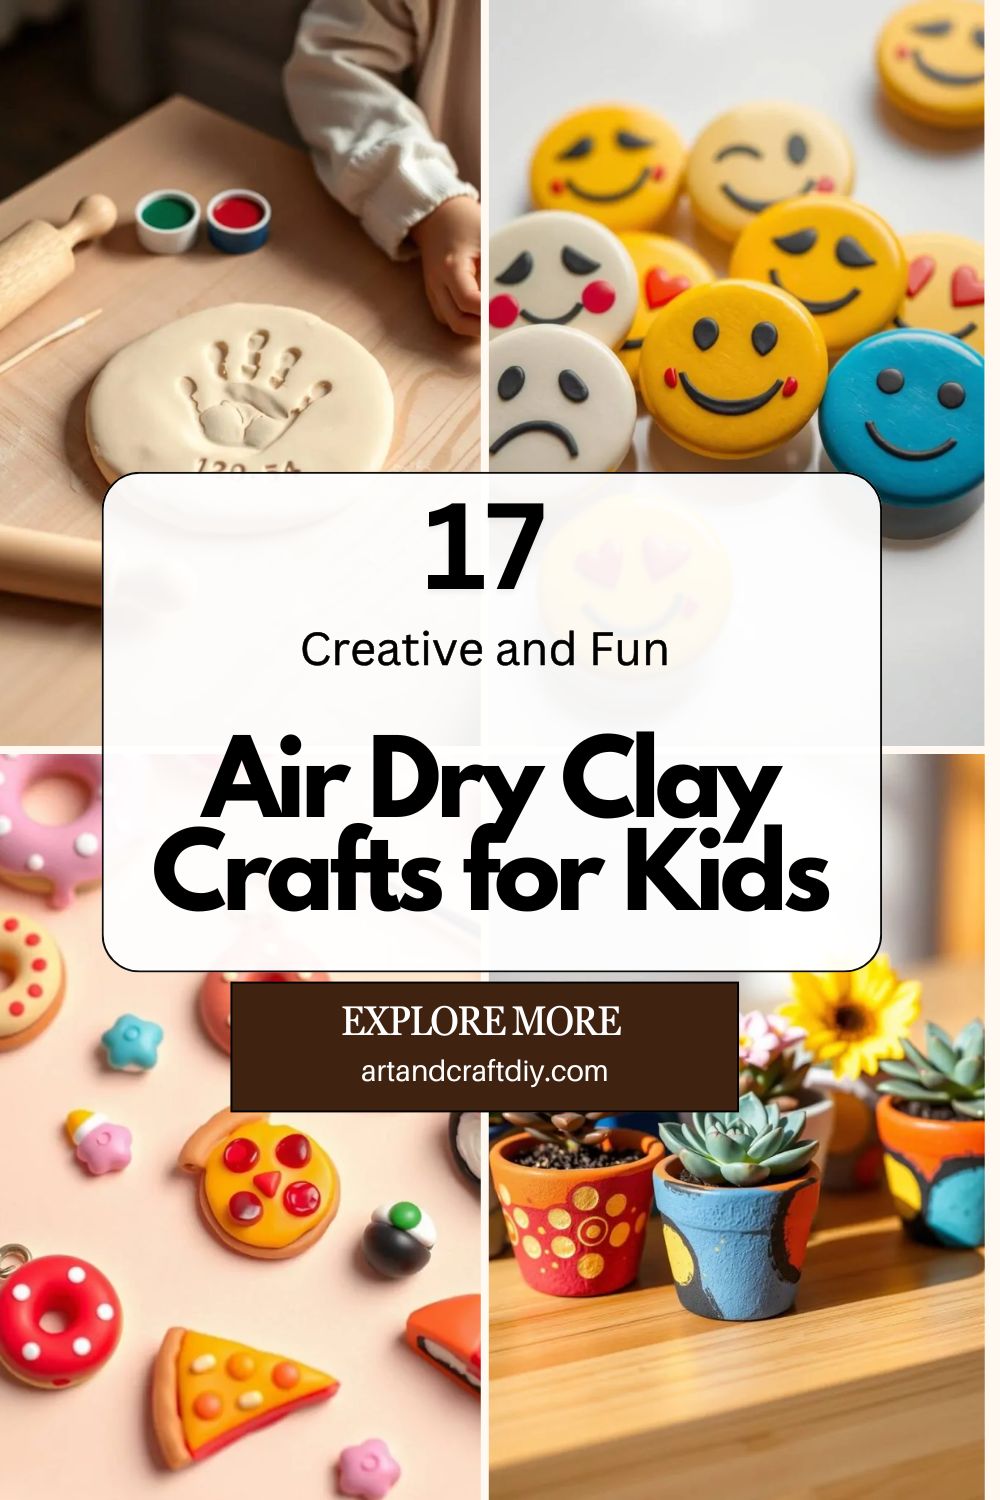
Handprint Keepsakes
There’s just something heart-melting about capturing those tiny hands in clay. I remember the first time I made a handprint keepsake with my niece—her fingers wiggled the entire time, and we ended up with a slightly smudged but adorable imprint. That’s what made it perfect, though. Imperfections are memories. All you need is a chunk of air dry clay, a rolling pin, and a calm-ish child. Press their hand gently and let it dry flat for a day or two.
Honestly, these make the best gifts for grandparents or just something sweet to hang on the wall. You can write the child’s name and date with a toothpick before it dries, then paint it once it’s hardened. I always suggest sealing it with a varnish so it lasts longer. Be warned: once you start, you’ll want to make a new one every year.
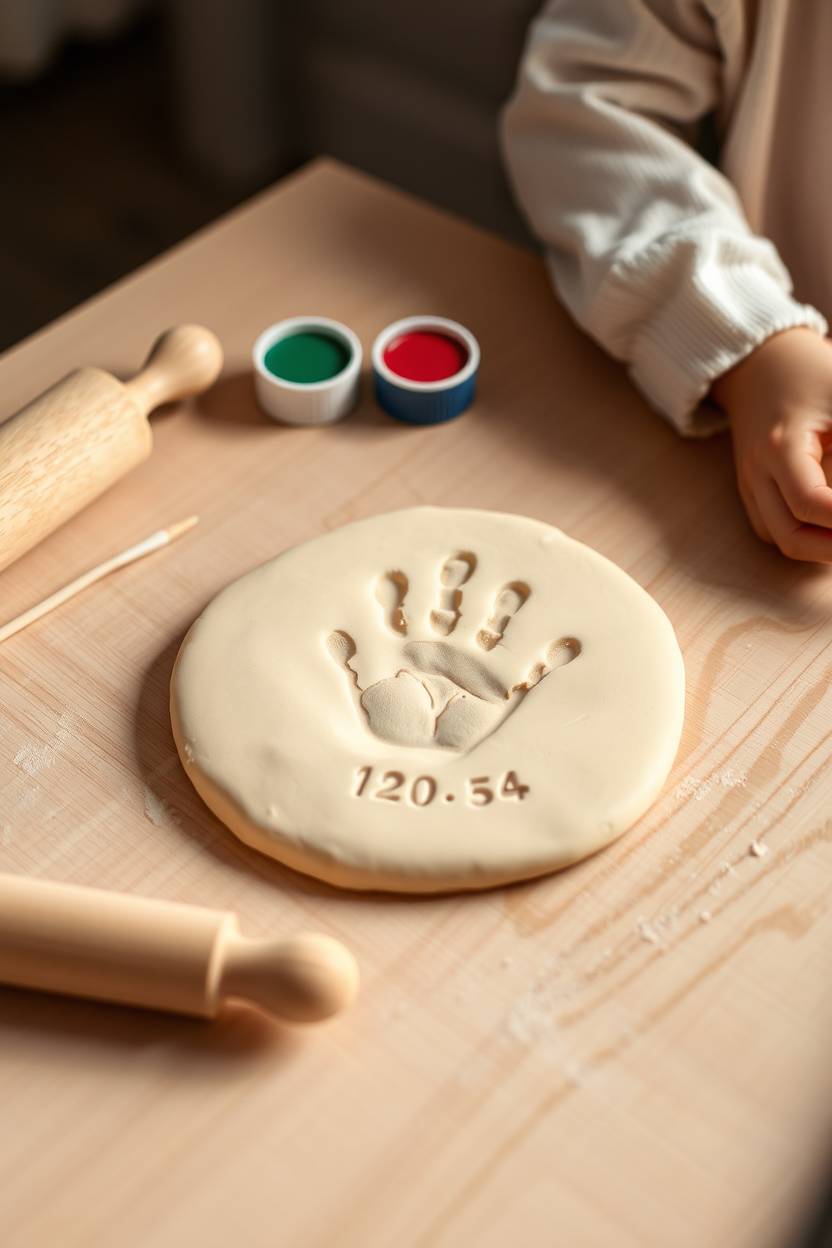
Animal Figurines
Making little animal friends out of clay? An all-time favorite. I started doing this with my son during a rainy week stuck indoors, and it turned into our own mini zoo. Start with basic shapes—circles for heads, ovals for bodies—and build from there. You don’t need perfection, just a bit of imagination and patience.
The best part? Kids LOVE creating their favorite animals, even if the lion ends up looking like a blob with googly eyes. In my opinion, it’s all about letting them lead. I usually keep toothpicks handy for whiskers and texture, and I always encourage painting them bright, wacky colors once they’re dry. There’s something magical about holding a creature you made yourself.
Clay Beads for Jewelry
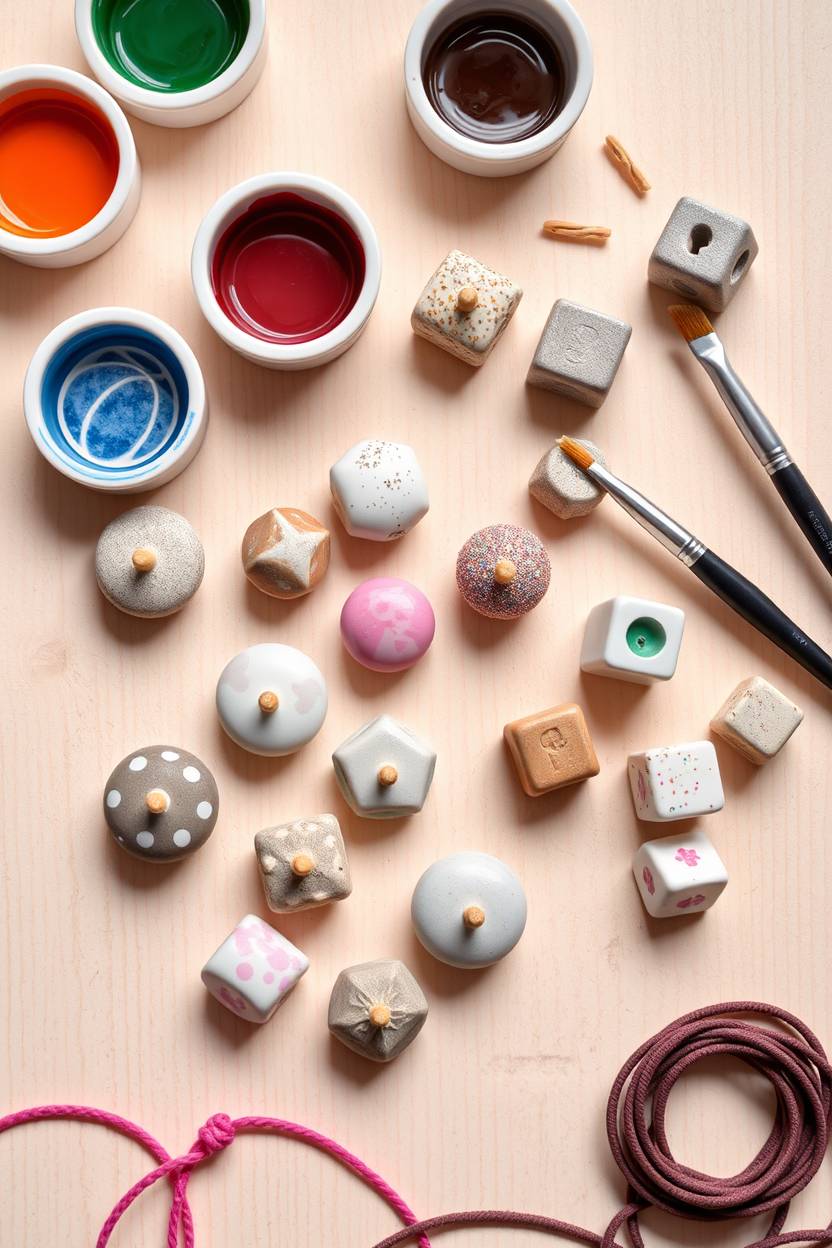
To be fair, this is more of a “me and my teen” activity, but even younger kids can jump in. Rolling out clay beads is oddly relaxing. We make all sorts—marbled, speckled, even glittered ones. You just roll tiny balls, poke a hole with a toothpick, and let them dry completely. Simple, satisfying.
One tip: rotate the toothpick halfway through drying so the hole doesn’t close up. I’ve made that mistake too many times. Once dry, we paint them or leave them natural, then string them on elastic or yarn. Watching my daughter beam with her DIY bracelet is priceless. Honestly, you’ll want to wear them yourself.
Personalized Name Tags

This one is a lifesaver for school bags and gift tags. I like using cookie cutters to shape the clay first—stars, hearts, circles—then I carve in names with a skewer. It’s quick and customizable. My little one made one for her backpack that said “Boss Girl” and strutted around with it all week. It’s the confidence for me.
After drying, paint and varnish to give it that professional look. These also make great party craft activities—each kid goes home with their own name tag. In my experience, they love it more than any party favor.
Mini Flower Pots
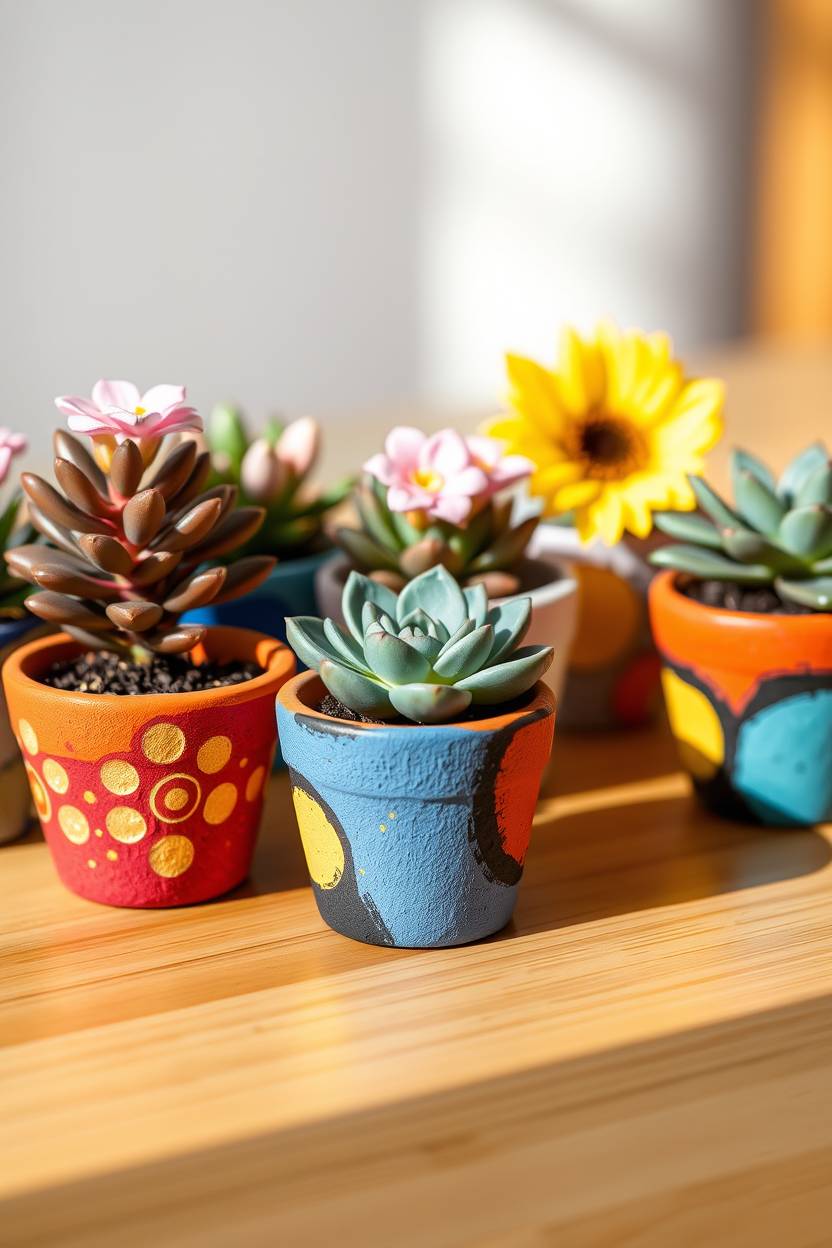
I once made these as teacher gifts, and they were a total hit. You basically mold a small bowl shape out of clay and gently press the bottom flat so it stands. Let it dry completely before adding paint. I personally love doing abstract paint patterns with kids—think dots, splashes, even fingerprints.
Fill it with a succulent or fake flowers, and voilà, adorable desk décor. Pro tip: don’t forget to line the inside with a bit of plastic wrap if you’re adding real plants. I’ve had a couple of soggy disasters.
Holiday Ornaments

This is a December must-do at our place. Every year, we sit down with hot cocoa, carols in the background, and roll out a fresh batch of ornaments. Stars, trees, snowflakes—you name it. The kids stamp in their names or tiny doodles and we let them dry overnight.
I usually pre-punch a hole at the top for hanging. Once dry, we go wild with glitter and metallic paint. I’ve even wrapped some up as gifts, and people never believe they’re handmade. Honest to goodness, it beats buying the same store ornaments every year.
Emoji Magnets

My youngest is emoji-obsessed, so we had to make these. We roll out flat discs, let them dry, then paint on classic faces—heart eyes, laughing tears, you get the idea. You can buy cheap magnets online and glue them to the back.
The laughter that comes from designing a poop emoji magnet together? Totally worth it. They’re fun, trendy, and the kids love swapping them on the fridge. Honestly, I still have one that says “meh” holding up my grocery list.
Fairy Garden Accessories
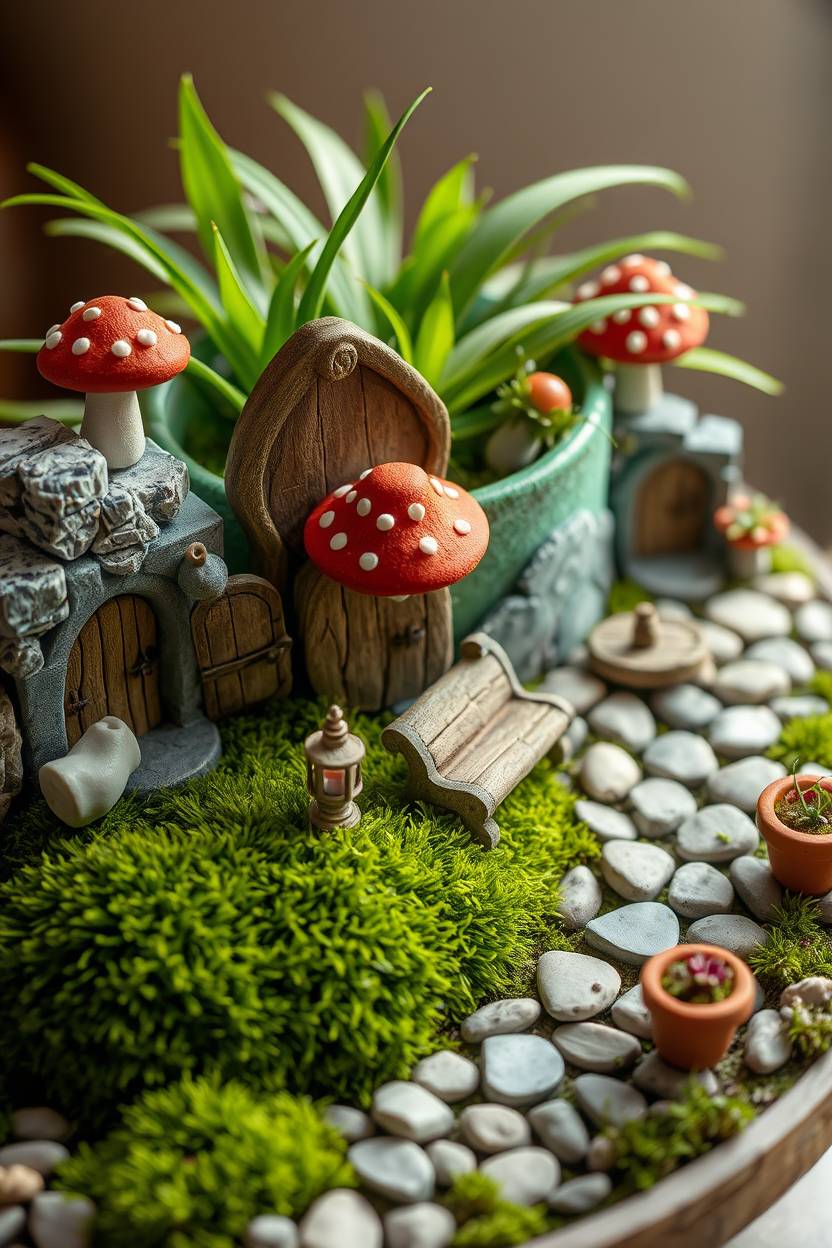
If your kid’s into fairies (or gnomes!), this one’s a winner. Think: tiny mushrooms, little doors, miniature benches. It’s all in the details. I let the kids sketch their designs first—somehow it always turns into a magical storyline.
We make the pieces and let them dry, then add them to a plant pot outside. It’s so charming, like building a world from scratch. In my opinion, there’s no wrong way to do it. As long as it sparks imagination, it’s perfect.
Food-Shaped Charms
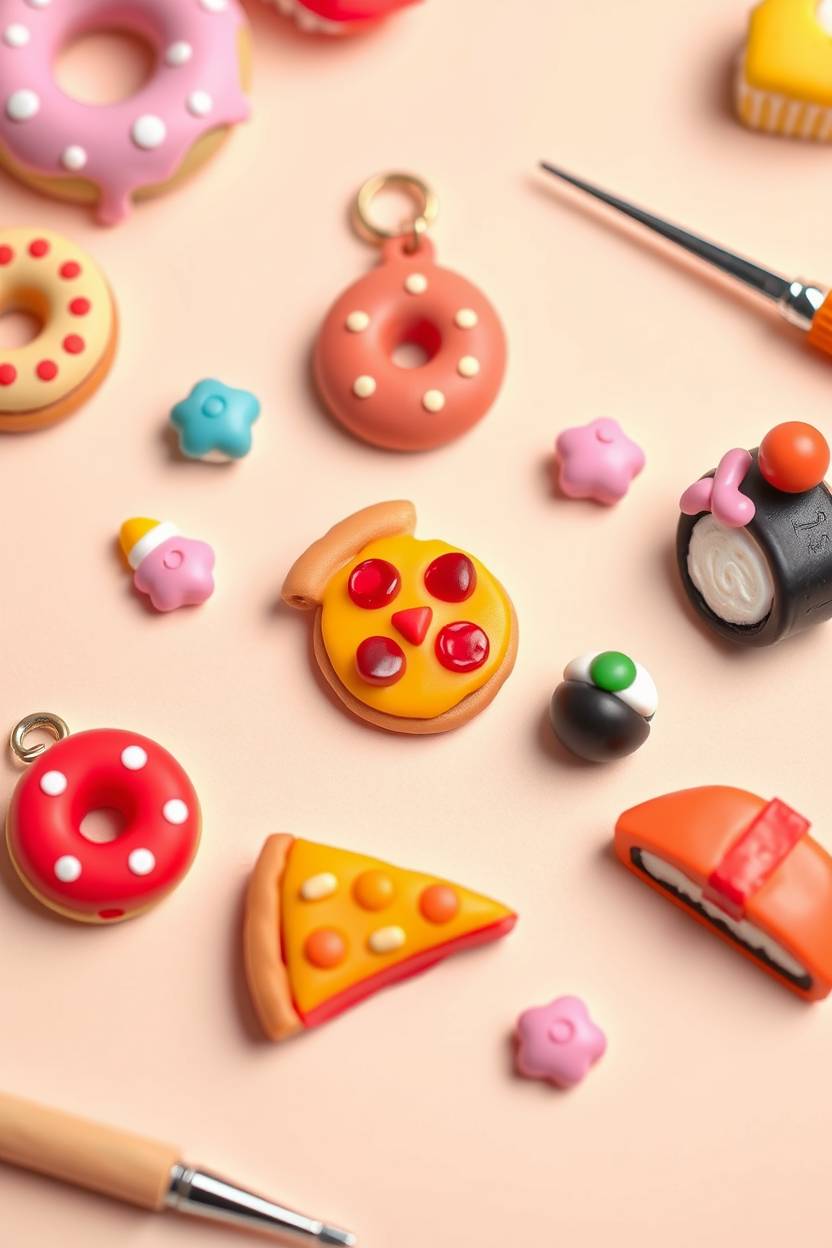
Tiny donuts, pizzas, cupcakes—these are just plain adorable. And, let’s be honest, very satisfying to make. I like to make these with toothpicks, shaping the tiniest details and layering colors like frosting and sprinkles.
My daughter once made a mini sushi roll and wore it as a pendant for a month. They’re also great for keychains or zipper pulls. Once dry and painted, seal them with gloss for a real “candy-shop” finish. It’s addictive—you’ve been warned.
Treasure Boxes
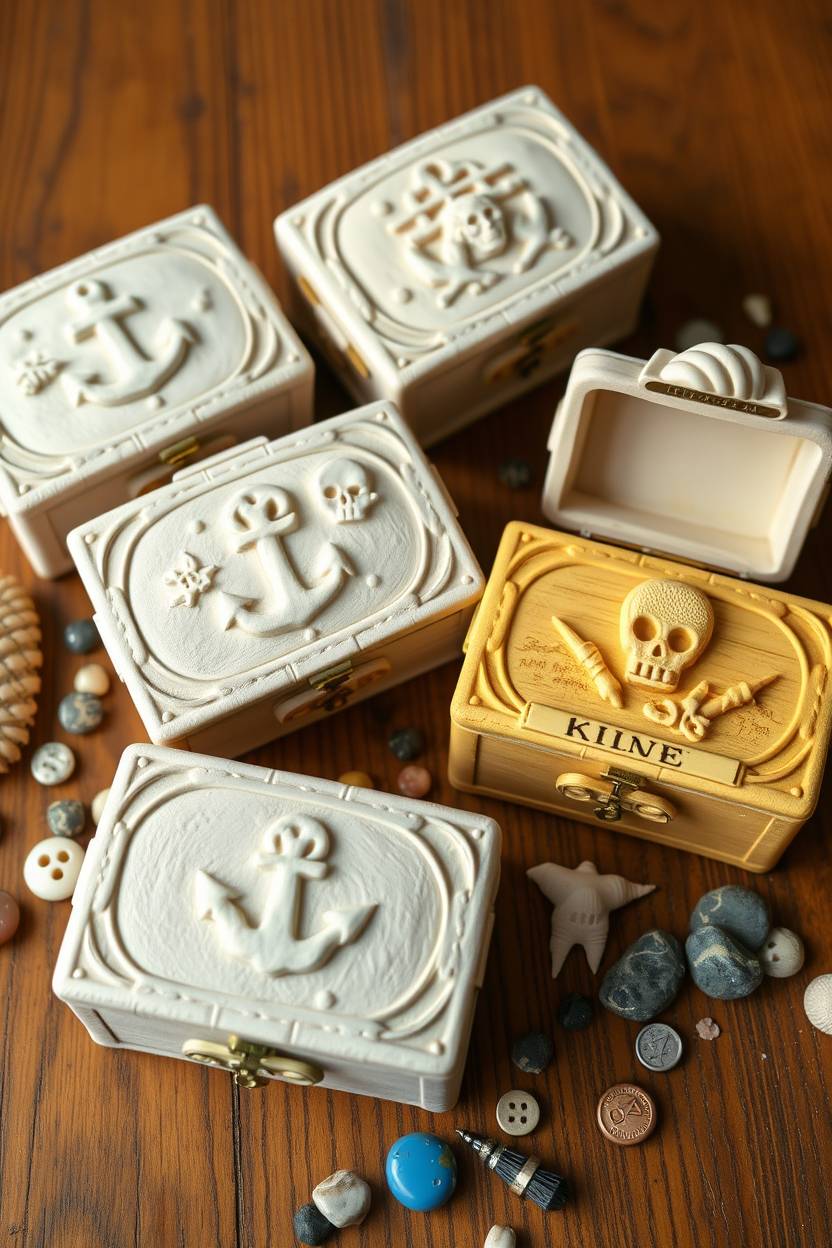
I made these for a pirate-themed party once, and they stole the show. Mold a basic box shape, add a lid, and don’t forget to etch in designs while the clay is soft. We used seashells and buttons for decorations.
Kids love having their own box to stash secret notes or shiny rocks. In my experience, adding their name on the lid makes it extra special. Just remember to let it dry thoroughly or the lid can crack. Been there, done that.
Leaf Prints
Nature walks + clay = magic. We collect leaves, press them into flattened clay discs, and the detail that comes out is just wow. I usually make sure the clay is soft and even, and we use a rolling pin for clean impressions.
Let them dry and then paint the veins with metallic golds or greens—it looks so pretty. I’ve even used them as coasters or wall hangings. Honestly, this is one of my all-time favorite clay crafts. So simple, so beautiful.
Star-Shaped Decorations
This one’s a go-to for sleepover crafts. We roll out the clay, use star cookie cutters, and then the kids decorate each one however they like. Some add initials, others press in rhinestones or glitter before it dries.
I hang these from windows, tie them onto gift wraps, or even string a bunch as bunting. In my opinion, the best part is seeing each child’s personal spin. No two stars are ever the same.
Picture Frame Borders
This one is kind of a hidden gem. We take old cardboard photo frames and decorate the borders with clay—tiny flowers, swirls, hearts. It gives a handmade upgrade to any photo. I once made one covered in mini animals for a baby picture, and it’s still sitting on my shelf.
The key is to make small, lightweight pieces so they don’t fall off. I glue them once the clay’s dry and solid. To be fair, it takes a bit of effort, but the results? Worth every minute.
Clay Dinosaurs
Okay, who doesn’t love dinosaurs? My nephew made a T-rex with the tiniest arms and it still cracks me up. Start with basic shapes—egg for body, sticks for tail and limbs—and assemble gently while the clay is still soft.
Once dry, go bold with colors—green, blue, even pink if they want. I like to add little texture marks with a fork. In my opinion, the messier the better. These end up looking delightfully weird and wonderful.
Alphabet Letter Stamps
These are so useful and fun. We roll small rectangles, carve letters into them with skewers, and once dry, they become DIY stamps. I made a full A-Z set with my daughter, and now we use them with paint for art projects.
Honestly, it’s a learning tool and a craft in one. You can even make stamps of their name to use on cards or books. I always remind kids to press gently or the clay cracks—but hey, it’s a learning process!
Drying and Finishing Your Crafts
Once your child finishes shaping their creation, it’s time to let the magic happen—drying and decorating! Proper drying and finishing make sure the clay stays strong and looks great for a long time. Here’s what you need to know:
-
Drying Time:
Air dry clay usually takes 24 to 72 hours to fully dry, depending on the size and thickness of the craft. Thinner pieces dry faster, while thicker ones may need extra time. -
Tips to Avoid Cracks:
-
Let the clay dry slowly at room temperature—avoid using heat or fans.
-
Make sure the surface underneath is flat and smooth.
-
If needed, cover the clay loosely with plastic wrap for the first few hours to slow down drying.
-
Try not to make the clay too thick—even thickness helps it dry evenly.
-
-
Painting and Decorating:
-
Once the clay is completely dry, you can paint it using acrylic paints.
-
Add glitter, googly eyes, or stickers for extra fun.
-
To protect the finished piece, use a clear sealant or varnish (water-based is best for kids).
-
Let the paint and sealant dry completely before handling or displaying.
-
With these simple steps, Air Dry Clay Crafts for Kids will turn into long-lasting keepsakes full of color and creativity!
FAQ
Is air dry clay safe for children?
Yes, most Air Dry Clay brands are non-toxic and safe for kids to use. Always check the packaging to make sure it’s labeled child-safe.
Do you need to bake Air Dry Clay Crafts for Kids?
No, air dry clay hardens on its own when left out at room temperature—no oven or baking required.
How long does it take for Air Dry Clay Crafts for Kids to dry?
Drying time usually ranges from 24 to 72 hours, depending on the size and thickness of the craft.
Can kids paint Air Dry Clay Crafts?
Yes! Once the clay is fully dry, children can paint it with acrylics, and even decorate with glitter, stickers, or googly eyes.

Hi, I’m Victoria, an art and craft teacher at Newark City Schools, where I have the joy of working with middle school students to help them explore their creativity and develop their artistic talents. I believe that art is a powerful way for students to express themselves, and I strive to make every lesson a fun, engaging, and inspiring experience.
I created this website to share the art and craft projects, techniques, and resources that I use in my classroom, hoping to inspire both educators and young artists alike. Whether you’re a teacher looking for new ideas or a student eager to try something new, I’m excited to provide creative tools and projects that anyone can enjoy.
When I’m not in the classroom, I love experimenting with different art forms and learning new crafting techniques. My goal is to help others discover the joy of making things with their hands, and I hope my website serves as a space for everyone to explore their creative potential.