
Last winter, I remember being stuck indoors with my little cousins while the rain tapped endlessly on the windows. You know that feeling when kids are bouncing off the walls, and you’re just desperate to keep them busy (without resorting to endless cartoons)? Yeah, that was me. I grabbed some paper, glue, and a handful of glitter, and before I knew it, we were knee-deep in snowflake cutouts and pinecone ornaments. And honestly? It turned a gloomy afternoon into one of the coziest memories. That’s the magic of winter crafts for kids—they’re not just about keeping little hands busy, they’re about laughter, creativity, and sometimes, even a bit of mess you don’t mind cleaning up. In this post, I’m sharing some of the best winter crafts for kids that are simple, affordable, and actually fun. So if you’re craving ideas that’ll warm up cold days, you’re in the right place.
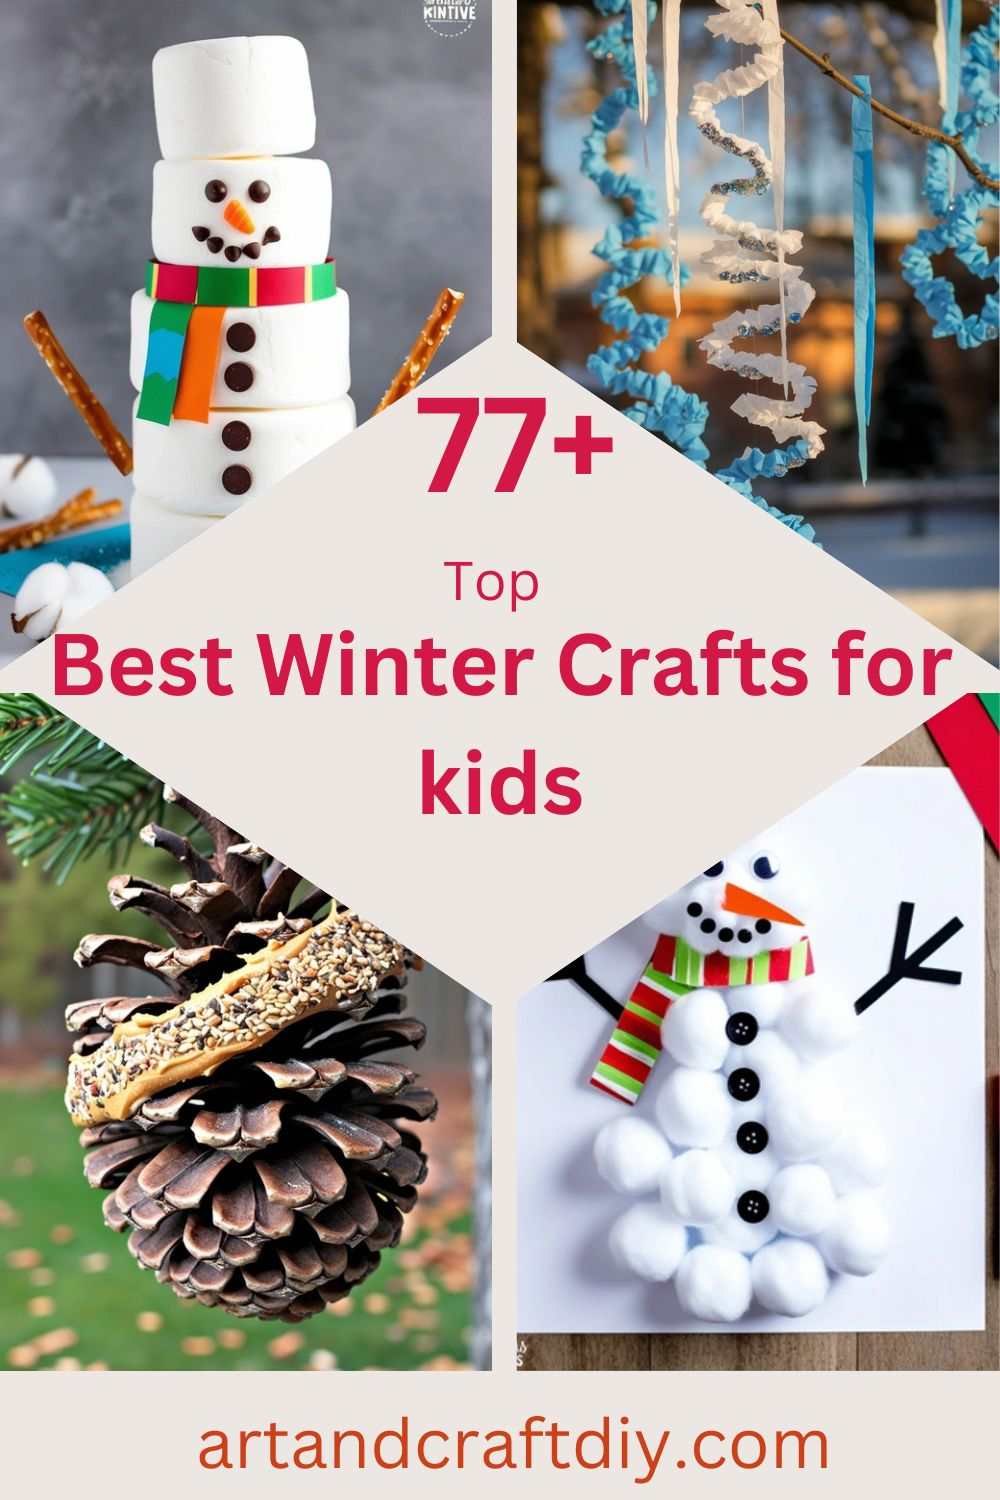
Best Winter Crafts for kids
DIY Paper Snowflakes
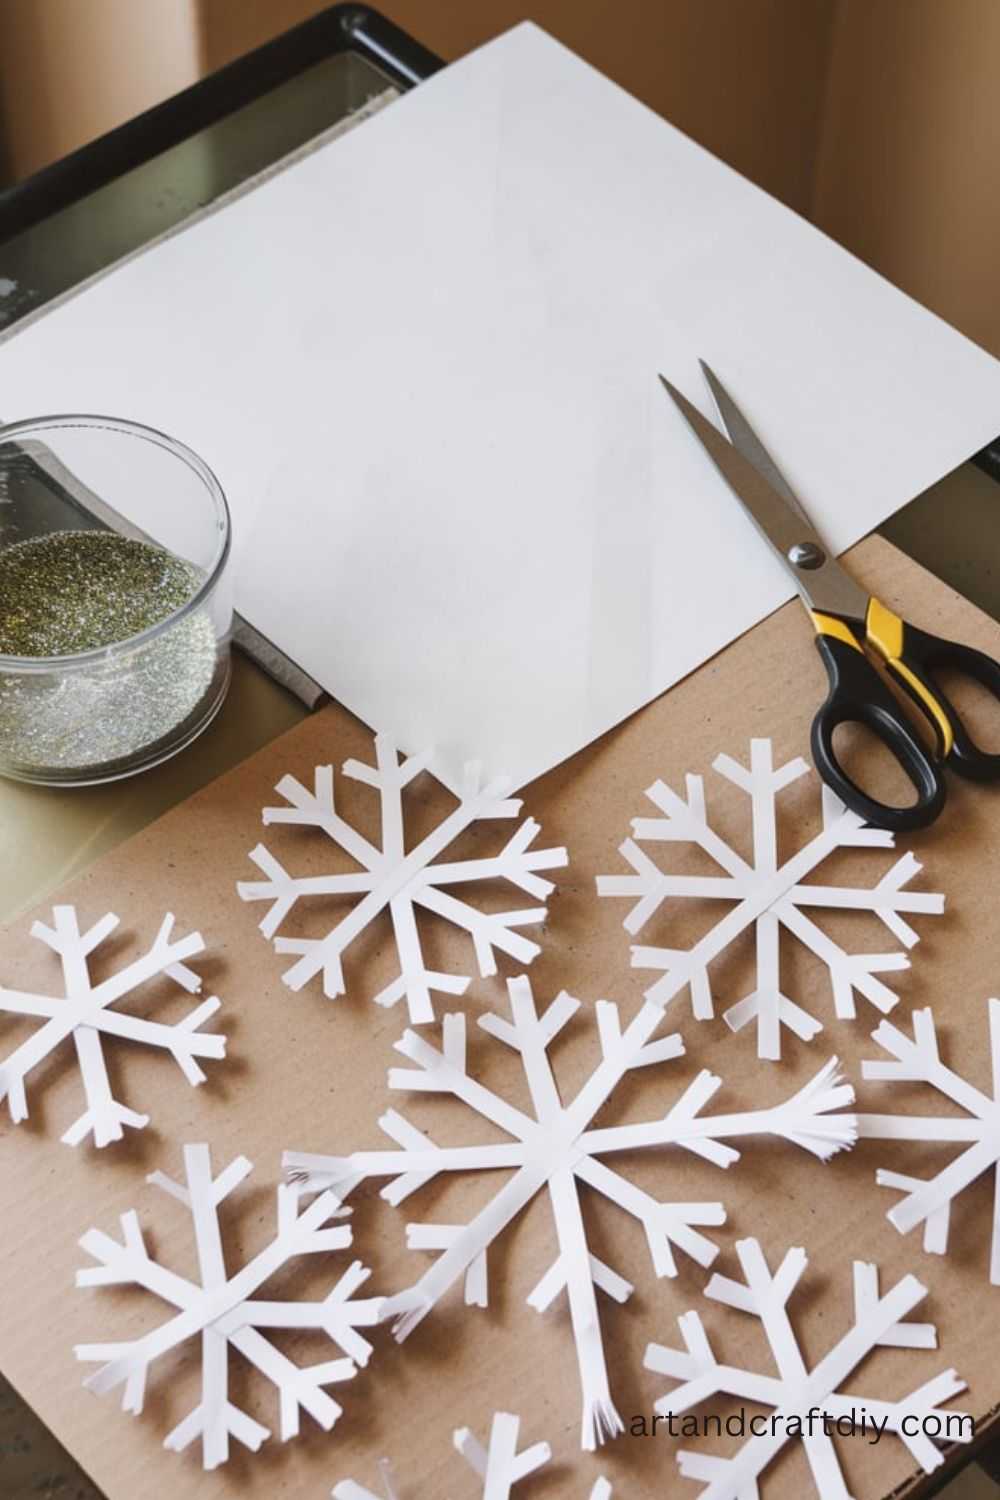
I don’t know about you, but whenever winter rolls in, I can’t resist folding up a piece of paper and cutting out snowflakes. Honestly, it feels a little magical every time you open one up and see what pattern you accidentally created. No two snowflakes ever come out the same, which makes me laugh because that’s exactly how nature does it too. I remember doing this as a kid with my mom—she would tape them on the windows, and at night the lights from the street would glow through them like frosty little stars.
If you want to try this with kids, just grab some plain white paper, fold it into triangles a few times, and start snipping random little shapes along the edges. To be fair, glitter and glue can get messy, but I say let them go wild—it’s part of the fun. I’ve found even the simplest ones look stunning when you hang them up on a window or string them into a garland.
Pinecone Bird Feeders

This one takes me straight back to chilly mornings when we’d hang pinecone feeders outside and watch little birds swoop in for breakfast. In my opinion, this is the coziest craft you can do with kids because it’s not just about making something—it’s about giving the wildlife a little treat in the middle of winter. Honestly, it’s like inviting birds over for a tiny outdoor party.
All you really need is a pinecone, some peanut butter, and birdseed. Roll the pinecone in peanut butter, then dip it into seeds until it’s covered. I’ve found tying a little string on top makes it easy to hang from tree branches. Kids love checking every morning to see which birds visited—it becomes a fun little routine. To be fair, it can get messy (sticky fingers everywhere!), but in the best, heartwarming way. And nothing beats seeing that first chickadee flutter in.
Cotton Ball Snowmen
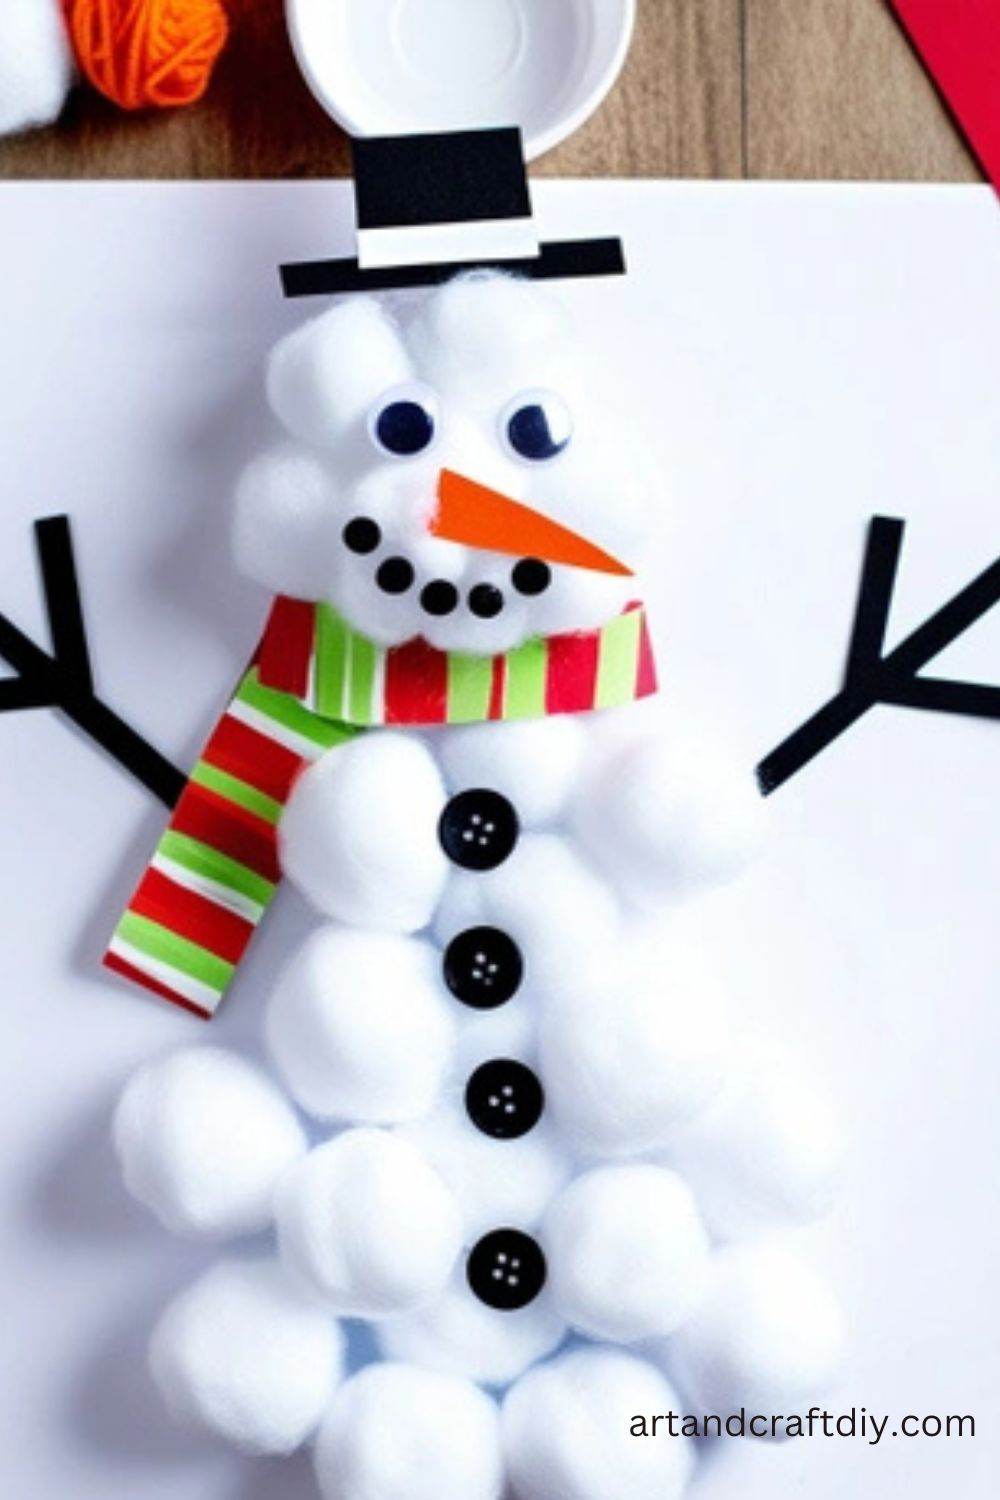
Okay, I’ll admit it—I once made a cotton ball snowman that looked more like a lumpy snow monster, but the kids thought it was hilarious and insisted he stay on the mantel all season. That’s the thing about this craft: perfection doesn’t matter. Honestly, the wonky ones are the most charming. All you need are cotton balls, glue, and a bit of imagination.
You can stack cotton balls onto cardboard circles or even use toilet paper rolls as a base. I’ve found buttons, scraps of felt, and even tiny hats made out of paper turn them into little characters. To be fair, cotton gets everywhere, but kids love the fluffy texture and can’t resist squishing them. In my opinion, this is one of those crafts where storytelling kicks in—you don’t just make snowmen, you create a whole snow-family with their own silly names and personalities. It’s ridiculously fun.
Handprint Mittens
Capture little handprints in a cute mitten craft.
Materials Needed:
- Construction paper
- Scissors
- Markers
- String or ribbon
- Glitter (optional)
Steps:
- Trace your child’s hands onto construction paper and cut out the shapes.
- Decorate the handprint mittens with markers, glitter, or stickers.
- Punch holes at the wrist of each mitten and string a ribbon through them.
- Hang the mittens as festive decorations.
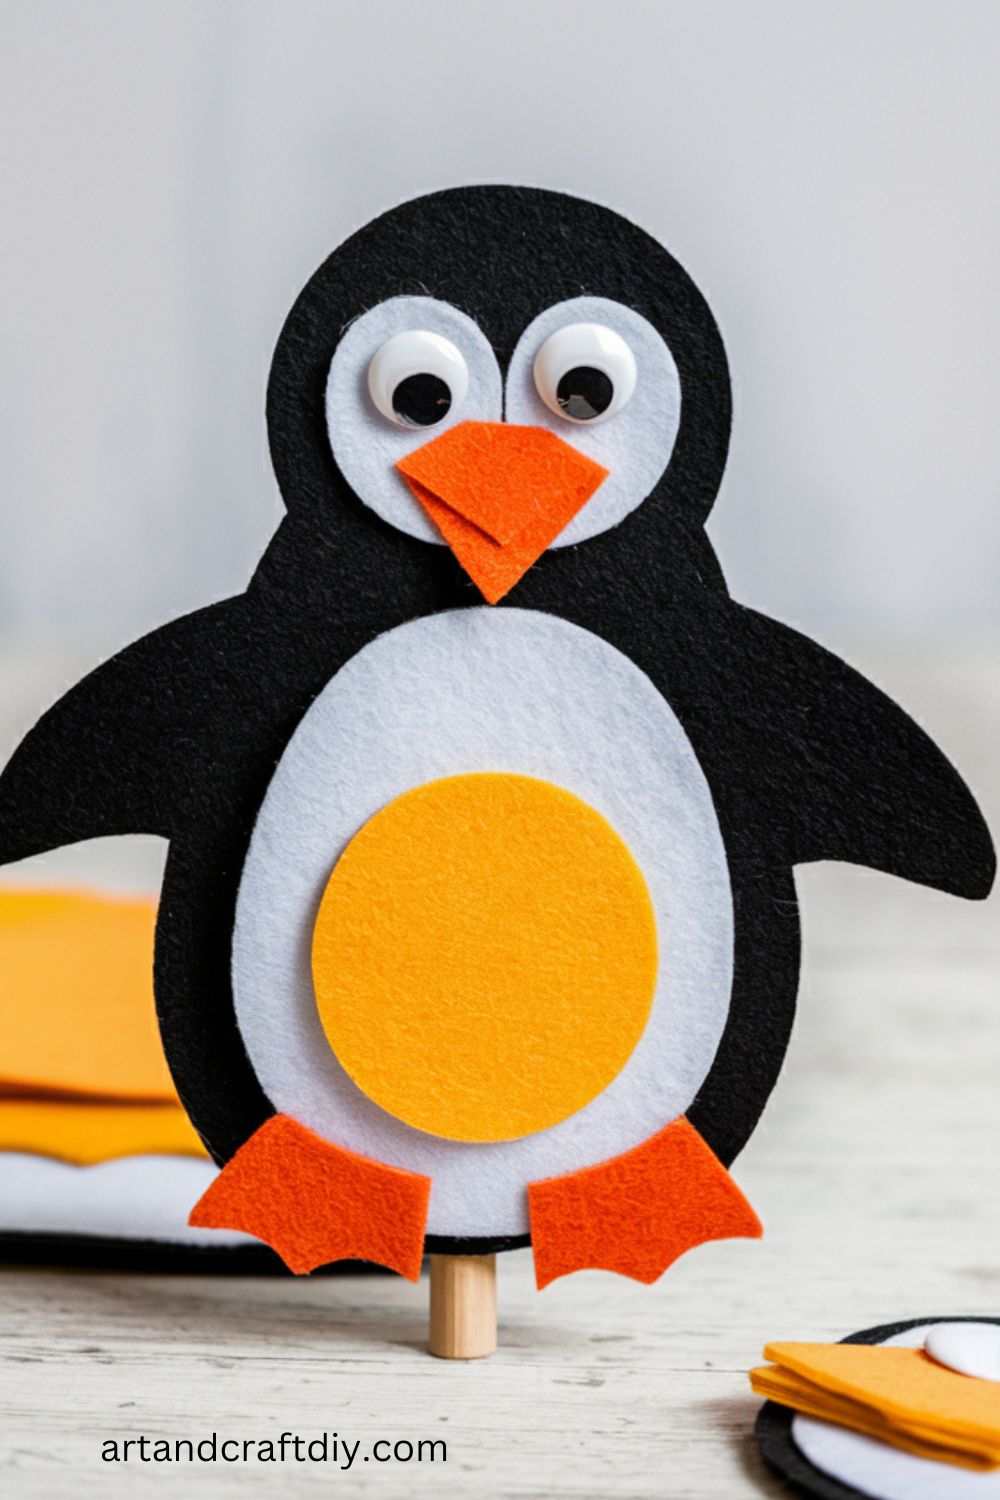
Felt Penguin Puppets
Create adorable penguin puppets for storytelling and playtime.
Materials Needed:
- Black, white, and orange felt
- Glue
- Googly eyes
- Scissors
Steps:
- Cut a penguin body shape out of black felt.
- Cut a smaller white oval for the belly and glue it onto the black body.
- Add an orange felt beak and feet at the appropriate places.
- Glue googly eyes above the beak to finish the face.
- Allow everything to dry before using the penguin as a puppet.
Winter-Themed Salt Dough Ornaments
Create keepsake ornaments to decorate your tree or give as gifts.
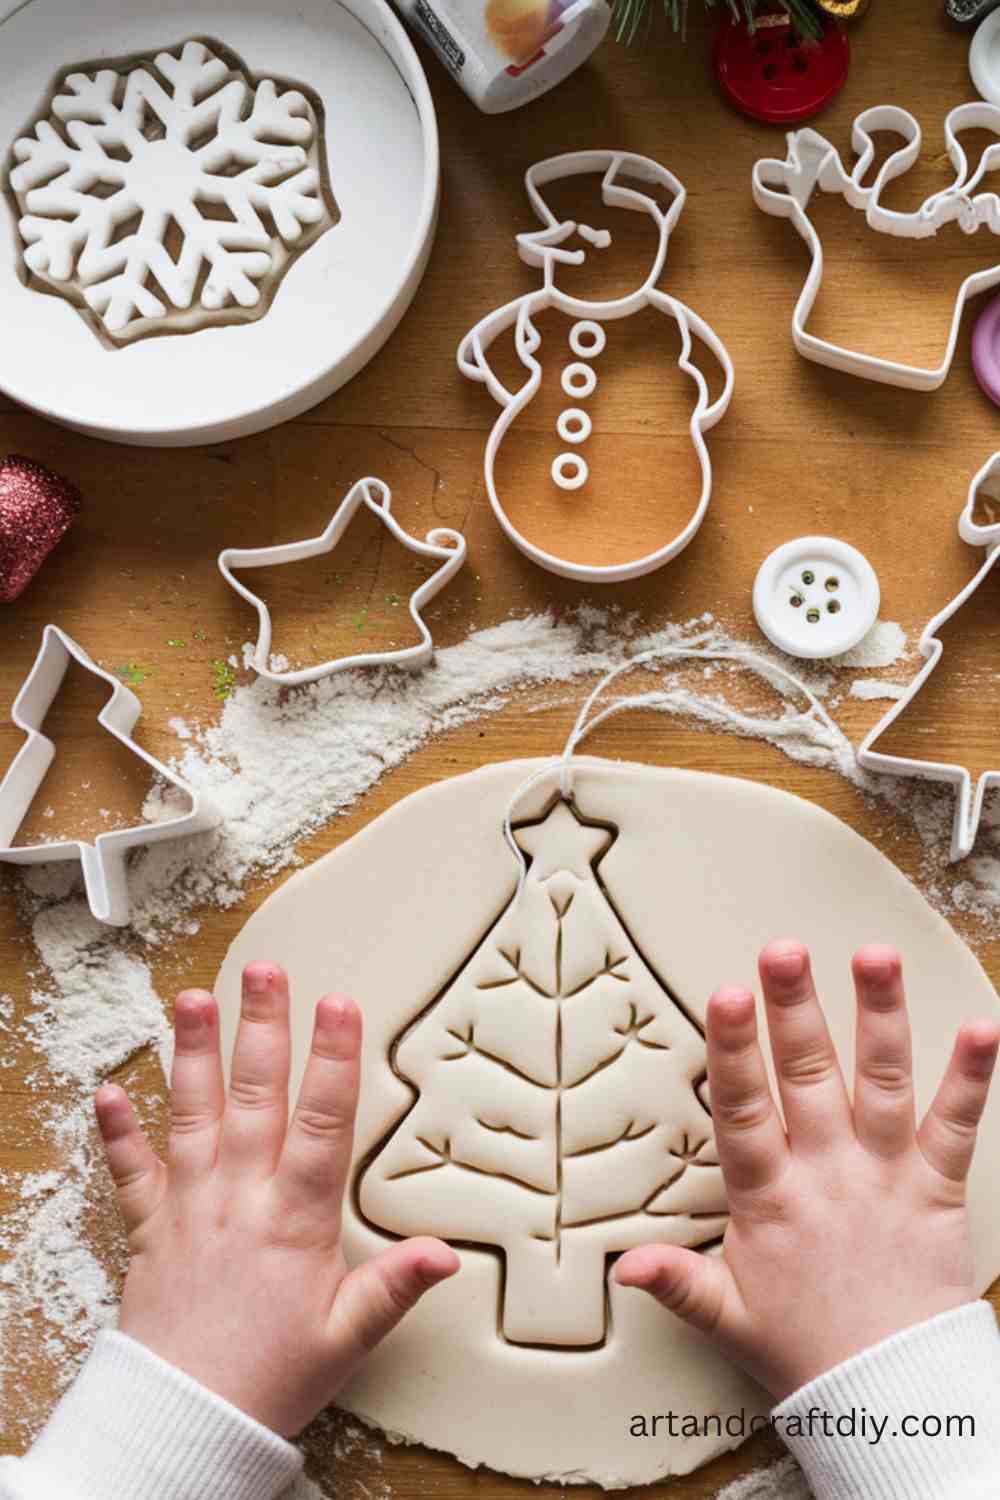
Materials Needed:
- Salt dough (1 cup salt, 2 cups flour, 1 cup water)
- Rolling pin
- Cookie cutters
- Paints and brushes
Steps:
- Mix salt, flour, and water to form dough. Knead until smooth.
- Roll out the dough and use cookie cutters to create winter shapes like snowflakes, stars, and mittens.
- Use a straw to poke a hole at the top of each ornament for hanging.
- Bake at 200°F (93°C) for 2-3 hours until hard.
- Once cooled, paint the ornaments and add a ribbon.
DIY Popsicle Stick Snowflakes
Transform simple popsicle sticks into beautiful snowflake decorations.
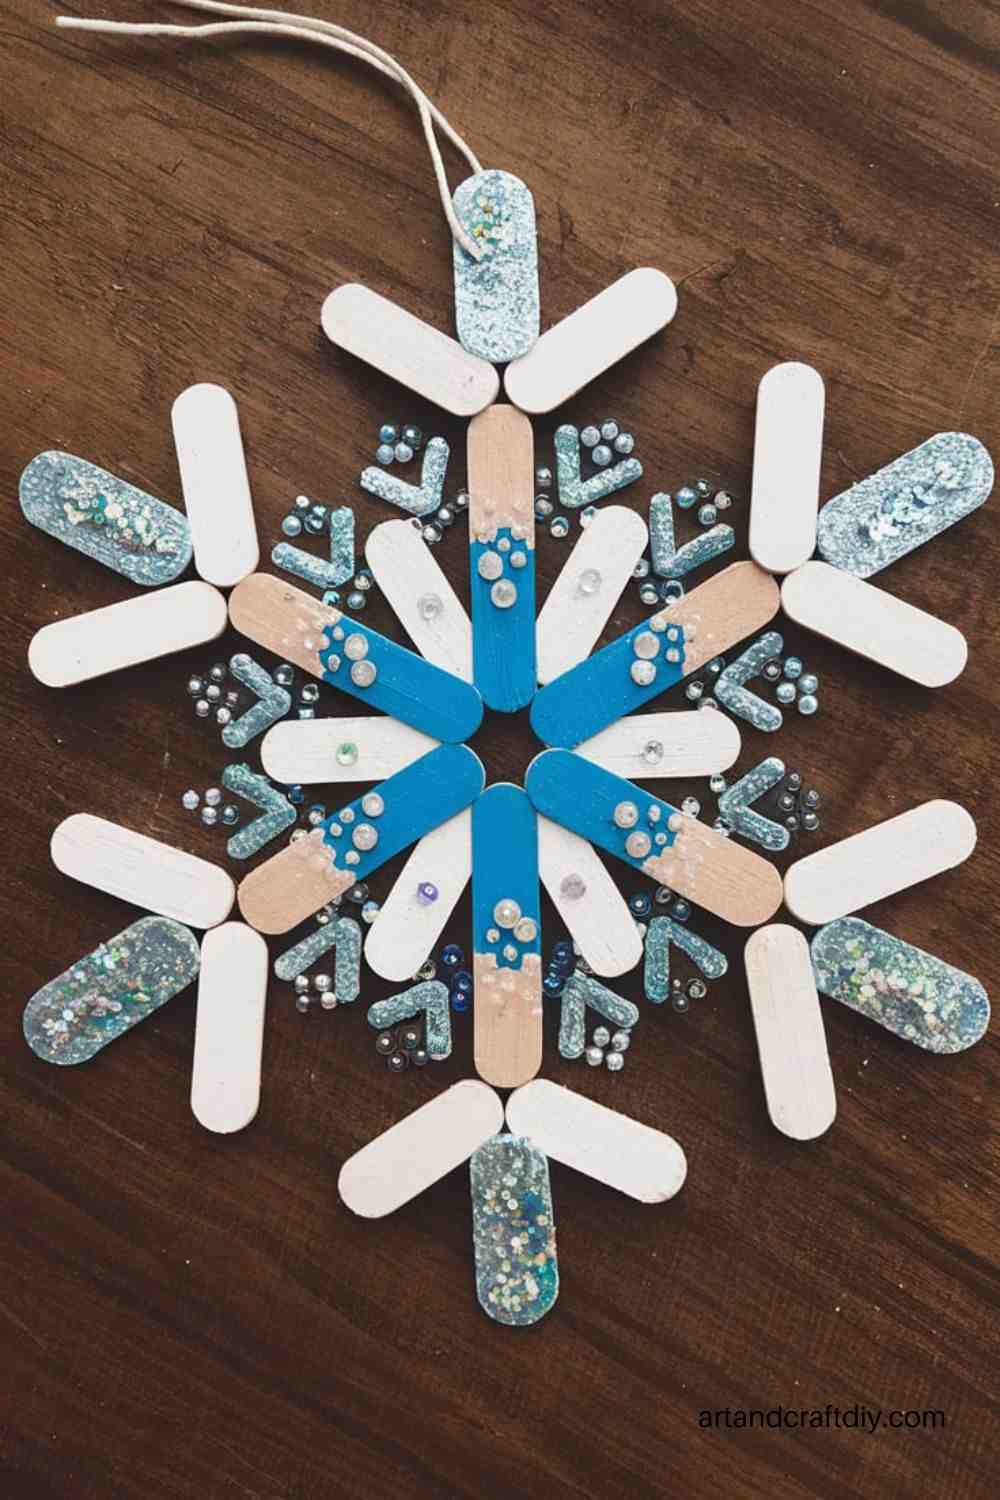
Materials Needed:
- Popsicle sticks
- Paint (white, silver, or blue)
- Glitter
- Glue
Steps:
- Arrange popsicle sticks in a snowflake pattern, crossing them in the center.
- Glue the sticks together and let them dry.
- Paint the snowflakes and sprinkle glitter on the wet paint for sparkle.
- Once dry, hang them up as decorations.
Tissue Paper Icicles
These shimmering icicles are perfect for window decorations.
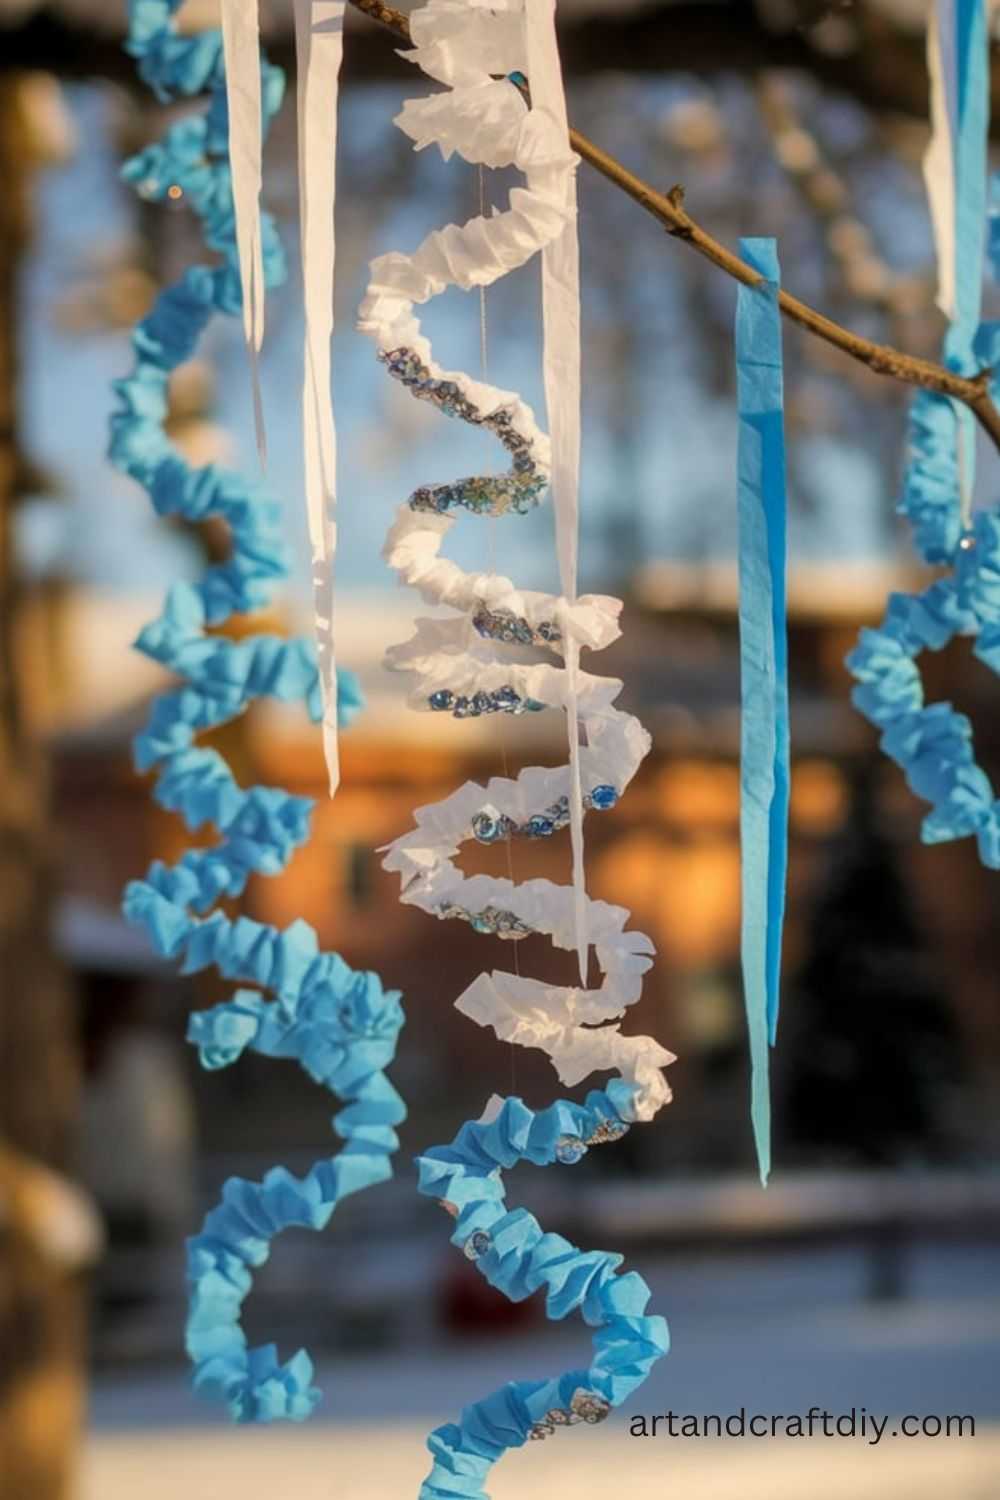
Materials Needed:
- Tissue paper (white, silver, or blue)
- Glue
- String or ribbon
Steps:
- Cut strips of tissue paper in varying lengths.
- Twist each strip gently to create an icicle shape.
- Glue the tops of the icicles to a string or ribbon.
- Hang the string across a window or doorway.
Marshmallow Snowman Craft
Use marshmallows to create an edible and fun snowman craft.
Materials Needed:
- Large marshmallows
- Toothpicks
- Candy eyes
- Licorice or pretzels (for arms)
- Chocolate chips
Steps:
- Stack three large marshmallows on a toothpick to form a snowman.
- Add candy eyes and a chocolate chip nose using a small dab of melted chocolate.
- Attach pretzel or licorice arms on either side of the middle marshmallow.
- Display or enjoy as a treat!
Snowy Pine Tree Art
Create a beautiful snowy forest scene using paint and Q-tips.
Materials Needed:
- Blue and green construction paper
- White paint
- Q-tips
- Glitter (optional)
Steps:
- Draw or cut out pine tree shapes from green construction paper and glue them onto blue paper.
- Dip Q-tips into white paint and dot them onto the trees to mimic snow.
- Add glitter to the snowy areas for extra shimmer.
brushes or cotton swabs
- Blue construction paper
Steps:
- Mix equal parts shaving cream and white glue in a bowl to create puffy paint.
- Use a paintbrush or cotton swab to paint three circles (head and body) on blue construction paper.
- Cut out a hat, buttons, and arms from black paper and a carrot nose from orange paper.
- Press these pieces into the wet paint to decorate your snowman.
- Add googly eyes and let the paint dry to create a 3D effect.
Winter-Themed Suncatchers
Brighten up those shorter winter days with colorful suncatchers that reflect light beautifully in your home.
Materials Used:
- Wax paper
- Tissue paper in various colors
- White glue
- Paintbrush
- Scissors
Steps:
- Cut tissue paper into small squares or shapes.
- Spread a thin layer of glue on a piece of wax paper using a paintbrush.
- Place the tissue paper pieces onto the glue in a fun pattern.
- Add a second layer of glue on top to secure everything.
- Once dry, cut the wax paper into desired shapes and hang it in a window.
DIY Pinecone Bird Feeders
Combine crafting with nature by creating bird feeders that bring wildlife to your yard.
Materials Used:
- Large pinecones
- Peanut butter or honey
- Birdseed
- String
Steps:
- Tie a string securely to the top of each pinecone for hanging.
- Spread peanut butter or honey all over the pinecone.
- Roll the pinecone in birdseed until it is fully coated.
- Hang your finished bird feeder on a tree branch outside and watch the birds enjoy it.
Cotton Ball Penguins
These fluffy cotton ball penguins are an adorable and simple craft for kids to make.
Materials Used:
- Black construction paper
- Cotton balls
- Googly eyes
- Orange construction paper
- Glue
Steps:
- Cut a penguin body shape out of black construction paper.
- Glue cotton balls to the center of the body to create the penguin’s fluffy tummy.
- Add googly eyes and a small orange paper beak to the face.
- Cut out small orange feet and attach them to the bottom.
Handprint Winter Trees
Create a charming keepsake by making winter trees out of your child’s handprints.
Materials Used:
- White construction paper
- Brown and white paint
- Paintbrushes
- Glitter (optional)
Steps:
- Paint your child’s hand with brown paint and press it onto the paper to make the tree trunk and branches.
- Once dry, use a paintbrush to dab white paint onto the branches for snow.
- Add glitter to the wet white paint for a sparkling effect.
Felt Mitten Garland
Decorate your home with a cozy mitten garland made of felt.
Materials Used:
- Colored felt
- Scissors
- Needle and thread or glue
- Ribbon or string
Steps:
- Cut mitten shapes out of felt in various colors.
- Decorate each mitten with smaller felt pieces or embroidery.
- Sew or glue the mittens onto a long ribbon or string.
- Hang the garland on a wall or mantle.
Egg Carton Polar Bears
Turn egg cartons into adorable polar bear faces with this upcycled craft.
Materials Used:
- Egg carton cups
- White paint
- Black marker
- Googly eyes
- Glue
Steps:
- Cut out individual cups from the egg carton.
- Paint the cups white and let them dry.
- Attach googly eyes and draw a nose and mouth with a black marker.
- Use additional carton pieces to create ears and glue them on top.
Snow Globe Jars
Create your own magical snow globe using jars and simple materials.
Materials Used:
- Small mason jars
- Glitter
- Small winter-themed figurines
- Glycerin
- Water
- Glue
Steps:
- Glue the figurine to the inside of the jar lid.
- Fill the jar with water and add a few drops of glycerin.
- Sprinkle in glitter for the “snow.”
- Screw the lid on tightly and turn the jar upside down.
Paper Plate Snowman Mask
Transform a plain paper plate into a wearable snowman mask.
Materials Used:
- Paper plate
- Markers
- Orange construction paper
- String or elastic
- Hole punch
Steps:
- Cut out holes for the eyes in the paper plate.
- Draw a snowman face, leaving space for the nose.
- Cut a carrot shape from orange paper and attach it to the mask.
- Punch holes on each side of the plate and attach a string or elastic to wear the mask.
Puffy Paint Snowmen
Use homemade puffy paint to make adorable snowmen that pop off the page. This craft is perfect for exploring textures while embracing a snowy theme.
Materials Used:
- Shaving cream
- White glue
- Black and orange construction paper
- Googly eyes
- Paintbrush
- Blue construction paper
Steps:
- Mix equal parts of shaving cream and white glue in a bowl to create puffy paint.
- On a piece of blue construction paper, use the puffy paint to make three stacked circles for the snowman.
- While the paint is still wet, add googly eyes and a small triangle of orange paper for the carrot nose.
- Cut small black circles from the construction paper and place them as the buttons and mouth.
- Let the snowman dry completely. Once dry, the puffy paint will remain raised and fluffy.
Mitten Garland
Create a cheerful mitten garland to decorate your home during the winter months. This craft doubles as a great way to practice tracing and cutting.
Materials Used:
- Colored construction paper
- Pencil
- Scissors
- String or yarn
- Hole punch
- Markers or stickers for decoration
Steps:
- Trace a mitten shape onto construction paper using a pencil. Create multiple mitten shapes in various colors.
- Cut out the mitten shapes.
- Decorate each mitten with markers, stickers, or patterns of your choice.
- Punch a hole at the top of each mitten and thread them onto a long piece of string.
- Hang your garland on a wall, mantle, or window for a festive touch.
Ice Lanterns
Bring the sparkle of winter ice indoors by creating ice lanterns. These make beautiful decorations and are fun for kids to make with adult supervision.
Materials Used:
- Balloons
- Water
- Glitter or small decorations
- LED tea lights
Steps:
- Fill a balloon with water and add a sprinkle of glitter or small decorations inside.
- Tie the balloon securely and place it in the freezer overnight.
- Once frozen solid, carefully cut and peel away the balloon.
- Place the ice orb over an LED tea light to create a glowing ice lantern.
- Display your lantern in a cool spot to prevent melting.
Winter-Themed Paper Plate Wreath
Transform a simple paper plate into a winter-themed wreath with snowflakes and sparkly accents.
Materials Used:
- Paper plates
- Blue and white paint
- Glitter
- Foam snowflake stickers or cutouts
- Ribbon
- Glue
Steps:
- Cut out the center of a paper plate to create a ring shape.
- Paint the plate ring blue or white and sprinkle glitter over the wet paint for sparkle.
- Once dry, decorate the wreath with foam snowflakes or paper cutouts.
- Attach a ribbon to the top of the wreath for hanging.
- Display your finished wreath on a door or wall.
Cotton Ball Penguins
These fluffy penguins are not only adorable but also a fantastic way to explore different textures while crafting.
Materials Used:
- Black construction paper
- Cotton balls
- Glue
- Googly eyes
- Orange paper for beaks and feet
Steps:
- Cut an oval shape from black construction paper for the penguin’s body.
- Glue cotton balls onto the oval to create the penguin’s fluffy belly.
- Add googly eyes above the cotton balls.
- Cut a small triangle from orange paper for the beak and glue it below the eyes.
- Add two orange feet at the bottom of the penguin’s body.
Paper Roll Snowy Owls
Upcycle paper rolls into charming snowy owls with simple supplies.
Materials Used:
- Toilet paper rolls
- White paint
- Black and orange markers
- Googly eyes
- Small feathers (optional)
Steps:
- Paint the paper roll white and let it dry completely.
- Fold the top of the roll inward on both sides to create the owl’s ears.
- Draw or glue googly eyes near the top of the roll.
- Use markers to draw a beak, wings, and snowy patterns.
- Add small feathers to the sides or top for extra flair.
Snow Globe Jars
Create magical snow globe jars that capture the spirit of winter in a sparkling, shakeable craft.
Materials Used:
- Glass jars with lids
- Distilled water
- Glitter
- Glycerin
- Small plastic figurines or trees
- Glue
Steps:
- Glue a figurine or small plastic tree to the inside of the jar lid. Let it dry.
- Fill the jar with distilled water, leaving a little space at the top.
- Add a few drops of glycerin to make the glitter float slower.
- Sprinkle in some glitter for the snow effect.
- Screw the lid on tightly and shake to see your snow globe come to life.
Tips for Crafting with Kids
Crafting with kids can be a fun, creative way to spend time together, allowing children to express themselves while developing fine motor skills and problem-solving abilities. However, it can also get messy and chaotic if not planned properly. Below are some practical tips for setting up a mess-free craft station, involving kids of different age groups, and encouraging creativity and personalization.
1. Setting Up a Mess-Free Craft Station
A well-organized and clean crafting area makes the experience enjoyable for everyone.
- Designate a Space: Choose a spot in your home where crafting is allowed—preferably somewhere easy to clean, like a kitchen table or a dedicated corner.
- Protect Surfaces: Cover the table with a plastic tablecloth, old newspaper, or a washable mat.
- Use Storage Bins: Store materials in labeled containers or bins for easy access and cleanup.
- Provide Cleanup Supplies: Keep paper towels, wet wipes, and a small trash bin nearby for quick mess management.
- Limit Supplies: Only bring out the supplies needed for the current project to minimize clutter.
2. Involving Kids of Different Age Groups
Different ages require different approaches to keep all children engaged and safe.
- Toddlers (2–4 years): Use simple, safe, and large materials like chunky crayons, stickers, or non-toxic finger paints. Supervise closely.
- Preschoolers (5–7 years): Provide age-appropriate tools like child-safe scissors, glue sticks, and basic craft kits. Let them practice cutting and assembling.
- Older Kids (8+ years): Offer more complex projects like weaving, sewing, or model-building. Encourage them to work independently and assist younger siblings.
- Collaborative Projects: Choose crafts where everyone can contribute, such as decorating a family banner or making holiday cards together.
3. Encouraging Creativity and Personalization
Fostering creativity helps children build confidence and develop unique problem-solving skills.
- Offer Choices: Let kids choose their colors, materials, and themes to make the project feel personal.
- Provide Open-Ended Materials: Items like pipe cleaners, beads, pompoms, and fabric scraps allow for limitless possibilities.
- Avoid Perfection: Emphasize effort over results. Praise their creativity, not how “perfect” the final product looks.
- Incorporate Their Interests: If a child loves animals, suggest creating animal masks or finger puppets.
- Display Their Work: Show off finished crafts on a wall, fridge, or shelf to celebrate their efforts.
FAQ
What are some easy and Best Winter Crafts for kids for young children?
For younger kids, simple crafts like snowflake cutouts, paper mittens, or handprint snowmen are perfect. These crafts involve minimal supplies and are easy for little hands to manage, fostering creativity and fine motor skills.
How can I make Best Winter Crafts for kids at home ?
You can create Best Winter Crafts for kids using common household materials such as construction paper, glue, scissors, cotton balls, and markers. Try making snow globes with jars, crafting paper snowflakes, or painting winter landscapes with acrylic paints.
Are there any Best Winter Crafts for kids that don’t involve snow?
Yes! Best Winter Crafts for kids can be inspired by the season’s cold weather without snow. Create crafts like hot cocoa mugs, winter animals (like penguins or polar bears), or Christmas ornaments.
Can I make Best Winter Crafts for kids using recycled materials?
Absolutely! You can recycle items such as cardboard, bottle caps, old magazines, and fabric scraps to make unique winter crafts. For example, cardboard can be turned into snowman shapes or animal figures, while bottle caps can be repurposed into tree ornaments.

Hi, I’m Victoria, an art and craft teacher at Newark City Schools, where I have the joy of working with middle school students to help them explore their creativity and develop their artistic talents. I believe that art is a powerful way for students to express themselves, and I strive to make every lesson a fun, engaging, and inspiring experience.
I created this website to share the art and craft projects, techniques, and resources that I use in my classroom, hoping to inspire both educators and young artists alike. Whether you’re a teacher looking for new ideas or a student eager to try something new, I’m excited to provide creative tools and projects that anyone can enjoy.
When I’m not in the classroom, I love experimenting with different art forms and learning new crafting techniques. My goal is to help others discover the joy of making things with their hands, and I hope my website serves as a space for everyone to explore their creative potential.