
Celebrating a mother’s birthday is an opportunity to honor the woman who has nurtured, supported, and loved unconditionally. A Birthday Gift for Mother DIY (Do It Yourself) not only showcases your appreciation but also reflects the thought, care, and effort you’ve put into choosing something truly special. DIY gifts carry a unique significance, as they are often more personal and heartfelt compared to store-bought alternatives. The time and creativity invested in crafting something from scratch make the gift feel deeply meaningful and genuine. In addition, making a gift for your mom offers numerous benefits, including the chance to demonstrate your love in a tangible way, creating a memorable experience and leaving her with something one-of-a-kind that she will cherish forever.
Birthday Gift for Mother DIY offer an unmatched level of personalization that store-bought items often can’t provide. Each carefully crafted detail—whether it’s a homemade card, a hand-painted picture frame, or a knitted scarf—reflects your deep connection with her. Birthday Gift for Mother DIY go beyond material value, symbolizing the bond between you and the effort you’ve made to create something meaningful. The thoughtfulness behind Birthday Gift for Mother DIY speaks volumes, making the gesture much more impactful than simply purchasing something off a shelf.
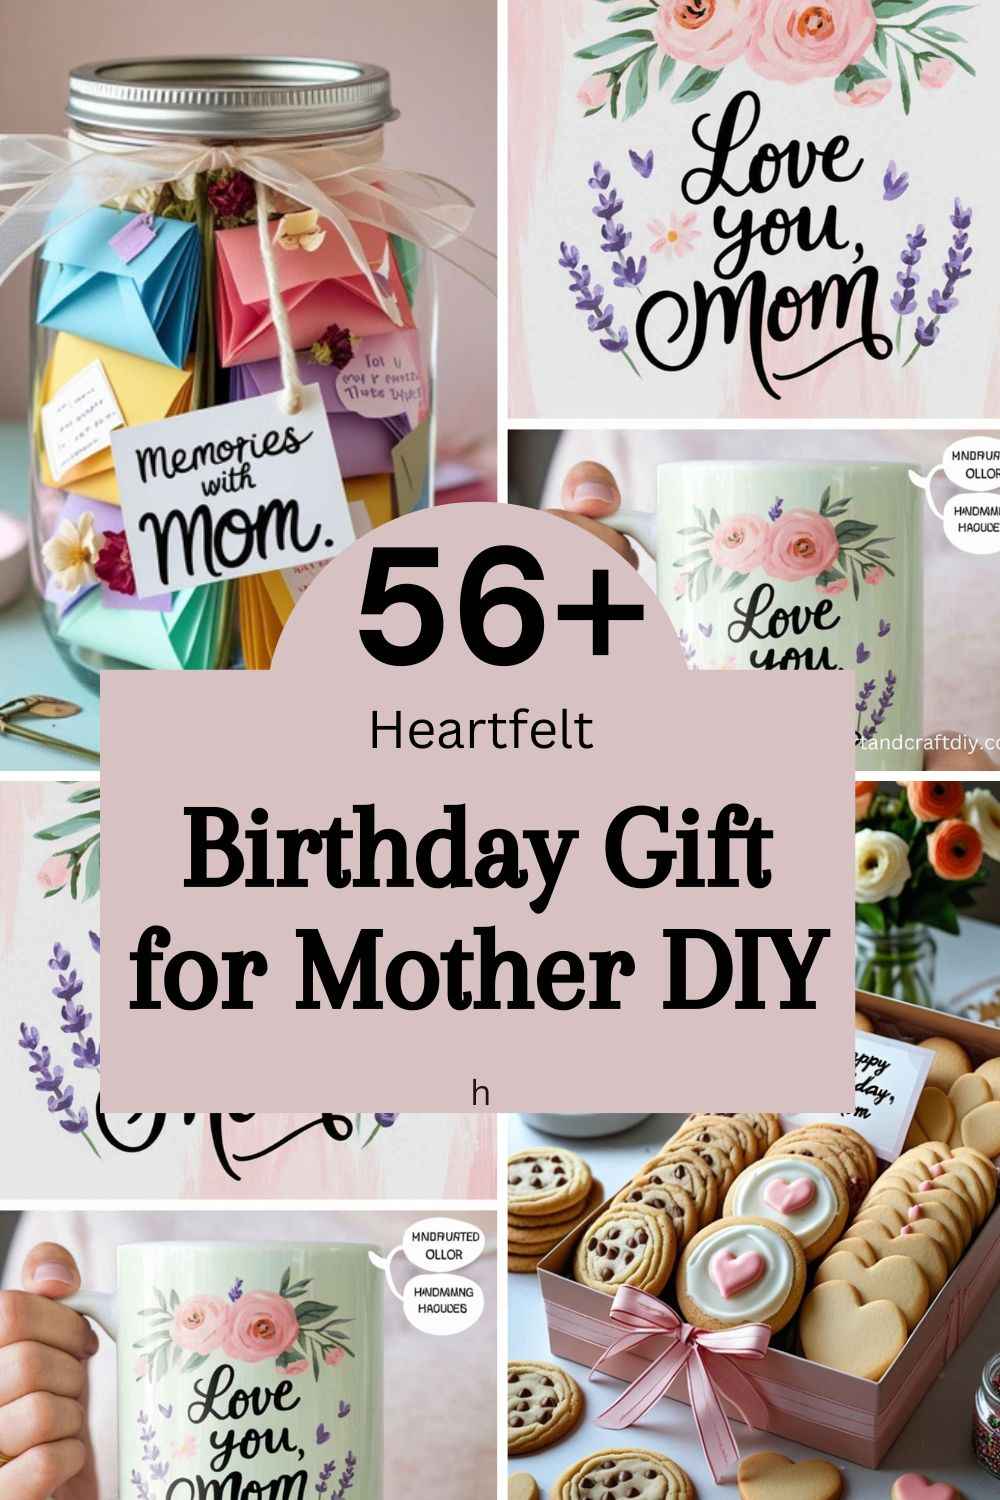
Birthday Gift for Mother DIY
A Birthday Gift for Mother DIY is a thoughtful and personal way to show your love and appreciation. It allows you to create something unique and meaningful that reflects her personality and interests. From handmade jewelry and custom photo albums to personalized candles or hand-painted mugs, DIY gifts add a special touch that store-bought presents often lack. Whether simple or elaborate, the effort and creativity put into crafting something by hand will make your mother’s birthday feel even more special.
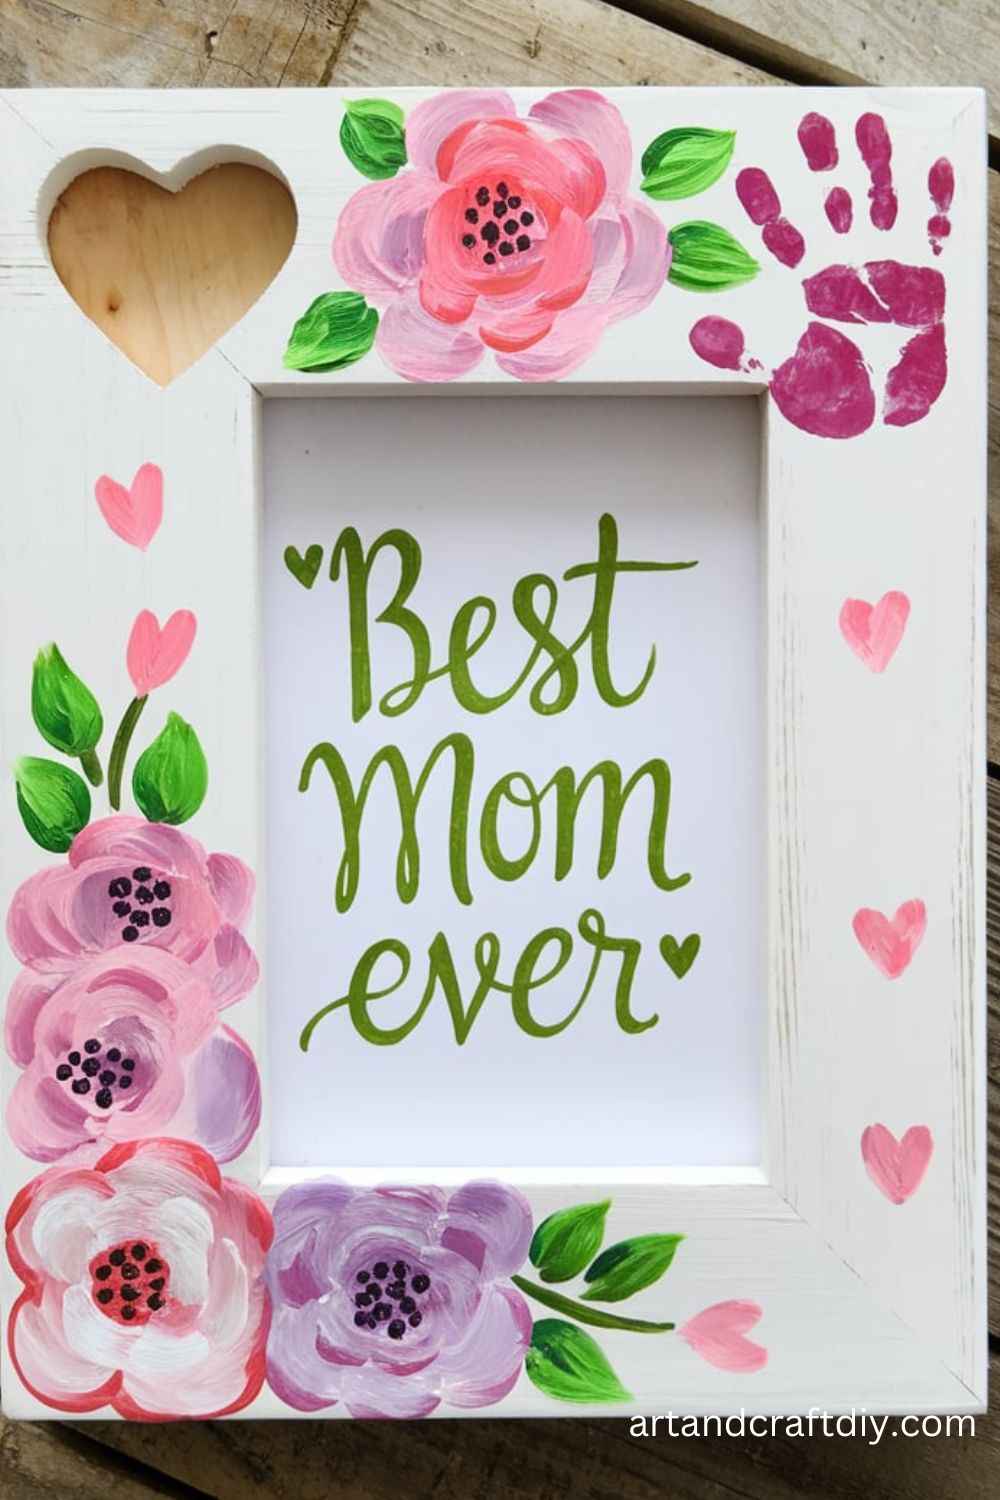
Mother Photo Frame Gift
A personalized photo frame is a wonderful way to capture memories with your mom. You can create a custom frame that suits her style and holds a special photograph.
Materials Used:
- Wooden frame
- Paint (acrylic)
- Paintbrush
- Embellishments (ribbons, stickers, buttons)
- Photo of your choice
Steps:
- Start by painting the wooden frame in the color of your choice. Let it dry completely.
- Once dry, add embellishments like buttons, ribbons, or stickers to decorate the frame.
- Carefully place a special photo inside the frame that captures a fond memory with your mom.
- You can even write a sweet message or add a personal touch like “Best Mom” or “Moments We Cherish” on the frame.
- Present it to her as a thoughtful and heartwarming gift.
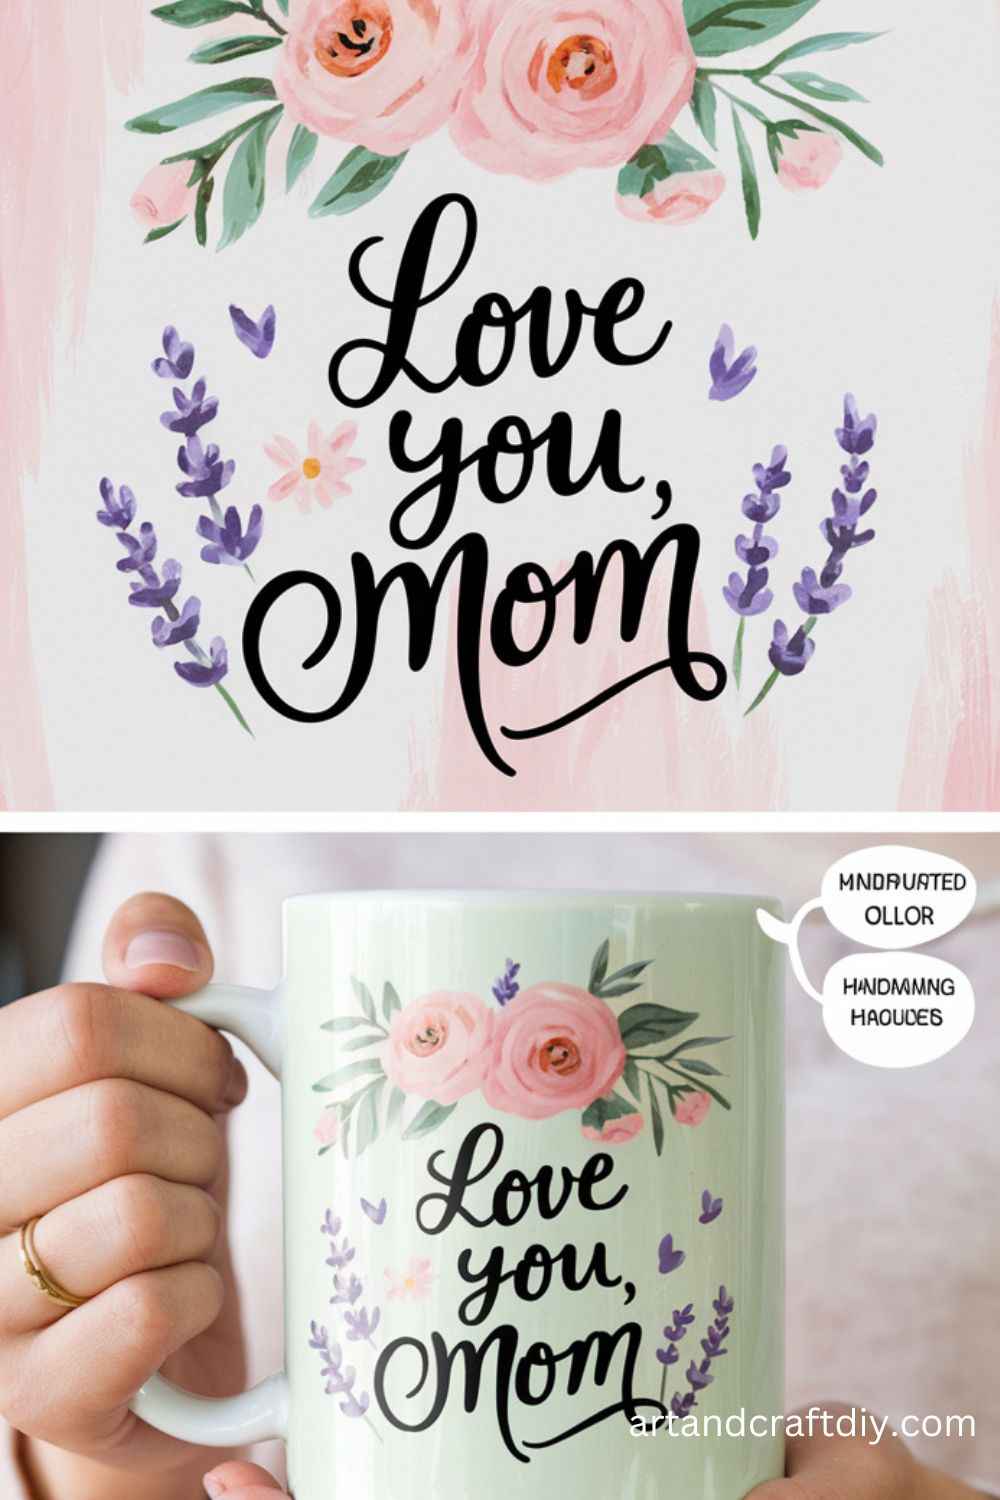
Mother Handcrafted Mug
A hand-painted mug is a practical yet personal gift your mom can use daily. This project allows you to showcase creativity while making something functional.
Explore more: Printable Valentine Crafts
Materials Used:
- White ceramic mug
- Ceramic paint or sharpie markers
- Paintbrushes
- Stencils (optional)
Steps:
- Clean the ceramic mug thoroughly before painting.
- Use ceramic paints or sharpie markers to design your mug. You can add a simple heart, her initials, or a favorite quote.
- If you want more precision, use stencils to create clean patterns or shapes.
- Once you’re done painting, let the mug dry completely, then bake it according to the instructions on the paint package to set the design.
- After baking, let the mug cool and give it to your mom as a functional gift she can use every day.
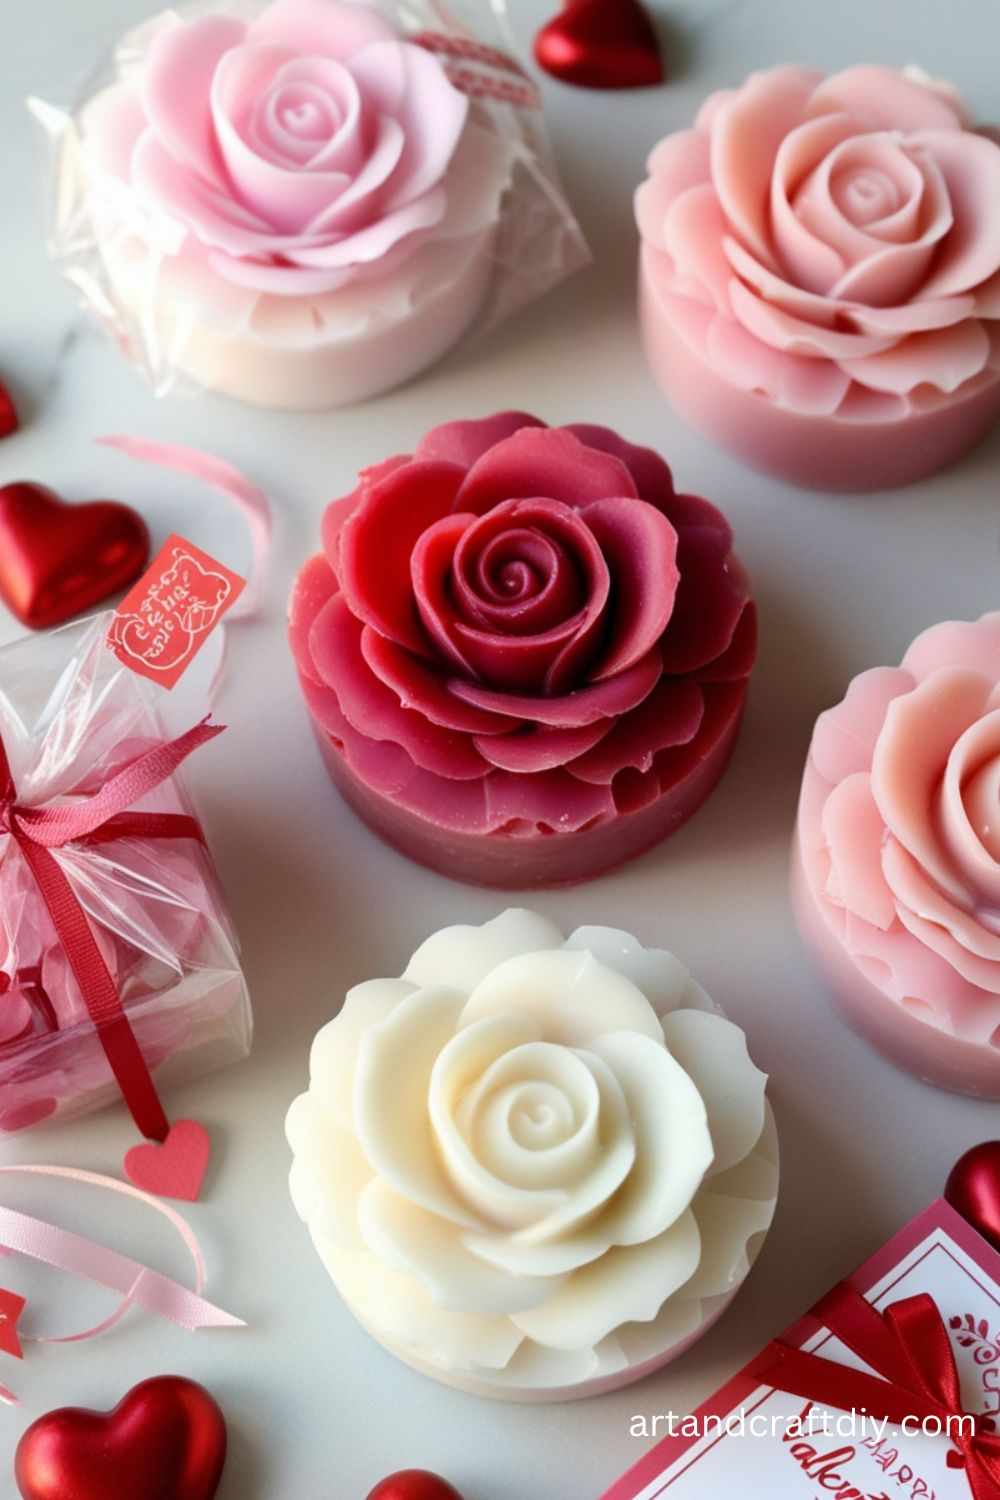
Handmade Flower Soap Bars
Handmade soap bars are a luxurious and pampering gift. You can customize the fragrance, color, and ingredients according to your mom’s preferences.
Materials Used:
- Soap base (glycerin, shea butter, etc.)
- Essential oils (lavender, rose, etc.)
- Soap molds
- Colorants (optional)
- Dried flowers or herbs (optional)
Steps:
- Cut the soap base into small cubes and melt it in a microwave or double boiler.
- Add a few drops of essential oils to give the soap a pleasant fragrance.
- If you want to add color, mix in a small amount of soap colorant.
- Pour the melted soap into the molds and let it set for a few hours until it hardens.
- If you want to add extra touches, sprinkle dried flowers or herbs into the soap before it hardens completely.
- Remove the soap from the molds and wrap it in a nice package to present to your mom.
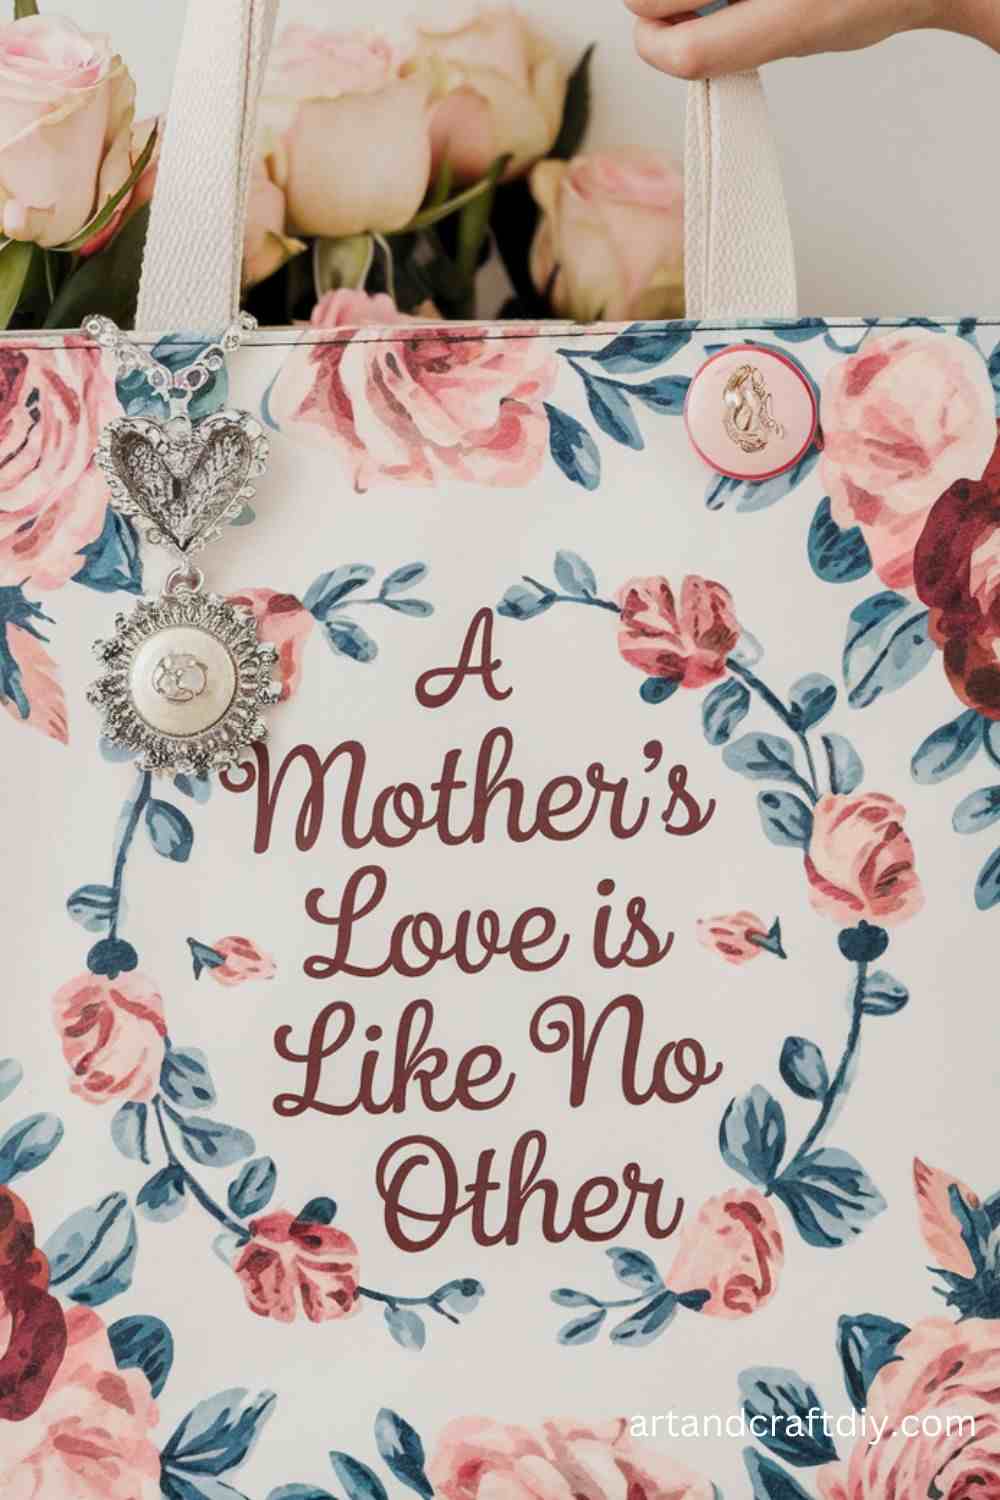
Mother Customizable colorful Tote Bag
A custom tote bag is a stylish and functional gift that your mom can use for shopping, carrying books, or going to the beach. You can personalize the design to fit her style.
Explore more: Best Winter Crafts for kids
Materials Used:
- Plain canvas tote bag
- Fabric paint or markers
- Paintbrushes
- Stencils (optional)
- Iron-on transfers (optional)
Steps:
- Lay the tote bag flat and decide on a design for the bag.
- Use fabric paints or markers to draw or paint your design. You can create abstract art, add a quote, or even personalize it with her name.
- If you want more precision, use stencils for intricate designs.
- Let the paint dry completely, and if you used fabric paint, iron the design to set it according to the manufacturer’s instructions.
- Once it’s dry and set, you have a unique tote bag that’s ready for gifting.
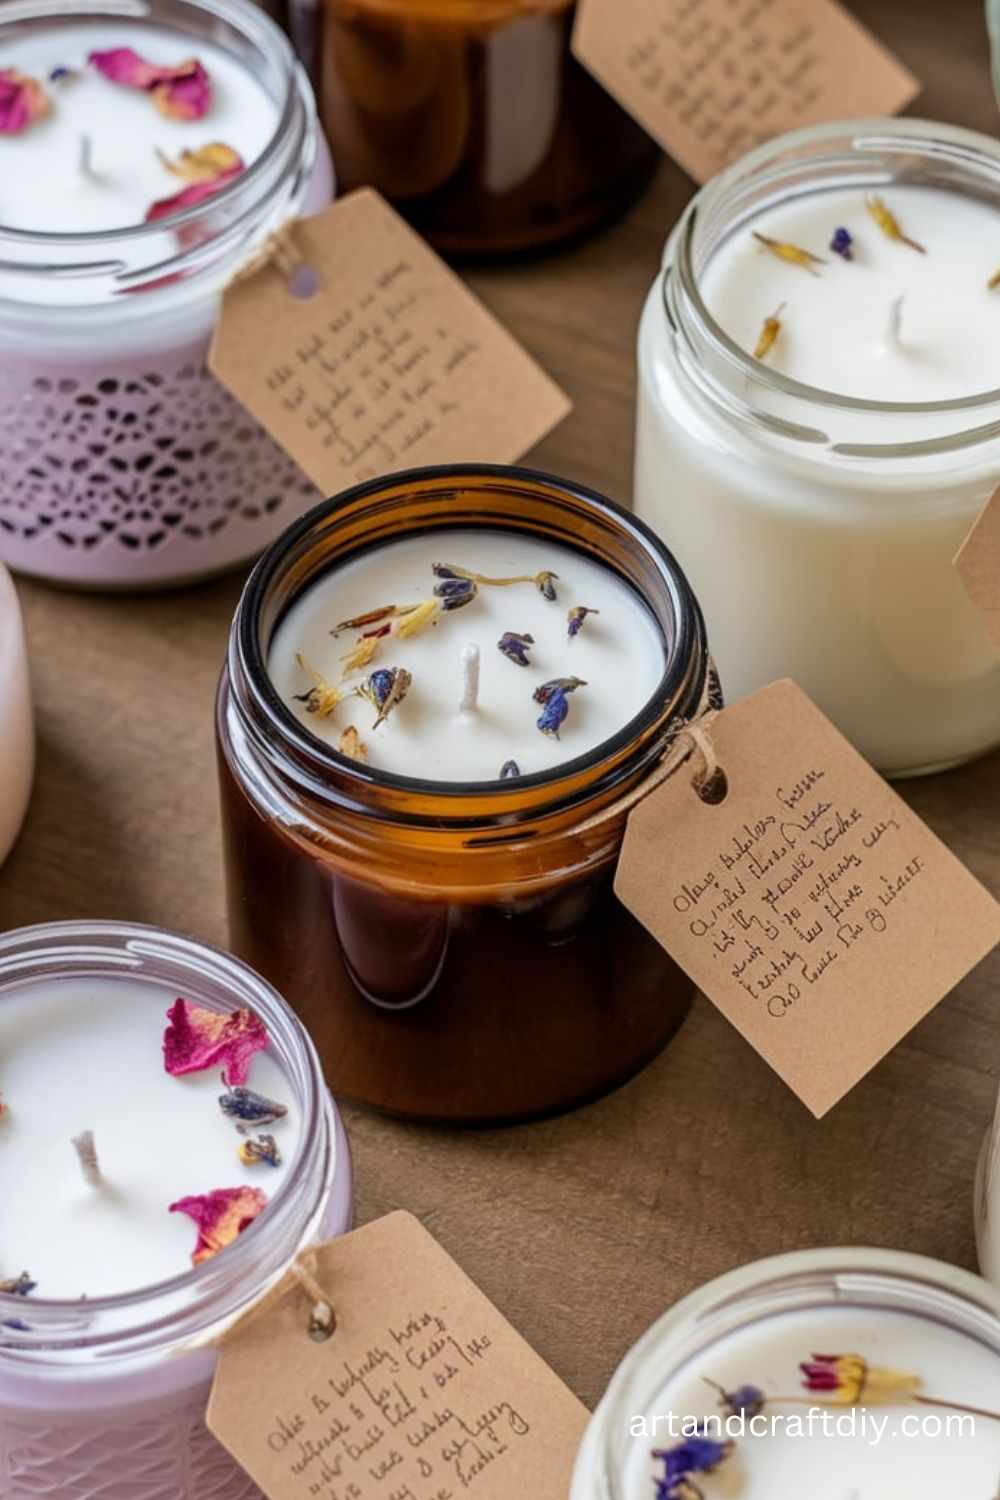
Scented DIY Candles
Making scented candles can be a relaxing and thoughtful gift. You can select your mom’s favorite scent and create a cozy ambiance with a personalized touch.
Materials Used:
- Soy wax
- Candle wicks
- Fragrance oils (lavender, vanilla, etc.)
- Glass jars or molds
- Dye (optional)
Steps:
- Melt the soy wax in a double boiler until it becomes liquid.
- Add a few drops of your chosen fragrance oil and mix it thoroughly.
- If desired, add a small amount of dye to color the wax.
- Attach the wick to the bottom of your jar or mold using glue or a wick holder.
- Pour the melted wax into the container and let it set for a few hours.
- Trim the wick to the desired length and present the candle as a sweet, aromatic gift.
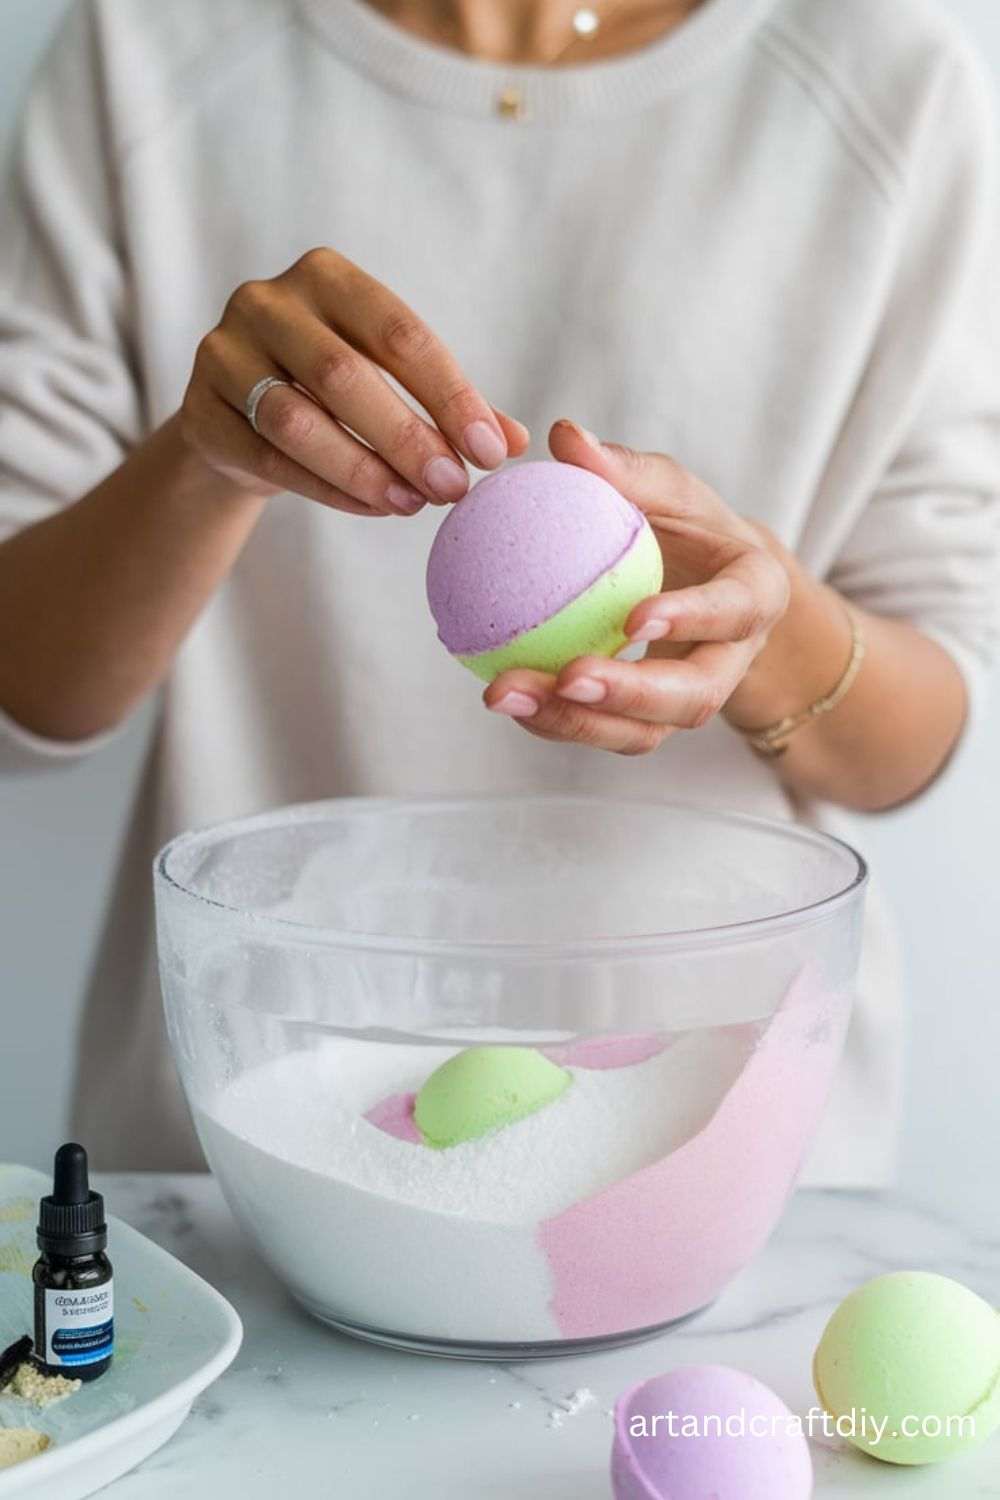
DIY Handmade Bath Bombs
Bath bombs are a fun and luxurious gift that will make your mom’s bath time extra special. You can create bath bombs in various colors, scents, and shapes.
Materials Used:
- Baking soda
- Citric acid
- Epsom salt
- Cornstarch
- Essential oils (eucalyptus, lavender, etc.)
- Water
- Molds (silicone molds or ice cube trays)
Steps:
- In a large bowl, mix 1 cup of baking soda, 1/2 cup of citric acid, 1/2 cup of Epsom salt, and 1/2 cup of cornstarch.
- Slowly add 2 teaspoons of essential oils to the dry ingredients and stir well.
- In a separate spray bottle, mix a little water with a few drops of food coloring (if desired).
- Slowly mist the water onto the dry mixture, stirring constantly to avoid activating the citric acid.
- Once the mixture feels like damp sand, press it into your molds.
- Let the bath bombs dry for 24 hours before removing them from the molds. Wrap them in a pretty gift box or bag.
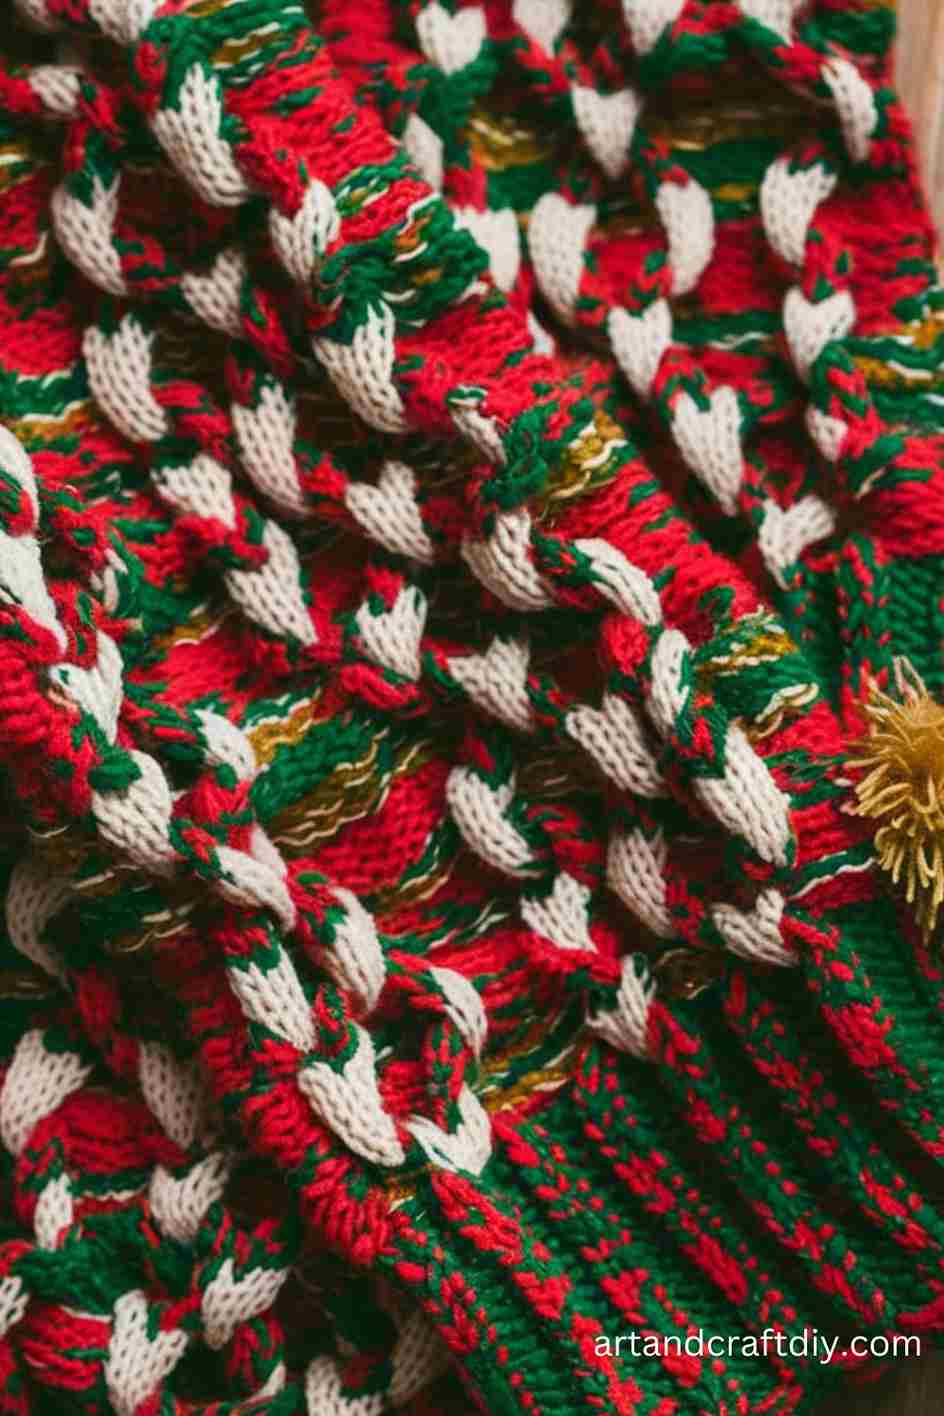
Colorful Knitted Scarf DIY
If you know how to knit, a handmade scarf is a beautiful and thoughtful gift that will keep your mom warm. You can choose colors and patterns that suit her style.
Materials Used:
- Yarn (choose a soft and cozy type)
- Knitting needles
Steps:
- Start by casting on the desired number of stitches (about 30-40 stitches for a standard scarf width).
- Knit every row until the scarf reaches your desired length (usually about 60 inches).
- Once the scarf is long enough, bind off and weave in the ends.
- If you’d like, add fringes to the ends of the scarf to make it extra special.
- Your mom will love wearing a scarf made with care and thoughtfulness.
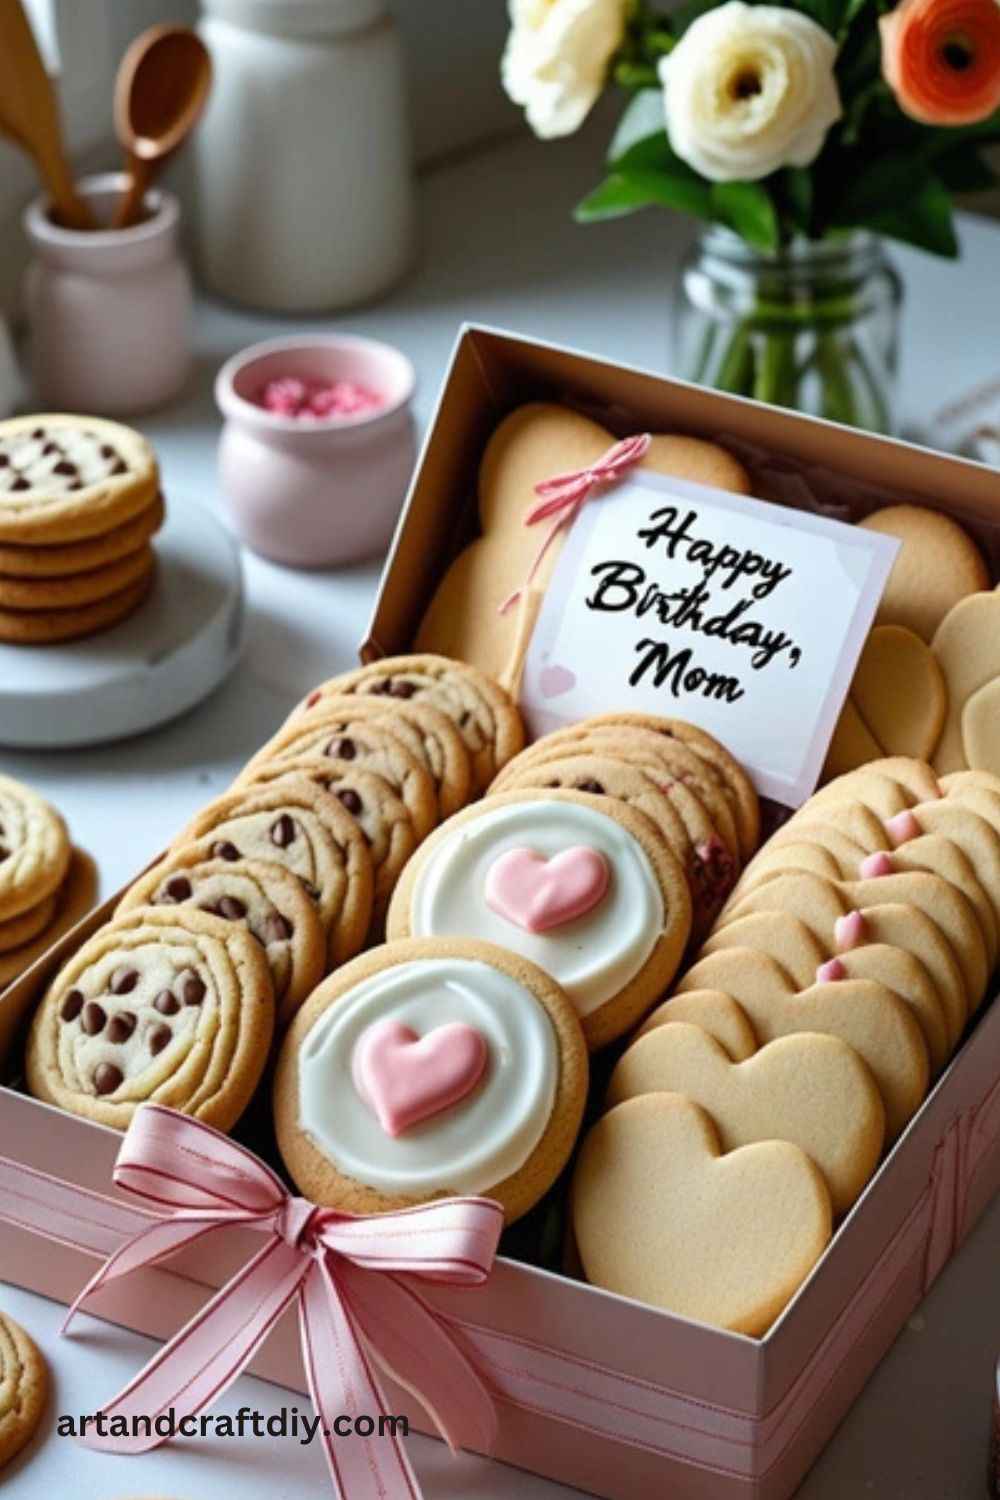
Baked Cookies
Baking homemade cookies is a sweet way to show appreciation for your mom. You can bake her favorite kind of cookie or try a new recipe together.
Materials Used:
- All-purpose flour
- Sugar
- Butter
- Eggs
- Chocolate chips (optional)
- Baking soda
- Vanilla extract
Steps:
- Preheat your oven to 350°F (175°C).
- In a large bowl, cream together butter and sugar until smooth.
- Beat in the eggs and vanilla extract.
- Gradually add the flour and baking soda to form a dough.
- Fold in any optional ingredients like chocolate chips or nuts.
- Drop spoonfuls of dough onto a baking sheet and bake for 10-12 minutes, or until golden brown.
- Let the cookies cool, then pack them in a nice container and present them to your mom as a delicious treat.
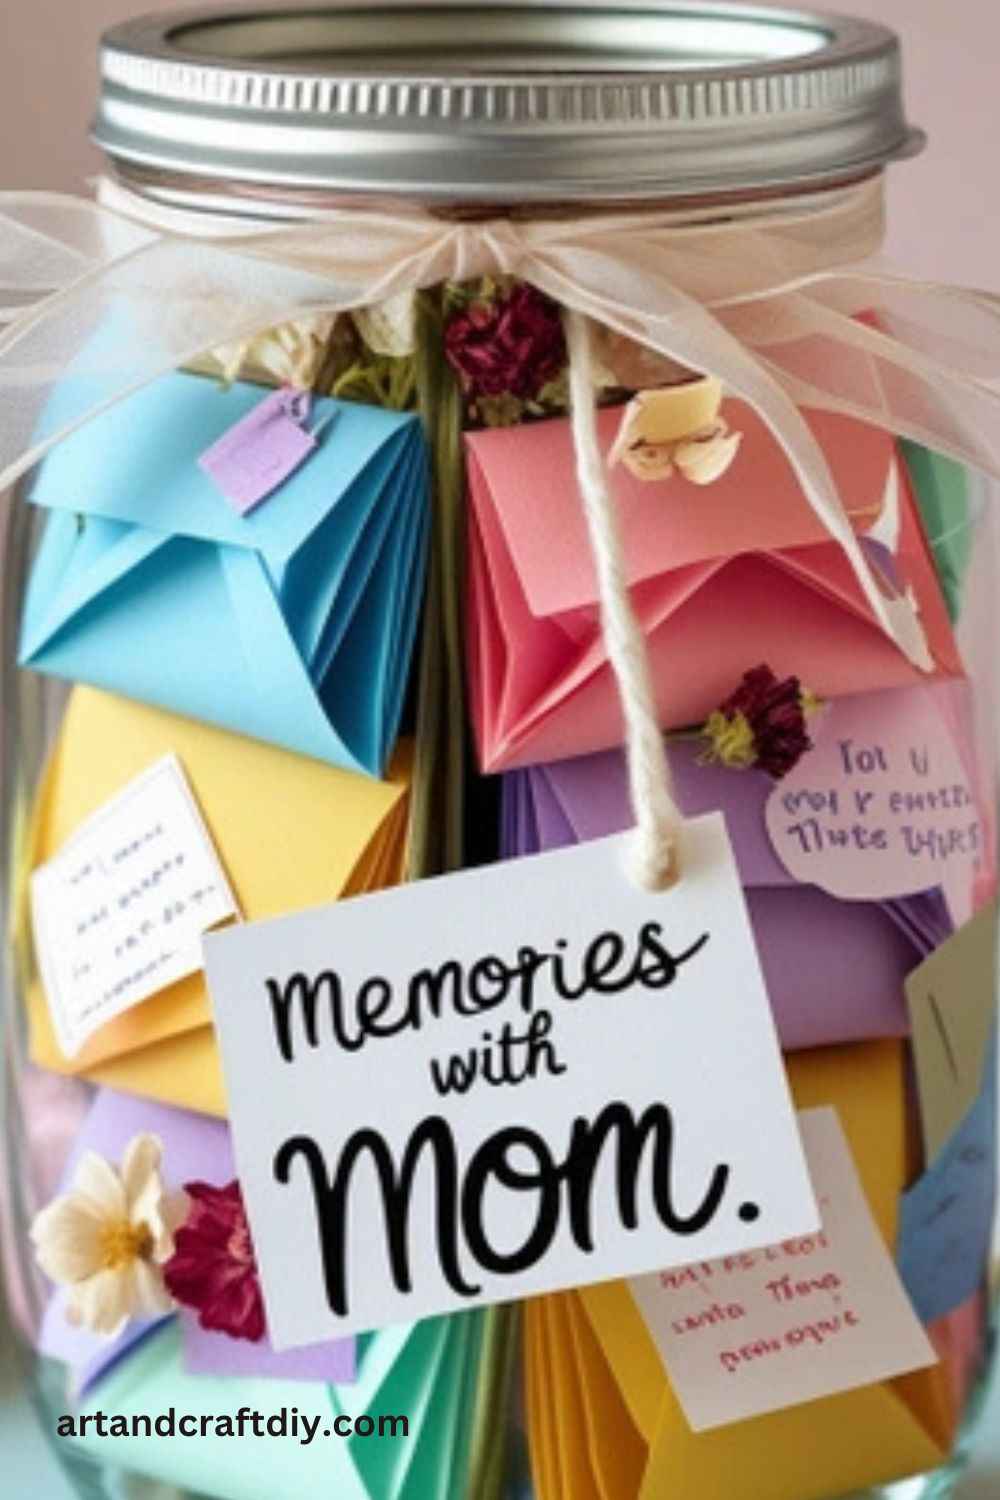
Memories with mom in jar
A memory jar is a heartfelt gift where you write down special memories or reasons why you love your mom. She can read them whenever she needs a reminder of your love.
Materials Used:
- A glass jar or container
- Small pieces of paper or note cards
- Pen
- Ribbon or decorations
Steps:
- Write down memories, quotes, or reasons why you love your mom on small pieces of paper.
- Fold each piece and place them in the jar.
- Decorate the jar with a ribbon or label it with something like “Mom’s Memory Jar.”
- Encourage your mom to read one note each day or whenever she needs a little boost of love.
- This gift is a constant reminder of your appreciation and love for her.
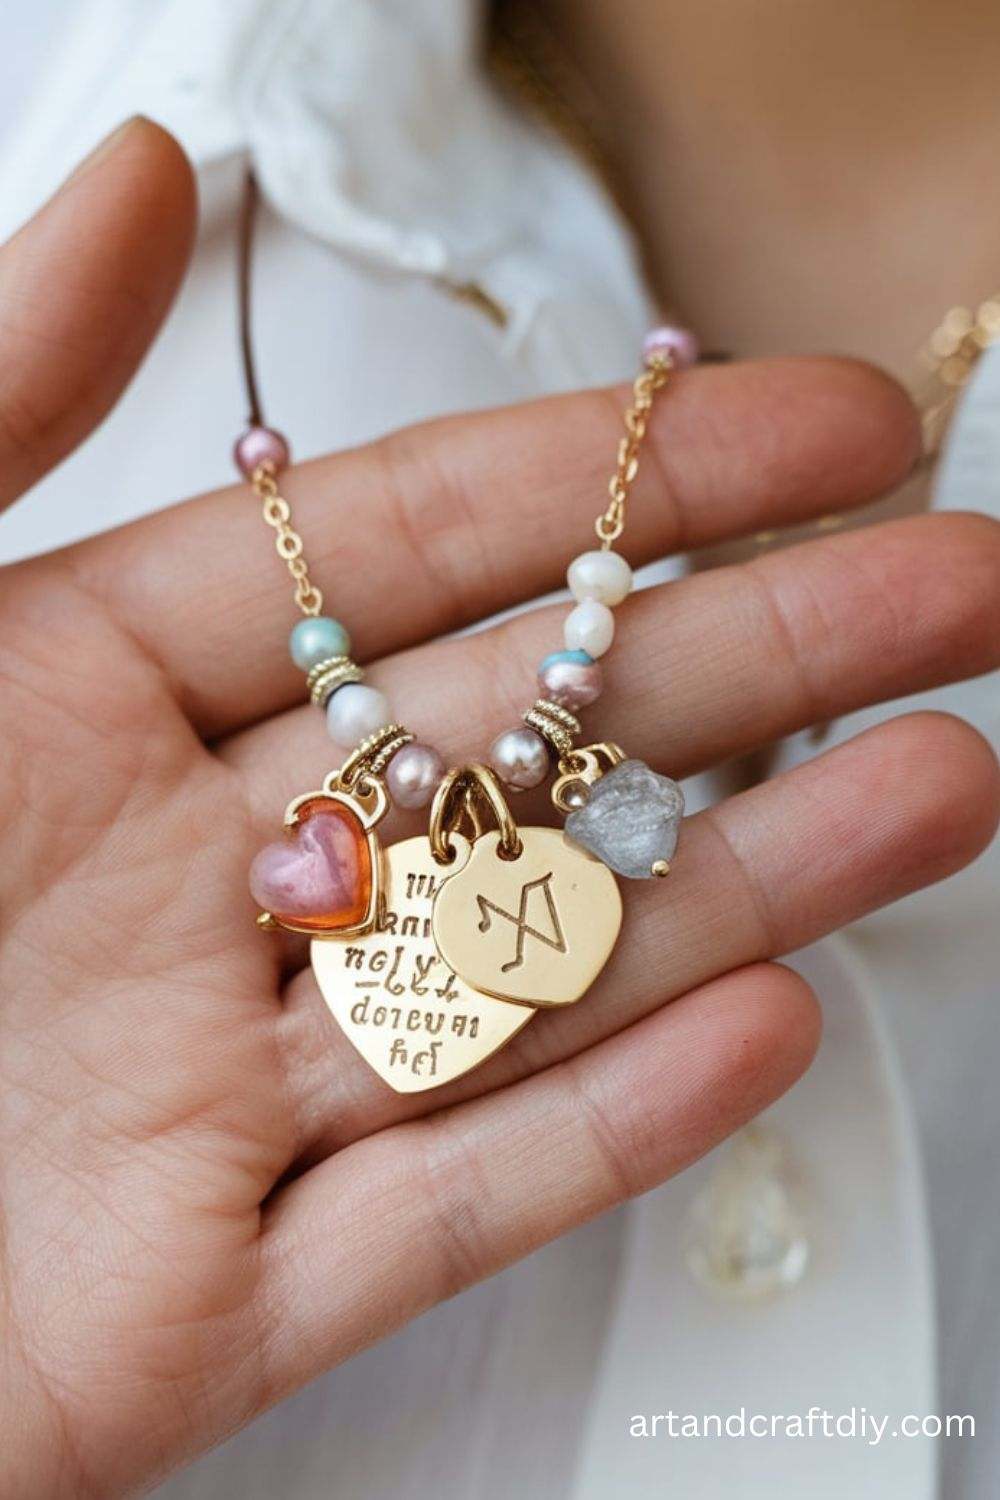
DIY Handmade Necklace
A handmade necklace is a lovely accessory that your mom can wear every day. You can design it with her favorite colors or birthstones for a personalized touch.
Materials Used:
- Beads (variety of colors)
- Necklace wire
- Clasps
- Pliers
Steps:
- Measure the length of the necklace you want to make.
- Cut a piece of necklace wire to your desired length.
- Arrange the beads in a pattern that you think your mom will love.
- String the beads onto the wire, making sure they are evenly spaced.
- Once you’ve finished beading, use pliers to attach the clasp to each end of the wire.
- Your mom will appreciate the thought and effort put into this unique, wearable gift.
Handwritten Letter
A handwritten letter is a classic yet meaningful way to express your love and gratitude to your mom. It’s a personal, timeless gift that will be cherished.
Materials Used:
- Paper
- Pen
- Envelope
Steps:
- Take a moment to reflect on all the things you love and appreciate about your mom.
- Write a heartfelt letter expressing your thoughts, memories, and gratitude.
- Use beautiful stationery or a simple piece of paper.
- Once you’re done writing, fold the letter and place it in an envelope.
- Seal it with a sticker or a wax seal for an extra special touch.
- Present the letter as a touching reminder of your love and appreciation for your mom.
Potted Plant
A potted plant is a gift that keeps on growing, symbolizing the growth of your love for your mom. You can choose a plant that fits her space and personality.
Materials Used:
- Plant (succulent, flower, etc.)
- Pot
- Soil
- Decorative stones or moss (optional)
Steps:
- Select a plant that you think your mom will enjoy (succulents, ferns, or flowering plants are great options).
- Fill the pot with soil, leaving enough room for the plant’s roots.
- Place the plant in the pot and add more soil around it, pressing gently to secure it.
- Add decorative stones or moss on top of the soil for a polished look.
- Water the plant according to its needs and present it as a gift that will brighten her home.
Personalized Bookmark
A personalized bookmark is a thoughtful gift for a mom who loves to read. You can make a unique design using simple materials.
Materials Used:
- Cardstock or thick paper
- Markers or paints
- Ribbons or string
- Laminating sheet (optional)
Steps:
- Cut the cardstock into a rectangular shape.
- Decorate the bookmark with colorful drawings, quotes, or personalized messages.
- Use markers or paints to add designs or patterns.
- If desired, laminate the bookmark to make it more durable.
- Punch a hole at the top and tie a ribbon or string for an added touch.
- Your mom will love using this personalized bookmark in her favorite books.
Handmade Pillow
A handmade pillow can add a cozy touch to your mom’s living space. You can choose a fabric that matches her decor or personal style.
Materials Used:
- Fabric (cotton, linen, etc.)
- Sewing machine or needle and thread
- Pillow stuffing
- Fabric paint (optional)
Steps:
- Cut two pieces of fabric into the shape of the pillow you want to make (usually square or rectangular).
- Place the pieces of fabric together with the patterned sides facing each other.
- Sew around the edges, leaving a small opening.
- Turn the pillow inside out, so the fabric’s right side is facing out.
- Stuff the pillow with filling to your desired firmness.
- Sew the opening shut and decorate the pillow with fabric paint or embroidery if desired.
- Your mom will love this handmade pillow as a cozy addition to her home.
Painted Rock Garden Markers
Painted rock garden markers are a creative way to personalize your mom’s garden. They add color and organization to her outdoor space.
Materials Used:
- Smooth rocks
- Acrylic paint
- Paintbrushes
- Permanent markers (optional)
Steps:
- Clean the rocks to ensure they are smooth and dry.
- Paint the rocks with different colors to create unique markers.
- Use a permanent marker to write the names of plants or herbs on each rock.
- Once dry, place the rocks in your mom’s garden to help her keep track of her plants.
- These handmade garden markers will add charm and organization to her garden.
Embroidered Handkerchief
An embroidered handkerchief is a delicate and thoughtful gift that your mom can use every day. You can add a personal touch with her initials or a meaningful design.
Materials Used:
- Plain handkerchief
- Embroidery thread
- Needle
Steps:
- Choose a design to embroider on the handkerchief, such as her initials or a small floral pattern.
- Thread the needle and begin embroidering the design onto the handkerchief.
- Use different stitches, like satin stitch or backstitch, to create a beautiful pattern.
- Once you’re done, trim any excess thread and present the handkerchief as a special keepsake.
Custom Recipe Book
A custom recipe book is a fantastic gift for a mom who loves to cook. You can gather her favorite recipes and organize them into a personalized book.
Materials Used:
- Blank notebook or binder
- Recipe cards or paper
- Stickers, decorations, or photos
- Pen
Steps:
- Collect your mom’s favorite recipes or any family recipes that she loves.
- Write each recipe on a recipe card or piece of paper, decorating each page with stickers, photos, or special notes.
- Organize the recipes into a binder or notebook for easy access.
- You can also add special sections, such as “Mom’s Favorite Desserts” or “Family Dinners.”
- This personalized recipe book will be a treasured gift for your mom to use in the kitchen.
DIY Sugar Scrub
A DIY sugar scrub is a luxurious gift that your mom can use to pamper herself. It’s simple to make and leaves skin feeling smooth and refreshed.
Materials Used:
- Sugar (brown or white)
- Coconut oil or olive oil
- Essential oils (optional)
- Jar or container
Steps:
- In a bowl, mix together 1 cup of sugar with 1/2 cup of coconut oil or olive oil.
- Add a few drops of essential oils for fragrance (lavender, peppermint, etc.).
- Stir until the scrub reaches your desired consistency.
- Transfer the scrub to a jar or container for easy gifting.
- Your mom will love using this homemade sugar scrub to exfoliate and nourish her skin.
Painted Flower Pot
A painted flower pot is a creative and personalized gift that’s perfect for a mom who loves gardening. You can decorate the pot with her favorite colors or a special design.
Materials Used:
- Clay or terracotta flower pot
- Acrylic paints
- Paintbrushes
- Potting soil
- Small plant or flower
Steps:
- Paint the flower pot with acrylic paints, creating a design that suits your mom’s style.
- Let the paint dry completely before adding a plant.
- Fill the pot with potting soil, then place a small plant or flower inside.
- Water the plant as needed, and present the painted flower pot as a vibrant and personalized gift.
Winter Wonderland Snow Globe
Create a mini winter wonderland by crafting your own snow globe, filled with snow and a tiny holiday scene.
Materials Used:
- Clear jar with a lid
- Fake snow or glitter
- Small plastic figurines (like snowmen or animals)
- Hot glue gun
- Water
- Glycerin (optional)
Steps:
- Glue your figurines to the inside of the jar lid using a hot glue gun.
- Fill the jar with water, leaving some space at the top. Add a few drops of glycerin (optional) to help the “snow” float.
- Add fake snow or glitter to the jar.
- Screw the lid tightly onto the jar and turn it over. Shake it gently to watch the snow fall around the scene.
Cotton Ball Snowmen
This simple craft involves making snowmen from cotton balls, creating a soft and fun winter decoration.
Materials Used:
- Cotton balls
- Glue
- Black markers
- Orange paper
- Small buttons or beads
Steps:
- Glue three cotton balls in a vertical line, creating a snowman shape.
- Use the black marker to draw eyes and a mouth on the top cotton ball.
- Cut a small triangle out of orange paper to create a carrot nose and glue it on.
- Glue small buttons or beads onto the snowman’s body for buttons.
- Optional: Add a scarf, hat, or mittens made from paper or fabric.
Winter Animal Handprint Art
Kids can create winter animals using their handprints, turning their hands into the shapes of creatures like penguins, reindeer, or polar bears.
Materials Used:
- Construction paper
- Paint (black, white, red, brown)
- Paintbrush
- Markers
Steps:
- Paint your child’s hand with white paint and press it onto the paper to create a handprint.
- Use the handprint as the body of the animal (e.g., a penguin for a winter theme).
- Add features with markers, like the eyes, beak, and wings for the penguin.
- For reindeer, use the handprint as the body and create antlers with the fingers.
- Allow the paint to dry, and you can add more details like a scarf or earmuffs.
Ice Painted Art
Use ice cubes to create unique art by painting with frozen colors. This activity mixes science and art as kids explore how the ice melts while they paint.
Materials Used:
- Ice cube tray
- Food coloring
- Water
- Paintbrushes
- Paper
Steps:
- Fill an ice cube tray with water and add different food coloring to each section.
- Freeze the colored ice cubes overnight.
- Give each child a paintbrush and a piece of paper.
- Let them paint with the colored ice cubes by dragging them across the paper. The ice will melt, leaving colorful streaks behind.
- Let the artwork dry and display it as winter-themed art.
Snowy Handprint Ornaments
This craft uses handprints to make personalized ornaments that can be treasured for years. A great way to preserve memories.
Materials Used:
- Salt dough (flour, salt, water)
- Rolling pin
- Paint
- Ribbon
- Hole punch
Steps:
- Make salt dough by mixing 1 cup of flour, 1/2 cup of salt, and 1/4 cup of water.
- Roll out the dough with a rolling pin to about 1/4 inch thick.
- Press your child’s handprint into the dough.
- Use a hole punch to make a hole at the top for a ribbon.
- Bake the ornament at 250°F for 2-3 hours until hard.
- Once cooled, paint the handprint with white paint to resemble snow, and add extra details like a snowman or winter scene.
- Thread a ribbon through the hole and hang it up.
Snowstorm in a Jar
This science craft creates a fun “snowstorm” inside a jar, making for a mesmerizing winter wonderland.
Materials Used:
- A clear jar with a lid
- Baby oil or vegetable oil
- White glitter
- White glue
- Liquid food coloring
Steps:
- Fill the jar about 3/4 full with baby oil or vegetable oil.
- Add a teaspoon of white glue to help the glitter stay suspended in the oil.
- Drop in a few drops of liquid food coloring for a touch of color.
- Add the glitter to the jar.
- Close the lid tightly and shake the jar to create a snowstorm effect.
- Watch the glitter swirl and settle like a snowstorm in the jar.
Snowy Pinecones
Gather pinecones from outside or purchase them to create a snowy scene using cotton balls and paint. This simple craft is perfect for winter displays.
Materials Used:
- Pinecones
- White paint
- Cotton balls
- Glue
Steps:
- Paint the tips of the pinecones with white paint to create a snow effect.
- While the paint is still wet, gently press cotton balls around the edges to simulate snow.
- Allow the pinecones to dry completely.
- Use them as winter decorations or tie a ribbon to hang them as ornaments.
Felt Snowman Ornament
This simple felt snowman ornament is perfect for kids to make and gift. It’s easy to customize with different accessories.
Materials Used:
- White felt
- Black felt
- Orange felt
- Scissors
- Needle and thread
- Ribbon
Steps:
- Cut out three snowman shapes from white felt.
- Sew or glue the three pieces together, starting from the bottom.
- Cut out small circles from black felt for buttons and eyes, and an orange triangle for the nose.
- Attach the face and buttons to the snowman.
- Use a ribbon to hang the snowman as a decoration.
- Optional: Add a small scarf or hat made from additional felt.
Marshmallow Snowman Sculpture
Use marshmallows to create a cute and edible snowman sculpture. It’s a fun way to work with a sweet treat while crafting.
Materials Used:
- Mini marshmallows
- Toothpicks
- Candy for buttons, eyes, and nose
- Small candies for accessories (like hats or scarves)
Steps:
- Stack three mini marshmallows on top of each other, using toothpicks to secure them.
- Use candy pieces to create eyes, buttons, and a nose on the snowman.
- Add a small candy or piece of felt for the hat.
- Once completed, the snowman can be eaten or displayed for the winter season.
Snowman Sock Craft
Create a snowman using an old sock, a great way to repurpose items around the house into a cute winter craft.
Materials Used:
- White sock
- Rice or fabric scraps
- Buttons
- Fabric or felt for the scarf and hat
- Hot glue gun
Steps:
- Fill the white sock with rice or fabric scraps to create a base for the snowman’s body.
- Tie off the top of the sock to form a head.
- Use buttons for eyes, a nose, and buttons down the front of the snowman’s body.
- Cut fabric or felt to create a scarf and hat for the snowman.
- Glue the scarf and hat to the snowman.
- Display the snowman as a fun winter decoration.
The Value of Making Mother’s Day Gifts by Hand
Mother’s Day is a special occasion to honor and appreciate the mothers and mother figures in our lives. While store-bought gifts are convenient, creating handmade DIY Mother’s Day gifts offers a unique and personal touch that can make the day even more memorable. When we put effort into crafting something with our own hands, we not only convey love but also create lasting memories. Here’s why making DIY Mother’s Day gifts by hand is a meaningful gesture:
- Personal Touch and Uniqueness
Handmade gifts are deeply personal and one-of-a-kind. They reflect the giver’s thoughtfulness and creativity, showing that time and effort were invested into creating something special for the recipient. - Emotional Connection
The process of making a gift allows for a deeper emotional connection. Whether it’s knitting a scarf, baking a cake, or painting a picture, the time spent crafting something with love can make the gift more meaningful and cherished. - Creativity and Customization
When you create a gift by hand, you can tailor it specifically to your mother’s tastes, preferences, and needs. Customization gives you the chance to choose colors, materials, and designs that are significant to her, making the gift even more special. - Cost-Effective
While handmade gifts can be incredibly valuable, they are often more budget-friendly than store-bought items. With creativity, you can make something truly beautiful without spending a fortune, making it an affordable option for everyone. - Timeless and Sentimental
Handmade gifts tend to have more sentimental value because they are made with love and care. They often become cherished keepsakes that hold memories long after the holiday has passed. These gifts are treasured and can be passed down through generations.
Presentation Tips for Gift Wrapping and DIY Touches
Gift wrapping is not just about the presentation; it’s about making the recipient feel special. The effort and creativity you put into the wrapping and accessories can transform a simple gift into something extraordinary. Here are some creative wrapping ideas and how to add a personal touch with DIY gift tags.
1. Using Twine for a Rustic Touch
- Twine adds a rustic, natural look to any gift. Whether you’re wrapping with kraft paper, plain brown paper, or fabric, twine works beautifully.
- For a personalized twist, consider tying small decorative items, like pinecones or sprigs of greenery, to the twine for a seasonal or nature-inspired theme.
- Layer the twine to create a textured effect or knot it in various ways for an added visual interest.
2. Fabric Scraps as Wrapping Materials
- If you’re looking for an eco-friendly and unique option, fabric scraps are a wonderful choice. Repurpose old linens, scarves, or pieces of cloth to wrap your gifts.
- This method is perfect for giving your presents a soft, cozy feel while minimizing waste. Use fabrics in fun patterns or colors that reflect the recipient’s personality.
- Fabric wrapping can be especially charming for holiday gifts or themed celebrations, adding texture and a handcrafted look.
3. Repurposing Jars for a Rustic Homemade Touch
- Use small jars, like mason jars, to hold your gift or as a decorative topper. A jar filled with homemade treats, candies, or even small craft supplies can act as both a container and part of the wrapping.
- Jars are great for adding a homemade touch to your gifts, perfect for gifts like jams, cookies, or handmade bath salts. Add a ribbon, twine, or a hand-written label to complete the look.
FAQ
What are some simple Birthday Gift for Mother DIY?
There are many thoughtful and simple Birthday Gift for Mother DIY such as personalized photo frames, hand-painted mugs, scrapbook albums, knitted scarves, homemade candles, or a custom recipe book. The key is to make something that reflects her personality and interests.
How can I create a Birthday Gift for Mother DIY on a budget?
Birthday Gift for Mother DIY can be inexpensive but still meaningful. Use materials you already have at home like fabric, wood, or photos. Consider baking her favorite treats, making a handmade card, or creating a memory jar filled with shared memories and notes of love.
What materials do I need for a Birthday Gift for Mother DIY?
It depends on the type of gift you’re creating. For a personalized photo frame, you might need cardboard, scissors, glue, decorative paper, and a picture. For homemade candles, you’d need wax, wicks, scent oils, and containers. Always plan ahead and gather the necessary materials for your specific project.
How do I personalize a Birthday Gift for Mother DIY?
To personalize a Birthday Gift for Mother DIY, incorporate elements that are meaningful to your mom, such as her favorite colors, quotes, or photos. You can also tailor the gift based on her hobbies or needs, like a hand-knitted blanket if she loves cozy moments, or a customized kitchen apron if she loves to cook.

Hi, I’m Victoria, an art and craft teacher at Newark City Schools, where I have the joy of working with middle school students to help them explore their creativity and develop their artistic talents. I believe that art is a powerful way for students to express themselves, and I strive to make every lesson a fun, engaging, and inspiring experience.
I created this website to share the art and craft projects, techniques, and resources that I use in my classroom, hoping to inspire both educators and young artists alike. Whether you’re a teacher looking for new ideas or a student eager to try something new, I’m excited to provide creative tools and projects that anyone can enjoy.
When I’m not in the classroom, I love experimenting with different art forms and learning new crafting techniques. My goal is to help others discover the joy of making things with their hands, and I hope my website serves as a space for everyone to explore their creative potential.