
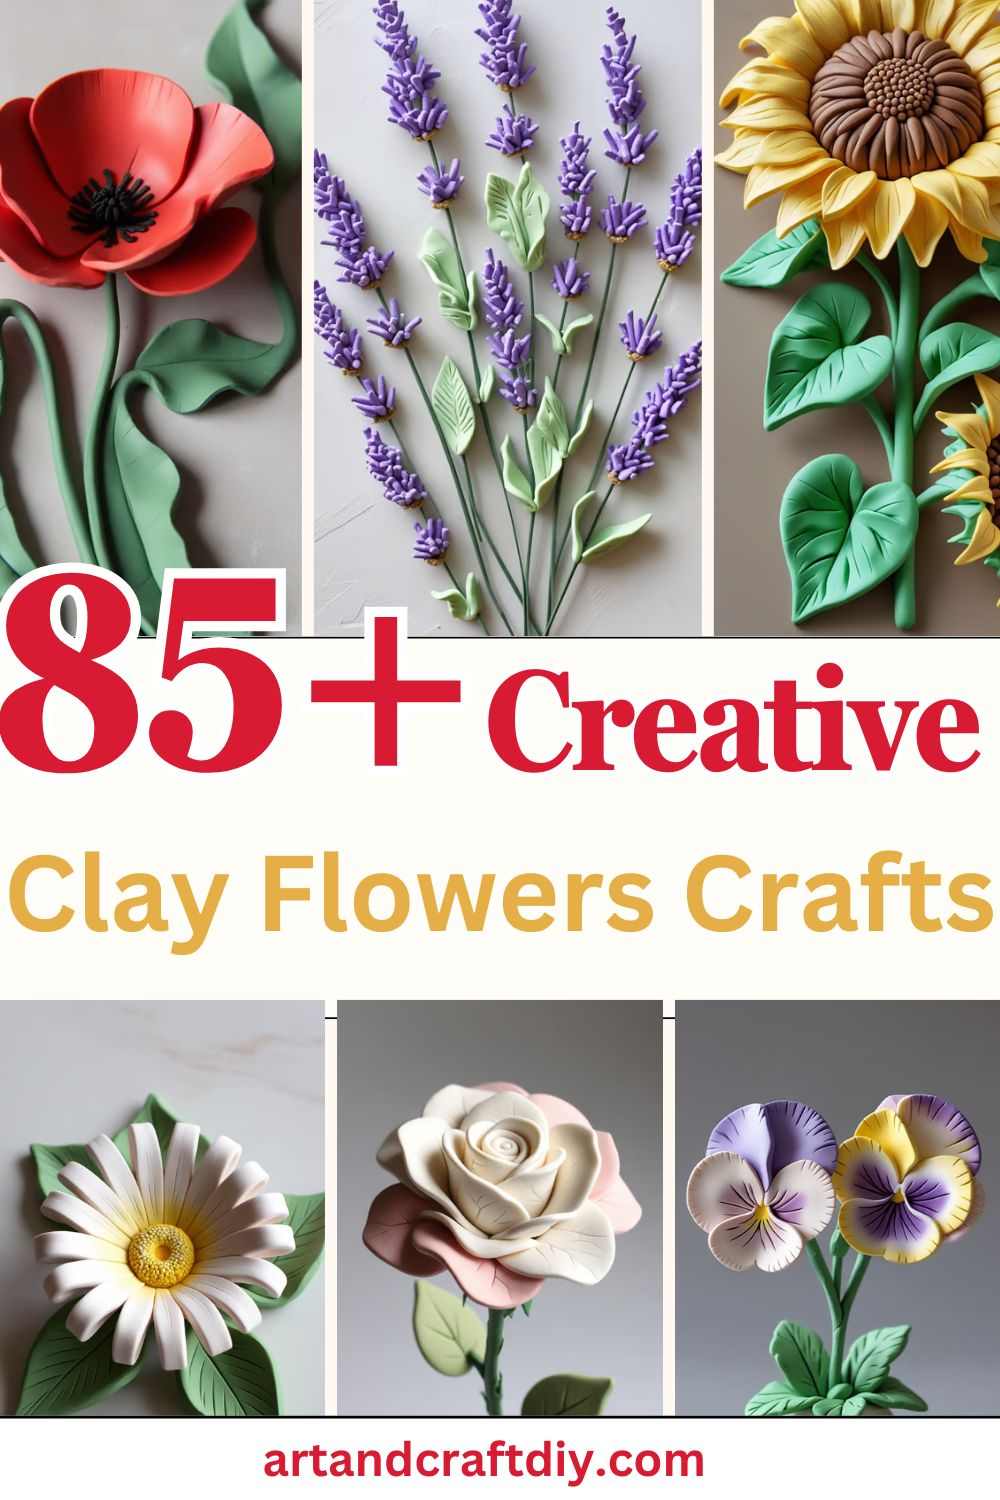
Clay flowers crafts have become a popular and cherished form of artistry, combining the timeless beauty of flowers with the creative possibilities of clay. Clay Flowers Crafts allows artists to create intricate and realistic flower replicas, making it a favorite for home decor, events, and personalized gifts. Whether as stunning centerpieces for weddings, delicate embellishments for interior spaces, or thoughtful handmade presents, Clay Flowers Crafts offer a unique touch that stands out from natural blooms. Working with clay offers numerous benefits—its durability ensures long-lasting creations, its versatility allows for endless design possibilities, and it fuels creativity, giving artists the freedom to experiment with colors, textures, and shapes to bring their visions to life.
The versatility of clay also makes it an ideal medium for creating flowers in a variety of styles, from realistic representations of roses, daisies, and peonies to more abstract or whimsical designs. Artists can experiment with different textures, colors, and sizes to suit any aesthetic, whether it’s a classic, vintage look or a modern, minimalistic design. This adaptability is what has made clay flowers a go-to choice for decorating weddings, parties, and other special occasions.
Clay Flowers Crafts
Clay flowers crafts have gained immense popularity in recent years, offering a refreshing alternative to traditional floral arrangements. Artists use various types of clay, such as polymer clay or air-dry clay, to meticulously mold flowers that mimic the delicate details and vibrant colors of real flowers. Unlike fresh flowers, clay flowers do not wither or fade over time, making them a long-lasting option for those looking to preserve the beauty of nature in their homes or events.
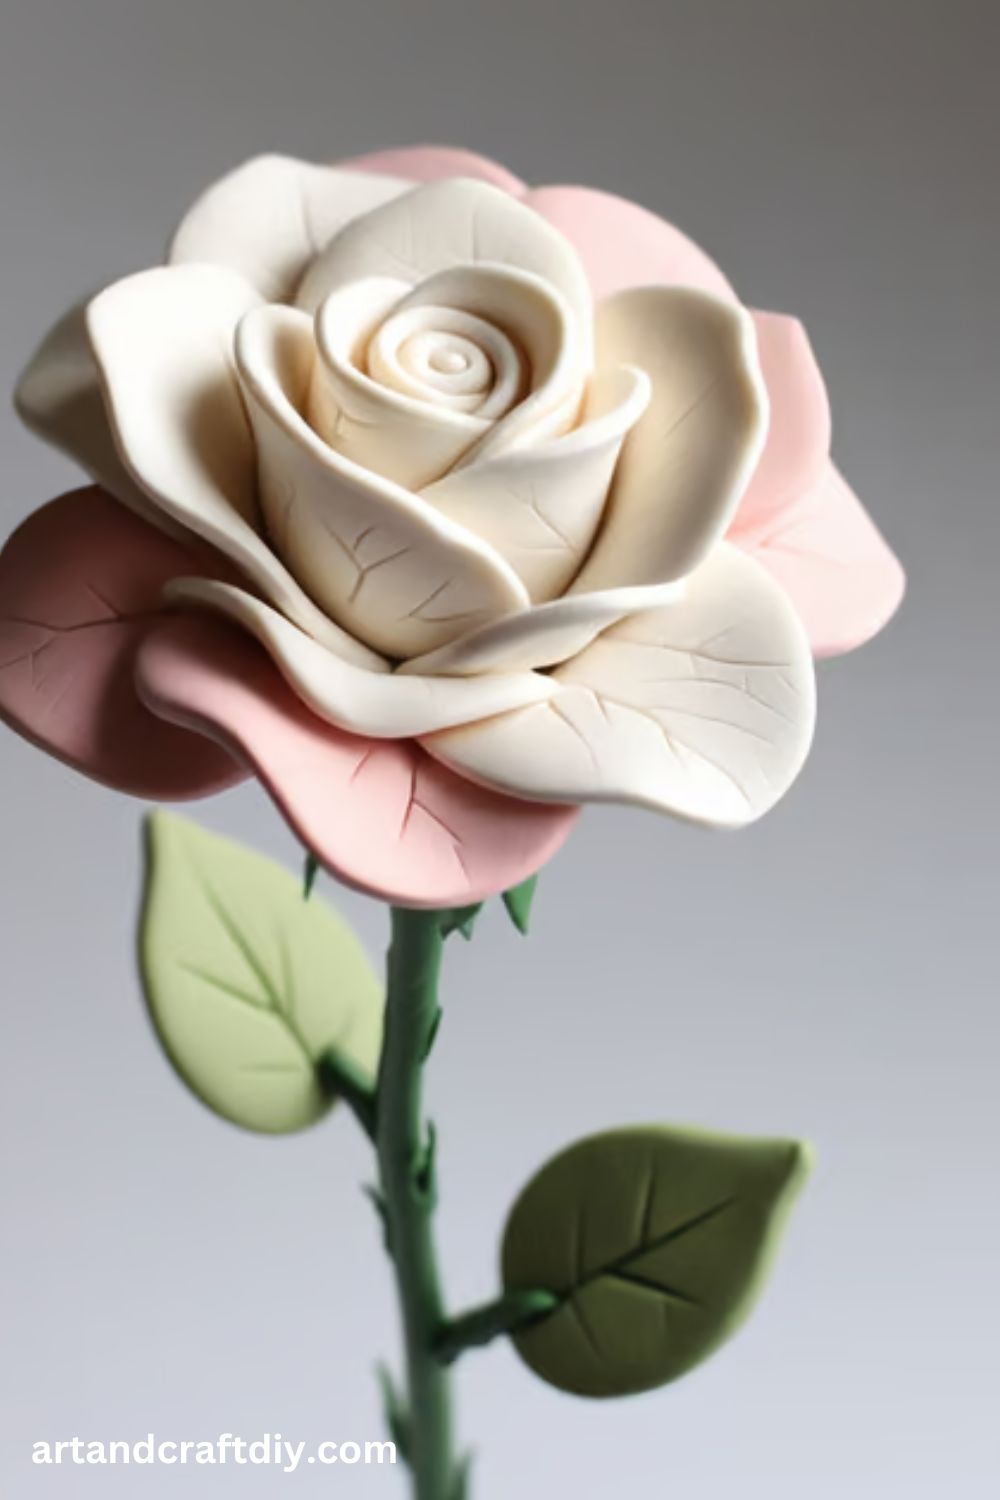
Clay Rose Flower
Create a beautiful rose from air-dry clay for home décor or as a thoughtful gift.
Materials:
- Air-dry clay
- Rolling pin
- Clay sculpting tools
- Green floral wire
- Paint (optional)
Steps:
- Roll out small, thin sheets of clay.
- Cut petal shapes, making each petal slightly larger than the previous one.
- Shape each petal and arrange them around a central ball of clay.
- Attach each layer, gently bending the petals outward.
- Create leaves from green clay, adding veins with sculpting tools.
- Stick the completed rose to a floral wire for easy arrangement in a vase.
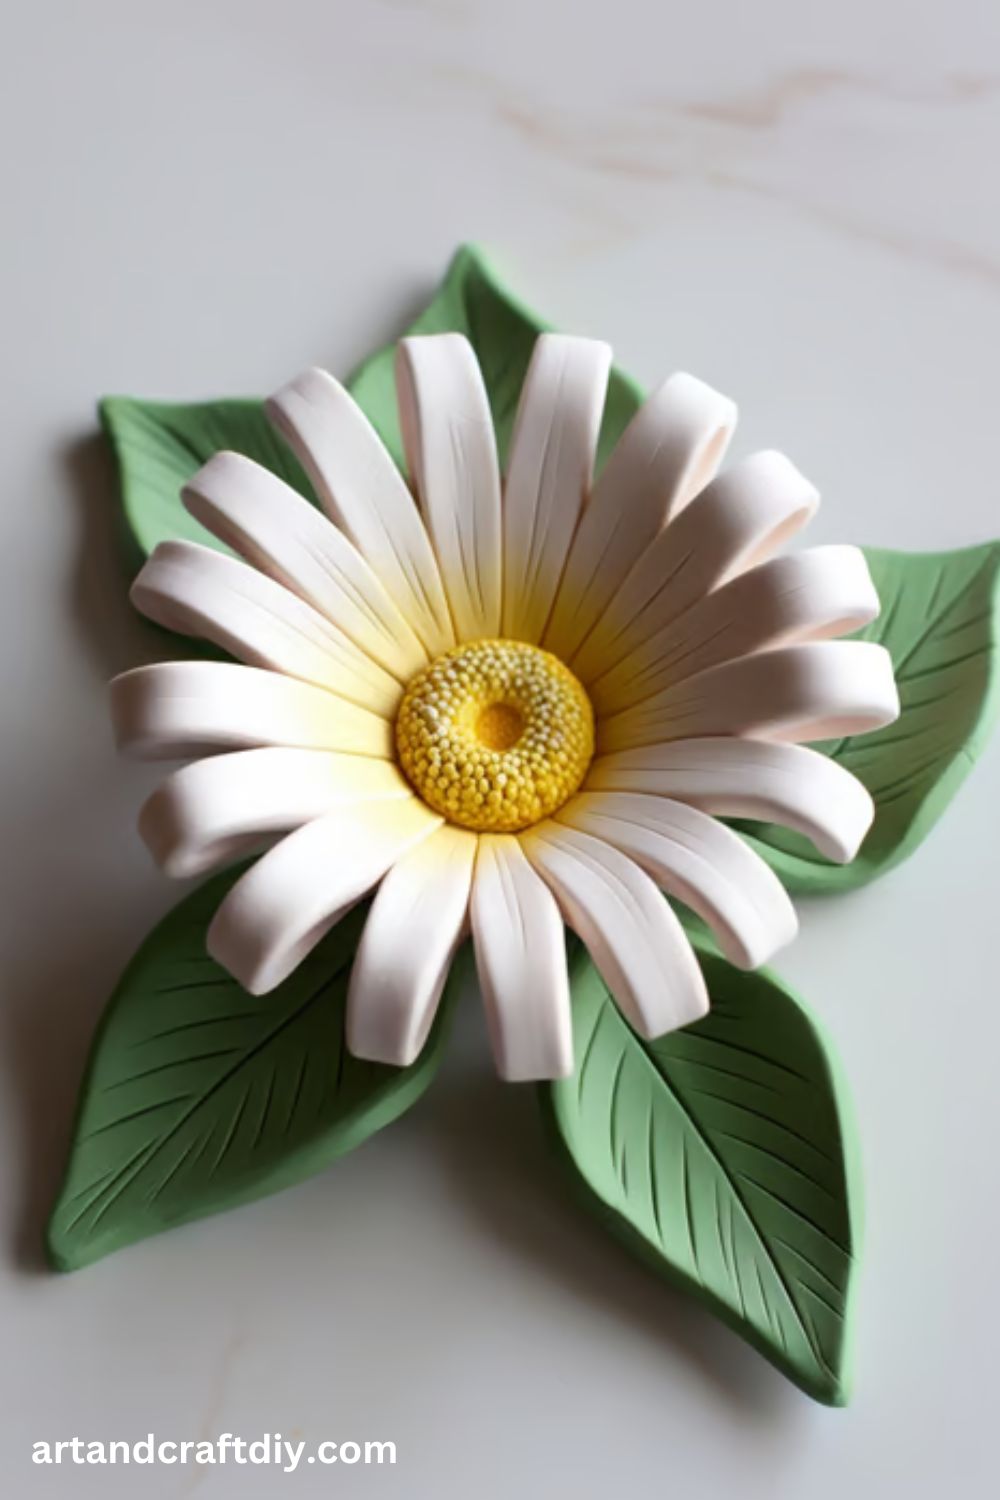
Clay Daisy Flower
The simple daisy can bring cheer and brightness to any space, made with clay.
Materials:
- White and yellow air-dry clay
- Rolling pin
- Clay tools (for shaping)
- Green floral wire or a wooden stick
Steps:
- Roll out a thin sheet of white clay and cut out petal shapes.
- Shape the petals into teardrop shapes and gently curve them.
- Roll a small ball of yellow clay for the center of the daisy.
- Attach the petals to the yellow center in a circular pattern.
- Create a green stem using floral wire or stick.
- Allow the daisy to dry and paint if desired.
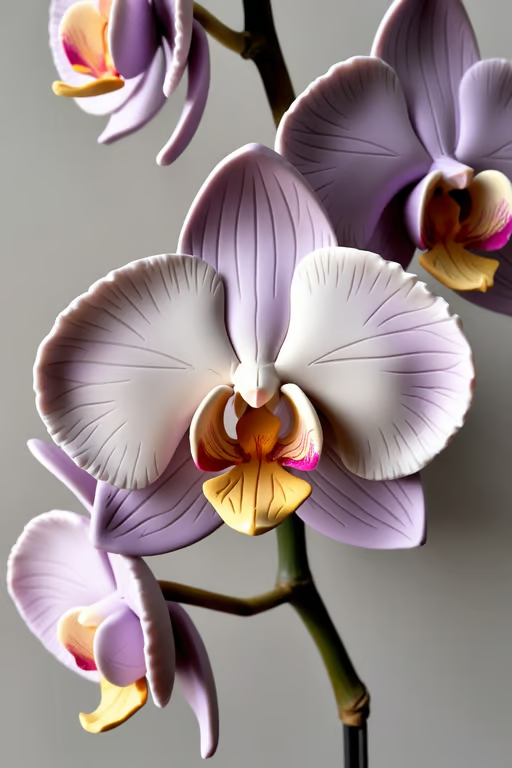
Clay Orchid Flower
Orchids are elegant flowers, and creating one from clay is a fun challenge for craft lovers.
Materials:
- Air-dry clay (white, pink, or purple)
- Rolling pin
- Clay sculpting tools
- Floral wire for stems
Steps:
- Roll out the clay and cut petal shapes.
- Mold the petals into soft curves, creating the elegant shape of orchid petals.
- Roll small balls of clay for the center and attach them.
- Arrange the petals around the center in layers.
- Create a stem using floral wire, wrapping it with green clay.
- Let dry and paint the petals in soft colors.
Clay Sunflower
Sunflowers are perfect for bright, sunny décor and can be made easily with air-dry clay.

Materials:
- Yellow and brown air-dry clay
- Rolling pin
- Clay sculpting tools
- Green floral wire for stem
Steps:
- Roll out yellow clay and cut out petal shapes.
- Shape the petals, making them slightly curved.
- Roll brown clay for the center of the sunflower and texture it with sculpting tools.
- Attach the petals around the center, ensuring they overlap slightly.
- Form a long stem from green clay and wire.
- Allow the sunflower to dry and adjust any petals.
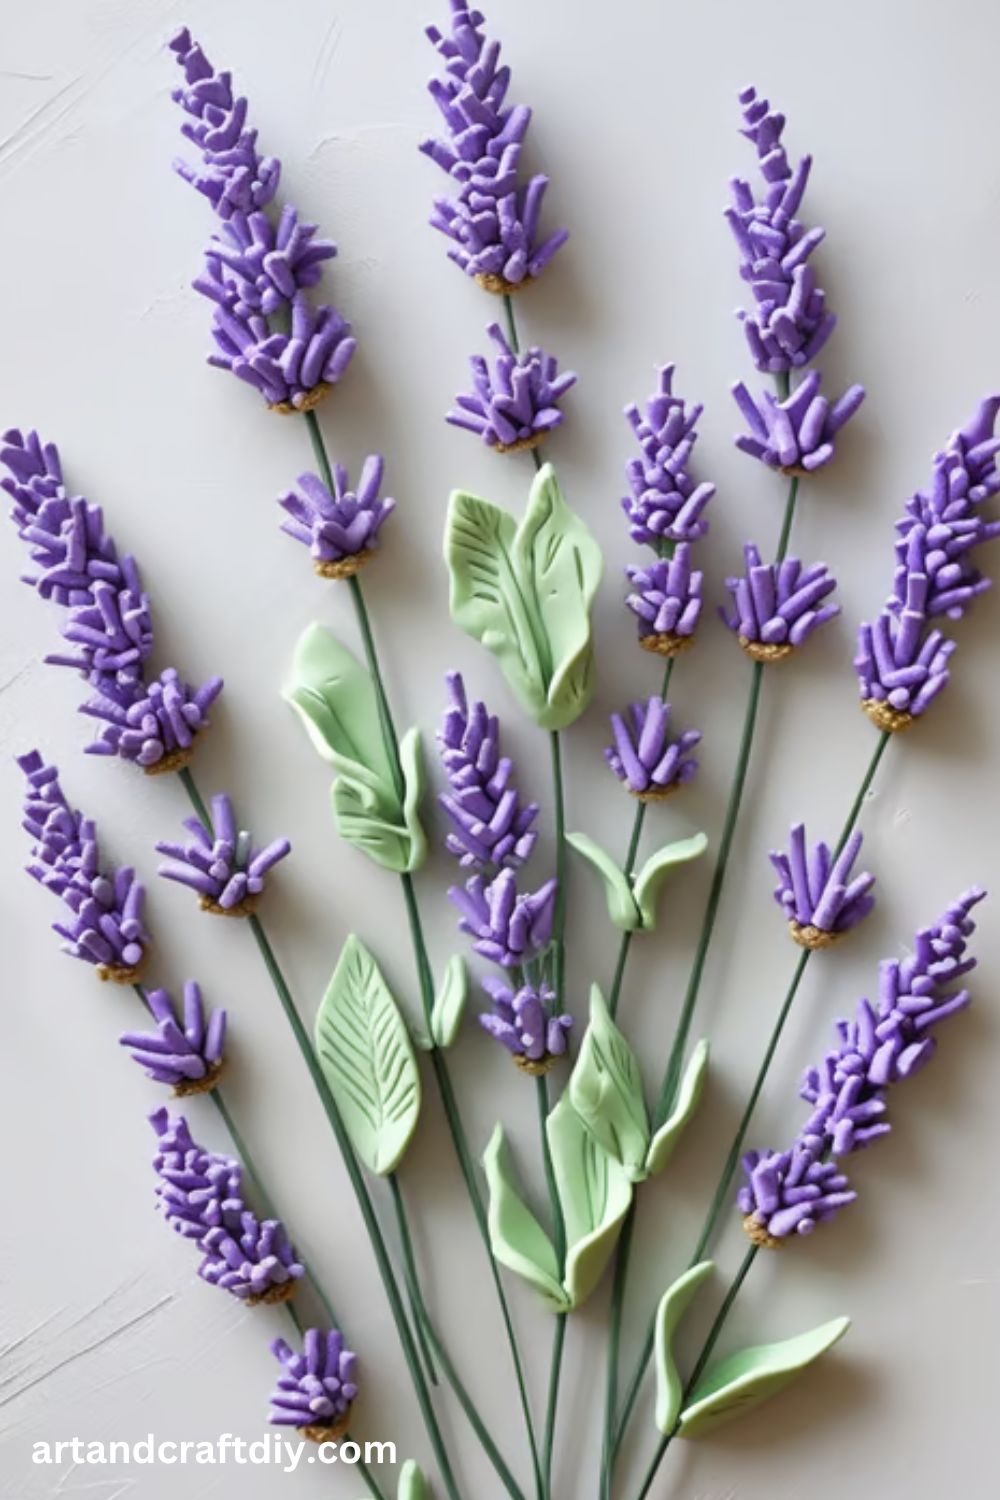
Clay Lavender Sprigs
Lavender sprigs made from clay are great for adding a rustic touch to your space.
Materials:
- Purple, green, and brown clay
- Rolling pin
- Small clay sculpting tools
- Wire for stems
Steps:
- Roll small, cylindrical pieces of purple clay and form the lavender buds.
- Roll out thin green clay for leaves and shape them using tools.
- Shape the stems by twisting green clay around floral wire.
- Attach the lavender buds to the wire stem, leaving some space for leaves.
- Let dry and paint if needed.
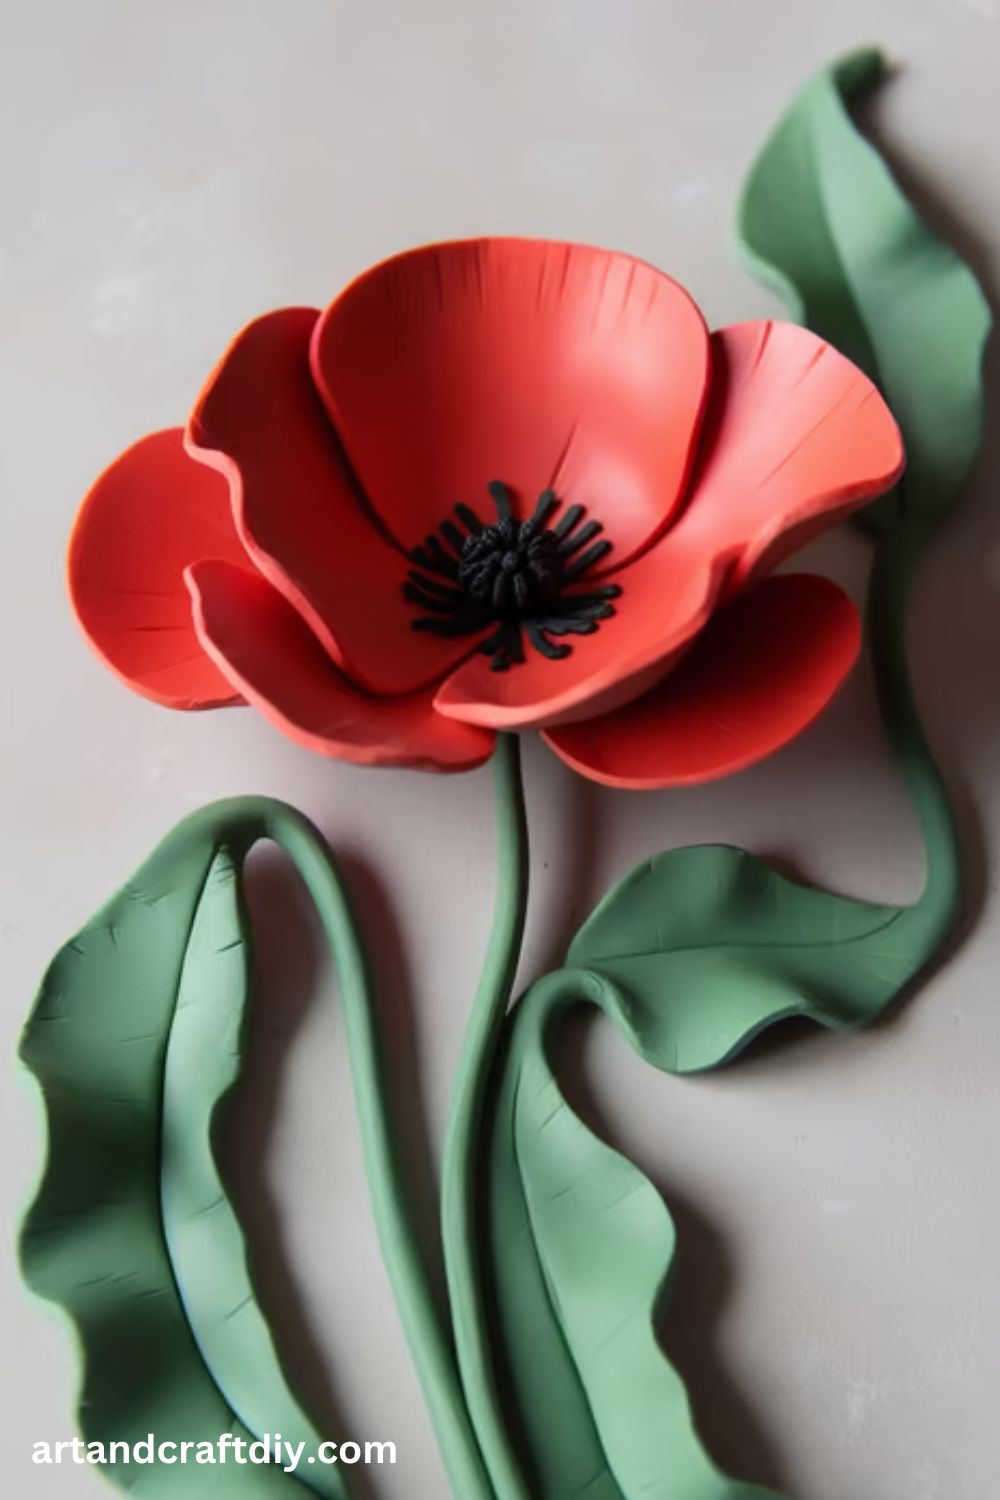
Clay Poppy Flower
A delicate poppy is a symbol of remembrance, and this simple design can be crafted from clay.
Materials:
- Red and black clay
- Clay tools for texturing
- Floral wire
Steps:
- Roll out a red sheet of clay and cut out five petal shapes.
- Shape the petals, giving them a soft wave along the edges.
- Form a small round shape from black clay for the center of the poppy.
- Attach the petals to the black center.
- Insert a floral wire into the base for the stem.
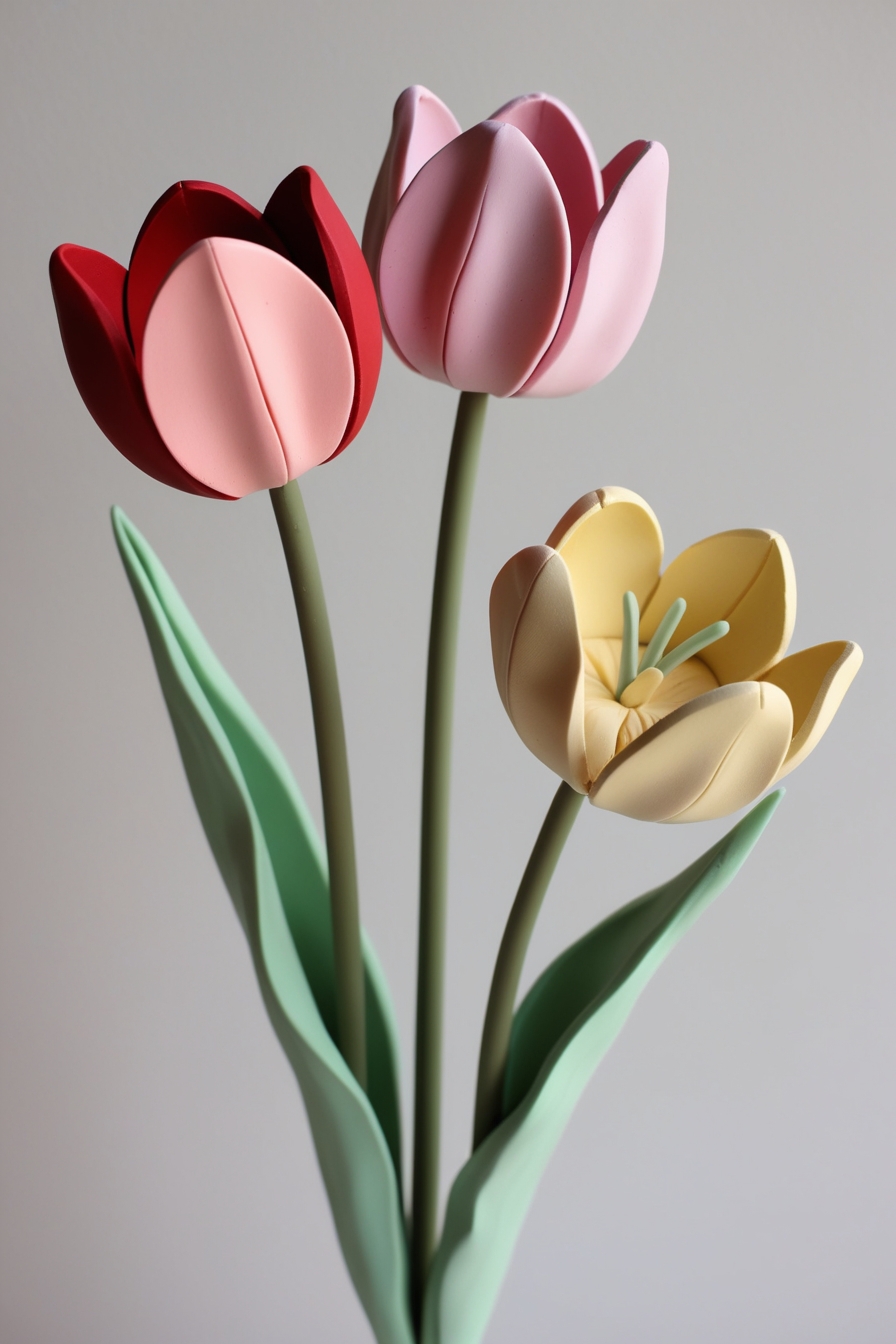
Clay Tulip Flower
Tulips are easy to create with air-dry clay and make a great craft project for beginners.
Materials:
- Red, yellow, or pink clay
- Rolling pin
- Clay tools for shaping
- Green floral wire
Steps:
- Roll the clay into a smooth ball and form the tulip petals by cutting oval shapes.
- Attach the petals at the top of a wire, overlapping them slightly.
- Form a leaf shape from green clay and attach it to the stem.
- Allow to dry and adjust the petals for shape.
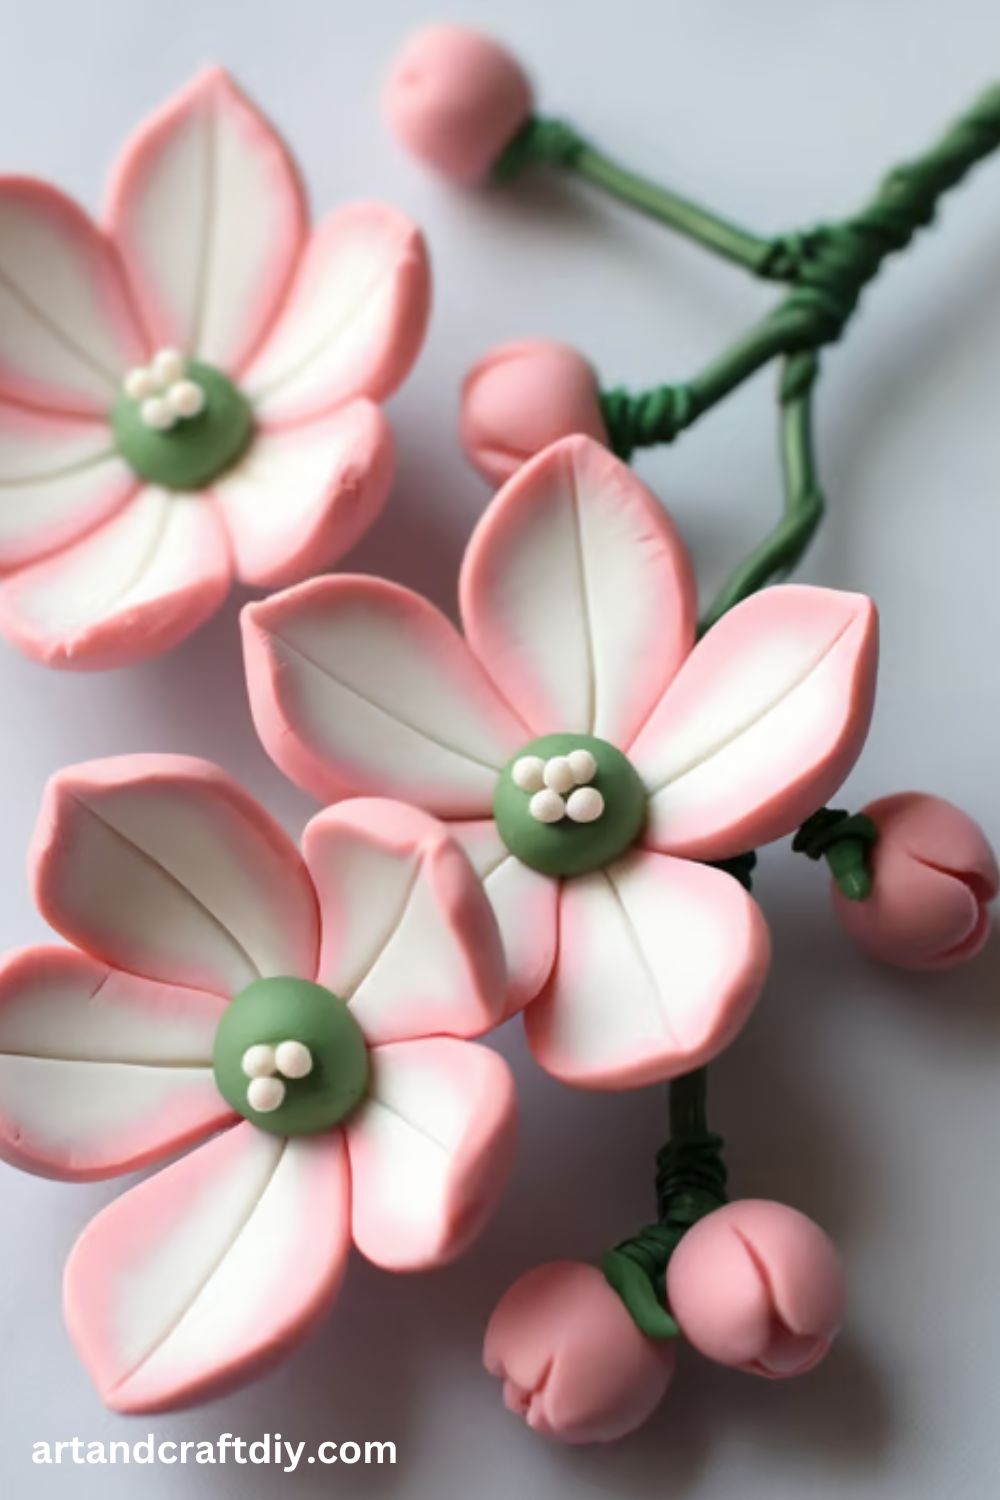
Clay Cherry Blossom
Cherry blossoms are a lovely representation of spring and are easy to craft with clay.
Materials:
- Pink air-dry clay
- Green clay for leaves
- Clay tools
- Floral wire
Steps:
- Roll out small pink balls of clay for the petals.
- Shape the petals and arrange them in a circular formation.
- Create a tiny ball for the center and place it in the middle.
- Form leaves from green clay and attach them to the wire stem.
- Allow the flowers to dry completely.
Clay Pansy Flower
Pansies are colorful flowers that can easily be made from clay, bringing a vibrant touch to your décor.

Materials:
- Yellow, purple, and green air-dry clay
- Rolling pin
- Clay sculpting tools
- Floral wire
Steps:
- Roll out sheets of yellow, purple, and green clay.
- Cut out petal shapes from the purple and yellow clay.
- Shape and layer the petals in an alternating pattern, starting with yellow.
- Add a green leaf and stem to complete the look.
- Allow the clay to dry before displaying.
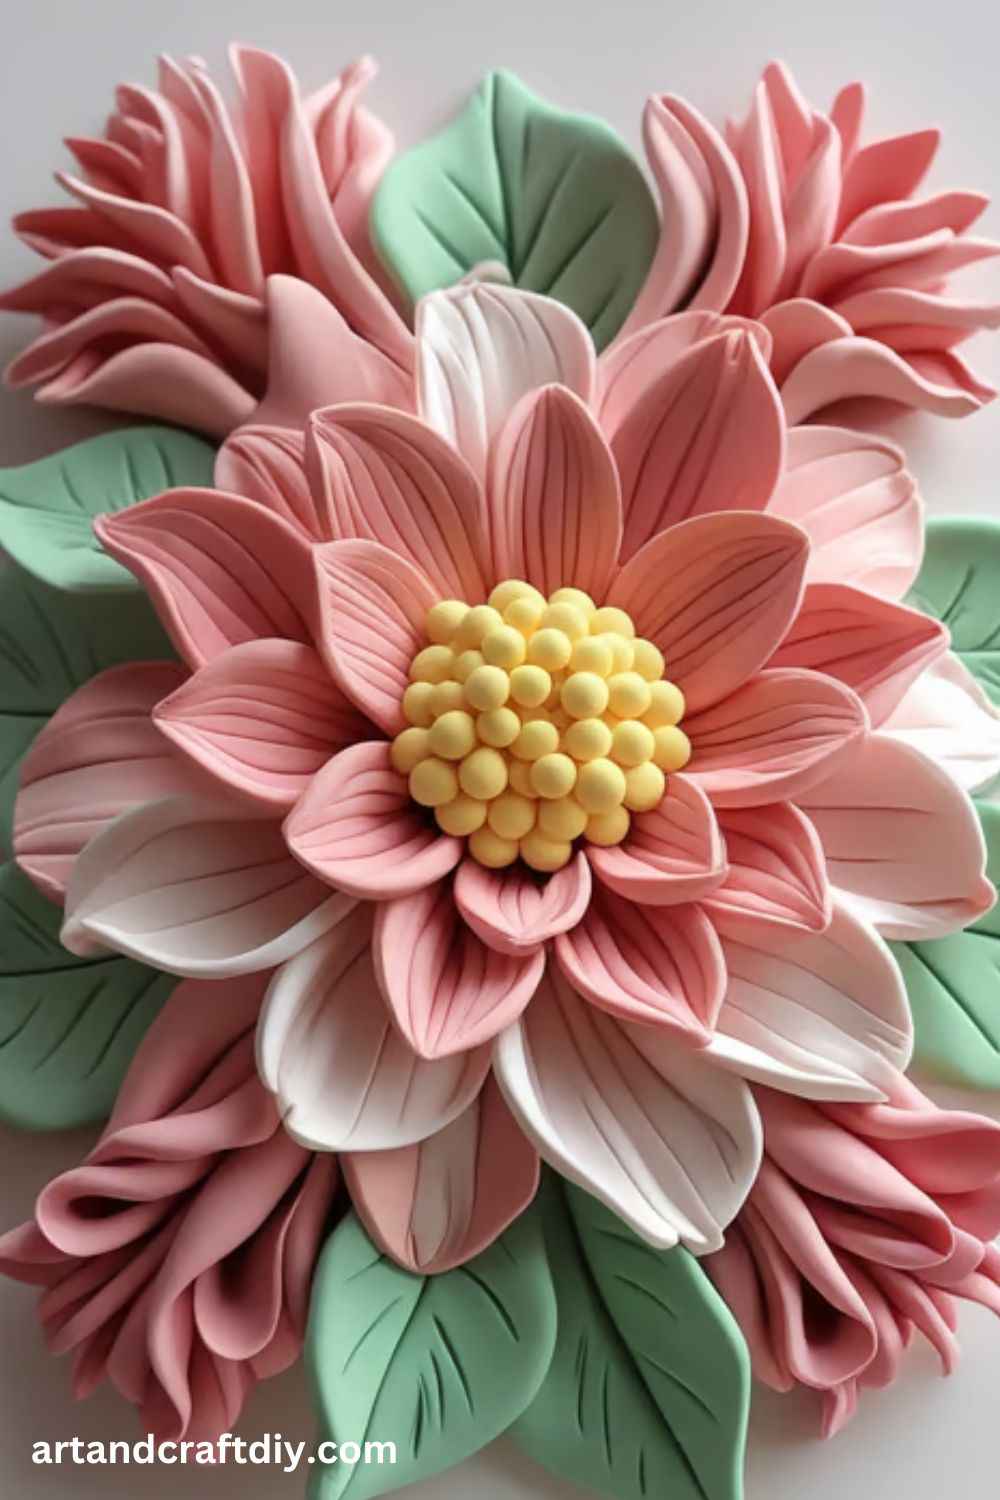
Clay Dahlia Flower
A clay dahlia will add a burst of color and texture to any setting, with layers upon layers of petals.
Materials:
- Pink, red, or yellow clay
- Rolling pin
- Clay sculpting tools
- Floral wire
Steps:
- Roll out a thin layer of clay and cut petal shapes in the desired size.
- Start layering petals from the center outward, adding a few at a time.
- Shape each petal with sculpting tools to give a realistic texture.
- Form a stem from floral wire and attach the dahlia to it.
- Let dry before displaying.
Clay Calla Lily
Calla lilies are graceful and elegant, perfect for adding a touch of class to any room.
Materials:
- White clay
- Yellow clay for the center
- Green clay for leaves
- Clay sculpting tools
Steps:
- Roll out a thin sheet of white clay and shape it into a trumpet-like petal.
- Roll a small piece of yellow clay for the center and shape it to fit inside the petal.
- Create a green leaf from clay and attach it to a wire stem.
- Allow to dry completely and adjust as needed.
Clay Jasmine Flower
Jasmine flowers are aromatic and delicate, and making them out of clay is surprisingly easy.
Materials:
- White and yellow clay
- Rolling pin
- Sculpting tools
- Floral wire
Steps:
- Roll out white clay and cut petal shapes.
- Gently curve the petals into the shape of a jasmine flower.
- Roll yellow clay for the center and attach it to the base of the flower.
- Insert a floral wire for the stem and wrap with green clay.
- Let dry before displaying.
Clay Carnation
A carnation made from clay will last forever and never lose its beauty, making it a great gift.
Materials:
- Pink, red, or white clay
- Rolling pin
- Clay tools
- Floral wire
Steps:
- Roll out a sheet of clay and cut multiple petal shapes.
- Layer the petals one by one, twisting and bending the edges to give a ruffled look.
- Create a small ball of clay for the center.
- Attach the petals to the ball and wrap the bottom with green floral wire.
- Let the clay set and dry.
lay Violet Flower
Violets are delicate flowers that can be easily crafted using air-dry clay for a unique decorative piece.
Materials:
- Purple and yellow clay
- Clay sculpting tools
- Floral wire
Steps:
- Roll out the purple clay and cut petal shapes for the violet.
- Shape the petals and arrange them in a radial pattern.
- Roll a tiny ball of yellow clay for the center of the flower.
- Attach the petals around the yellow center and insert a green floral wire for the stem.
- Allow to dry before displaying.
Clay Lotus Flower
A lotus symbolizes purity and enlightenment, and it’s simple to make with clay for your décor.
Materials:
- White or pink clay
- Green clay for leaves
- Rolling pin
- Sculpting tools
Steps:
- Roll out sheets of white or pink clay.
- Cut out petal shapes, gradually increasing the size as you move outward.
- Form a small center with clay and attach it in the middle.
- Shape green leaves from clay and arrange them around the base of the flower.
- Allow the clay to set and dry.
Clay Cactus Flower
Cacti are known for their hardiness, and crafting a flower from clay brings a colorful pop to their prickly charm.
Materials:
- Bright colored clay (pink, yellow, or red)
- Green clay for the cactus body
- Rolling pin
- Sculpting tools
Steps:
- Shape the body of the cactus from green clay and place it in a pot.
- Roll out bright-colored clay for the flowers.
- Form petals and attach them to the top of the cactus.
- Add small decorative details like tiny clay beads for the cactus’s center.
- Let dry before displaying.
Clay Marigold Flower
Marigolds are colorful and vibrant, ideal for crafting a lively floral arrangement.
Materials:
- Orange and yellow clay
- Rolling pin
- Sculpting tools
- Green clay for leaves and stem
Steps:
- Roll out sheets of orange and yellow clay and cut out petal shapes.
- Layer the petals in a circular pattern, starting from the center.
- Roll green clay for the leaves and stem.
- Attach the leaves around the base of the flower and let it dry.
Clay Cabbage Rose
The cabbage rose is known for its layered, ruffled petals that can easily be replicated with clay.
Materials:
- Light pink, white, or yellow clay
- Rolling pin
- Clay tools for texturing
Steps:
- Roll the clay into thin sheets and cut out petal shapes.
- Layer the petals in a circular pattern, starting from the center.
- Shape the petals to have a ruffled look by gently pinching the edges.
- Create a green leaf from clay and attach it to the stem.
- Let it dry before displaying.
Clay Apple Blossom
Apple blossoms are delicate and light, making them perfect for crafting with air-dry clay.
Materials:
- White and pink clay
- Green clay for leaves
- Floral wire for the stem
Steps:
- Roll out white clay and cut out petal shapes.
- Shape the petals, adding a hint of pink at the tips.
- Roll small balls of green clay for leaves and attach them to the flower.
- Insert floral wire and form the stem.
Clay Bluebell Flower
Bluebells have a drooping shape, and their subtle color can be achieved easily with clay.
Materials:
- Blue and green clay
- Floral wire
Steps:
- Roll out the blue clay and shape it into bell-shaped petals.
- Attach the petals to the top of floral wire, arranging them in clusters.
- Shape green leaves and add them around the flowers.
- Let the clay set before displaying.
Clay Peony Flower
Peonies are full of fluffy petals, and you can make them just as beautiful with clay.
Materials:
- Soft pink and white clay
- Rolling pin
- Sculpting tools
Steps:
- Roll out thin sheets of clay and cut petal shapes.
- Shape the petals to give a soft, rounded look.
- Layer the petals on top of each other, starting from the center.
- Add a stem and leaves to complete the flower.
- Let dry completely before displaying.
Clay Snowdrop Flower
Snowdrops are simple, delicate flowers, making them a great choice for beginners.
Materials:
- White and green clay
- Floral wire
Steps:
- Roll white clay and shape it into teardrop petals.
- Attach the petals around the base, forming the flower’s shape.
- Create a small stem using green clay.
- Insert floral wire for easy display.
- Allow to dry fully before showing.
Clay Daffodil Flower
Daffodils are iconic spring flowers, and they are easy to create with clay.
Materials:
- Yellow and white clay
- Rolling pin
- Sculpting tools
- Floral wire for stems
Steps:
- Roll yellow clay and cut out petal shapes for the daffodil.
- Mold the petals into trumpet-like shapes and layer them around the center.
- Create a white center by rolling clay and forming a trumpet shape.
- Attach the daffodil to floral wire for the stem.
- Let the flower dry completely.
Clay Iris Flower
Irises are known for their intricate petals, and crafting them from clay adds a beautiful, artistic touch.
Materials:
- Purple, blue, and yellow clay
- Clay tools for shaping
Steps:
- Roll purple and blue clay into thin sheets and cut out petal shapes.
- Shape the petals to look like an iris flower, with curves and waves.
- Add a yellow center for detail.
- Attach the petals together and insert floral wire for the stem.
- Let the clay dry before displaying.
Clay Hibiscus Flower
Hibiscus flowers are tropical and vibrant, which makes them fun to create using colorful clay.
Materials:
- Red, pink, or yellow clay
- Clay tools for shaping
Steps:
- Roll the clay into sheets and cut petal shapes.
- Shape the petals into broad, curved shapes.
- Form a small ball for the center and insert a thin wire to replicate the pistil.
- Attach the petals around the center.
- Add leaves and let dry.
Clay Jasmine Garland
A jasmine flower garland made from clay is perfect for crafting a beautiful, everlasting decoration.
Materials:
- White and yellow clay
- Floral wire
- Green clay for leaves
Steps:
- Roll small balls of white clay for the flowers.
- Shape the balls into flower petals and assemble them into clusters.
- Form small yellow centers for each flower.
- Arrange the flowers on floral wire to create a garland.
- Add green leaves and let dry before hanging.
Clay Morning Glory
Morning glories are vibrant and unique flowers that can be easily made with clay.
Materials:
- Blue and purple clay
- Floral wire
Steps:
- Roll out blue or purple clay and cut out petal shapes.
- Form a tubular shape for the center of the flower.
- Attach the petals around the center and shape them.
- Add green leaves and stems.
- Allow to dry completely before using.
Clay Camellia Flower
The camellia is a layered flower, and its beauty can be captured perfectly with clay.
Materials:
- White or pink clay
- Floral wire
- Sculpting tools
Steps:
- Roll out thin sheets of clay and cut out multiple petal shapes.
- Shape and layer the petals, starting from the center.
- Add fine details to the petals using sculpting tools.
- Create a stem and leaves from green clay and insert floral wire.
- Let it dry completely before display.
Clay Fuchsia Flower
Fuchsia flowers are vibrant and hanging, which makes them a great choice for crafting with clay.
Materials:
- Pink and purple clay
- Floral wire
Steps:
- Roll out pink and purple clay and cut petal shapes.
- Layer the petals and form a hanging look for the flower.
- Attach the petals around a small ball for the center.
- Insert floral wire for the stem.
- Let dry completely before displaying.
Clay Snapdragon Flower
Snapdragons are tall flowers, and creating them from clay can bring life to any craft project.
Materials:
- Various colors of clay (purple, pink, yellow)
- Floral wire
Steps:
- Roll out sheets of colored clay and cut petal shapes.
- Shape each petal and assemble them into a tall, stacked formation.
- Attach the petals around a floral wire stem.
- Let dry and adjust if needed before displaying.
Tips for Displaying and Preserving Clay Flowers
Clay flowers are delicate and beautiful creations that can add a charming touch to your home decor. However, to ensure they retain their beauty over time, proper care and preservation are key. Whether you’re looking to display them proudly or store them safely, here are some tips to help you protect and showcase your clay flowers:
- Proper Storage Techniques
- Avoid direct sunlight: Clay can become brittle and fade if exposed to sunlight for long periods. Store your clay flowers in a cool, dry place, away from windows.
- Use a protective container: For long-term storage, consider placing your clay flowers in clear storage boxes or containers with a soft lining to prevent them from getting scratched or damaged.
- Keep away from humidity: Excessive moisture can cause clay flowers to warp or soften. Store them in a dry environment to preserve their shape.
- Protecting Clay Flowers from Dust and Damage
- Display in glass or acrylic cases: If you want to keep your flowers on display, a shadow box or glass display case is an excellent way to protect them from dust and accidental damage.
- Use a soft cloth: When cleaning or handling clay flowers, gently wipe them with a soft microfiber cloth to avoid breaking delicate petals.
- Handle with care: Always handle clay flowers by their base, not the petals, to prevent bending or snapping fragile parts.
Common Mistakes in Clay Work and How to Avoid Them
When working with clay, it’s easy to make mistakes, especially for beginners. However, understanding and addressing these common errors can help you improve your techniques and create better pieces. In this guide, we’ll cover four typical mistakes potters and clay artists make and offer tips on how to avoid them.
1. Overworking the Clay
One of the most frequent mistakes is overworking the clay. This happens when you handle the clay too much, which can lead to dryness, cracking, or losing the desired texture. Overworking the clay can also remove air bubbles that help in achieving the right consistency.
How to Avoid It:
- Try to work quickly but carefully.
- If your clay starts to feel dry, mist it with a small amount of water or cover it with a damp cloth to keep it moist.
- Avoid excessive kneading or rolling out clay that has already reached the ideal consistency.
2. Improper Drying or Curing Times
Rushing the drying or curing process is a mistake that can result in cracked or misshapen pottery. It’s essential to let your pieces dry slowly and evenly before firing them.
How to Avoid It:
- Allow pieces to dry gradually by covering them loosely with plastic for the first few days.
- Dry thick pieces more slowly by turning them regularly to ensure even drying.
- Always follow the manufacturer’s guidelines for curing times and temperatures during firing
FAQ
What are Clay Flowers Crafts made of?
Clay Flowers Crafts are crafted using different types of modeling clays, such as polymer clay, air-dry clay, or clay dough. These materials are flexible and easy to shape, allowing artisans to create intricate and realistic flower designs.
How do I make Clay Flowers Crafts?
To make clay flowers, you need clay, sculpting tools, and often a wire stem. First, shape the clay into petals, leaves, and other components. Then, assemble the pieces and allow them to dry or bake (depending on the type of clay used). You can paint and add decorative elements to enhance the flowers.
Are Clay Flowers Crafts durable?
Yes, clay flowers are quite durable, especially if they are made from polymer clay, which hardens when baked. Air-dry clay flowers may be slightly more delicate but can still last a long time if handled with care.
Can Clay Flowers Crafts be used for decoration?
Absolutely! Clay Flowers Crafts make beautiful decorations for homes, weddings, events, or as gifts. They can be arranged in bouquets, displayed in vases, or used as standalone pieces of art.

Hi, I’m Victoria, an art and craft teacher at Newark City Schools, where I have the joy of working with middle school students to help them explore their creativity and develop their artistic talents. I believe that art is a powerful way for students to express themselves, and I strive to make every lesson a fun, engaging, and inspiring experience.
I created this website to share the art and craft projects, techniques, and resources that I use in my classroom, hoping to inspire both educators and young artists alike. Whether you’re a teacher looking for new ideas or a student eager to try something new, I’m excited to provide creative tools and projects that anyone can enjoy.
When I’m not in the classroom, I love experimenting with different art forms and learning new crafting techniques. My goal is to help others discover the joy of making things with their hands, and I hope my website serves as a space for everyone to explore their creative potential.