
You know, the other day I was sitting at my kitchen table with a pile of scraps—bits of fabric, half-burnt candles, random jars I refused to throw away—and I thought, “Why do I hold onto this stuff?” Then it hit me: it’s because Crafts & DIY projects make me feel calm and creative at the same time. There’s just something magical about turning “junk” into something useful or beautiful, right? And honestly, I think a lot of us crave that little spark.
Maybe you’ve had one of those afternoons where you’re scrolling online, wishing you had something fun (and maybe cheap) to do with your hands. I’ve been there too. That’s why in this article, I’m sharing some super doable ideas you can actually enjoy—whether you’re crafty by nature or just dipping your toes in. Think of it as a friendly nudge to create something that’s yours.
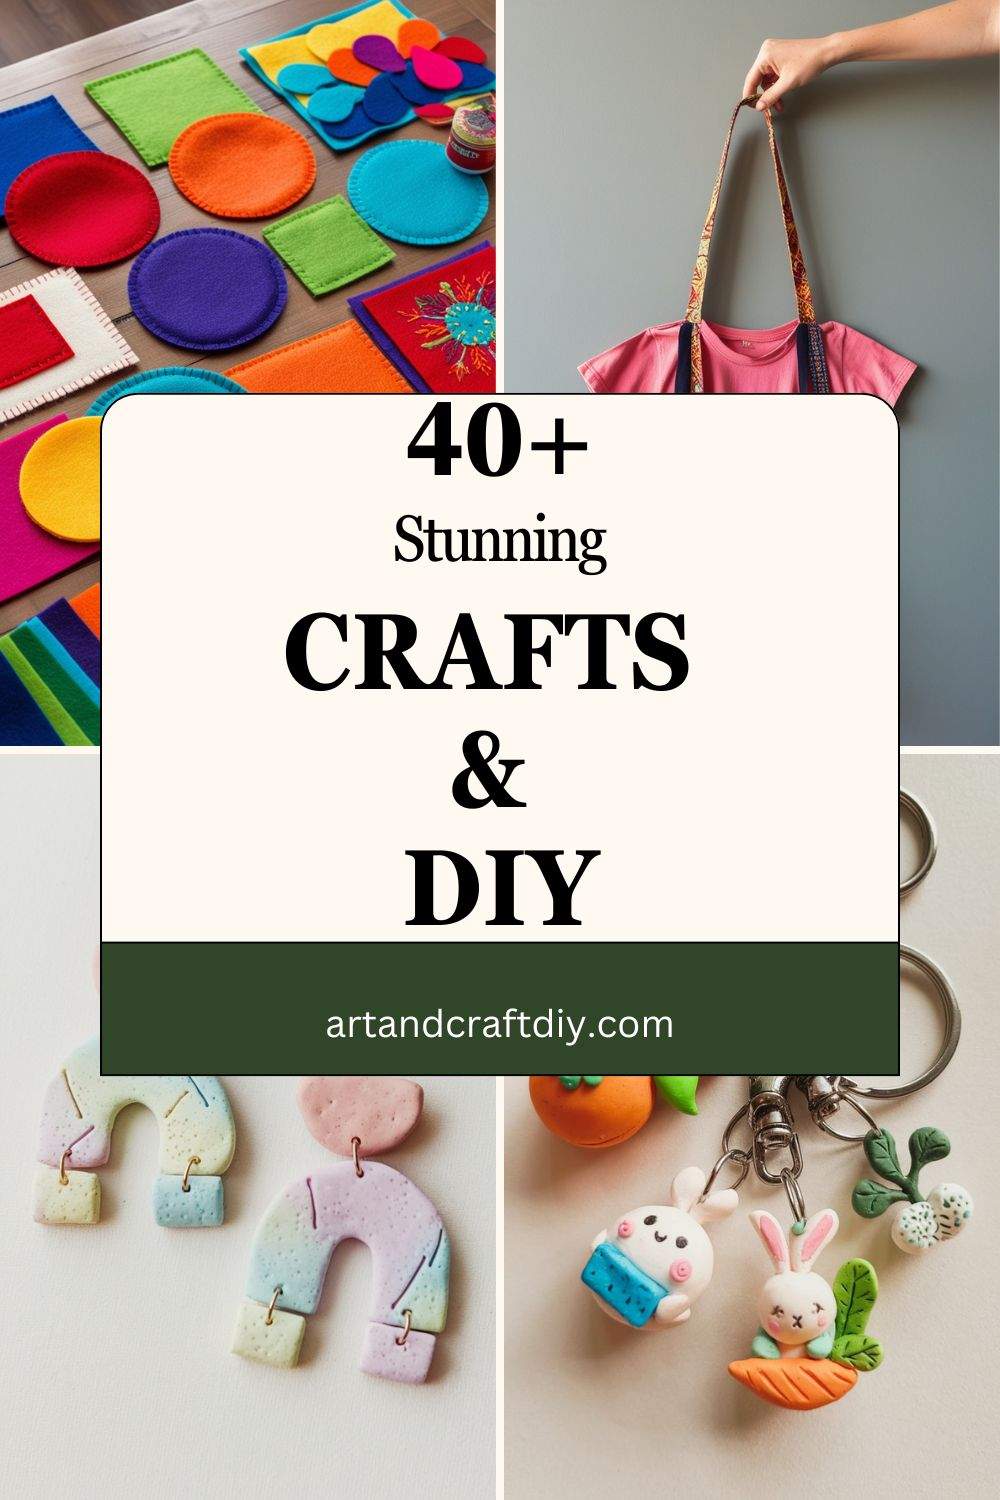
Crafts & DIY
Crafts & DIY (Do-It-Yourself) are creative activities that involve making things by hand, often using simple materials and tools.
DIY Button Art
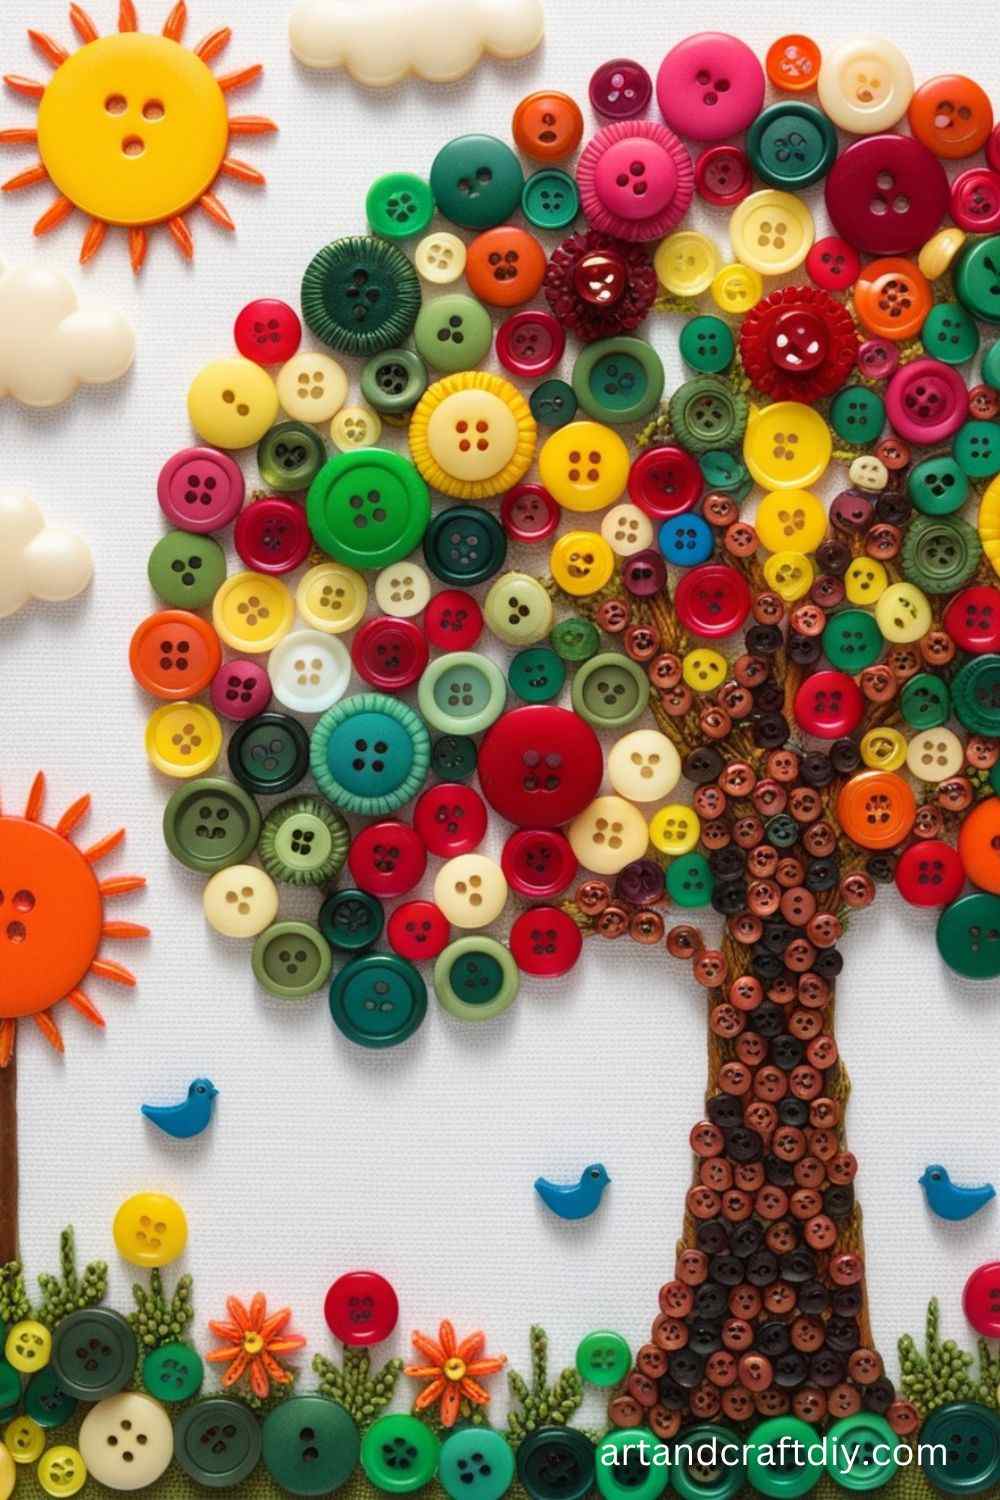
I’ve always had this little obsession with buttons. You know the kind—bright ones, dull ones, shiny ones you find rolling around the bottom of a sewing box. One day, I decided to stop hoarding them and actually make something, and that’s how button art became one of my favorite go-to crafts. The beauty of it is, you don’t need to be an artist at all. I just sketched a heart on canvas, filled it in with buttons of all shapes, and suddenly it looked like a piece you’d see hanging in a cozy boutique. Honestly, the hardest part was choosing which buttons to use.
What I love most about button art is how personal it feels. If you’ve got old buttons from your grandma’s sewing kit or ones that popped off your favorite shirt, glue them on and they instantly carry a story. In my opinion, it’s the easiest way to create art that’s both affordable and filled with memories. Just a canvas, a glue gun, and a handful of buttons—that’s all it takes to turn something ordinary into something you’ll smile at every time you walk past it.
DIY Pom-Pom Garland
I never thought I’d enjoy making pom-poms as much as I do, but oh boy, it’s addictive. The first time I made a pom-pom garland was for a small birthday party at home, and people honestly thought I bought it from a fancy decor shop. All I had was some leftover yarn and a bit of patience. The trick is winding the yarn around your fingers or a fork, tying it tight, and then snipping away until you’ve got this fluffy little ball. The first few I made looked more like squashed spiders, but after a bit of practice, they turned out perfectly round.
Stringing them together is the fun part—you can play around with colors and patterns. I’ve hung mine across bookshelves, draped it around windows, even used one for a festive table backdrop. In my opinion, pom-pom garlands are like confetti you never have to clean up. They bring instant cheer to any space, and making them feels oddly therapeutic, especially when you get into the rhythm of trimming those little yarn tufts.
Painted Mason Jars
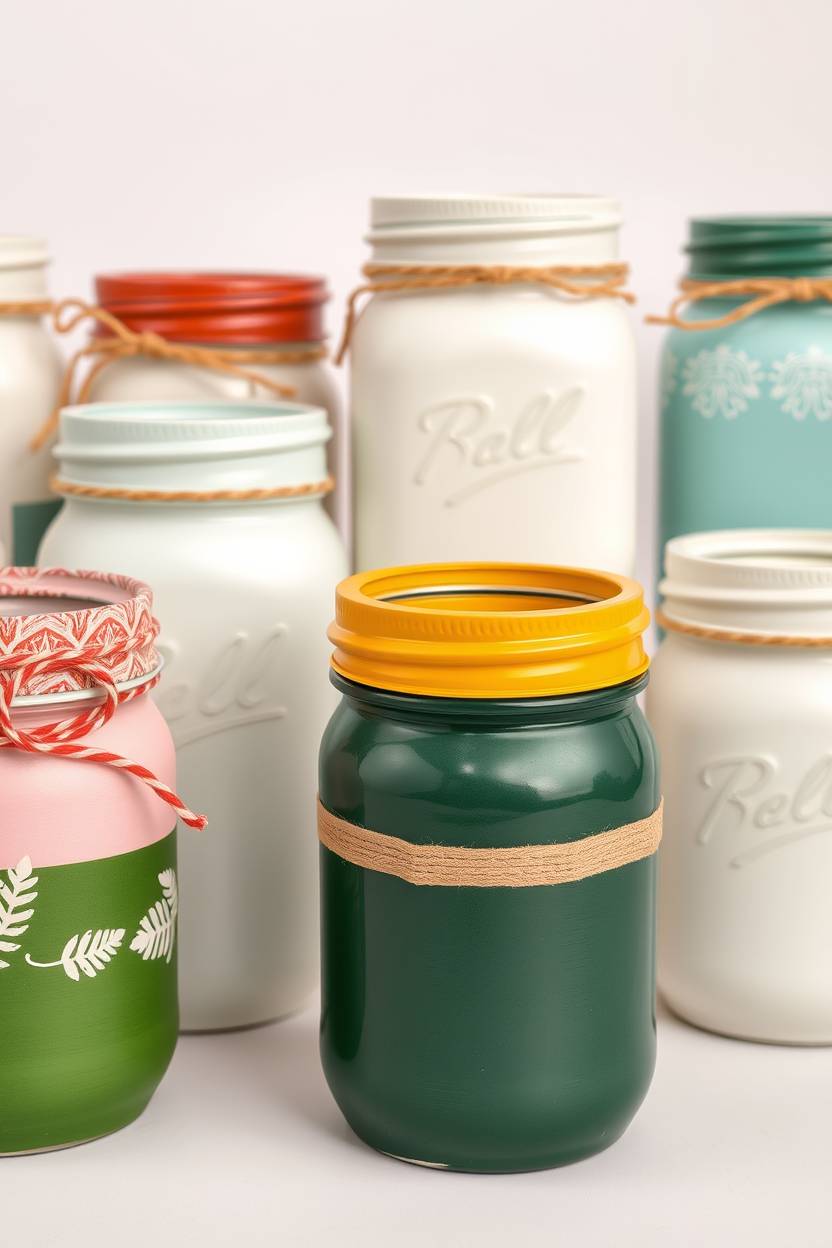
I’ll admit, I used to roll my eyes when I saw painted mason jars all over Pinterest. I thought, “How special can a painted jar really be?” But then I tried it myself, and wow, I was hooked. The first jar I painted was with chalk paint, a soft pastel blue, and I used it as a vase for fresh flowers from my garden. It immediately gave my kitchen this rustic, cozy charm that I didn’t even know I was missing. The paint goes on surprisingly well, and if you add a bit of twine or lace around the rim, it looks like something out of a farmhouse magazine.
The thing about mason jars is they’re incredibly versatile. I’ve used them as candle holders, pen stands, and even for gifting homemade jams with a personal touch. To be fair, not every jar comes out perfect—sometimes the paint streaks or chips—but honestly, that imperfection makes it look even more charming. If you’ve got a few old jars lying around, don’t toss them. A coat of paint and a little imagination can give them a whole new life, and you’ll feel ridiculously proud every time you look at them.
Decorative Rock Painting
Paint unique designs on rocks to create cute decorations or give as personalized gifts
Materials Used:
- Smooth rocks
- Acrylic paint
- Paintbrushes
- Sealant spray
Steps:
- Clean and dry the rocks.
- Paint a base color on the rock, letting it dry completely.
- Add detailed designs, such as patterns or animals, using fine brushes.
- Once the paint is dry, spray the rock with a sealant to protect the design.
- Allow the rock to fully dry before displaying or gifting it.
Paper Plate Cow Craft
Make a fun and colorful cow craft with paper plates, ideal for kids.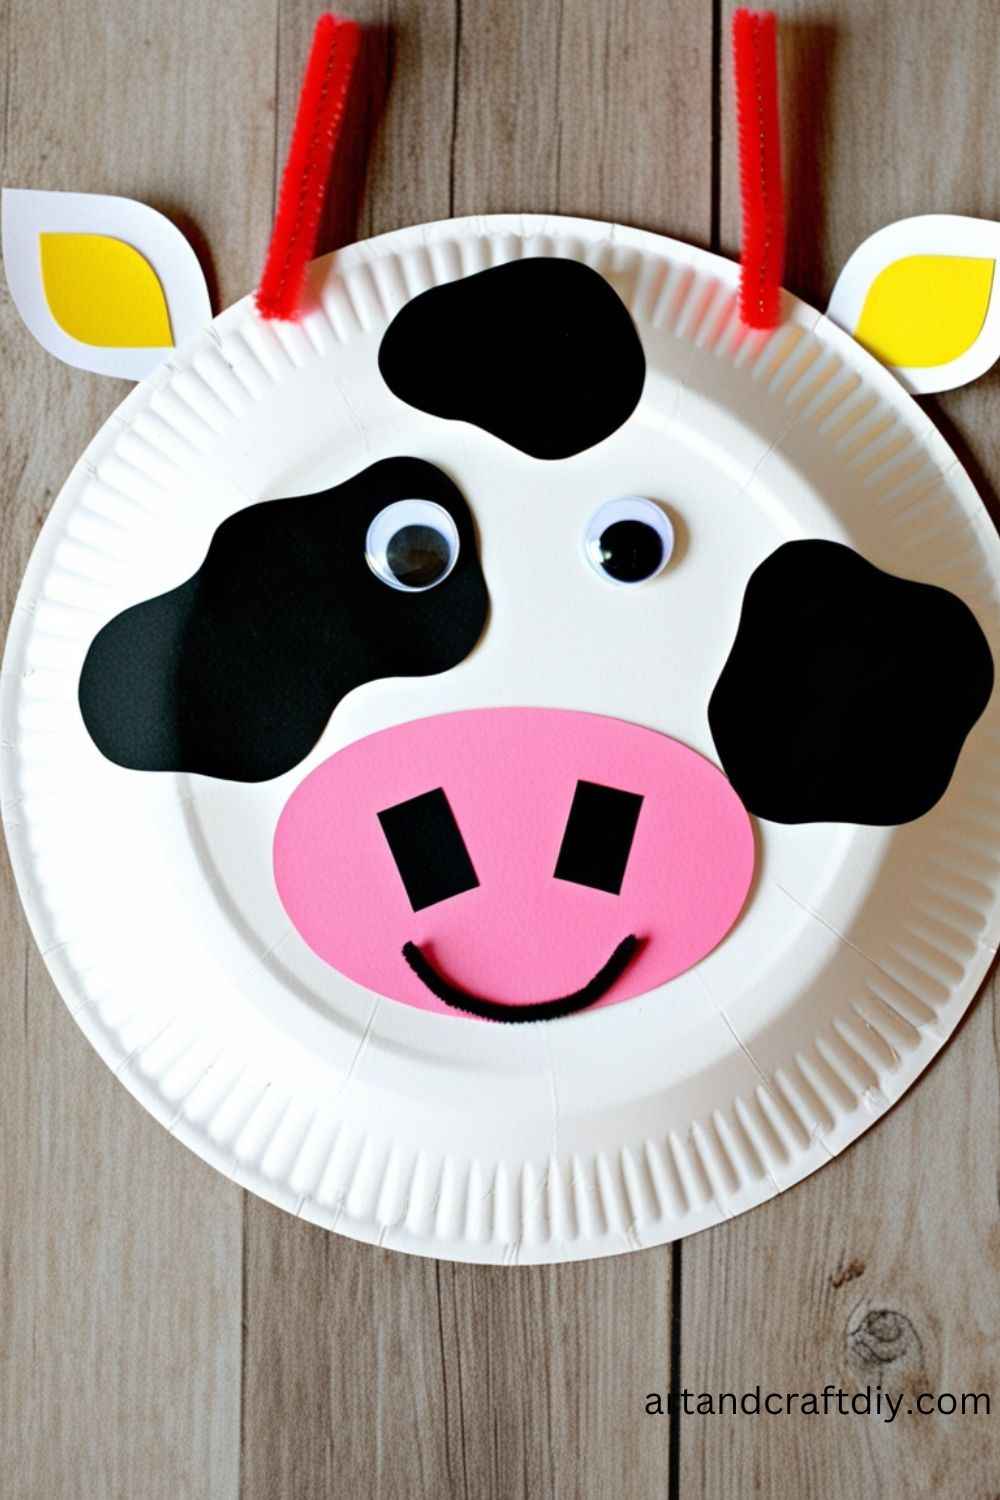
Materials Used:
- Paper plates
- Paint or markers
- Scissors
- Glue
- Googly eyes
Steps:
- Cut the paper plate in half to form the cow face.
- Paint or color the plate with vibrant colors.
- Glue on googly eyes to give the cow character.
- Cut additional paper pieces to create ear and glue them onto the cow body.
- Let it dry and hang your cow on the wall or use it as a decoration.
Clay Earrings
Handcrafted clay earrings can add a personalized touch to your jewelry collection.
Materials Used:
- Polymer clay
- Earring hooks
- Baking sheet
- Rolling pin
- Sculpting tools
- Parchment paper
Steps:
- Roll out the clay into thin sheets using a rolling pin.
- Use cutters or sculpting tools to create shapes, such as circles or abstract designs.
- Place a hole at the top of each design for the earring hook.
- Bake the clay according to the manufacturer’s instructions.
- Once cooled, attach the earring hooks to the clay designs.
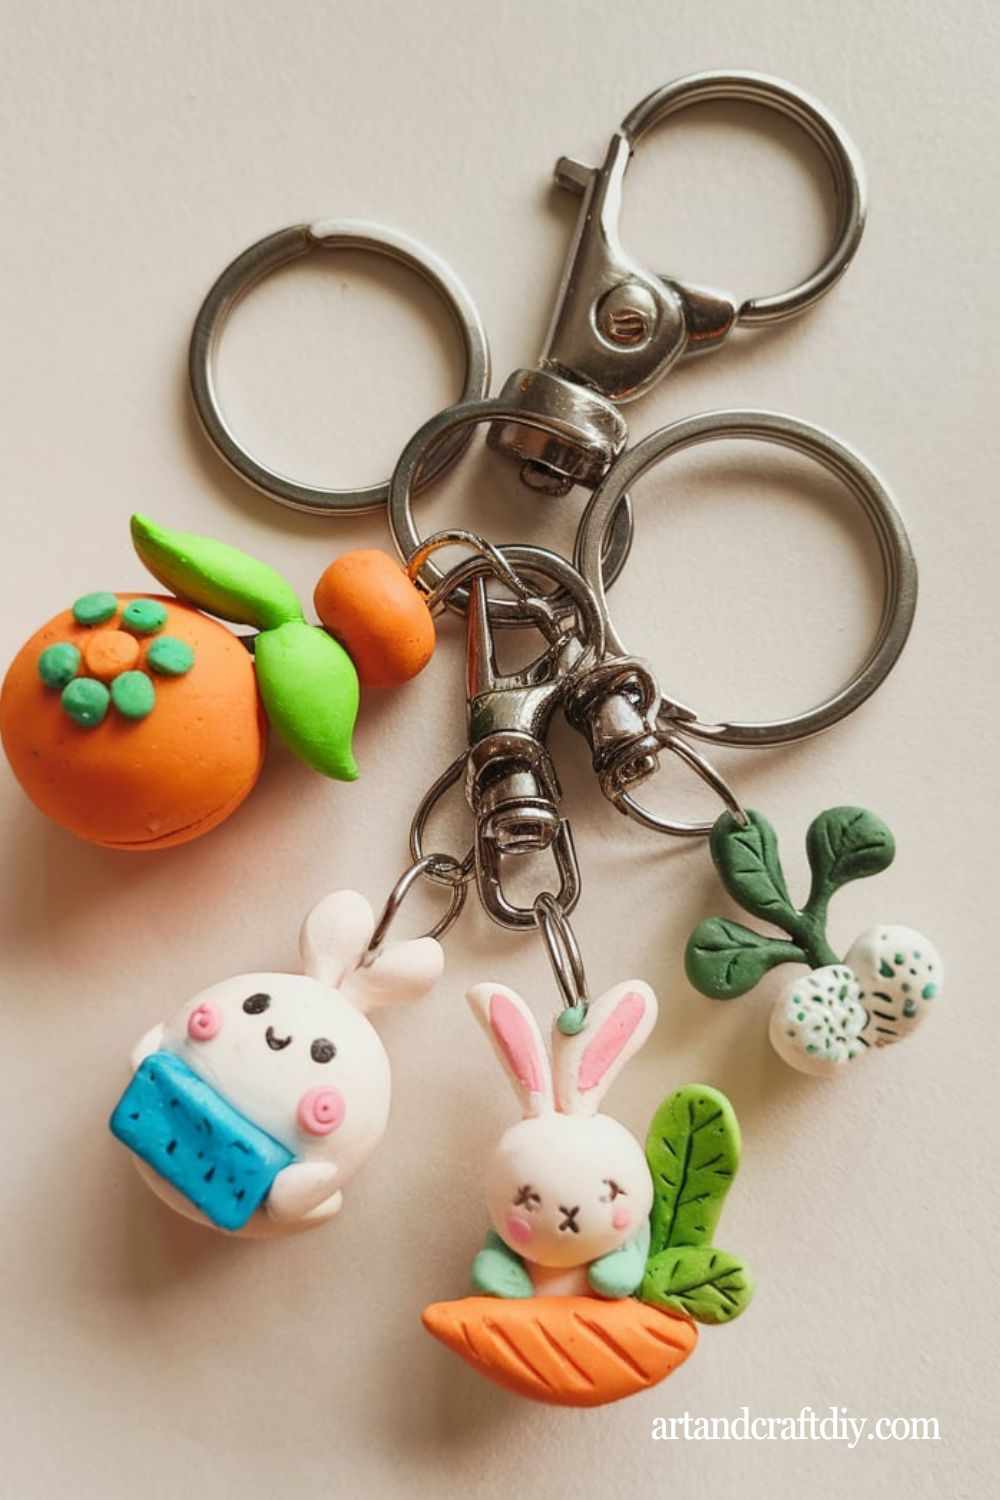
Custom Keychains
Make unique and personalized keychains using a variety of materials, perfect as gifts.
Materials Used:
- Keychain rings
- clay or wood shapes
- Paint, beads, or charms
- Hot glue gun
Steps:
- Mold polymer clay into your desired shape, or use a pre-cut wooden shape.
- Bake or paint the clay to add color or texture.
- Attach a keychain ring to the item using a jump ring or glue.
- Optionally, add beads, charms, or personalized touches to make it unique.
- Let the keychain dry and enjoy it or gift it to someone special.
Upcycled T-Shirt Tote Bag
Turn an old t-shirt into a stylish tote bag for shopping or everyday use.
Materials Used:
- Old t-shirt
- Scissors
- Needle and thread (optional)
Steps:
- Lay the t-shirt flat and cut off the sleeves.
- Cut around the neckline to create an opening.
- Cut the bottom of the shirt into fringe-like strips.
- Tie the strips together in knots to form the bottom of the bag.
- Turn the shirt inside out and use thread to reinforce the seams.
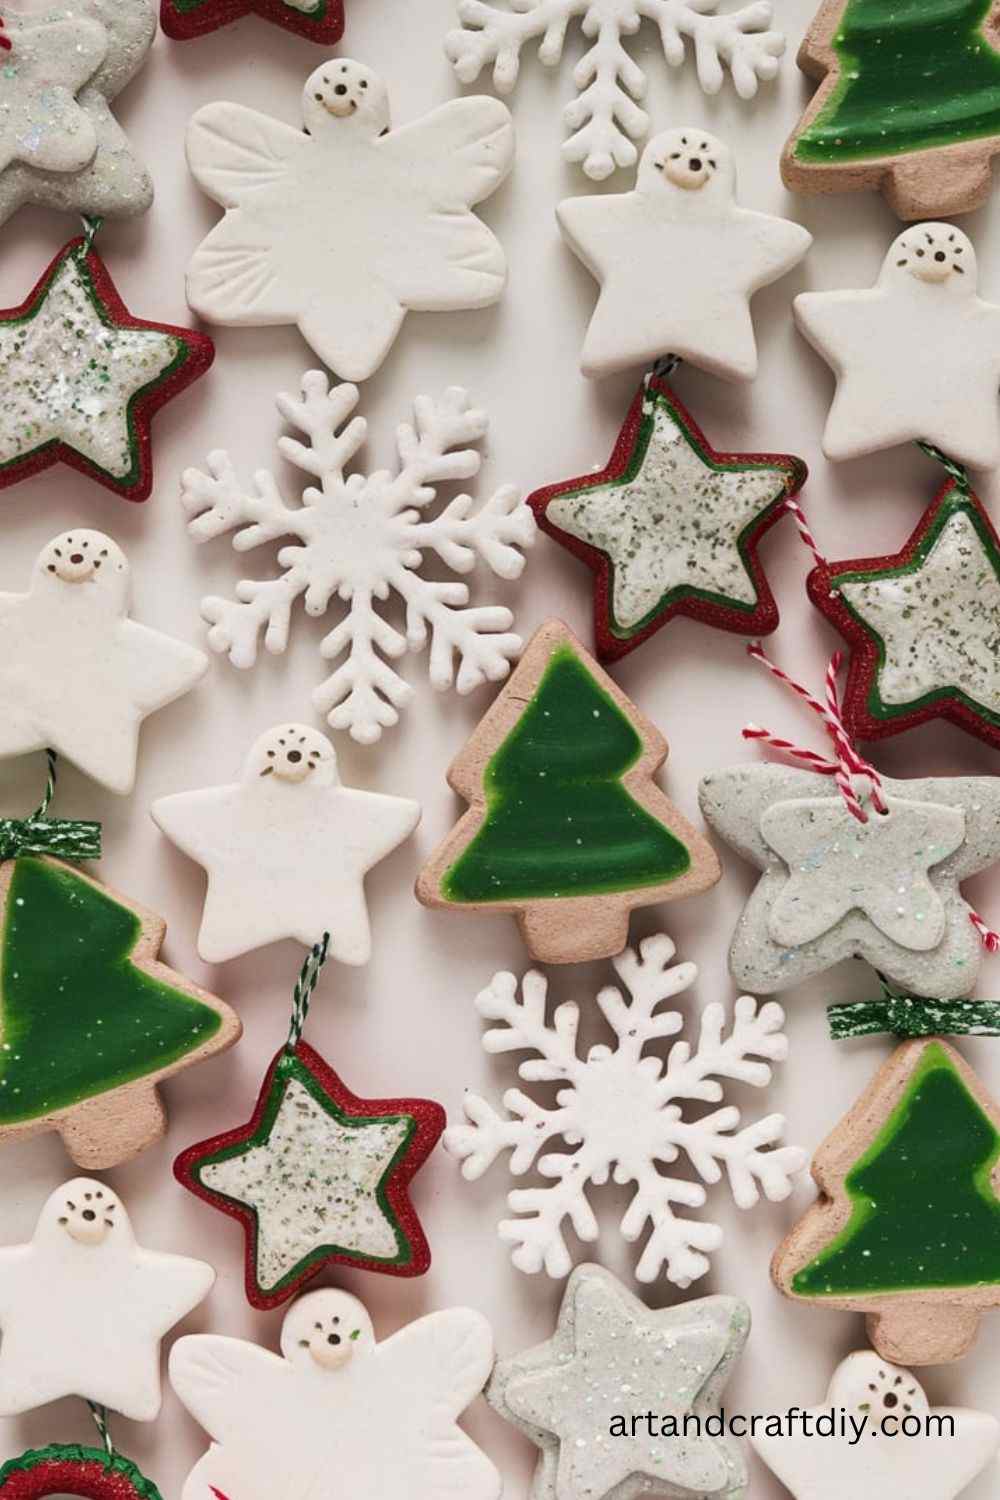
Salt Dough Ornaments
Craft these easy salt dough ornaments that can be personalized and used as decorations.
Materials Used:
- Salt
- Flour
- Water
- Cookie cutters
- Ribbon
- Paint (optional)
Steps:
- Mix salt, flour, and water to form a dough.
- Roll the dough out and use cookie cutters to create shapes.
- Use a straw to punch a hole at the top for the ribbon.
- Bake the shapes at 250°F for 2 hours or until hard.
- Paint or decorate the ornaments and thread a ribbon through the hole.
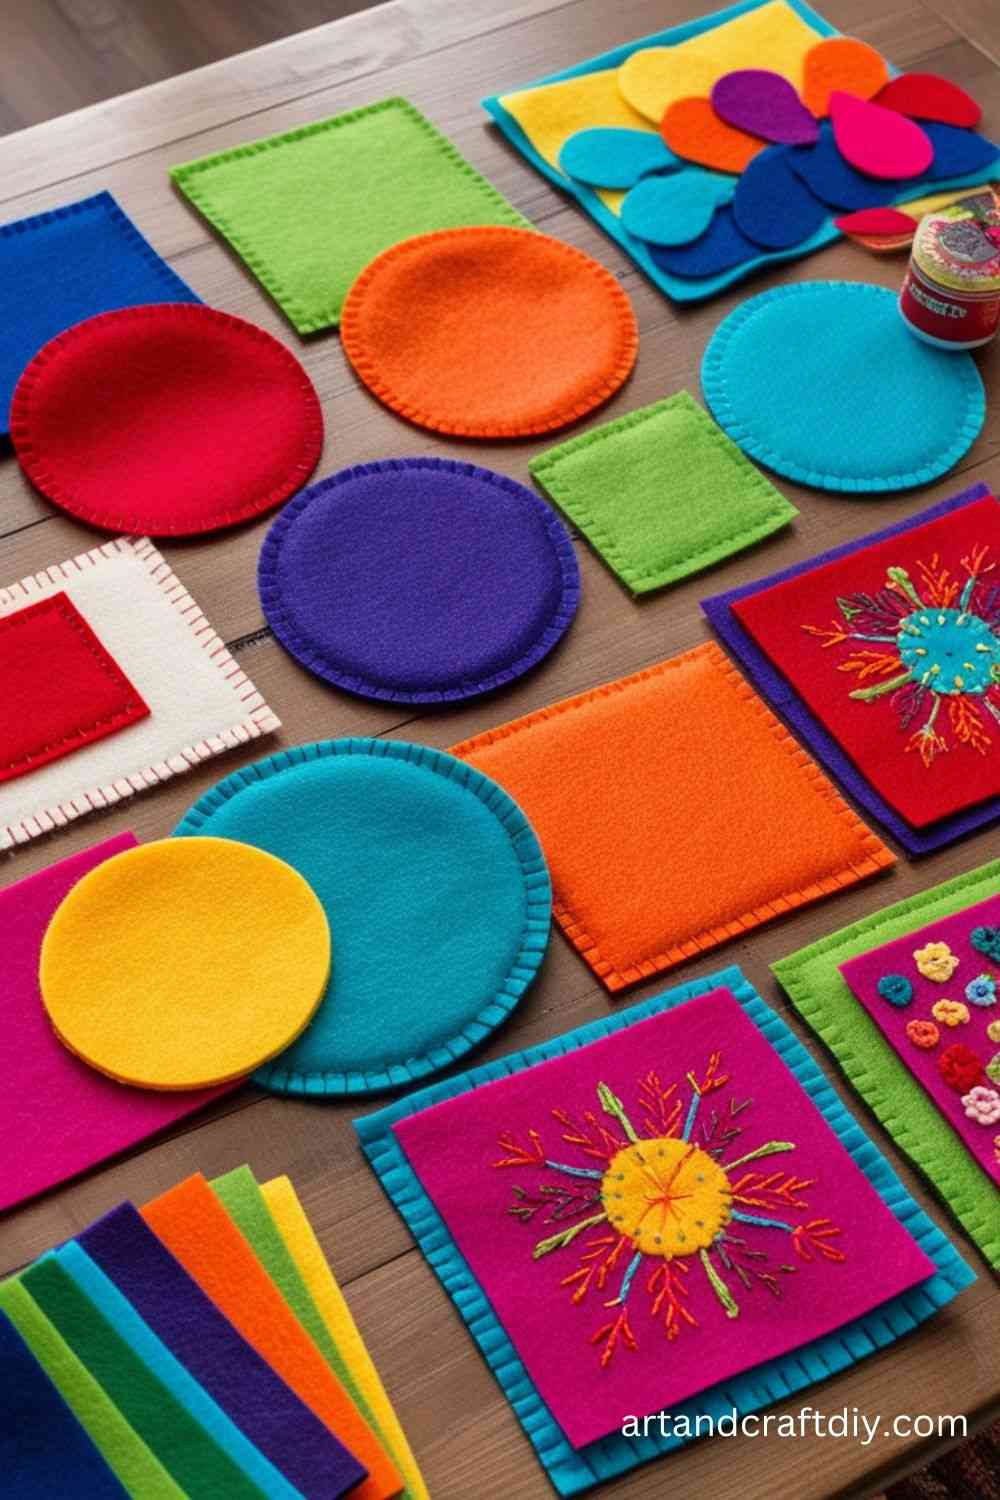
DIY Felt Coasters
Make your own felt coasters to protect your furniture and add a personal touch.
Materials Used:
- Felt fabric
- Scissors
- Hot glue gun or sewing kit
Steps:
- Cut the felt into circular or square shapes.
- Layer different colors or patterns of felt to add dimension.
- Use a hot glue gun or sew the pieces together.
- Let the glue dry completely before using the coasters.
Macrame Plant Hanger
Create a stylish plant hanger using the art of macrame to display your favorite plants.
Materials Used:
- Cotton rope
- Wooden ring
- Scissors
- Plant pot
Steps:
- Cut several lengths of cotton rope, all equal in size.
- Tie a knot at the top of the rope and attach it to the wooden ring.
- Use macrame knots to create a net-like design with the ropes.
- Leave space at the bottom for your plant pot.
- Attach the plant pot to the finished hanger.
Wooden Spoons Wall Art
Transform wooden spoons into a charming piece of wall art.
Materials Used:
- Wooden spoons
- Acrylic paint
- Glue
- Canvas or wooden board
Steps:
- Paint the wooden spoons with your desired colors and designs.
- Allow the spoons to dry completely.
- Arrange the spoons on a canvas or wooden board.
- Glue the spoons in place and let them dry.
- Hang your new wall art.
Customized Coffee Mugs
Personalize plain coffee mugs with your own designs.
Materials Used:
- Plain ceramic mugs
- Sharpie or paint pens
- Oven
Steps:
- Use a Sharpie or paint pens to draw designs on the mug.
- Once you’ve finished your design, place the mug in the oven.
- Bake the mug at 350°F for 30 minutes to set the design.
- Let the mug cool before using it.
Hand-Painted Wooden Signs
Create personalized wooden signs for your home or as gifts.
Materials Used:
- Wooden board
- Acrylic paint
- Paintbrushes
- Stencils (optional)
Steps:
- Sand the wooden board smooth to prepare for painting.
- Paint the background color and let it dry.
- Use stencils or freehand designs to add text or patterns.
- Let the paint dry before displaying the sign.
DIY Terrarium
Build a beautiful terrarium using small plants and glass containers.
Materials Used:
- Glass container
- Small plants (succulents or air plants)
- Rocks
- Potting soil
- Decorative elements (optional)
Steps:
- Layer rocks at the bottom of the glass container for drainage.
- Add a layer of potting soil on top of the rocks.
- Place the plants inside and arrange them.
- Add decorative elements like pebbles, moss, or figurines.
- Water the plants as needed.
Paper Mâché Bowls
Make unique bowls using paper mâché for a fun, eco-friendly craft.
Materials Used:
- Newspaper
- Flour
- Water
- Balloon
- Paint (optional)
Steps:
- Inflate a balloon to your desired bowl size.
- Mix flour and water to create the paper mâché paste.
- Tear the newspaper into strips and dip them into the paste.
- Layer the strips onto the balloon, covering it completely.
- Let it dry and harden overnight before popping the balloon.
- Paint the bowl if desired.
Woven Wall Hanging
Create a stunning woven wall hanging for a boho-inspired look.
Materials Used:
- Yarn
- Wooden dowel
- Scissors
- Tapestry needle
Steps:
- Cut various lengths of yarn in different colors and textures.
- Tie the yarn to a wooden dowel to create the base.
- Begin weaving the yarn in a simple pattern, alternating colors.
- Trim the ends for a clean, finished look.
Simple Knit Scarf
Create a cozy knit scarf to keep you warm during the colder months.
Materials Used:
- Yarn
- Knitting needles
Steps:
- Cast on stitches onto the knitting needles.
- Knit in a simple pattern, such as garter stitch or stockinette.
- Continue knitting until the scarf reaches your desired length.
- Bind off and weave in the loose ends.
DIY String Art
Create unique string art designs using nails and string.
Materials Used:
- Wooden board
- Nails
- Hammer
- Colored string
Steps:
- Draw a design or shape on the wooden board.
- Hammer nails along the outline of the design.
- Begin wrapping string around the nails, following the shape.
- Continue adding layers of string to create a textured effect.
Recycled Bottle Bird Feeder
Create an eco-friendly bird feeder using a recycled bottle.
Materials Used:
- Empty plastic bottle
- String
- Peanut butter
- Birdseed
Steps:
- Poke two holes in the sides of the plastic bottle.
- Thread the string through the holes and tie a knot at the top for hanging.
- Spread peanut butter over the outside of the bottle.
- Roll the bottle in birdseed so it sticks to the peanut butter.
- Hang the bird feeder outside.
Painted Flower Pots
Decorate plain flower pots with paint to brighten up your garden or home.
Materials Used:
- Flower pots
- Acrylic paint
- Paintbrushes
- Sealant spray
Steps:
- Clean and dry the flower pots.
- Paint the pots with your desired design or pattern.
- Allow the paint to dry completely.
- Spray the pots with a clear sealant to protect the design.
Fabric Covered Books
Give your old books a makeover by covering them with fabric.
Materials Used:
- Old books
- Fabric
- Scissors
- Glue
Steps:
- Measure the fabric to fit the book covers.
- Cut the fabric and glue it onto the book covers.
- Smooth out any wrinkles and let the glue dry.
- Trim the excess fabric for a neat finish.
Homemade Soap Bars
Craft your own soap bars with natural ingredients and scents.
Materials Used:
- Glycerin soap base
- Essential oils
- Molds
- Dried flowers or herbs (optional)
Steps:
- Melt the glycerin soap base in the microwave or double boiler.
- Add a few drops of essential oils for fragrance.
- Pour the mixture into molds and add dried flowers if desired.
- Let the soap cool and harden before removing it from the molds.
Knotted Headbands
Make trendy knotted fabric headbands for a chic accessory.
Materials Used:
- Fabric
- Needle and thread
- Scissors
Steps:
- Cut the fabric into long strips.
- Fold the fabric and sew the ends to create a loop.
- Twist the fabric to create a knot in the center.
- Sew the edges for a finished look.
Fabric Scrap Garland
Use leftover fabric scraps to make a cute, colorful garland.
Materials Used:
- Fabric scraps
- Scissors
- Twine or string
Steps:
- Cut the fabric scraps into strips of various sizes.
- Tie the strips onto a length of twine or string.
- Arrange the fabric strips in a pleasing pattern.
- Hang the garland in your space.
Wooden Photo Frames
Create rustic photo frames using wooden materials for a personal touch.
Materials Used:
- Wooden planks or sticks
- Glue
- Paint (optional)
- Photo
Steps:
- Arrange the wooden planks into the desired frame shape.
- Glue the planks together.
- Paint the frame if desired.
- Attach the photo to the frame with glue or a clip.
Beaded Keychains
Make personalized keychains using beads for a unique touch.
Materials Used:
- Beads
- Keychain rings
- Jewelry wire
Steps:
- Thread beads onto the wire in a design you like.
- Secure the beads in place.
- Attach the wire to a keychain ring.
- Trim any excess wire.
Pom-Pom Pillow
Create a cute and cozy pillow adorned with colorful pom-poms.
Materials Used:
- Pillow cover
- Yarn
- Scissors
- Needle and thread
Steps:
- Cut yarn into small strands and make pom-poms using a pom-pom maker.
- Sew the pom-poms onto the pillow cover.
- Stuff the pillow cover with filling and sew it shut.
Painted Rocks for Garden Markers
Use painted rocks as garden markers to organize your plants.
Materials Used:
- Rocks
- Acrylic paint
- Paintbrushes
- Permanent marker
Steps:
- Clean the rocks.
- Paint each rock with a color or design.
- Write the name of the plant on the rock using a permanent marker.
- Place the rocks in your garden to label your plants.
DIY Wind Chimes
Create your own wind chimes using materials you have at home.
Materials Used:
- Wooden dowel or stick
- String
- Metal washers or beads
- Scissors
Steps:
- Cut lengths of string and tie them to the dowel or stick.
- Attach metal washers or beads to the strings.
- Hang the wind chime outside and enjoy the sound.
Gift-Making Crafts: Creative and Personal Touch for Special Occasions
Gift-making crafts are a thoughtful way to express love and creativity when celebrating special occasions. Whether it’s for a birthday, holiday, or anniversary, handmade gifts bring a unique and personal touch that store-bought items often lack. These gifts show care, effort, and attention to detail, making them especially meaningful. Here are some popular ideas for creating your own gifts:
1. Handmade Gifts for Special Occasions
- Birthdays, Holidays, and Anniversaries: Handmade gifts are perfect for marking milestones like birthdays, anniversaries, or holiday celebrations. These can range from simple keepsakes to more elaborate projects.
- Example: A hand-painted picture frame for a birthday or a knitted scarf for the holidays.
- Why it’s special: These gifts can be personalized to match the recipient’s style or interests, making them more meaningful.
2. Personalized Gifts
- Customizing Items: One of the best ways to make a gift stand out is by personalizing it. Items like mugs, t-shirts, or photo books can be tailored to feature names, dates, or inside jokes.
- Example: A custom photo book filled with memories, a mug with a personalized message, or a t-shirt with a fun design.
- Why it’s special: Custom gifts celebrate the uniqueness of the recipient, making them feel truly seen and appreciated.
3. Eco-Friendly Gifts
- Sustainable and Reusable Items: Eco-conscious handmade gifts are becoming increasingly popular as people seek to reduce waste and support sustainability. These gifts can be both functional and stylish.
- Example: A reusable tote bag made from fabric scraps, a hand-poured soy wax candle, or a natural skincare gift set.
- Why it’s special: Eco-friendly gifts reflect a commitment to the environment while still being thoughtful and personal. They also appeal to recipients who prioritize sustainability.
By crafting these unique, meaningful, and personalized gifts, you not only create something special but also demonstrate how much you care about the person receiving them.
Crafting Tools & Supplies
Whether you’re a beginner or a seasoned crafter, having the right tools and materials can make a significant difference in the quality of your projects. From basic tools like scissors to advanced equipment such as sewing machines, the right supplies can help bring your creative visions to life.
Essential Tools for Beginners
- Scissors: A good pair of scissors is a must for any crafter. Invest in fabric scissors, paper scissors, and multi-purpose scissors for different tasks. Sharp scissors make cutting easier and more precise, which is essential for clean lines in your projects.
- Glue Guns: A hot glue gun is perfect for projects that require quick drying and a strong bond. It works well for everything from paper crafting to attaching embellishments on larger projects. Consider getting one with adjustable temperature settings for more versatility.
- Sewing Machines: For those who enjoy fabric projects, a sewing machine can take your crafting to the next level. Whether you’re making clothes, quilts, or accessories, a sewing machine offers speed, precision, and the ability to work on a larger scale. Beginners may want to start with a basic model before investing in more advanced machines.
- Cutting Mats & Rotary Cutters: These tools help make cutting fabric or paper smooth and accurate. A self-healing cutting mat protects your workspace, while a rotary cutter makes cutting long, straight lines easier.
- Rulers & Measuring Tapes: Accurate measurements are essential for any craft. A clear acrylic ruler and a flexible measuring tape will help you measure and cut with precision, whether you’re quilting, scrapbooking, or working with fabric.
- Pliers and Tweezers: For jewelry making or any small project involving tiny components, pliers and tweezers are invaluable. They help you handle beads, wires, and delicate parts without damaging your work.
Sourcing Materials
- Craft Stores: Traditional craft stores are excellent places to find supplies like paints, beads, fabrics, and papers. Popular chains offer a wide range of materials and tools, often with knowledgeable staff who can offer advice or tips.
- Online Retailers: Websites like Amazon, Etsy, and specialized craft stores provide access to a vast array of supplies. Shopping online gives you the advantage of finding unique or niche materials that might not be available locally. It’s also convenient for ordering in bulk or finding specific brands.
- Repurposing Materials: One of the most creative ways to source materials is by repurposing items you already have at home. Old magazines, fabric scraps, broken jewelry, buttons, and even cardboard can all be used for a variety of crafting projects. Repurposing not only saves money but also helps reduce waste.
- Thrift Stores and Flea Markets: Thrift stores and flea markets often carry useful items for crafters, such as fabrics, yarn, and containers. Look for vintage items, old clothes for upcycling, or materials you can use in your projects.
Storage & Organization Tips
Keeping your crafting space organized is crucial for both productivity and creativity. A cluttered workspace can slow you down and make it difficult to find the tools and materials you need.
- Storage Containers: Invest in clear plastic bins, drawers, and tackle boxes to store smaller supplies like beads, buttons, and sewing notions. Transparent containers allow you to see the contents without opening them, saving you time when looking for materials.
- Pegboards: Pegboards are great for hanging tools like scissors, glue guns, rulers, and thread spools. This keeps your frequently used items easily accessible and organized.
- Labeling: Label your storage containers and shelves so you can quickly identify where everything belongs. You can use a label maker, masking tape, or even color-coded labels for a neat, efficient organization system.
- Workstation Setup: Dedicate a specific area for your craft projects. A well-lit table with easy access to your tools and materials is essential for staying focused and working efficiently. If space is limited, consider multi-functional furniture that provides both storage and workspace.
- Wire Racks or Shelves: If you have larger items like fabric, paper, or rolls of ribbon, use wire racks or shelves to store them upright. This not only saves space but also helps prevent wrinkles or damage to your materials.
By investing in essential tools, sourcing materials from a variety of places, and staying organized, you can create a productive and inspiring craft environment. Happy crafting!
FAQ
What are some beginner-friendly crafts I can try?
There are plenty of beginner-friendly crafts to get you started! You can try simple projects like paper crafts, painting, knitting, or creating DIY home décor with materials like wood or fabric. Start with basic tutorials and gradually progress to more advanced projects as you build your skills.
How do I choose the right materials for my DIY project?
Choosing materials depends on the type of project you’re working on. For example, for a wood project, you’ll need saws, sandpaper, and paint. For knitting, you’ll need yarn and needles. Always research the materials required for your specific project, and ensure you have everything before you begin.
Can I do crafts without expensive supplies?
Yes! Many crafts can be done with everyday materials you already have at home. You can reuse old magazines, fabric scraps, cardboard, or glass jars for various DIY projects. Creativity often shines the most when you work with limited resources!
How can I improve my crafting skills?
Practice is key! Start with simple projects and follow tutorials online. You can also take classes, join crafting communities, or participate in workshops to learn new techniques. The more you experiment, the more your skills will improve.
What are the most popular DIY projects?
Popular DIY projects vary, but some favorites include home décor items like wall art, candles, or custom furniture. People also enjoy making handmade gifts, creating jewelry, or upcycling old furniture for a new look. Pinterest and Instagram are great places to find trending projects.

Hi, I’m Victoria, an art and craft teacher at Newark City Schools, where I have the joy of working with middle school students to help them explore their creativity and develop their artistic talents. I believe that art is a powerful way for students to express themselves, and I strive to make every lesson a fun, engaging, and inspiring experience.
I created this website to share the art and craft projects, techniques, and resources that I use in my classroom, hoping to inspire both educators and young artists alike. Whether you’re a teacher looking for new ideas or a student eager to try something new, I’m excited to provide creative tools and projects that anyone can enjoy.
When I’m not in the classroom, I love experimenting with different art forms and learning new crafting techniques. My goal is to help others discover the joy of making things with their hands, and I hope my website serves as a space for everyone to explore their creative potential.