Valentine’s Day is a celebration of love, affection, and meaningful connections that has been cherished for centuries. It’s a time to express your feelings for loved ones through thoughtful gestures, and what better way to do so than with Cute Valentines Day Crafts? Cute Valentines Day Crafts creations add a unique, personal touch to the celebration, making your gifts and decorations even more special.
Handmade crafts allow you to infuse your personality and heartfelt emotions into every piece. Whether it’s a hand-decorated card, a charming DIY gift, or festive home décor, these crafts carry a sincerity that store-bought items often lack. Cute Valentines Day Crafts provide an opportunity to bond with family and friends, turning the crafting process into a memorable experience.
Cute Valentines Day Crafts
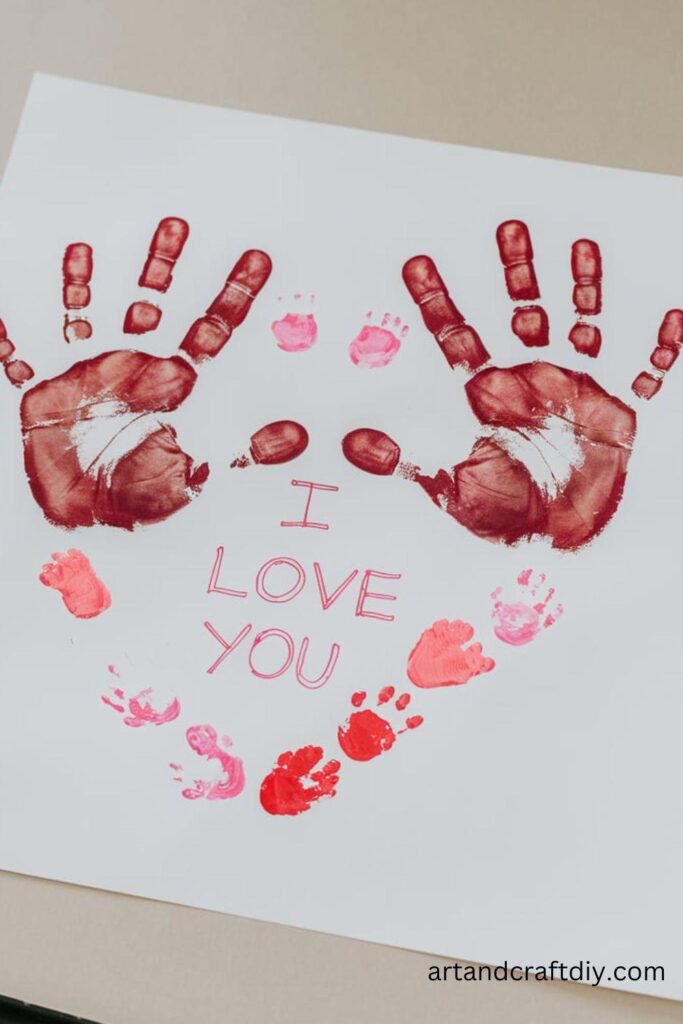
Cute Heart-Shaped Handprint Art
This keepsake craft is perfect for capturing memories with your little ones and gifting it to grandparents or other loved ones.
Materials Used:
- Non-toxic paint (red or pink)
- White or colored cardstock
- Paintbrush
- Marker
Steps:
- Spread the paint on your child’s hands evenly using a paintbrush.
- Help your child press their hands onto the cardstock in a heart shape by angling the thumbs downward and together.
- Let the paint dry completely.
- Use a marker to write a sweet message around the heart, such as “Handmade with Love.”
- Frame it or leave it as a card to share with loved ones.
Valentine’s Day Mason Jar Candle Holders
A glowing mason jar candle holder is a romantic and cozy gift idea for Valentine’s Day decor.
Materials Used:
- Mason jars
- Tissue paper (pink, red, or white)
- Mod Podge
- Paintbrush
- LED tea lights
Steps:
- Cut tissue paper into small heart shapes or squares.
- Use a paintbrush to apply Mod Podge to the outside of the mason jar.
- Stick the tissue paper pieces onto the jar in a random or patterned arrangement.
- Apply another layer of Mod Podge over the tissue paper to seal it.
- Let it dry completely.
- Place an LED tea light inside the jar for a warm, flickering glow.
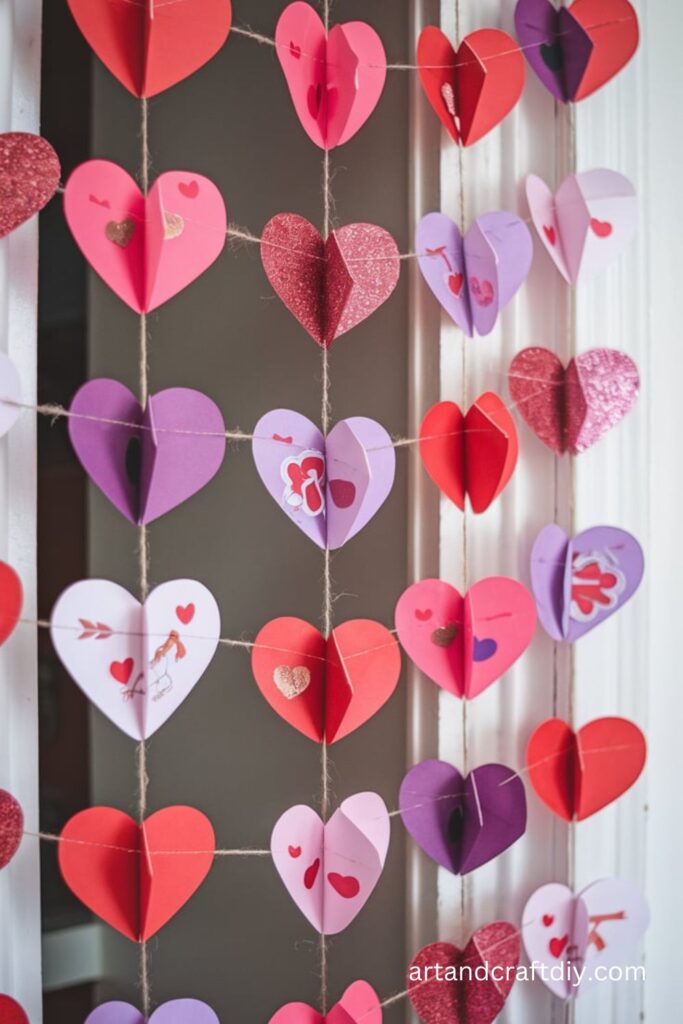
DIY Heart Garland
A charming heart garland is an easy craft to decorate your home or classroom.
Materials Used:
- Colored paper (red, pink, white)
- Scissors
- String or twine
- Hole punch
Steps:
- Cut out multiple heart shapes from the colored paper.
- Punch two holes at the top of each heart.
- Thread the string or twine through the holes to create a garland.
- Continue until you have the desired length.
- Hang it across a wall, window, or fireplace for festive decor.
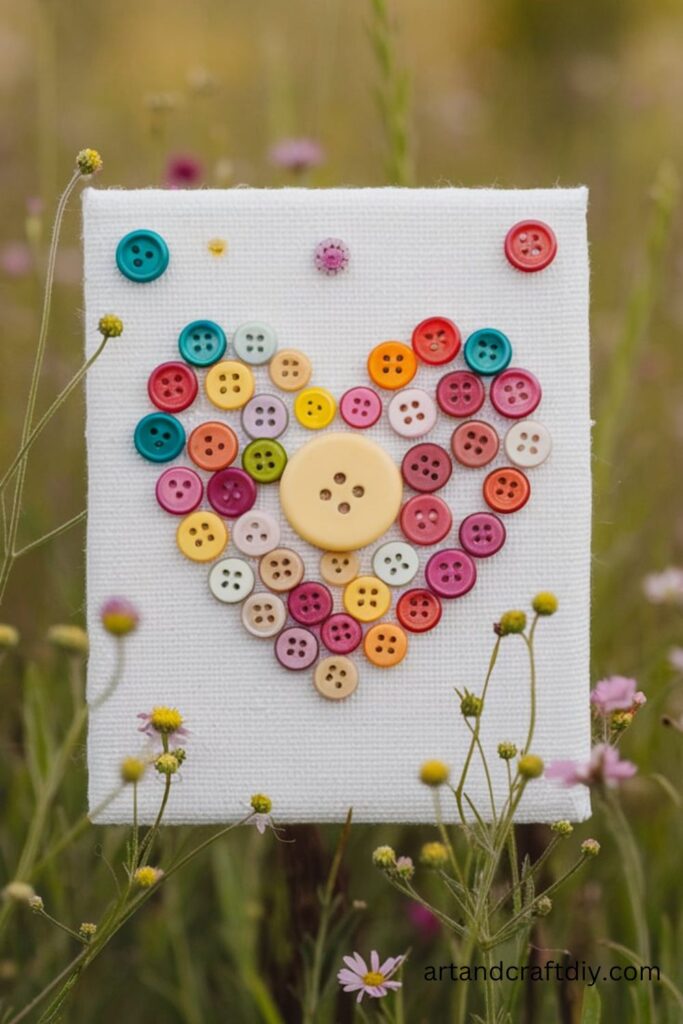
Cute Button Heart Canvas
This unique craft combines buttons and a blank canvas to create a textured Valentine’s Day decoration.
Materials Used:
- Blank canvas
- Assorted buttons (red, pink, white)
- Glue gun or craft glue
- Pencil
Steps:
- Lightly sketch a heart shape on the canvas using a pencil.
- Arrange buttons of different sizes and colors within the heart outline.
- Use glue to attach the buttons to the canvas, layering them as needed.
- Let it dry completely before displaying it as decor.
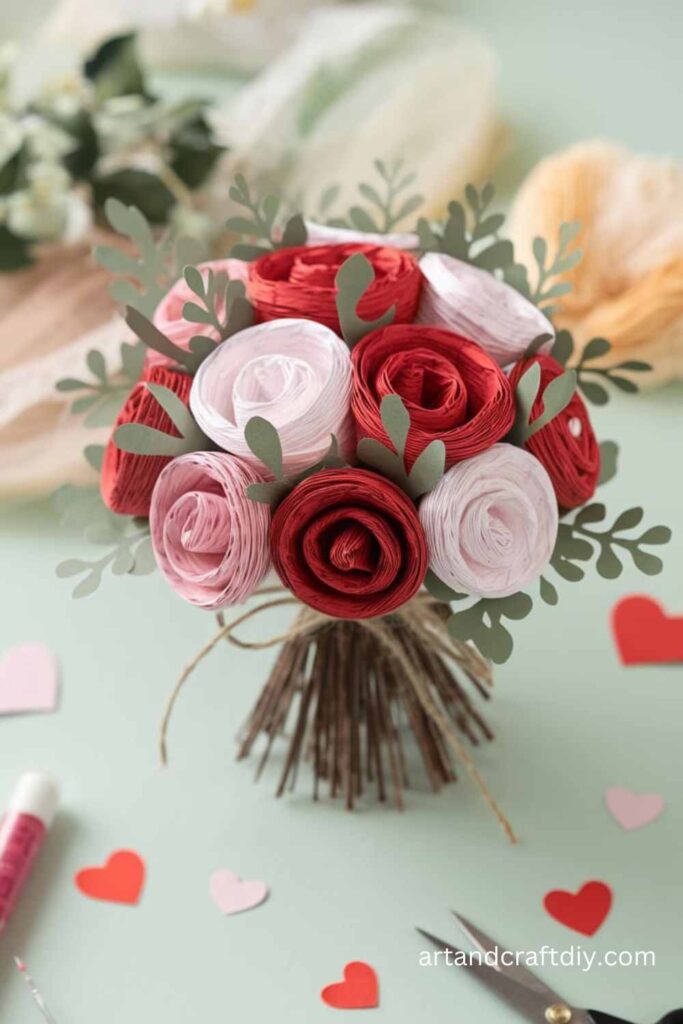
Paper Roses Bouquet
A bouquet of paper roses is a long-lasting and thoughtful Valentine’s gift.
Materials Used:
- Colored paper (red, pink)
- Green paper for leaves
- Scissors
- Glue
- Floral wire
Steps:
- Cut the colored paper into spirals.
- Starting from the outer edge, roll the spiral tightly into the shape of a rose.
- Glue the end of the spiral to secure the rose.
- Attach floral wire to the base of the rose to create a stem.
- Cut leaf shapes from green paper and glue them to the stem.
- Arrange multiple roses into a bouquet.
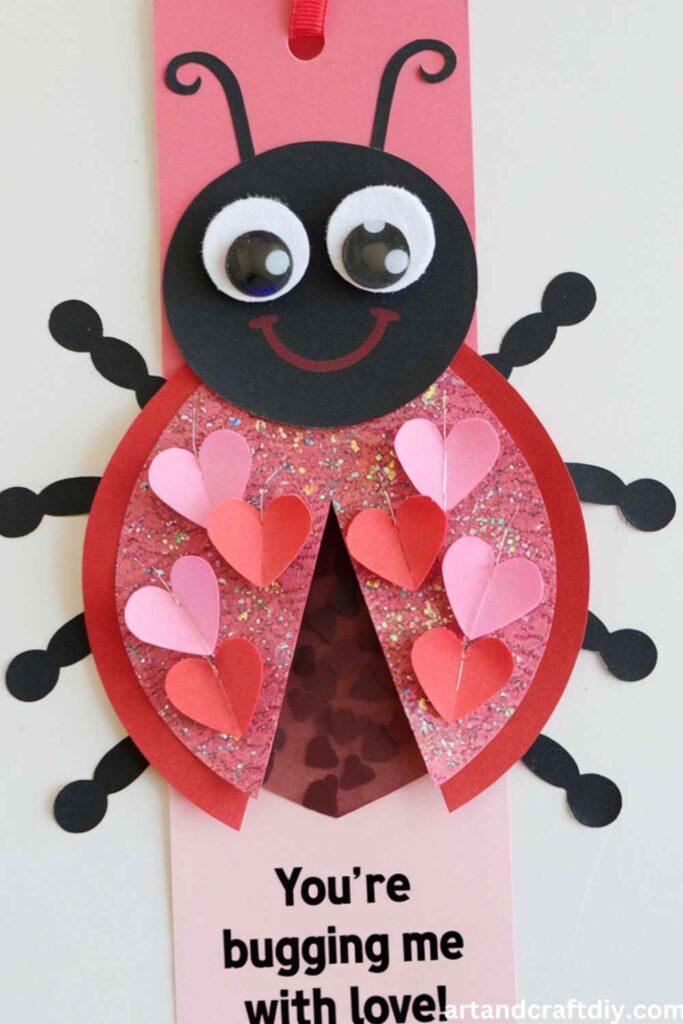
Love Bug Bookmarks
These adorable love bug bookmarks are a perfect craft for kids to make and give.
Materials Used:
- Colored craft foam or cardstock
- Googly eyes
- Pipe cleaners
- Glue
- Scissors
Steps:
- Cut heart shapes out of the craft foam or cardstock for the love bug’s body.
- Glue googly eyes onto the heart.
- Cut pipe cleaners into small pieces and shape them into antennae.
- Glue the antennae to the back of the heart.
- Add decorative elements like smaller hearts or glitter for a personalized touch.
Valentine’s Day Small Treat Bags
Cute treat bags are a creative way to share sweets with classmates or coworkers.
Materials Used:
- Plain paper bags
- Stickers, markers, or stamps
- Ribbon
- Small candies or treats
Steps:
- Decorate the paper bags using stickers, markers, or stamps.
- Fill each bag with small candies or treats.
- Fold the top of the bag and punch a hole in the center.
- Thread a ribbon through the hole and tie it into a bow to secure the bag.
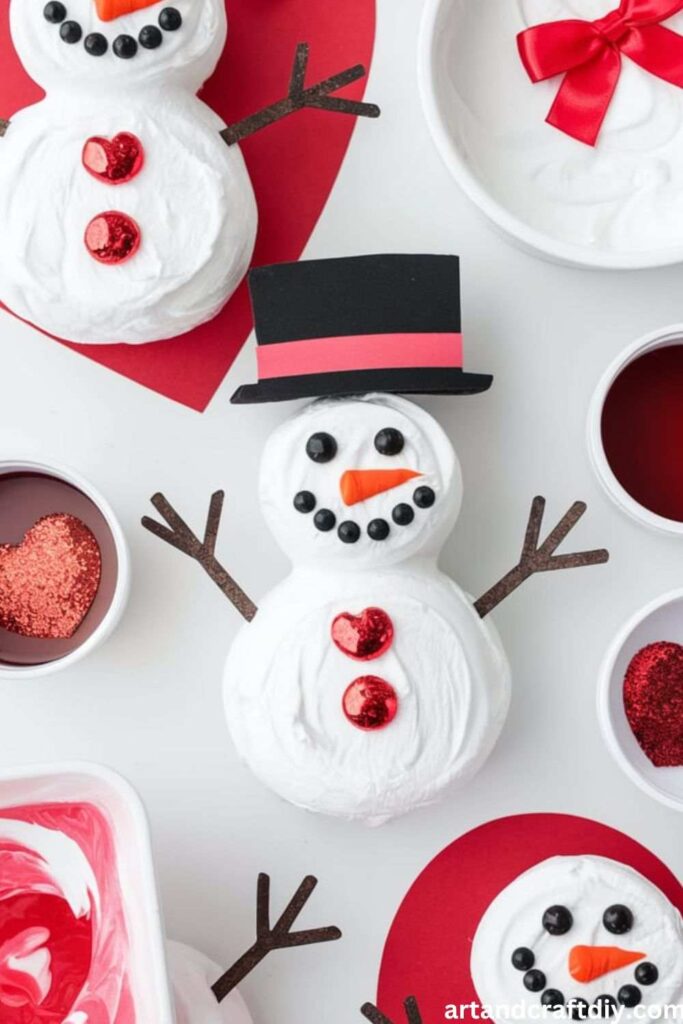
Puffy Paint Snowmen
Use homemade puffy paint to make adorable snowmen that pop off the page.
Materials Used:
- Shaving cream
- White glue
- Black and orange construction paper
- Googly eyes
- Paintbrushes
- Blue cardstock or thick paper
Steps:
- Mix equal parts of shaving cream and white glue to create the puffy paint.
- On a blue cardstock, use a paintbrush to create the body of a snowman with the puffy paint mixture.
- Cut out small black circles for the snowman’s buttons and eyes, and an orange triangle for the nose.
- Place the buttons, eyes, and nose onto the puffy paint while it’s still wet.
- Let the paint dry completely, and enjoy the fluffy snowman!
Cute Paper Plate Polar Bear
Transform simple paper plates into cute polar bear faces with this fun and easy craft.
Materials Used:
- Paper plates
- White cotton balls
- Black and pink construction paper
- Glue
- Scissors
Steps:
- Cover the paper plate with glue and stick white cotton balls all over it to create the fur.
- Cut out two circles from white paper for the ears and two smaller black circles for the inner ears. Attach these to the top of the plate.
- Cut out a black circle for the nose and small black ovals for the eyes. Glue them in place.
- Add a small pink oval for the tongue to give your polar bear a friendly look.
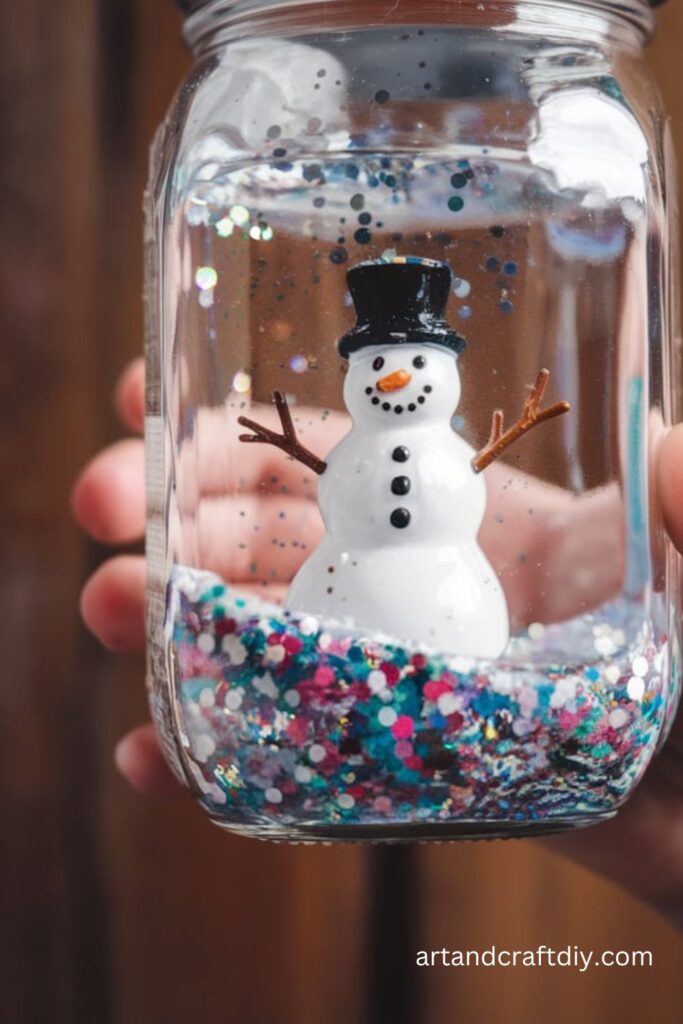
Cute Snow Globe Jars
Make a winter wonderland inside a jar with this simple snow globe project.
Materials Used:
- Mason jars
- Small plastic figurines (like trees or snowmen)
- White glitter
- Clear-drying craft glue
- Water
Steps:
- Glue the plastic figurine to the inside of the mason jar lid and let it dry.
- Fill the jar with water, leaving some space at the top.
- Add a generous amount of white glitter to the water.
- Screw the lid onto the jar tightly.
- Shake your jar to see the glitter swirl like snow in a magical globe!
Winter-Themed Popsicle Stick Ornaments
Create charming ornaments using popsicle sticks that kids can hang on the Christmas tree.
Materials Used:
- Popsicle sticks
- Acrylic paint
- Mini pom-poms
- Ribbon or thread
- Hot glue
Steps:
- Paint the popsicle sticks in colors like white, blue, or red, depending on your desired design.
- Arrange and glue the sticks into shapes like snowflakes, stars, or trees.
- Decorate with mini pom-poms or paint accents.
- Attach a piece of ribbon or thread to the top for hanging.
Cotton Ball Snow Scenes
Create a fluffy and textured snowy landscape using cotton balls.
Materials Used:
- Blue construction paper
- Cotton balls
- Glue
- Markers or crayons
- Small cutouts of houses, trees, or animals
Steps:
- Glue cotton balls onto blue construction paper to form a snowy ground or falling snow.
- Add cutouts of trees, houses, or animals to create a scenic winter setting.
- Use markers or crayons to add details like stars, clouds, or footprints in the snow.
Handprint Mittens
Turn handprints into adorable mitten designs for a heartwarming winter keepsake.
Materials Used:
- Colored construction paper
- Scissors
- Glitter glue
- Markers
- Ribbon
Steps:
- Trace your child’s hand on a piece of colored construction paper and cut it out.
- Repeat the process to make a pair of mitten shapes.
- Decorate the mittens with glitter glue and markers.
- Attach a ribbon to connect the two mittens, just like a real pair.
DIY Icicle Ornaments
Add sparkle to your winter decor with homemade icicle ornaments.
Materials Used:
- Clear plastic straws
- Silver glitter
- Glue
- Ribbon or thread
Steps:
- Apply glue along the outside of the plastic straws.
- Sprinkle silver glitter generously over the glued surface.
- Let the icicles dry, then tie a ribbon or thread at one end to hang them.
- Decorate your Christmas tree or windows with these sparkly creations.
Pinecone Penguins
Turn ordinary pinecones into cute penguins with a bit of paint and felt.
Materials Used:
- Pinecones
- Black and white acrylic paint
- Orange and black felt
- Googly eyes
- Glue
Steps:
- Paint the body of the pinecone black, leaving an oval shape unpainted in the front for the penguin’s belly.
- Paint the unpainted area white for the belly.
- Cut out small orange triangles for the beak and small black and orange shapes for feet.
- Attach googly eyes, the beak, and the feet with glue.
Salt Dough Ornaments
These salt dough ornaments are a perfect winter craft that kids can make and later hang on the Christmas tree or around the house.
Materials Used:
- 1 cup of flour
- 1/2 cup of salt
- 1/4 cup of water
- Rolling pin
- Cookie cutters
- String or ribbon
Steps:
- In a bowl, mix the flour, salt, and water together to form a dough.
- Roll the dough out on a flat surface with a rolling pin to about 1/4 inch thickness.
- Use cookie cutters to cut out fun winter shapes like snowflakes, stars, or Christmas trees.
- Make a hole at the top of each ornament using a straw for hanging.
- Bake the ornaments at 250°F for 2-3 hours or until they are hard.
- Once cool, thread a ribbon through the hole to hang your ornament.
Paper Plate Snowman
This easy craft turns a simple paper plate into an adorable snowman face, perfect for younger children.
Materials Used:
- Paper plate
- White paint
- Orange and black markers
- Glue
- Colored construction paper
- Cotton balls
Steps:
- Paint the front of the paper plate white and allow it to dry.
- Use the black marker to draw eyes and buttons on the plate.
- Cut a carrot shape out of orange construction paper and glue it to the center for the nose.
- Glue cotton balls around the edges to create the snowman’s scarf or hat.
- Decorate with additional features like a scarf made from colored paper or fabric.
Winter Handprint Tree
Capture your child’s handprint to create a winter tree, decorated with little snowflakes.
Materials Used:
- Construction paper (brown and green)
- White paint
- A paintbrush
- Markers or stickers
Steps:
- Paint your child’s hand with white paint and have them press it onto brown construction paper to make the trunk of the tree.
- Add green construction paper for the branches and shape them as a tree.
- Let the handprint dry before decorating the tree with snowflakes drawn with a white paintbrush or snowflake stickers.
- Add additional decorations like glitter or sequins.
Winter-Themed Sensory Bottles
Sensory bottles are a great way to let children engage with winter-themed materials in a calm and soothing way.
Materials Used:
- Empty plastic bottles
- Glitter
- Water
- Glycerin (optional)
- Small winter-themed items (snowflakes, sequins, beads)
Steps:
- Fill a plastic bottle halfway with water.
- Add glitter, sequins, or small winter-themed items such as snowflakes, fake snow, or tiny plastic animals.
- Add a few drops of glycerin (this helps the glitter move slowly when shaken).
- Seal the bottle tightly with hot glue or tape.
- Let kids shake the bottle to watch the winter scene come to life!
Snowy Handprint Art
This craft uses the handprint to create a winter landscape covered in snow, making it a memorable keepsake.
Materials Used:
- White construction paper
- Paint (blue, white, and black)
- Paintbrush
- Glitter or fake snow
Steps:
- Paint the child’s hand with white paint and press it onto the blue construction paper to create the “snowy” handprint.
- Paint the tips of the handprint in white to create the effect of falling snow.
- Add a snowman or winter trees using the black paint and paintbrush.
- Sprinkle glitter or fake snow over the entire scene to add texture and shimmer.
DIY Snow Globes
Kids will love creating their very own snow globe using simple materials to give them the magic of a snowy scene.
Materials Used:
- Small glass jar
- Mini winter figurines
- Water
- Glitter or fake snow
- Glycerin
- Hot glue gun
Steps:
- Select a small jar and glue your winter figurine to the inside of the jar lid using the hot glue gun.
- Fill the jar with water, leaving a small gap at the top.
- Add glitter or fake snow to the water.
- Drop in a little glycerin to help the snow swirl gently when shaken.
- Seal the jar and lid tightly.
- Shake and enjoy your homemade snow globe!
Popsicle Stick Snowflakes
Simple popsicle sticks can be transformed into beautiful snowflakes that are great for kids to make and decorate.
Materials Used:
- Popsicle sticks
- Hot glue gun or white glue
- Glitter
- Markers or paint
Steps:
- Lay six popsicle sticks in a star shape on a flat surface.
- Glue the ends together with hot glue or white glue.
- Once dry, paint or color the sticks with markers.
- Add glitter or other decorative elements to make the snowflake sparkle.
- Hang it up as a decoration for the season.
Cotton Ball Winter Scene
This craft encourages children to create an entire winter scene using fluffy cotton balls.
Materials Used:
- Cotton balls
- Construction paper (blue, white)
- Markers
- Glue
Steps:
- Draw or cut out winter scene elements like trees, houses, or snowmen on the blue construction paper.
- Use cotton balls to create snow on the ground and sky.
- Glue the cotton balls in place.
- Add additional details like branches, windows, or animals using markers or colored pencils.
- Display the winter scene for a cozy look.
Recycled Plastic Bottle Snowmen
Transform plastic bottles into charming snowmen, using recycled materials to create a fun and eco-friendly craft.
Materials Used:
- Empty plastic bottles
- White paint
- Buttons, ribbon, or fabric
- Felt or paper for accessories
- Black and orange markers
Steps:
- Paint the plastic bottles white and let them dry.
- Stack the bottles to create a snowman shape.
- Use buttons for eyes and a mouth, and an orange marker to draw a carrot nose.
- Attach ribbon or fabric around the snowman’s neck to form a scarf.
- Add a hat made of felt or paper.
Paper Bag Winter Puppets
Children can make adorable winter-themed puppets from simple paper bags, perfect for storytelling.
Materials Used:
- Paper bags
- Colored construction paper
- Scissors
- Glue
- Googly eyes
Steps:
- Use a paper bag as the base for the puppet.
- Cut out shapes from construction paper to create a hat, scarf, or other winter accessories.
- Glue the accessories onto the paper bag.
- Attach googly eyes and cut out a nose and mouth from paper.
- Let kids use the puppets to create winter-themed stories.
Creativity and Personalization in Valentine’s Day Crafts
Valentine’s Day crafts offer a wonderful opportunity to express creativity and personalize gifts or decorations for loved ones. By infusing unique ideas and personal touches, individuals can create meaningful and memorable gestures that go beyond store-bought gifts. Whether it’s for a romantic partner, a friend, or family member, crafting allows for a deeper connection and thoughtfulness. Below are some points highlighting how creativity and personalization elevate Valentine’s Day crafts.
Key Points:
- Unique Expressions of Love: Personalized crafts enable you to show love in a way that is deeply connected to your relationship, making it more meaningful than generic gifts.
- Customizable Gifts: From handmade cards to personalized photo frames or custom jewelry, crafts can be tailored to fit the tastes and interests of the recipient.
- Creative Materials and Techniques: Use various materials like paper, fabric, wood, or clay, and experiment with different crafting techniques such as painting, embossing, or stitching to create something special.
- Sentimental Touch: Adding personal notes, inside jokes, or shared memories into your creations brings a sentimental value that can be cherished for years to come.
- Affordability and Accessibility: Crafting allows for budget-friendly gifts that still hold high emotional value. Many crafts use readily available supplies, making it easy to create something special without a hefty price tag.
Celebrating the Holidays with Meaningful and Cost-Effective Crafts
The holiday season is a time for togetherness, creativity, and celebration, but it doesn’t always have to come with a hefty price tag. Crafts offer a wonderful, affordable way to enhance the holiday spirit, providing both personal touches to your celebrations and meaningful ways to express your love and appreciation. Here’s why crafting can be an ideal way to make the most of the season without breaking the bank:
- Personalized Gifts: Handmade gifts show a level of thoughtfulness and care that store-bought items often can’t match. Whether it’s a knitted scarf or a painted ornament, personalized creations add a special meaning to the exchange of gifts.
- Family Bonding: Crafting is a great activity to do with loved ones. It encourages collaboration, creativity, and can be a fun tradition that brings families closer together.
- Budget-Friendly: Many holiday crafts use inexpensive materials that you may already have at home. From recycled items to basic supplies like paper and string, you can make beautiful decorations or gifts without spending a lot of money.
- Sustainable Practices: Opting for DIY crafts helps reduce waste and supports sustainability. You can repurpose old materials, like fabric scraps or paper, into new holiday items, making the celebration eco-friendly.
- Customizable Decor: Holiday decorations are often expensive, but creating your own allows you to customize them to match your home’s aesthetic, color scheme, or personal style. You can create ornaments, wreaths, and garlands that fit perfectly with your vision for the season.
- Memories that Last: Crafting creates lasting memories. Each year, you can look back on the items you’ve made together, adding a sentimental value to the decorations and gifts that grow in importance over time.
FAQ
What are some simple and Cute Valentines Day Crafts for kids?
Some fun and Cute Valentines Day Crafts for kids include making heart-shaped cards, decorating cookies, creating paper cup flowers, or assembling heart garlands from construction paper. You can also try making lovebug bookmarks or handprint cards.
What materials do I need for Cute Valentines Day Crafts?
For most Cute Valentines Day Crafts, you’ll need basic supplies like construction paper, glue, scissors, markers, glitter, ribbon, and stamps. Additionally, items like stickers, beads, and foam shapes can be great additions to your projects.
Can I make Valentine’s Day gifts instead of just cards?
Absolutely! You can create gifts like personalized picture frames, DIY scented candles, hand-painted mugs, or heart-shaped jewelry. Many of these ideas can be adapted for both kids and adults, making them versatile gifts.
How do I create a Valentine’s Day card with a unique design?
To create a unique card, try layering different materials like lace or fabric on a cardstock base. You can cut out heart shapes, use stamps, or even add glitter or rhinestones. Personalizing it with a handwritten message adds a special touch.

Hi, I’m Victoria, an art and craft teacher at Newark City Schools, where I have the joy of working with middle school students to help them explore their creativity and develop their artistic talents. I believe that art is a powerful way for students to express themselves, and I strive to make every lesson a fun, engaging, and inspiring experience.
I created this website to share the art and craft projects, techniques, and resources that I use in my classroom, hoping to inspire both educators and young artists alike. Whether you’re a teacher looking for new ideas or a student eager to try something new, I’m excited to provide creative tools and projects that anyone can enjoy.
When I’m not in the classroom, I love experimenting with different art forms and learning new crafting techniques. My goal is to help others discover the joy of making things with their hands, and I hope my website serves as a space for everyone to explore their creative potential.


