
If you’ve ever found yourself wishing for easy, screen-free ways to keep kids busy (and maybe sneak in some quiet time for yourself), you’re in the right place. I’ve gathered a bunch of fun, creative, and totally doable crafts that’ll keep little hands happy—and maybe spark your own creativity too.
DIY Crafts For Kids
DIY crafts for kids are fun, creative activities that allow children to explore their imagination and develop important skills like fine motor coordination, problem-solving, and creativity.

DIY Paper Plate Animals
When my kids were little, paper plates were like gold in our craft stash. I’d pull out a stack and suddenly they’d transform into lions, owls, or even funny-faced aliens. Honestly, it amazed me how a plain white circle could become so many different things with just a few scribbles of marker and some scraps of colored paper. To be fair, it was never about perfect details—half the fun was watching them decide that a crooked ear made their bunny “unique.”
What I love most about paper plate animals is how cheap and easy they are. You don’t need a craft store haul—just glue, scissors, crayons, and maybe some old magazines for cutting out patterns. In my opinion, it’s a brilliant way to keep kids busy on a rainy day. Plus, they get to proudly show off their “creations” on the fridge, which feels like their personal art gallery.
DIY Salt Dough Ornaments
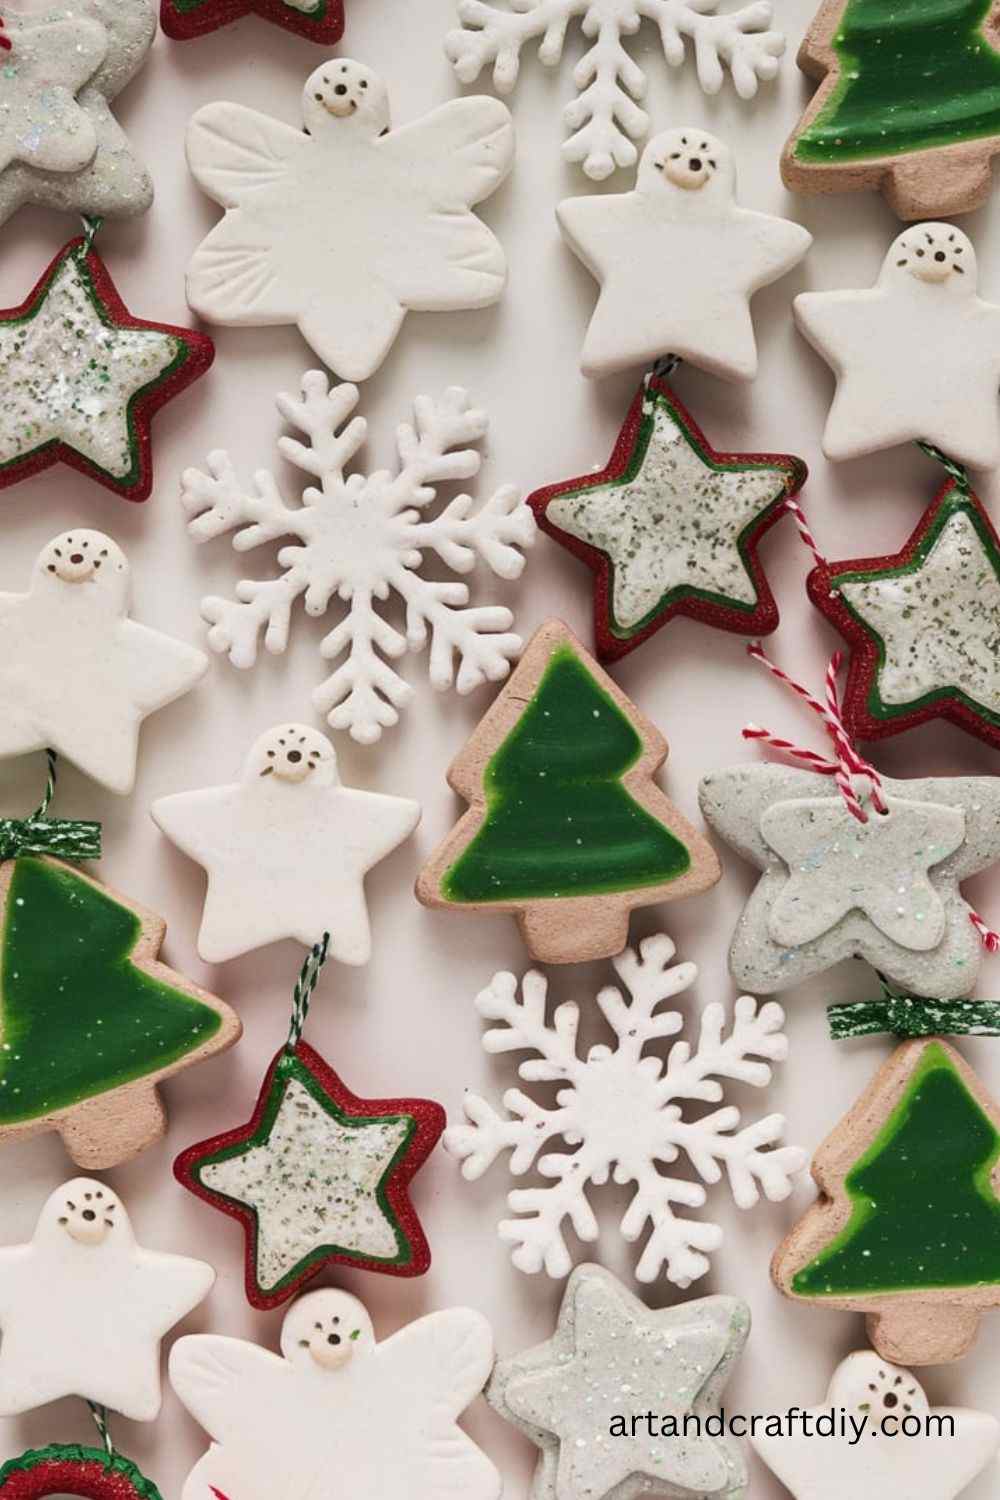
There’s something magical about salt dough—it’s like playing with clay but without the big price tag. I remember making a batch around Christmas, and my kitchen smelled like floury childhood memories. We rolled the dough flat, used cookie cutters for shapes, and then baked them until they turned hard as rocks. The kids painted them later, and to be fair, most of the paint ended up on their fingers. Still, those clumsy little stars and hearts are tucked away in our holiday box, and I bring them out every year.
The best part? Salt dough is ridiculously forgiving. If the first batch cracks, just whip up another—it’s only flour, salt, and water. I’ve found that adding a layer of clear varnish (or even nail polish if you’re desperate) helps the ornaments last longer. Honestly, it’s one of those crafts that doesn’t need to be fancy; it’s all about the memory-making.
Painted Rock Animals
Now, this one is close to my heart. I started painting rocks during one summer holiday when my kids complained of boredom. We went for a walk, gathered smooth stones, and came back with pockets full of “canvases.” I sat with a tiny brush painting ladybugs, while my daughter insisted her lumpy rock was destined to be a cat—even if it looked more like a potato with whiskers. Honestly, those silly rocks still sit in my garden, and they make me smile every time I water the plants.
What’s lovely is how simple it is. Just wash the rocks, let them dry, and then bring out some acrylic paints. If you don’t have brushes, even cotton swabs or old toothbrushes do the trick. In my opinion, rock animals are such a fun outdoor project—you can leave them around the garden or even hide them in parks for others to find. It’s like spreading tiny bits of joy.
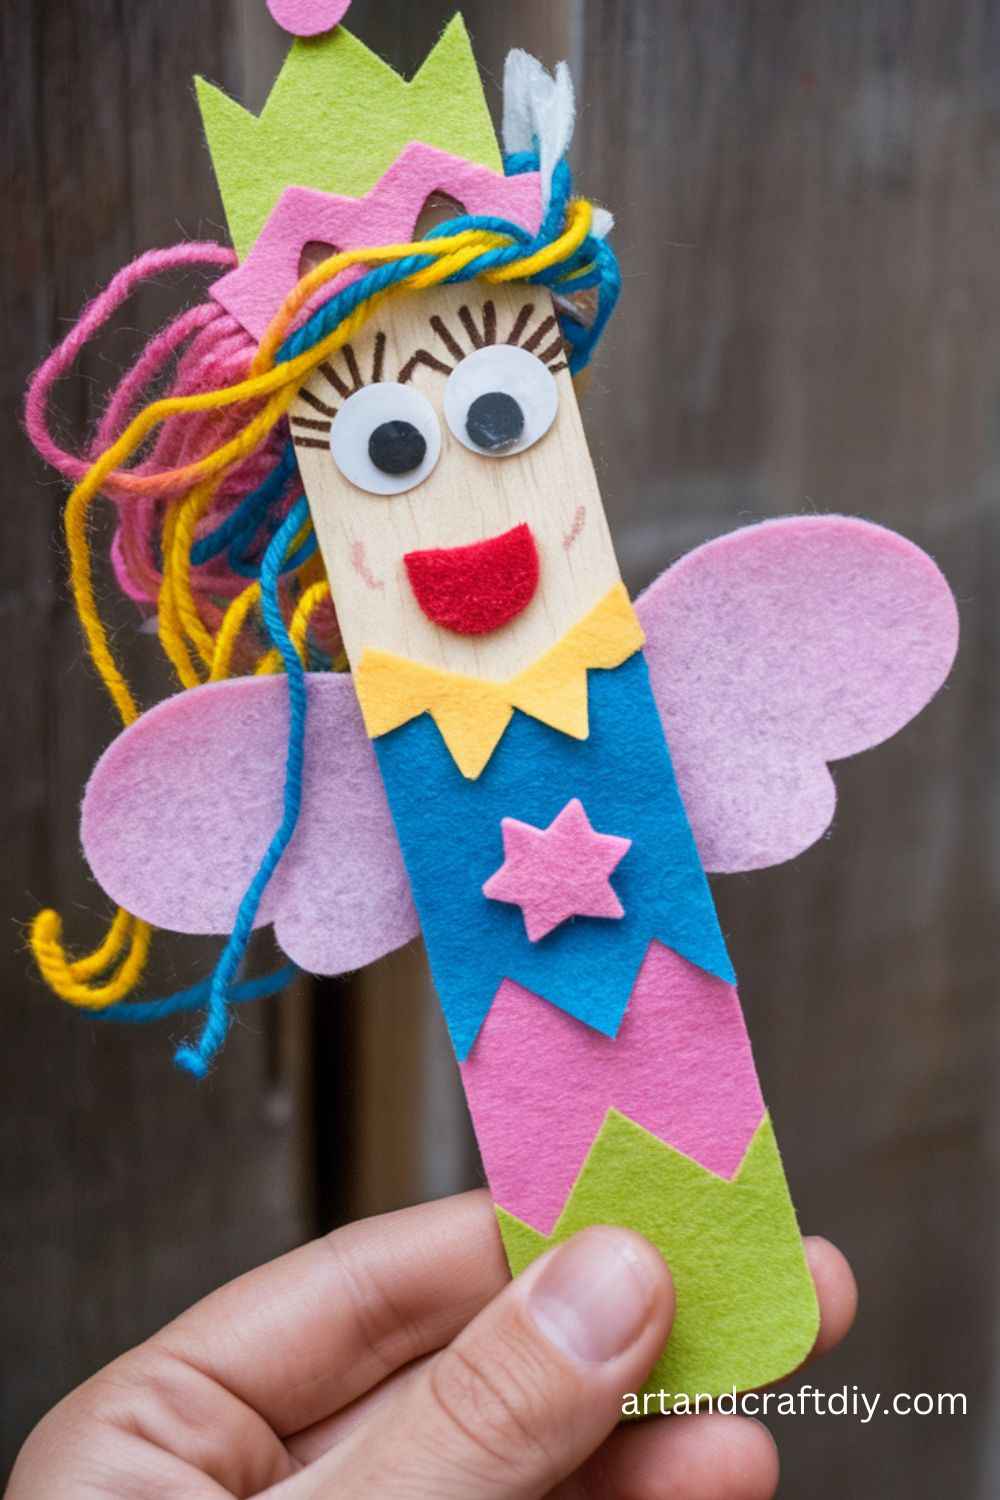
Popsicle Stick Puppets
Use popsicle sticks to create adorable puppet characters. This is an interactive craft, great for storytelling and imaginative play.
Materials Used:
- Popsicle sticks
- Colored paper
- Glue
- Markers
- Scissors
Steps:
- Decorate the popsicle stick with markers or paper to create a face or character body.
- Cut out arms, hats, and other accessories from colored paper.
- Glue these accessories to the stick.
- Once dry, use your puppet in plays or as a toy.
Button Flowers
Button flowers are a great way for kids to learn about shapes and colors while making a fun springtime craft.
Materials Used:
- Buttons in various colors
- Pipe cleaners
- Glue
- Craft paper
Steps:
- Choose buttons that will act as the petals and center of your flower.
- Thread a pipe cleaner through the center button to form the stem.
- Attach the other buttons around the center button to make petals.
- Glue everything in place and let it dry.
- You can create a whole garden by making more button flowers!
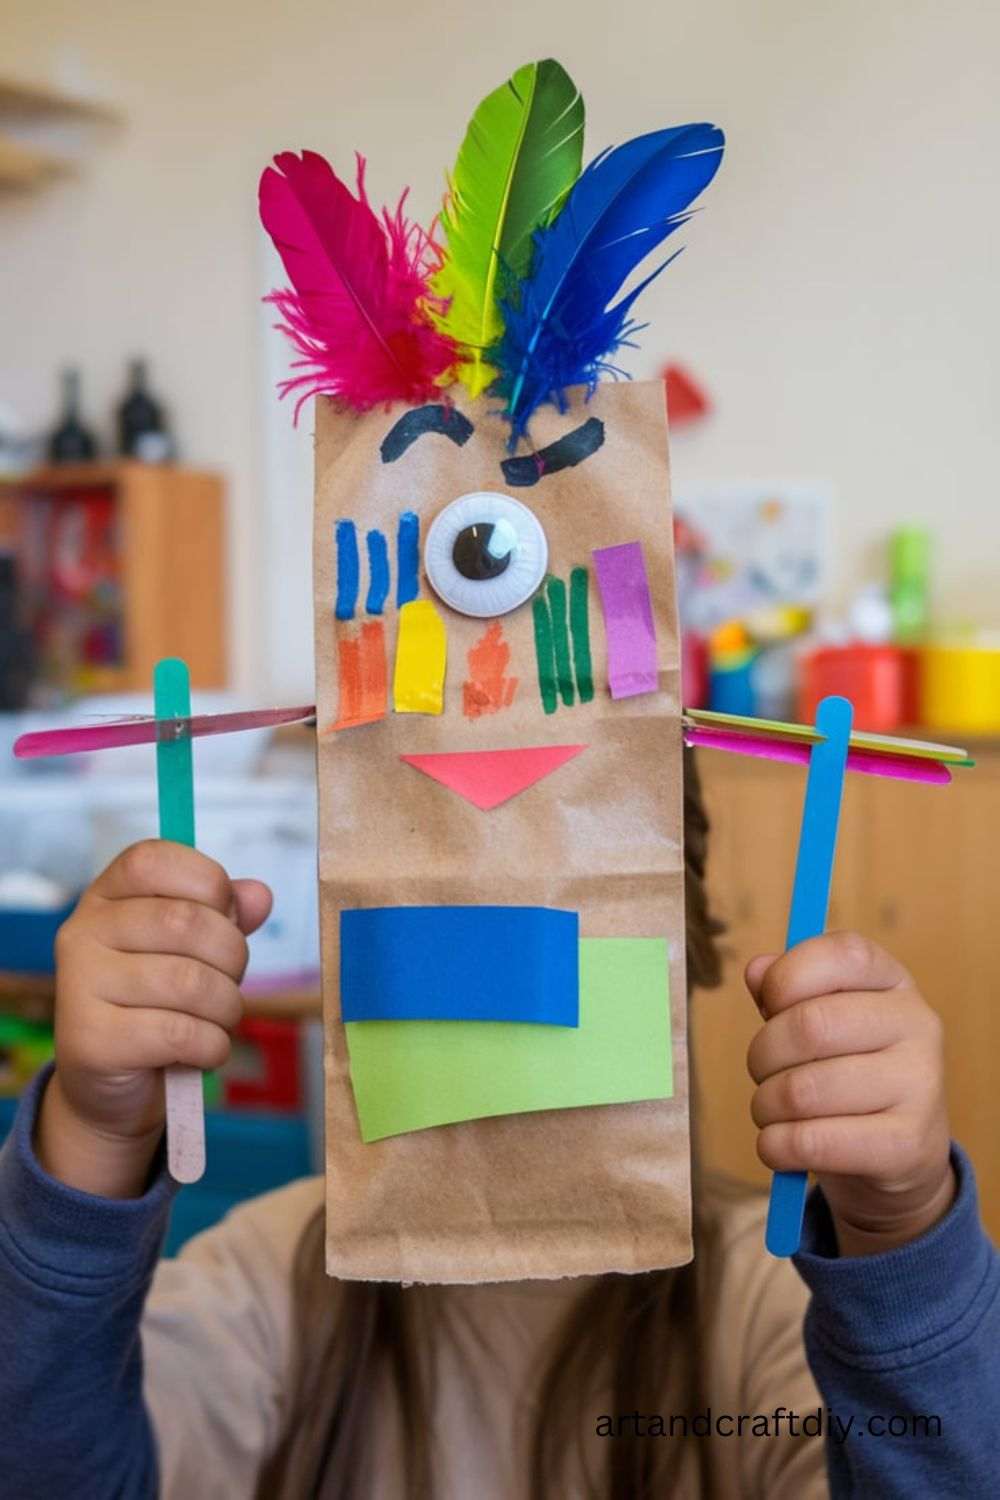
Paper Bag Puppets
Paper bag puppets are simple to make and provide endless opportunities for creative play and imagination.
Materials Used:
- Paper bags
- Markers or crayons
- Construction paper
- Glue
Steps:
- Take a brown paper bag and lay it flat.
- Decorate the flap of the bag to make a puppet’s face.
- Add details like eyes, mouth, and ears using construction paper and markers.
- Once everything is glued on, use your puppet for performances.
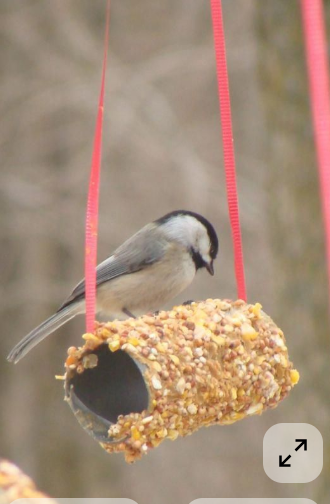
DIY Bird Feeder
A bird feeder is an easy and educational craft that lets kids help nature by attracting birds to their yard.
Materials Used:
- Toilet paper roll
- Peanut butter
- Bird seed
- String
Steps:
- Spread peanut butter all over the toilet paper roll.
- Roll it in bird seed, pressing gently so the seeds stick.
- Thread a piece of string through the hole and tie it in a knot.
- Hang it on a tree branch for the birds to enjoy!
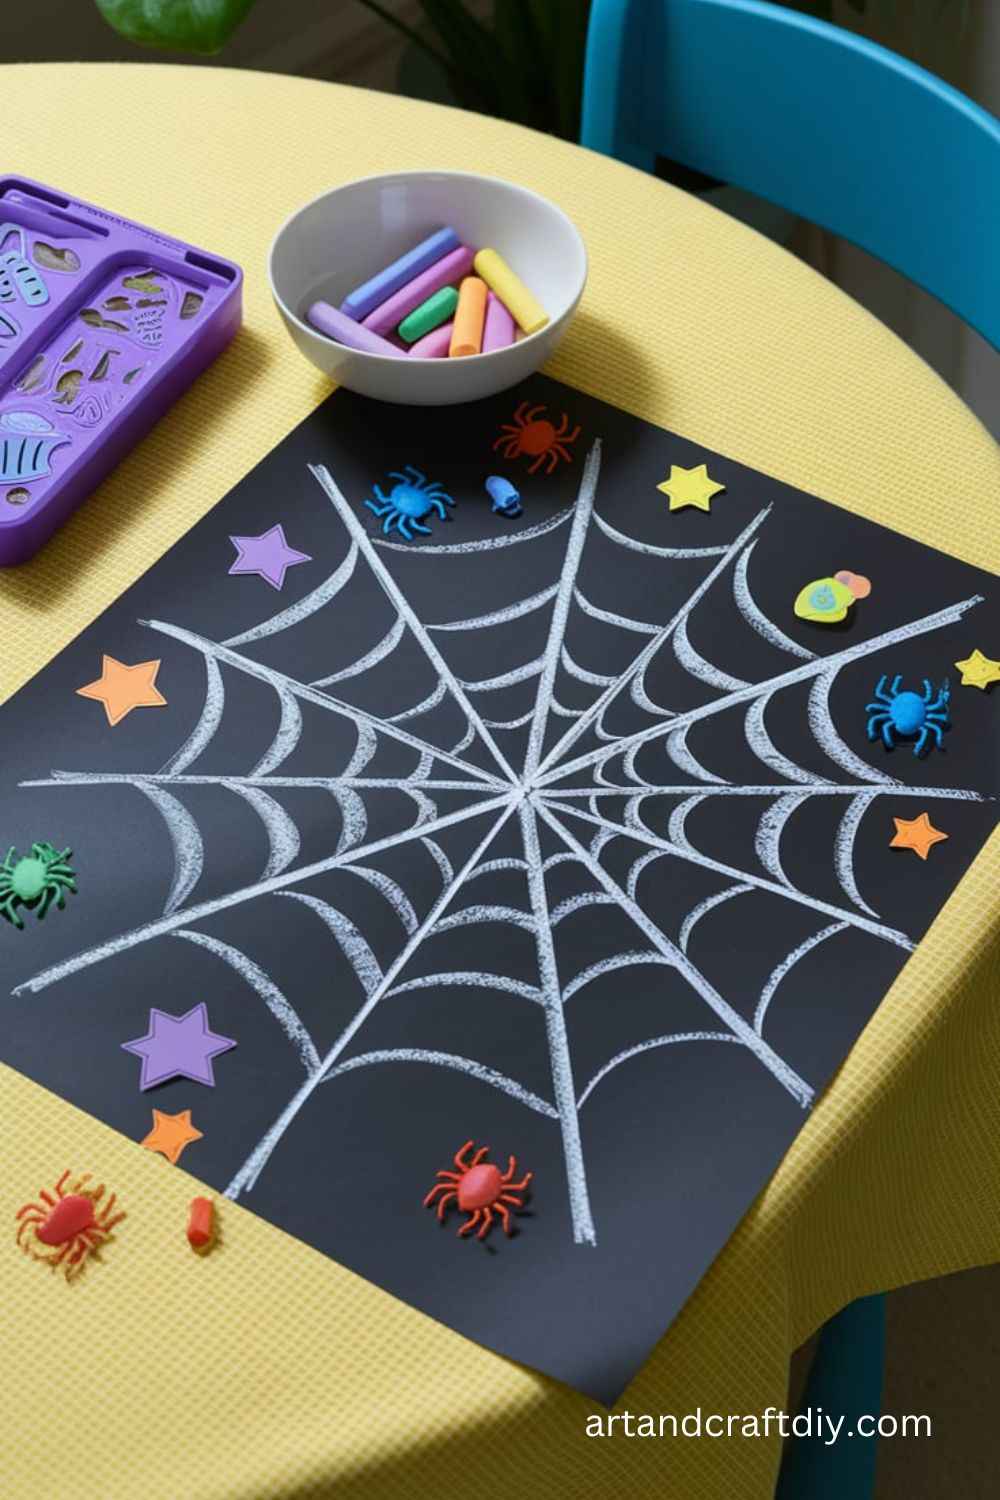
Spider Web Art
Spider webs can be made from yarn, and it’s a great craft for Halloween or as a science project on insects.
Materials Used:
Black construction paper
White yarn
Glue
Steps:
1.Cut a piece of yarn into short strands.
2.Glue the yarn in a spider web pattern on black paper.
3.Create a spider shape from additional yarn or stickers and add it to the center.
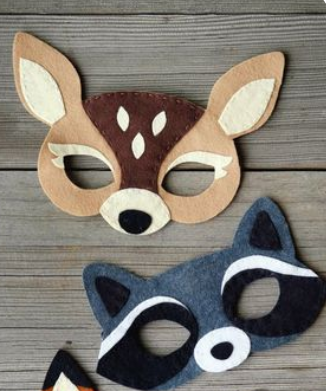
Felt Animal Masks
Felt masks are perfect for pretend play and dress-ups, offering a chance for kids to create characters.
Materials Used:
Felt sheets
Elastic
Scissors
Glue
Steps:
1.Cut out an animal face shape from the felt.
2.Use additional felt to cut out eyes, noses, and other features.
3.Glue all the pieces onto the base mask.
4.Attach elastic on both sides to wear the mask comfortably.
Balloon Stamps
Balloon stamps are a fantastic way to make prints on paper, perfect for younger kids to get creative with colors and patterns.
Materials Used:
- Balloons
- Paint
- Paper
Steps:
- Inflate a small balloon and dip it into paint.
- Press the balloon gently onto the paper to create prints.
- Use different colors and sizes of balloons for a fun, multi-colored design.
Paper Cup Clowns
Transform paper cups into fun clown faces that kids can decorate and interact with.
Materials Used:
- Paper cups
- Markers
- Glue
- Craft paper (for hats, hair, etc.)
Steps:
- Decorate the paper cup to create a clown face, using markers for the eyes, nose, and mouth.
- Create a hat, hair, and accessories out of construction paper and glue them onto the cup.
- Once everything is dry, you have your very own clown puppet!
Sticker Resist Art
Sticker resist art is a creative way for kids to explore painting and how certain areas can stay white while the rest is painted.
Materials Used:
- Stickers
- Watercolor paint
- Watercolor paper
Steps:
- Place stickers randomly or in a pattern on a piece of watercolor paper.
- Use watercolor paint to cover the entire sheet of paper.
- Once the paint dries, peel off the stickers to reveal the white areas underneath.
Pasta Necklaces
Pasta necklaces are a classic craft that combines fine motor skills with creativity, and kids can make their own wearable art!
Materials Used:
- Uncooked pasta (different shapes)
- String or yarn
- Paint (optional)
Steps:
- If you want colorful pasta, paint the pasta pieces and let them dry.
- Cut a piece of string to the desired necklace length.
- Thread the pasta onto the string, creating patterns or random designs.
- Tie the ends together and wear your necklace!
Cardboard Box Cars
Use cardboard boxes to make fun, interactive car designs for kids to play in.
Materials Used:
- Large cardboard boxes
- Markers, crayons, or paint
- Scissors
- Tape
Steps:
- Take a large cardboard box and cut out holes for the arms and head.
- Paint or color the box to look like a car.
- Add wheels, windows, and other details with markers or paper.
- Let your child climb into the box and pretend they’re driving!
Coffee Filter Butterflies
Coffee filter butterflies are a simple, colorful craft, great for spring or summer-themed activities.
Materials Used:
- Coffee filters
- Markers or paints
- Pipe cleaners
- Water
Steps:
- Color a coffee filter with markers or paint.
- Gently spray it with water to let the colors blend together.
- Once the filter dries, fold it into the shape of butterfly wings.
- Twist a pipe cleaner around the center to form the body and antennae.
Paper Towel Roll Boats
Crafting boats from paper towel rolls is a fun way for kids to make their own fleet for a water-based adventure.
Materials Used:
- Paper towel roll
- Construction paper
- Markers
- Glue
- Scissors
Steps:
- Cut a paper towel roll into smaller sections to form boat shapes.
- Decorate the boats using markers and construction paper.
- Create a sail by folding a piece of paper into a triangle and gluing it to a toothpick.
- Place the sail in the center of the boat and let it dry.
Paper Straw Wind Chimes
Paper straws can be turned into colorful wind chimes that kids can hang outdoors to hear the sound of the wind.
Materials Used:
- Paper straws
- String
- Beads
- Scissors
Steps:
- Cut the paper straws into varying lengths.
- Thread the straws onto pieces of string, separating them with beads.
- Tie each string to a stick or wooden dowel to create a frame.
- Hang your wind chimes outside and enjoy the sound!
Clay Handprints
Creating handprints with clay is a personal and sentimental craft, perfect for making keepsakes.
Materials Used:
- Air-dry clay
- Rolling pin
- Paint (optional)
Steps:
- Roll out a slab of air-dry clay with a rolling pin.
- Press your child’s hand into the clay to make an impression.
- Cut the clay around the handprint to make a shape or ornament.
- Allow the clay to dry completely, then paint if desired.
Paper Plate Frisbees
A paper plate frisbee is a great craft for a fun outdoor game that kids can make and play with.
Materials Used:
- Paper plates
- Markers or paint
- Scissors
- Stickers (optional)
Steps:
- Decorate your paper plate with markers or paint.
- Cut out the center of the plate to make it into a ring shape.
- Add stickers or additional decorations to personalize it.
- Toss your frisbee outside for some fun!
Butterfly Craft with Pipe Cleaners
Create delicate butterfly wings using colorful pipe cleaners, great for imaginative play and learning about insects.
Materials Used:
- Pipe cleaners (various colors)
- Beads (optional)
- Scissors
Steps:
- Twist two pipe cleaners together to form the body of the butterfly.
- Bend two more pipe cleaners into wing shapes and attach them to the body.
- Add beads or extra pipe cleaners to decorate the wings.
- Gently bend the wings to create a realistic butterfly shape.
Paper Roll Binoculars
Kids can make their own binoculars to use in pretend play or to explore nature.
Materials Used:
- Two toilet paper rolls
- String
- Paint or markers
- Glue
Steps:
- Glue the two toilet paper rolls side by side.
- Paint or decorate them using markers or paper.
- Attach a string to the ends so the binoculars can hang around the neck.
- Let it dry before using in outdoor play or exploration.
Flower Crown
Flower crowns are beautiful accessories for pretend play, dress-ups, or special occasions like parties.
Materials Used:
- Artificial flowers
- Wire or headband
- Glue
Steps:
- Cut the stems off the artificial flowers, leaving a small piece to glue.
- Attach the flowers onto a headband or wire, arranging them as you like.
- Secure the flowers by gluing them into place.
- Let it dry, then wear your beautiful crown!
Felt Animal Masks
Felt masks are perfect for pretend play and dress-ups, offering a chance for kids to create characters.
Materials Used:
- Felt sheets
- Elastic
- Scissors
- Glue
Steps:
- Cut out an animal face shape from the felt.
- Use additional felt to cut out eyes, noses, and other features.
- Glue all the pieces onto the base mask.
- Attach elastic on both sides to wear the mask comfortably.
Glitter Slime
Glitter slime is a sensory activity that is fun to make and even more fun to play with.
Materials Used:
- Glue
- Baking soda
- Contact lens solution
- Glitter
Steps:
- Mix glue and baking soda together in a bowl.
- Add a few tablespoons of contact lens solution to activate the slime.
- Stir in glitter for a sparkly effect.
- Knead the slime until it forms the desired consistency.
Straw Necklace
A straw necklace is an easy craft that kids can wear and enjoy. It’s also a great way to practice threading skills.
Materials Used:
- Drinking straws
- String
- Scissors
Steps:
- Cut straws into smaller pieces.
- Thread them onto a string, creating patterns or random designs.
- Tie the ends of the string to complete your necklace.
DIY Wind Sock
Make a fun and colorful wind sock to hang outside and watch flutter in the wind.
Materials Used:
- A paper towel roll or plastic bottle
- Streamers or ribbons
- Glue
Steps:
- Attach streamers or ribbons to the bottom of a paper towel roll or bottle.
- Decorate the tube with colors or stickers.
- Attach a string to hang it up outside.
Coffee Filter Jellyfish
Create whimsical jellyfish by combining coffee filters with colorful streamers.
Materials Used:
- Coffee filters
- Streamers or ribbons
- Markers or paints
- String
Steps:
- Decorate the coffee filter with colors and patterns.
- Cut the streamers into strips and glue them to the bottom of the filter.
- Hang your jellyfish using a piece of string.
Paper Cup Ice Cream Cones
These ice cream cone crafts are perfect for pretend play or as fun decorations.
Materials Used:
- Paper cups
- Construction paper
- Glue
- Pom-poms or cotton balls
Steps:
- Cut a cone shape out of construction paper.
- Attach it to the bottom of the paper cup.
- Use pom-poms or cotton balls to make the “ice cream” topping.
Egg Carton Caterpillar
Transform an egg carton into a colorful caterpillar that kids can use in imaginative play or simply admire as a craft.
Materials Used:
- Egg carton
- Paint
- Pipe cleaners
- Glue
Steps:
- Cut the egg carton into individual cups.
- Paint the cups to create a colorful caterpillar.
- Attach pipe cleaners for legs and antennae.
- Once everything is dry, display or play with your caterpillar!
Crafting with Nature: A Creative Exploration
Nature offers a wealth of materials that can be transformed into beautiful, eco-friendly art. From leaves and rocks to flowers, the natural world around us provides endless opportunities for crafting projects that are not only fun but also foster a deeper connection with the environment. DIY Crafts For Kids are perfect for all ages, allowing individuals to explore their creativity while appreciating the beauty of the outdoors.
1. Leaf Rubbings: Creating Textured Art with Leaves and Crayons
Leaf rubbings are a simple and enjoyable way to capture the intricate textures and shapes of leaves. By placing a leaf under a piece of paper and rubbing over it with crayons, children and adults alike can create beautiful patterns that reflect the natural world. This activity is great for enhancing fine motor skills and an appreciation for the details found in nature.
- Materials Needed: Leaves, crayon (or pastel), white paper
- How to Create:
- Collect various leaves of different sizes and textures.
- Place the leaves under the paper.
- Use a crayon to gently rub over the paper, revealing the details of the leaf.
- Variation: Experiment with different colors and layering multiple leaves for a more intricate design.
2. Rock Painting: Transforming Rocks into Colorful Animals or Inspirational Messages
Rock painting is a versatile craft that turns ordinary stones into delightful works of art. Whether you choose to paint small animals, inspiring quotes, or abstract designs, this activity provides an opportunity to bring a unique touch to nature’s canvas. Painted rocks can be displayed in your garden, used as paperweights, or hidden around for others to find as part of a “rock hunting” game.
- Materials Needed: Smooth rocks, acrylic paints, paintbrushes, clear sealant (optional)
- How to Create:
- Select clean, smooth rocks for painting.
- Sketch your design lightly with a pencil.
- Paint your design with vibrant colors and allow it to dry completely.
- Variation: For a more personal touch, write an inspirational quote or add patterns like mandalas to the rocks.
3. Pressed Flower Art: Preserving Flowers and Creating Unique Cards or Pictures
Pressed flower art is a wonderful way to preserve the beauty of flowers while creating one-of-a-kind cards, framed pictures, or even bookmarks. By pressing flowers between heavy books, you can capture their vibrant colors and delicate shapes for future crafting projects.
- Materials Needed: Fresh flowers, heavy book (or flower press), cardstock, glue, scissors
- How to Create:
- Collect fresh flowers and carefully arrange them between sheets of wax paper.
- Press the flowers by placing them in a heavy book for a few days.
- Once dried, arrange the flowers on a piece of cardstock or other paper, then glue them in place.
- Variation: Create a greeting card by adding personal messages and decorating with the pressed flowers.
Creative Ways to Display Kids’ Crafts
As kids embark on their creative adventures, the masterpieces they produce can quickly pile up, leaving you wondering how to store or display them in a way that celebrates their efforts. Rather than letting these crafts get buried in drawers or forgotten in corners, there are some fun and creative ways to showcase them in your home. By turning your living space into a gallery or organizing their art in unique ways, you not only preserve memories but also make your child’s creativity a focal point of your home. Here are two inspiring ideas:
1. Craft Galleries at Home: Turning Your Home into a Mini Gallery
Transforming your home into an art gallery for your child’s crafts is an excellent way to celebrate their creativity while making the pieces a part of your décor. Here are a few ideas to get you started:
- Wall Collages: Designate a wall or section of a room to display a rotating collection of artwork. Use frames, strings with clothespins, or magnetic strips to make it easy to switch out old art for new projects. This keeps the display fresh and highlights new achievements.
- Shadow Boxes: For 3D crafts like sculptures or clay models, use shadow boxes to give them a space to stand out. These boxes can be hung on walls or placed on shelves to showcase three-dimensional creations.
- Gallery-Style Framing: Invest in sleek, multi-opening frames that allow you to display several pieces of art in one frame. This way, you can give a polished look to a collection of works while keeping the artwork organized.
2. Craft Journals: Creating a Scrapbook or Journal for Each Child’s Crafting Journey
Another thoughtful way to preserve your child’s art is by creating a personalized craft journal or scrapbook. This can become a cherished keepsake that tells the story of their creative growth over the years. Here’s how to approach it:
- Date and Label: Add dates, titles, and brief descriptions of each craft, highlighting the inspiration or the process behind it. This can provide both context and nostalgia as you look back at their progress.
- Include Photos: For larger crafts that can’t be stored in the journal, take photos and add them alongside the smaller pieces. This way, you’ll capture every project, no matter its size.
- Incorporate Writing: Encourage your child to write about their work. Whether it’s a title, a few sentences about their process, or a story inspired by the craft, writing adds a personal touch to each entry.
By using these creative ways to display kids’ crafts, you can not only keep their artwork organized but also transform your home into a place that reflects the uniqueness of your child’s imagination.
FAQ
What are some simple DIY crafts for kids?
Simple DIY crafts for kids include paper plate masks, handprint art, pom-pom creatures, and paper roll binoculars. These projects require minimal materials and are perfect for younger children.
What materials do I need for DIY crafts for kids?
Basic materials include construction paper, scissors, glue, markers, paint, pom-poms, googly eyes, and popsicle sticks. You can also use recycled items like cardboard, bottle caps, and toilet paper rolls.
How do I ensure the DIY crafts are safe for kids?
Make sure to use non-toxic materials, keep scissors and glue out of reach of young children, and supervise the use of any sharp objects. Always choose age-appropriate crafts that match the child’s skill level.
Can kids do DIY crafts on their own?
It depends on the child’s age. Younger kids may need help with cutting or using glue, while older kids can do most of the crafting independently. Providing instructions and guidance makes it a fun and educational experience.
What are some seasonal DIY Crafts For Kids?
For winter, try making snowflakes or holiday ornaments. In spring, kids can create flower crowns or colorful bird feeders. Summer crafts can include painted rocks or sand art, while fall is perfect for pumpkin decorations or leaf prints.

Hi, I’m Victoria, an art and craft teacher at Newark City Schools, where I have the joy of working with middle school students to help them explore their creativity and develop their artistic talents. I believe that art is a powerful way for students to express themselves, and I strive to make every lesson a fun, engaging, and inspiring experience.
I created this website to share the art and craft projects, techniques, and resources that I use in my classroom, hoping to inspire both educators and young artists alike. Whether you’re a teacher looking for new ideas or a student eager to try something new, I’m excited to provide creative tools and projects that anyone can enjoy.
When I’m not in the classroom, I love experimenting with different art forms and learning new crafting techniques. My goal is to help others discover the joy of making things with their hands, and I hope my website serves as a space for everyone to explore their creative potential.