
Oh man, the other day I was digging through a box of old photos and I found this one of my little cousin making a huge mess with glitter and glue. I couldn’t stop laughing, but it got me thinking — why don’t I do more DIY Crafts To Do At Home Picture Frame? Seriously, sometimes all you need is a little creative boost to turn a lazy afternoon into something fun and memorable. One of my favorites has got to be making your own picture frame. There’s just something so satisfying about taking plain wood or cardboard and transforming it into something that actually feels personal, you know? And honestly, it’s not as complicated as it sounds. I know we all struggle with finding time or thinking we’re “not crafty enough,” but trust me, this is doable. Stick with me, and I’ll show you easy, fun ways to make a DIY picture frame that’ll actually look cute on your wall.
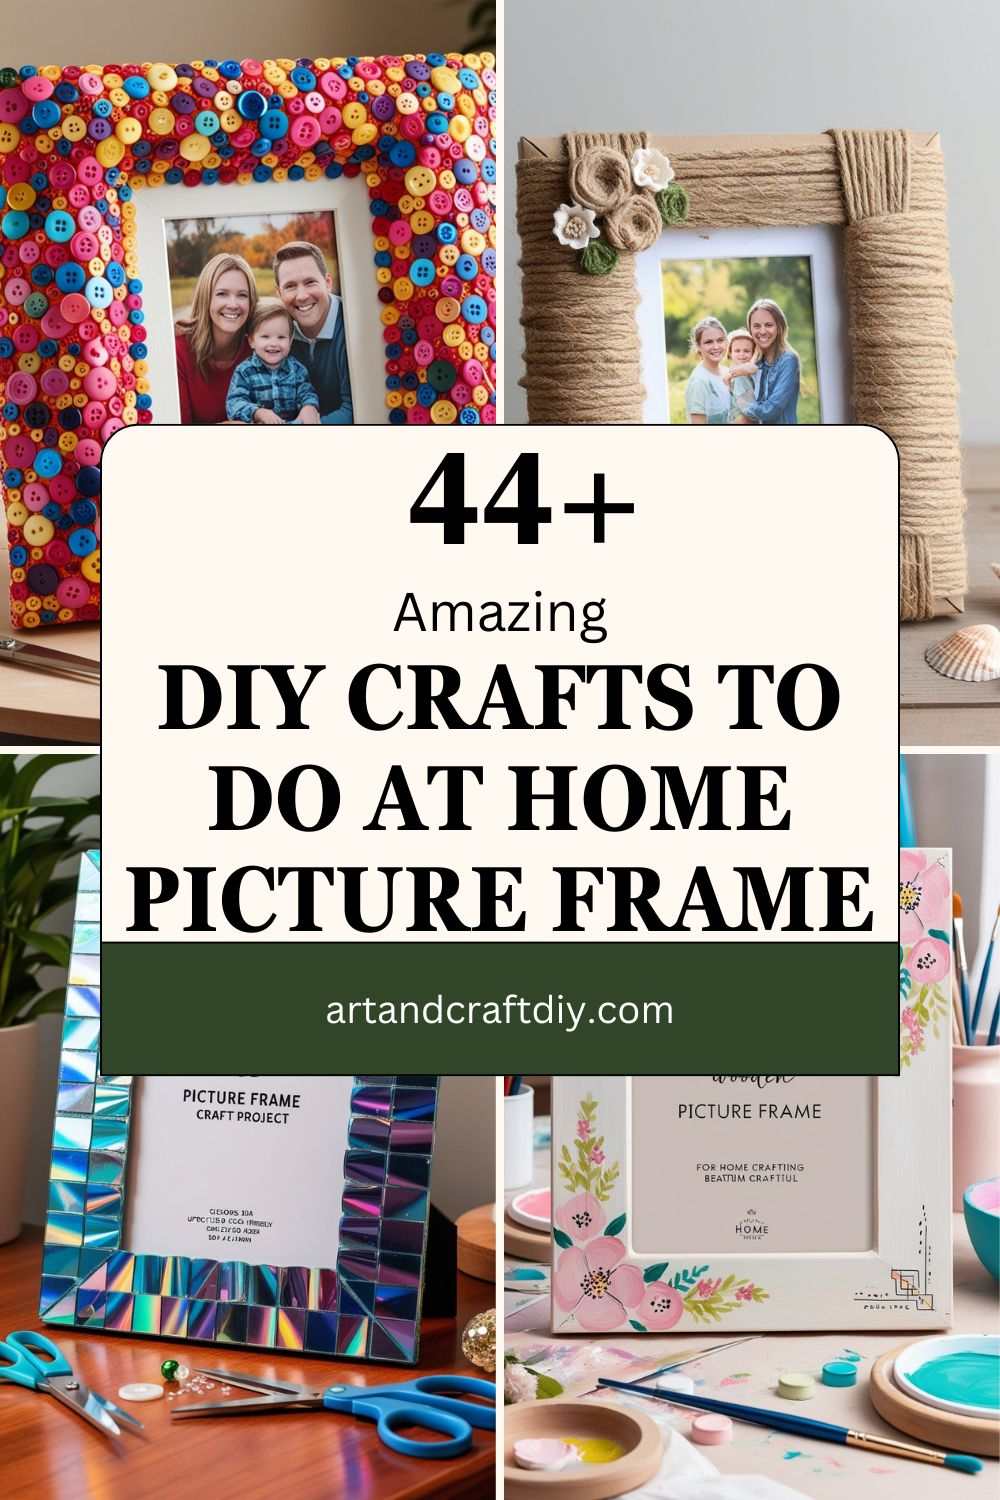
DIY Crafts To Do At Home Picture Frame
DIY Crafts To Do At Home Picture Frame are a fun and creative way to personalize your living space.
Painted Wooden Picture Frame
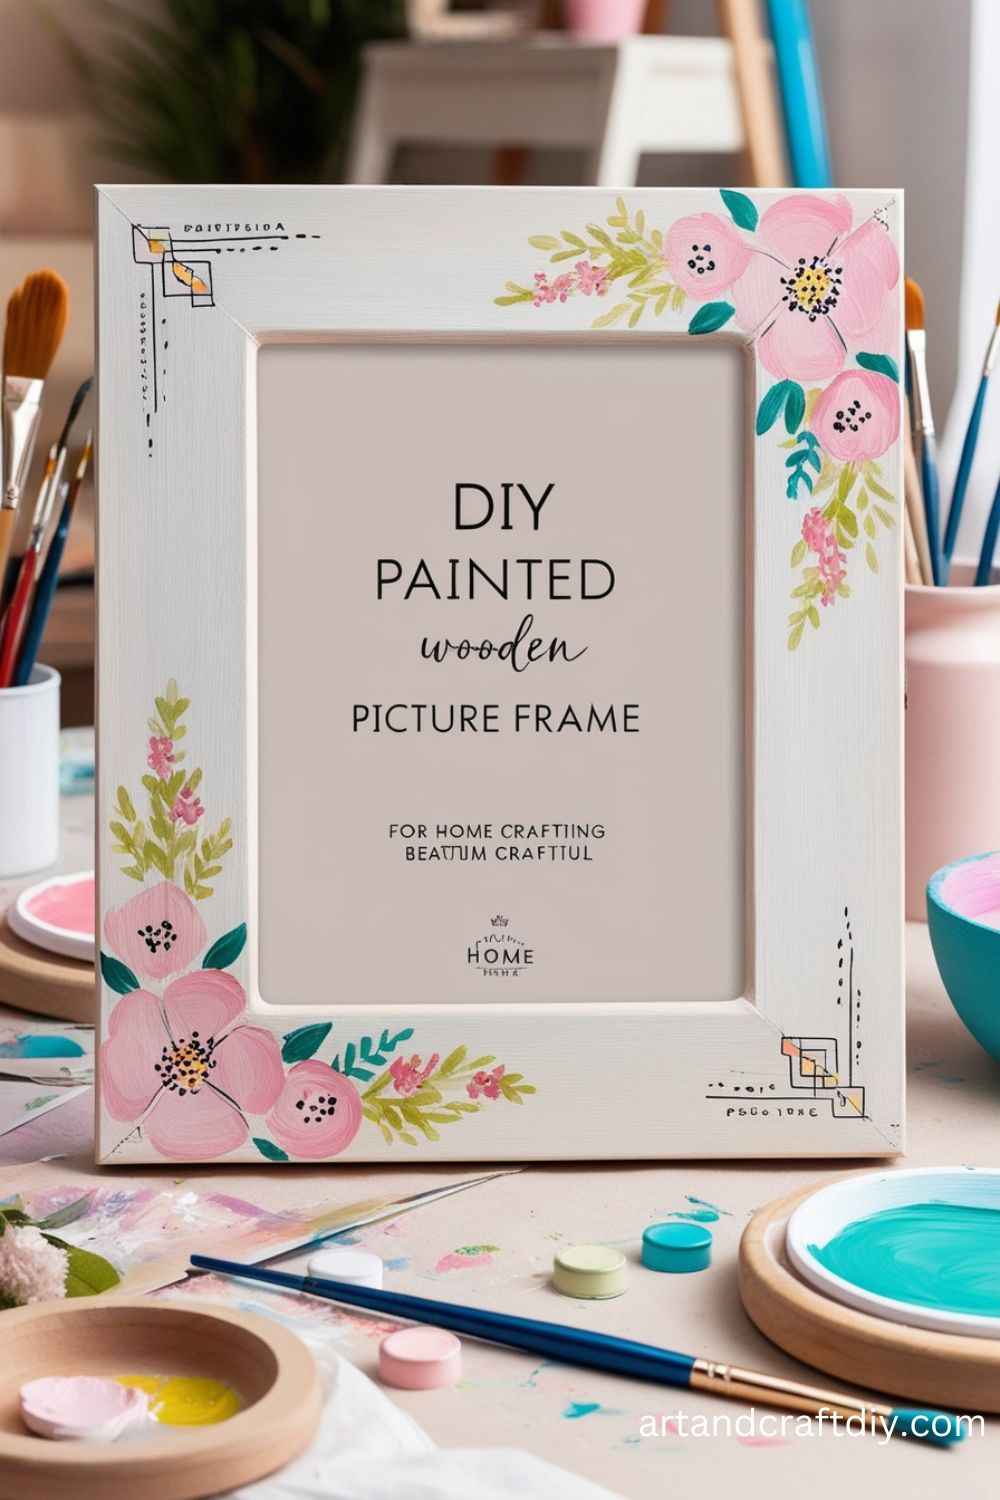
Honestly, I’ve always loved the idea of taking a plain wooden frame and turning it into something that actually pops on my wall. There’s something so satisfying about picking up a brush and seeing colors come alive. For me, I usually sand down the frame first because, let’s be real, a smooth surface makes painting way easier. I’ve tried skipping this step before, and trust me, it’s a little messy.
After that, I grab some painter’s tape and create random stripes or patterns. Sometimes I get a little wild with it—geometric shapes, zigzags, even hearts. I love using acrylic paints because they dry fast and the colors are super vibrant. A tip I’ve found: one or two thin coats work better than slapping on a thick one. Once it’s dry, a quick coat of varnish or clear spray seals it, and honestly, seeing it on my shelf always makes me smile.
Mosaic Picture Frame
To be fair, mosaic frames are a bit more work, but oh my gosh, the final look is so worth it. I remember the first time I tried this, I was scared I’d mess up, but breaking tiles or even using old buttons and glass pieces is actually kind of therapeutic. I’ve found that spreading the glue in small sections makes placing the pieces so much easier.
Once the pieces are stuck down, I usually wait for them to dry completely before grouting. And yes, grouting can get messy, but I actually enjoy wiping away the excess and seeing the pattern really pop. I like adding little personal touches like a tiny charm or a bead—it makes the frame feel uniquely mine. Honestly, it’s not just about the end result; I love the process of arranging pieces and just experimenting until it feels right. Every frame tells a little story that way.
Twine Wrapped Picture Frame
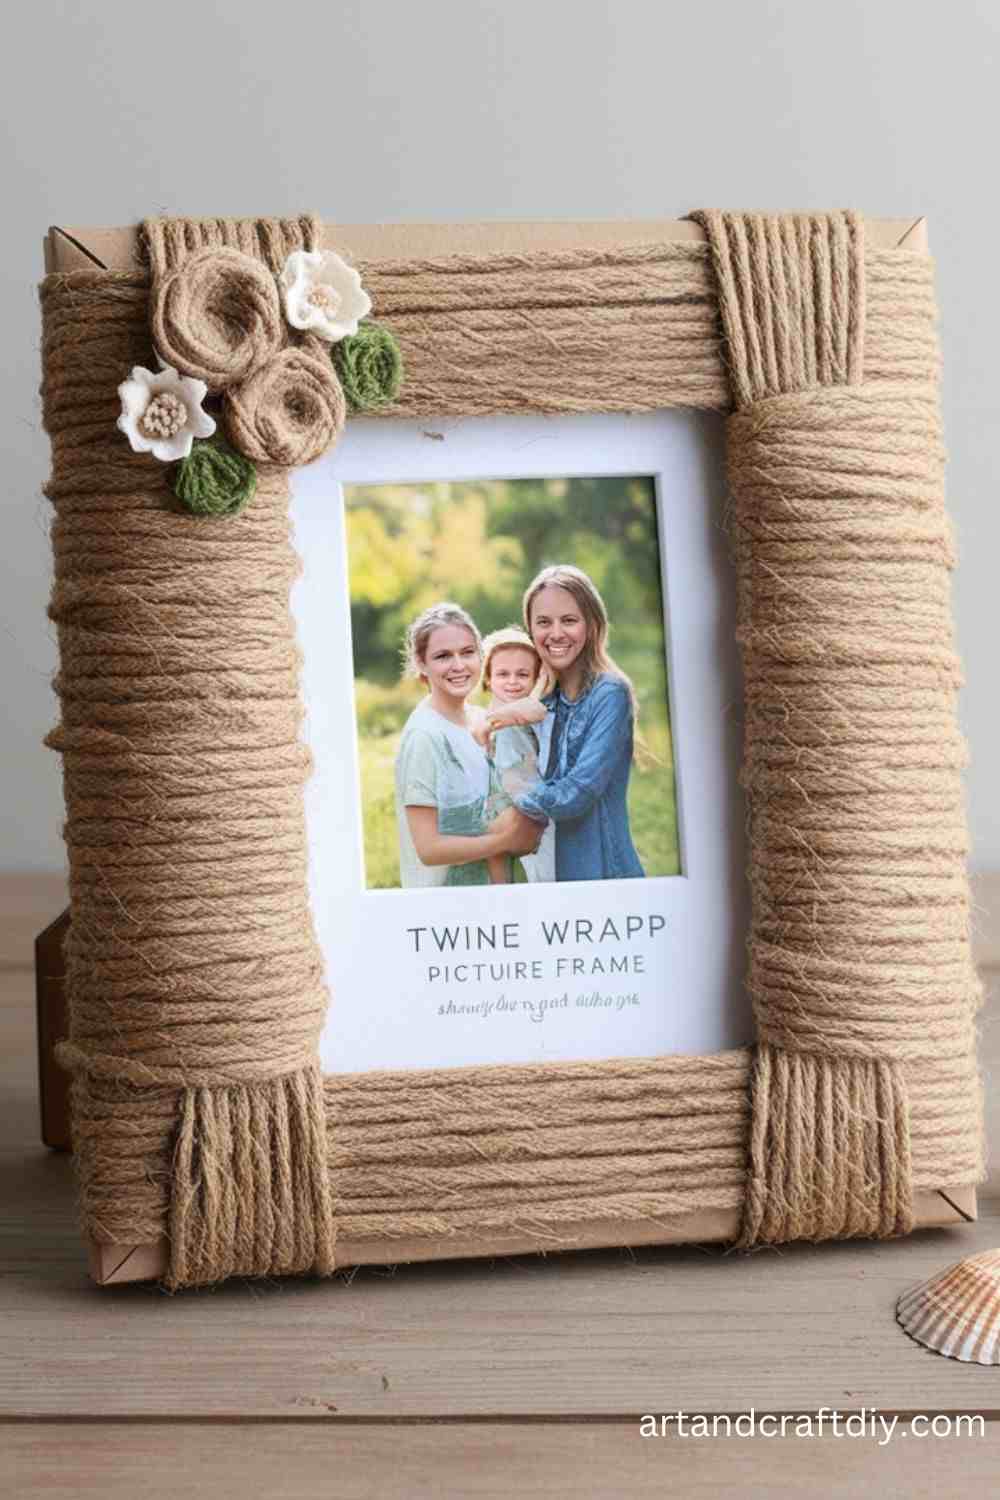
I’ve got to say, twine frames are my cozy little favorite. There’s something about the rustic, homey vibe that just clicks with me. I usually start with a plain frame and a hot glue gun in hand, and then just start wrapping the twine around. At first, I worried it would look sloppy, but honestly, imperfections add character in my opinion.
Sometimes I even mix in bits of ribbon or lace with the twine—it gives it a little unexpected flair. One time, I wrapped an entire frame with twine and added a few pressed flowers under the twine, and it turned out surprisingly charming. The best part? It’s ridiculously easy and almost meditative. You just wind, glue, and adjust. Every time I make one, I catch myself thinking, “Wow, I could make a whole set of these for gifts,” because they really do have that warm, handmade feel.
Floral Embellished Picture Frame
This craft uses faux flowers to decorate a simple frame for a soft, vintage look.

Materials used:
- Plain wooden or plastic frame
- Faux flowers (roses, daisies, etc.)
- Hot glue gun
- Scissors
- Paint (optional)
Steps:
- If desired, paint the frame a soft pastel color.
- Cut the flowers into smaller pieces, removing any unnecessary stems.
- Apply a small amount of hot glue to the back of each flower and attach them to the frame.
- Continue attaching flowers around the entire frame.
- Fill in any gaps with smaller flowers or greenery.
- Once the glue has dried, insert your photo into the frame.
Upcycled CD Picture Frame
Use old CDs to create a shiny and reflective picture frame that gives a modern, eco-friendly vibe.
Materials used:
- Old CDs
- Cardboard or a wooden frame
- Hot glue gun
- Scissors
Steps:
- Cut the old CDs into smaller shards or shapes using scissors.
- Apply hot glue to the back of the CD pieces and stick them to the surface of the frame.
- Continue until the entire frame is covered in the shiny CD shards.
- Trim any excess CD pieces hanging off the edges of the frame.
- Let the glue dry, and then insert your favorite photo into the frame.
Beaded Picture Frame
This decorative craft project involves using beads to create a colorful and textured frame.
Materials used:
- Wooden or plastic frame
- Beads (glass or plastic)
- Hot glue gun
- Ribbon (optional)
Steps:
- Prepare the frame by removing any backing or glass.
- Apply a thin layer of hot glue on the edges of the frame.
- Carefully place the beads on the glued areas, ensuring they are tightly packed.
- For added decoration, you can glue a ribbon around the outside of the frame.
- Allow the glue to cool and harden before placing a photo inside.
Fabric Covered Picture Frame
Fabric adds a soft touch to your picture frame, making it look cozy and unique.
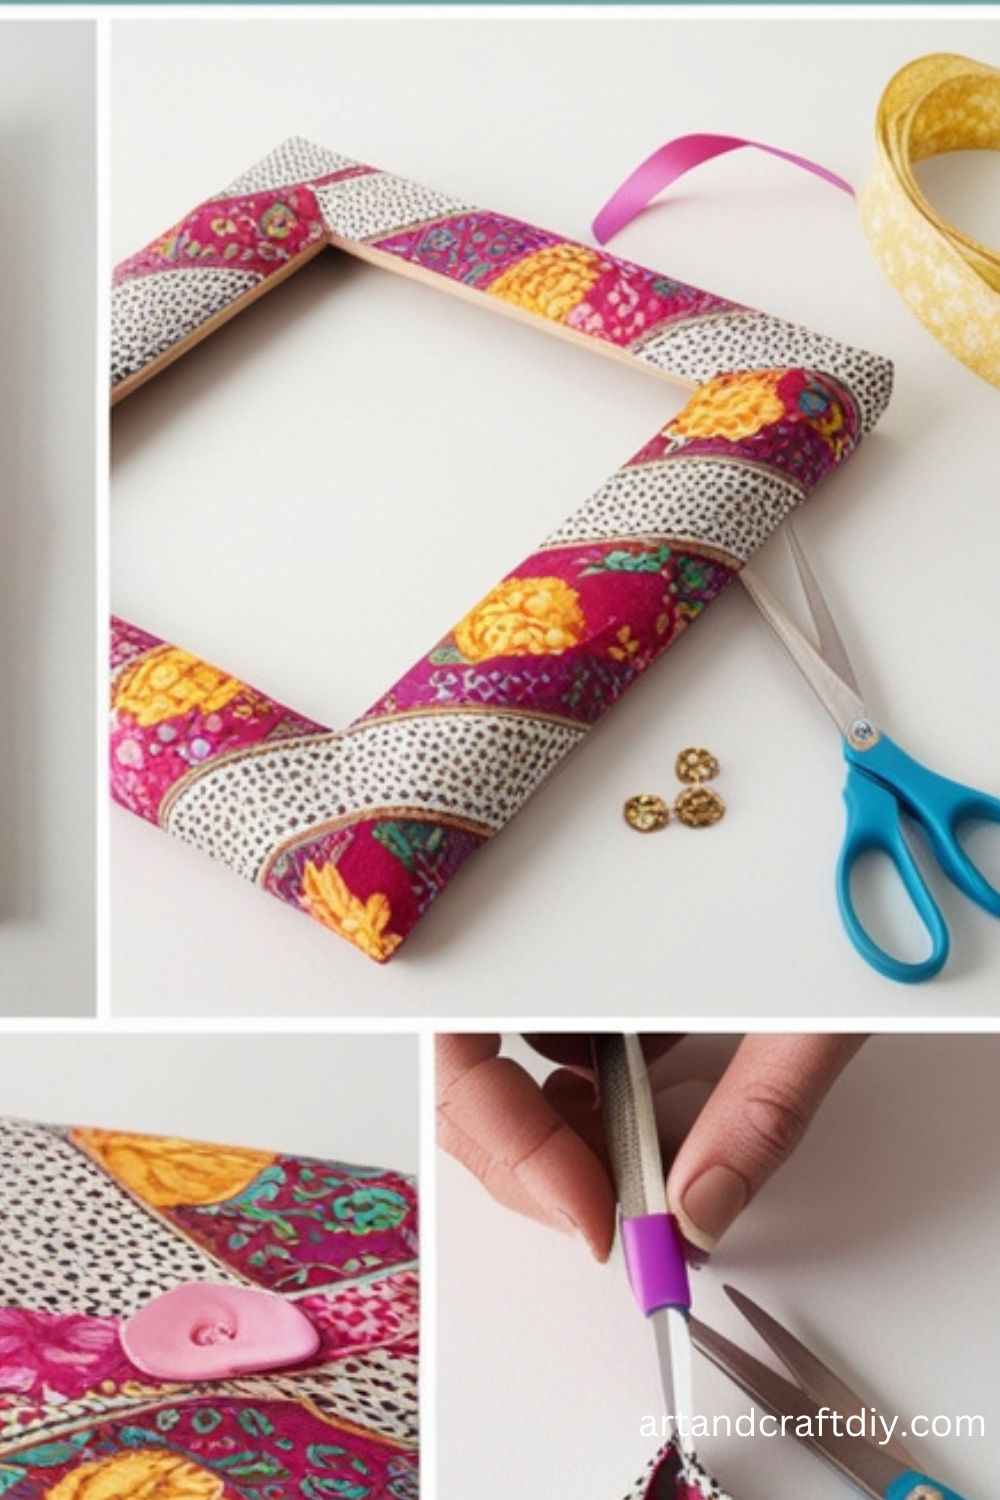
Materials used:
- Plain wooden frame
- Fabric of choice
- Scissors
- Hot glue gun
- Staple gun (optional)
Steps:
- Cut the fabric to fit the size of the frame.
- Lay the fabric flat and position the frame on top.
- Pull the fabric tightly over the frame and glue it in place at the back.
- Use a staple gun for extra security around the frame’s edges if needed.
- Trim off any excess fabric from the edges.
- Let it dry before inserting your picture.
Button Picture Frame
Using old buttons of various colors, sizes, and styles, you can make a fun and colorful picture frame.
Materials used:
- Wooden frame
- Assorted buttons
- Hot glue gun
Steps:
- Lay out the buttons in a pattern or randomly around the frame.
- Apply hot glue to the back of each button and stick it onto the frame.
- Continue placing buttons until the frame is fully decorated.
- Allow the glue to set before inserting your photo.
Chalkboard Picture Frame
Transform an old frame into a functional chalkboard with a personalized touch.
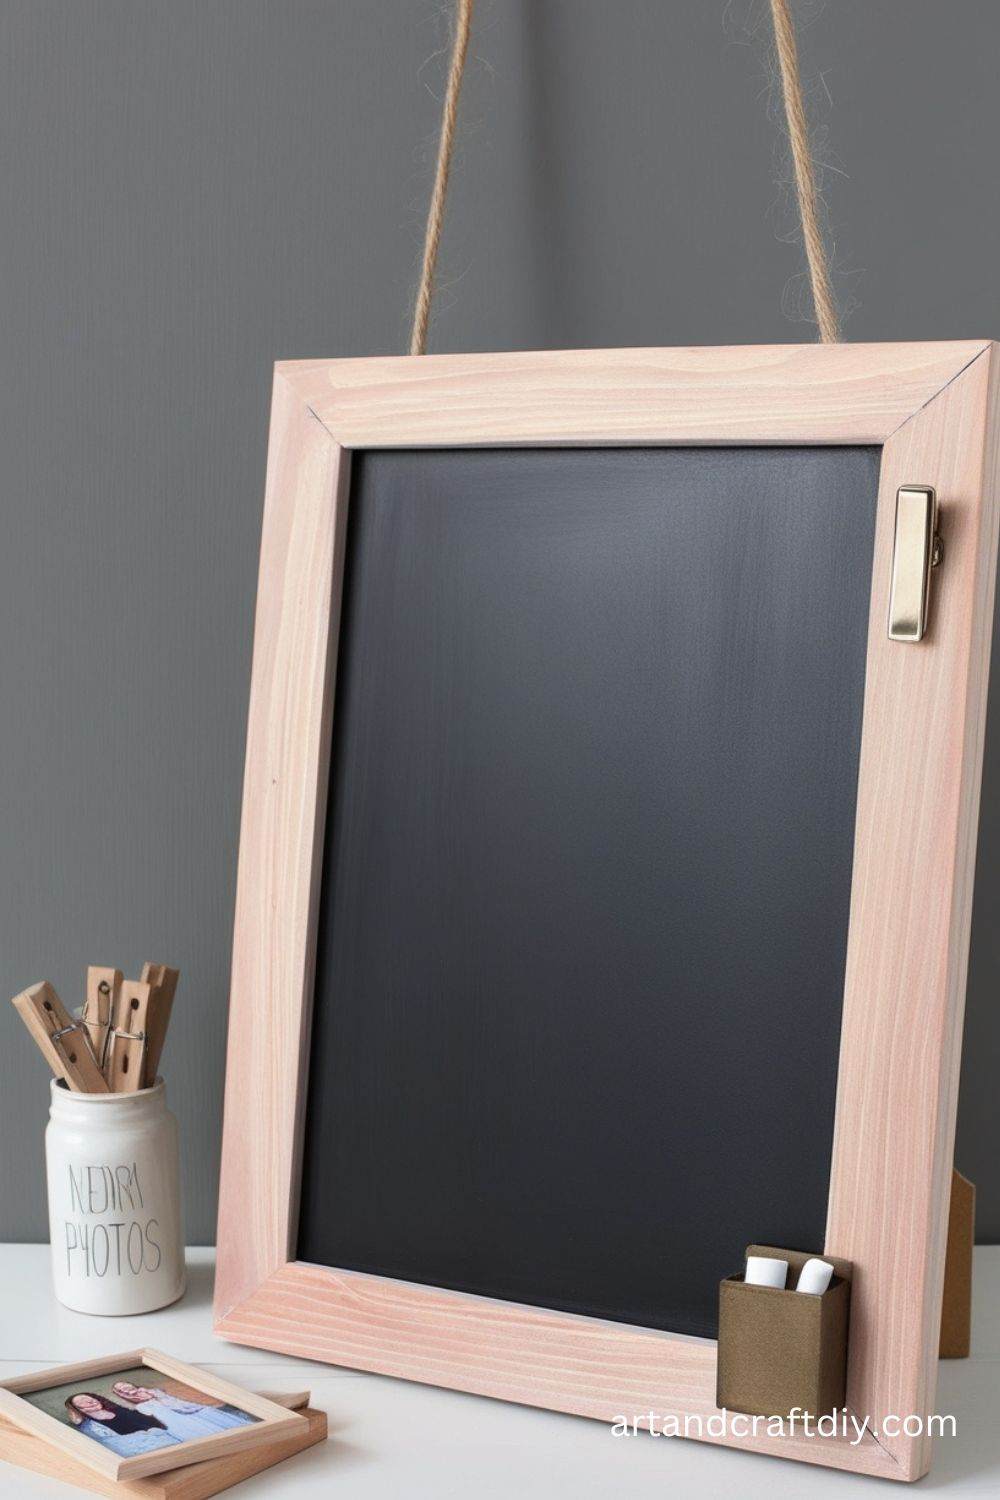
Materials used:
- Wooden frame
- Chalkboard paint
- Paintbrush
- Sandpaper
Steps:
- Sand the frame lightly to ensure the paint adheres properly.
- Apply a coat of chalkboard paint to the surface of the frame, covering the entire inner space where you will write.
- Let the paint dry completely, then apply a second coat if necessary.
- Once dry, use a piece of chalk to season the chalkboard surface.
- Insert your picture and use the chalkboard area for writing messages.
Leaf-Imprint Picture Frame
Create an earthy, natural frame by using leaves to make imprints or patterns.
Materials used:
- Wooden frame
- Fresh leaves
- Acrylic paint
- Paintbrush
Steps:
- Place the leaves onto the wooden frame, arranging them how you’d like.
- Lightly paint the leaves with acrylic paint.
- Press the painted side of the leaves onto the frame to create a print.
- Repeat the process until the frame is covered in beautiful leaf prints.
- Let the paint dry, then insert your photo.
Stone-Decorated Picture Frame
A stone-decorated frame is perfect for adding a rustic touch to any space.
Materials used:
- Plain picture frame
- Small stones or pebbles
- Hot glue gun
Steps:
- Clean the stones to remove any dirt or debris.
- Glue the stones one by one around the frame, ensuring each one fits securely.
- Fill any gaps with smaller stones or pebbles.
- Allow the glue to set, then place your photo inside the frame.
String Art Picture Frame
This idea combines string art with a frame to create a unique, textured design.
Materials used:
- Wooden frame
- Nails
- String or yarn
- Hammer
Steps:
- Plan the design you want to create (a heart, star, or abstract pattern).
- Hammer small nails around the edges of the frame, following your design.
- Once the nails are in place, tie the string around the nails and weave it in and out to form the design.
- Continue until the pattern is complete, and insert your photo.
Pinecone Picture Frame
For a rustic, autumn-inspired look, decorate a frame with pinecones.
Materials used:
- Plain wooden frame
- Pinecones
- Hot glue gun
Steps:
- Arrange the pinecones around the frame to see how they fit best.
- Use hot glue to attach the pinecones to the frame.
- Cover the entire frame with pinecones for a natural look.
- Let the glue set, then insert your photo.
Magazine Collage Picture Frame
Create a collage of colorful magazine cutouts to decorate your frame.
Materials used:
- Old magazines
- Wooden or plastic frame
- Scissors
- Mod Podge
Steps:
- Cut out interesting images and shapes from magazines.
- Apply a thin layer of Mod Podge to the frame.
- Arrange the cutout pieces on the frame and glue them in place.
- Cover the entire frame with magazine clippings.
- Let the glue dry before inserting your photo.
Wood Slice Picture Frame
For a rustic and earthy look, use wooden slices to decorate your frame.
Materials used:
- Wooden picture frame
- Small wood slices
- Hot glue gun
Steps:
- Cut wood slices into thin pieces if needed.
- Arrange the wood slices around the frame.
- Glue the wood slices into place, overlapping slightly to create a layered look.
- Let the glue dry completely before inserting your picture.
Macrame Picture Frame
Create a boho-inspired frame using macrame knots and strings.
Materials used:
- Wooden frame
- Macrame cord
- Scissors
- Hot glue gun
Steps:
- Cut lengths of macrame cord to fit the size of your frame.
- Begin knotting the cords in your preferred macrame pattern (such as square knots).
- Attach the cords to the frame using hot glue.
- Continue until the entire frame is covered with macrame knots.
- Let the frame dry, then insert your photo.
Cork Picture Frame
An eco-friendly frame can be made using wine corks for a unique, textured design.
Materials used:
- Wine corks
- Wooden picture frame
- Hot glue gun
Steps:
- Cut the corks in half if necessary to create smaller pieces.
- Glue the corks around the edges of the frame.
- Arrange the corks in a pattern or random design.
- Allow the glue to dry before inserting your picture.
Puzzle Piece Picture Frame
Create a playful and personalized frame using leftover puzzle pieces.
Materials used:
- Wooden picture frame
- Old puzzle pieces
- Paint (optional)
- Hot glue gun
Steps:
- Paint the puzzle pieces if you’d like a colorful frame.
- Glue the puzzle pieces around the frame, starting from one corner.
- Continue gluing the pieces in place until the frame is covered.
- Let the glue dry and then insert your photo.
Knotted Rope Picture Frame
This DIY project creates a frame with a nautical or bohemian touch.
Materials used:
- Picture frame (wooden or plastic)
- Rope (cotton or jute)
- Hot glue gun
- Scissors
Steps:
- Cut the rope into sections that will cover the frame.
- Start gluing the rope around the edges of the frame.
- Wrap the rope tightly and continue until the frame is fully covered.
- Trim any excess rope and allow the glue to dry before inserting your photo.
Embroidery Thread Picture Frame
Create a textured, colorful frame using embroidery thread for a crafty touch.
Materials used:
- Wooden picture frame
- Embroidery thread
- Needle and thread
Steps:
- Choose a color of embroidery thread that complements your decor.
- Thread the needle and start stitching along the edges of the frame.
- Use simple stitches, like backstitch or running stitch, to outline the frame.
- Once finished, tie off the thread and insert your photo.
Tissue Paper Frame
This craft uses colorful tissue paper to create a textured, colorful picture frame.
Materials used:
- Plain wooden frame
- Tissue paper (cut into small squares)
- Mod Podge
Steps:
- Cut the tissue paper into squares or other shapes.
- Apply a layer of Mod Podge to the frame.
- Stick the tissue paper pieces onto the frame, layering them as you go.
- Once the entire frame is covered, apply another coat of Mod Podge to seal the tissue paper.
- Let it dry, then insert your photo.
Washi Tape Picture Frame
For a quick and easy decorative frame, use colorful and patterned washi tape.
Materials used:
- Wooden frame
- Washi tape
- Scissors
Steps:
- Clean the frame and cut strips of washi tape.
- Stick the tape in a pattern or design on the frame.
- Trim any excess tape with scissors.
- Let the tape set before inserting your photo.
Shell Picture Frame
Perfect for summer, a shell-decorated frame evokes memories of beach vacations.
Materials used:
- Wooden frame
- Assorted shells
- Hot glue gun
Steps:
- Gather various shells that you’d like to use for your frame.
- Apply glue to the back of each shell and attach them to the frame.
- Arrange the shells creatively around the edges of the frame.
- Let the glue dry before placing your photo inside.
Glass Tile Picture Frame
Decorating a frame with glass tiles will give it a sleek, modern appearance.
Materials used:
- Wooden frame
- Glass tiles or mirror pieces
- Hot glue gun
Steps:
- Apply glue to the back of each glass tile.
- Press each tile carefully onto the frame.
- Continue gluing the tiles around the frame until fully covered.
- Let the glue dry and then insert your photo.
Leaf and Twig Picture Frame
Capture the essence of nature by decorating your frame with twigs and leaves.
Materials used:
- Wooden frame
- Small twigs
- Fake leaves (optional)
- Hot glue gun
Steps:
- Collect small twigs or branches that will fit the size of your frame.
- Glue the twigs along the frame’s edges.
- Add artificial or real leaves to fill in gaps.
- Allow everything to dry completely before inserting your photo.
Denim Picture Frame
An old pair of jeans can be upcycled into a stylish picture frame.
Materials used:
- Old jeans
- Wooden or cardboard frame
- Scissors
- Hot glue gun
Steps:
- Cut the denim fabric into strips or shapes.
- Glue the fabric onto the frame to cover the surface.
- Let the glue dry before inserting your photo.
Hemp Cord Frame
For a rustic, textured design, use hemp cord to decorate a wooden frame.
Materials used:
- Wooden frame
- Hemp cord
- Hot glue gun
Steps:
- Cut the hemp cord into sections.
- Glue the hemp cord along the edges of the frame.
- Continue wrapping or gluing cord around the frame until fully covered.
- Allow the glue to dry before inserting your photo.
Macramé Tassel Frame
Incorporate macramé tassels into your frame for a fun, bohemian look.
Materials used:
- Wooden frame
- Macramé cord
- Scissors
- Hot glue gun
Steps:
- Cut sections of macramé cord and tie them into knots to form tassels.
- Attach the tassels to the bottom or top of the frame using hot glue.
- Let the glue set before inserting your photo.
Pom-Pom Picture Frame
Make a playful and colorful frame by decorating it with small pom-poms.
Materials used:
- Plain frame
- Pom-poms (various sizes)
- Hot glue gun
Steps:
- Glue pom-poms along the edges of the frame.
- Arrange the pom-poms to create a uniform or random pattern.
- Allow the glue to dry, and then insert your photo.
Wood Burned Picture Frame
Create a personalized frame with wood burning for a rustic and artistic touch.
Materials used:
- Wooden frame
- Wood-burning tool
- Stencils (optional)
Steps:
- Use a wood-burning tool to burn designs into the surface of the frame.
- You can freehand your design or use stencils for intricate patterns.
- Once you’re done, allow the wood to cool, then insert your picture.
Creative Variations in DIY Crafts To Do At Home Picture Frame
Picture frames are not just functional items for displaying photos; they can be a reflection of personal style, creativity, and thoughtfulness. Customizing or crafting unique frames allows individuals to express their personality while also creating a meaningful, one-of-a-kind accent for their homes. Here are a few creative ways to personalize or craft picture frames that stand out:
1. Personalized Frames with Names or Quotes
- Adding names, dates, or meaningful quotes to picture frames transforms them into more than just decorative items. Whether it’s a family photo, a wedding picture, or a quote that resonates, personalizing a frame with text can make it a heartfelt gift or a significant piece in your home.
- Techniques like engraving, stenciling, or painting can be used to add the text directly onto the frame’s surface, creating a lasting and memorable effect.
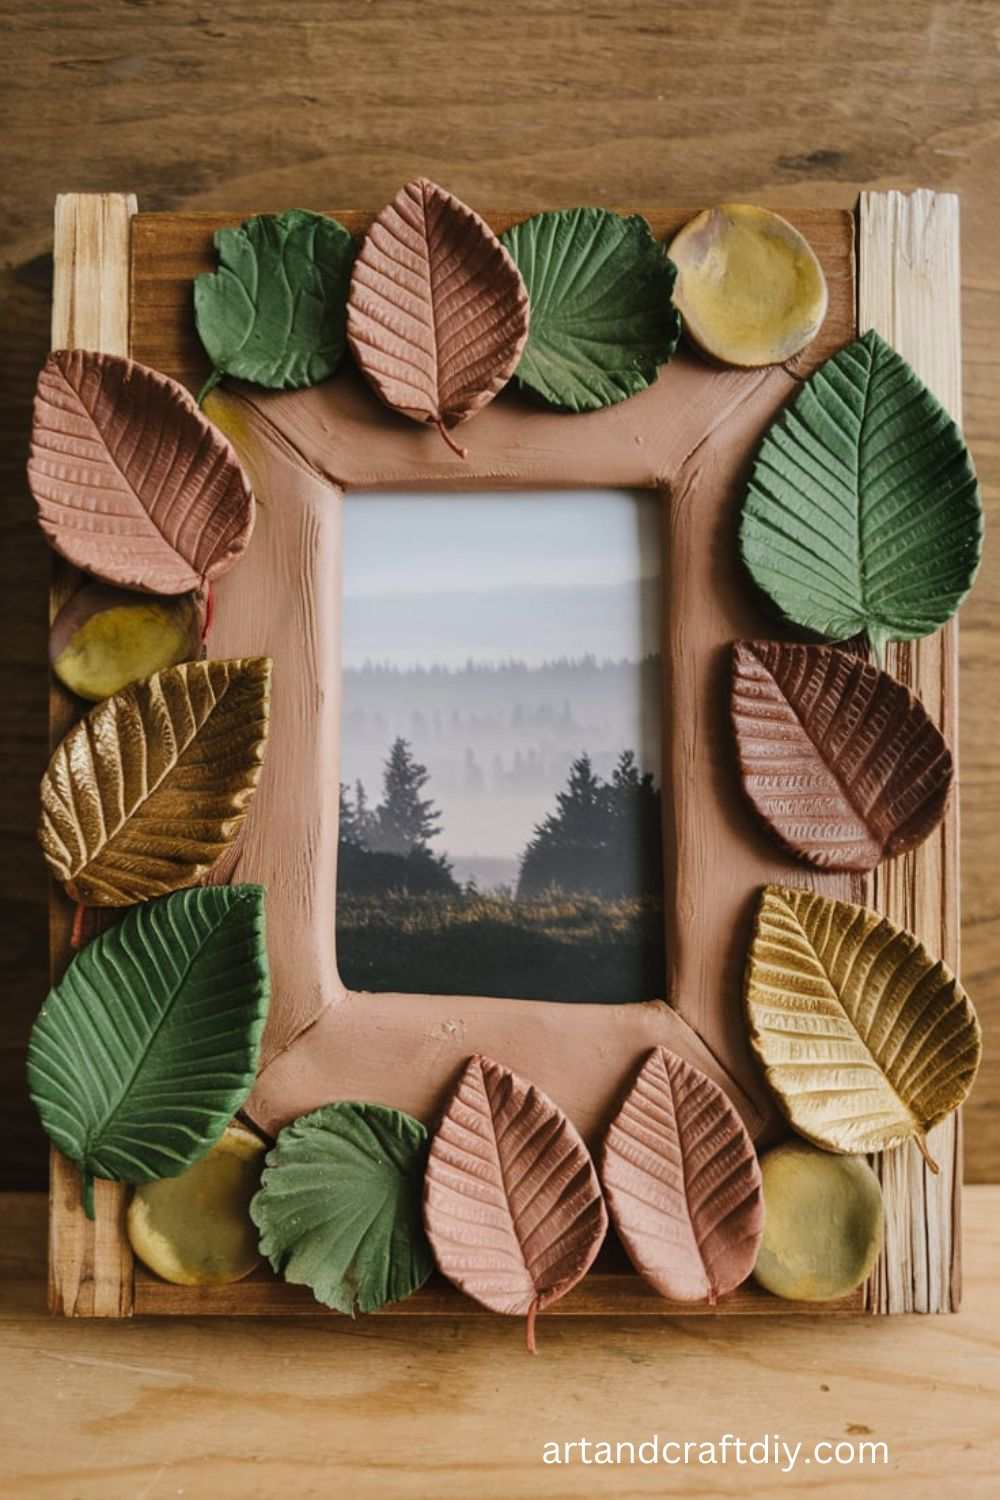
2. Rustic Wooden Frames Using Twigs or Reclaimed Wood
- Embrace a natural aesthetic by crafting rustic frames from materials like twigs, branches, or reclaimed wood. This style brings an earthy, organic vibe to any photo, making it perfect for outdoor enthusiasts or those who love vintage and rustic home décor.
- You can gather twigs from your backyard or use reclaimed wood from old furniture or pallets, which adds a touch of sustainability to your creative project.
3. Picture Frames for Holidays or Themed Décor
- Celebrate special occasions or seasons by creating themed picture frames. For holidays like Christmas, Halloween, or Easter, you can design frames that complement the festivities. Think about incorporating festive colors, patterns, or elements like miniature ornaments, dried flowers, or seasonal embellishments.
- A picture frame tailored to a specific holiday or theme adds charm and personality to your home décor, making photos feel even more special during those times.
4. Using Upcycled Materials (e.g., Old Magazines, Fabric Scraps)
- Upcycling is a fantastic way to turn discarded materials into something beautiful. Old magazines, fabric scraps, buttons, or even old jewelry can be repurposed into vibrant, textured frames. This approach not only gives new life to waste materials but also results in uniquely textured, colorful frames that carry a story.
- For example, magazine pages can be cut and glued onto a basic frame to create a collage effect, while fabric scraps can be sewn or glued onto frames for a soft, cozy look.
Tips and Tricks for DIY Crafts To Do At Home Picture Frame
Whether you’re a DIY enthusiast or a seasoned crafter, custom framing can take your projects to the next level. From creating precise cuts to choosing the best adhesives and customizing your frame for different occasions, a few key tips can make all the difference. Here are some tricks to help you craft perfect frames, no matter the project.
1. How to Make Precise Cuts
- Use a Sharp Blade: Whether you’re working with cardboard, matboard, or any other material, a sharp blade ensures clean cuts. Dull blades can tear or fray the edges.
- Measure Twice, Cut Once: Accurate measurements are crucial. Use a ruler or measuring tape and double-check your dimensions before cutting.
- Cut with a Stable Surface: Always use a self-healing mat or a cutting board as your base. This will protect your blades and provide a steady surface for clean cuts.
- Use a Rotary Cutter: For smoother, more precise cuts, consider using a rotary cutter instead of scissors. This is particularly useful for straight lines.
- Work Slowly and Steadily: Rushing through cuts can lead to mistakes. Take your time to make sure the cuts are precise and clean.
2. Best Adhesive Choices for Different Materials
- Wood Frames: Use wood glue or a hot glue gun. These adhesives bond well to wood and provide a durable hold.
- Paper and Cardboard: Acid-free craft glue or double-sided tape works best for paper and matboard to avoid damage and yellowing over time.
- Glass: If your project involves attaching glass to a frame, use silicone adhesive or mirror adhesive, as these provide a strong hold without damaging the glass surface.
- Fabric: Fabric adhesive or fabric glue is ideal for attaching fabric to frames or for lining the back of the frame with fabric.
- Metal Frames: Epoxy resin or strong industrial adhesive is recommended for metal frames, as these create a solid bond for materials like metal and glass.
3. Ways to Customize the Frame for Different Occasions
- Birthdays: For a fun birthday frame, use bright, bold colors. You can personalize it with birthday-themed stickers, embellishments, or even a party hat design. Add a colorful ribbon or bow for a festive touch.
- Weddings: Wedding frames can be elegant and sophisticated. Opt for neutral tones, metallic accents, or lace details. For a personalized touch, consider engraving the couple’s names or wedding date on the frame.
- Holidays: Customize frames for holidays by choosing decorations that match the season. For Christmas, you could incorporate red and green ribbons, or for Halloween, use black and orange accents with spooky embellishments. Adding seasonal charms or small ornaments can make the frame even more festive.
- Baby Showers: For baby-themed frames, go for soft pastels, baby animal designs, or even a cute footprint pattern. You can also add a small charm or a button to symbolize the little one.
- Graduations: To celebrate academic achievements, frame diplomas or graduation photos with academic-themed decorations. Consider adding elements like a graduation cap, scrolls, or a tassel.
FAQ
How do I cut the materials for my picture frame?
You can use a craft knife or scissors to cut the base material. Ensure you measure the dimensions accurately with a ruler, especially for the frame opening, where your picture will fit.
What type of glue should I use for my picture frame?
Craft glue or hot glue is ideal for attaching the pieces of the frame together. Hot glue dries quickly and provides a strong bond, while craft glue gives you a little more time to adjust before it sets.
Can I decorate my DIY picture frame?
Absolutely! You can paint your frame, decorate it with beads, buttons, ribbons, or even fabric. You can also add texture with materials like lace or twine to give it a personal touch.
How do I make a stand for my picture frame?
If you want to make your frame stand, you can cut a triangle shape out of cardboard and glue it to the back of the frame. Ensure it’s sturdy enough to hold the weight of your frame

Hi, I’m Victoria, an art and craft teacher at Newark City Schools, where I have the joy of working with middle school students to help them explore their creativity and develop their artistic talents. I believe that art is a powerful way for students to express themselves, and I strive to make every lesson a fun, engaging, and inspiring experience.
I created this website to share the art and craft projects, techniques, and resources that I use in my classroom, hoping to inspire both educators and young artists alike. Whether you’re a teacher looking for new ideas or a student eager to try something new, I’m excited to provide creative tools and projects that anyone can enjoy.
When I’m not in the classroom, I love experimenting with different art forms and learning new crafting techniques. My goal is to help others discover the joy of making things with their hands, and I hope my website serves as a space for everyone to explore their creative potential.