
Last year, I remember standing in the middle of Dollar Tree with a basket full of random little things—ribbons, ornaments, even a pack of snowflake napkins I definitely didn’t need—and thinking, okay Victoria, what exactly are you making with all this? But you know what? Those tiny $1.25 treasures ended up turning into some of my favorite Christmas crafts. There’s just something about creating décor with your own two hands that feels so much more special (and honestly, way cheaper than buying everything pre-made). If you’ve ever felt that mix of excitement and overwhelm walking through those aisles, I get it. The good news is, I’ve already done the experimenting for you. In this article, I’m sharing my favorite DIY Dollar Tree Christmas crafts—simple, affordable, and actually pretty cute. So grab your hot glue gun and let’s turn those budget-friendly finds into holiday magic together.
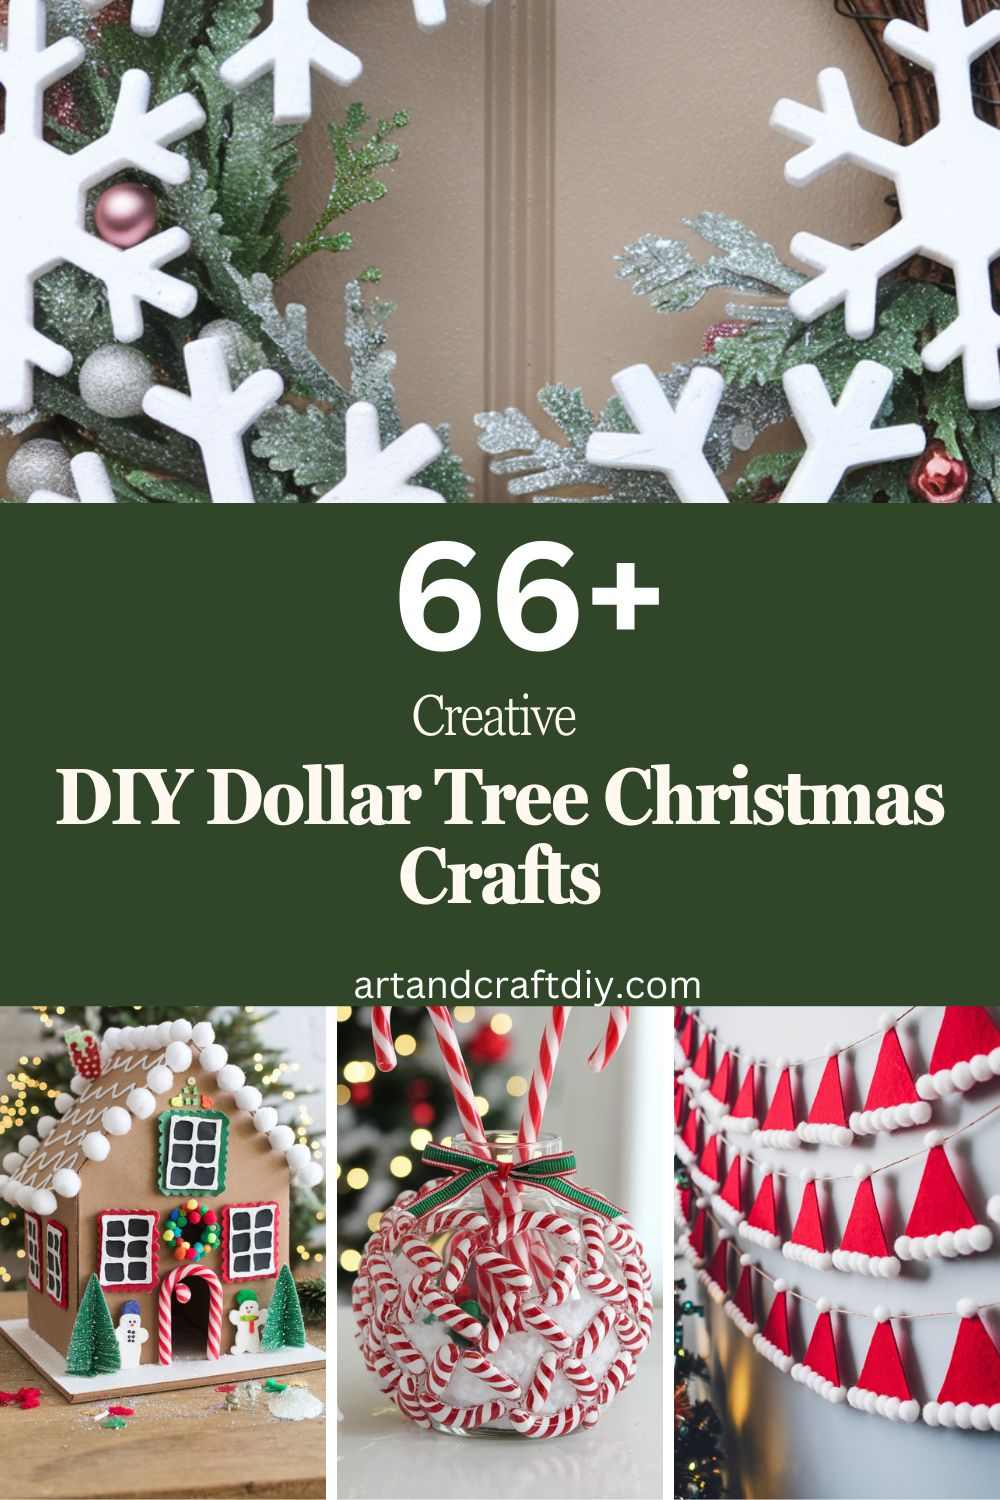
DIY Dollar Tree Christmas Crafts
DIY Dollar Tree Christmas crafts are a fun and budget-friendly way to create festive holiday decorations and gifts.
DIY Snowman Mason Jar
I’ll be honest, the first time I tried making a snowman mason jar, I wasn’t even sure it would look like a snowman. But with a little white acrylic paint, some buttons, and a bit of ribbon, it came together so sweetly that I couldn’t stop smiling. What I love most is how affordable it is—you can grab all the supplies at Dollar Tree without breaking the bank. I like painting the jars in a slightly messy way because it makes them look more “frosty” and less perfect, if you know what I mean. Once the paint dries, I glue on little felt pieces for the nose and eyes. It’s kind of like giving the jar its own personality, and no two jars ever look the same.
I usually make a bunch of these at once because they’re adorable for gifting. Last year, I filled mine with peppermint candies and handed them out to neighbors—it was a small gesture, but people loved it. If you’re like me and sometimes overthink décor, this craft is a relief. It’s quick, cheerful, and doesn’t need to be flawless to be charming. In my opinion, it’s the imperfections that make them so lovable. And honestly, watching my niece glue the scarf on sideways was a memory I’ll never forget—it made her jar look like a snowman who’d had one too many mugs of cocoa.
Christmas Tree Wall Hanging
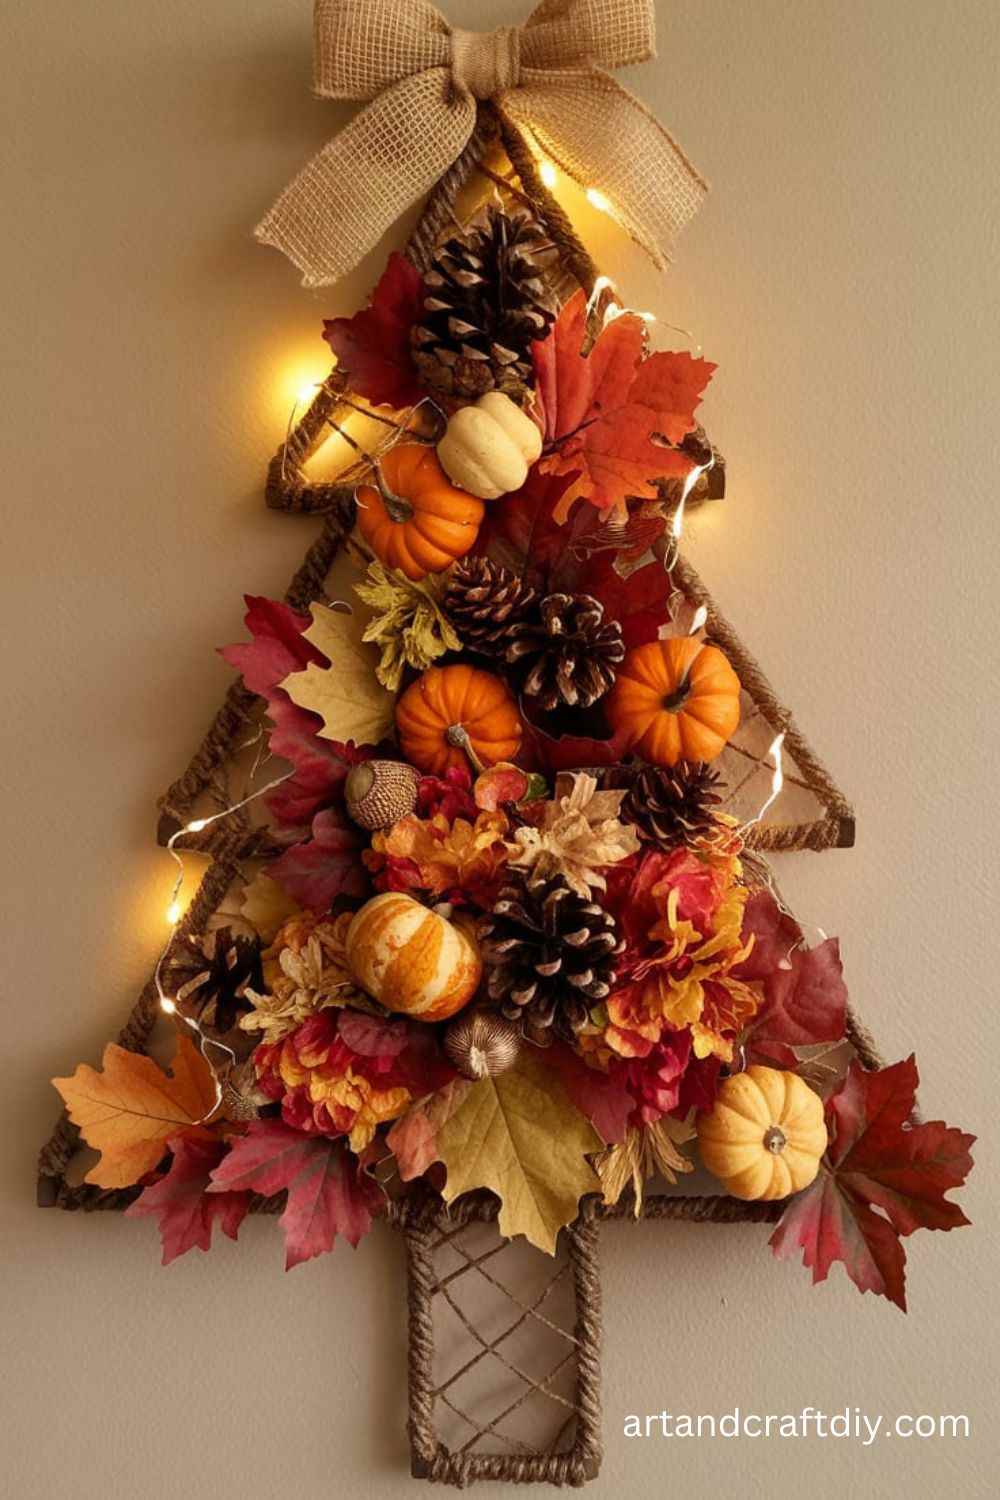
Now this is one of those projects that looks way fancier than it actually is. I made a Christmas tree wall hanging out of Dollar Tree supplies when I didn’t have space for a full-size tree in my apartment. At first, I worried it might look cheap, but to be fair, once I layered the green garland, added fairy lights, and clipped on some mini ornaments, it looked surprisingly magical. I used a plain wooden frame as a base and honestly, that made everything easier. The fun part is arranging the garland in a zig-zag pattern to mimic the shape of a tree.
I’ll admit, I went a little overboard with glitter stars the first time around (my wall sparkled for weeks). But that’s the beauty of it—you can go minimal or bold depending on your mood. I like to mix in a few personal touches, like little photos or handmade tags, to make it feel like “my tree.” My best friend visited one December and couldn’t believe it was all from Dollar Tree. She actually asked if I’d bought it premade somewhere fancy, which, honestly, was the best compliment. If you’ve got a small space or just want something extra festive, this is such a fun, budget-friendly idea.
DIY Reindeer Ornament
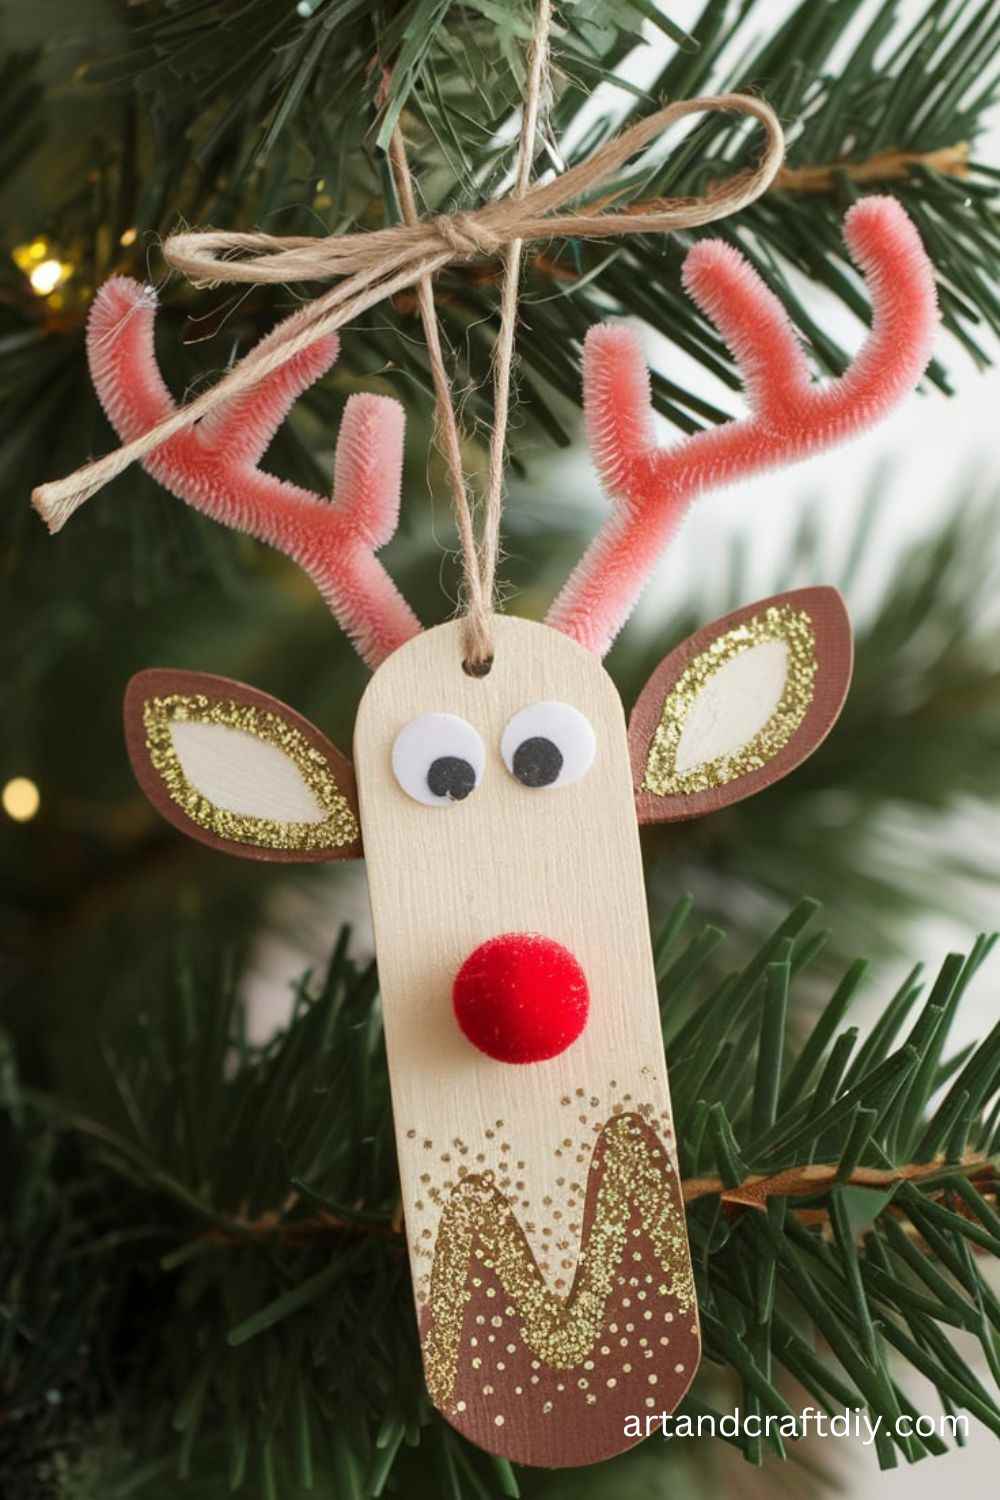
This one might be my favorite because it’s equal parts silly and adorable. I made my first DIY reindeer ornament with brown craft foam, googly eyes, and a red pom-pom nose (yep, Rudolph vibes all the way). It’s such a simple project, but for some reason, every time I see that little reindeer hanging on my tree, I can’t help but laugh. I usually trace a basic reindeer head shape, but if you’re like me and can’t draw evenly, don’t stress. I’ve found that the wonky antlers actually give them more character—kind of like they’re each having a “bad hair day.”
Last Christmas, my younger cousin helped me make a batch, and her reindeer ended up with neon green bows and glitter all over the place. To be fair, they didn’t exactly match the rest of my tree décor, but they brought so much personality that I decided to keep them front and center. That’s what I love about crafts like this—they’re not about perfection, they’re about the joy of making something with your own hands. In my opinion, if your reindeer makes you smile when you hang it up, then you’ve nailed it. And honestly, who can resist a little pom-pom nose peeking out from the branches?
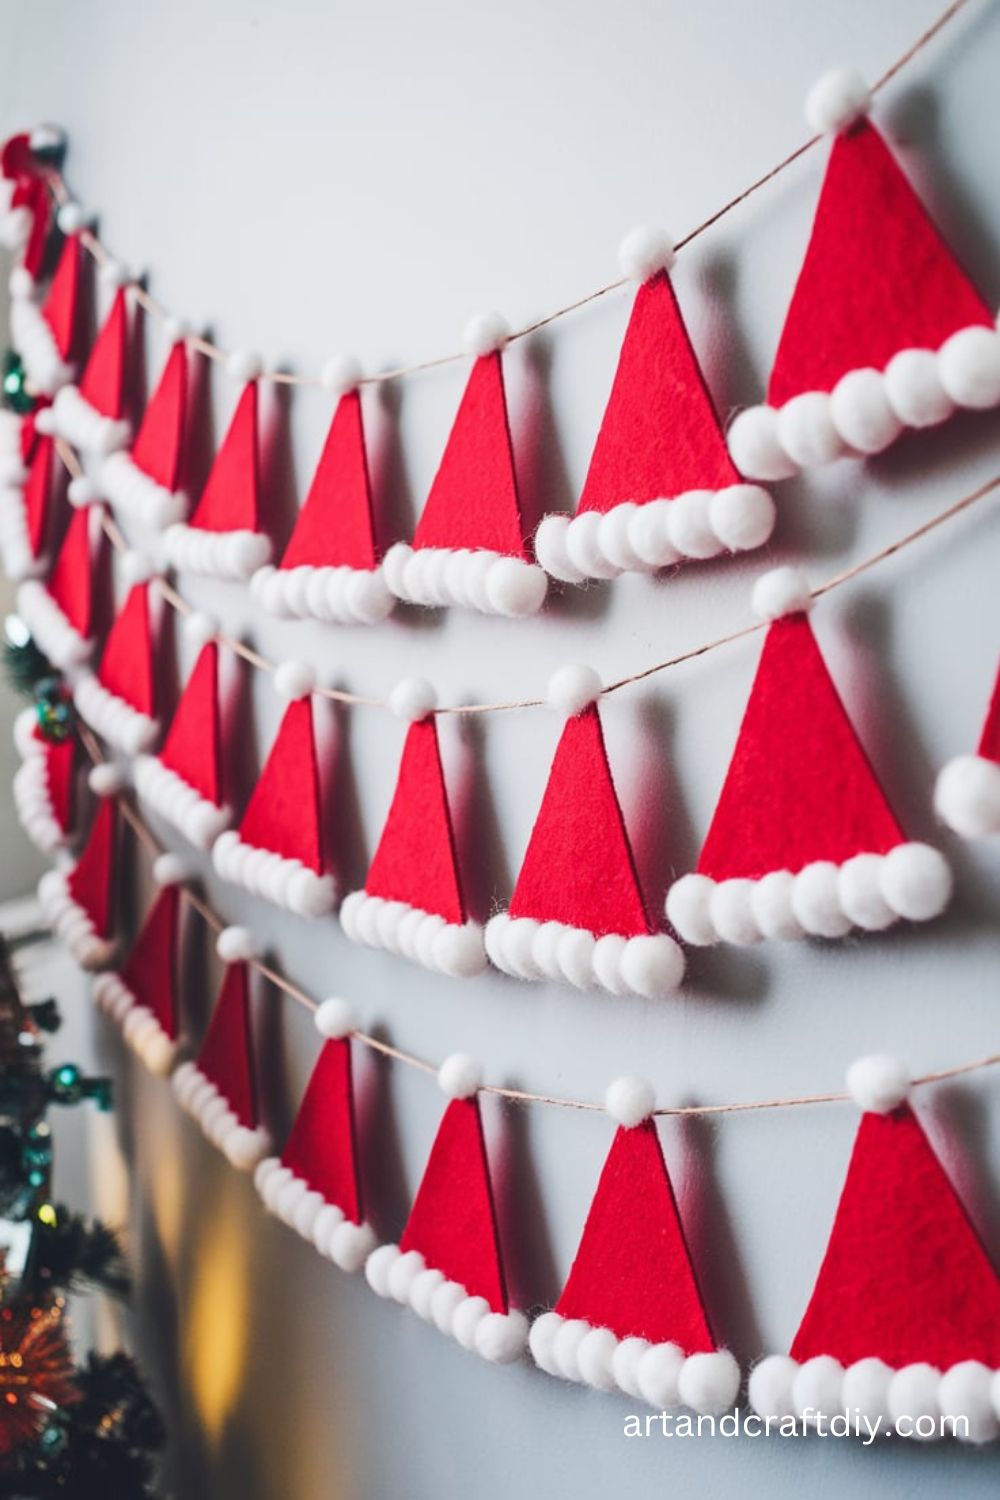
Santa Hat Garland
This festive garland will brighten up any mantel or wall. Made from inexpensive materials, it’s an easy project that adds a lot of holiday cheer.
Materials Used:
- Red felt
- Cotton balls
- Scissors
- Twine
- Hot glue gun
Steps:
- Cut out several triangles from the red felt to form the base of the Santa hats.
- Glue a cotton ball to the tip of each hat to mimic the fluffy pom-pom.
- Attach a small piece of cotton along the bottom edge of each hat for the brim.
- Create holes in the corners of each hat and thread a piece of twine through to connect them.
- Hang your garland across your mantel or wall.
DIY Candy Cane Vase
This DIY craft project turns simple candy canes into a beautiful holiday vase. It’s a perfect centerpiece for your dining table or a great gift idea.
Materials Used:
- Candy canes
- Hot glue gun
- Clear glass vase
- Red ribbon
Steps:
- Arrange candy canes around the outside of the glass vase.
- Using hot glue, attach each candy cane to the vase, making sure the curved ends are facing outward.
- Once the vase is completely covered, tie a red ribbon around the top for an extra festive touch.
- Fill the vase with faux flowers, greenery, or even real candy canes for a fun twist.
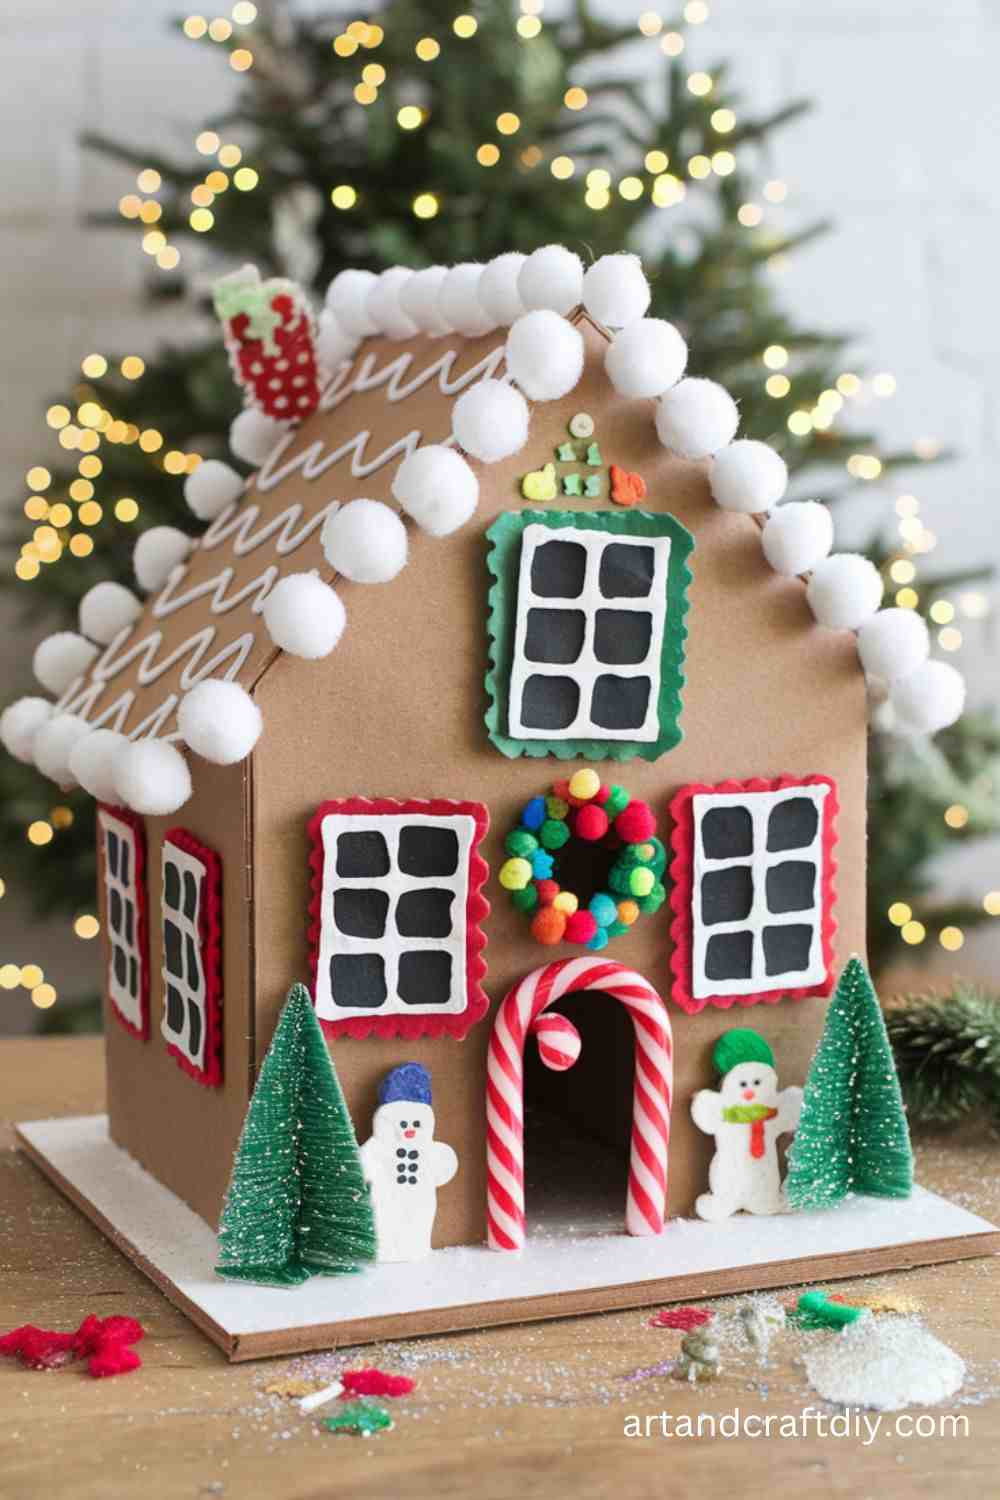
DIY Gingerbread House
This is a fun way to create a gingerbread house without all the baking! Made from foam sheets and other materials, it’s a cute decoration that won’t go stale.
Materials Used:
- Brown foam sheets
- White puffy paint
- Mini candy ornaments
- Scissors
- Hot glue gun
Steps:
- Cut out the walls, roof, and base of the gingerbread house from brown foam sheets.
- Use hot glue to attach the pieces together, forming the shape of a house.
- Decorate the edges of the roof and walls with white puffy paint to mimic icing.
- Attach mini candy ornaments around the house for a sweet, festive look.
- Allow the glue and paint to dry completely before displaying your gingerbread house.
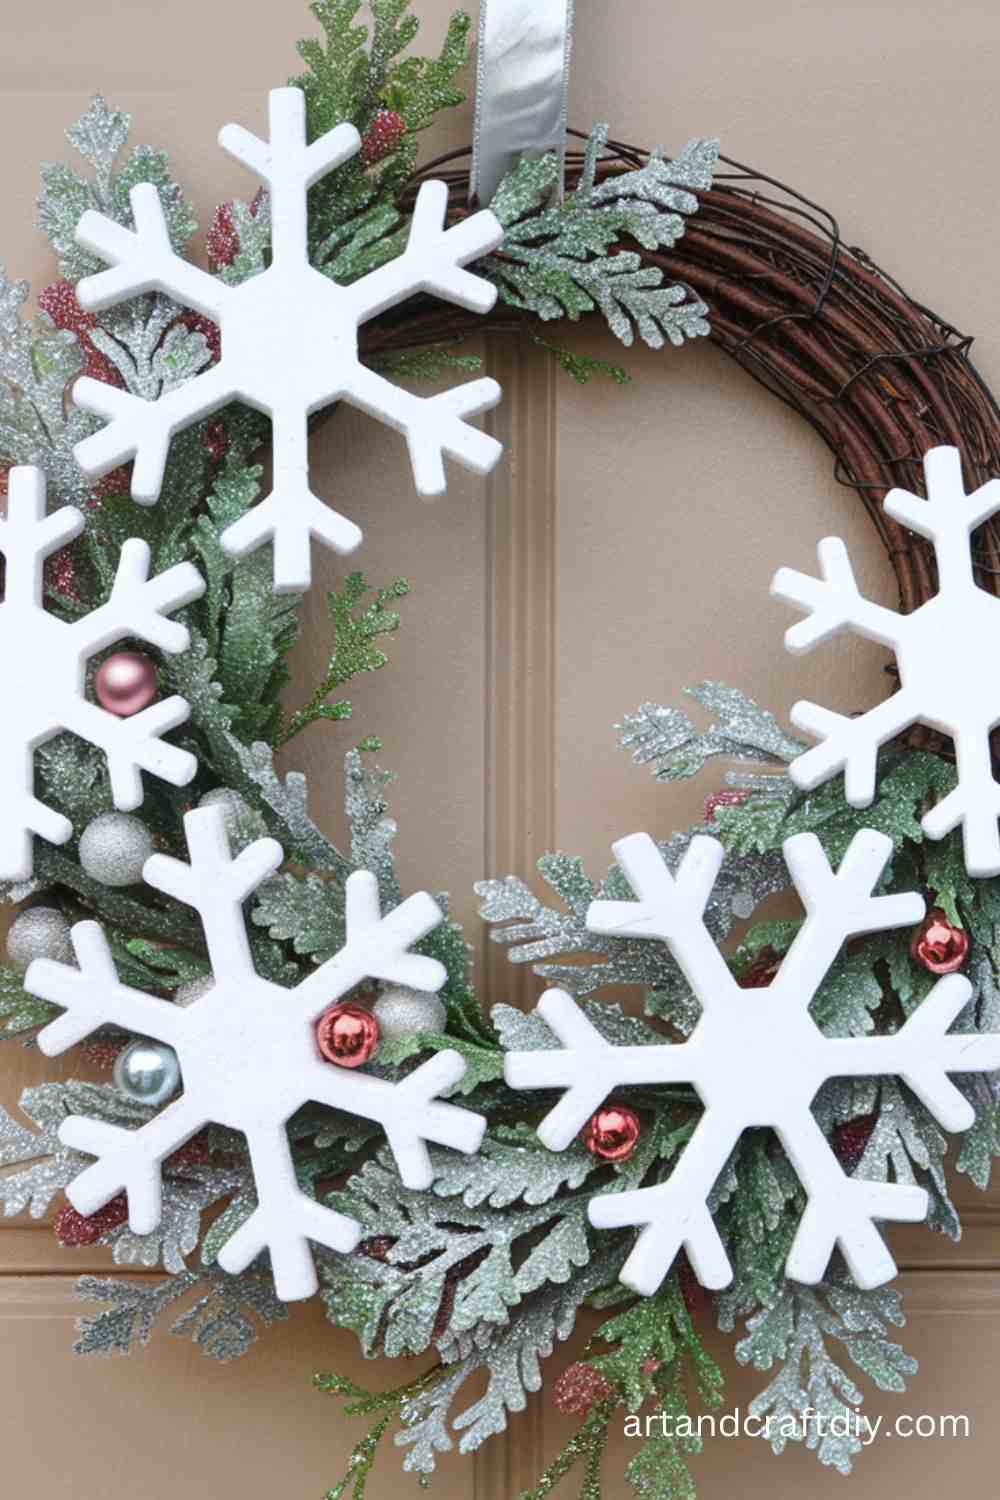
DIY Snowflake Wreath
This easy-to-make snowflake wreath will look beautiful on your door or wall. It’s a simple and elegant craft idea that brings a frosty winter feel to any space.
Materials Used:
- Foam snowflakes
- Hot glue gun
- Ribbon
- Scissors
Steps:
- Arrange the foam snowflakes in a circular pattern on a flat surface to form a wreath.
- Use hot glue to attach the snowflakes together at the edges.
- Tie a ribbon into a bow and glue it to the top of the wreath.
- Attach a loop of ribbon to the back for hanging.
- Display your snowflake wreath on your door or wall.
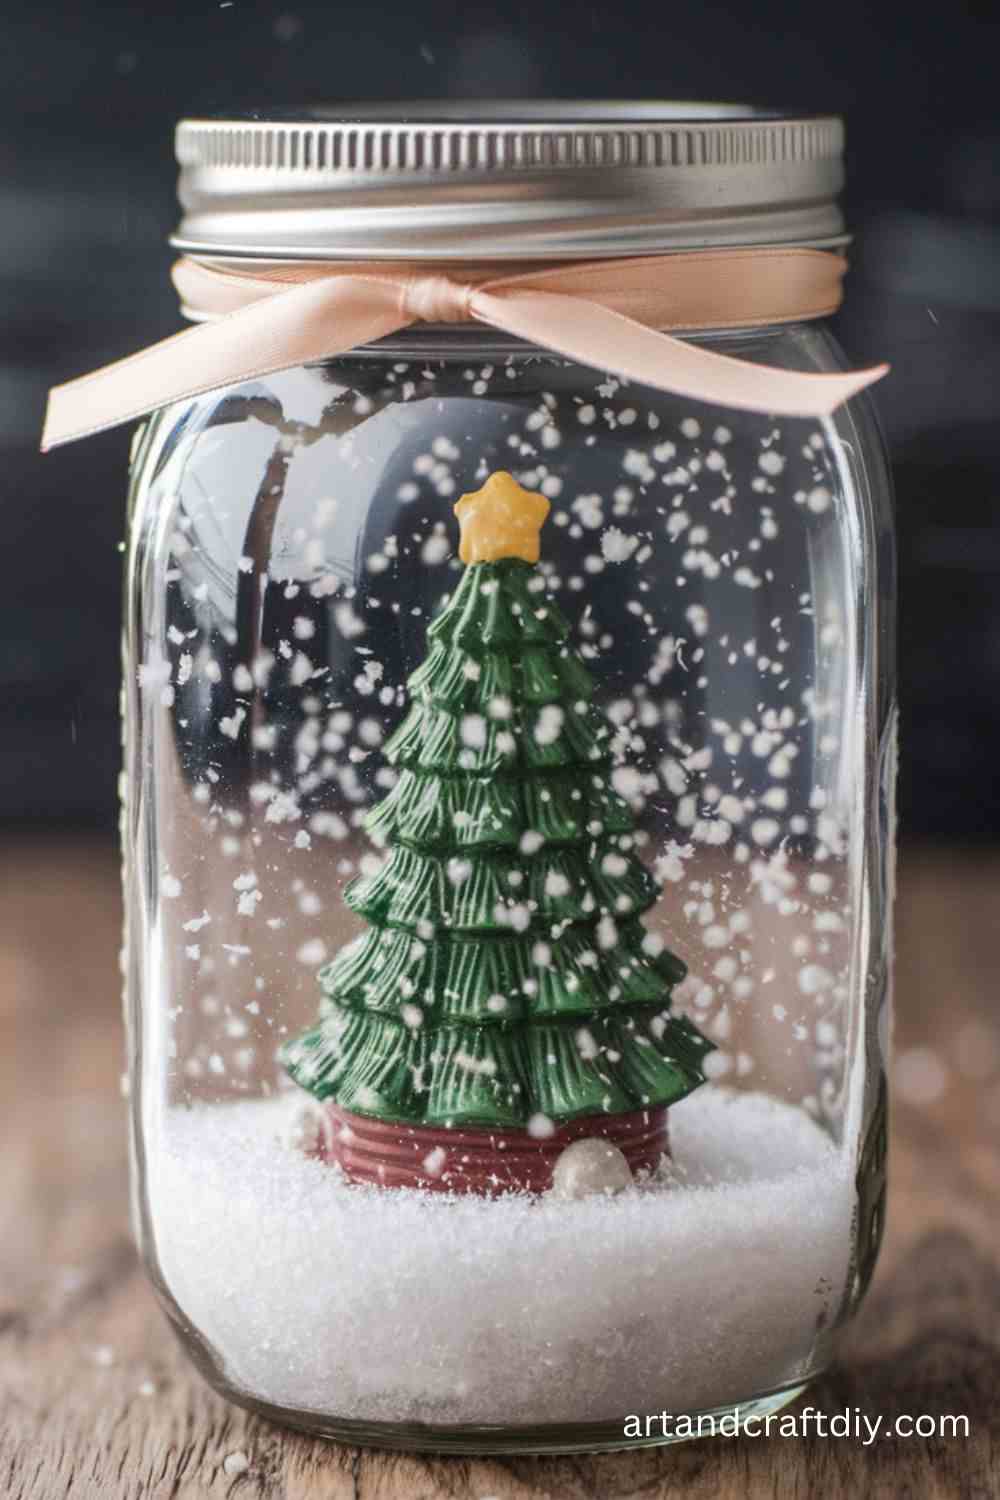
DIY Snow Globe Jar
This simple DIY snow globe is a magical craft that brings the winter wonderland indoors. You can create a personalized snow globe with your favorite little figurines.
Materials Used:
- Empty jar
- Fake snow
- Small figurines
- Hot glue gun
- Clear glue
- Water
Steps:
- Glue your figurine to the inside of the jar lid.
- Fill the jar with water, leaving a little space at the top.
- Add fake snow to the jar, making sure to avoid overfilling.
- Carefully glue the lid onto the jar.
- Shake the jar gently to see the snow fall around the figurine inside.
DIY Christmas Card Holder
Keep all your Christmas cards organized with this creative card holder. It’s a fun way to display all the festive cards you receive during the holidays.
Materials Used:
- Clothespins
- Ribbon
- Hot glue gun
- Scissors
Steps:
- Cut a long piece of ribbon and glue it horizontally to the wall.
- Attach several clothespins to the ribbon with hot glue.
- Allow the glue to dry, then clip your Christmas cards onto the clothespins.
- Hang your card holder in a prominent spot to display all your holiday greetings.
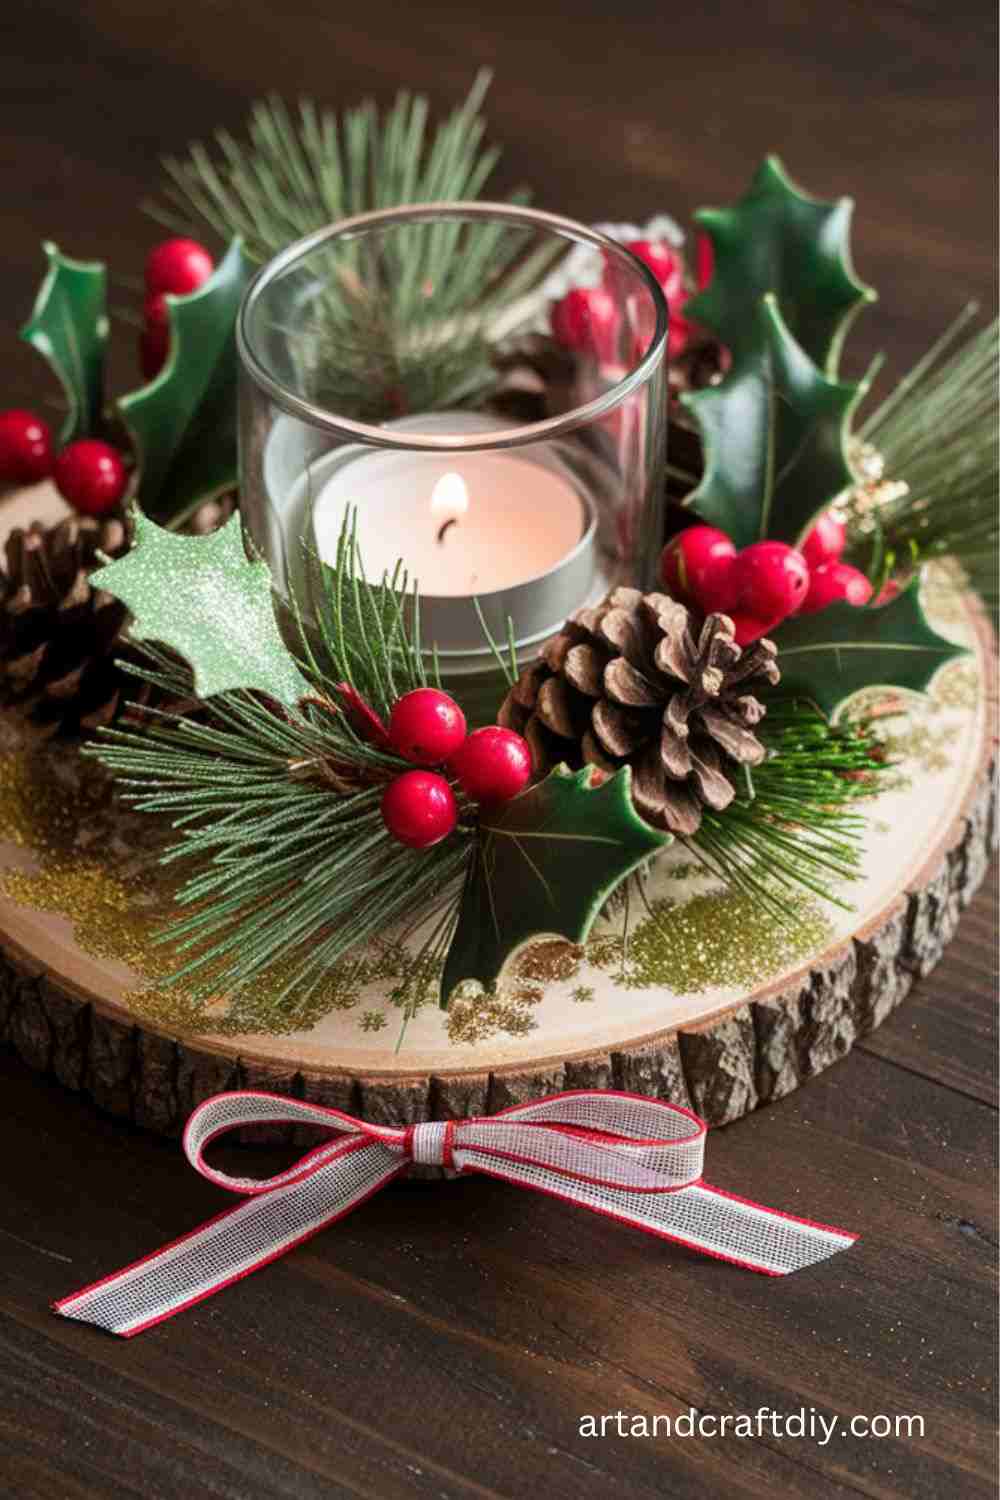
DIY Holiday Candle Holder
This easy project allows you to make a festive candle holder that will add warmth to your holiday décor.
Materials Used:
- Glass candle holder
- Pinecones
- Fake snow
- Hot glue gun
- Mini ornaments
Steps:
- Apply hot glue to the outside of a glass candle holder.
- Attach pinecones around the glass, pressing them into the glue.
- Fill the inside of the holder with fake snow.
- Decorate the base of the candle holder with mini ornaments.
- Place a candle inside and light it to enjoy the warm glow.
Christmas Button Tree
This charming button tree is made with colorful buttons and can be customized to fit your Christmas color theme.
Materials Used:
- Buttons in various sizes and colors
- Foam sheet
- Hot glue gun
- Scissors
Steps:
- Cut the foam sheet into a triangle shape to form the tree.
- Arrange the buttons on the foam, starting with large buttons at the bottom and working your way up.
- Use hot glue to secure the buttons in place.
- Add a small button or pom-pom at the top of the tree for a tree topper.
- Display your button tree on a table or wall.
DIY Christmas Stocking
This easy-to-make Christmas stocking will add a personal touch to your home. You can make one for each family member or for your pets.
Materials Used:
- Felt (red and white)
- Scissors
- Hot glue gun
- Ribbon
Steps:
- Cut out two stocking shapes from red felt.
- Cut a white piece of felt to create a cuff for the top of the stocking.
- Glue the white cuff onto the top edge of one of the stocking pieces.
- Place the two stocking pieces together and glue the edges, leaving the top open.
- Add a piece of ribbon to the top for hanging.
- Personalize your stocking by adding decorations such as pom-poms or fabric paint.
DIY Christmas Countdown Calendar
Make the days leading up to Christmas even more exciting with this simple countdown calendar. This project will give kids a fun way to track the days until Christmas.
Materials Used:
- Small boxes
- Christmas wrapping paper
- Stickers
- Hot glue gun
Steps:
- Wrap each box in Christmas wrapping paper.
- Number the boxes from 1 to 24.
- Decorate the boxes with Christmas stickers.
- Stack the boxes in a pyramid shape or hang them on a wall in a festive pattern.
- Fill each box with small surprises like candy, mini toys, or notes for each day leading up to Christmas.
DIY Pinecone Place Settings
These natural-looking pinecone place settings are perfect for your Christmas dinner table. They’ll add a rustic and festive touch to your table settings.
Materials Used:
- Pinecones
- Ribbon
- Hot glue gun
- Small ornaments
Steps:
- Tie a piece of ribbon around the base of a pinecone.
- Add a small ornament or tag to the ribbon for an extra touch.
- Place each pinecone at each dinner guest’s seat for a festive place setting.
DIY Santa Boot Ornament
This cute Santa boot ornament can be hung on the tree or used as a gift decoration. It’s made from inexpensive materials, making it a perfect craft for the holidays.
Materials Used:
- Red felt
- White felt
- Scissors
- Hot glue gun
- Ribbon
Steps:
- Cut out a boot shape from the red felt.
- Cut a white piece of felt to create the fluffy cuff at the top of the boot.
- Glue the white felt onto the red boot shape.
- Attach a small piece of ribbon to the top for hanging.
- Personalize the boot with small decorations or glitter if desired.
DIY Mini Christmas Tree
Create a tiny and adorable Christmas tree that’s perfect for desks, shelves, or as a table centerpiece.
Materials Used:
- Cone foam or cardboard
- Green felt
- Hot glue gun
- Mini ornaments
Steps:
- Cover a foam cone or cardboard cone with green felt using hot glue.
- Decorate the tree with mini ornaments, beads, or sequins.
- Top the tree with a small star or pom-pom for the finishing touch.
Christmas-Themed Coasters
Craft your own set of holiday coasters using inexpensive materials. They make great gifts or decorations for your coffee table.
Materials Used:
- Cork coasters
- Christmas-themed scrapbook paper
- Mod Podge
- Scissors
Steps:
- Cut the scrapbook paper into circles to fit your coasters.
- Apply a thin layer of Mod Podge to the top of each coaster.
- Attach the scrapbook paper to the coaster and smooth it out.
- Allow it to dry, then apply another coat of Mod Podge to seal the design.
DIY Holiday Photo Frame
Make a festive photo frame to display your favorite holiday memories. This is a simple and personal craft idea that adds a touch of love to your Christmas décor.
Materials Used:
- Wooden frame
- Christmas-themed paint
- Ribbon
- Mini ornaments
- Hot glue gun
Steps:
- Paint the wooden frame with Christmas-themed colors or designs.
- Attach mini ornaments or decorations around the frame using hot glue.
- Add a ribbon to the top for hanging.
- Place your favorite holiday photo inside the frame and display it!
DIY Christmas Tree Ornaments
These custom ornaments can be personalized for each person or themed for your tree. Make them in various shapes and colors for a fun holiday project.
Materials Used:
- Clear ornaments
- Paint
- Glitter
- Ribbon
Steps:
- Fill clear ornaments with your choice of glitter or paint.
- Shake the ornament to distribute the contents.
- Add a ribbon for hanging and personalize with names or messages if desired.
DIY Christmas Angel
This angel craft is an elegant and timeless decoration. With just a few materials, you can make your own little angel for your holiday décor.
Materials Used:
- Foam cones
- White felt
- Ribbon
- Hot glue gun
Steps:
- Cut the foam cone to create the angel’s body and head.
- Wrap the body with white felt and glue in place.
- Create wings from white felt and attach them to the back.
- Add a ribbon for a halo at the top.
DIY Holiday Soap Dispenser
Transform a simple soap dispenser into a Christmas-themed decoration that adds some flair to your kitchen or bathroom.
Materials Used:
- Empty soap dispenser
- Holiday stickers
- Paint or ribbon
Steps:
- Clean and dry an empty soap dispenser.
- Decorate the outside of the dispenser with Christmas-themed stickers or paint.
- Add a ribbon around the neck for a festive touch.
DIY Christmas Paper Lanterns
Create these easy paper lanterns to add a cozy glow to your space during the holiday season.
Materials Used:
- Paper rolls
- Scissors
- Hot glue gun
- Ribbon
Steps:
- Cut slits around the paper rolls to create a lantern shape.
- Decorate the outside with Christmas-themed designs.
- Add a piece of ribbon to hang the lanterns.
DIY Snowman Cup
This cute snowman cup can be used for drinks or as a decoration. It’s a perfect project for those who love winter and snowmen.
Materials Used:
- Plastic cup
- White paint
- Foam
- Googly eyes
- Ribbon
Steps:
- Paint the outside of the cup white to resemble a snowman’s body.
- Glue on googly eyes and a small orange foam nose.
- Attach a ribbon around the cup to create a scarf.
DIY Christmas Door Sign
This craft is perfect for adding a personal touch to your front door or any room during the holidays.
Materials Used:
- Wooden plaque
- Paint
- Stencils
- Ribbon
Steps:
- Paint the wooden plaque with your desired holiday colors.
- Use stencils to write a holiday message or design on the plaque.
- Attach a ribbon for hanging.
DIY Festive Placemats
Decorate your holiday table with these simple yet charming placemats made from felt.
Materials Used:
- Red and green felt
- Scissors
- Hot glue gun
Steps:
- Cut the felt into large rectangular shapes to create the placemats.
- Add holiday shapes like Christmas trees or presents using different colored felt.
- Glue the decorations onto the placemats.
DIY Christmas Pillow
Make a cozy Christmas pillow to add extra comfort and holiday cheer to your living room or bedroom.
Materials Used:
- Red and green fabric
- Pillow stuffing
- Hot glue gun
Steps:
- Cut the fabric into two square shapes.
- Glue the edges together, leaving one side open.
- Stuff the pillow with stuffing.
- Glue the final side shut.
DIY Candy Cane Wreath
This fun and festive wreath is easy to create and makes a perfect addition to your door.
Materials Used:
- Candy canes
- Ribbon
- Hot glue gun
Steps:
- Glue several candy canes together to form a circle.
- Tie a ribbon around the wreath for hanging.
- Display the wreath on your front door.
DIY Winter Wonderland Jar
This project creates a mini winter scene inside a jar, which can be a great gift or décor item.
Materials Used:
- Small figurines
- Faux snow
- Jar
- Hot glue gun
Steps:
- Glue the figurines to the inside of the jar lid.
- Fill the jar with faux snow.
- Seal the jar and shake it gently to create a snow globe effect.
DIY Christmas Tree Centerpiece
Create a festive and beautiful centerpiece with simple materials that will brighten up your holiday table.
Materials Used:
- Foam cone
- Green felt
- Mini ornaments
- Hot glue gun
Steps:
- Wrap the foam cone with green felt to form the base of your tree.
- Attach mini ornaments and decorations.
- Place the tree as a centerpiece on your table.
DIY Holiday Paper Chains
Make these easy and colorful paper chains to decorate your space with a festive touch.
Materials Used:
- Christmas-colored paper
- Scissors
- Glue
Steps:
- Cut the paper into strips.
- Glue the ends of each strip together to form links.
- Hang the paper chains around your space for a fun holiday look.
Tips for Shopping at Dollar Tree for Craft Supplies
Dollar Tree is a fantastic place for crafting enthusiasts looking for budget-friendly supplies. While it’s known for its low prices, it’s also filled with hidden gems that can spark creativity and save you money. From seasonal items to everyday materials that can be repurposed, you can find everything you need to create beautiful crafts without breaking the bank.
Here are some tips for shopping at DIY Dollar Tree Christmas crafts supplies:
1. Look for Hidden Gems in the Craft Aisle
- Ribbon: Dollar Tree offers a wide variety of ribbons, perfect for adding flair to any project. Look for holiday-themed ribbons, satin ribbons, or even burlap for rustic crafts.
- Fake Snow: During the holiday season, fake snow is a great find. It can be used for winter scenes, snow globes, or even as part of a festive wreath or table setting.
- Ornaments: Dollar Tree stocks inexpensive ornaments that can be repainted, decorated, or repurposed for unique projects, such as homemade garlands, wreaths, or personalized gifts.
2. Repurpose Everyday Items
- Dishware: Don’t overlook the glass bowls, plates, and mugs. These can easily be transformed into DIY projects like candle holders, tiered trays, or flower arrangements. A little paint or decorative fabric can turn plain dishware into stunning crafts.
- Glass Jars: Empty jars, such as those from candles or food items, can be repurposed into vases, storage containers, or even mini terrariums. With some paint, ribbon, or a coat of glitter, these simple jars can be personalized for any occasion.
- Gift Bags: Gift bags can be cut up and repurposed as wrapping paper or as a material for scrapbooking, card-making, and decoupage projects. The bright patterns and designs make them versatile crafting tools.
3. Spot Seasonal Items for Holiday Crafts
- Christmas Decorations: Dollar Tree is a go-to spot for Christmas crafting materials, from tree decorations to garlands and wreaths. During the holiday season, look for inexpensive items like pinecones, mini trees, and holiday-themed floral picks that can easily be incorporated into DIY decor.
- Seasonal Candles: Seasonal candles, especially the ones with decorative designs or seasonal scents, can be used in your holiday crafts. Use them as a base for a candleholder, or repurpose the wax for melted wax crafts or ornament-making.
- Holiday Stickers & Decals: Dollar Tree often has a variety of seasonal stickers and decals that can be applied to cards, gift tags, and even jars or mirrors to make quick, festive crafts.
4. Be Creative with Storage and Organizing
- Craft Storage: Dollar Tree offers many storage options, like clear plastic bins, baskets, and even tackle boxes, which are perfect for organizing small craft supplies like beads, buttons, and paints.
- Organizing Labels: Use labels or small containers to keep your supplies neat and easy to access. Repurpose containers to store seasonal items or completed crafts until you’re ready to use or gift them.
5. Don’t Miss Out on Basic Crafting Tools
- Basic Tools: Dollar Tree carries a variety of essential tools like scissors, glue guns, paintbrushes, and even hot glue sticks. Stock up on these affordable supplies to complement your larger crafting projects.
- Paints & Markers: Although the selection may be limited, Dollar Tree often has basic acrylic paints, permanent markers, and paint pens that can be perfect for smaller DIY projects or for adding details to repurposed items.
By shopping smart at Dollar Tree, you can find a treasure trove of inexpensive and versatile crafting materials. Whether you’re looking for specific supplies or just exploring, there’s always something to inspire your next DIY project. Happy crafting!
Organizing Your Supplies for Easy Crafting
Crafting is a fun and therapeutic hobby, but it can become overwhelming if your supplies are disorganized. Having your materials well-arranged not only saves you time but also enhances your creativity and ensures you have everything you need at hand. By taking a little time to organize, you can create a crafting space that’s both functional and inspiring.
Here are some tips for organizing your crafting supplies:
1. Categorize Your Supplies
- Group similar items together (e.g., paints, brushes, beads, fabric, and papers). This way, you know exactly where to find what you’re looking for and avoid clutter.
- Use clear bins or drawer organizers to sort different types of supplies (like markers, scissors, and adhesives) into distinct sections.
2. Use Storage Containers
- Invest in stackable storage bins, jars, or boxes. Clear containers are great because they allow you to see what’s inside without opening them.
- Use smaller containers to hold small items like buttons, sequins, or pins. Consider repurposing glass jars, old spice containers, or craft organizers designed specifically for tiny pieces.
3. Label Everything
- Labeling your containers and shelves helps you stay on track and makes it easier for others to find things. You can use a label maker, sticky notes, or colorful tags.
- Ensure that frequently used supplies are labeled in a way that you can easily access them.
4. Create a Craft Station
- Set up a dedicated crafting area where all your supplies are within easy reach. If you have limited space, consider a rolling cart that you can move around.
- Make sure your workspace has a clear surface, and keep the essentials nearby: cutting tools, adhesives, measuring items, and your most-used supplies.
5. Use Vertical Space
- If you’re working in a small area, maximize vertical space by installing shelves or pegboards for hanging tools like scissors, tape, or ribbons.
- This keeps your crafting area tidy and allows you to display your materials creatively.
6. Set Up a Sorting System for Paper
- Paper crafting can be tricky when you have multiple designs, colors, and textures. Organize your paper by size or color and store it in file folders, a hanging file organizer, or a large portfolio.
- Consider using dividers to keep different types of paper (like card stock, patterned paper, or tissue paper) separate.
7. Establish a “Work in Progress” Area
- Sometimes, crafting projects take time to complete. Set up a space where you can leave unfinished projects without them getting in the way.
- A dedicated box or tray can help keep your current projects separate from other supplies, ensuring you don’t accidentally misplace anything.
8. Keep Tools and Essentials Accessible
- Your tools (scissors, rulers, glue guns, etc.) should be easily accessible. Consider wall-mounted holders, a caddy, or a tool box to keep your essentials in one place.
- Avoid overstuffing drawers or containers, as it can make it harder to locate your tools when you need them.
9. Declutter Regularly
- As you accumulate more supplies, periodically review your stock. Donate or discard items that you no longer use or have duplicates of.
- This keeps your space functional and prevents it from getting overloaded with unnecessary items.
10. Maintain a System
- Develop a system that works for you, whether it’s organizing by color, type, or project. Make a habit of returning items to their designated places after each crafting session.
- A well-maintained organization system ensures your crafting area remains efficient and inviting.
By organizing your supplies effectively, you’ll reduce stress, save time, and make your crafting experience more enjoyable. With everything in place, you’ll have more room to explore your creativity and enjoy the process!
FAQ
What are some popular DIY Dollar Tree Christmas crafts?
Popular Dollar Tree Christmas crafts include handmade wreaths, personalized ornaments, Christmas garlands, DIY gift bags, and decorative centerpieces. You can also create unique Christmas tree decorations, like snowflakes, angels, and mini gift boxes.
How do I make a wreath from Dollar Tree materials?
To make a wreath, start with a foam wreath form from Dollar Tree. You can decorate it with faux greenery, pinecones, ribbons, and other festive embellishments. Use a hot glue gun to secure the pieces in place, and add a bow for the finishing touch.
Can I create DIY Christmas ornaments from DIY Dollar Tree Christmas crafts?
Yes! Dollar Tree offers many items that can be transformed into ornaments. Use clear plastic or glass ornaments, fill them with glitter, fake snow, or small craft items. You can also decorate them with paint, stickers, and ribbon for a personalized touch.
What supplies from Dollar Tree can be used to make Christmas gift bags?
Dollar Tree carries a variety of gift bags, tissue paper, and gift tags. You can personalize the bags with stickers, ribbon, or even paint for a more creative look. You can also add embellishments like faux snow, glitter, or small ornaments.

Hi, I’m Victoria, an art and craft teacher at Newark City Schools, where I have the joy of working with middle school students to help them explore their creativity and develop their artistic talents. I believe that art is a powerful way for students to express themselves, and I strive to make every lesson a fun, engaging, and inspiring experience.
I created this website to share the art and craft projects, techniques, and resources that I use in my classroom, hoping to inspire both educators and young artists alike. Whether you’re a teacher looking for new ideas or a student eager to try something new, I’m excited to provide creative tools and projects that anyone can enjoy.
When I’m not in the classroom, I love experimenting with different art forms and learning new crafting techniques. My goal is to help others discover the joy of making things with their hands, and I hope my website serves as a space for everyone to explore their creative potential.