You know that moment when you’re scrolling late at night, half tired, half inspired, thinking I really want to make something cute… but also not complicated? Yeah, same. I remember sitting at my table with leftover paper, a glue stick that barely worked, and zero plan—just the urge to create something pretty. That’s honestly how my love for DIY Flower Craft Ideas started.
If you’ve ever felt stuck, bored, or just craving a calm, creative break, you’re in the right place. Maybe you want to decorate your room, make a handmade gift, or just switch your brain off for a bit (we all need that). These ideas aren’t about being perfect or “Pinterest-level” flawless. They’re simple, fun, and actually doable.
In this article, I’ll walk you through flower crafts that feel relaxing, budget-friendly, and genuinely satisfying to make. No pressure. No fancy tools. Just easy ideas, small wins, and something lovely at the end. Sounds good, right?
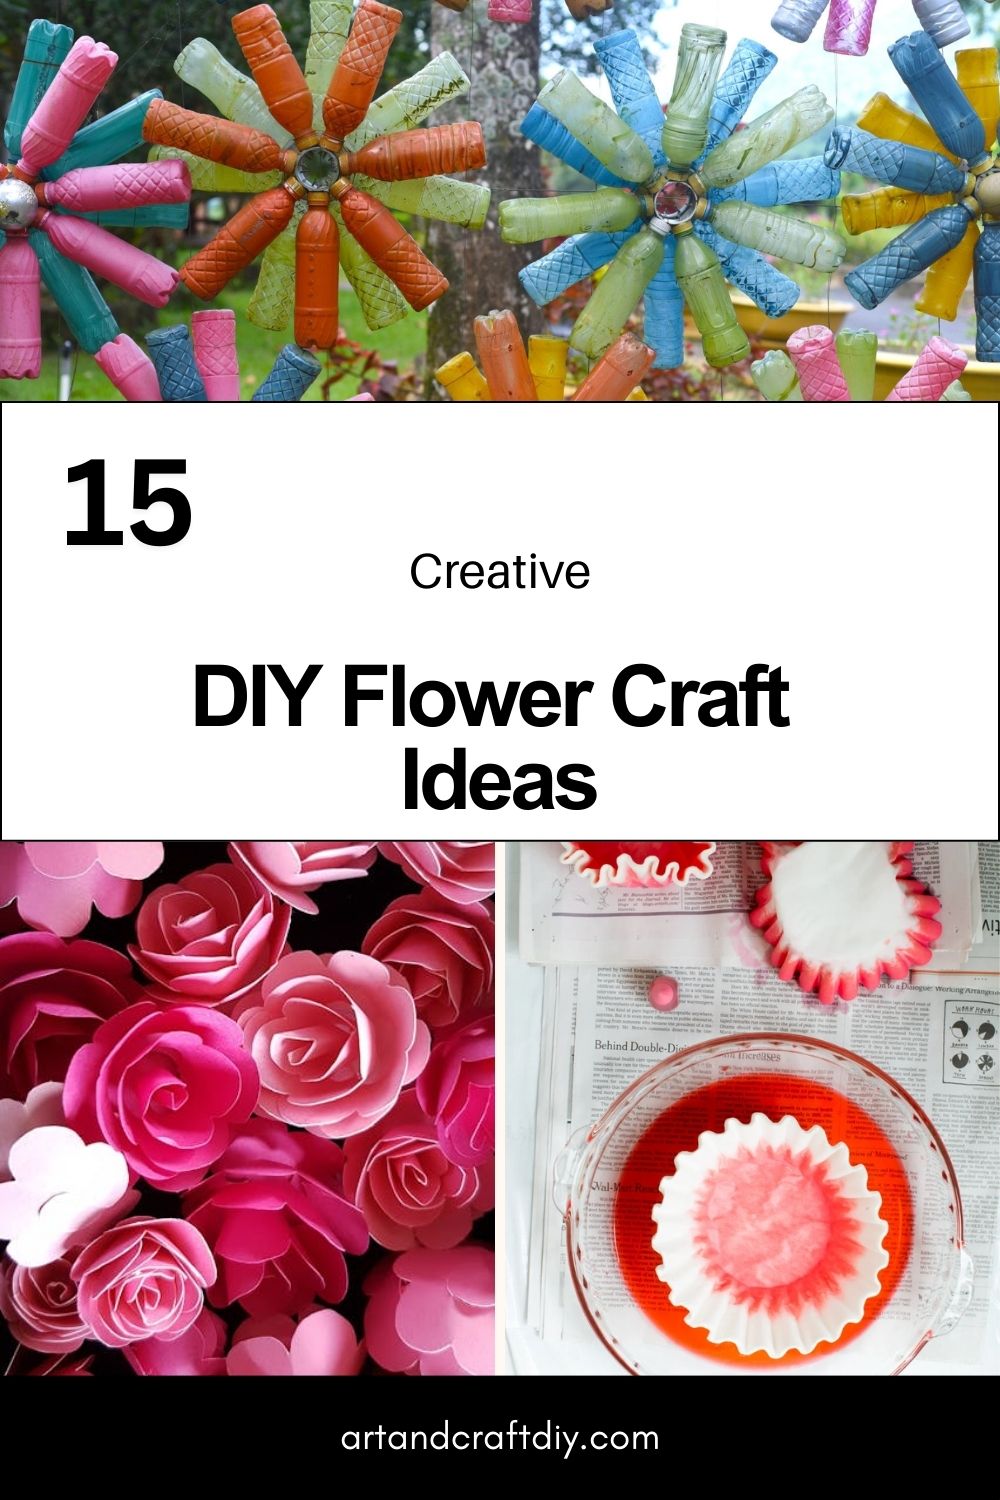
DIY Flower Craft Ideas
DIY flower craft ideas are a fun and relaxing way to add color and creativity to your space using simple materials. Whether you’re crafting for décor, gifts, or just for joy, handmade flowers always feel special.
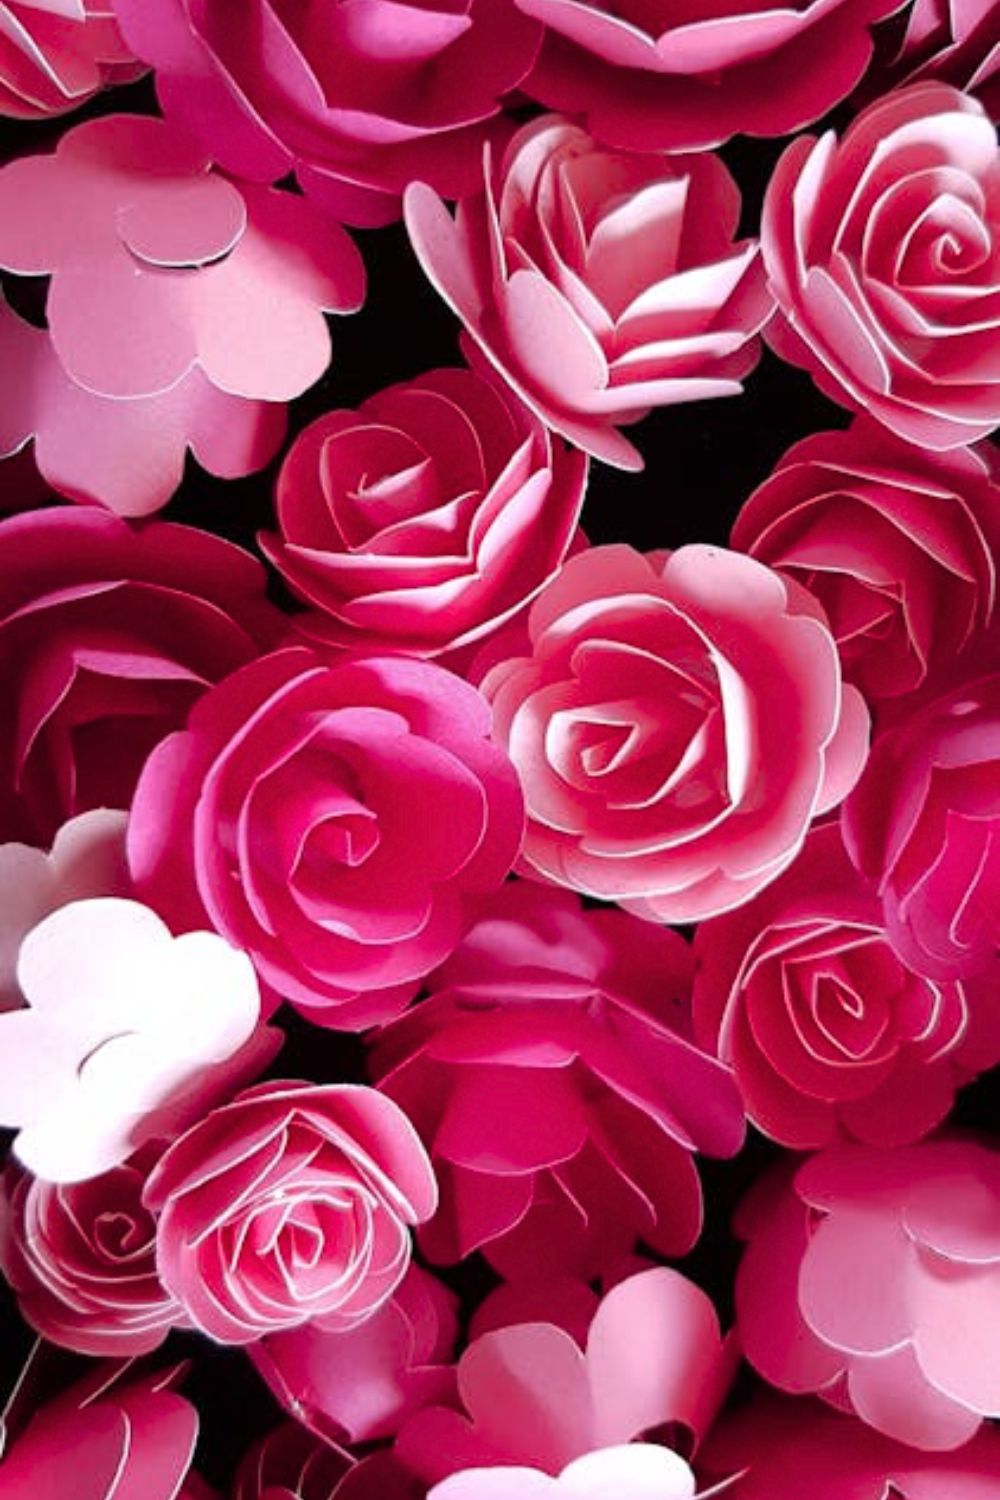
Paper Rose Flowers
I’ll be honest—paper rose flowers were the first DIY flower craft that made me feel weirdly proud of myself. I remember thinking, this is just paper, how hard can it be? Turns out, once you start curling petals with a pencil and layering them slowly, it becomes oddly calming. I’ve found that thicker craft paper works best because it holds shape without fighting you. I usually sketch petal shapes lightly, cut them out while watching something random, and then assemble them when I’m relaxed. No rush, no pressure.
When I make paper roses now, I don’t aim for perfection. In my opinion, slightly uneven petals actually look more realistic. A dab of glue at the base, a gentle curl outward, and suddenly it starts looking like a real bloom. If you’re new, start small. One rose, simple colors. Once you get the hang of it, you’ll end up making whole bunches without realizing how much time passed.
Tissue Paper Blooms
Tissue paper blooms are my go-to when I want quick results without stressing. Honestly, they’re forgiving, and that’s why I love them. I usually stack sheets, accordion-fold them, tie the center, and then slowly pull each layer apart. It feels repetitive in the best way. I’ve messed these up plenty of times, and they still turned out cute, which says a lot.
What I’ve found is that softer pulls work better than rushing. Tear a little? It’s fine. That texture adds character. In my opinion, mixing two colors in one bloom gives it more depth. I’ve used these for last-minute decor, gifts, even wall backdrops. They’re proof that simple materials can still make something that feels thoughtful and handmade.
Felt Flower Bouquet
Felt flower bouquets feel cozy to me, like something you’d keep forever instead of tossing after a week. I started making these when I wanted flowers that wouldn’t wilt. Felt is great because it doesn’t fray, so you can cut freely without panic. I usually trace petal shapes, cut them while half-listening to music, and stitch or glue them together slowly.
To be fair, felt flowers take more patience than paper, but they’re worth it. I’ve found that rolling felt tightly for roses or layering petals for daisies works best. Add wooden skewers or floral wire, and suddenly you have a bouquet that lasts years. In my opinion, these make amazing handmade gifts because they show effort without being overly delicate.
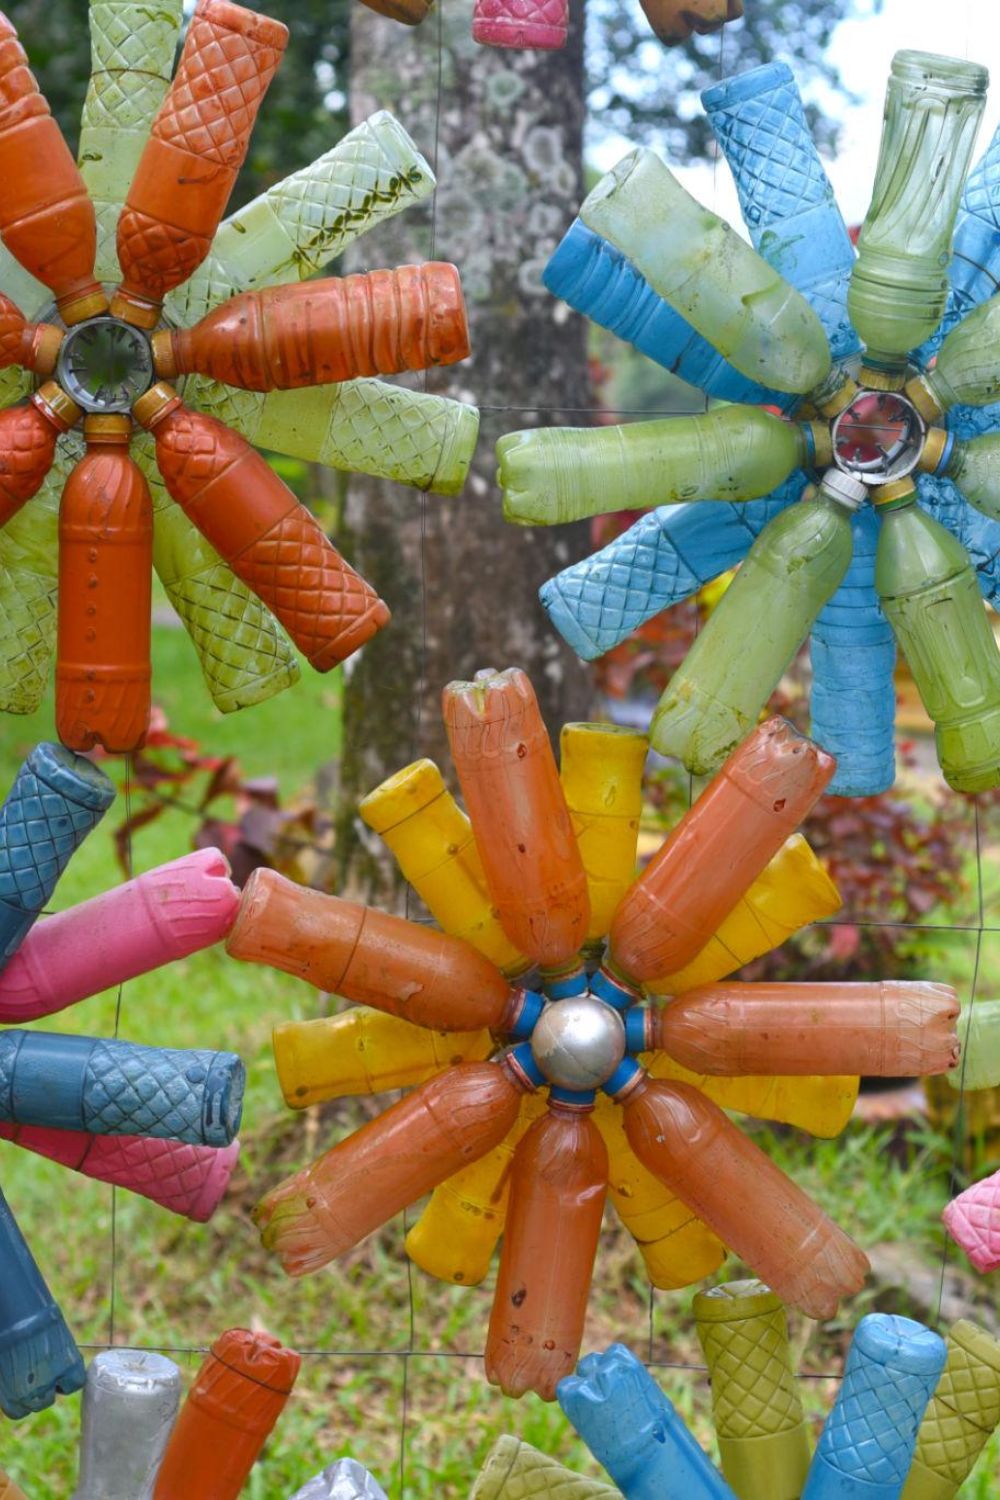
Recycled Bottle Flowers
Recycled bottle flowers started as an experiment and turned into one of my favorite eco-friendly crafts. I remember cutting into a plastic bottle and thinking I’d ruin it—but honestly, that’s part of the fun. I cut petal shapes around the bottle base, smooth the edges carefully, and then paint them once they’re shaped.
What surprised me most is how sturdy they feel. I’ve found acrylic paint sticks well, especially after a light sanding. These flowers work great for outdoor decor or garden corners. In my opinion, they’re perfect if you like crafts that feel a little rebellious—turning trash into something decorative just hits differently.
Clay Flower Sculptures
Clay flower sculptures are where I slow down the most. I don’t rush these, ever. Working with clay feels grounding, and shaping petals by hand makes you notice tiny details. I usually start with simple flowers because complex ones can get frustrating fast. Air-dry clay works fine, honestly, if you’re not into firing or baking.
I’ve found that slightly moist fingers help smooth petal edges without cracking. Let them dry fully before painting—this part tests patience. In my opinion, clay flowers feel more like keepsakes than decor. They’re heavier, more permanent, and every fingerprint reminds you that you made it yourself.
Foam Sheet Flowers
Foam sheet flowers are underrated, in my opinion. They’re lightweight, colorful, and super beginner-friendly. I like using them when crafting with kids or when I just want something easy. Cutting foam is satisfying, and it holds shape surprisingly well when layered.
I’ve found that using a toothpick or blunt tool to press vein details into foam adds depth. Glue layers slowly, and don’t overthink symmetry. Honestly, these flowers are playful, not serious. They’re great for school projects, room decor, or gift wrapping accents when you want color without complexity.
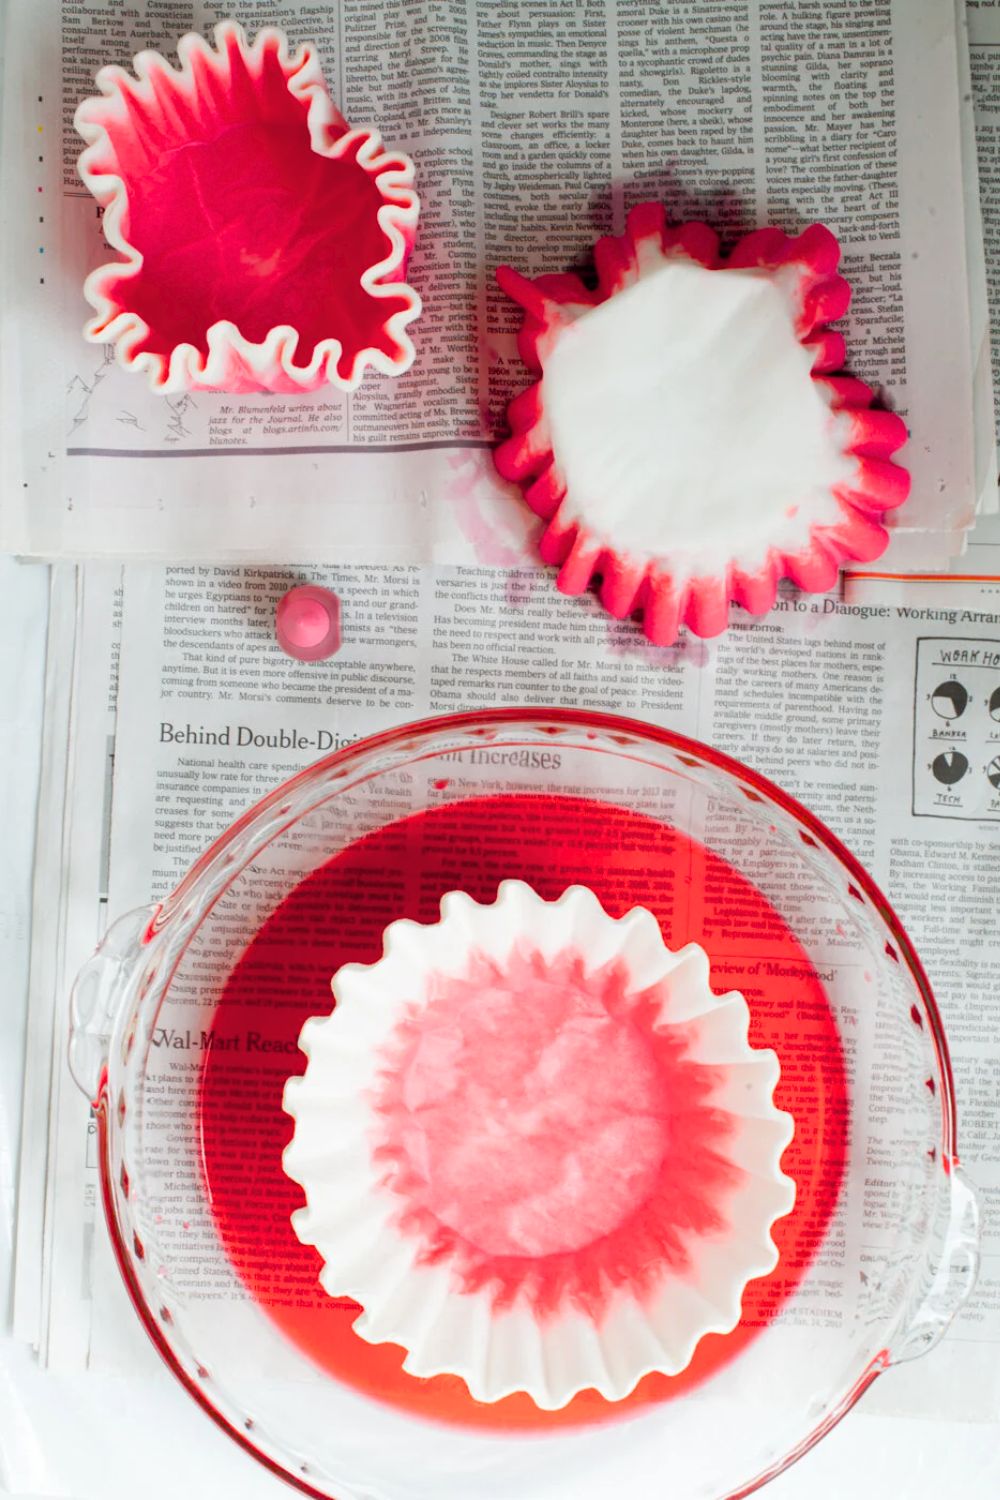
Coffee Filter Flowers
Coffee filter flowers were a happy accident for me. I dyed them once just to see what would happen, and I was hooked. Filters absorb color beautifully, which gives petals a soft, watercolor look. I usually fold, cut petal shapes, then gently separate layers after dyeing.
What I love is how delicate they look compared to how cheap the materials are. I’ve found that letting them dry fully before shaping makes a big difference. In my opinion, these flowers look way more expensive than they actually are, especially when arranged in a simple vase.
Fabric Flower Brooches
Fabric flower brooches feel personal, almost like wearable memories. I started making these from scrap fabric, and now I can’t throw leftovers away. Cutting circles, folding, stitching—it’s repetitive but relaxing. I usually hand-stitch because it feels more intentional.
To be fair, they take time, but the result is worth it. I’ve found that adding a button or bead in the center gives them character. In my opinion, fabric flowers work best when they’re slightly imperfect. Attach a pin at the back, and you’ve got a handmade accessory that actually tells a story.
Handprint Flower Art
Handprint flower art always hits me emotionally. I’ve done this with kids, nieces, even once for myself just for fun. Tracing or painting handprints and turning them into petals feels playful and meaningful at the same time. I usually arrange prints in a circle and draw stems afterward.
I’ve found that bright colors work best here—don’t hold back. Honestly, this isn’t about technique; it’s about memory. In my opinion, handprint flowers are perfect keepsakes. Frame them, gift them, keep them. They’re messy, imperfect, and full of personality.
Cardboard Roll Flowers
Cardboard roll flowers surprised me more than any other craft. I didn’t expect much, to be fair. But cutting rolls into rings and shaping them into petals actually works. I flatten them slightly, arrange them in flower shapes, and glue everything down before painting.
I’ve found that metallic or pastel paint really elevates the look. These flowers are sturdy and great for wall decor. In my opinion, they’re perfect if you like bold, structured designs and want to reuse materials without it looking obvious.
Crepe Paper Flowers
Crepe paper flowers feel fancy, even when they’re not perfect. The stretch in crepe paper lets you shape petals beautifully, which I’ve found makes a huge difference. I usually stretch gently from the center outward to give petals a natural curve.
Honestly, crepe paper takes practice, but once it clicks, it’s addictive. In my opinion, these flowers look the most realistic out of all paper crafts. Take your time, layer slowly, and don’t rush the shaping—it’s where the magic happens.
Pressed Flower Frames
Pressed flower frames are quiet and sentimental, in the best way. I started pressing flowers from random walks, and now each one reminds me of a moment. Press flowers between heavy books, wait patiently, then arrange them on paper before framing.
I’ve found that less is more here. Don’t overcrowd the frame. In my opinion, pressed flowers feel like storytelling through nature. They’re subtle, thoughtful, and perfect for preserving memories without saying a word.
Tips for Making Beautiful DIY Flower Crafts
Creating DIY flower crafts is all about enjoying the process and adding your own creative touch. With a few simple techniques and the right approach, you can make your handmade flowers look neat, realistic, and long-lasting. These easy tips will help you get better results every time.
Choosing the right colors Pick colors that work well together and match your theme or space. Soft pastels give a delicate look, while bright shades make your flowers bold and eye-catching. You can also mix light and dark tones of the same color to add depth and a more natural feel.
Cutting and shaping techniques Always use sharp scissors for clean edges, as rough cuts can spoil the look of your flowers. Cut slowly and carefully, and gently curl or shape petals using your fingers, a pencil, or a stick to give them a realistic, soft finish.
Gluing and assembling tips Use glue in small amounts to avoid messy spots and visible stains. Assemble your flower step by step, letting each layer set properly before adding the next, so everything stays secure and well-shaped.
How to make flowers long-lasting Choose sturdy materials like thick paper, felt, or fabric for better durability. Keep your finished flowers away from moisture and direct sunlight, and store them carefully to maintain their shape and color over time.
Hi, I’m Victoria, an art and craft teacher at Newark City Schools, where I have the joy of working with middle school students to help them explore their creativity and develop their artistic talents. I believe that art is a powerful way for students to express themselves, and I strive to make every lesson a fun, engaging, and inspiring experience.
I created this website to share the art and craft projects, techniques, and resources that I use in my classroom, hoping to inspire both educators and young artists alike. Whether you’re a teacher looking for new ideas or a student eager to try something new, I’m excited to provide creative tools and projects that anyone can enjoy.
When I’m not in the classroom, I love experimenting with different art forms and learning new crafting techniques. My goal is to help others discover the joy of making things with their hands, and I hope my website serves as a space for everyone to explore their creative potential.