
Last year, right before the 4th of July, I realized I had zero decorations…and honestly, no time to shop either. I remember standing in my kitchen, looking at a few empty jars and thinking, “Can I make something cute out of these?” Turns out, I could—and it actually became one of my favorite little projects.
If you’ve ever felt stuck or just don’t want to spend too much on decor, I totally get it. That’s exactly why DIY Patriotic Mason Jars are such a lifesaver. They’re simple, budget-friendly, and honestly kind of fun to make (even if you’re not super crafty).
In this article, I’ll walk you through easy ideas that actually work—no complicated steps, no fancy supplies. Just real, doable inspiration to help you create something festive and personal. Trust me, if I could pull this off last-minute, you definitely can too.
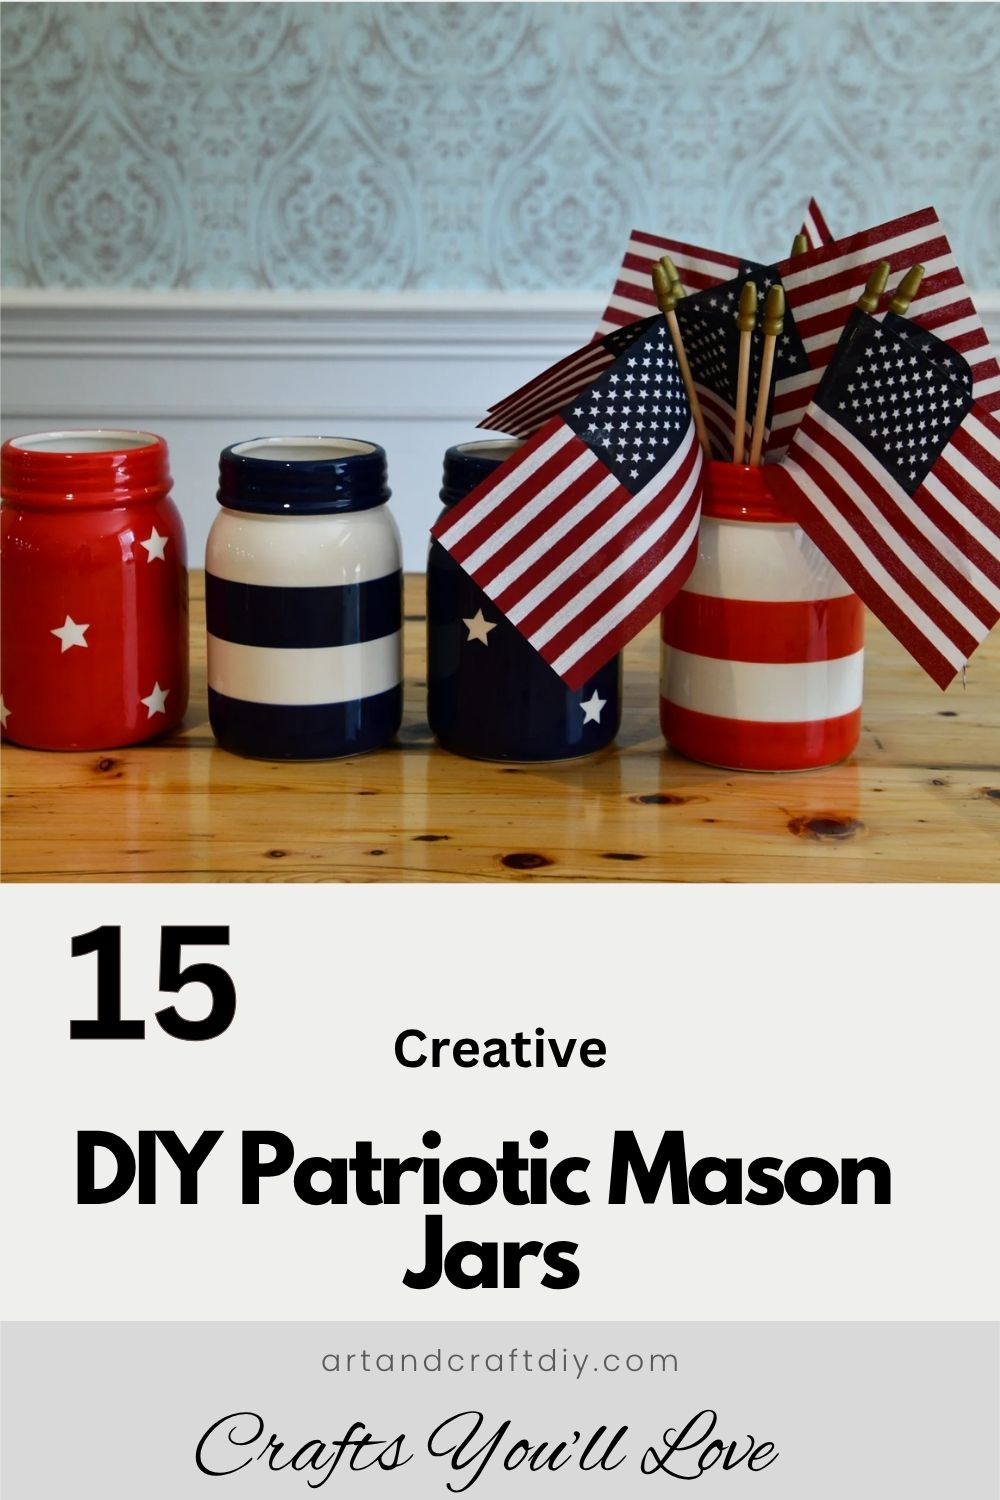
DIY Patriotic Mason Jars
DIY Patriotic Mason Jars are a simple and fun way to add red, white, and blue charm to your celebrations without spending much. They’re easy to make, super creative, and perfect for decorating your home or party space.
Painted Tricolor Mason Jars

I still remember the first time I tried painted tricolor mason jars—I thought it would be messy, and honestly, it kind of was… but in the best way. I usually go with red, white, and blue acrylic paints and just let myself have fun with it instead of stressing over perfection. I’ve found that painting the jar in sections works better than trying to do everything at once.
What really helped me was using painter’s tape to get those clean lines. But to be fair, even if the lines aren’t perfect, it still looks charming once everything dries. I like to finish them with a matte sealant because it gives that soft, classy vibe. You can pop in flowers or even use them as utensil holders—it’s one of those crafts that ends up being way more versatile than you expect.
Rustic Flag-Inspired Mason Jars
These are probably my favorite when I want something a bit more farmhouse-style. I once made a set for a backyard BBQ, and everyone kept asking where I bought them—which, not gonna lie, felt pretty great. The trick here is not to overdo the paint. I usually dry-brush red and white stripes and then lightly add a blue section with tiny stars.
I’ve learned that sanding the jar slightly after painting gives it that worn, rustic look. It sounds like an extra step, but honestly, it makes a huge difference. Sometimes I even use chalk paint because it naturally gives that vintage finish. Pair it with some burlap or twine, and suddenly your simple jar looks like it belongs in a Pinterest-perfect picnic setup.
Glitter Star Mason Jars
Okay, these can get messy fast—but they’re so worth it. I tried making glitter star jars one evening, and I’m pretty sure I was still finding glitter in random places days later. What I do now is use adhesive star stickers first, paint over the jar, and then peel them off to reveal clean star shapes.
Then comes the glitter part. I usually apply glue just inside the star shapes and sprinkle glitter carefully. In my opinion, less is more here—too much glitter can overpower the design. Once it’s sealed, though, it looks magical, especially when you place a candle inside. It’s one of those crafts that feels a bit chaotic during the process but turns out surprisingly polished.
Ombre Patriotic Mason Jars
I didn’t think ombre would work on glass jars at first, but wow—I was wrong. The blending of red into white and then blue looks so soft and dreamy. I’ve found that using a sponge instead of a brush helps blend the colors much better without harsh lines.
It does take a bit of patience, though. You kind of have to dab and blend slowly, and honestly, I’ve had moments where I thought I ruined it halfway through. But once it dries, everything settles beautifully. I like to keep these jars simple—just add fairy lights or a single flower. They’re subtle but still very festive, which I personally love.
Twine-Wrapped Patriotic Jars
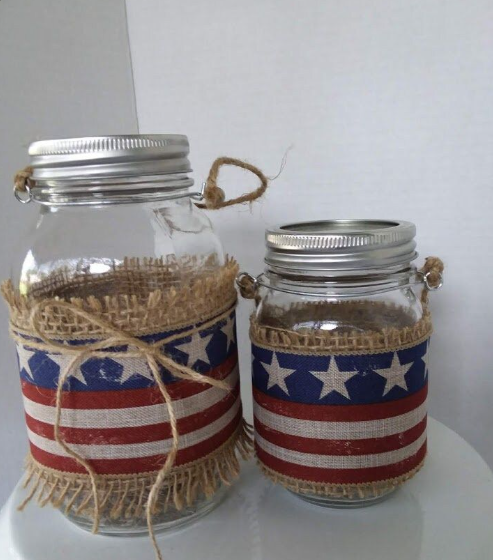
These are my go-to when I want something quick but still cute. I’ve wrapped so many jars with twine while watching TV—it’s oddly relaxing. I usually start by painting the jar in a soft patriotic color, then wrap twine around the middle or neck of the jar.
Sometimes I’ll tuck in tiny flags or beads into the twine for extra detail. To be fair, it’s not the most flashy design, but that’s kind of the point. It feels cozy and handmade. I’ve used these as centerpieces, and they always give off that warm, rustic vibe that people seem to love without trying too hard.
Patriotic Lantern Mason Jars
These are honestly one of my favorite evening decorations. I made a few for a 4th of July dinner, and when the sun went down, they completely changed the vibe. I usually paint the jars lightly or add star cutouts, then place a tea light or LED candle inside.
One thing I’ve learned is to keep the paint slightly translucent so the light can shine through. If it’s too thick, you lose that lantern effect. I also like adding a wire handle around the neck so I can hang them outside. It’s simple, but the glow it creates feels so cozy and festive.
Hand-Painted Stripe Mason Jars
I’ve tried a lot of designs, but hand-painted stripes are something I keep coming back to. There’s just something satisfying about those bold red and white lines. I usually freehand them, and honestly, they’re never perfectly straight—but that’s part of the charm.
If you want cleaner lines, painter’s tape helps a lot. I’ve done both, and it really depends on the look you’re going for. Sometimes I add a blue band with tiny stars at the top to tie it all together. These jars look great as table decor or even as drink holders—it’s one of those designs that feels classic and always works.
Vintage Distressed Patriotic Jars
This style took me a couple of tries to get right. At first, I overdid the distressing and ended up with something that looked… well, just messy. But once I figured out the balance, I fell in love with the look. I usually paint the jar fully, then lightly sand the edges and raised areas.
I’ve found that using muted tones instead of bright colors gives a more authentic vintage feel. It’s subtle but makes a big difference. These jars look amazing with dried flowers or simple greenery. In my opinion, they’re perfect if you want something patriotic without it feeling too bold or loud.
Floral Patriotic Mason Jars
This one feels a bit softer and more elegant compared to the others. I once made these for a small gathering, and they instantly made the table look prettier. I usually paint the jar in a base color and then add small floral patterns using red, white, and blue.
I’m not the best at painting flowers, to be honest, but even simple dots and petals work. You don’t need to be super detailed. I like to pair these with fresh flowers that match the colors—it just ties everything together. It’s a nice option if you want something festive but still a bit delicate.
LED Light Patriotic Jars
These are such a game-changer, especially for nighttime setups. I’ve used LED string lights inside jars more times than I can count, and it never gets old. I usually paint or decorate the jar lightly so the lights can still shine through.
Battery-operated lights work best because you don’t have to deal with cords. I’ve found that warm white lights look more cozy, but colored ones can be fun too. Honestly, once you turn them on, even a simple jar looks magical. It’s one of the easiest ways to make your setup feel special without much effort.
Stencil Art Mason Jars
Stencil art saved me on days when I didn’t feel confident about freehand painting. I remember messing up a design and then switching to stencils—it made everything so much easier. I usually use star or flag-themed stencils and dab paint over them gently.
The key is not to use too much paint at once, or it can bleed under the stencil. I’ve learned that the hard way. Once you peel it off, though, it looks so neat and professional. It’s perfect if you want a clean, polished look without stressing too much.
Mini Patriotic Mason Jar Favors
These tiny jars are honestly adorable. I made a batch for party favors once, and people loved them more than I expected. I usually fill them with candies, small notes, or even mini candles. Decorating them is quick—just a bit of paint, ribbon, or twine.
I’ve found that adding a little tag or handwritten note makes them feel more personal. It doesn’t have to be fancy. To be fair, it’s the kind of detail people remember. These mini jars are simple, but they leave a lasting impression—and that’s kind of what makes them special.
Tips for Best Results
When I make DIY patriotic mason jars, I’ve learned that a few small details can really make a big difference in how the final result looks. It’s not just about painting the jars—it’s about finishing them neatly so they look clean, bright, and long-lasting. These simple tips will help your jars turn out more polished and professional, even if you’re a beginner.
- Use thin paint layers for a smooth finish
Instead of applying thick coats, go for thin layers of paint. This helps avoid streaks and uneven texture, and your jars will look much cleaner. - Let paint dry completely before decorating
I know it’s tempting to rush, but letting each layer dry fully prevents smudging and keeps your design neat and sharp. - Use a waterproof sealant for outdoor use
If you’re planning to place your jars outside, sealing them will protect the paint from rain, dust, and fading. - Mix textures like matte and glitter
Combining different textures adds depth and makes your jars stand out. A little glitter with matte paint gives a really eye-catching effect.

Hi, I’m Victoria, an art and craft teacher at Newark City Schools, where I have the joy of working with middle school students to help them explore their creativity and develop their artistic talents. I believe that art is a powerful way for students to express themselves, and I strive to make every lesson a fun, engaging, and inspiring experience.
I created this website to share the art and craft projects, techniques, and resources that I use in my classroom, hoping to inspire both educators and young artists alike. Whether you’re a teacher looking for new ideas or a student eager to try something new, I’m excited to provide creative tools and projects that anyone can enjoy.
When I’m not in the classroom, I love experimenting with different art forms and learning new crafting techniques. My goal is to help others discover the joy of making things with their hands, and I hope my website serves as a space for everyone to explore their creative potential.