
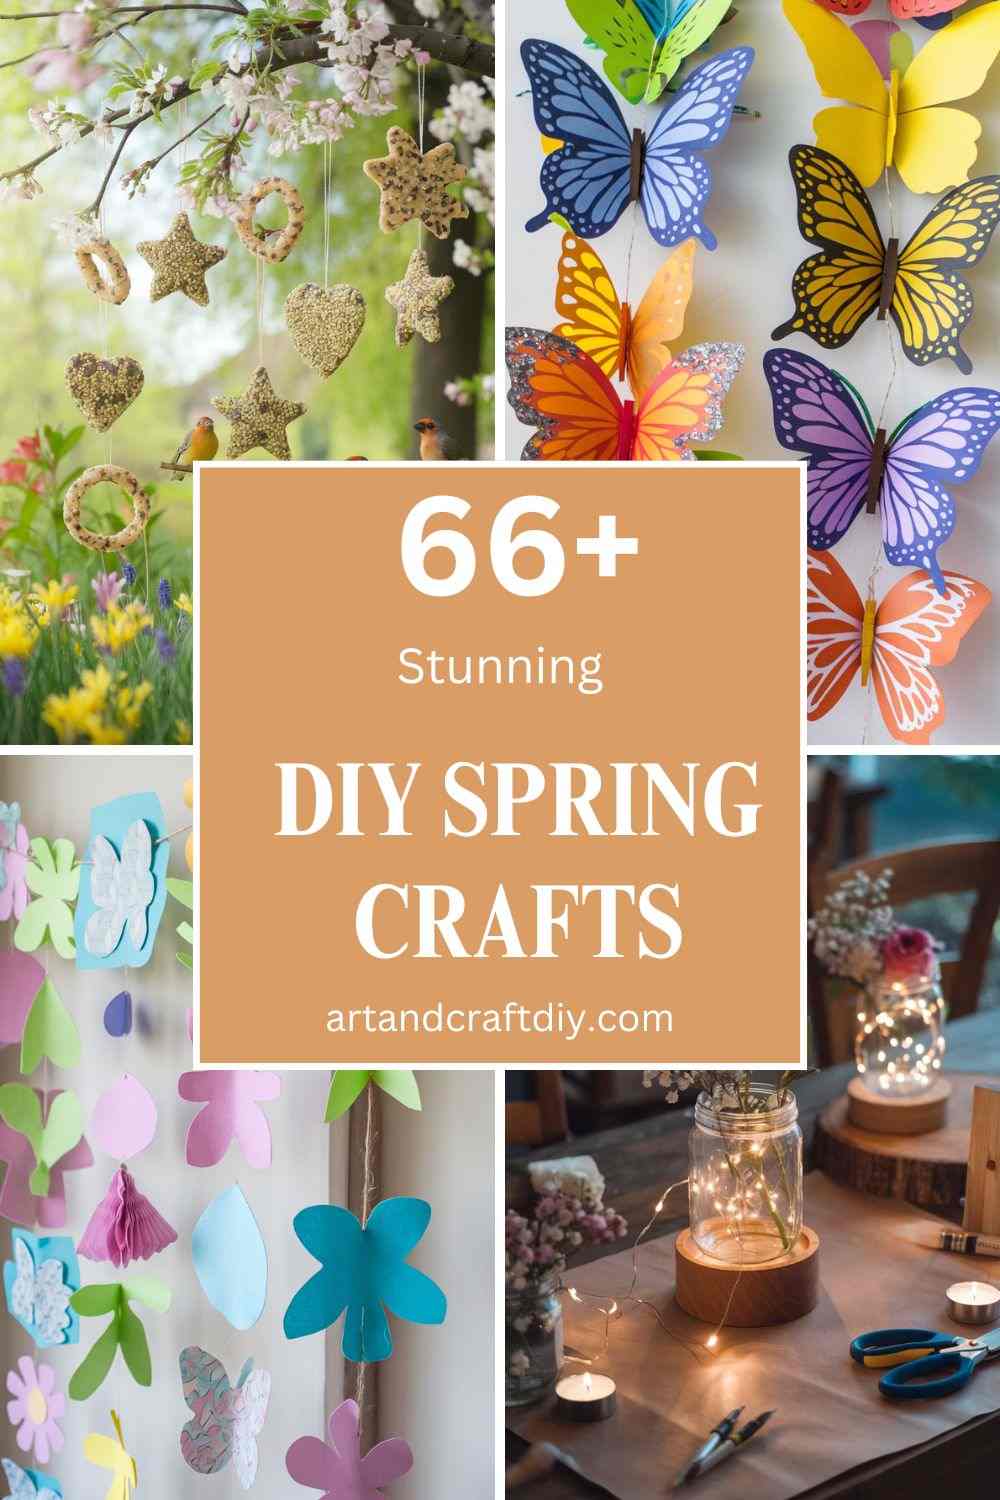
Last spring, I remember sitting on my porch with a cup of tea, staring at all the empty jars and scraps of fabric I’d been “saving for later.” You know how it goes—you tell yourself you’ll make something cute with them, but they just sit there, collecting dust. I finally decided to dive into some DIY spring crafts, and honestly, it was the best little mood booster. There’s something about creating with your hands that just makes the season feel brighter, right? Plus, it’s way cheaper (and more personal) than buying new decor. If you’ve ever felt stuck on what to do with those random bits lying around—or you just want to add some fresh, handmade touches to your home—I’ve got you. In this article, I’ll share some fun, simple ideas that’ll bring in all those spring vibes without stressing you out. Sound good? Let’s do it.
DIY Spring Crafts
DIY Spring Crafts are creative projects that capture the essence of spring, celebrating its vibrant colors, blooming flowers, and cheerful vibes.
Egg Carton Flowers
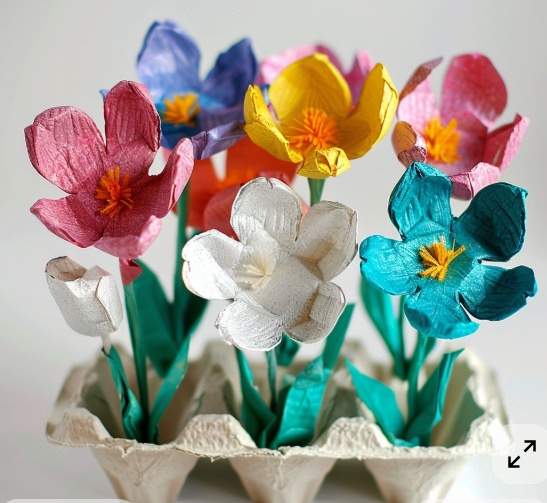
I can’t even count how many times I’ve turned old egg cartons into flowers, but every single time it feels a little magical. Honestly, I love the idea of giving trash a second life—it’s like you’re proving to yourself that creativity doesn’t need fancy supplies. I remember sitting at my kitchen table one spring afternoon, surrounded by scissors, paint, and a mess of little carton cups, and thinking, “Wow, this is going to look so much better than I expected.” And to be fair, the fun is really in the painting part. You snip the cups into petal shapes, paint them in bright spring colors, and suddenly your kitchen smells like acrylic paint and hope.
What I like to do is attach pipe cleaners or even straws as stems, then arrange them in an old mason jar. It’s ridiculously simple, but it looks cheerful enough to brighten a corner of the house. In my opinion, these flowers make the sweetest homemade gifts too. I once gave a bunch to my niece for her birthday (alongside a real gift, of course), and she loved that they wouldn’t wilt. It’s these little handmade touches that make spring crafts feel personal and not just “projects.”
Hand-Painted Spring Rocks
Painting rocks might sound a little silly at first, but trust me, it’s strangely addictive. I started doing it one spring after a walk when I came home with pockets full of smooth little stones. There’s something so calming about holding one in your hand and then deciding it’s going to be, say, a tiny bumblebee or a flower that never fades. Honestly, I think of it as nature’s little canvases—you don’t need to spend a fortune on supplies. Just a set of paints, brushes, and a good playlist, and you’re set for a cozy afternoon.
One of my favorite memories was hiding painted rocks around my garden for my kids to “discover.” Their excitement was worth the smudged paint on my hands. And to be fair, you don’t even have to be good at painting for this to look adorable—simple daisies, pastel stripes, or even little words like “hope” or “smile” work beautifully. In my opinion, it’s one of those crafts where the imperfections actually make it charming.
Floral Mason Jar Lanterns

Mason jars are basically the blank slates of the craft world, and I’ll admit I hoard them like they’re treasure. One spring evening, I grabbed a few, some pressed flowers, and a handful of tea lights, and decided to see what would happen. Spoiler: it turned into one of my favorite seasonal decorations ever. Honestly, the glow from a candle shining through delicate petals feels almost magical—like bottled springtime. I found myself just sitting there, staring at them longer than I’d like to admit.
To make them, you can press flowers between books for a week or two, then use a little Mod Podge to stick them onto the jars. Slip a candle inside, and boom—you’ve got yourself the coziest lantern. I even lined a few on my porch last year, and neighbors kept asking where I’d bought them. To be fair, there’s something extra special about being able to say, “Oh, these? I made them.” In my opinion, crafts like these remind you why handmade always feels warmer than store-bought.
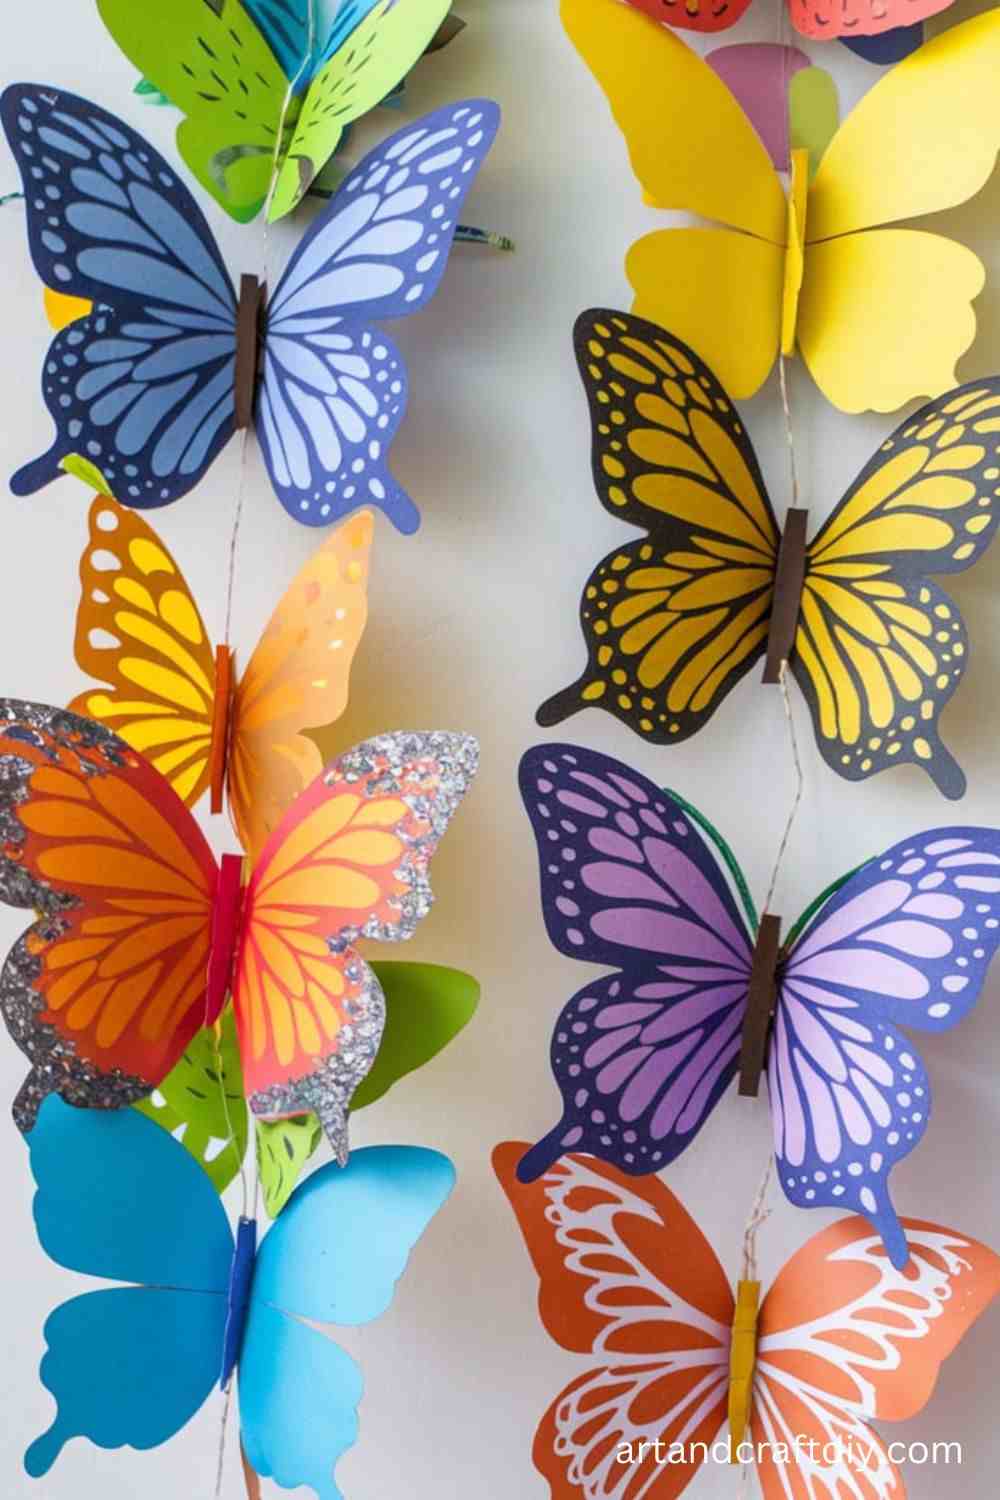
Spring Butterfly Garland
Create a whimsical butterfly garland to decorate your walls or windows.
Materials Needed:
- Colorful cardstock paper
- Butterfly stencil or template
- Scissors
- Hole punch
- String or twine
- Glue (optional)
Steps:
- Trace butterfly shapes onto the cardstock using your stencil or template.
- Cut out the butterfly shapes carefully.
- Fold each butterfly slightly in the middle to give it a 3D effect.
- Punch a small hole at the top of each butterfly.
- Thread the string or twine through the holes to create a garland.
- Hang the garland wherever you’d like to add a touch of spring.
DIY Birdseed Ornaments
Invite feathered friends into your garden with these easy-to-make birdseed ornaments.
Materials Needed:
- Birdseed
- Unflavored gelatin
- Warm water
- Cookie cutters
- Wax paper
- Ribbon or twine
Steps:
- Mix unflavored gelatin with warm water as per package instructions.
- Stir in birdseed until it forms a thick mixture.
- Place cookie cutters on a wax paper-lined surface.
- Once the flowers are positioned, apply another layer of Mod Podge over them to seal them in place. Allow it to dry completely.
- Place a tea light candle inside the jar. If using real candles, ensure the jar is heat-safe.
- Light it up and enjoy the magical floral glow in your space.
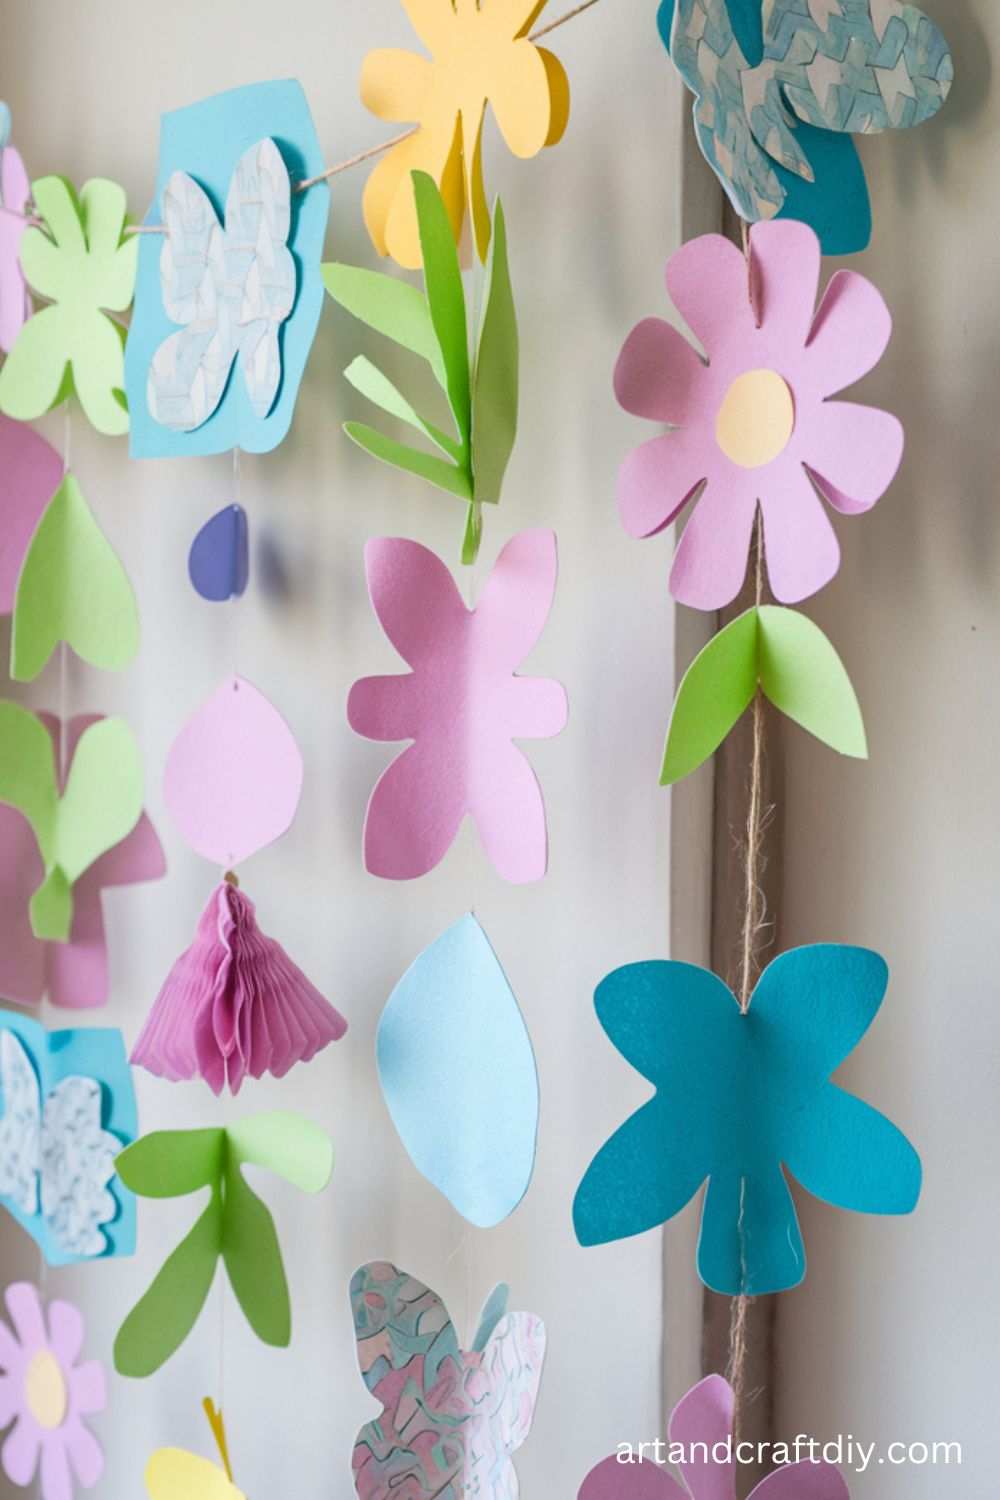
Spring-Themed Paper Garland
Brighten any room with a cheerful garland featuring flowers, butterflies, and pastel shapes. This easy craft is perfect for parties or seasonal décor.
Materials Needed:
- Colored paper or cardstock
- Scissors
- String or twine
- Hole punch
- Glue or tape
Steps:
- Cut out flower, butterfly, and leaf shapes from the colored paper. Use templates if needed for consistency.
- Punch a hole at the top of each shape.
- Thread the shapes onto a string or twine, spacing them out evenly.
- Secure each shape in place with a small dab of glue or tape at the back.
- Hang the garland along walls, windows, or doorways to bring a pop of springtime cheer.
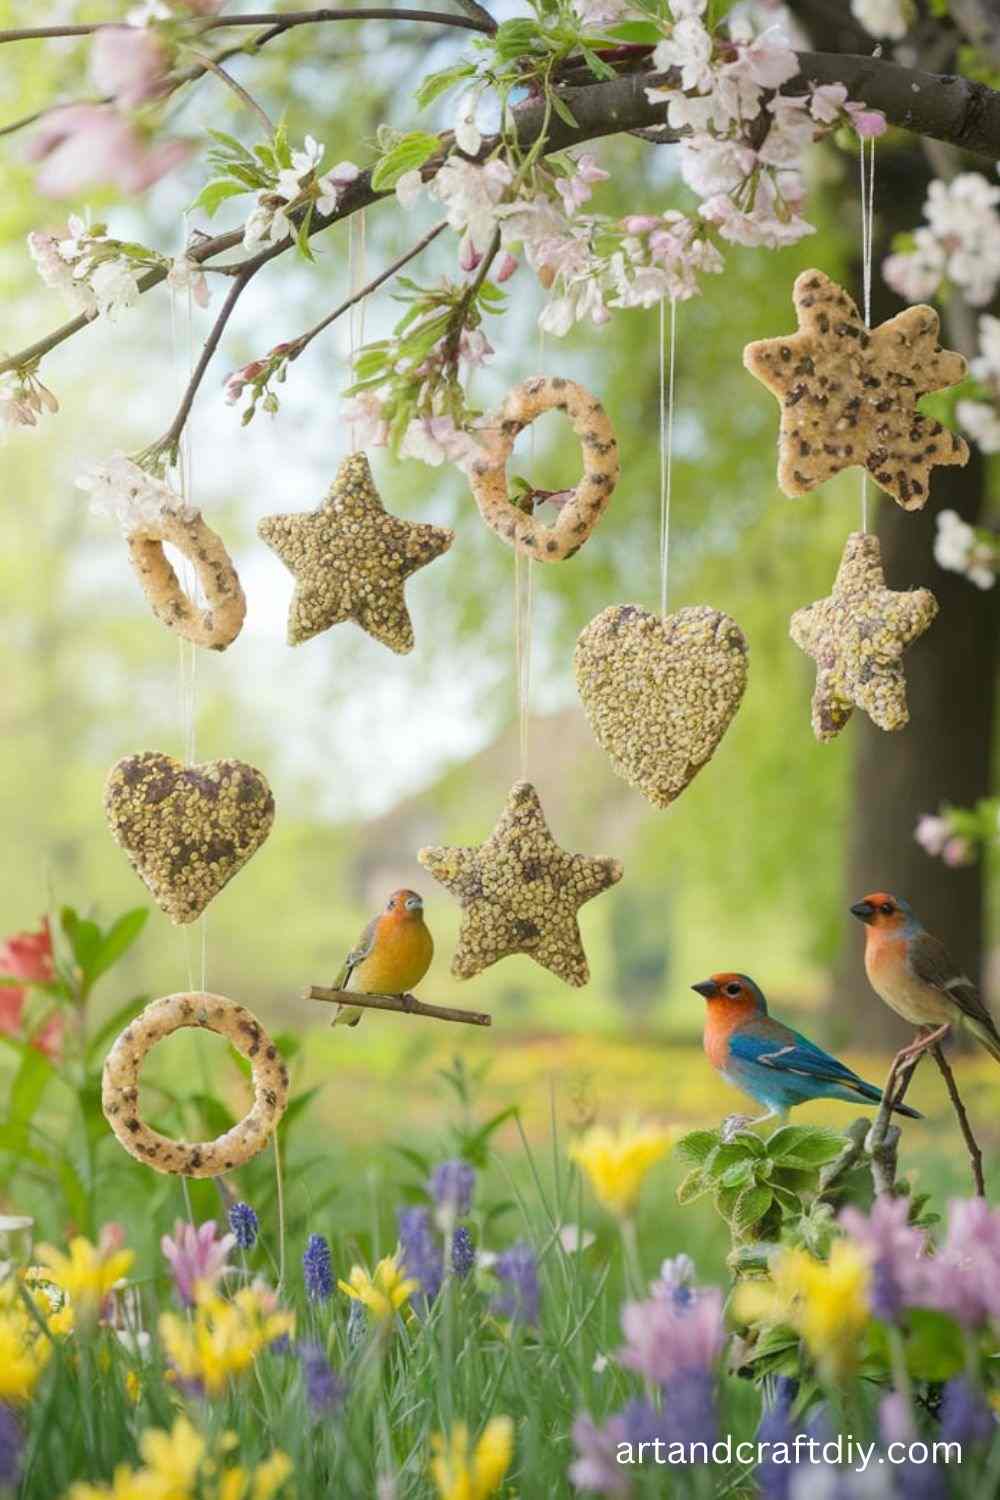
Birdseed Hanging Ornaments
Welcome feathered friends to your garden with these easy-to-make birdseed ornaments. A fun craft for all ages!
Materials Needed:
- Birdseed
- Gelatin powder
- Warm water
- Cookie cutters
- Wax paper
- String
Steps:
- Mix two tablespoons of gelatin with 1/3 cup of warm water until dissolved.
- Stir in birdseed until the mixture is thick and sticky.
- Place cookie cutters on a sheet of wax paper.
- Press the birdseed mixture firmly into the cookie cutters.
- Insert a loop of string at the top of each ornament, ensuring it’s embedded in the mixture.
- Let the ornaments dry overnight. Once hardened, hang them on tree branches outside.
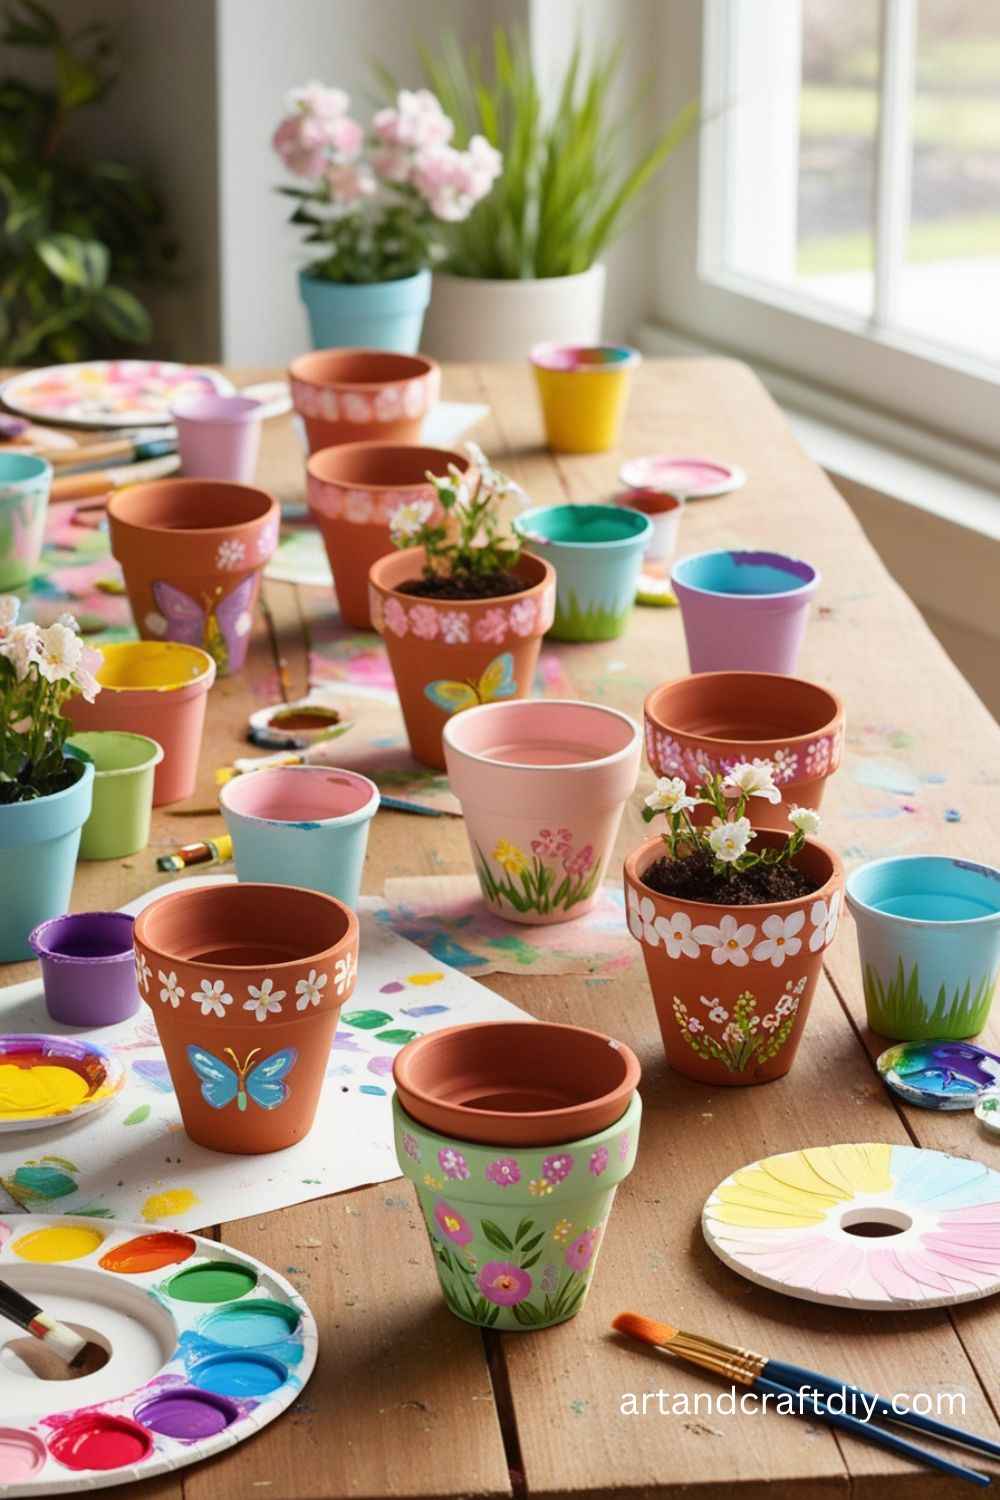
Painted Terracotta Pots
Upgrade plain terracotta pots into colorful planters that scream spring. Perfect for flowers, herbs, or succulents.
Materials Needed:
- Terracotta pots
- Acrylic paints
- Paintbrushes
- Sealant spray
Steps:
- Clean the terracotta pots to remove dust and dirt.
- Apply a base coat of acrylic paint to each pot and let it dry completely.
- Use smaller brushes to add patterns, flowers, or abstract designs.
- Once the paint is dry, seal the pots with a sealant spray to make them water-resistant.
- Fill them with your favorite plants and display them indoors or outdoors.
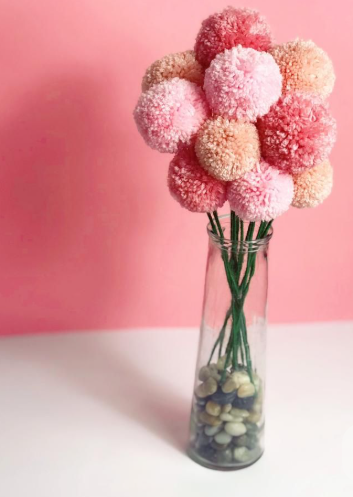
Pom-Pom Flower Bouquet
Create a bouquet of everlasting flowers using colorful pom-poms for a playful, springy vibe.
Materials Needed:
- Yarn in various colors
- Fork or pom-pom maker
- Scissors
- Green floral wire
- Glue gun
Steps:
- Wrap yarn around the prongs of a fork (or pom-pom maker) until you achieve the desired fullness.
- Tie a piece of yarn tightly around the center of the wrapped yarn.
- Slide it off the fork and cut through the loops on both ends. Fluff the pom-pom.
- Attach a piece of green floral wire to the pom-pom using a glue gun to form the flower stem.
- Repeat to make a bouquet, and display in a vase.
Butterfly Suncatchers
Bring color and light to your windows with these stunning butterfly suncatchers.
Materials Needed:
- Clear contact paper
- Tissue paper in bright colors
- Black cardstock
- Scissors
- Glue stick
Steps:
- Cut butterfly shapes out of black cardstock and carefully cut out “windows” within the wings.
- Stick a piece of clear contact paper to the back of each butterfly shape.
- Tear tissue paper into small pieces and press them onto the sticky surface to fill the “windows.”
- Once the wings are filled, cover the back with another piece of contact paper to seal it.
- Trim any excess paper, and hang the butterflies in a sunny window.
Spring Wreath with Fabric Scraps
Repurpose fabric scraps into a gorgeous, rustic wreath for your front door.
Materials Needed:
- Wire wreath frame
- Fabric scraps in spring colors
- Scissors
Steps:
- Cut fabric scraps into strips about 1 inch wide and 6 inches long.
- Tie the strips onto the wire frame, alternating colors and patterns for a full effect.
- Continue until the frame is completely covered.
- Fluff the fabric to add texture, and hang your wreath on the door.
Flower Pressing with Spring Blossoms
Capture the delicate beauty of spring flowers by pressing them to create lasting keepsakes or decorations.
Materials Needed:
- Fresh spring flowers
- Heavy books
- Parchment paper
- Wax paper
Steps:
- Choose fresh flowers that are in full bloom.
- Place the flowers between two pieces of parchment paper.
- Stack the flowers and parchment paper between pages of a heavy book.
- Leave the flowers pressed for about 1–2 weeks, changing the paper if necessary to absorb moisture.
- Once fully pressed, use the flowers in cards, scrapbooks, or frame them for a lovely decoration.
Spring-Inspired Watercolor Art
Explore your artistic side by painting vibrant, watercolor spring scenes that capture the essence of the season.
Materials Needed:
- Watercolor paints
- Watercolor paper
- Paintbrushes
- Water container
- Paper towels
Steps:
- Wet the watercolor paper with a clean brush dipped in water.
- Start painting soft pastel backgrounds, such as a sky or soft clouds.
- Once dry, paint floral or nature-themed elements, such as tulips, birds, or trees.
- Experiment with different techniques like wet-on-wet or dry brush to create various effects.
- Once the painting is complete, let it dry and display it in a frame for a spring touch.
Upcycled Tin Can Flower Planters
Transform old tin cans into charming planters for your spring blooms with this eco-friendly craft.
Materials Needed:
- Empty tin cans
- Spray paint or acrylic paint
- Paintbrushes
- Drainage pebbles (optional)
- Potting soil and flowers
Steps:
- Clean and dry the tin cans thoroughly.
- Paint the cans with spray paint or acrylic paint in bright, cheerful colors.
- If needed, create a small hole in the bottom of the can for drainage.
- Fill the can with drainage pebbles (optional), then add potting soil.
- Plant your favorite spring flowers, and display the planters on your porch or windowsill.
Paper Plate Birds
Let your creativity soar with these easy and adorable paper plate birds.
Materials Needed:
- Paper plates
- Colored paper or construction paper
- Glue
- Scissors
- Markers or paint
Steps:
- Cut a paper plate in half and color or paint it to form the bird’s body.
- Cut out wings, a beak, and eyes from colored paper.
- Glue the wings on each side of the bird’s body.
- Attach the beak and eyes, and use markers or paint to add details like feathers or patterns.
- Hang your birds in a window or create a mobile to brighten up a room.
Fabric Painted Spring Tote Bag
Create a stylish and practical spring accessory with a custom-designed fabric tote bag.
Materials Needed:
- Plain fabric tote bag
- Fabric paint
- Stencils or freehand designs
- Paintbrushes
Steps:
- Lay the tote bag flat and decide on your design.
- Use fabric paint and stencils to create spring-themed patterns, like flowers, butterflies, or leaves.
- Alternatively, paint freehand designs directly onto the bag.
- Let the paint dry completely, following the fabric paint instructions for setting.
- Use your personalized tote bag for spring outings or gift it to a friend.
Spring Bug Jar
Catch and release the springtime critters with a bug jar craft that’s perfect for curious kids.
Materials Needed:
- Clear glass jar
- Plastic or paper bugs
- Hot glue gun
- Colorful craft paper
- Scissors
Steps:
- Clean and dry the glass jar thoroughly.
- Cut colorful craft paper into strips and glue them around the lid of the jar.
- Glue small plastic or paper bugs to the inside of the jar.
- Secure the lid back onto the jar.
- Let the kids decorate the outside with stickers or additional craft elements, then use it for pretend play.
Daffodil Tissue Paper Craft
Create beautiful daffodils that won’t wilt with this easy tissue paper craft, perfect for spring décor.
Materials Needed:
- Yellow tissue paper
- Green pipe cleaners
- Scissors
- Glue
Steps:
- Cut the yellow tissue paper into squares.
- Layer the squares and scrunch them up in the middle to create a flower shape.
- Attach the flower to the top of a green pipe cleaner, twisting it to secure.
- Add additional layers of tissue paper to create a fuller bloom.
- Arrange the flowers in a vase or use them as gift toppers.
Springtime Button Art
Use buttons to create delightful spring-themed artwork, perfect for gifting or hanging on the wall.
Materials Needed:
- Assorted buttons in various colors
- Canvas or thick cardstock
- Hot glue gun
Steps:
- Choose a spring-inspired design, such as a flower, bird, or tree.
- Sketch the outline of the design lightly onto the canvas or cardstock.
- Begin gluing buttons onto the design, using buttons of different sizes and colors for dimension.
- Fill in the details of your design, covering the entire sketch with buttons.
- Let it dry completely before framing or gifting the artwork.
Spring Wall Hangings with Yarn
Make a cozy and colorful wall hanging to add some warmth to your spring décor with this simple yarn craft.
Materials Needed:
- Wooden dowel or branch
- Yarn in different colors
- Scissors
- Twine or string
Steps:
- Cut various lengths of yarn in different colors and textures.
- Tie the yarn to the wooden dowel or branch in a variety of patterns (e.g., knots, braids, or simple loops).
- Vary the length and texture of the yarn to create a layered effect.
- Once satisfied with the design, hang your yarn creation on the wall using twine or string.
- Enjoy the cozy, handmade touch it brings to your spring home décor.
Spring Feathered Crown
Celebrate the season with a whimsical, feathered crown that can be worn or displayed as décor.
Materials Needed:
- Colorful feathers
- Floral wire
- Hot glue gun
- Ribbon
Steps:
- Measure the circumference of your head and cut the floral wire to size.
- Begin gluing feathers onto the wire, layering them to create a full, feathery effect.
- Add flowers or beads for extra decoration, if desired.
- Once the crown is finished, tie a ribbon to each end of the wire to secure it on your head.
- Wear the crown to celebrate spring or place it on display as a decorative piece.
Felt Bunny Garland
Decorate your home with an adorable bunny-themed garland that’s perfect for Easter or spring celebrations.
Materials Needed:
- Felt sheets in pastel colors
- Scissors
- Bunny template
- String or ribbon
- Hot glue gun
Steps:
- Trace bunny shapes onto felt sheets using a template, then cut them out.
- Use a smaller circle or pom-pom to create tails for the bunnies and glue them in place.
- Lay out the bunnies in a line, and glue or sew them onto a string or ribbon.
- Hang the garland across a fireplace, window, or wall for festive spring décor.
Spring Memory Jars
Preserve your favorite spring memories by crafting decorative memory jars filled with seasonal treasures.
Materials Needed:
- Clear jars with lids
- Small flowers, leaves, or other spring mementos
- Ribbon or twine
- Labels or tags
Steps:
- Collect small items that remind you of spring, such as dried flowers, petals, or seeds.
- Place these items in the clear jar, arranging them to create an aesthetic display.
- Tie a ribbon or twine around the jar’s neck for decoration.
- Add a label or tag with the date or description of the memory.
- Display the jars on shelves or give them as thoughtful gifts.
Rainbow Wind Chime
Create a colorful wind chime that brings music and joy to your spring garden.
Materials Needed:
- Small terra-cotta pots or sturdy plastic cups
- Acrylic paints
- String or fishing line
- Small bells or beads
- Scissors
Steps:
- Paint each pot or cup in a different color of the rainbow, and let them dry completely.
- Cut lengths of string or fishing line and tie small bells or beads to the ends.
- Thread the strings through the pots, tying knots to secure them in place.
- Attach all the strings to a sturdy stick or a large ring to complete the wind chime.
- Hang it outside where the breeze will make it chime melodiously.
Floral Embroidery Hoops
Transform a simple embroidery hoop into a stunning spring decoration featuring flowers and greenery.
Materials Needed:
- Embroidery hoop
- Artificial flowers and greenery
- Hot glue gun
- Ribbon
Steps:
- Arrange artificial flowers and greenery around one half of the embroidery hoop.
- Glue them in place using a hot glue gun, layering for a full, textured look.
- Add a ribbon to the top of the hoop to create a loop for hanging.
- Display the hoop as wall art, a door decoration, or part of a spring centerpiece.
Painted Wooden Spring Signs
Create rustic wooden signs with spring-themed quotes or designs to add charm to your home.
Materials Needed:
- Wooden planks or pallets
- Acrylic paint
- Paintbrushes
- Stencils or freehand designs
Steps:
- Sand the wooden plank to create a smooth surface for painting.
- Apply a base coat of paint in a pastel color and let it dry.
- Use stencils or freehand to paint spring-themed quotes, such as “Hello Spring” or “Bloom & Grow.”
- Add decorative elements like flowers or birds to complement the design.
- Once dry, place the sign on a mantel or hang it on a wall.
Tissue Paper Cherry Blossoms
Recreate the beauty of cherry blossom trees with delicate tissue paper flowers.
Materials Needed:
- Pink tissue paper
- Brown craft paper or branches
- Glue
- Scissors
Steps:
- Cut the pink tissue paper into small squares or circles.
- Scrunch each piece into a flower shape, twisting the bottom to hold it together.
- Glue the tissue flowers onto branches or brown craft paper arranged like tree branches.
- Create a display by placing the branches in a vase or mounting them on a wall.
Springtime Candle Holders
Design elegant candle holders with a floral theme to set the mood for spring evenings.
Materials Needed:
- Glass jars or votive holders
- Pressed flowers
- Mod Podge
- Paintbrush
Steps:
- Clean the glass jar or holder and dry it thoroughly.
- Apply a thin layer of Mod Podge to the outside surface using a paintbrush.
- Carefully press pressed flowers onto the surface, smoothing them out.
- Seal the flowers with another layer of Mod Podge and let it dry completely.
- Place a tea light or votive candle inside, and enjoy the soft glow.
DIY Floral Crowns
Make a dreamy floral crown to wear at spring festivals, photoshoots, or just for fun!
Materials Needed:
- Floral wire
- Artificial flowers and greenery
- Floral tape
Steps:
- Measure the floral wire to fit around your head, leaving extra for securing the ends.
- Attach artificial flowers and greenery to the wire using floral tape, layering for fullness.
- Continue until the entire wire is covered with flowers.
- Secure the ends of the wire and wear the crown as a beautiful spring accessory.
Spring Ribbon Wands
Perfect for outdoor play, these ribbon wands are colorful and fun for kids and adults alike.
Materials Needed:
- Wooden dowels
- Ribbon in various colors
- Hot glue gun
Steps:
- Cut ribbons into long strips, about 2–3 feet each.
- Glue the ribbons to the top of the wooden dowel, layering them to create a full effect.
- Let the glue dry completely.
- Use the wands for dancing, play, or festive decorations at spring events.
Tips for Sharing & Celebrating Your Spring Crafts
Spring is the perfect season to celebrate creativity and bring people together through crafts. Whether you’re hosting a party, decorating your space, or sharing your work online, there are countless ways to enjoy and showcase your handmade creations. Here are some tips to help you share and celebrate your DIY Spring Crafts.
1. Hosting a Spring Craft Party
Throwing a craft party is a fun way to connect with friends and family while creating something beautiful together. Here’s how to make it a success:
- Set a Theme: Choose a spring theme like floral arrangements, Easter decorations, or nature-inspired crafts to tie the event together.
- Plan Ahead: Provide materials for a few easy-to-follow projects that cater to different skill levels.
- Create a Cozy Atmosphere: Decorate with fresh flowers, pastel colors, and cheerful spring music to set the mood.
- Offer Refreshments: Serve light snacks or a DIY drink station with lemonade and tea to keep everyone energized.
- Capture the Moment: Encourage guests to take photos of their creations and group shots to remember the event.
2. Displaying Your Creations at Home or Gifting Them
Your handmade crafts deserve to be admired! Here’s how you can showcase or share them:
- Home Decor: Use your crafts to brighten up your space. Place paper flowers on your dining table, hang wreaths on doors, or display painted pots on windowsills.
- Create Seasonal Gifts: Package your creations thoughtfully with eco-friendly wrapping and handwritten notes for a personal touch.
- Craft Kits: Assemble DIY kits of your projects as gifts, allowing others to enjoy the crafting experience themselves.
3. Sharing Projects on Social Media or in Community Groups
Showcasing your work online or locally can inspire others and foster a sense of community. Here’s how to share effectively:
- Social Media Platforms: Post photos and videos of your process and finished projects on Instagram, Pinterest, or TikTok with relevant hashtags like #SpringCrafts or #DIYInspiration.
- Engage with Others: Join crafting groups on Facebook or forums to exchange ideas, get feedback, and celebrate your creativity with like-minded people.
- Host Virtual Workshops: If you love teaching, organize a virtual crafting session and invite friends or followers to join.
- Local Art Fairs or Libraries: Display your crafts at community centers, markets, or spring events to connect with people in your area.
FAQ
What are some popular DIY Spring Crafts to make at home?
Popular DIY Spring Crafts include making floral wreaths, painting flower pots, creating paper flowers, designing fabric garlands, and decorating mason jars with pastel colors.
What materials do I need for DIY Spring Crafts?
Materials typically include colored paper, glue, scissors, ribbons, paint, floral wire, artificial or real flowers, and fabric scraps. Many DIY Spring Crafts can also use recycled items like jars or cardboard.
Are DIY spring crafts kid-friendly?
Yes, many DIY Spring Crafts are perfect for kids! Activities like decorating eggs, making paper flowers, or creating butterfly DIY Spring Crafts with construction paper are simple and safe with supervision.
How can I make a spring wreath?
To make a spring wreath, you’ll need a foam or wire wreath base, artificial flowers, greenery, a glue gun, and ribbon. Attach the flowers and greenery to the base with glue or floral wire, then add a ribbon for hanging.

Hi, I’m Victoria, an art and craft teacher at Newark City Schools, where I have the joy of working with middle school students to help them explore their creativity and develop their artistic talents. I believe that art is a powerful way for students to express themselves, and I strive to make every lesson a fun, engaging, and inspiring experience.
I created this website to share the art and craft projects, techniques, and resources that I use in my classroom, hoping to inspire both educators and young artists alike. Whether you’re a teacher looking for new ideas or a student eager to try something new, I’m excited to provide creative tools and projects that anyone can enjoy.
When I’m not in the classroom, I love experimenting with different art forms and learning new crafting techniques. My goal is to help others discover the joy of making things with their hands, and I hope my website serves as a space for everyone to explore their creative potential.