
Last summer, I found myself sitting on the porch with an iced coffee, staring at a pile of random craft supplies I’d bought on a whim. You know that feeling when you want to do something fun and creative, but your brain’s just blank? Yeah, that was me. The heat makes it hard to focus sometimes, but honestly, summer is the perfect season for simple, colorful DIY summer crafts. There’s something about sunshine, open windows, and long evenings that just makes creativity flow a little easier. And let’s be real—crafting is way better than doom-scrolling on your phone (guilty here too). Whether you’ve got kids begging for activities, or you just want something relaxing for yourself, I’ve got you covered. In this article, I’ll share easy, cheerful ideas that won’t break the bank or require a ton of skill—just some supplies, a little time, and a spark of inspiration.
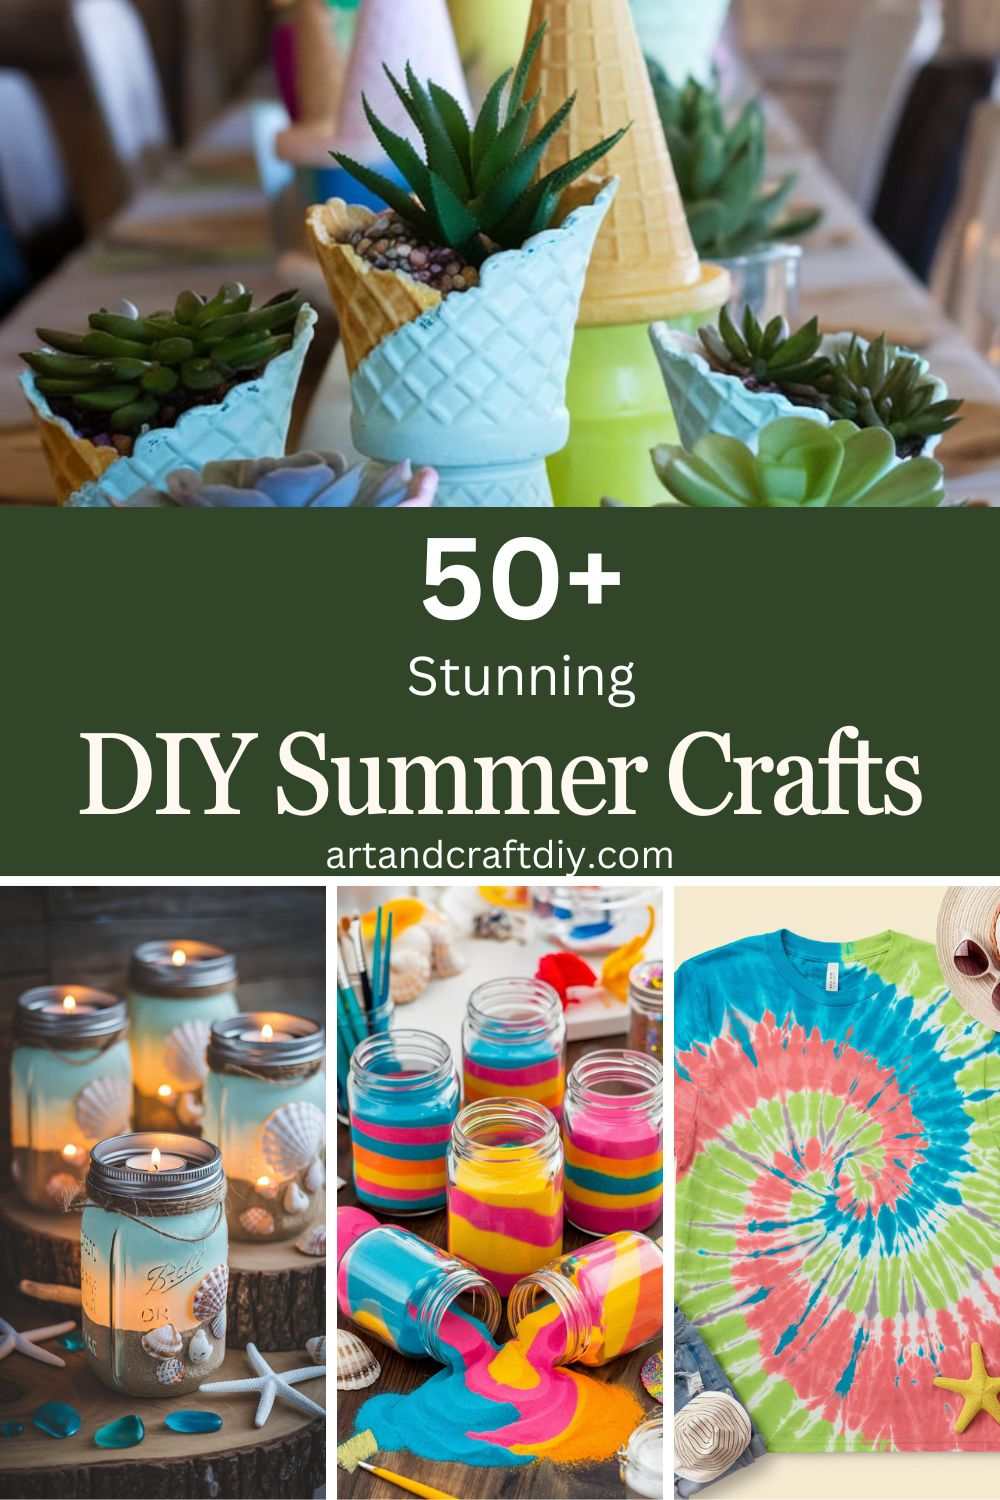
DIY Summer Crafts
DIY summer crafts are a fun and creative way to make the most of the warm, sunny months.
Painted Rock Garden Markers
Materials Used:
- Smooth rocks
- Acrylic paint
- Paintbrushes
- Permanent markers (optional)
- Clear acrylic sealer
Steps:
- Select smooth rocks of varying sizes.
- Clean and dry the rocks completely.
- Paint each rock with a base color using acrylic paint.
- Once the base coat is dry, add designs like flowers, names of plants, or fun patterns.
- Use a permanent marker to write plant names on the rocks.
- Let the paint dry completely, and then spray a clear acrylic sealer to protect the artwork from the elements.
- Place your painted rocks in the garden to mark your plants.
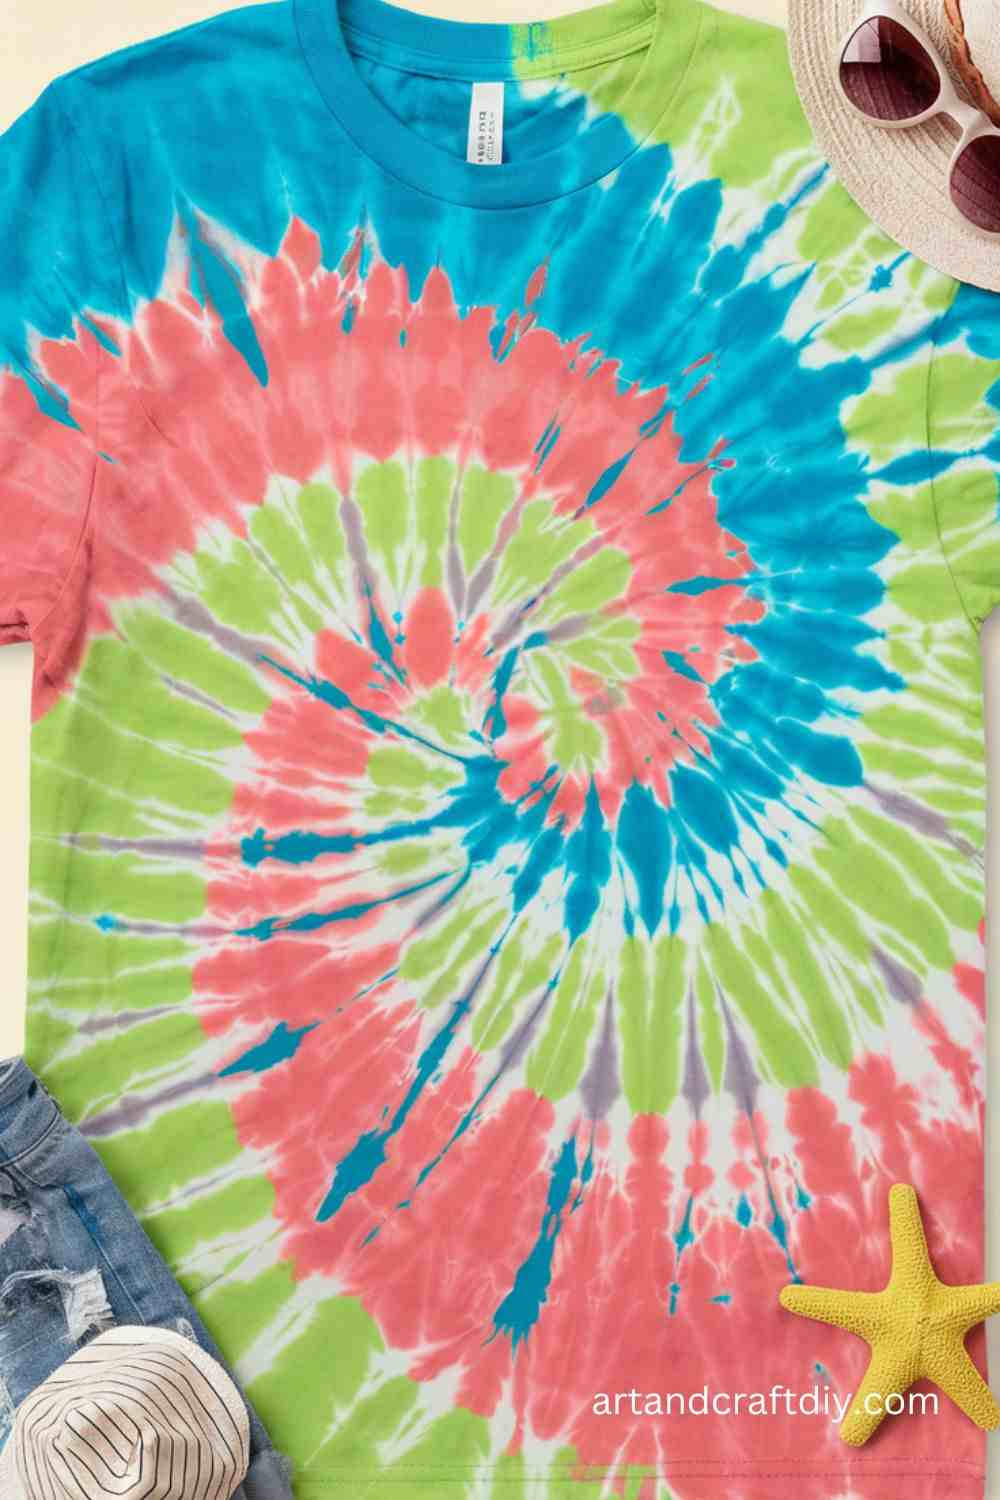
Tie-Dye T-Shirts
Tie-dyeing is a colorful and fun way to customize your clothes and add some flair to your summer wardrobe. This timeless craft is perfect for family gatherings and parties.
Materials Used:
- White cotton t-shirts
- Fabric dye in multiple colors
- Rubber bands
- Plastic squeeze bottles
- Plastic tablecloth or drop cloth
Steps:
- Lay down a plastic drop cloth to protect your working surface.
- Pre-wash your cotton t-shirts to remove any sizing.
- Decide on a tie-dye pattern (spiral, stripes, etc.).
- Use rubber bands to tightly bind sections of the shirt.
- Fill squeeze bottles with fabric dye and apply colors in your desired pattern.
- Allow the t-shirt to sit for 6-8 hours, wrapped in plastic.
- Rinse the shirt in cold water and let it air dry.
Seashell Wind Chime
A seashell wind chime is a perfect way to bring the sound of the ocean to your home or garden. This project will help you preserve summer memories through natural materials like seashells.

Materials Used:
- Seashells
- Fishing line or strong string
- Small wooden stick or driftwood
- Glue gun
- Drill (optional)
Steps:
- Collect seashells of different sizes and shapes.
- Drill small holes near the top of each seashell (if needed) or use glue to attach the fishing line.
- Cut pieces of fishing line in varying lengths.
- Tie the fishing line through the shells and attach them to the wooden stick or driftwood.
- Make sure the shells are spaced evenly.
- Hang the wind chime outside, and enjoy the soothing sound of the wind.
Watermelon Paper Lanterns
Watermelon paper lanterns are an adorable way to bring a fun and fruity touch to your summer décor. These lanterns can be used for outdoor parties, barbecues, or just to brighten up your patio.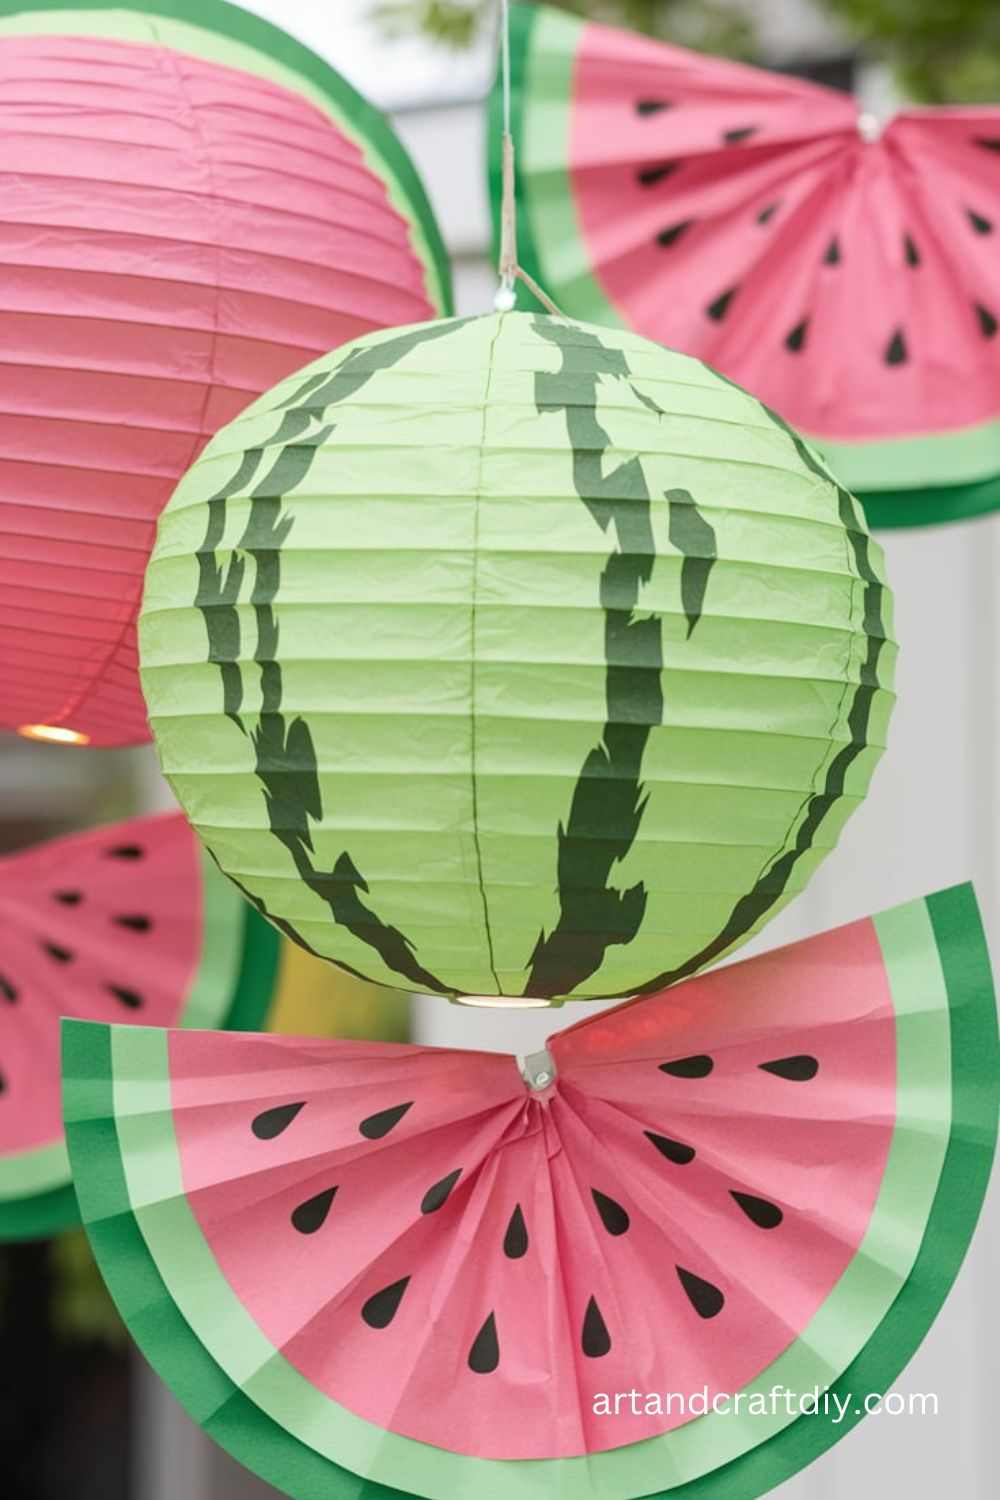
Materials Used:
- Red, green, and black construction paper
- Glue stick or hot glue gun
- Scissors
- LED tea light candles
Steps:
- Cut a large circle out of red construction paper for the watermelon “slice.”
- Cut a slightly smaller circle out of green paper for the rind.
- Attach the green paper around the edge of the red circle to form the rind.
- Cut small black seeds from the black paper and glue them onto the red circle.
- Cut slits in the red paper to form a lantern shape.
- Attach the ends of the red paper circle to form a cylindrical lantern.
- Place an LED tea light inside to illuminate the lantern.
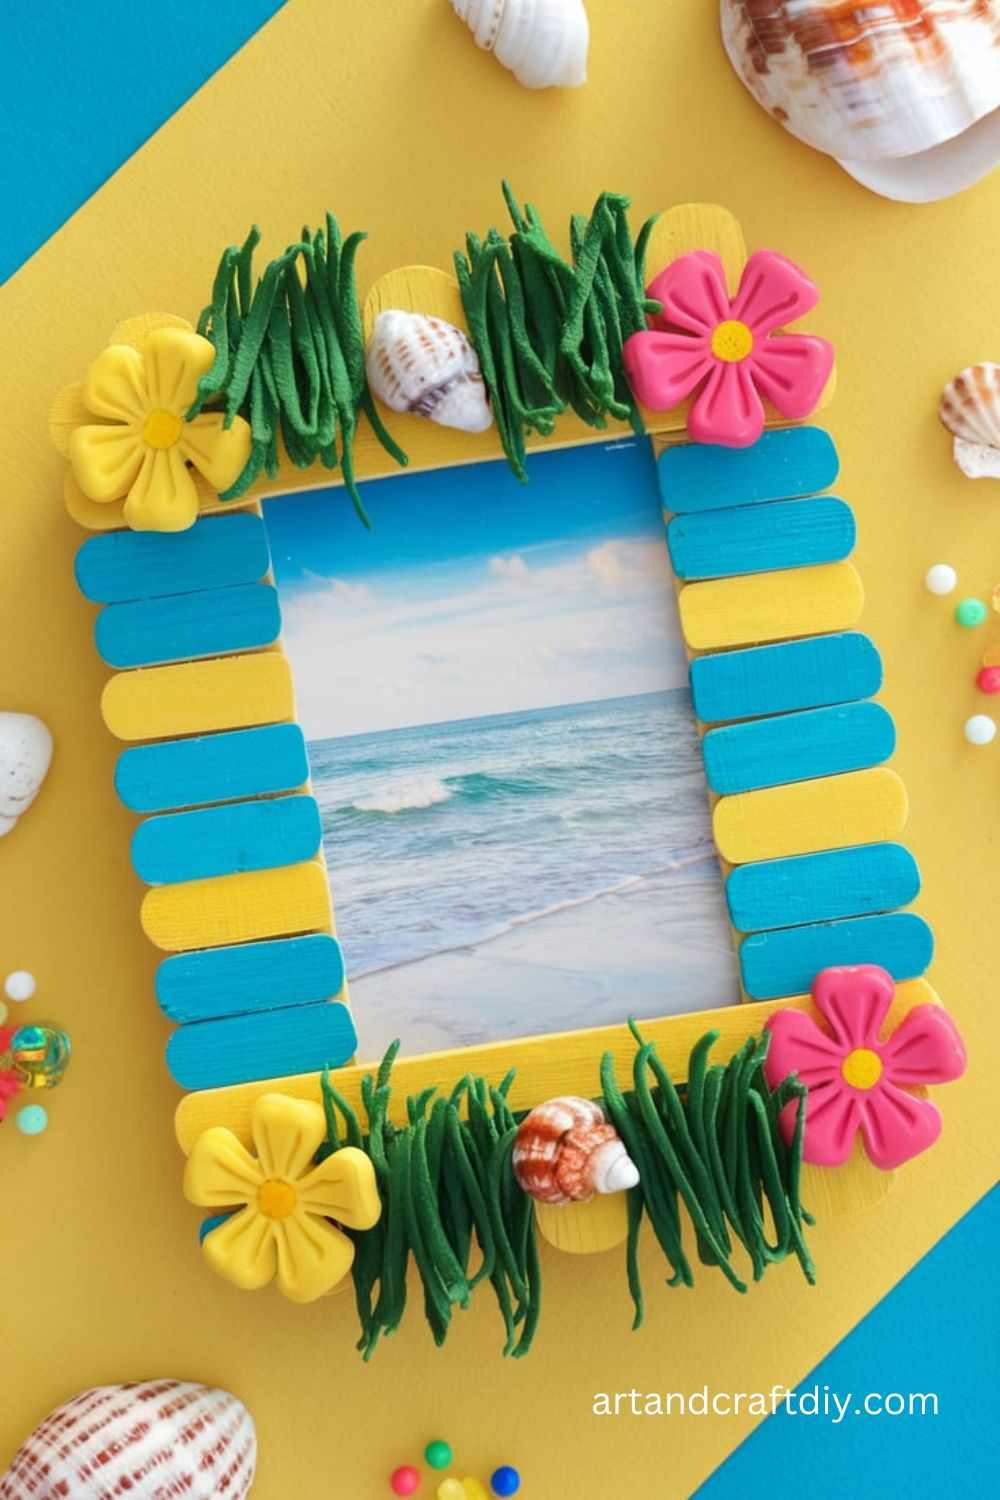
Popsicle Stick Picture Frames
This easy craft lets you create customized picture frames using popsicle sticks. You can decorate them with colorful paint, glitter, or embellishments to showcase your favorite summer memories.
Materials Used:
- Popsicle sticks
- Glue
- Paint and brushes
- Embellishments (buttons, glitter, etc.)
- Photo
Steps:
- Lay out the popsicle sticks and glue them together to form a square or rectangle, leaving a small gap in the center to place a photo.
- Let the glue dry completely.
- Paint the frame with vibrant colors or use a design like stripes, polka dots, or even tie-dye.
- Embellish the frame with glitter, buttons, or small seashells.
- Insert a photo and glue a backing material like cardboard to hold the photo in place.
DIY Bird Feeder
Create a simple and fun bird feeder to attract local birds to your yard. This craft is great for animal lovers and perfect for teaching kids about nature.
Materials Used:
- Toilet paper roll
- Peanut butter
- Birdseed
- String (optional)
Steps:
- Spread peanut butter evenly over the surface of the toilet paper roll.
- Roll the peanut butter-covered toilet paper roll in birdseed until it’s fully coated.
- If desired, thread a piece of string through the hole in the roll to hang it up.
- Hang the bird feeder on a tree branch and watch the birds come to visit.
Colorful Sand Jars
These vibrant sand jars make beautiful décor for any summer setting. You can mix and match different colored sands to create layered patterns in the jar, making it a fun and visually pleasing craft.
Materials Used:
- Colored sand
- Clear glass jars or containers
- Small funnel (optional)
Steps:
- Gather different colors of sand (you can buy colored sand or create your own using powdered chalk).
- Fill a clear jar with layers of sand in different colors.
- Use a funnel for a neat, controlled pour.
- Repeat the process to create striped patterns in the jar.
- Seal the jar with a lid for a finished look or leave it open for a decorative touch.
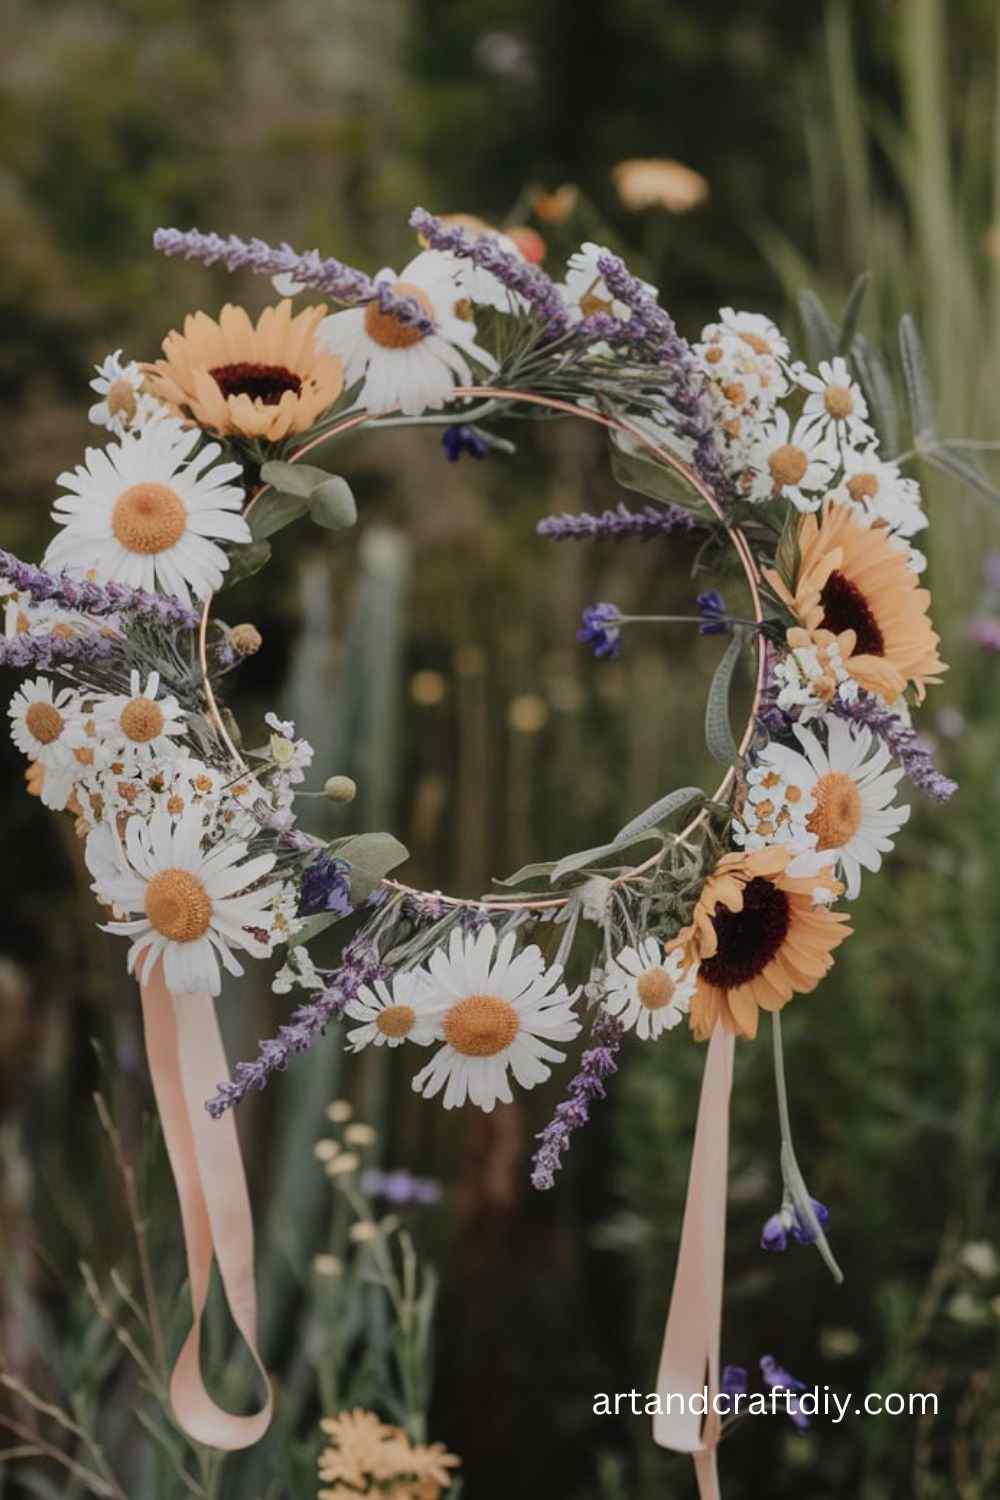
DIY Flower Crowns
Flower crowns are perfect for summer festivals, parties, or just as a fun accessory for a sunny day. This craft allows you to create beautiful headpieces using fresh or faux flowers.
Materials Used:
- Fresh flowers or faux flowers
- Floral wire
- Floral tape
- Ribbon (optional)
Steps:
- Measure the floral wire around your head to determine the size of the crown.
- Cut the wire and form a circular shape, securing the ends together with floral tape.
- Trim the flowers to short stems.
- Attach the flowers to the wire frame by wrapping their stems with floral tape.
- Continue adding flowers until the entire crown is covered.
- Tie a ribbon to the back of the crown for extra decoration and to ensure a snug fit.
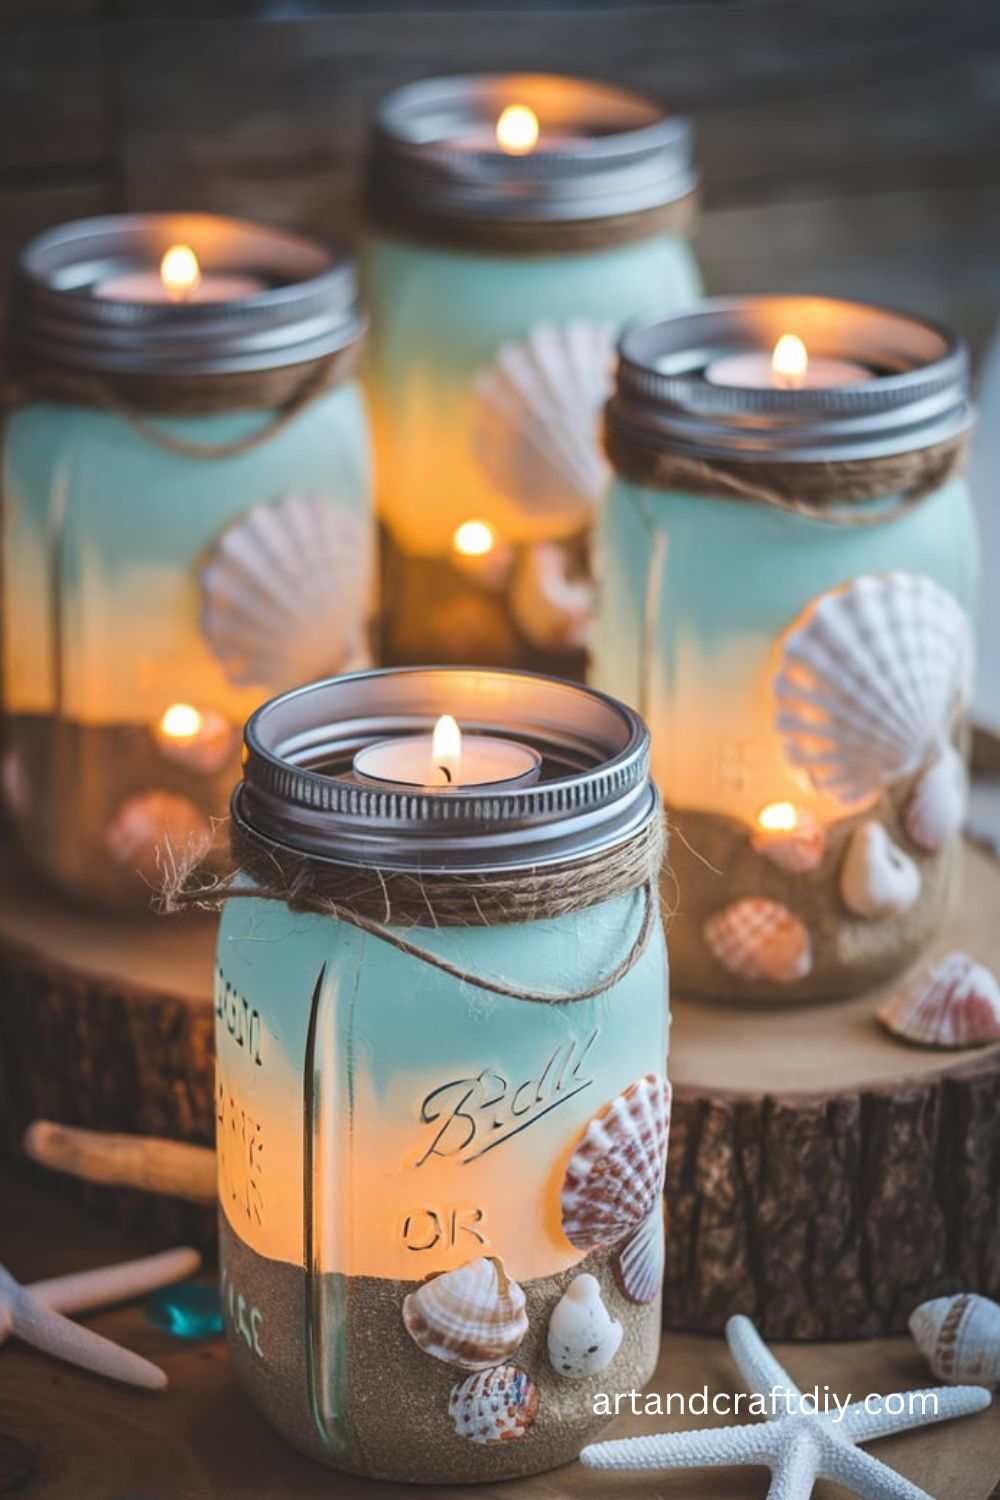
Beach-Themed Mason Jar Lanterns
These beach-themed lanterns create a calming coastal atmosphere. They are perfect for evening outdoor parties or adding a subtle glow to your porch.
Materials Used:
- Mason jars
- Sand
- Seashells
- Tea light candles
Steps:
- Fill the mason jars with a small layer of sand.
- Add a few seashells and smooth stones for decoration.
- Place a tea light candle inside each jar.
- Light the candles and enjoy the soft glow.
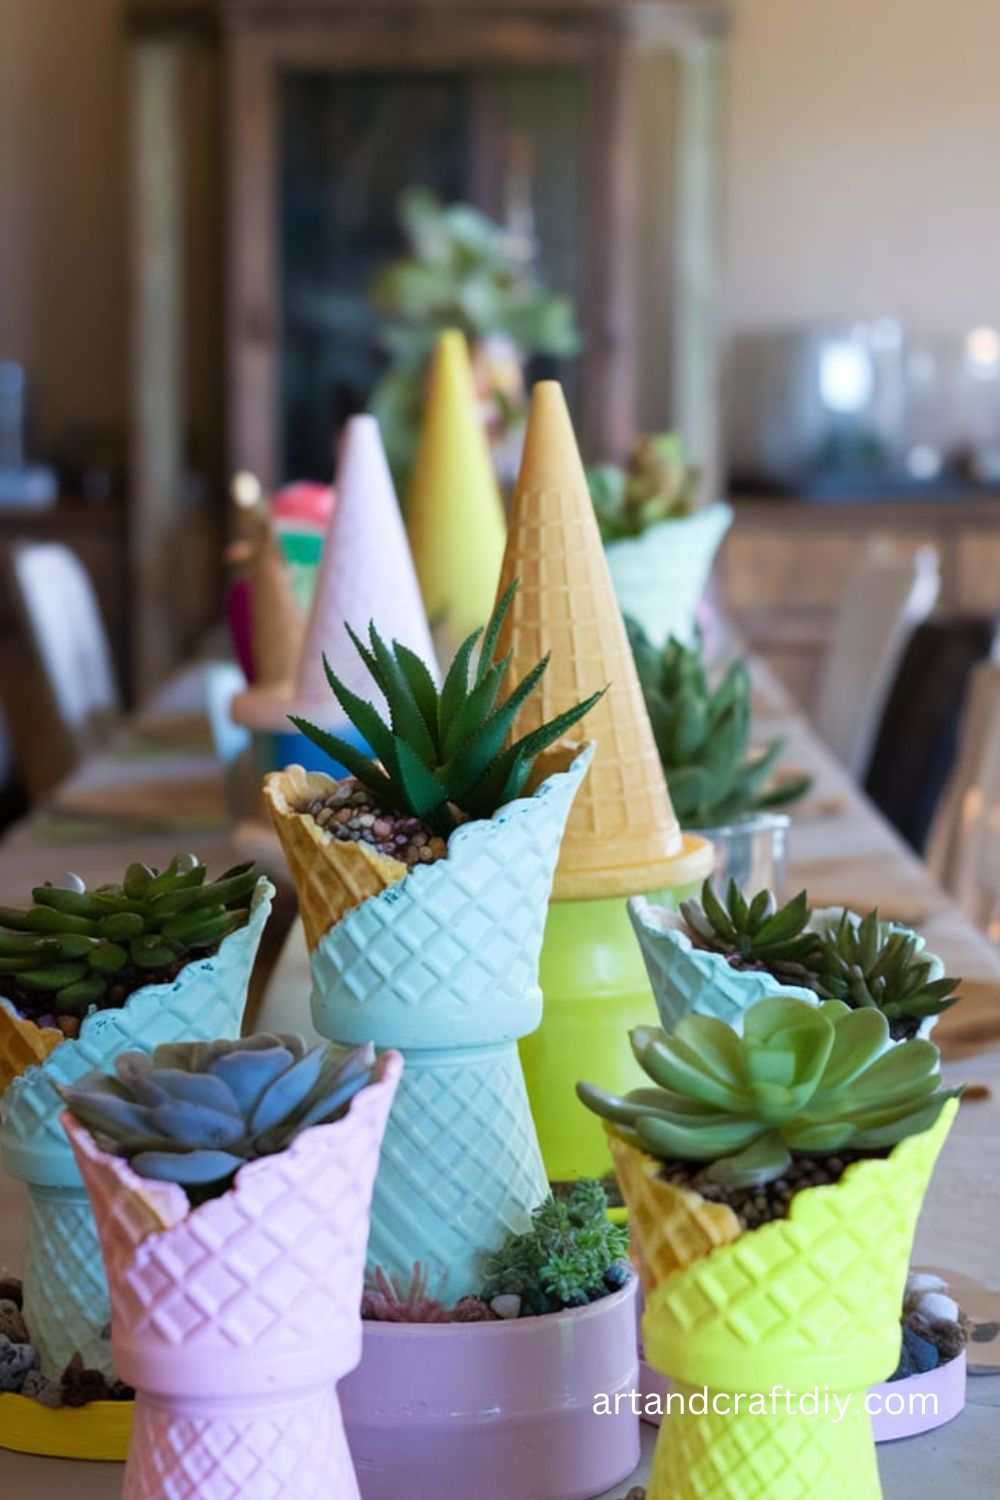
Ice Cream Cone Planters
Ice cream cone planters are a whimsical way to plant small flowers or succulents. This project is both fun and functional for adding a sweet touch to your home.
Materials Used:
- Small terracotta pots
- Acrylic paint
- Miniature fake ice cream cones
- Hot glue gun
- Plants or succulents
Steps:
- Paint the terracotta pots with pastel colors to mimic an ice cream cone.
- Once the paint is dry, use hot glue to attach a miniature fake ice cream cone to the top of the pot.
- Fill the pots with small plants or succulents.
- Display the ice cream cone planters indoors or outdoors.
Summer Wind Spinner
A wind spinner adds movement and color to your outdoor space. This craft is a fun way to create a vibrant, interactive decoration that catches the breeze.
Materials Used:
- Colorful paper
- Scissors
- Wooden dowel
- Glue
- String
Steps:
- Cut the paper into strips or shapes of your choice.
- Glue the paper to the wooden dowel, arranging the strips to create a spinner effect.
- Attach a string to the top of the dowel to hang it.
- Let the spinner catch the wind for a colorful display.
Mason Jar Fairy Lights
Add a magical glow to your home or garden with mason jar fairy lights. This craft is perfect for creating a cozy and enchanting atmosphere.
Materials Used:
- Mason jars
- String lights (battery-operated)
- Glitter (optional)
- Hot glue gun
Steps:
- Fill the mason jar with string lights.
- Optionally, sprinkle some glitter inside for a sparkling effect.
- Secure the lid of the mason jar, leaving the light strand hanging out.
- Turn on the lights and place the jars around your space for a soft, warm glow.
Pinecone Bird Nest
Create a bird nest using pinecones to attract wildlife to your yard. It’s a simple and eco-friendly way to make a nature-inspired craft.
Materials Used:
- Pinecones
- Twigs
- Hot glue gun
- Yarn or thread
Steps:
- Collect several pinecones that have a good natural shape.
- Glue small twigs between the pinecones to form the shape of a nest.
- Add a few strands of yarn or thread to simulate nesting materials.
- Place the nest in your garden or on your porch to watch birds come and go.
DIY Rainbow Wind Chime
A rainbow wind chime is a colorful and melodic addition to your outdoor décor. This project combines crafting and music for a whimsical touch.
Materials Used:
- Colorful beads
- Fishing line
- Metal or wooden rods
- String
- Scissors
Steps:
- Cut fishing line into various lengths.
- Thread colorful beads onto each strand of fishing line.
- Attach one end of each fishing line to the metal or wooden rods.
- Hang the rods so that they dangle at different lengths.
- The beads will produce a gentle sound as they sway in the wind.
DIY Beach Glass Jewelry
Beach glass jewelry is a beautiful way to recycle natural treasures found on the beach. This craft turns ordinary beach glass into elegant necklaces, earrings, and bracelets.
Materials Used:
- Beach glass
- Jewelry wire
- Pliers
- Necklace or earring hooks
Steps:
- Choose your favorite pieces of beach glass.
- Use jewelry wire to create loops around the glass pieces.
- Attach the glass to a necklace chain or earring hooks using small jump rings.
- Wear your beach glass jewelry as a reminder of your summer adventures.
Painted Plant Pots
Personalized plant pots make great gifts or additions to your garden. You can paint them with any design or color that suits your style.
Materials Used:
- Terracotta pots
- Acrylic paint
- Paintbrushes
- Clear acrylic sealer
Steps:
- Clean and dry the terracotta pots.
- Paint the pots with a design of your choice, such as geometric patterns or floral motifs.
- Let the paint dry completely.
- Seal the pots with a clear acrylic sealer to protect your design.
- Plant your favorite flowers or herbs in the newly painted pots.
Bubble Wrap Prints
Bubble wrap printing is a fun and tactile way to create textured artwork. It’s great for kids and adults alike and offers endless creative possibilities.
Materials Used:
- Bubble wrap
- Paint
- Paper
- Paintbrush
Steps:
- Cut a piece of bubble wrap to the size of your paper.
- Apply paint to the bubble wrap with a paintbrush.
- Press the painted bubble wrap onto the paper to transfer the texture.
- Peel off the bubble wrap and let the print dry.
DIY Seashell Coasters
Seashell coasters make a beautiful and practical souvenir from summer beach trips. These coasters can be customized with shells of different shapes and sizes.
Materials Used:
- Cork coasters
- Seashells
- Hot glue gun
- Mod Podge (optional)
Steps:
- Arrange seashells on the cork coaster in your desired pattern.
- Use a hot glue gun to attach the seashells securely.
- Optionally, coat the entire coaster with Mod Podge for added protection.
- Let the glue dry completely, and enjoy your new coasters.
Sun-Print T-Shirts
Sun-printing is an innovative craft that uses sunlight to create beautiful designs on fabric. This technique is great for experimenting with nature-inspired patterns.
Materials Used:
- White cotton t-shirts
- Sun-print fabric paint
- Natural objects (leaves, flowers, etc.)
Steps:
- Lay the t-shirt flat on a surface outside.
- Place natural objects on the fabric.
- Apply sun-print fabric paint over the items to reveal their shapes.
- Let the shirt sit in direct sunlight for several hours.
- Once the design is complete, remove the objects and let the shirt dry.
DIY Lavender Sachets
Lavender sachets are a delightful way to infuse your home with a relaxing, floral scent. They make wonderful gifts and can be placed in closets, drawers, or under pillows.
Materials Used:
- Dried lavender
- Small fabric squares or bags
- Needle and thread
- Ribbon
Steps:
- Sew small fabric bags or use pre-made fabric squares.
- Fill the bags with dried lavender buds.
- Sew the bags shut and tie a ribbon around them.
- Place the sachets in drawers or use them as gifts.
Painted Mason Jar Vases
Add a burst of color to your table with painted mason jar vases. These jars can be customized with various paint techniques to create unique, stylish vases for flowers.
Materials Used:
- Mason jars
- Acrylic paint
- Paintbrushes
- Clear acrylic sealer
Steps:
- Paint the mason jars with a color of your choice using acrylic paint.
- Once the paint dries, add decorative details such as stripes, dots, or flowers.
- Seal the jars with a clear acrylic sealer to protect the design.
- Use the jars as vases for fresh or artificial flowers.
Handprint Jellyfish
A handprint jellyfish craft is a perfect project for kids. It’s simple and fun, allowing little ones to create their own underwater artwork.
Materials Used:
- Blue construction paper
- Paint (blue, white, and pink)
- Markers
- Scissors
Steps:
- Paint your child’s hand with pink or purple paint and press it onto the construction paper.
- Once dry, use markers to draw a jellyfish’s tentacles coming from the handprint.
- Decorate with additional sea creature features if desired.
- Let the artwork dry before hanging it up.
Pineapple String Art
Pineapple string art combines geometry and creativity to produce a tropical decoration. This craft works well for brightening up any room.
Materials Used:
- Wooden board
- Nails
- Hammer
- Yellow and green string
Steps:
- Trace the shape of a pineapple on the wooden board.
- Hammer nails along the outline of the pineapple shape.
- Once the outline is complete, use yellow string to fill in the body of the pineapple.
- Add green string for the top leaves of the pineapple.
- Display your pineapple string art in your home.
Salt Dough Ornaments
Salt dough ornaments are a great way to create keepsakes or gifts. You can mold and shape them into a variety of designs that reflect summer fun.
Materials Used:
- Flour
- Salt
- Water
- Food coloring (optional)
- Cookie cutters
Steps:
- Mix 2 cups flour, 1 cup salt, and 1/2 cup water to form dough.
- Roll out the dough and use cookie cutters to create shapes like stars or seashells.
- Bake the ornaments at 250°F for 2-3 hours until they harden.
- Paint and decorate the ornaments as desired.
Paper Plate Jellyfish
Paper plate jellyfish are simple and fun to make. They are perfect for kids and help introduce them to ocean creatures.
Materials Used:
- Paper plates
- Streamers or tissue paper
- Markers
- Glue
Steps:
- Cut a paper plate in half and color it with markers.
- Glue streamers or tissue paper to the bottom of the plate to form tentacles.
- Decorate the top with a face or additional designs.
- Hang the jellyfish by attaching string to the top.
DIY Beach Tote Bag
Make your own beach tote bag for summer adventures. Personalize it with fabric paint or patches to make it uniquely yours.
Materials Used:
- Plain tote bag
- Fabric paint or fabric markers
- Stencils (optional)
- Paintbrushes
Steps:
- Lay out the tote bag on a flat surface.
- Use fabric paint or markers to decorate the bag.
- Let the bag dry before using it to carry towels, books, and snacks to the beach.
Summer Memory Box
Create a memory box to preserve your summer keepsakes. It’s a fun way to hold onto tickets, photos, and trinkets.
Materials Used:
- Wooden box
- Paint or decorative paper
- Stickers or embellishments
Steps:
- Decorate the wooden box using paint or paper.
- Add stickers or embellishments to make the box personalized.
- Use the box to store mementos from your summer adventures.
Paper Straw Bunting
This paper straw bunting makes a colorful and festive decoration for summer parties. It’s easy to make and adds a pop of color to any event.
Materials Used:
- Paper straws
- Scissors
- String or twine
- Glue
Steps:
- Cut the paper straws into small segments.
- Thread the straws onto a piece of string or twine.
- Arrange the straws in a pattern, gluing them in place.
- Hang the bunting at your party or event.
Fruit Slice Coasters
Fruit slice coasters are a fun and fruity craft project. They’re perfect for summer picnics and barbecues.
Materials Used:
- Felt in different colors
- Scissors
- Fabric glue
Steps:
- Cut the felt into circular shapes.
- Use additional felt in different colors to create fruit slices (lemons, watermelons, etc.).
- Glue the pieces together to form fruit slice designs.
- Use the coasters to protect your surfaces from drinks.
Butterfly Feeding Station
A butterfly feeding station is an interactive craft that encourages wildlife into your garden. It’s simple to make and beneficial for the local ecosystem.
Materials Used:
- Small dishes
- Sugar water or overripe fruit
- Sponges
Steps:
- Place small dishes filled with sugar water or overripe fruit in your garden.
- Soak sponges in sugar water and place them in the dishes.
- Wait for butterflies to come and enjoy the feeding station!
Eco-Friendly Crafts: Sustainable and Fun DIY Projects
Eco-friendly crafts are an excellent way to repurpose old items and create something useful while reducing waste. Whether you’re looking to create reusable items for your home or eco-conscious gifts, these DIY projects are simple, enjoyable, and help the environment. Here are three easy upcycling ideas you can try, all made from common materials you likely already have at home.
Upcycled T-Shirt Tote Bags
Transform old t-shirts into stylish, reusable tote bags that help reduce plastic waste. It’s a fun, no-sew project perfect for beginners.
Materials Needed:
- Old t-shirts
- Scissors
- Sewing kit (optional)
Step-by-Step Instructions:
- Lay your old t-shirt flat on a surface.
- Cut off the sleeves and neckline of the shirt to create the handles and open top.
- Turn the shirt inside out and sew or knot the bottom closed. If sewing, simply stitch across the bottom of the shirt to seal it.
- Flip the shirt right-side out, and you now have a cute, eco-friendly tote bag!
DIY Beeswax Food Wraps
Create your own sustainable food wraps to replace single-use plastic wraps. These beeswax wraps are perfect for packing lunches, wrapping fruits, or covering leftovers.
Materials Needed:
- Cotton fabric (old shirts, tea towels, or fabric scraps)
- Beeswax pellets
- Parchment paper
- Iron
Step-by-Step Instructions:
- Cut the cotton fabric into the desired shape and size for your food wrap (typically about 12×12 inches).
- Place the fabric on a sheet of parchment paper and sprinkle beeswax pellets evenly across the fabric.
- Cover with another piece of parchment paper and gently press with an iron on a low setting to melt the beeswax into the fabric.
- Let the fabric cool and solidify. Your reusable beeswax food wrap is now ready to use!
Plant-Based Bird Feeders
A fun, simple way to support local wildlife and create an eco-friendly bird feeder that uses natural materials.
Materials Needed:
- Pinecones
- Peanut butter (smooth or chunky)
- Birdseed
Step-by-Step Instructions:
- Take a pinecone and spread peanut butter all over it, making sure to coat it generously.
- Roll the peanut butter-covered pinecone in birdseed until it’s well covered.
- Hang the pinecone feeder from a tree branch using a string or twine.
- Watch as birds enjoy the tasty treat!
FAQ
What are some easy DIY summer crafts for beginners?
There are many simple DIY summer crafts you can try, such as creating painted rocks, making tie-dye t-shirts, crafting flower crowns, or designing paper lanterns. These projects require minimal supplies and are fun for all ages.
What materials do I need for DIY summer crafts?
Basic materials for summer crafts often include paper, fabric, glue, scissors, paint, markers, beads, ribbons, and natural items like flowers or shells. Specific projects may require additional items, but these are a good starting point.
How can I make my DIY summer crafts eco-friendly?
To make eco-friendly crafts, use recycled materials, natural elements like leaves or stones, and non-toxic paints or glues. You can also repurpose old clothing or jars to create something new.
What are some DIY summer crafts I can do with kids?
Kids will love making things like DIY kites, painted seashells, popsicle stick picture frames, or friendship bracelets. These projects are easy, safe, and fun for young hands.

Hi, I’m Victoria, an art and craft teacher at Newark City Schools, where I have the joy of working with middle school students to help them explore their creativity and develop their artistic talents. I believe that art is a powerful way for students to express themselves, and I strive to make every lesson a fun, engaging, and inspiring experience.
I created this website to share the art and craft projects, techniques, and resources that I use in my classroom, hoping to inspire both educators and young artists alike. Whether you’re a teacher looking for new ideas or a student eager to try something new, I’m excited to provide creative tools and projects that anyone can enjoy.
When I’m not in the classroom, I love experimenting with different art forms and learning new crafting techniques. My goal is to help others discover the joy of making things with their hands, and I hope my website serves as a space for everyone to explore their creative potential.