
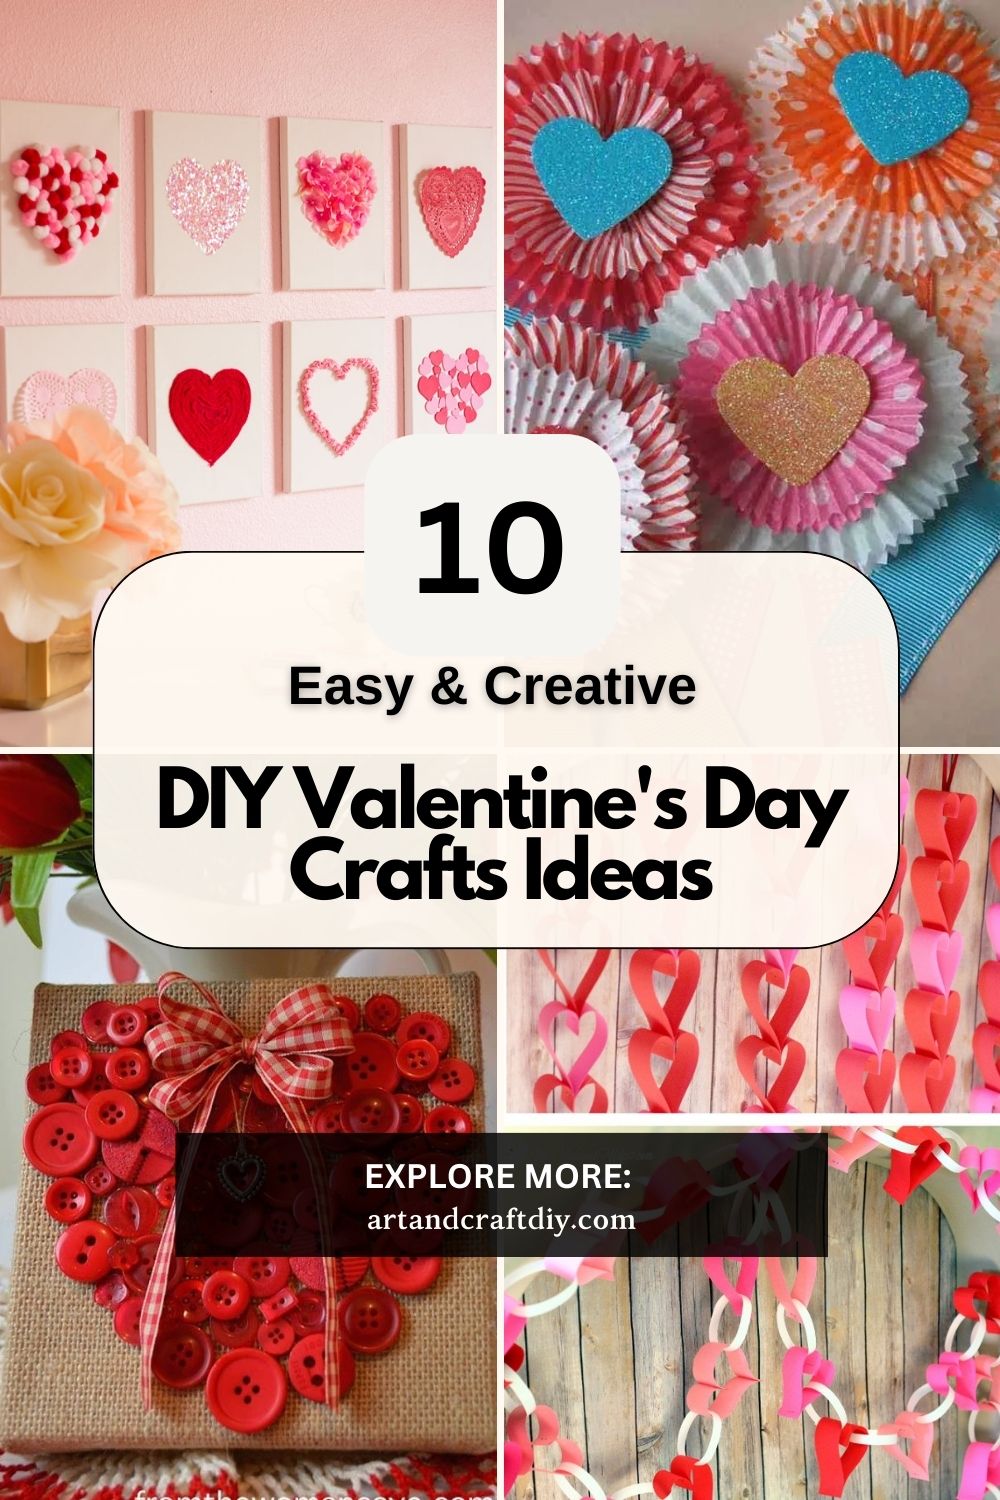
I still remember one Valentine’s Day when I realized—way too late—that I’d forgotten to buy a card. Shops were crowded, everything felt overpriced, and honestly, none of it felt me. So I grabbed some paper, glue, and whatever was lying around at home… and you know what? That handmade card ended up meaning way more than anything store-bought. Ever been there?
That’s exactly why I love DIY Valentine’s Day Crafts Ideas. They’re not about being perfect or Pinterest-famous. They’re about slowing down, getting a little messy, and making something that actually feels personal. Whether you’re short on time, on a budget, or just tired of the same old hearts-and-roses routine, I get it. We all want something meaningful without the stress, right?
In this article, I’ll share simple, creative ideas that anyone can try—yes, even if you think you’re “not crafty.” Stick with me, and by the end, you’ll have fun, doable craft ideas that feel heartfelt, not forced. 💖
DIY Valentine’s Day Crafts Ideas
DIY Valentine Crafts ideas are a fun and creative way to celebrate love and affection, whether for a partner, friends, or family. DIY Valentine Crafts ideas allow you to personalize gifts, cards, and decorations, adding a special touch that store-bought items can’t match.
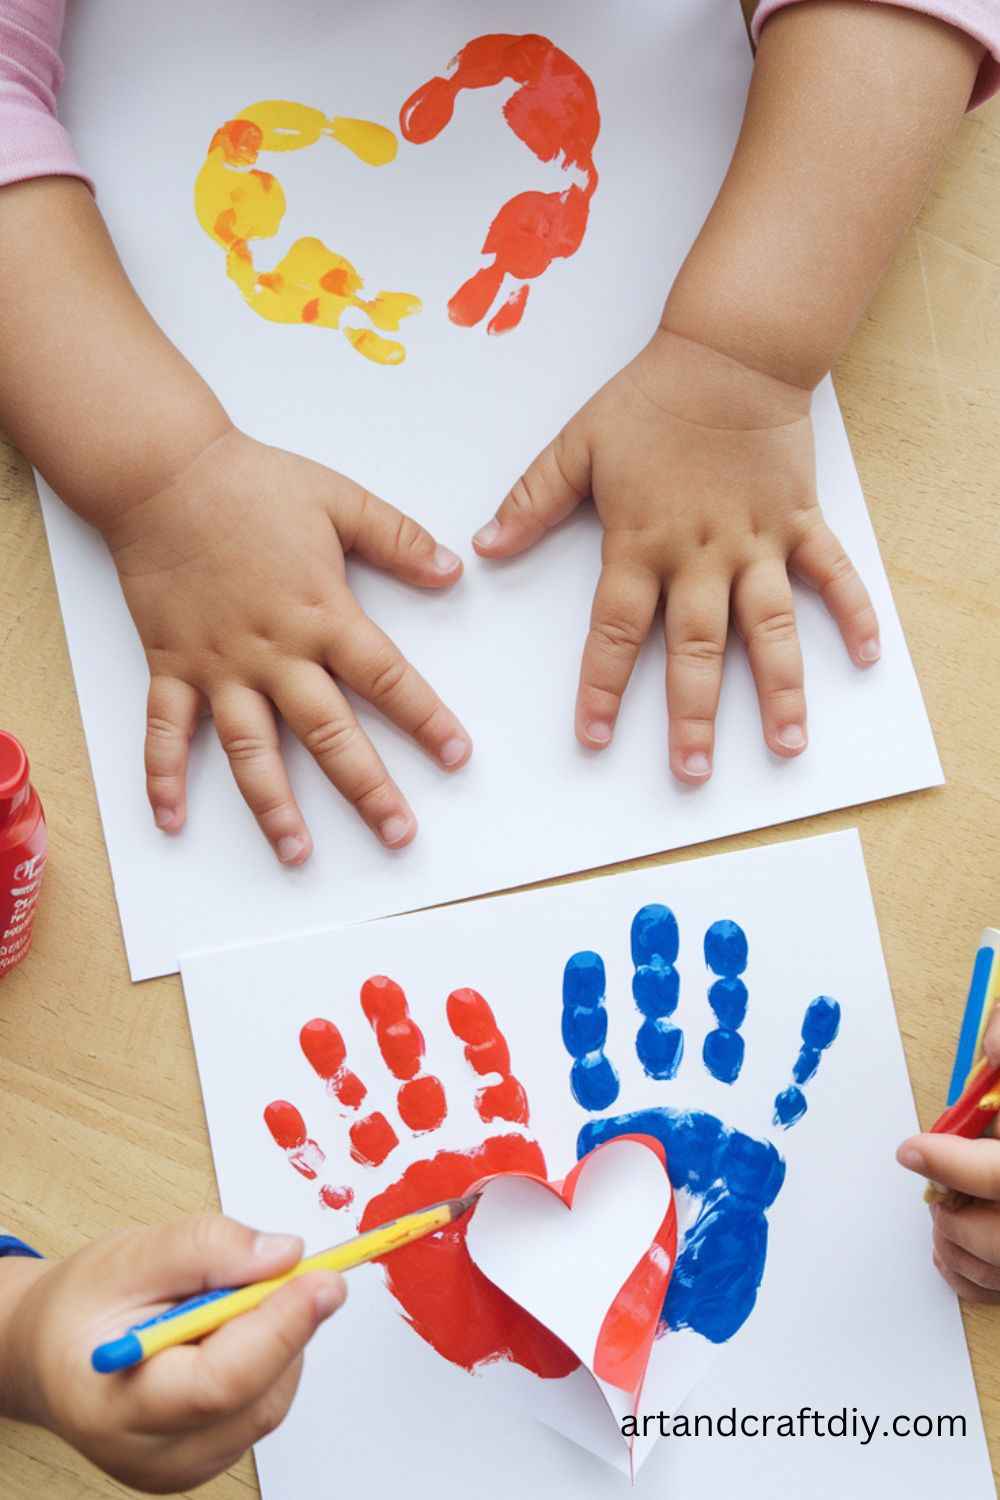
Heart-Shaped Handprint Card
This craft is a perfect keepsake that incorporates your child’s handprint into a beautiful Valentine’s Day card. It’s a fun and memorable way to create a unique card for a loved one.
Explore more: DIY Crafts For Teens
Materials Used:
- Construction paper
- Markers
- Paint
- Scissors
- Glue
Steps:
- Begin by folding the construction paper in half to form a card.
- Use paint to stamp your child’s handprint on the front of the card, positioning the hands in a heart shape.
- Let the print dry completely.
- Once dry, use markers to add a sweet message or drawing around the handprints.
- You can also decorate the card with additional hearts, stars, or glitter.
- Let everything dry before giving it to a loved one.
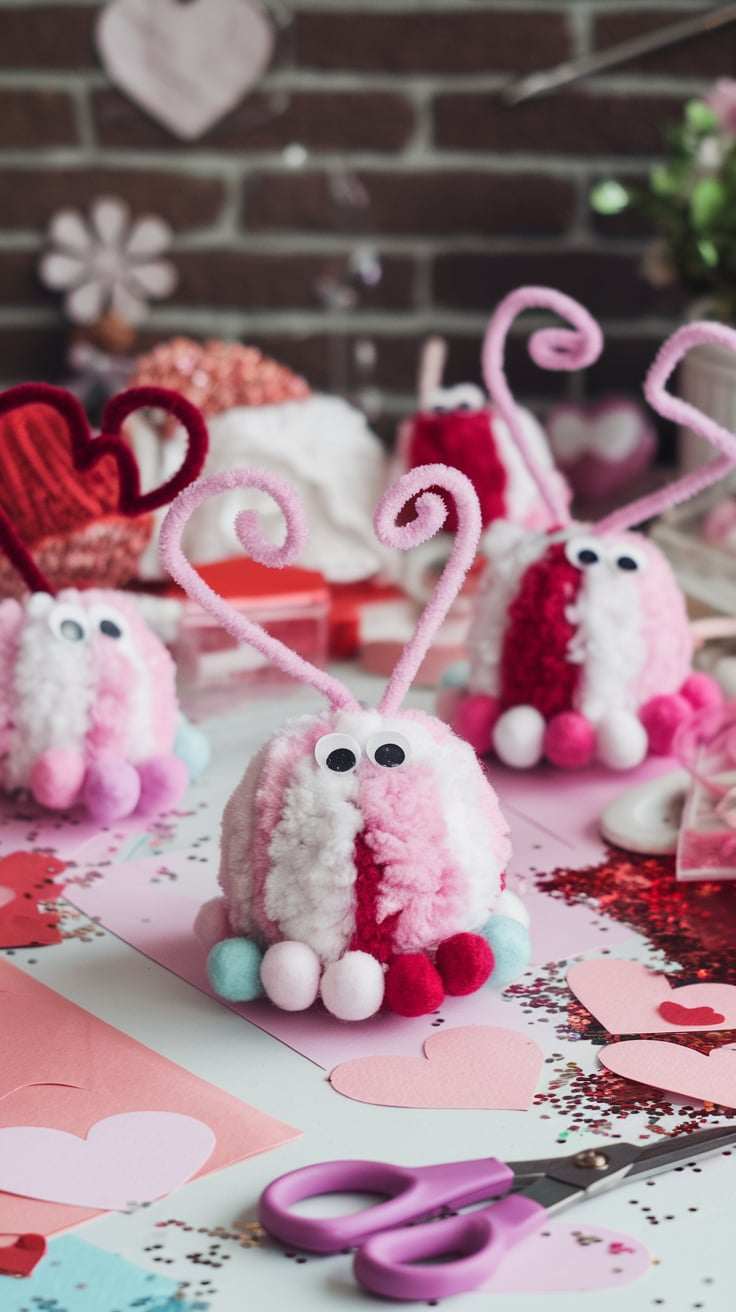
Lovebug Pom-Poms
Create adorable lovebug pom-poms using simple materials that can be customized for a cute Valentine’s gift or decoration.
Materials Used:
- Red, pink, and black yarn
- Glue gun or craft glue
- Googly eyes
- Pipe cleaners
Steps:
- Start by making a pom-pom with red or pink yarn. To do this, wrap yarn around your fingers until it’s thick, then tie a knot in the center to secure it.
- Cut the loops on both sides to create a fluffy pom-pom.
- For the antennae, bend pipe cleaners into small loops and glue them to the top of the pom-pom.
- Attach googly eyes to the front of the pom-pom.
- You can also add little hearts or decorations around the bug.
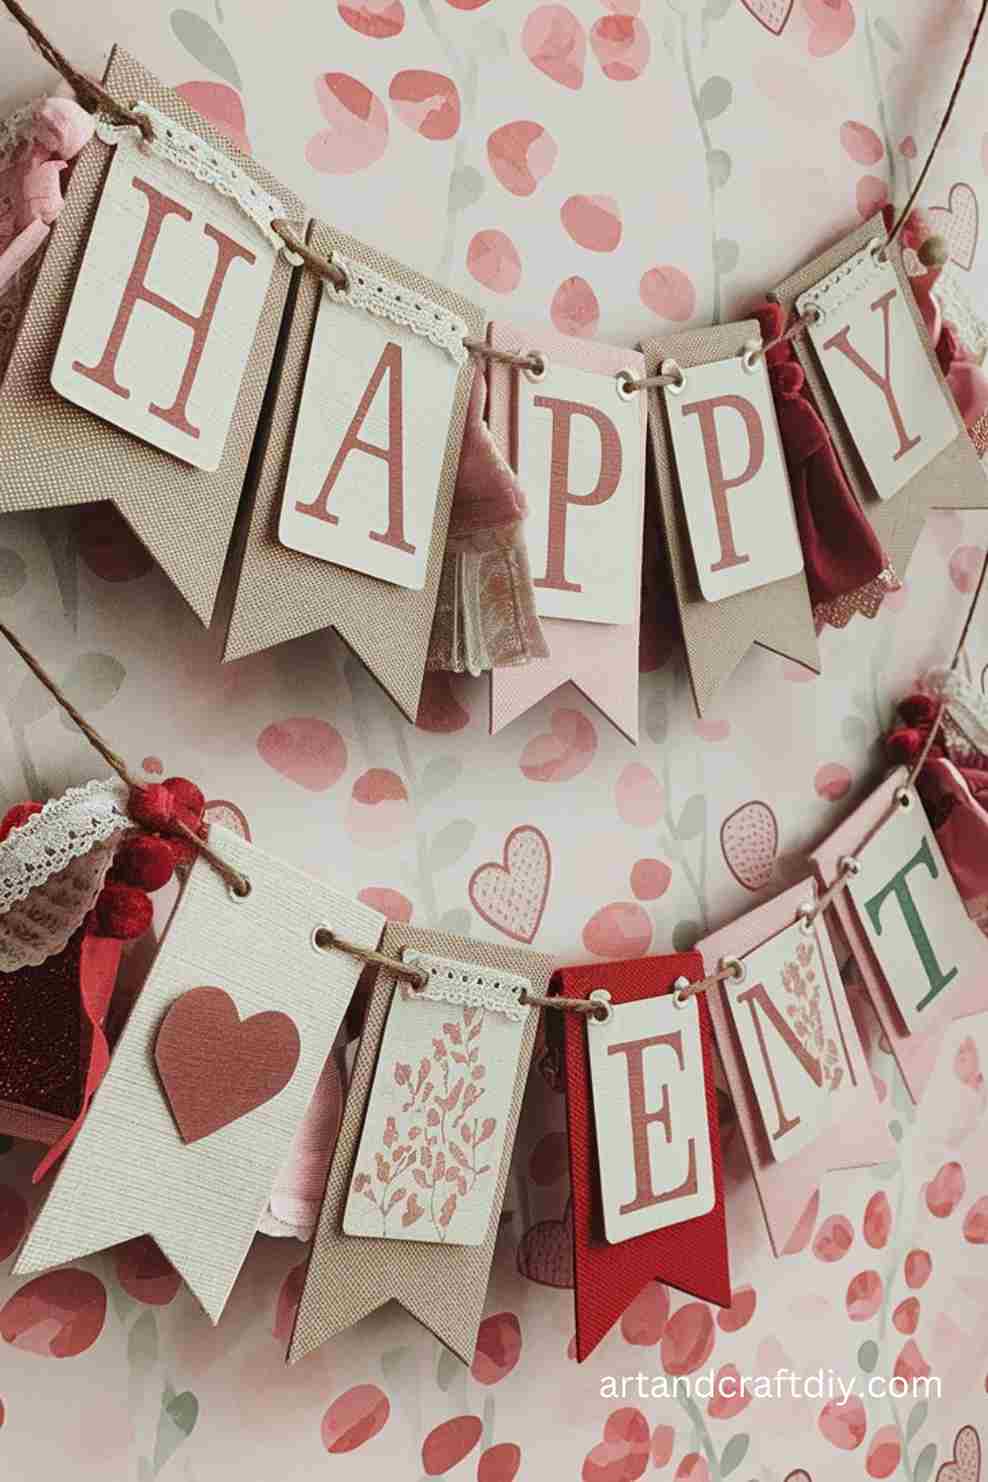
DIY Valentine’s Day Banner
This simple banner will add a festive touch to your home decor for the holiday. You can hang it above a fireplace or on a wall.
Explore more: DIY Craft Warehouse
Materials Used:
- Red and pink felt
- Scissors
- Twine or ribbon
- Fabric glue
- Markers or fabric paint
Steps:
- Cut the felt into small triangles, around 4-5 inches tall.
- Use fabric glue to attach each triangle to a piece of twine, leaving a little space between each.
- Decorate each triangle with a different message, drawing, or design.
- Once dry, hang your banner where it can be admired.
Valentine’s Day Photo Frame
A personalized photo frame is a sentimental gift, perfect for displaying a special memory.

Materials Used:
- Wooden frame
- Paint
- Stickers or embellishments
- A photo
Steps:
- Paint the frame in Valentine’s colors like red, pink, or white.
- Once dry, decorate the frame with stickers, beads, or other embellishments.
- Place your favorite photo inside the frame.
- Your custom Valentine’s Day photo frame is ready to give as a gift.
DIY Valentine’s Day Slime
A fun and messy way to make Valentine’s-themed slime that can be gifted or played with!
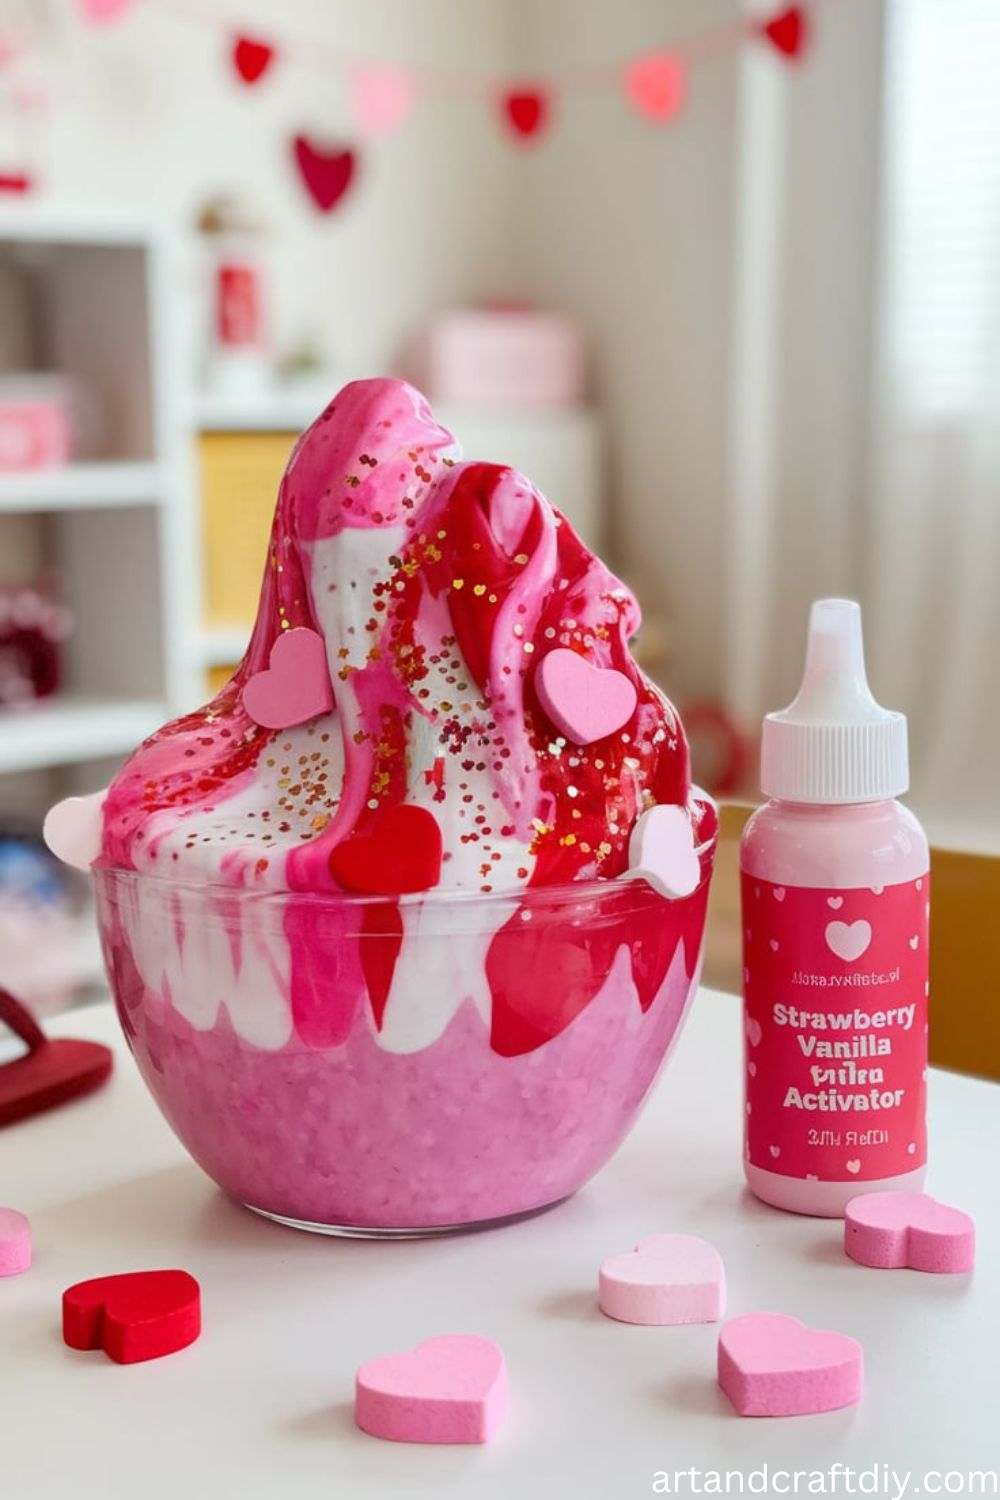
Materials Used:
- White school glue
- Baking soda
- Contact lens solution
- Glitter
- Red or pink food coloring
Steps:
- Pour about ½ cup of white glue into a bowl.
- Add a few drops of food coloring and mix.
- Stir in 1 teaspoon of baking soda.
- Slowly add contact lens solution, stirring constantly until the mixture turns into slime.
- Add glitter for some sparkle and play with your new Valentine’s slime!
Personalized Love Mugs
Create personalized Valentine’s Day mugs that make a perfect gift for your partner, friend, or family member.
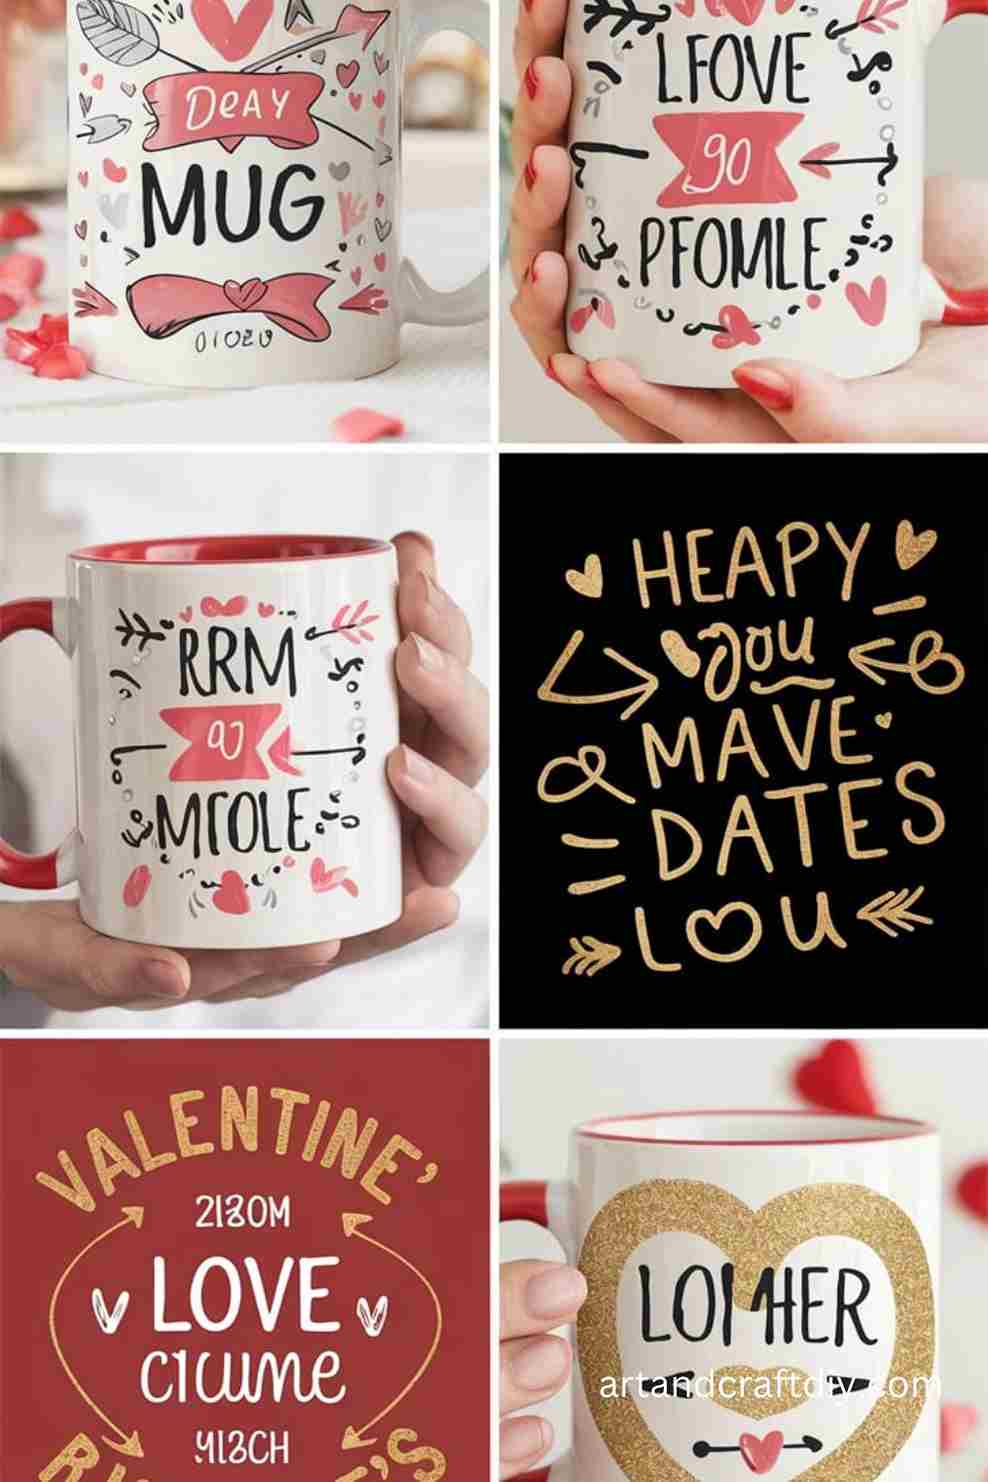
Materials Used:
- Plain ceramic mugs
- Sharpie paint markers
- Rubbing alcohol
Steps:
- Clean the mug using rubbing alcohol to remove any oils or dirt.
- Use sharpie paint markers to draw designs or write a message on the mug.
- Draw hearts, “Love You,” or any other Valentine’s theme.
- Bake the mug in the oven at 350°F for 30 minutes to set the design.
- Let the mug cool completely before gifting it.
Cupid’s Arrow Pencil Topper
A fun, school-inspired craft that can be attached to your pencils or pens. It’s a great way to add a little Valentine’s spirit to your desk.
![]()
Materials Used:
- Red, pink, and white foam sheets
- Scissors
- Hot glue gun
- Wooden pencil
Steps:
- Cut a small heart from the pink foam and a pointed arrowhead shape from the white foam.
- Attach the arrowhead to the tip of the pencil with hot glue.
- Next, cut a small slit in the center of the heart, then glue it at the back end of the pencil, creating the fletching (feathers) of the arrow.
- Once the glue has dried, you can use your decorated pencil!
Heart Garland
This DIY heart garland is a simple and cute decoration that adds a festive touch to your home for Valentine’s Day.
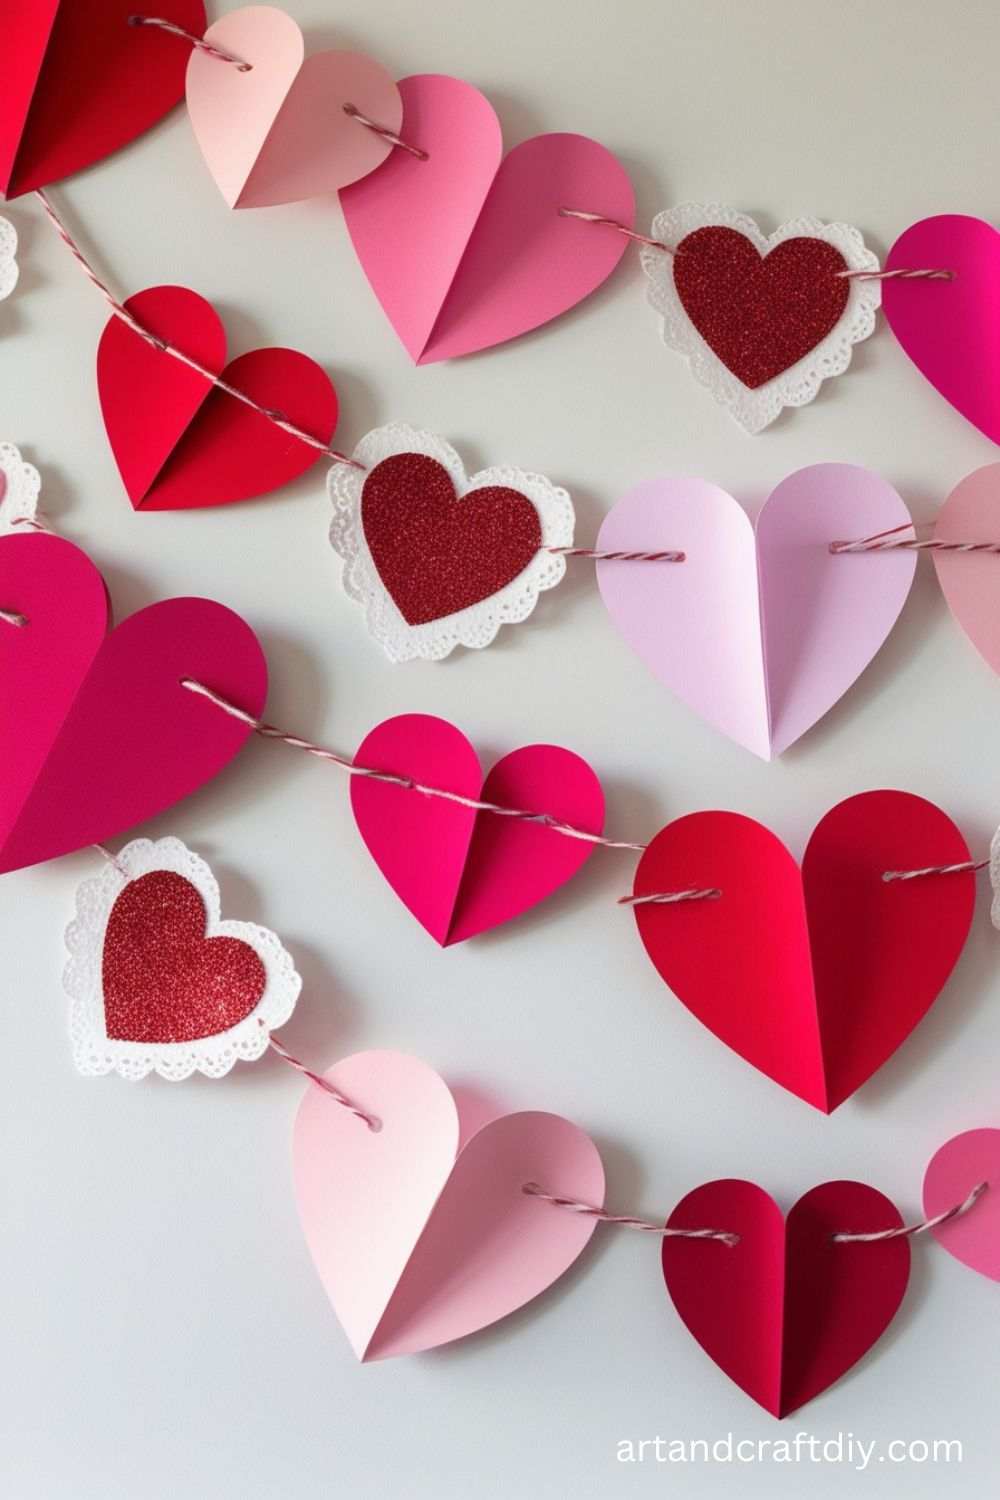
Materials Used:
- Red, pink, and white construction paper
- Scissors
- Hole punch
- String or ribbon
- Glue
Steps:
- Cut out several small hearts from the construction paper.
- Use a hole punch to make a small hole at the top of each heart.
- Thread the hearts onto a string or ribbon, spacing them evenly.
- Once you have enough hearts on the string, hang the garland around your house, doorways, or across the fireplace for a cute decoration.
Paper Rose Bouquet
This is a charming DIY paper bouquet that looks like a real rose but lasts forever. It’s perfect for giving a bouquet without worrying about the flowers wilting.
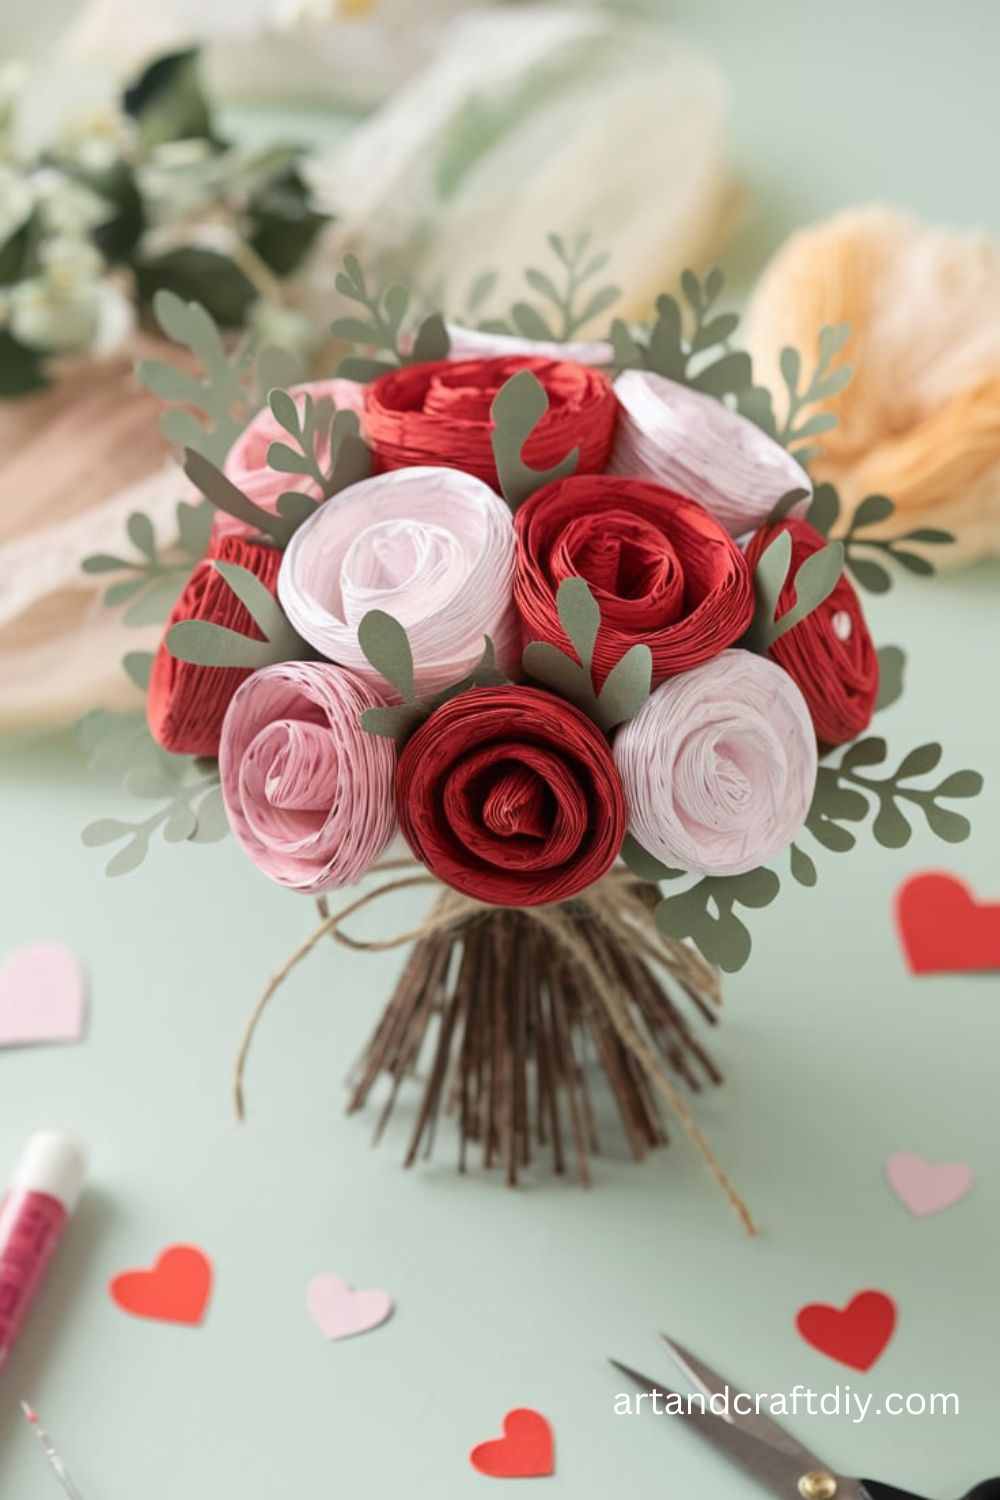
Materials Used:
- Red, pink, and green paper
- Scissors
- Hot glue gun
- Green floral wire
- Green tape
Steps:
- Cut several circular petals from the red or pink paper.
- Cut small slits at the edges of each petal to create a more natural look.
- Roll the petals around each other to form a flower shape, securing each layer with hot glue.
- Use green paper to cut out leaves and attach them to the base of the flower.
- Wrap the floral wire with green tape to form the stem, then attach the rose to the stem using hot glue.
- Arrange your flowers into a beautiful bouquet.
Valentine’s Day Felt Hearts
These cute felt hearts are easy to make and can be used as ornaments or as a part of a larger decoration like a garland.
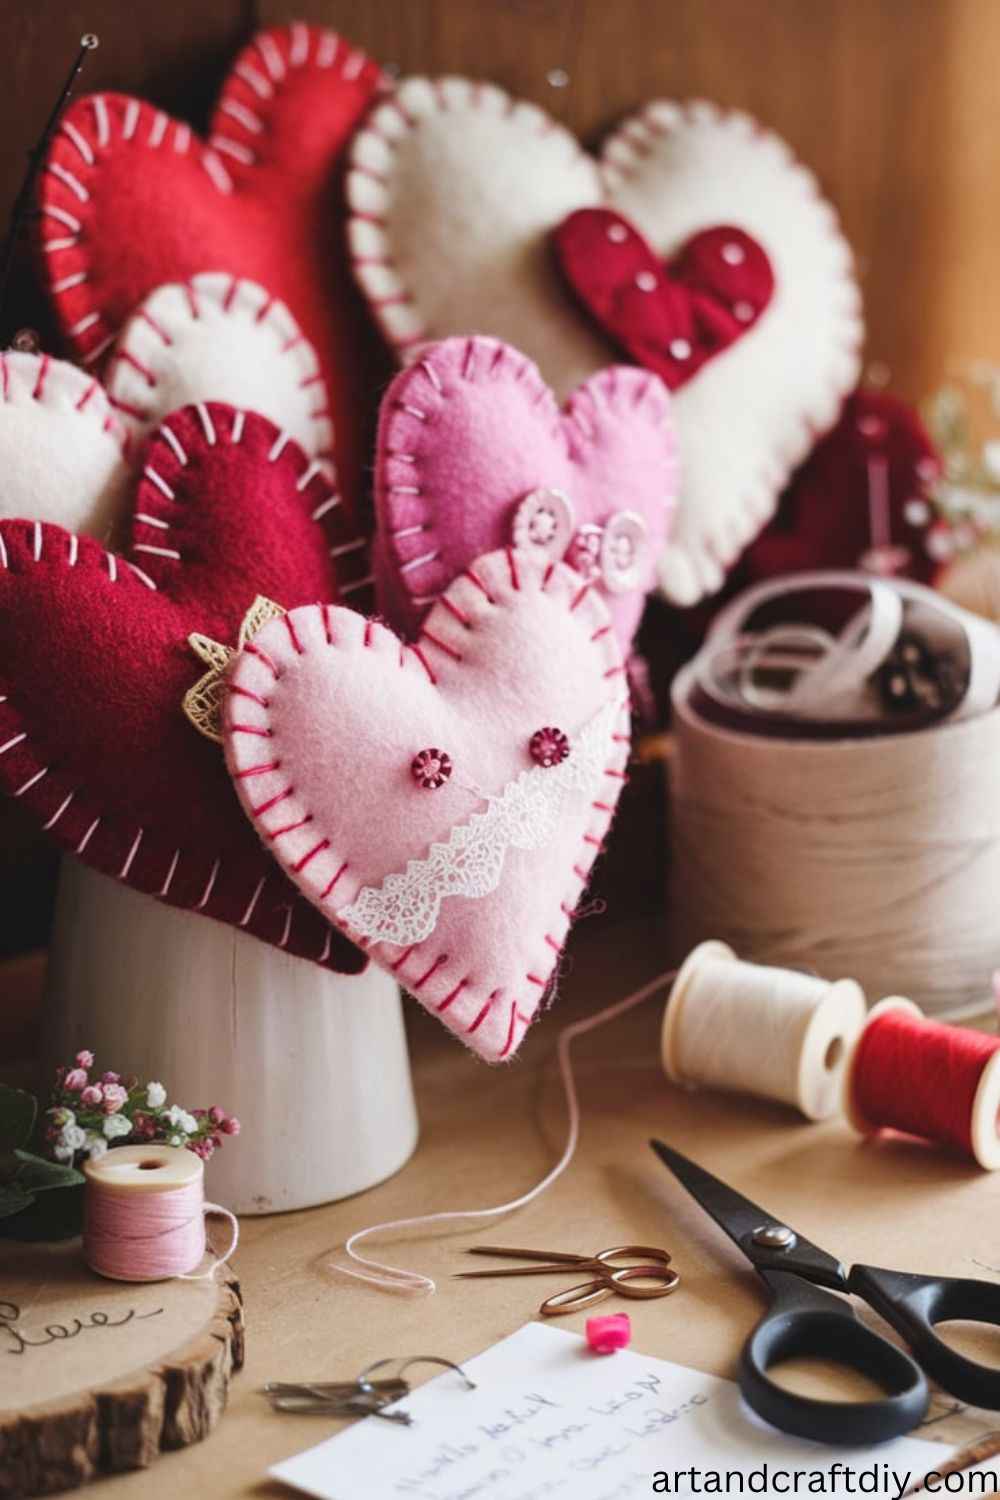
Materials Used:
- Red and pink felt
- Scissors
- Thread and needle
- Stuffing material
Steps:
- Cut heart shapes from the felt fabric, making two identical pieces per heart.
- Sew the edges of the hearts together, leaving a small opening for stuffing.
- Fill the heart with a little stuffing to give it some volume.
- Complete sewing the heart shut.
- Attach a string or ribbon at the top to hang the heart as an ornament.
Love Potion Jar
This craft is perfect for someone who loves quirky gifts. A jar filled with candies, charms, or special notes can make a lovely Valentine’s surprise.
Materials Used:
- Small glass jar
- Decorative ribbon
- Candy, charms, or mini notes
- Glitter (optional)
Steps:
- Fill the small jar with your chosen treat or trinket.
- If you like, add some glitter for sparkle.
- Tie a ribbon around the lid of the jar.
- Add a note that says “Love Potion” or a sweet Valentine’s message.
- Gift the jar to someone special!
DIY Heart String Art
This craft combines creativity and precision, using nails, string, and wood to create a beautiful heart design.
Materials Used:
- Wooden board
- Nails
- Red, pink, or white string
- Hammer
Steps:
- Start by drawing a heart outline on your wooden board.
- Use nails to follow the heart shape, placing them around the edges.
- Once you have nailed down the shape, take your string and start weaving it around the nails to form the heart.
- Keep layering the string until you have a solid, colorful design.
- Once complete, trim any excess string and hang your artwork.
Handmade Valentine’s Day Coasters
A great craft project for creating personalized gifts that will be both practical and cute.
Materials Used:
- Cork coasters
- Paint
- Paint markers
- Mod Podge
Steps:
- Start with a basic cork coaster as your base.
- Paint the coaster with a background color of your choice, like red, white, or pink.
- Once dry, use paint markers to draw hearts or write Valentine’s-themed messages.
- To protect the paint, apply a layer of Mod Podge and let it dry.
- These coasters make great gifts for friends or loved ones.
Paper Plate Love Birds
This is a sweet and simple craft that can be made using paper plates, perfect for kids to create Valentine’s decorations.
Materials Used:
- Paper plates
- Construction paper (red, pink, yellow)
- Scissors
- Glue
Steps:
- Start by cutting one paper plate in half.
- Use the other paper plate to cut out wings and beaks for the lovebirds.
- Glue the two halves together to form the bodies of the birds.
- Add wings, beaks, and heart-shaped feet to complete your birds.
- Let everything dry before displaying or giving to someone special.
Valentine’s Day Mason Jar Luminaries
These glowing jar decorations are a perfect romantic touch for a Valentine’s dinner or to light up a special evening.
Materials Used:
- Mason jars
- Red or pink tissue paper
- Mod Podge
- Tea light candles
Steps:
- Cut tissue paper into small squares or shapes.
- Apply Mod Podge to the outside of the jar and stick the tissue paper onto the jar’s surface.
- Once the jar is covered, apply another coat of Mod Podge over the tissue to secure it.
- Let the jar dry.
- Place a tea light candle inside, and your luminary is ready.
Valentine’s Day Treat Bags
Fill these adorable treat bags with candy or small gifts for a sweet surprise.
Materials Used:
- Clear plastic bags
- Red and pink construction paper
- Tape
- Stickers or decorations
Steps:
- Fill clear treat bags with your chosen candy or gifts.
- Cut out heart shapes from construction paper.
- Use tape or glue to attach the hearts to the bags.
- Add Valentine’s-themed stickers or tags.
- Tie the bag with a ribbon, and it’s ready to gift.
Love Notes Jar
This simple yet meaningful gift involves filling a jar with little love notes or sweet messages.
Materials Used:
- Small jar
- Paper slips
- Pen
- Ribbon
Steps:
- Cut paper into small slips.
- Write sweet notes, love messages, or quotes on each slip.
- Fold the slips and fill them into a jar.
- Tie a ribbon around the jar for extra decoration.
- This can be a fun gift for someone to read through all year round.
DIY Candy Bouquet
Create a candy bouquet that makes a fun and delicious gift for anyone on Valentine’s Day.
Materials Used:
- Candy of your choice (chocolates, lollipops, etc.)
- Wooden dowels
- Floral tape
- Tissue paper
Steps:
- Attach candy to the ends of the wooden dowels using floral tape.
- Wrap the sticks with floral tape for a finished look.
- Arrange the candies in a bouquet shape, securing them with more floral tape.
- Wrap the base in tissue paper to hide the sticks, and tie with a ribbon.
- Present your candy bouquet as a sweet Valentine’s gift.
Handmade Valentine’s Day Soap
Handmade soap is a thoughtful and personal gift, and it can be customized with heart shapes and sweet scents.
Materials Used:
- Soap base
- Essential oils
- Soap molds
- Red and pink dye
Steps:
- Melt the soap base according to the package instructions.
- Add a few drops of essential oils for fragrance.
- Divide the melted soap into portions and add dye to each portion to create red or pink soap.
- Pour the soap into molds and allow them to cool and harden.
- Once firm, remove the soap from the molds and package them as gifts.
Heart Shaped Bath Bombs
Create Valentine’s-themed bath bombs that can add a romantic or relaxing touch to anyone’s bath time.
Materials Used:
- Baking soda
- Citric acid
- Epsom salt
- Essential oils
- Bath bomb molds
Steps:
- Mix dry ingredients (baking soda, citric acid, and Epsom salt) in a bowl.
- Slowly add a few drops of essential oils for fragrance.
- Spray with a tiny amount of water while stirring to form a damp, sandy texture.
- Press the mixture into heart-shaped molds.
- Let the bath bombs dry overnight, then package and gift them.
Handmade Friendship Bracelets
These simple and heartfelt bracelets are a wonderful way to show appreciation for friends on Valentine’s Day.
Materials Used:
- Embroidery floss
- Scissors
- Tape
Steps:
- Cut several pieces of embroidery floss in different colors.
- Tape one end to a flat surface and braid the strings together.
- Continue braiding until the bracelet reaches the desired length.
- Tie off the ends and create a loop for easy wearing.
- Gift your handmade friendship bracelet to someone special.
Valentine’s Day Candle Holders
These personalized candle holders can create a romantic atmosphere for the holiday.
Materials Used:
- Empty toilet paper rolls
- Paint
- Glitter
- Tea light candles
Steps:
- Paint the toilet paper rolls in Valentine’s colors.
- Add glitter for a little sparkle.
- Place a tea light candle inside each roll.
- Set the holders around your home for a cozy, festive atmosphere.
Heart-Shaped Cookies
Bake delicious heart-shaped cookies and decorate them for a fun and edible Valentine’s Day craft.
Materials Used:
- Sugar cookie dough
- Heart-shaped cookie cutter
- Frosting
- Sprinkles
Steps:
- Roll out the sugar cookie dough and cut out heart shapes with the cookie cutter.
- Bake according to the dough’s instructions.
- Once cooled, decorate with frosting and sprinkles.
- These cookies are a perfect treat to give to friends and loved ones.
Valentine’s Day Scratch Cards
Create custom Valentine’s Day scratch cards with hidden messages or images.
Materials Used:
- Cardstock
- Acrylic paint
- Dish soap
- Markers
Steps:
- Draw a design or message on cardstock.
- Mix acrylic paint with a little dish soap to create a scratch-off paint mixture.
- Cover the design with the scratch-off paint.
- Let it dry, then scratch away to reveal the hidden message.
DIY Valentine’s Day Magnets
Create fun Valentine-themed magnets to decorate your fridge or share with friends.
Materials Used:
- Small wooden shapes
- Paint
- Magnets
- Glue
Steps:
- Paint the wooden shapes with Valentine’s designs, such as hearts, flowers, or cupids.
- Once dry, glue a magnet to the back of each shape.
- Stick them to your fridge or gift them to others as a cute Valentine’s decoration.
Heart-Shaped Paper Clips
These unique heart-shaped paper clips are easy to make and perfect for giving as small gifts or for organizing Valentine’s cards.
Materials Used:
- Wire
- Pliers
Steps:
- Use the pliers to shape the wire into heart shapes.
- Bend the wire carefully to form the clips.
- Use them as bookmarks, or give them as a small but thoughtful Valentine’s gift
What materials do I need for DIY Valentine Crafts ideas?
For most DIY Valentine Crafts ideas you’ll need basic crafting supplies like construction paper, glue, scissors, markers, glitter, ribbon, buttons, and stamps. Specific crafts might require additional items like felt, fabric, beads, or other decorative materials.
What are some easy DIY Valentine Crafts ideas for beginners?
Simple crafts like homemade Valentine’s Day cards, heart-shaped bookmarks, or paper garlands are perfect for beginners. You can also try creating heart magnets or decorating small picture frames with stickers or washi tape.
Can I make DIY Valentine Crafts ideas without spending a lot of money?
Absolutely! Many DIY gifts can be made with inexpensive or recycled materials. Ideas like personalized photo frames, hand-painted mugs, or homemade candles are thoughtful yet budget-friendly options.
How can I personalize my DIY Valentine Crafts ideas?
Personalizing crafts can be as simple as adding initials, names, or special messages. You can also incorporate favorite colors, inside jokes, or shared memories to make your crafts even more meaningful.

Hi, I’m Victoria, an art and craft teacher at Newark City Schools, where I have the joy of working with middle school students to help them explore their creativity and develop their artistic talents. I believe that art is a powerful way for students to express themselves, and I strive to make every lesson a fun, engaging, and inspiring experience.
I created this website to share the art and craft projects, techniques, and resources that I use in my classroom, hoping to inspire both educators and young artists alike. Whether you’re a teacher looking for new ideas or a student eager to try something new, I’m excited to provide creative tools and projects that anyone can enjoy.
When I’m not in the classroom, I love experimenting with different art forms and learning new crafting techniques. My goal is to help others discover the joy of making things with their hands, and I hope my website serves as a space for everyone to explore their creative potential.