
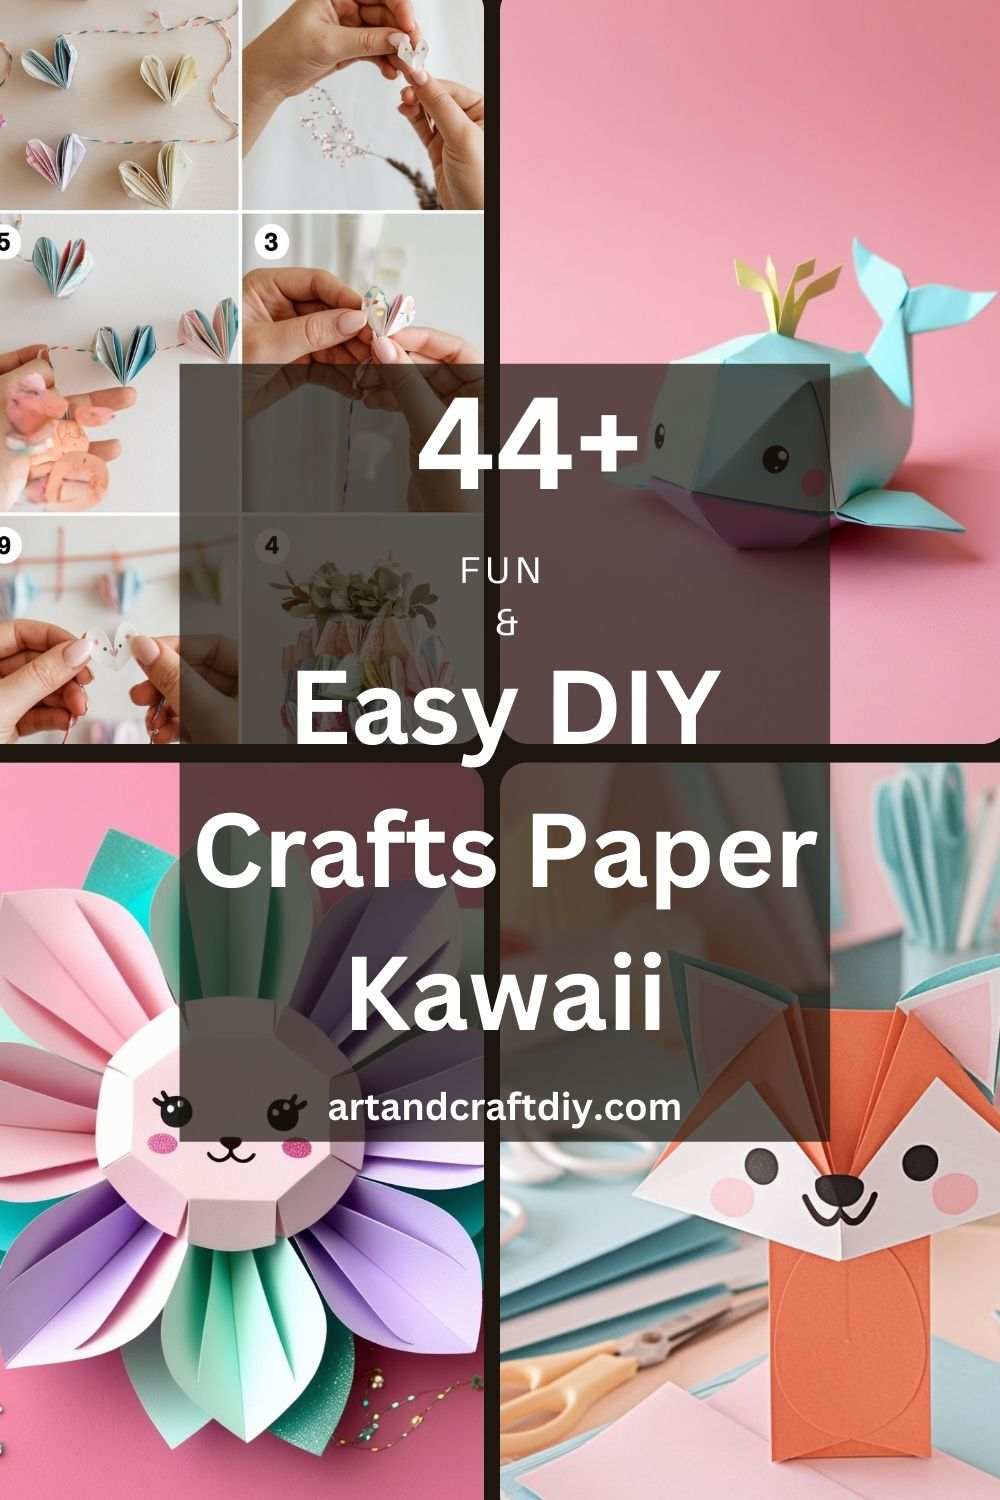
The other day I was cleaning out an old drawer and found this tiny paper cat I’d folded years ago. It was a little crooked, the edges weren’t perfect, but honestly—it made me smile so much. Isn’t it funny how something so small and simple can just brighten your mood? That’s the magic of easy DIY crafts—especially when it comes to paper kawaii creations. They’re cute, fun, and don’t need a ton of fancy supplies. Just a sheet of paper, maybe some markers, and a bit of imagination. And hey, I get it—you might be thinking, “But I’m not that crafty.” Trust me, neither am I most days. But these little projects aren’t about perfection; they’re about enjoying the process and making something that feels joyful. In this article, I’ll walk you through adorable, doable paper kawaii ideas that’ll leave you grinning. Ready to give it a try?
Easy DIY Crafts Paper Kawaii
Easy DIY Crafts Paper Kawaii refers to simple, fun, and cute craft projects that involve using paper to create adorable Kawaii-style items.
Kawaii Paper Fox Bookmark

I’ve always had this thing for foxes—they look so sly and adorable at the same time. So when I first tried making a kawaii paper fox bookmark, I honestly couldn’t stop smiling at how cute it turned out. The orange paper makes it pop right out of your book, and the little black-tipped ears? Oh, they’re my favorite detail. To be fair, I wasn’t even planning to keep the first one because I thought it would look like a messy triangle, but now I have about five of them tucked into different books around my house.
What I love most is that it’s super quick—you just fold a square, tuck here and there, and suddenly you’ve got this little fox peeking out from your novel. Kids love it too, so if you’ve got younger ones around, this is such a fun afternoon project. And, in my opinion, bookmarks like this make reading feel a little more magical.
Kawaii Paper Penguin

Penguins have always reminded me of little gentlemen in tuxedos, and making a kawaii paper penguin just confirmed that thought. The first time I tried, I accidentally made mine look like it was wearing a crooked bow tie—but, to be fair, that only made it cuter. All you need is black, white, and a tiny bit of orange paper for the beak and feet. Suddenly, you’ve got this waddling little buddy that looks like it’s ready to slide across your desk.
Honestly, I think this craft is perfect when you just want to relax without overthinking. There’s something about the round belly shape that makes me laugh every time. I’ve given these penguins as little “extras” when wrapping gifts, and people always ask, “Did you make that?” Yep—and it’s easier than it looks. In my opinion, the best part is drawing on the big wide eyes. They can look shocked, sleepy, or silly—your choice!
Kawaii Paper Flower
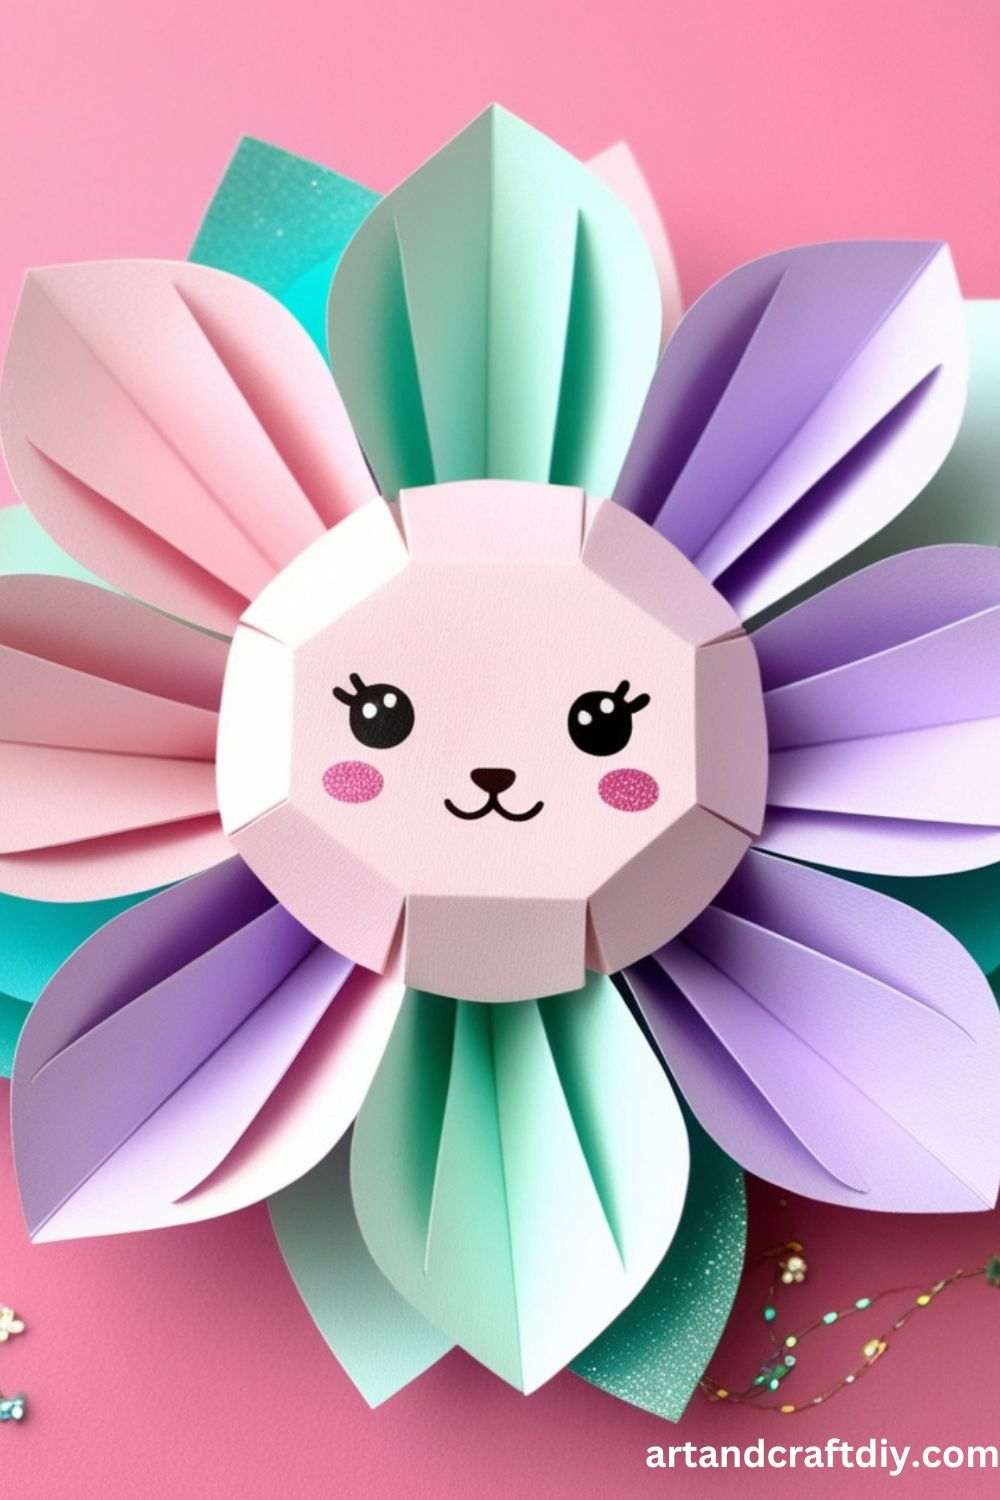
Flowers never fail to cheer me up, and paper flowers are even better because they don’t wilt. When I first learned to fold kawaii paper flowers, I thought they’d be too fiddly, but surprisingly, they’re pretty forgiving. Even if your folds aren’t perfect, the final bloom looks charming in its own way. I remember making a bunch in pastel colors and sticking them in an old mason jar—honestly, they looked like something out of a cozy café corner.
What’s fun is experimenting with different shades. A mix of bright pink, soft yellow, and sky blue gives such a dreamy vibe. I’ve found that kids really enjoy making these because they can layer petals however they like, and there’s no wrong way to do it. To be fair, the first few might feel a bit flat, but after a couple tries, they puff out beautifully. In my opinion, they’re the easiest way to brighten up a dull desk.
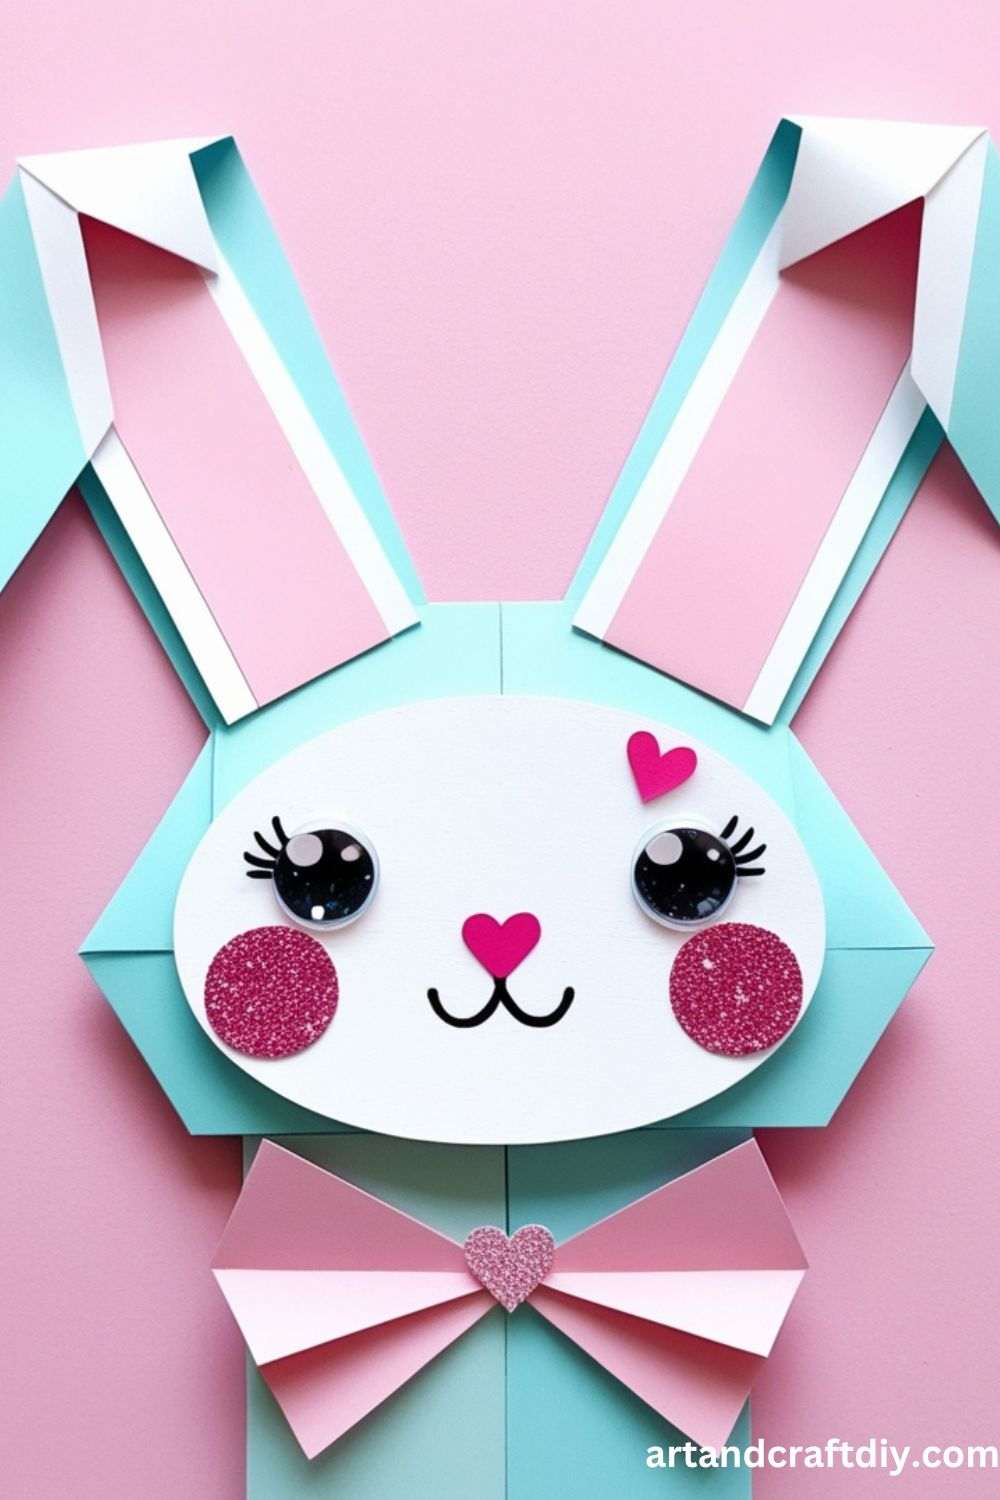
Kawaii Paper Bunny
This cute bunny can be used as a decoration or a playful greeting card.
Materials Used:
- Pink, white, and black paper
- Scissors
- Glue stick
- Marker for details
Steps:
- Cut a large oval from the white paper for the bunny’s body.
- Cut smaller ovals from pink paper for the bunny’s inner ears and glue them onto the white paper.
- Cut two small black circles for the eyes and a pink oval for the nose.
- Use the marker to draw a mouth and whiskers.
- Add a fluffy cotton ball to the back of the bunny for the tail.
- Stick your bunny onto a card or use it as a fun decoration.
Kawaii Paper Ice Cream Cone
Create a fun and colorful ice cream cone that’s perfect for crafting during summer.
Materials Used:
- Brown, pink, and blue paper
- Scissors
- Glue
- Black marker
Steps:
- Cut a triangle from brown paper for the cone.
- Cut two circles from pink and blue paper for the scoops of ice cream.
- Glue the scoops on top of the cone, layering them.
- Use the black marker to draw little sprinkles on the ice cream.
- Add a cute smiley face if you like.
- Your adorable ice cream cone is now ready to display.
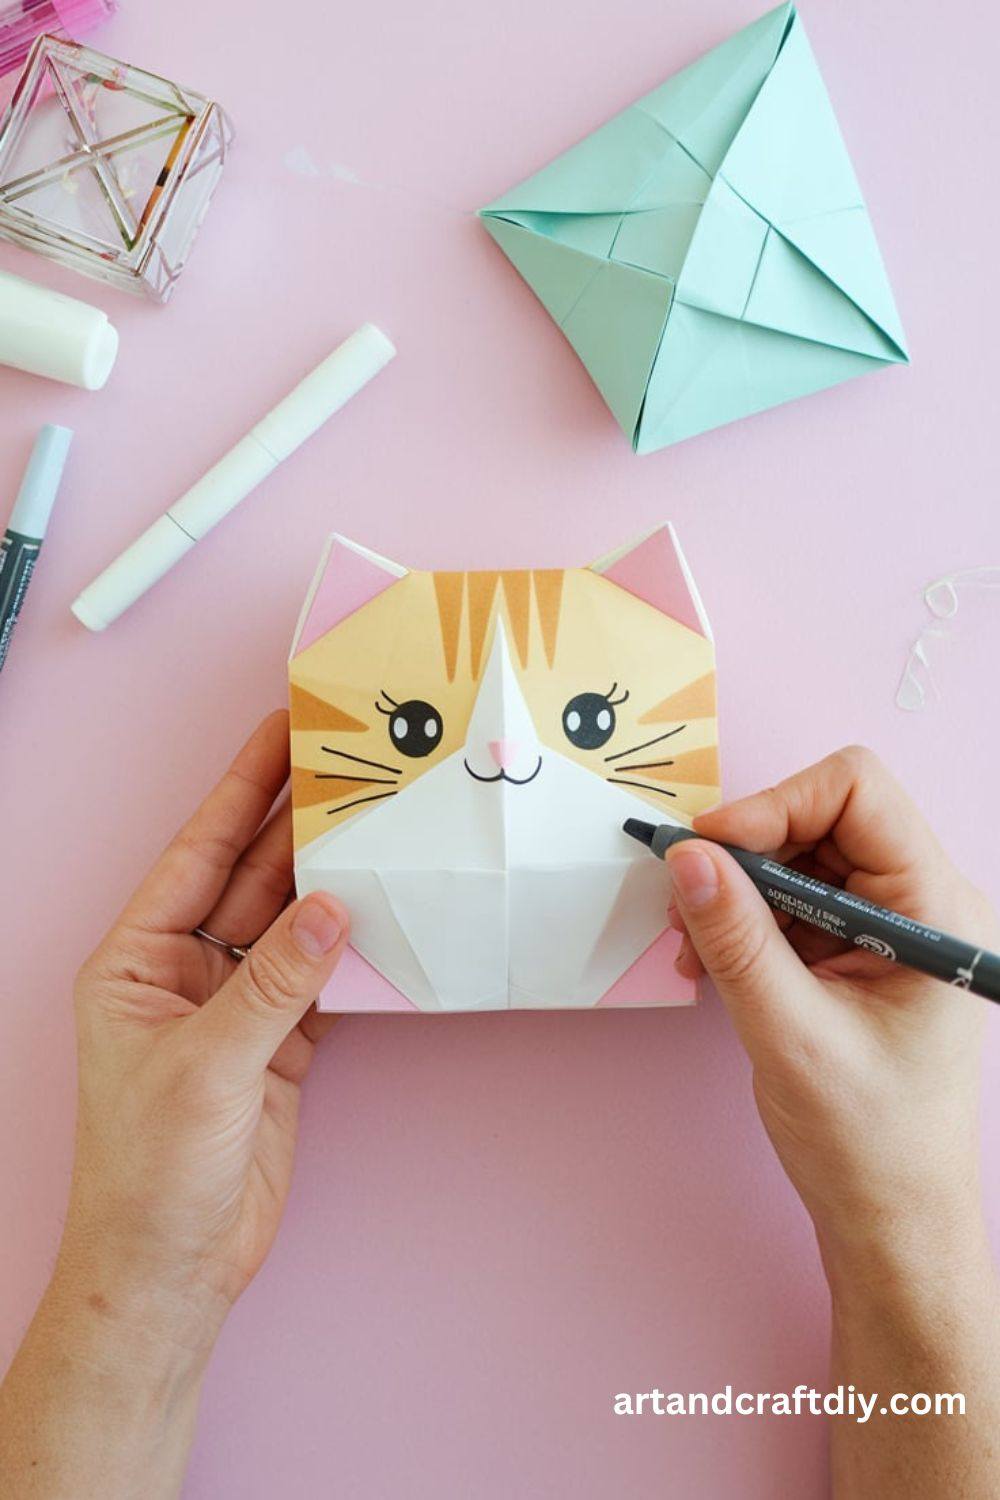
Kawaii Paper Cat
This paper cat is a simple yet adorable craft for beginners.
Materials Used:
- Pink, black, and white paper
- Scissors
- Glue
- Black marker
Steps:
- Cut a circle from the pink paper for the cat’s face.
- Cut two triangle shapes from black paper for the ears and glue them on top of the circle.
- Cut two smaller ovals from white paper and glue them inside the ears.
- Draw eyes, a nose, and whiskers with the black marker.
- Cut a small strip of pink paper for the cat’s tail and glue it on the back.
- Display your Kawaii cat as a bookmark or decoration.
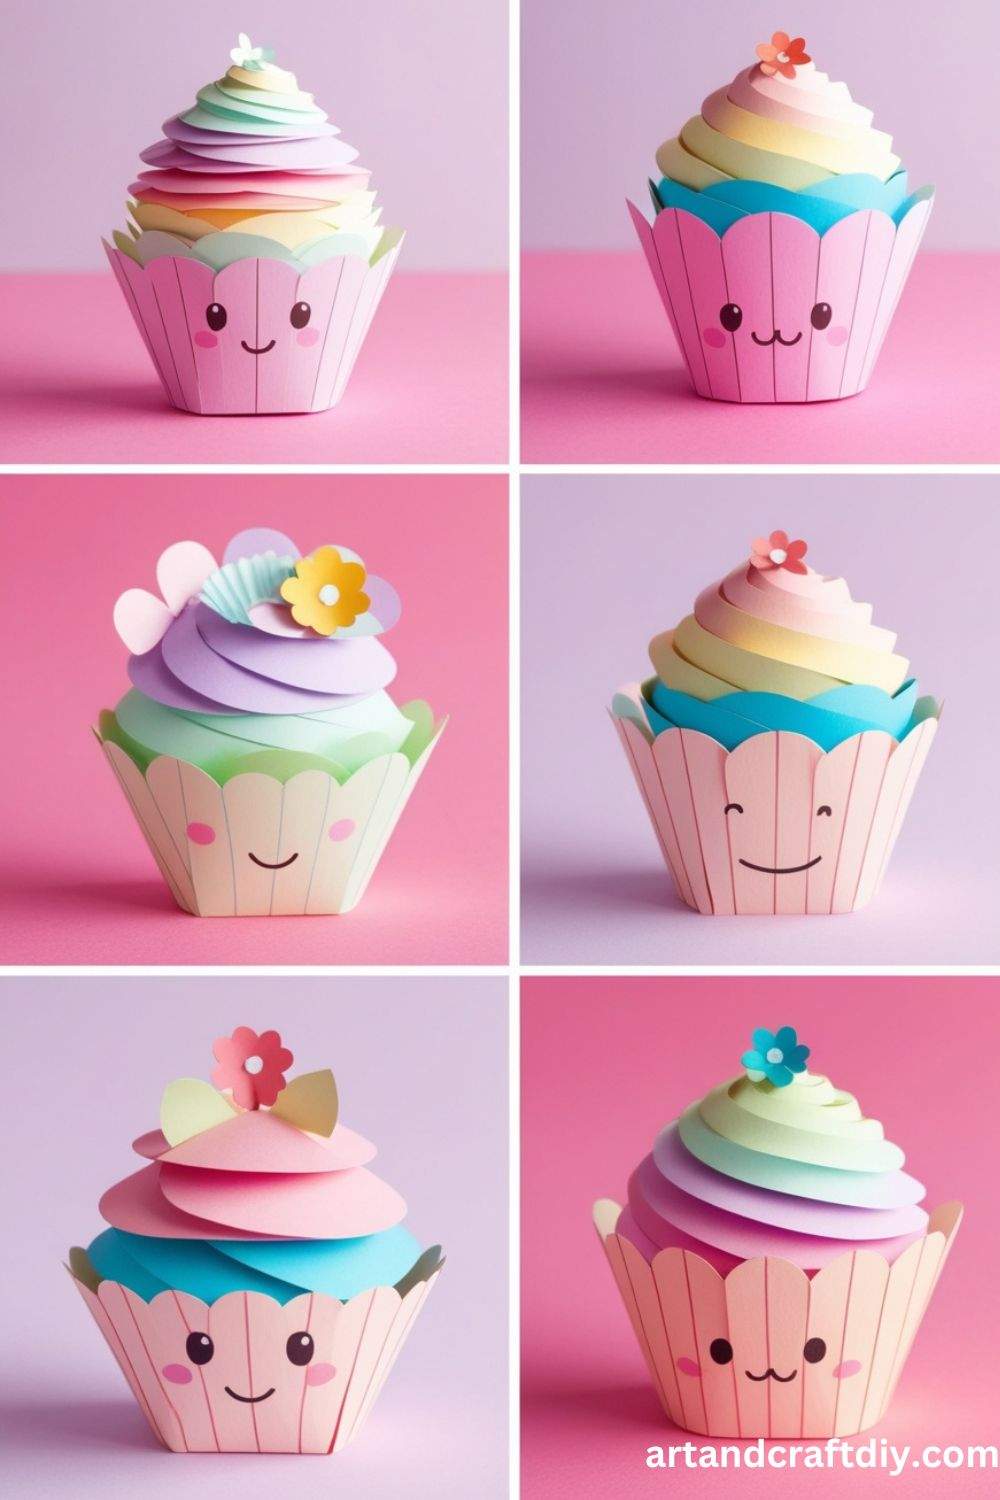
Kawaii Paper Cupcake
This Kawaii cupcake is perfect for party decorations or scrapbooking.
Materials Used:
- Colorful paper (for cupcake wrapper and icing)
- Scissors
- Glue stick
- Marker
Steps:
- Cut a rectangle from your chosen color for the cupcake wrapper and curl it into a cylinder.
- Cut a fluffy shape from white paper for the icing and glue it to the top of the wrapper.
- Cut small colorful circles or stars to decorate the icing.
- Use the marker to add a face to the cupcake for extra Kawaii charm.
- Let the cupcake dry and place it on your favorite projects.
Kawaii Paper Heart Garland
A lovely and romantic paper heart garland to decorate your space.

Materials Used:
- Red, pink, and white paper
- Scissors
- String
- Glue
Steps:
- Cut out several heart shapes from the colored paper.
- Fold each heart in half to give them a 3D effect.
- Glue a small piece of string between each heart to create the garland.
- Hang the heart garland around your room or as part of a gift decoration.
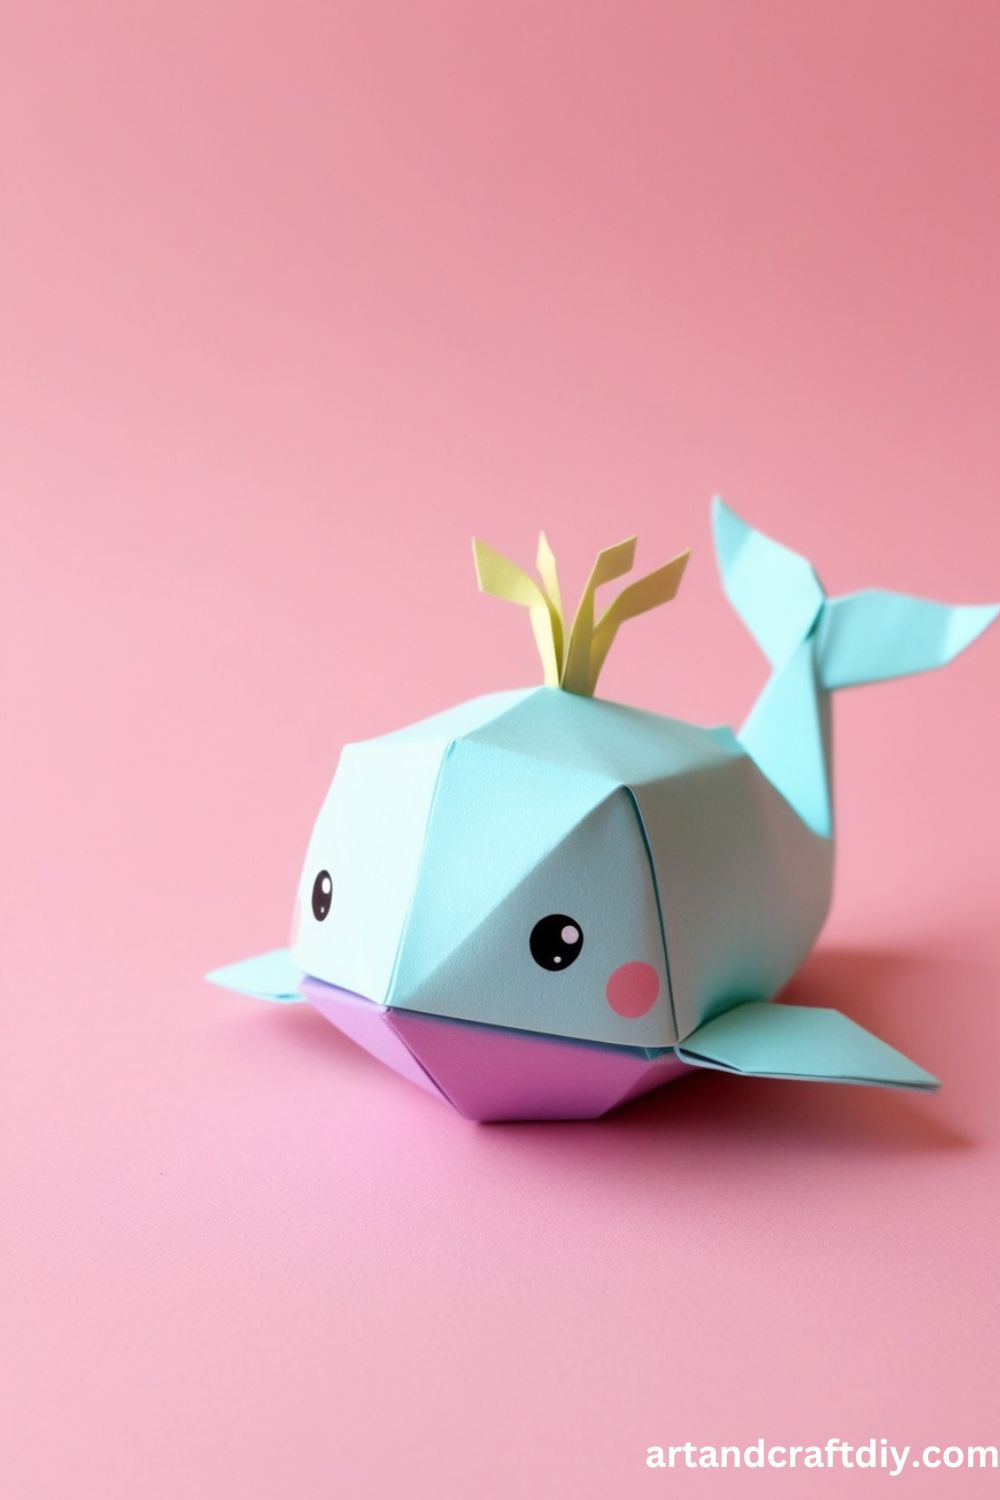
Kawaii Paper Whale
Make a cute Kawaii whale to celebrate ocean life.
Materials Used:
- Blue, white, and grey paper
- Scissors
- Glue stick
- Black marker
Steps:
- Cut a large oval from the blue paper for the whale’s body.
- Cut a smaller oval from white paper for the belly and glue it on the body.
- Cut a triangle from grey paper for the tail and glue it at the back.
- Cut two small circles from white paper for the eyes and draw the pupils with the black marker.
- Attach your Kawaii whale to a card or use it as a playful decoration.
Kawaii Paper Star
A simple yet magical star craft that’s perfect for a night sky decoration.
Materials Used:
- Yellow paper
- Scissors
- Glue stick
Steps:
- Cut out a simple five-pointed star shape from yellow paper.
- Decorate the star with additional smaller stars or sparkles.
- Add a cute face to the star with a black marker.
- Use the star for bookmarks, cards, or hang it as a decoration.
Kawaii Paper Cactus
Create a Kawaii cactus to add a quirky touch to your home decor.
Materials Used:
- Green and brown paper
- Scissors
- Glue
- Black marker
Steps:
- Cut a rectangular piece of green paper for the cactus body.
- Cut smaller pieces of green paper to create the cactus’s arms and glue them to the body.
- Cut a small piece of brown paper for the pot and glue it at the bottom of the cactus.
- Draw small spikes with a black marker.
- Display your Kawaii cactus as a cute home decoration.
Kawaii Paper Cloud
A fluffy, cute paper cloud to hang or use for greeting cards.
Materials Used:
- White paper
- Scissors
- Glue stick
Steps:
- Cut several cloud-shaped pieces from the white paper.
- Layer the cloud shapes on top of each other, creating a puffy cloud.
- Optionally, cut out small hearts or stars to glue onto the cloud.
- Use the cloud as a decoration or as part of a card.
Kawaii Paper Cup
Create a cute paper cup that you can use for parties or as a decorative item.
Materials Used:
- Colorful paper
- Scissors
- Glue stick
- Marker
Steps:
- Cut a rectangle of paper that fits the circumference of the cup you want to make.
- Roll the paper into a cylinder shape and glue the edges.
- Cut a smaller piece of paper to form the cup’s base and glue it to the bottom.
- Decorate the cup with Kawaii faces or doodles.
- Use it as a unique container for tiny gifts or trinkets.
Kawaii Paper Animal Faces
Make a variety of cute animal faces to use as decorations or in scrapbooking.
Materials Used:
- Colored paper (various colors)
- Scissors
- Glue stick
- Markers
Steps:
- Choose an animal to create (e.g., bear, fox, bunny).
- Cut out the basic shapes for the face and ears.
- Glue the pieces together to form the animal’s face.
- Use markers to add eyes, a nose, and other facial features.
- Attach the finished animal face to a card or project.
Kawaii Paper Fish
A simple yet adorable fish made from paper, perfect for underwater-themed crafts.
Materials Used:
- Blue and yellow paper
- Scissors
- Glue stick
- Black marker
Steps:
- Cut a fish shape from blue paper.
- Cut small triangles from yellow paper to form the fish’s fins and tail.
- Glue the fins and tail onto the fish body.
- Draw a cute face and scales on the fish using the black marker.
- Display your fish on a greeting card or scrapbook page.
Kawaii Paper Butterfly
A beautiful and colorful butterfly to brighten any room or craft project.
Materials Used:
- Colorful paper
- Scissors
- Glue stick
- Marker
Steps:
- Cut two large butterfly wing shapes from colorful paper.
- Cut two smaller wing shapes from a contrasting color for the inner wings.
- Glue the inner wings onto the outer wings to create the butterfly.
- Fold a thin strip of paper into a body and glue it in the middle.
- Use markers to add intricate details on the wings.
Kawaii Paper Robot
Create a playful little robot for scrapbooks or cards.
Materials Used:
- Gray, red, and yellow paper
- Scissors
- Glue stick
- Black marker
Steps:
- Cut a rectangle from gray paper for the robot’s body.
- Cut smaller squares for the robot’s head, arms, and legs.
- Glue the pieces together to form the robot’s shape.
- Add details like eyes, buttons, and antennas using the black marker.
- Place the robot on a greeting card or other fun project.
Kawaii Paper Camera
A fun little camera craft for your Kawaii projects.
Materials Used:
- Black, white, and yellow paper
- Scissors
- Glue stick
- Black marker
Steps:
- Cut a rectangle from black paper for the camera body.
- Cut a circle from white paper for the lens and glue it to the center.
- Cut small rectangles for buttons and glue them to the top.
- Use the black marker to draw extra details, such as a camera flash.
- Use your cute camera as part of a photo album or card design.
Kawaii Paper Cupcake Wrapper
Craft a Kawaii cupcake wrapper that you can use to wrap mini treats or for decoration.
Materials Used:
- Paper (for the wrapper)
- Scissors
- Glue stick
- Marker
Steps:
- Cut a rectangular piece of paper to fit around your cupcake.
- Fold the paper into a cone shape to create the wrapper.
- Glue the edges together to hold the shape.
- Add a cute face and decoration to the wrapper with markers.
- Use the cupcake wrapper to present small gifts or desserts.
Kawaii Paper Dinosaur
Make an adorable Kawaii dinosaur to bring some prehistoric charm to your crafts.
Materials Used:
- Green, yellow, and pink paper
- Scissors
- Glue stick
- Black marker
Steps:
- Cut a long oval shape from green paper for the dinosaur’s body.
- Cut smaller triangles from yellow paper for the dinosaur’s spikes and glue them along its back.
- Cut smaller ovals for the arms and legs, then glue them to the body.
- Cut a small circle from pink paper for the face and glue it to the body.
- Use the black marker to draw a cute face with eyes, a mouth, and nostrils.
- Your little Kawaii dinosaur is ready for display!
Kawaii Paper Cupcake Liner
Create a charming paper liner for your cupcakes, making them even cuter for a party or decoration.
Materials Used:
- Colored paper
- Scissors
- Glue stick
- Markers
Steps:
- Cut a strip of colored paper that fits around your cupcake.
- Fold the strip into a circular shape and glue the ends to secure it.
- Use a second piece of paper to create a small “icing” top and glue it to the wrapper.
- Decorate the top with markers or small stickers for extra cuteness.
- Place your cupcake liner around your treat for an adorable, sweet touch.
Kawaii Paper Owl
Craft a wise and adorable Kawaii owl for your room decor or as a bookmark.
Materials Used:
- Brown, yellow, white, and black paper
- Scissors
- Glue stick
- Black marker
Steps:
- Cut a large oval from brown paper for the owl’s body.
- Cut a smaller white circle for the face and glue it to the body.
- Cut two small yellow circles for the eyes and glue them onto the face.
- Draw the pupils and a beak with a black marker.
- Cut small feathers from the brown paper and glue them to the body to create texture.
- Place the owl on a bookmark or hang it as a decoration.
Kawaii Paper Cloud with Raindrops
Create a cute rainy day scene with a paper cloud and raindrops.
Materials Used:
- White, blue, and silver paper
- Scissors
- Glue stick
- Markers
Steps:
- Cut out a fluffy cloud shape from the white paper.
- Cut several raindrop shapes from blue paper.
- Attach the raindrops to the bottom of the cloud.
- Optionally, cut small hearts or stars from silver paper and add them to the cloud.
- Use markers to add some cute details, like a smiling face on the cloud.
- Hang this Kawaii cloud decoration anywhere you like.
Kawaii Paper Jellyfish
A whimsical, Kawaii jellyfish to decorate your space or as part of a summer project.
Materials Used:
- Light blue and pink paper
- Scissors
- Glue stick
- Ribbon
Steps:
- Cut a semi-circle from light blue paper for the jellyfish’s bell.
- Cut long strips of pink paper to form the jellyfish’s tentacles.
- Glue the tentacles to the bottom of the bell.
- Attach a small piece of ribbon at the top of the bell for hanging.
- You can add eyes to your jellyfish using markers or small circles of paper.
- Hang your jellyfish as a fun decoration for a beach-themed room.
Kawaii Paper Dragon
Create a cute, colorful dragon that will surely bring magic to your day.
Materials Used:
- Green, yellow, and red paper
- Scissors
- Glue stick
- Markers
Steps:
- Cut a long oval from green paper for the dragon’s body.
- Cut triangles from yellow paper to form the dragon’s wings and glue them to the body.
- Cut small red paper shapes for the dragon’s spikes and glue them along the back.
- Use markers to add facial features like eyes, a mouth, and nostrils.
- Add cute details like tiny hearts or stars around the dragon for a magical touch.
- Display your Kawaii dragon proudly on your desk or bookshelf.
Kawaii Paper Snowman
A cheerful snowman to welcome the winter season with a Kawaii twist.
Materials Used:
- White, orange, black, and red paper
- Scissors
- Glue stick
- Marker
Steps:
- Cut three large circles from white paper to form the snowman’s body.
- Stack the circles, gluing them together from largest to smallest.
- Cut a small orange triangle for the nose and glue it in the middle of the top circle.
- Cut small circles from black paper for the eyes and buttons, and glue them onto the snowman.
- Cut a red strip of paper for the scarf and glue it around the snowman’s neck.
- Draw little details on the snowman with a black marker, like a smiling face and twig arms.
Kawaii Paper Pencil Holder
A fun and cute pencil holder to organize your desk with a Kawaii flair.
Materials Used:
- Colorful paper
- Scissors
- Glue stick
- Markers
Steps:
- Cut a rectangular piece of paper to fit around a small can or cup.
- Wrap the paper around the can and glue the ends together.
- Use additional pieces of paper to create Kawaii details like eyes, a mouth, or bows.
- Decorate with markers or stickers for added personality.
- Place your pens, pencils, and other stationery inside the holder to organize your desk.
Kawaii Paper Pizza Slice
An adorable paper pizza slice that looks good enough to eat!
Materials Used:
- Yellow, red, and brown paper
- Scissors
- Glue stick
- Markers
Steps:
- Cut a triangle from yellow paper for the pizza slice.
- Cut out small circles from red paper for pepperoni and glue them onto the slice.
- Cut thin strips of brown paper to form the crust and glue them to the edges.
- Add extra details like tiny cheese spots and herbs using the markers.
- Your Kawaii pizza slice can be used as a fun decoration or a card topper.
Kawaii Paper Strawberry
A sweet and simple paper strawberry to brighten your crafts.
Materials Used:
- Red, green, and yellow paper
- Scissors
- Glue stick
- Marker
Steps:
- Cut an oval shape from red paper for the strawberry’s body.
- Cut small green leaves from paper and glue them to the top.
- Use yellow paper to cut tiny dots for the seeds and glue them onto the strawberry.
- Draw little details on the strawberry using a marker for extra charm.
- Use your strawberry in scrapbooking or card making.
Kawaii Paper Shark
Make a fierce but friendly Kawaii shark to add some ocean fun to your craft collection.
Materials Used:
- Blue, white, and gray paper
- Scissors
- Glue stick
- Black marker
Steps:
- Cut a large oval from blue paper for the shark’s body.
- Cut a smaller triangle from white paper for the shark’s teeth and glue it inside the mouth.
- Add fins and a tail from gray paper, gluing them to the body.
- Use the black marker to draw the shark’s eyes and gills.
- Your Kawaii shark is ready for play!
Creative Variations and Ideas for Kawaii Crafts
Kawaii crafts offer a fun and whimsical way to personalize everyday items, and there are endless possibilities for turning them into thoughtful, creative gifts. Here are some ideas to inspire you:
1. Turning Kawaii Crafts into Gifts
- Bookmarks: Use your favorite Kawaii characters or motifs like cute animals, smiling faces, or pastel-colored shapes to make bookmarks. You can add glitter, ribbons, or even personalize them with names or quotes for a special touch.
- Greeting Cards: Create greeting cards adorned with adorable Kawaii characters. Whether it’s a birthday, a holiday, or just a “thinking of you” card, a cute design can brighten anyone’s day. You can combine Kawaii with hand lettering, stamps, or doodles to add a unique flair.
- Little Decorations: From keychains and fridge magnets to desk ornaments, Kawaii crafts can be transformed into delightful decorations for any space. Small plushies, painted stones, or even polymer clay creations can be used to add a pop of fun to someone’s home or workspace.
2. Using Kawaii Creations for Scrapbooking or Journaling
- Scrapbooking: Kawaii elements are perfect for adding charm to your scrapbooking projects. Stickers, paper cut-outs, and stamped images of Kawaii characters or icons like hearts, stars, and clouds can embellish your pages. You can also create cute borders or page layouts with Kawaii illustrations for an extra personal touch.
- Journaling: Incorporating Kawaii designs in your bullet journals or personal planners can make organizing tasks feel more enjoyable. Use cute washi tape, Kawaii stickers, or hand-drawn illustrations to decorate your journal entries. Adding small doodles and motivational Kawaii quotes can inspire creativity while keeping things organized and fun.
3. Incorporating Kawaii Elements into Everyday Life
- Home Decor: Transform your living space with Kawaii-inspired accessories. Think Kawaii cushions, wall art featuring cute illustrations, or even Kawaii-themed DIY projects like fabric storage bins and photo frames.
- Stationery: Customize notebooks, pens, and pencil cases with Kawaii motifs. Whether through decorative stickers, stamps, or even hand-drawn art, you can infuse your work or study materials with Kawaii charm.
- Gift Wrapping: Use Kawaii designs for gift wrapping. Personalized tags, adorable wrapping paper, or cute ribbon bows will make your gifts even more exciting to unwrap. You can also add small Kawaii items like keychains or pins as part of the gift presentation.
By incorporating Kawaii elements into Easy DIY Crafts Paper Kawaii and everyday items, you can create a delightful world of cuteness while also adding a personal touch to your projects and gifts. Whether you’re crafting for yourself or for others, Kawaii is all about spreading joy and creativity in every little detail!
FAQ
What are Easy DIY Crafts Paper Kawaii ?
Kawaii paper craft refers to the Japanese art of creating cute and adorable designs using paper. The term “kawaii” translates to “cute” in English, and these crafts often feature characters, animals, and objects with simple, exaggerated features like big eyes, pastel colors, and cheerful expressions.
What supplies do I need for making paper Kawaii crafts?
To create paper Kawaii crafts, you typically need:
- Colored paper (preferably pastel colors)
- Scissors
- Glue or tape
- Markers or pens for drawing facial expressions
- Stamps or stickers (optional)
- Craft punches or templates (optional)
Are Kawaii paper crafts beginner-friendly?
Yes, Kawaii paper crafts are ideal for beginners because they often involve simple shapes and easy-to-follow instructions. The focus is on cuteness rather than intricate detail, making it accessible to crafters of all skill levels.
What types of projects can I create with paper Kawaii crafts?
Some popular Kawaii paper crafts include:
- Paper animals (e.g., cute bears, cats, bunnies)
- Greeting cards with cute designs
- Kawaii bookmarks
- Paper decorations for parties
- Paper dolls and characters

Hi, I’m Victoria, an art and craft teacher at Newark City Schools, where I have the joy of working with middle school students to help them explore their creativity and develop their artistic talents. I believe that art is a powerful way for students to express themselves, and I strive to make every lesson a fun, engaging, and inspiring experience.
I created this website to share the art and craft projects, techniques, and resources that I use in my classroom, hoping to inspire both educators and young artists alike. Whether you’re a teacher looking for new ideas or a student eager to try something new, I’m excited to provide creative tools and projects that anyone can enjoy.
When I’m not in the classroom, I love experimenting with different art forms and learning new crafting techniques. My goal is to help others discover the joy of making things with their hands, and I hope my website serves as a space for everyone to explore their creative potential.