
Halloween Party Invitation Ideas are a fun way to start your spooky celebration. The invitation is the first thing your guests see, and a creative invite sets the tone for a fun and thrilling party. You can choose from different options like DIY handmade cards, digital e-invitations, or printed invitations to match your Halloween theme. A well-designed invitation gets everyone excited and ready for the Halloween fun!
Halloween Party Invitation Ideas
Halloween Party Invitation Ideas help set the spooky mood for your party. Creative invites, whether DIY, digital, or printed, get your guests excited to join the fun. Here some Halloween Party Invitation Ideas:
Spooky Pumpkin Invitations
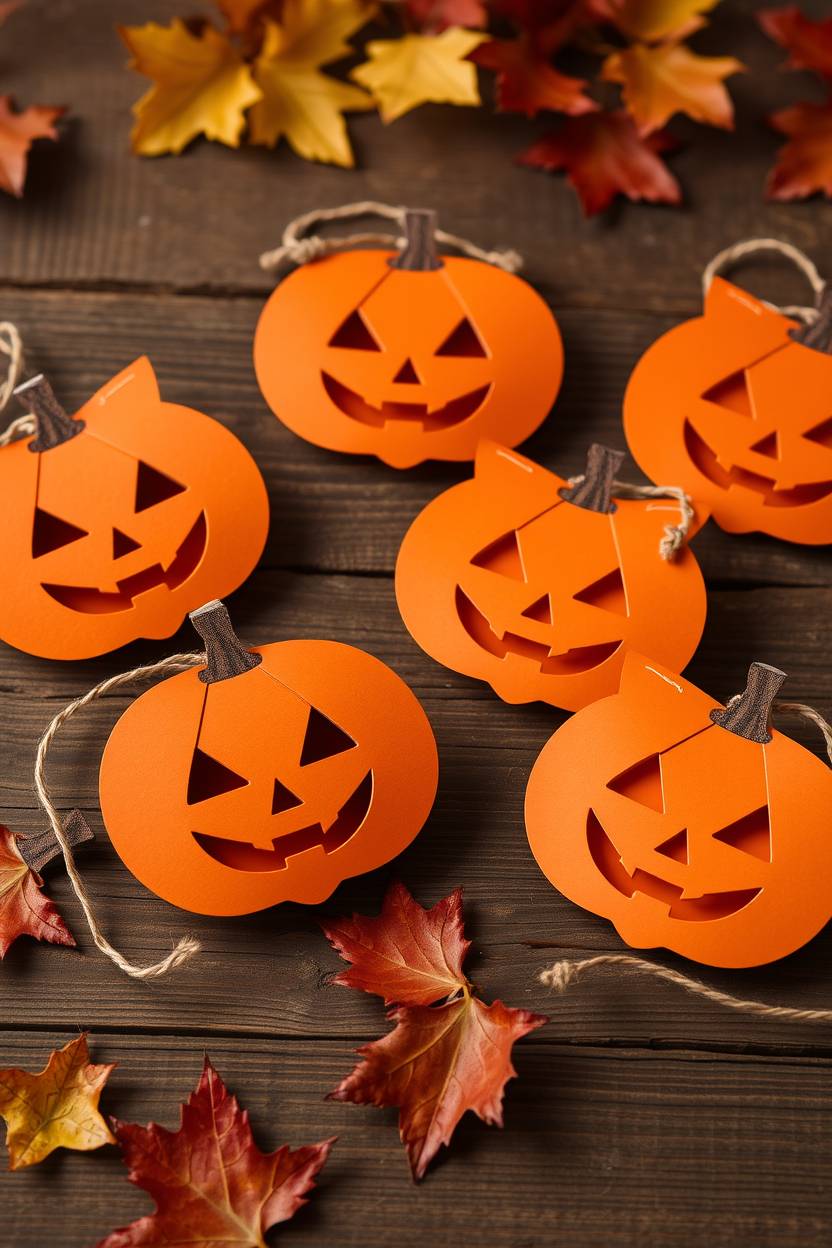
Honestly, I’ve always had a soft spot for pumpkins, especially the ones that look extra spooky. For invitations, I love carving little pumpkin faces on orange cardstock—it instantly screams Halloween. You can even add a tiny touch of glitter or metallic pen to make the eyes pop. I once made a batch for a friend’s party, and people actually said they didn’t want to open them because the pumpkins looked so cute and eerie at the same time.
To make them, I cut pumpkin shapes out of cardstock, drew creepy or funny faces, and wrote party details inside. You can even attach a small ribbon or twine loop so they hang on doors. In my opinion, these give such a warm, festive feeling. Guests immediately know your party is going to be fun, playful, and just a little bit scary.
Haunted House Cards

I’ve found haunted house invitations are perfect if you want to set a spine-chilling tone right from the start. I like drawing little crooked houses with torn windows and maybe a tiny ghost peeking out. Honestly, even simple black silhouettes on gray cardstock can look eerily professional. Once, a friend of mine made these with pop-up doors and tiny skeletons inside—I swear, I couldn’t stop laughing and shivering at the same time.
To make your own, sketch your haunted house or print a template, then fold the card so that doors or windows open to reveal the party info. Adding fake cobwebs or a little silver pen for moonlight effects really sells the creepy vibe. In my opinion, these are great for anyone who loves Halloween movies and wants guests to feel like they’re stepping into a spooky scene before the party even starts.
Witch’s Brew Potion Bottles

Potion bottles are honestly one of my favorite invitation ideas. I love buying tiny glass bottles and filling them with colored sand, glitter, or even a few fake “ingredients” like tiny beads or sequins. I once sent these to a friend’s party and got messages like, “Are we supposed to drink this?”—so funny! To be fair, it’s a little time-consuming, but the effect is priceless.
I usually attach a small tag with party details and tie it with black or purple ribbon. You can also write messages like “Drink if you dare!” or “Potion inside: Halloween fun” to make it playful. In my experience, these invitations feel magical and personal, and they immediately make guests excited because it’s not just a card—it’s a tiny little gift they get to keep.
Ghost Pop-Up Invitations

Ghost pop-ups are such a fun surprise! Honestly, I’ve tried simple flat ghost cards, but adding the pop-up element gives a little jump-scare effect when someone opens it. I still remember my cousin’s reaction last year when she opened hers and the ghost “floated” up—she literally screamed and laughed at the same time.
To make them, cut ghost shapes from white paper, fold them cleverly, and glue them inside the card so they pop up when opened. I like adding googly eyes or shading with gray pencil to give dimension. In my opinion, pop-ups make invitations feel interactive, like you’re inviting your friends to a little Halloween magic show even before they reach the party.
Vampire Bite Notes

I’ve found vampire bite invitations to be cheeky and fun. Honestly, a little red ink or tiny bite marks on the corner of a card can turn a plain invitation into something memorable. Last year, I did these with fake blood splatters, and everyone kept commenting, “Are you actually turning us into vampires?”—love that reaction.
To make them, write the party details on cream or white cardstock, then use a red marker or paint to add the bites and drops of blood. You could even seal them in small envelopes with a wax stamp for extra flair. In my opinion, this style is playful, perfect for teens or adults, and immediately sets a slightly mischievous tone for your party.
Skeleton Scrolls
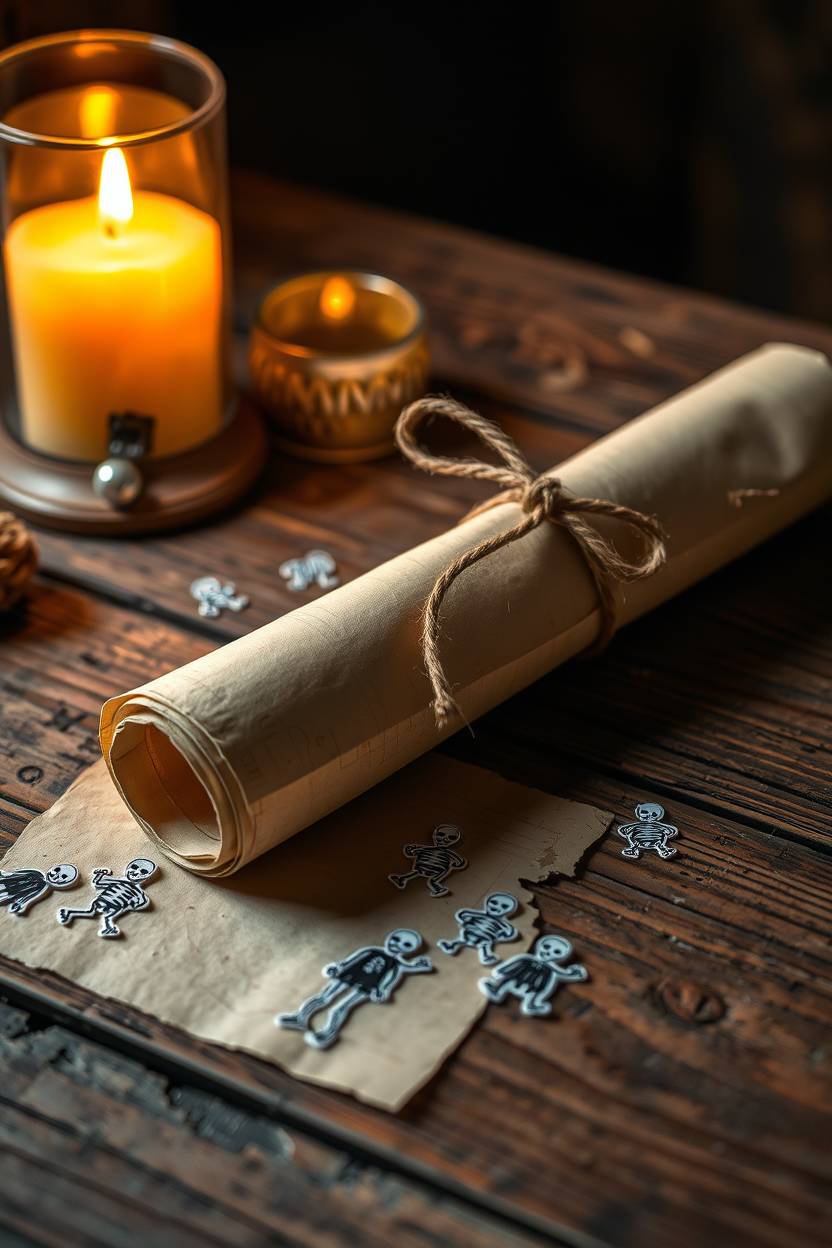
Skeleton scrolls are a total favorite of mine when I want something theatrical. I honestly feel like a pirate delivering spooky treasure every time I hand one out. You can roll them up, tie with twine, and even add a tiny skeleton sticker or stamp. Once, I made a batch, and one friend unrolled it so dramatically that we all ended up laughing at her performance more than the actual party details.
To make these, print or write your info on parchment-style paper, roll them carefully, and secure with ribbon. I’ve even drawn tiny bones or creepy little doodles to make them look more alive. In my opinion, they’re perfect if you love props and want your invitations to feel like part of the Halloween fun, not just a card.
Candy Corn Cut-Outs
Candy corn cut-outs are honestly adorable, and I’ve found that everyone loves a sweet-themed invite. I cut candy corn shapes from yellow, orange, and white paper and layer them like the real candy. Last year, I sent a stack of these to kids at my niece’s party, and the reactions were priceless—they wanted to eat the paper!
To make them, simply cut three layers of cardstock in the right colors, glue them together, and write the party details on the back. You can also punch a hole and hang them with ribbon. In my opinion, this is a cute, simple idea that looks professional but is really fun to make, and it instantly makes your party feel cheerful and festive.
Monster Mask Invites

Monster masks are honestly hilarious because guests can actually wear them to the party. I’ve done this a few times, and watching adults try to read the party details through a giant paper monster face is just too funny. Kids especially go wild for these—they love cutting and decorating their own masks.
To make them, cut basic mask shapes from cardstock, decorate with googly eyes, fangs, or feathers, and attach a ribbon. Write the party info on the back or on a separate tag. In my opinion, this is perfect if you like crafting and want your invitations to double as a little activity or costume starter for the guests.
Black Cat Silhouette Cards
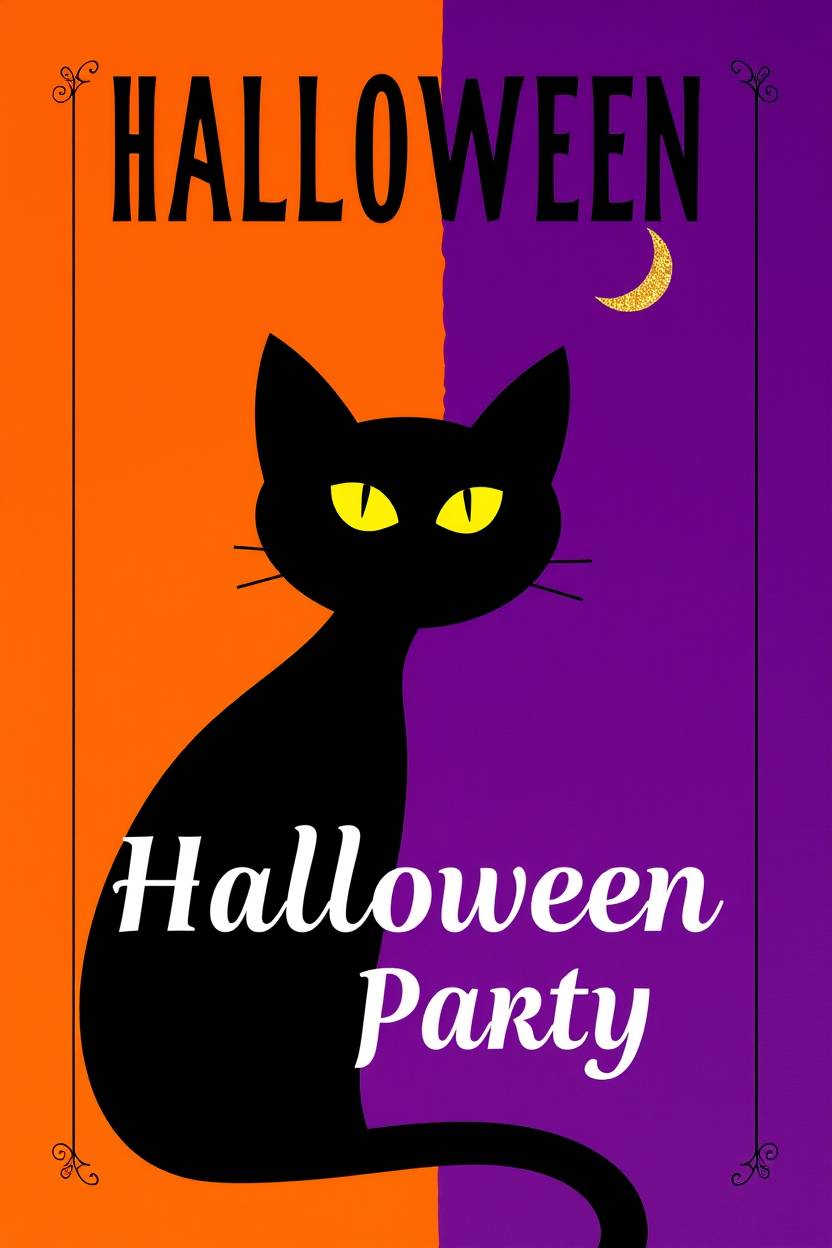
Honestly, black cats are classic, and silhouettes on invitations always look so chic yet spooky. I like cutting black cardstock into cat shapes and gluing them onto orange or purple backgrounds. Once, I sent these to a friend’s party, and someone joked, “Are the cats cursed?”—I laughed so hard.
To make them, trace or print a silhouette, cut carefully, and paste it onto a colored card. You can add little details like yellow eyes or a tiny glitter moon. In my opinion, these are elegant but still festive, perfect if you want a slightly more grown-up vibe while keeping the Halloween spirit alive.
Trick-or-Treat Bag Invitations
Trick-or-treat bag invites are honestly my personal favorite for small groups. I’ve filled tiny bags with candy and tucked in a folded card with the party details—it’s like giving a mini party starter. One time, my niece’s friends didn’t even notice the card at first because they were so busy eating the candy!
To make these, use small paper or cloth bags, add candy, and fold in your invitation. You can even stamp or draw cute Halloween designs on the bag. In my opinion, these feel extra generous and fun because guests are getting a treat even before the party starts, which sets a super positive, playful tone.
Glow-in-the-Dark Ghost Cards
Glow-in-the-dark invitations honestly add a “wow” factor. I’ve done this a few times with glow-in-the-dark paint or stickers, and I swear the reactions are always, “How did you do that?!” It’s kind of magical opening a card that lights up in a dark room.
To make them, paint simple ghost shapes with glow paint, let dry, and write the party details with a contrasting color. You could also use glow-in-the-dark cardstock. In my opinion, these are perfect if you want your invite to feel interactive and spooky, and they make the party feel exciting before it even begins.
Zombie Hand Invitations
Zombie hands are honestly hilarious and a little gross—in the best way! I’ve cut hand shapes from green cardstock, added red “blood” details, and folded them so the fingers peek out. The first time I sent these, someone said, “I hope this doesn’t bite me!”—I laughed for days.
To make them, draw or trace hands, color them like zombies, and write the party details on the palm or forearm area. You can even add fake dirt or scratches for realism. In my opinion, these are perfect if you want a creepy-cute vibe, and they definitely make people chuckle while feeling slightly scared.
Full Moon Circle Cards
Full moon circle cards are honestly one of my quieter, artsy favorites. I’ve cut round cards, painted them silver or pale yellow, and added tiny silhouettes of bats or witches. Last Halloween, a friend said, “This looks like a piece of art I want to hang,” which honestly made my day.
To make them, cut circles from cardstock, paint or decorate with moons, stars, or silhouettes, and write the details inside. I sometimes add a shimmer or glitter for that moonlit glow. In my opinion, these feel more mystical than scary, perfect if you want elegance and a little magic in your invites.
Bat-Shaped Invitations
Bats are honestly classic Halloween creatures, and bat-shaped invites are a blast to make. I’ve cut them out of black cardstock and folded the wings to add dimension. One year, I hung them on a string as a little display, and it looked so festive!
To make them, cut bat shapes, fold wings slightly, and write the party info on the back or body. You can add googly eyes or tiny fangs for fun. In my opinion, bat invitations are playful, easy to make, and they immediately set a fun, slightly spooky tone.
Creepy Crawlies Pop-Up Cards
Creepy crawlies pop-ups are honestly both fun and a little gross—but in the best way. I’ve made cards with pop-up spiders, worms, or centipedes, and guests always get a tiny squeal when opening them. It’s hilarious and perfect if your crowd loves a laugh with a bit of fright.
To make them, cut and fold your creepy critters and attach them inside a card so they spring up. You can add googly eyes, glitter, or even tiny web strings for effect. In my opinion, these are great for kids and adults alike, and they instantly make your invitations interactive and memorable.
Tips for Planning Invitations
Planning your Halloween Party Invitation Ideas carefully can make your party more organized and fun. Here are some helpful tips to make sure your invites are perfect:
-
Send them in advance: Give your guests enough time to plan and get excited about the party.
-
Match invitation style with party theme: Make sure the design and colors of your invitation fit the spooky theme of your party.
-
Include all necessary details: Clearly mention the date, time, venue, and any dress code so guests know what to expect.
-
Manage RSVPs: Keep track of who is coming to help with planning food, games, and decorations.
FAQ
When should I send Halloween Party Invitation Ideas?
It’s best to send invitations 2–3 weeks before the party so guests have enough time to plan.
Should the invitation match the party theme?
Yes! Matching the invitation style with your theme makes the party more exciting and sets the right mood.
Can digital invitations work as well as printed ones?
Absolutely! Digital invitations are convenient, eco-friendly, and can include fun animations or interactive elements.
What details should I include in the invitation?
Include the date, time, venue, dress code, RSVP information, and any special instructions for your guests.

Hi, I’m Victoria, an art and craft teacher at Newark City Schools, where I have the joy of working with middle school students to help them explore their creativity and develop their artistic talents. I believe that art is a powerful way for students to express themselves, and I strive to make every lesson a fun, engaging, and inspiring experience.
I created this website to share the art and craft projects, techniques, and resources that I use in my classroom, hoping to inspire both educators and young artists alike. Whether you’re a teacher looking for new ideas or a student eager to try something new, I’m excited to provide creative tools and projects that anyone can enjoy.
When I’m not in the classroom, I love experimenting with different art forms and learning new crafting techniques. My goal is to help others discover the joy of making things with their hands, and I hope my website serves as a space for everyone to explore their creative potential.