
I still remember the first time I picked up a pack of air-dry clay. Honestly, I thought I’d just mess around for an hour, maybe make a lumpy bowl and call it a day. But somewhere between rolling, shaping, and smoothing out those little imperfections, I realized how much fun it was—and how surprisingly good the finished piece looked. (Okay, not “museum quality,” but my best friend asked me where I bought it, which felt like a win!) If you’ve ever wanted to create something with your own hands that looks store bought—without needing a pottery wheel, fancy tools, or, let’s be real, years of practice—you’re in the right place.
I get it: sometimes you want a creative project that’s relaxing and actually useful. That’s why I’m sharing some of my favorite small clay projects that are simple, fun, and guaranteed to look way fancier than they really are.
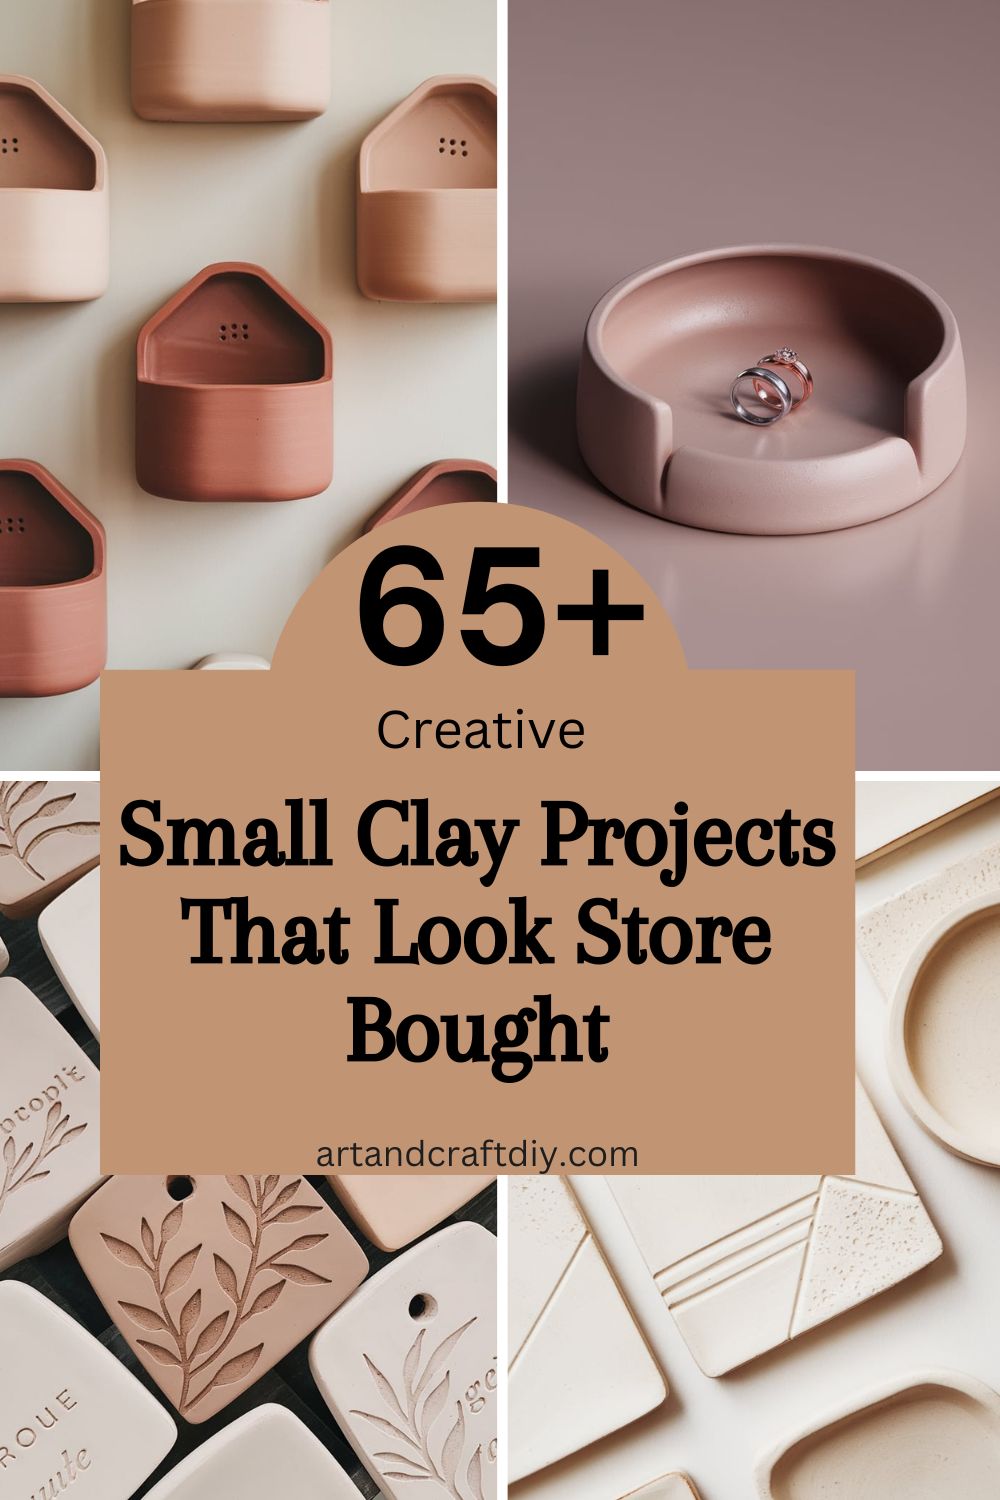
Small Clay Projects That Look Store Bought
Small clay projects that look store-bought are handmade creations that have a polished, professional appearance despite being crafted by hand. Small Clay Projects That Look Store Bought often feature clean lines, smooth finishes, and well-thought-out designs that give them a commercial, high-quality feel. Whether it’s pottery, sculptures, or home décor items, the key to achieving this effect is mastering clay techniques, using the right tools, and paying attention to detail. The result is something unique, yet refined enough to resemble the kind of item you’d find on store shelves.
Clay Plant Markers
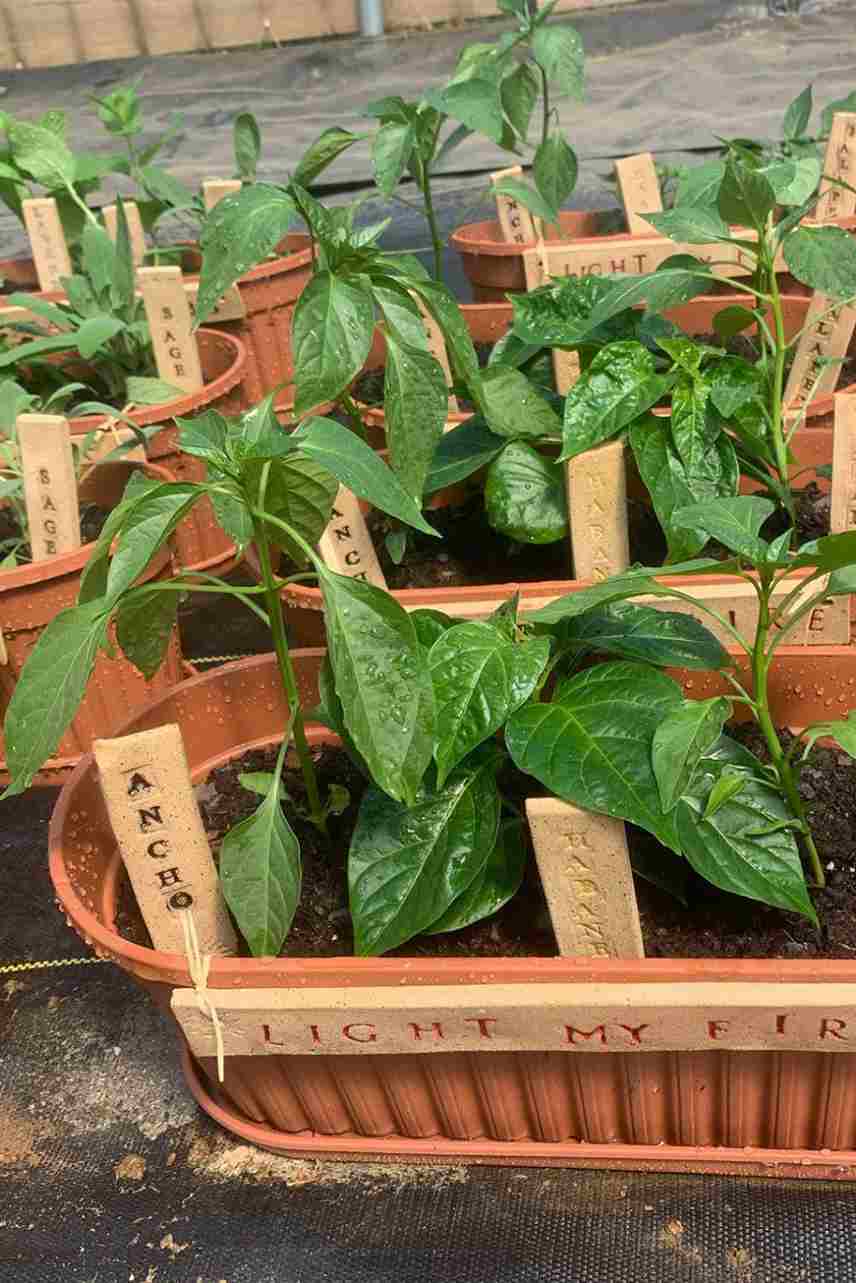
I’m one of those people who constantly forgets what I planted where—basil ends up looking like mint, and I’m left second-guessing myself every time. That’s where clay plant markers come in. The first time I made them, I rolled out some clay, cut little rectangles, and stamped the herb names into them. Honestly, I thought they’d look kind of rough, but after baking and painting the letters with a thin brush, they looked like something you’d find in a boutique garden store.
To be fair, you don’t need any fancy tools for these. I used a butter knife and some old alphabet stamps I had lying around from scrapbooking. If you want them glossy, a quick coat of varnish does the trick. These little markers not only keep my herbs organized, but every time I see them in the garden, I feel like I’ve upgraded my tiny balcony into something way fancier than it is.
Materials Used: Air-dry clay, rolling pin, knife, pencil, acrylic paints.
Steps:
- Roll out a piece of clay to about 1/4-inch thickness.
- Cut the clay into small rectangles or custom shapes (like leaves or flowers).
- Use a pencil to lightly write plant names on the surface.
- Allow the clay to dry, then paint the text and designs.
- Once dry, place in the soil of your plants.
Minimalist Clay Coasters
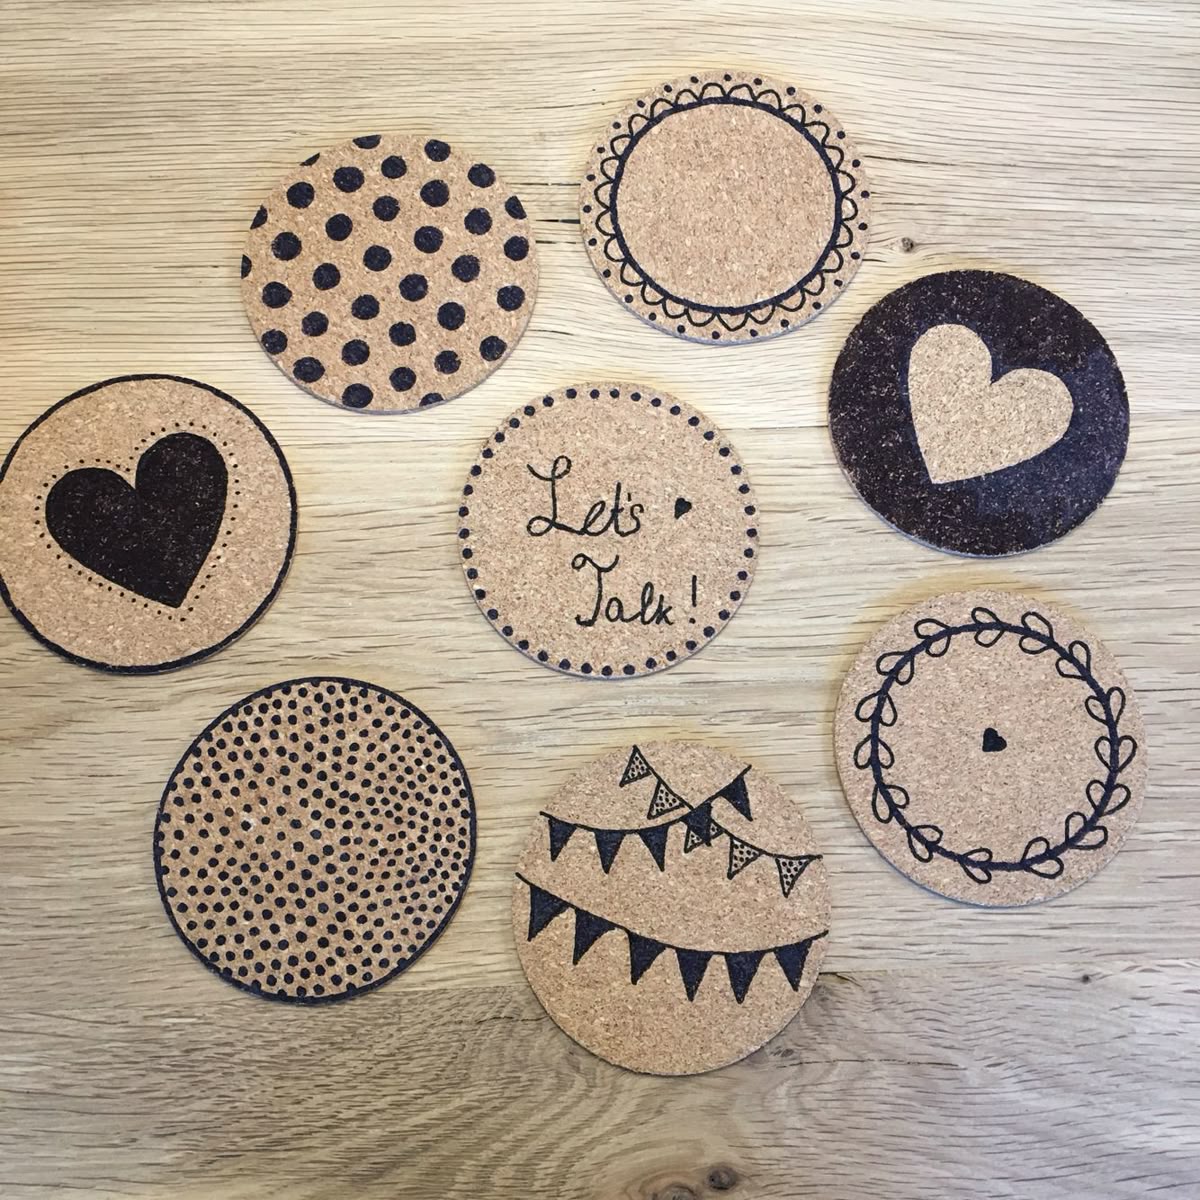
I’ve bought coasters so many times, and somehow they either disappear or get ruined with coffee stains. Making clay coasters was a little “aha” moment for me—simple circles, pressed with a glass to get that perfect round edge, and voilà. The first time, I left them plain white because I was in that minimalist phase. To my surprise, they came out looking like something from a Scandinavian design shop.
Now, I’ve gotten bolder. I’ve marbled two clay colors together—nothing too wild, just subtle swirls of white and grey. They honestly look like polished stone. Pro tip: sand the edges a bit after baking so they don’t scratch your table. In my opinion, coasters are one of those things that are ridiculously overpriced in stores, so making a set that looks sleek and high-end with just a bit of clay feels like winning. And they make a sweet housewarming gift too.
Materials Used: Air-dry clay, rolling pin, round cutter, acrylic paints, glaze.
Steps:
- Roll out the clay and use a round cutter to shape it into a coaster size.
- Let it dry completely, then lightly sand the edges for a smooth finish.
- Paint simple designs, like stripes or dots.
- Once painted and dry, coat with a glaze for added durability.
DIY Clay Candle Holders
The very first clay candle holder I made was lopsided, and I laughed every time I lit it—but here’s the thing: guests thought it was “artsy.” That’s when I realized imperfections actually make these look more handmade-chic. Rolling out a small ball of clay and pressing in a taper candle to form the slot works every time. If it’s uneven, just smooth the edges with a damp finger.
I’ve also played with textured designs—pressing lace fabric into the clay before baking gives such a delicate finish. To be fair, these are so much cheaper and more personal than anything I’ve found in home décor shops. Plus, you can paint them metallic gold or leave them matte white for that trendy, clean look. In my opinion, lighting candles in holders you made yourself gives a room a cozy vibe that feels store-bought but with way more character.
Materials Used: Air-dry clay, rolling pin, small cup or mold, knife.
Steps:
- Roll out the clay and cut it into a small circle.
- Mold the clay around a small cup or object to form the base.
- Create a small depression in the center to fit a candle.
- Let dry, then sand the edges.
- You can paint or leave it as is for a rustic look.
Clay Ring Dish
My dresser used to be a mess of scattered rings and earrings, so I whipped up a small clay ring dish. Rolling the clay into a circle and gently pressing it into a shallow bowl shape is all it takes. Honestly, the first one I made wasn’t even painted—I left it raw and matte, and it looked so stylish on its own.
Later, I started painting edges with gold acrylic paint, and wow—it looked like something straight out of an Etsy shop. To be fair, you don’t even have to be “good” at painting. Even a messy metallic rim feels intentional. These little dishes are such a lifesaver, and they’re also ridiculously giftable. I’ve made them for friends, customized with initials, and they always look more expensive than they actually are. In my opinion, once you make one, you’ll wonder how you ever lived without it.
Materials Used: Air-dry clay, rolling pin, small bowl, acrylic paints.
Steps:
- Roll out the clay and flatten it into a circle.
- Place a small bowl in the center to create a shallow dish shape.
- Let the dish dry, then paint with your choice of design.
- Once painted, coat with a protective glaze to preserve it.
Clay Keychains
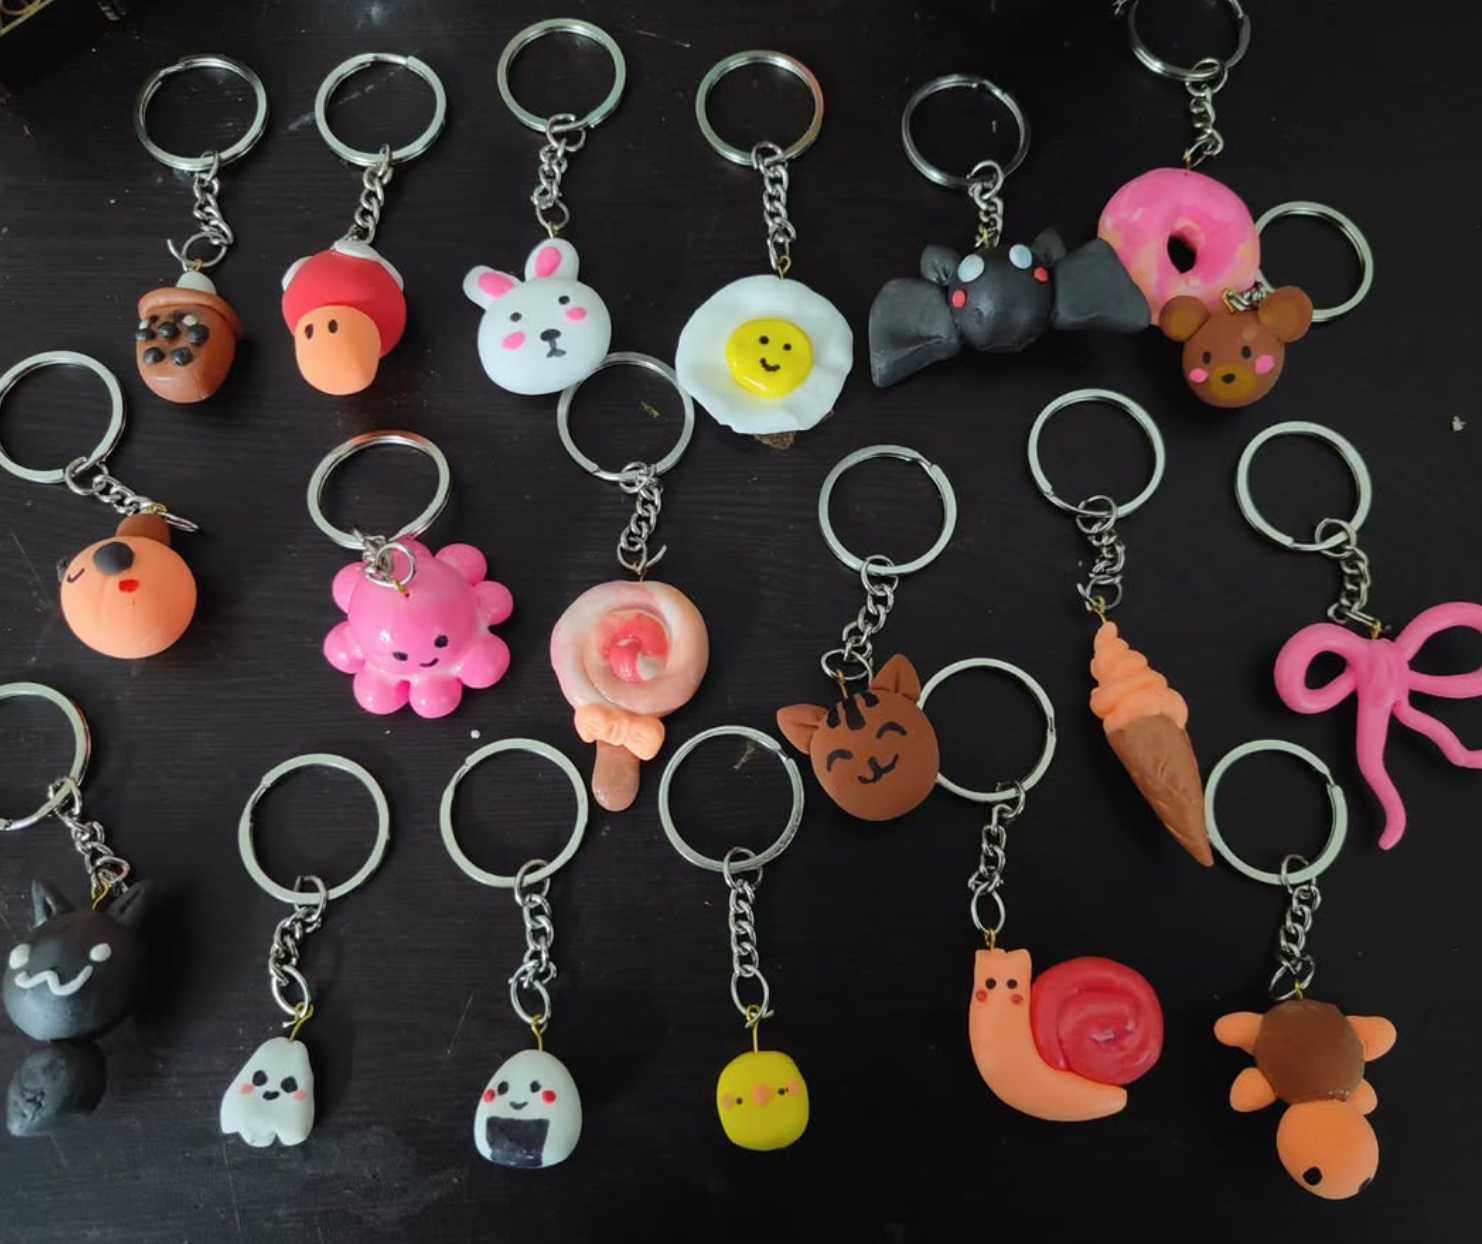
One day I got tired of my boring plastic keychain, so I grabbed some leftover clay and shaped a tiny heart. Punched a hole before baking, added a keyring afterward, and honestly—it looked like something I’d buy at a craft fair. I even stamped my initials in one, and it instantly felt more personal.
Keychains are fun because you can go simple or quirky. I’ve made little geometric shapes, and once, I tried making a mini cactus (which, okay, looked a little sad, but still cute). To be fair, the clay is super forgiving—if you mess up, just roll it out again. Painting them is where the real fun comes in. Bright colors pop against your keys, and a coat of glaze makes them shine like ceramic. In my opinion, clay keychains are one of those projects where even “mistakes” end up looking playful and handmade.
Materials Used: Air-dry clay, small cutter, keychain rings, paint, glaze.
Steps:
- Roll out the clay and cut out your desired shape (hearts, stars, etc.).
- Use a small tool to create a hole for the keychain ring.
- Let it dry completely.
- Paint the shape and allow the paint to dry.
- Attach a keychain ring.
Clay Jewelry Dishes
Different from a ring dish, I like making jewelry dishes bigger so they can hold necklaces and bracelets too. The first one I made, I pressed a leaf into the clay for texture before baking. When I painted over it in white and rubbed a little gold into the veins, it genuinely looked store-bought.
What I’ve found is that experimenting with textures—like lace, doilies, or even pressing in coins—creates the coolest patterns. Honestly, half the fun is seeing how the design turns out after baking. To be fair, you’ll want to make sure the sides curve up just enough so your jewelry doesn’t slide out. Every time I look at mine, I feel a little proud that I didn’t cave and buy one from Anthropologie. In my opinion, these dishes are proof that clay can look way more “designer” than the effort it takes.

Materials Used: Air-dry clay, rolling pin, small bowl, paint.
Steps:
- Roll the clay into a flat piece and cut into the desired shape.
- Press the clay into a small bowl to form a dish shape.
- Let dry, sand the edges for a smooth finish.
- Paint your dish with patterns or a solid color.
Clay Wall Planters
This one felt ambitious at first, but trust me, wall planters are easier than they sound. I shaped a flat-backed pouch with clay, smoothed the edges, and poked two small holes for hanging. Once baked and painted, it held my tiny succulents perfectly. Honestly, I couldn’t believe it didn’t come from a boutique.
I’ve also experimented with geometric shapes, like hexagons, and those came out super modern. To be fair, they’re more for lightweight plants or faux greenery—you don’t want anything too heavy. I used jute twine for hanging, and it added a rustic touch. In my opinion, clay wall planters are such a statement piece. People always ask me where I bought them, and when I say I made them, they’re shocked. If you want your walls to look stylish without spending a fortune, this project is a winner.
Materials Used: Air-dry clay, rolling pin, small bowls, paint, string or hooks.
Steps:
- Roll out the clay and shape it into a small bowl or plant pot.
- Create small holes in the top for hanging.
- Allow the clay to dry completely, then paint the pots.
- Attach string or hooks to hang them on the wall.
Clay Mugs
Now, I’ll be honest—making clay mugs felt like stepping into “real pottery” territory, but air-dry clay makes it way less intimidating. I rolled out a rectangle for the body, added a strip for the handle, and joined them with slip (just watery clay). The first one leaked because I didn’t seal it properly, but I kept it as a pencil holder. Still, it looked gorgeous sitting on my desk.
On my second try, I sealed it better and painted it matte black with a white rim. To be fair, most air-dry clay mugs are best for decorative use unless you use food-safe glaze, but that doesn’t mean they’re useless. In my opinion, even as décor, they have that handcrafted charm that screams “store-bought but better.” I love filling mine with faux flowers—it looks effortlessly chic on my coffee table.
Materials Used: Air-dry clay, rolling pin, mug form, carving tools, paint.
Steps:
- Roll out clay and form it into a cylinder shape to make the mug body.
- Use another piece of clay to create the handle and attach it.
- Once dry, carve designs and paint as desired.
- Let the mug dry completely.
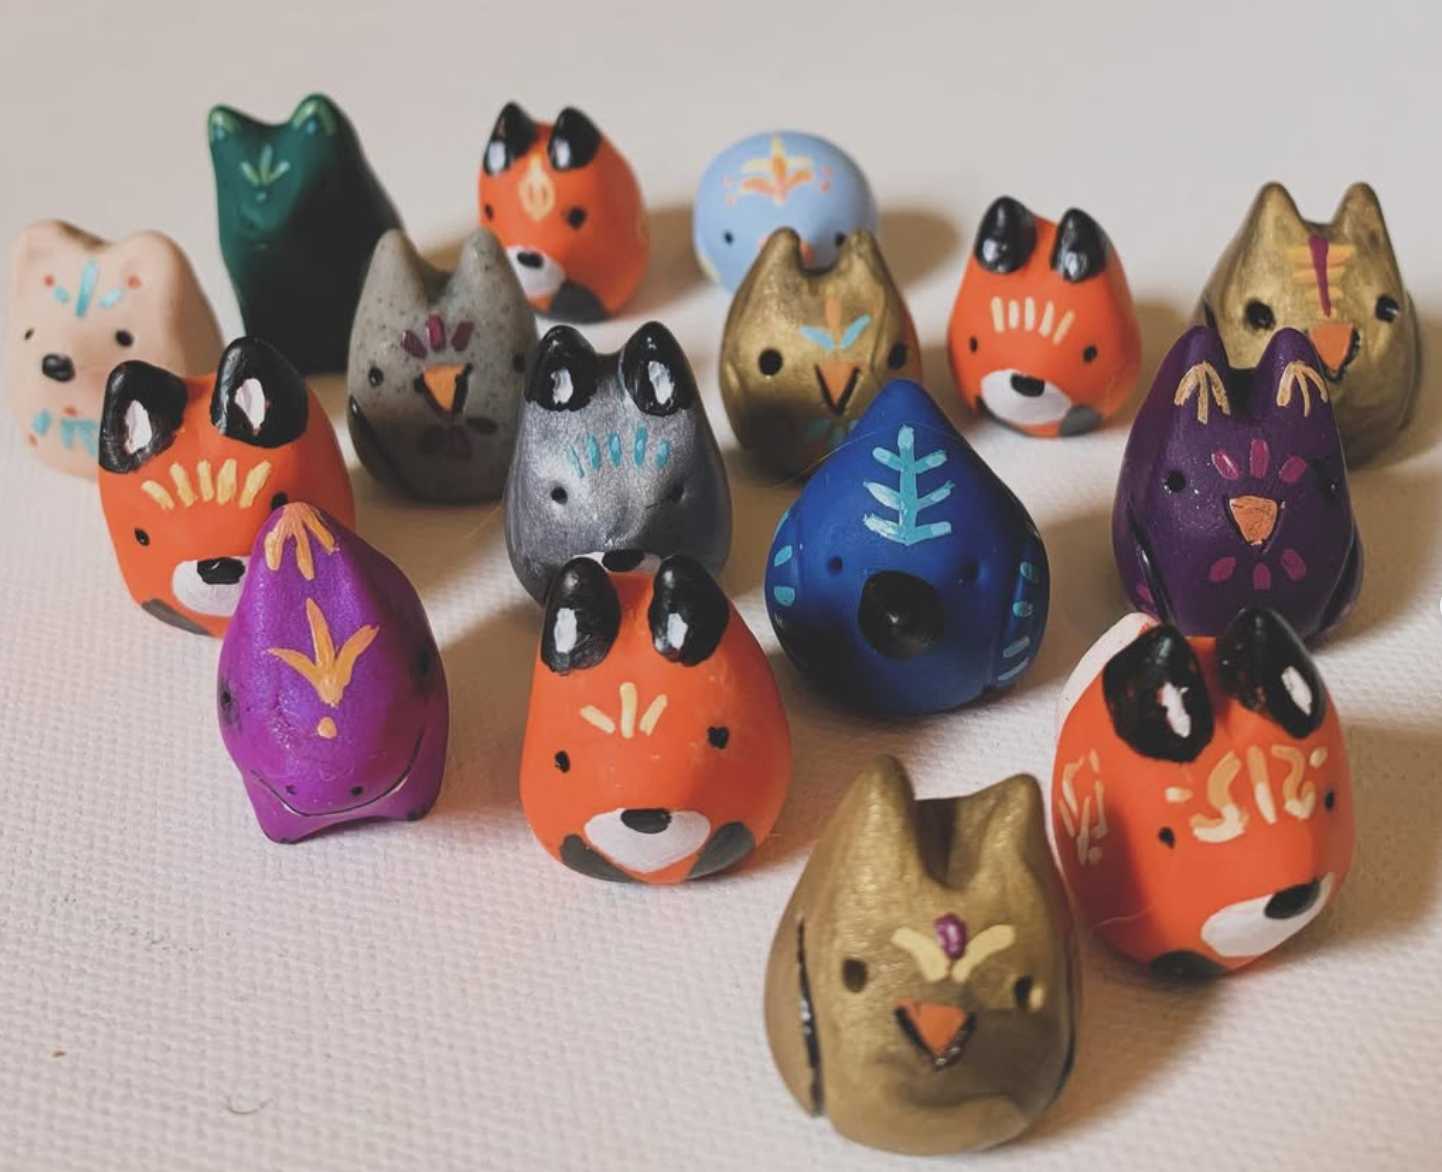
Clay Figurines
I’ve always admired those little animal figurines in gift shops, but I never wanted to spend twenty bucks on one. So I tried making a tiny clay cat. To be honest, it looked more like a lumpy rabbit at first, but after painting it, the charm was undeniable.
What I’ve learned is that figurines don’t have to be perfect. Slightly crooked ears or uneven shapes just add personality. To be fair, the simpler the design, the better—stick figures, minimalist animals, or even abstract shapes can look amazing. I once made a tiny house-shaped figurine for my shelf, and it genuinely looked like a trendy home décor piece. In my opinion, figurines are the most forgiving clay project because you can lean into the “handmade” vibe without worrying about perfection. And every time I glance at mine, they make me smile.
Materials Used: Air-dry clay, sculpting tools, paint.
Steps:
- Use small pieces of clay to shape different parts of the figurine.
- Attach the pieces together, smoothing the seams.
- Let dry, then paint the figurine in your chosen design.
Clay Plant Pots
Plant pots are where I really went big. I rolled out slabs of clay and joined them into a cylinder, smoothing out the seams with water. The first one cracked a little while drying, but honestly, I didn’t even mind—it gave it that rustic, handmade look.
Once I got better, I started adding details like carved lines or painted patterns. To be fair, air-dry clay isn’t as sturdy as ceramic, so I use these mostly for indoor plants or as covers for plastic pots. But in my opinion, they totally elevate the look of a space. I’ve got one with black-and-white stripes that looks like it came straight out of a modern home décor catalog. Whenever friends come over, they always ask where I bought it. And the best part? I get to say, “Oh, I made that.”
Materials Used: Air-dry clay, rolling pin, mold, paint.
Steps:
- Roll out the clay and shape it around a mold to form a pot.
- Let the clay dry.
- Paint or decorate the pot to your liking.
Clay Photo Frames
Make a custom photo frame that fits your style, whether modern, rustic, or boho.
Materials Used: Air-dry clay, rolling pin, cutter, glue, paint.
Steps:
- Roll out the clay and cut out the desired shape for the frame.
- Attach the frame pieces together, creating space for the photo.
- Once dry, paint and decorate the frame.
- Attach the photo to the frame using glue.
Clay Wall Hooks
Create wall hooks that are both functional and stylish.
Materials Used: Air-dry clay, rolling pin, hook screws, paint.
Steps:
- Roll out clay and shape it into a small disc or other desired form.
- Attach hook screws before the clay dries.
- Paint and let dry completely before using.
Clay Magnets
Personalize your fridge with custom clay magnets.
Materials Used: Air-dry clay, rolling pin, small cutters, magnet backs, paint.
Steps:
- Roll out clay and cut into your desired shapes.
- Attach magnet backs to the flat side of the shape.
- Paint and let the clay dry completely.
Clay Soap Dishes
Handmade soap dishes add a personal touch to your bathroom or kitchen.
Materials Used: Air-dry clay, rolling pin, small cutter, glaze.
Steps:
- Roll the clay and cut out a round or square shape.
- Mold the clay into a shallow dish.
- Once dry, glaze for a smooth finish.
Clay Pendant Light Fixtures
Elevate your lighting with custom-made clay pendants.
Materials Used: Air-dry clay, lamp cord, cutter, glue.
Steps:
- Roll out the clay and shape it into a pendant fixture.
- Make a hole at the top for the lamp cord.
- Allow to dry before assembling onto the lamp.
Clay Animal Sculptures
Create fun and quirky animal sculptures to decorate your space.
Materials Used: Air-dry clay, sculpting tools, paint.
Steps:
- Sculpt the body, legs, and head of your animal out of clay.
- Attach the pieces and smooth out the seams.
- Paint the sculpture once dry.
Clay Bracelets
Craft personalized bracelets to wear or give as gifts.
Materials Used: Air-dry clay, rolling pin, small cutters, paint.
Steps:
- Roll out clay and cut into strips for the bracelet band.
- Form the clay into a circle to fit your wrist.
- Paint the bracelet and let it dry completely.
Clay Wall Art
Create textured, abstract art with clay.
Materials Used: Air-dry clay, sculpting tools, canvas, paint.
Steps:
- Roll out clay and cut into various shapes and patterns.
- Attach them to a canvas or board, creating a layered design.
- Paint the clay once dry for an artistic touch.
Clay Leaf Bowls
Make small, leaf-shaped bowls to hold trinkets or jewelry.
Materials Used: Air-dry clay, leaf for imprinting, sculpting tools.
Steps:
- Roll out the clay and press a real leaf into it to create an imprint.
- Shape the edges into a bowl shape.
- Allow to dry and paint if desired.
Clay Wind Chimes
Craft a beautiful, personalized wind chime to hang in your garden or on your porch.
Materials Used: Air-dry clay, wire, string, beads.
Steps:
- Shape small pieces of clay into beads or shapes for the chimes.
- Thread the pieces onto a string or wire, attaching them together.
- Hang the chimes outdoors.
Clay Planter Saucer
Make a small, functional saucer for your plant pots.
Materials Used: Air-dry clay, rolling pin, small cutter, paint.
Steps:
- Roll the clay and cut into a circle that matches the base of your plant pot.
- Let it dry completely, then paint it to match your décor.
Clay Bookends
Make custom bookends that are both decorative and practical.
Materials Used: Air-dry clay, sculpting tools, paint.
Steps:
- Roll out clay and shape it into blocks.
- Sculpt the blocks into interesting shapes, like animals or geometric forms.
- Paint them for a polished finish.
Clay Phone Holder
Create a stylish and functional phone holder for your desk.
Materials Used: Air-dry clay, rolling pin, sculpting tools, paint.
Steps:
- Roll out clay and create a base with a slight incline.
- Carve a slit for your phone to rest in.
- Paint and allow to dry.
Clay Tea Set
Create a miniature tea set for your dolls or as a decorative piece.
Materials Used: Air-dry clay, sculpting tools, paint.
Steps:
- Shape the clay into small cups, saucers, and teapots.
- Allow to dry and paint with intricate details.
Clay Serving Tray
Create a custom tray that’s perfect for serving tea or coffee.
Materials Used: Air-dry clay, rolling pin, mold, glaze.
Steps:
- Roll out clay and form it into a tray shape.
- Let it dry, then glaze for durability.
Clay Paperweights
Make functional and stylish paperweights with clay.
Materials Used: Air-dry clay, sculpting tools, paint.
Steps:
- Roll the clay into a ball and sculpt it into a desired shape.
- Let it dry, then paint or decorate as desired.
Clay Cupcake Toppers
Create adorable cupcake toppers for your next party.
Materials Used: Air-dry clay, sculpting tools, paint.
Steps:
- Shape the clay into mini cupcakes, flowers, or other fun designs.
- Let them dry, then paint for a festive look.
Clay Button Set
Make your own set of decorative buttons for crafts or clothing.
Materials Used: Air-dry clay, small cutters, paint.
Steps:
- Roll out clay and cut into small circles for buttons.
- Create holes in the center using a needle.
- Paint the buttons once dry.
Clay Business Card Holder
Design a chic holder for your business cards to display on your desk.
Materials Used: Air-dry clay, sculpting tools, paint.
Steps:
- Roll the clay into a small rectangle to serve as the base.
- Create a small slit along the top to hold cards.
- Paint the holder in your preferred design.
Finishing Touches: Painting, Sealing, and Assembly for Clay Creations
Once you’ve molded and shaped your clay pieces, it’s time to focus on the finishing touches that will bring your creations to life. Whether you’re making jewelry, home decor, or small sculptures, painting, sealing, and assembling are key steps to ensure your pieces are polished and durable. Here’s a guide to help you navigate each stage effectively.
Types of Paints and Finishes to Make Clay Look Polished:
- Acrylic Paints: Acrylic paints are versatile, fast-drying, and come in various finishes such as matte, satin, and gloss. They are ideal for adding vibrant color to clay without losing its texture.
- Alcohol Inks: For more translucent, fluid designs, alcohol inks work wonders on clay. They can create beautiful, marbled, and layered effects that enhance the clay’s appearance.
- Oil-Based Paints: These paints offer a more durable finish, making them perfect for pieces that will see a lot of use, such as jewelry or home decor items.
- Spray Paints: For a smooth, even finish, spray paints (either matte or glossy) can cover large areas quickly and are great for clay sculptures and planters.
- Metallic and Pearlized Paints: To add a touch of shine, metallic or pearlized paints can make your clay pieces look sophisticated and polished.
How to Assemble Components?
- Attaching Hooks to Earrings: When creating earrings or other jewelry, it’s crucial to securely attach jump rings or earring hooks to your clay pieces. Use pliers to open and close jump rings carefully so they don’t break or distort the clay. For stronger holds, consider adding small metal loops or using epoxy glue.
- Adding Bases to Planters: For planters, use a strong adhesive like super glue or E6000 to attach clay bases to the main body. You may also need to drill small holes into the base to allow for drainage, ensuring your planter is functional and sturdy.
- Joining Multiple Clay Pieces: When assembling larger pieces or sculptures, a strong adhesive like super glue, liquid clay, or epoxy resin can help bond different components. If possible, score the surfaces where the pieces will meet to create a stronger bond.
- Securing Other Attachments: For any additional components such as chains for necklaces or legs for clay sculptures, make sure to securely glue or thread them through pre-made holes or attached eye pins. Always test the attachment before finalizing.
FAQ
What are some simple small clay projects that look store-bought?
You can make items like minimalist bowls, sleek vases, geometric planters, and simple jewelry dishes. Try experimenting with smooth finishes, clean lines, and neutral colors for a polished, store-bought look.
How can I make my Small Clay Projects That Look Store Bought look more professional?
Use fine-grit sandpaper to smooth out imperfections, and consider using a pottery wheel for even shapes. Glaze your pieces with high-quality, glossy glazes, and avoid visible fingerprints or tool marks.
What kind of clay should I use for small projects?
Polymer clay or air-dry clay are ideal for small projects because they are easy to work with and can be molded into intricate designs. Polymer clay requires baking, while air-dry clay will set on its own.
Can I use regular acrylic paint on my clay creations?
Yes, you can use acrylic paint on clay projects, but make sure to seal your pieces with a clear coat of varnish afterward to prevent the paint from chipping.

Hi, I’m Victoria, an art and craft teacher at Newark City Schools, where I have the joy of working with middle school students to help them explore their creativity and develop their artistic talents. I believe that art is a powerful way for students to express themselves, and I strive to make every lesson a fun, engaging, and inspiring experience.
I created this website to share the art and craft projects, techniques, and resources that I use in my classroom, hoping to inspire both educators and young artists alike. Whether you’re a teacher looking for new ideas or a student eager to try something new, I’m excited to provide creative tools and projects that anyone can enjoy.
When I’m not in the classroom, I love experimenting with different art forms and learning new crafting techniques. My goal is to help others discover the joy of making things with their hands, and I hope my website serves as a space for everyone to explore their creative potential.