
Tie Dye Crafts for Kids are a vibrant and enjoyable way to introduce children to the world of art and creativity. This hands-on activity allows kids to explore a variety of colorful designs by folding, twisting, and dyeing fabric to create unique patterns. Tie-dyeing is not only a fun and interactive craft but also an opportunity to express individual creativity through color choices and designs. Whether creating colorful t-shirts, socks, or bags, tie-dye crafts offer endless possibilities for self-expression.
Tie Dye Crafts for Kids
Tie-dye crafts for kids offer a fun and creative way to express individuality through vibrant colors and patterns. These hands-on projects not only spark imagination but also help develop fine motor skills and an understanding of color theory.
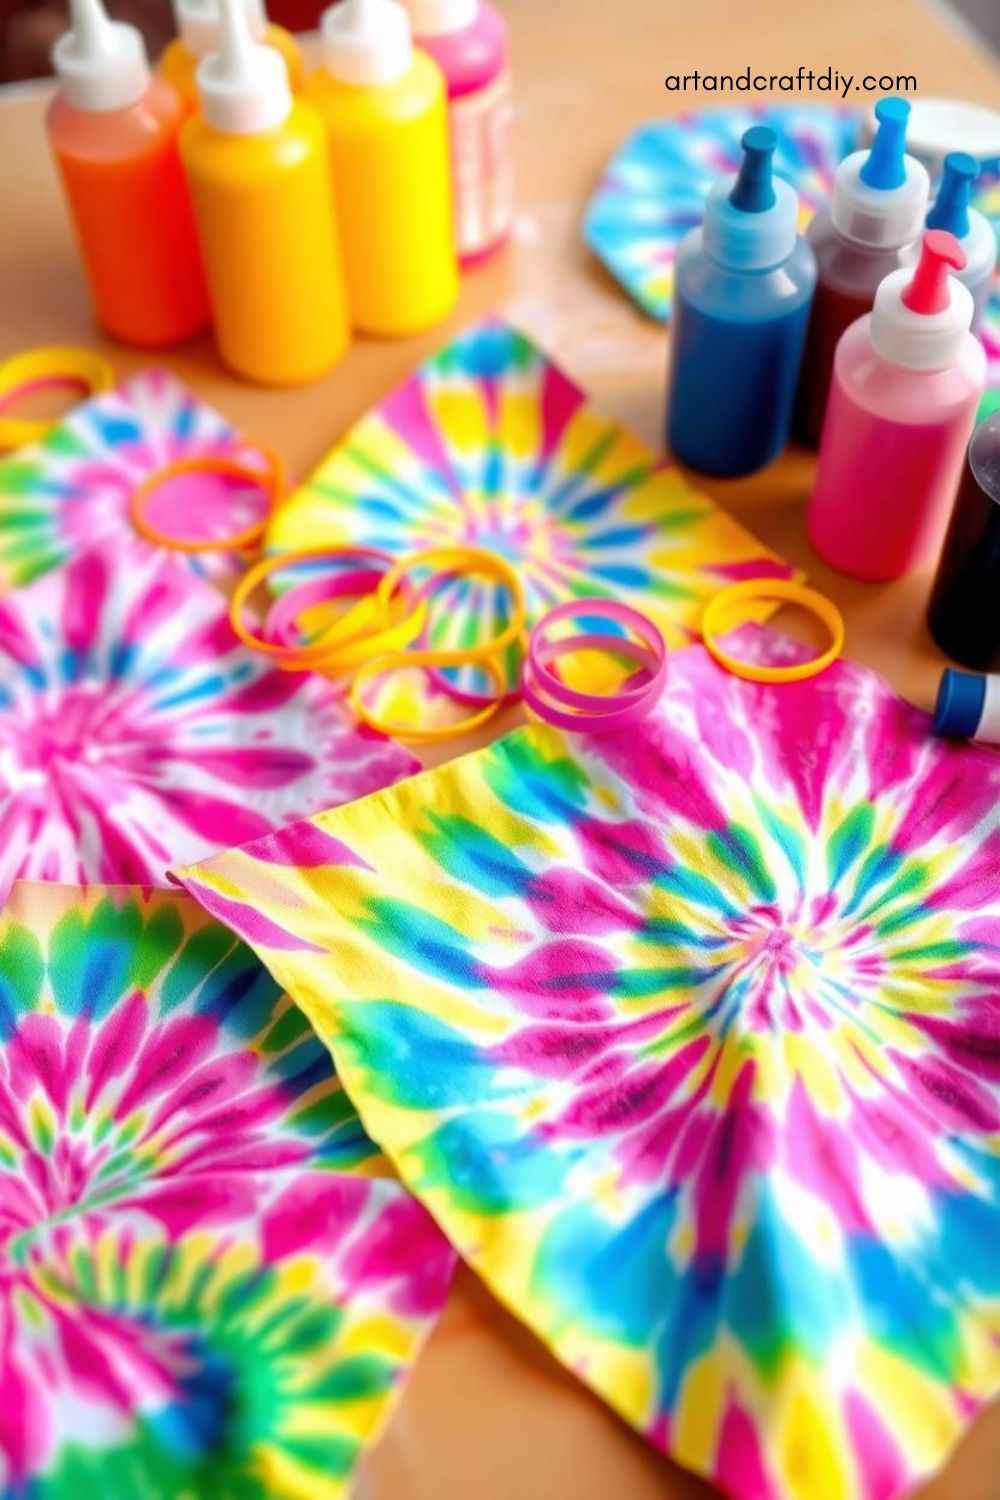
Tie-Dye T-Shirts
Tie-dye t-shirts are a classic craft for kids, and they’re perfect for wearing their colorful creations. This activity allows children to express their style by choosing their favorite colors and creating cool patterns.

Tips:
-
Use a 100% cotton shirt for the best dye absorption.
-
Plan your design before starting to ensure a balanced look.
-
Be mindful of the dye distribution to avoid too much overlap.
-
Wear gloves to avoid staining hands during the process.
-
Allow the shirt to sit in plastic for 6-8 hours to let the colors set.
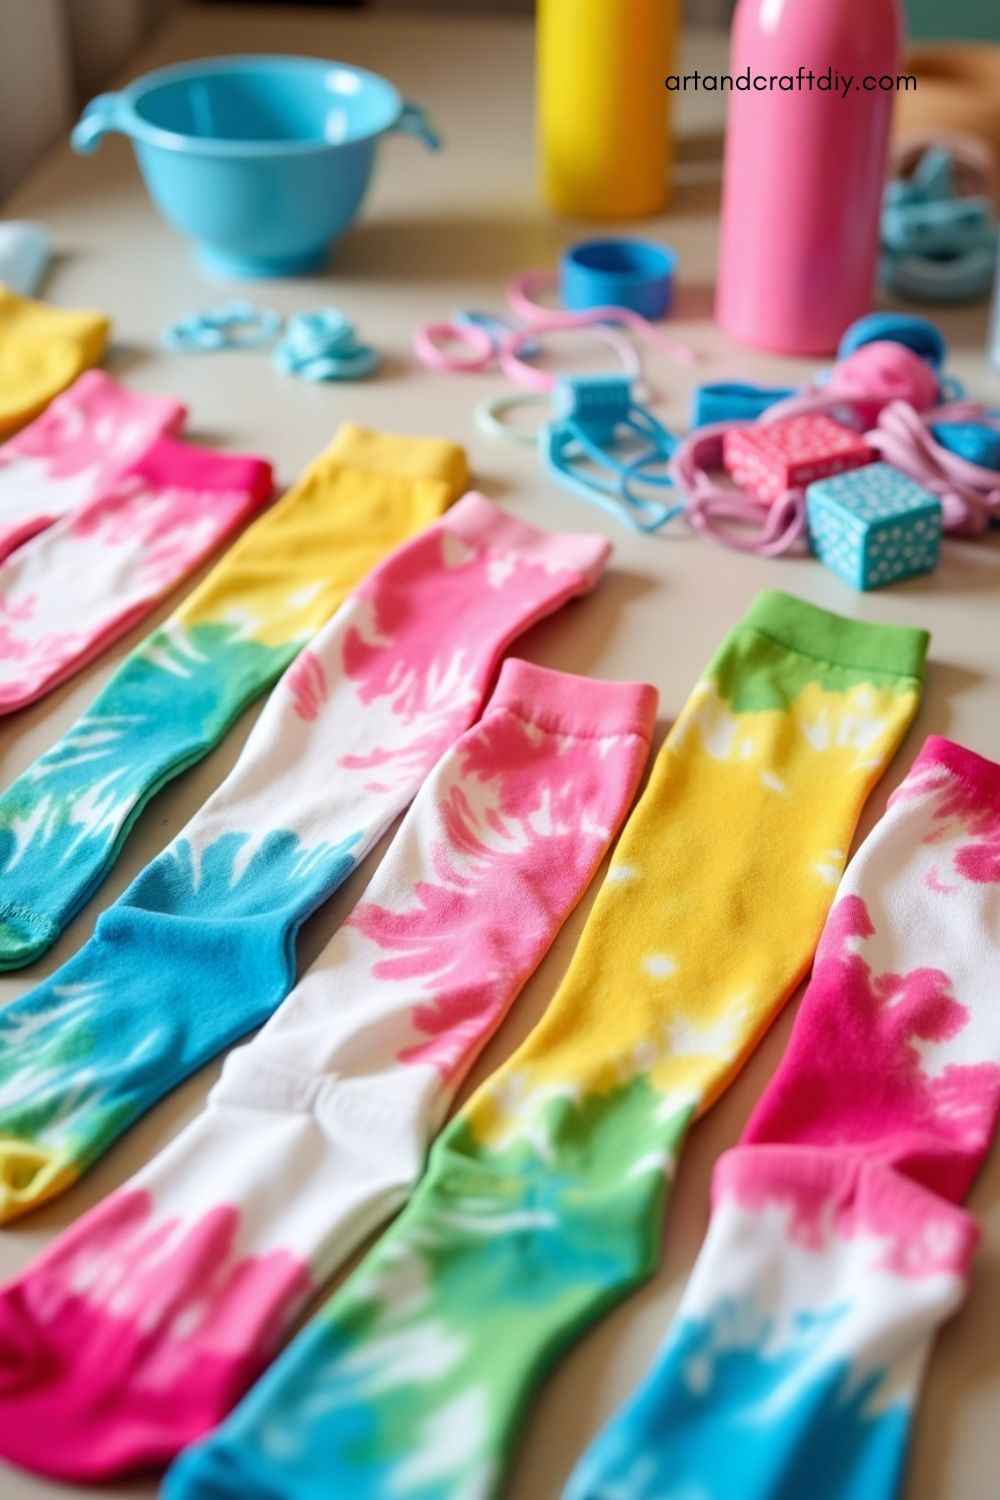
Tie-Dye Socks
Give your kids’ socks a fun upgrade with tie-dye! This simple craft transforms plain white socks into colorful accessories that are perfect for everyday wear.
Tips:
-
Use smaller rubber bands for more intricate designs.
-
Ensure the socks are completely dry before wearing them after dyeing.
-
You can mix bright, bold colors for a more playful look.
-
Don’t forget to protect the area with plastic or newspaper to avoid stains.
-
Let the socks sit overnight for the best dye saturation.
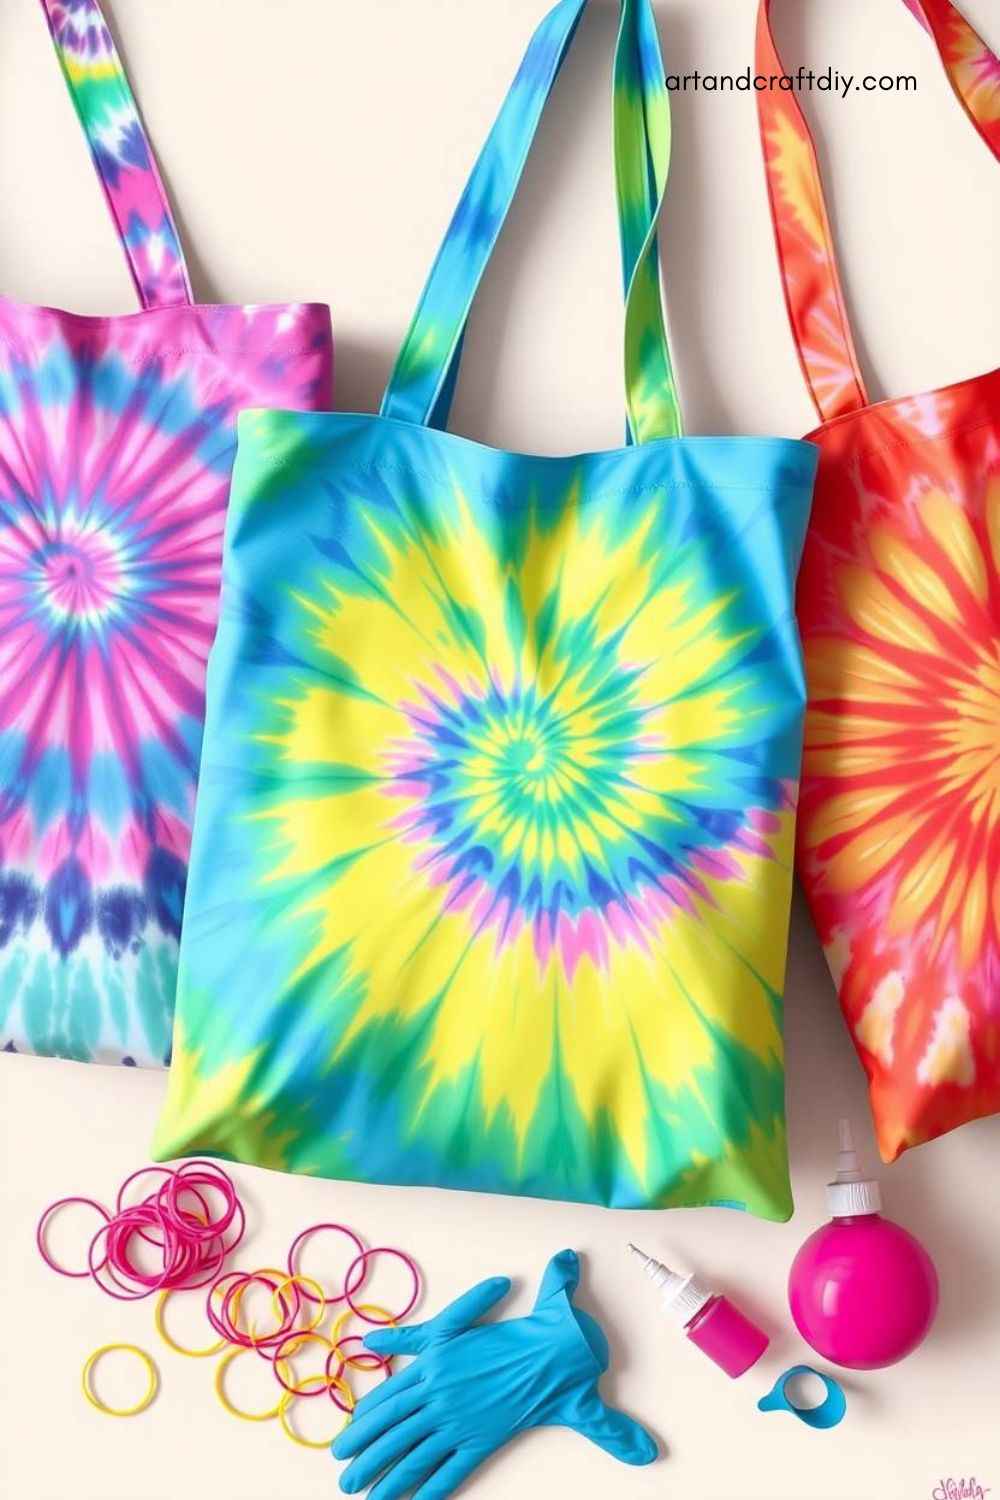
Tie-Dye Tote Bags
Tie-dye tote bags make for fantastic personalized gifts or fun accessories. Kids can use their bags for school, shopping, or carrying books, making this craft both practical and creative.
Tips:
-
Use a thick, cotton tote bag to ensure better dye retention.
-
Experiment with multiple color combinations to make the bag stand out.
-
Secure the design with tight rubber bands for sharp color edges.
-
After dyeing, rinse with cold water to prevent colors from bleeding.
-
Allow the bag to fully dry before using it to avoid smearing.
Tie-Dye Bandanas
Tie-dye bandanas are not only stylish but can also be used for various purposes. Kids can wear them as headbands, scarves, or even accessories for their dolls.
Tips:
-
Use light pastel colors for a subtle and soft design.
-
For bolder designs, use contrasting bright colors.
-
Keep the bandana flat while dyeing to avoid uneven patterns.
-
Choose a fabric that holds dye well, like cotton or linen.
-
Wash the bandana separately in cold water to prevent bleeding onto other fabrics.
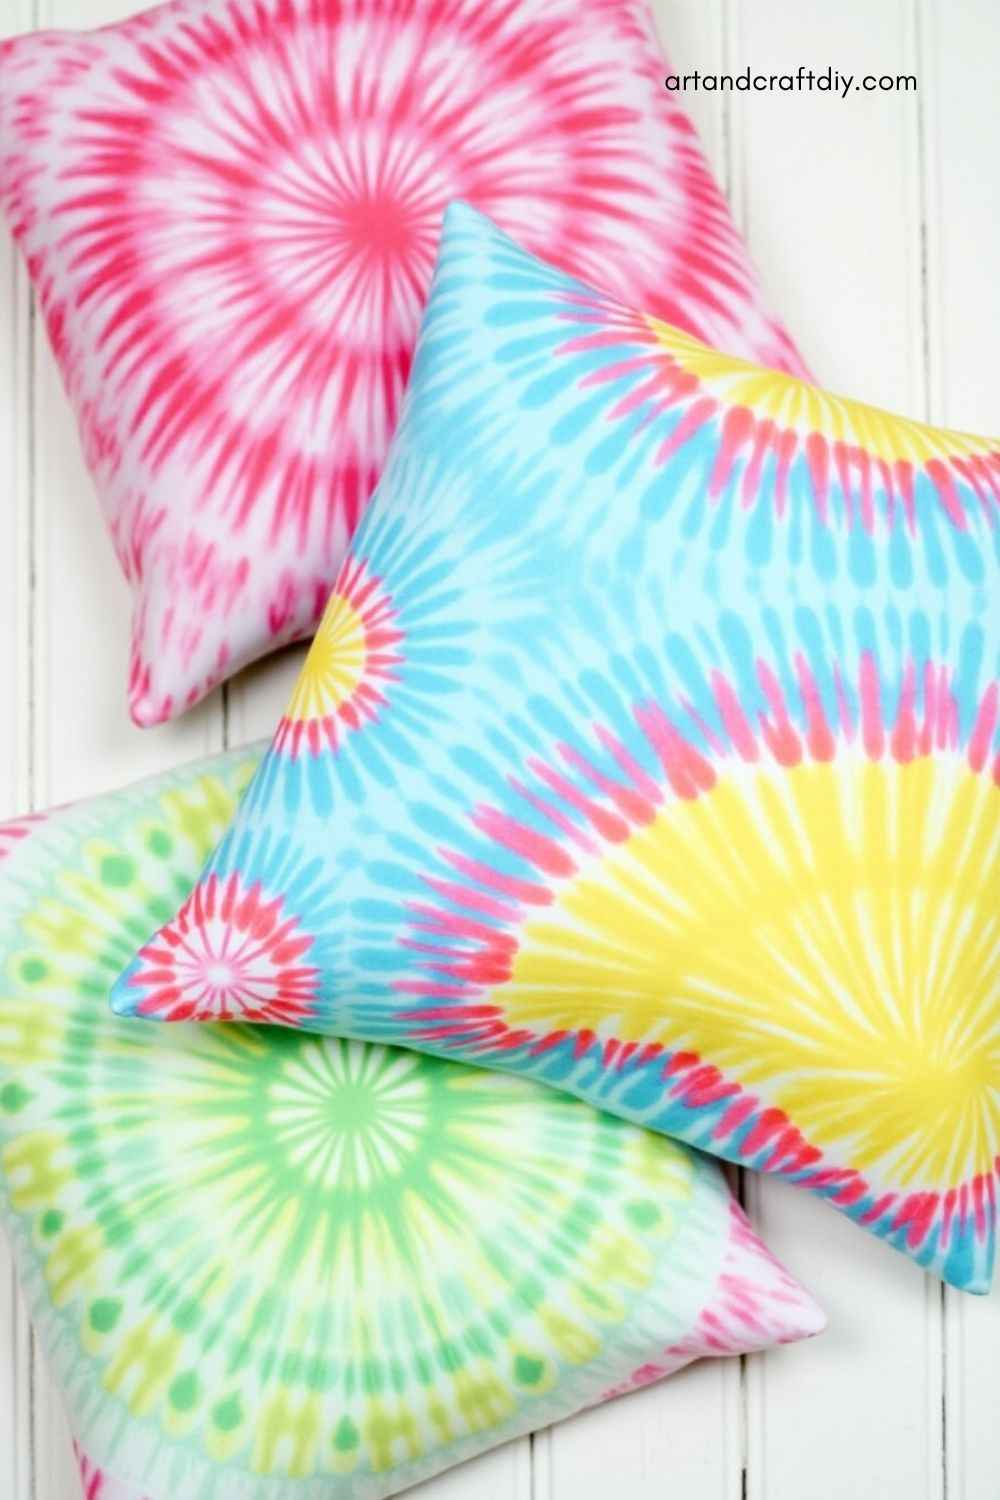
Tie-Dye Pillowcases
Give your child’s bedroom a pop of color by creating tie-dye pillowcases. This project is easy and can be completed in a few simple steps while making the bed look more inviting.
Tips:
-
Opt for pillowcases made from natural fibers like cotton for better dye results.
-
Pre-wash the pillowcases to remove any fabric softeners that could interfere with dye absorption.
-
Roll and fold the pillowcase into a spiral for a fun, hypnotic effect.
-
Keep colors separate to avoid unwanted mixing.
-
Let the pillowcase dry completely before using it to avoid stains on bedding.
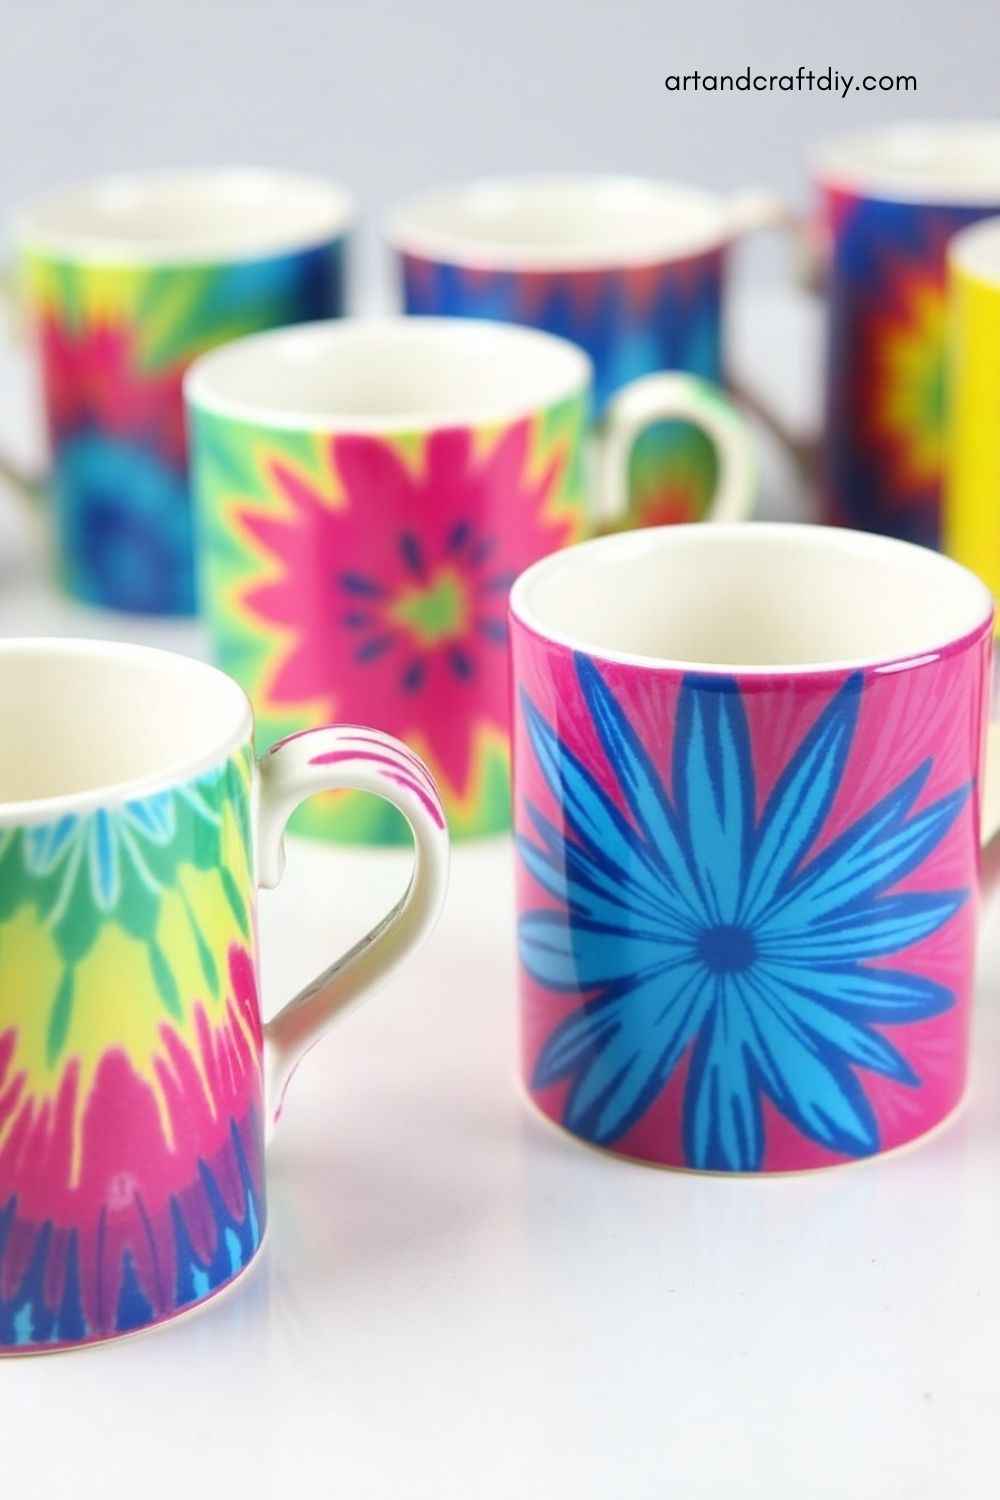
Tie-Dye Mugs
Transform plain white mugs into colorful creations that your kids will love drinking from. This craft is an easy way to teach them about using colors creatively on ceramic.
Tips:
-
Use fabric dye or ceramic-safe paint for best results.
-
Secure the mug with rubber bands to create interesting patterns.
-
Avoid over-soaking the mug to prevent colors from running.
-
Let the mug air dry for 24 hours before using.
-
Personalize the mug with your child’s name or favorite shapes for a unique touch.
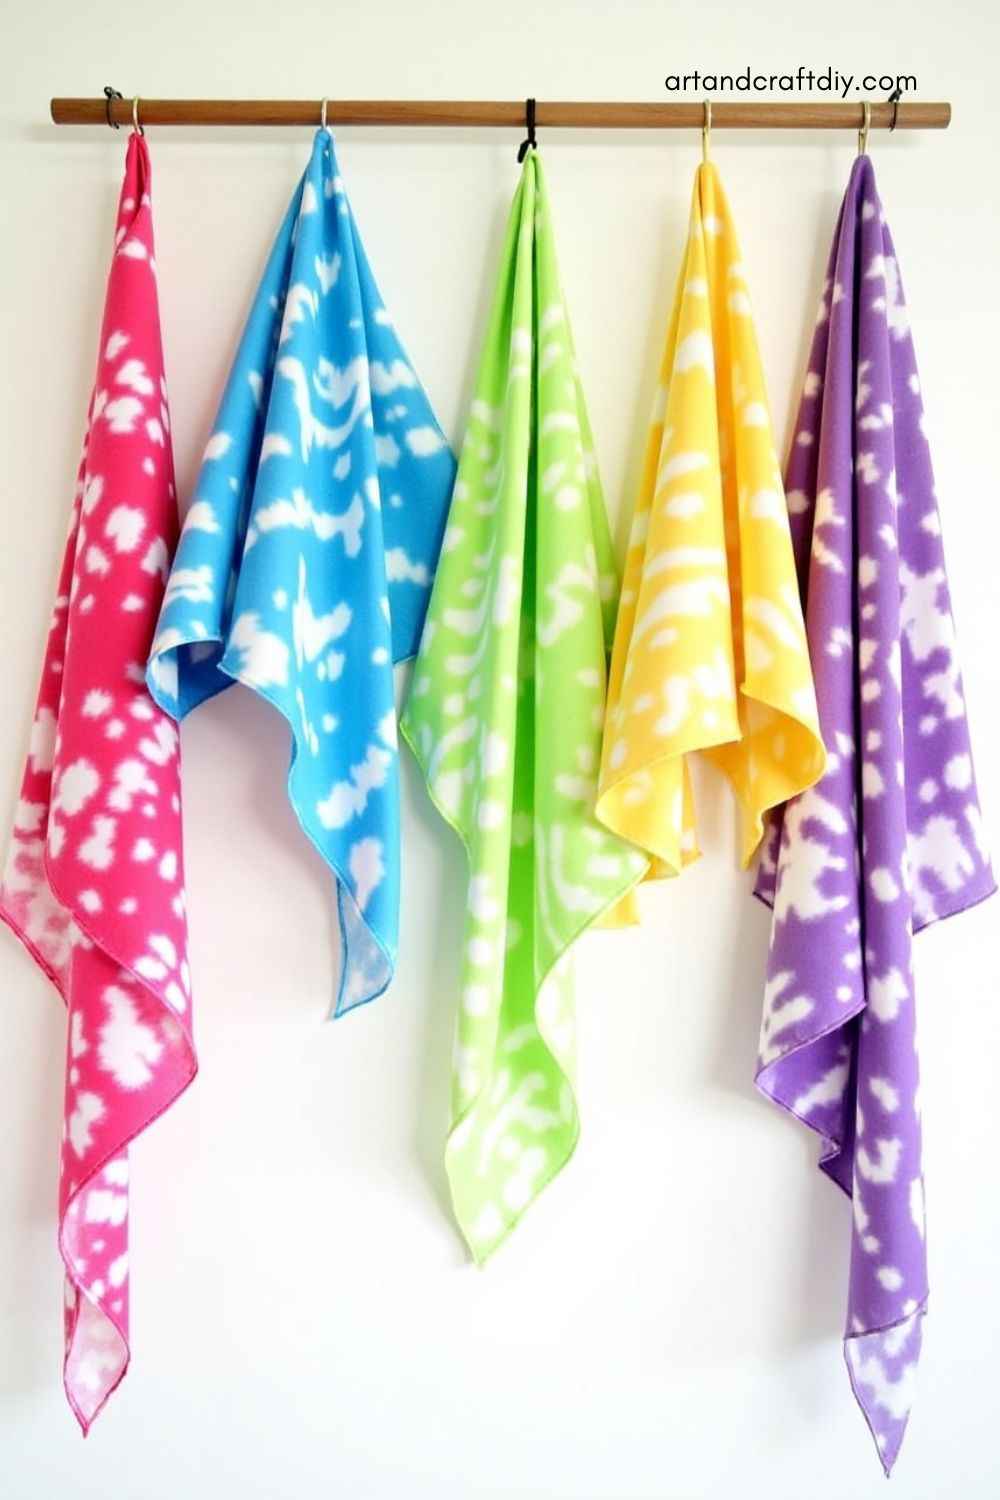
Tie-Dye Wall Hangings
Create a colorful statement piece for a child’s room by making tie-dye wall hangings. This craft is a fun way to decorate a space with vibrant colors and designs.
Tips:
-
Choose a large piece of fabric, like an old sheet, for a bigger design.
-
Create different tie-dye techniques like crumple or spiral for variety.
-
Ensure the fabric is stretched tightly while dyeing for crisp lines.
-
Use fabric paint or permanent markers for additional designs after dyeing.
-
Hang the finished piece on a dowel or wooden rod for easy display.
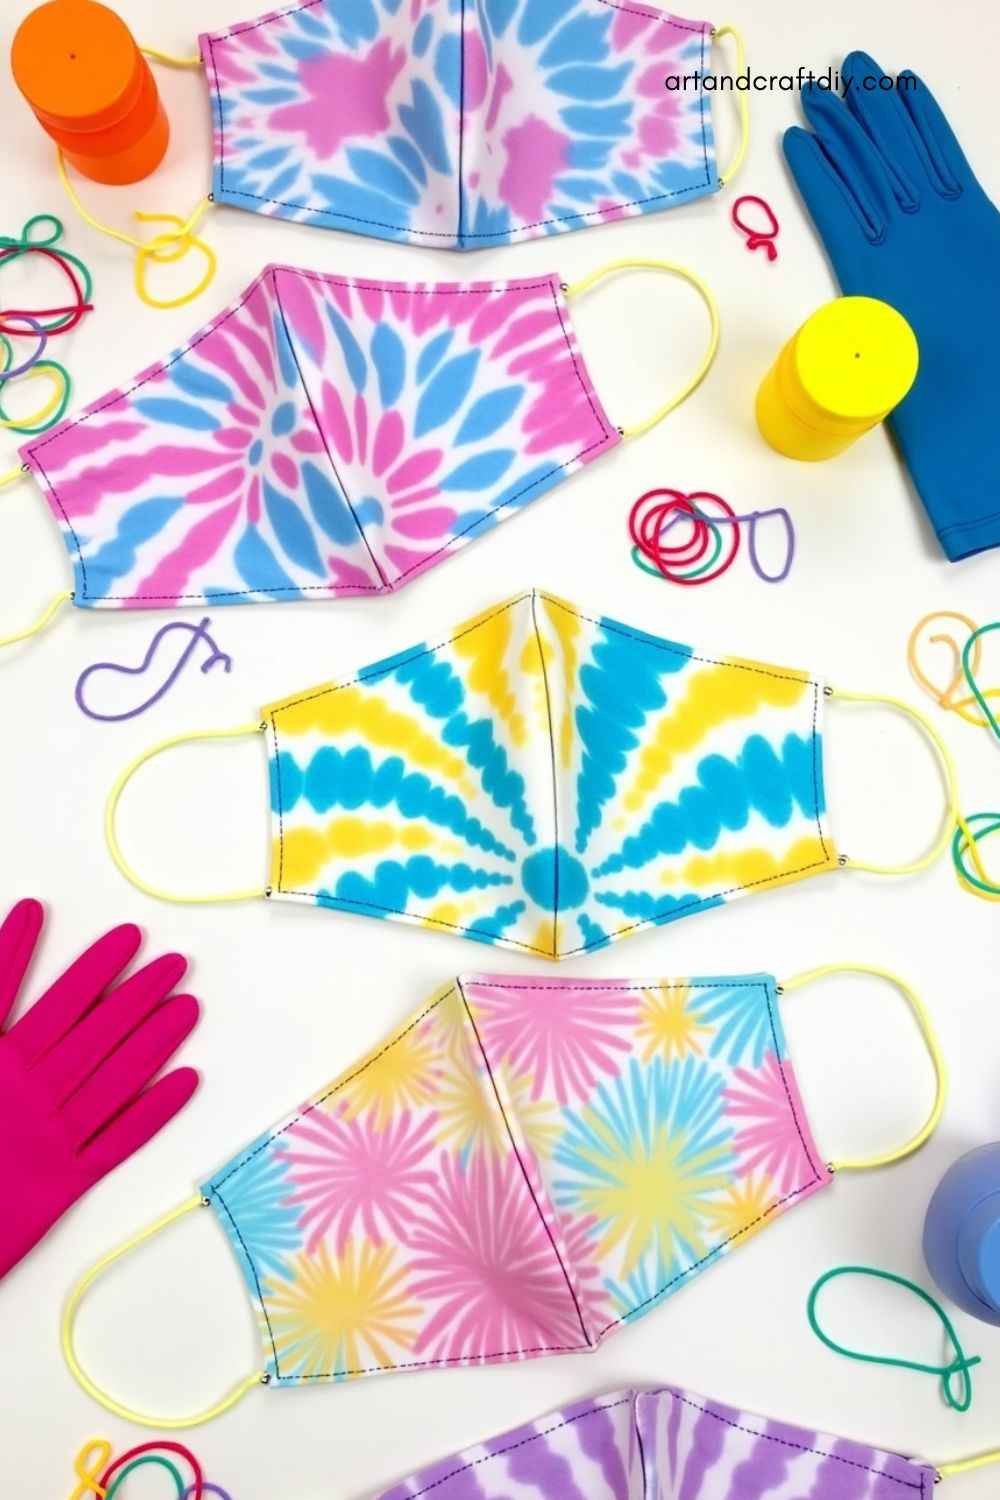
Tie-Dye Face Masks
Tie-dye face masks are both fun and functional, offering an opportunity to personalize a necessary accessory with bright colors and patterns.
Tips:
-
Choose cotton or cotton-blend fabric for maximum comfort and dye absorption.
-
Wash the fabric before dyeing to remove any residue.
-
Use multiple colors for an eye-catching effect, but be careful not to overcrowd.
-
Allow the mask to set for 6-8 hours in plastic for deeper color saturation.
-
Rinse the mask with cold water before wearing to set the dye and avoid irritation.
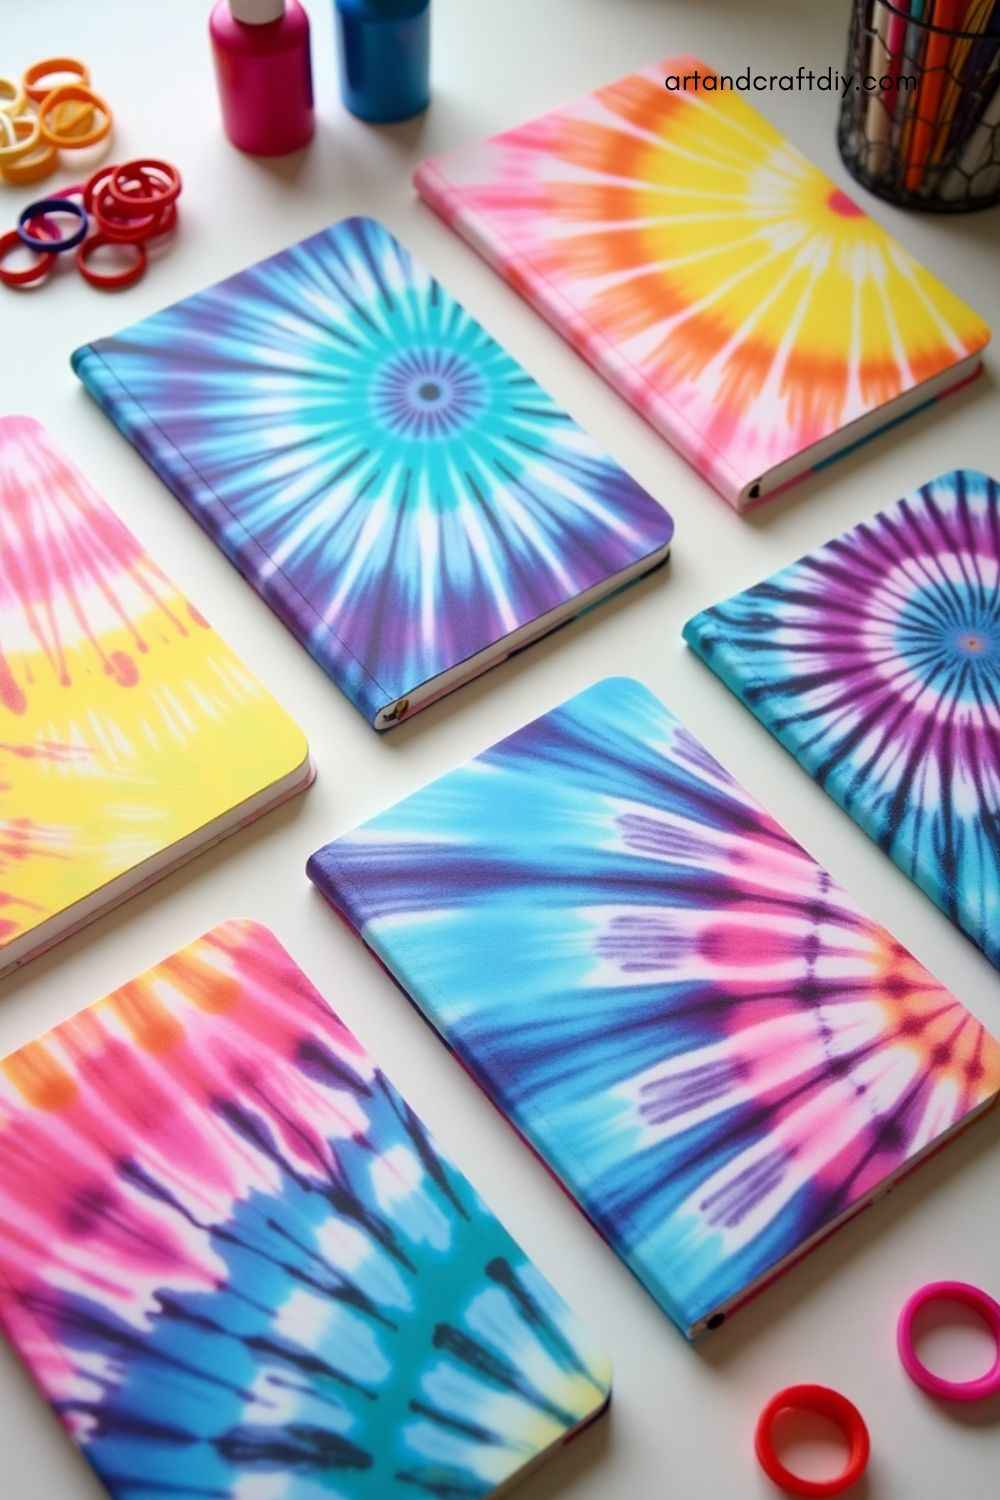
Tie-Dye Journals
Create custom tie-dye covers for notebooks or journals. This craft not only allows kids to express their creativity but also gives them a personalized space to write or draw.
Tips:
-
Use plain fabric or old t-shirts as material for the cover.
-
Make sure the fabric is tightly secured to the journal for even dye application.
-
Choose colors that match the journal’s theme or your child’s favorite hues.
-
Let the fabric dry thoroughly before attaching it to the journal.
-
Encourage your kids to add stickers or designs to enhance the tie-dye cover.
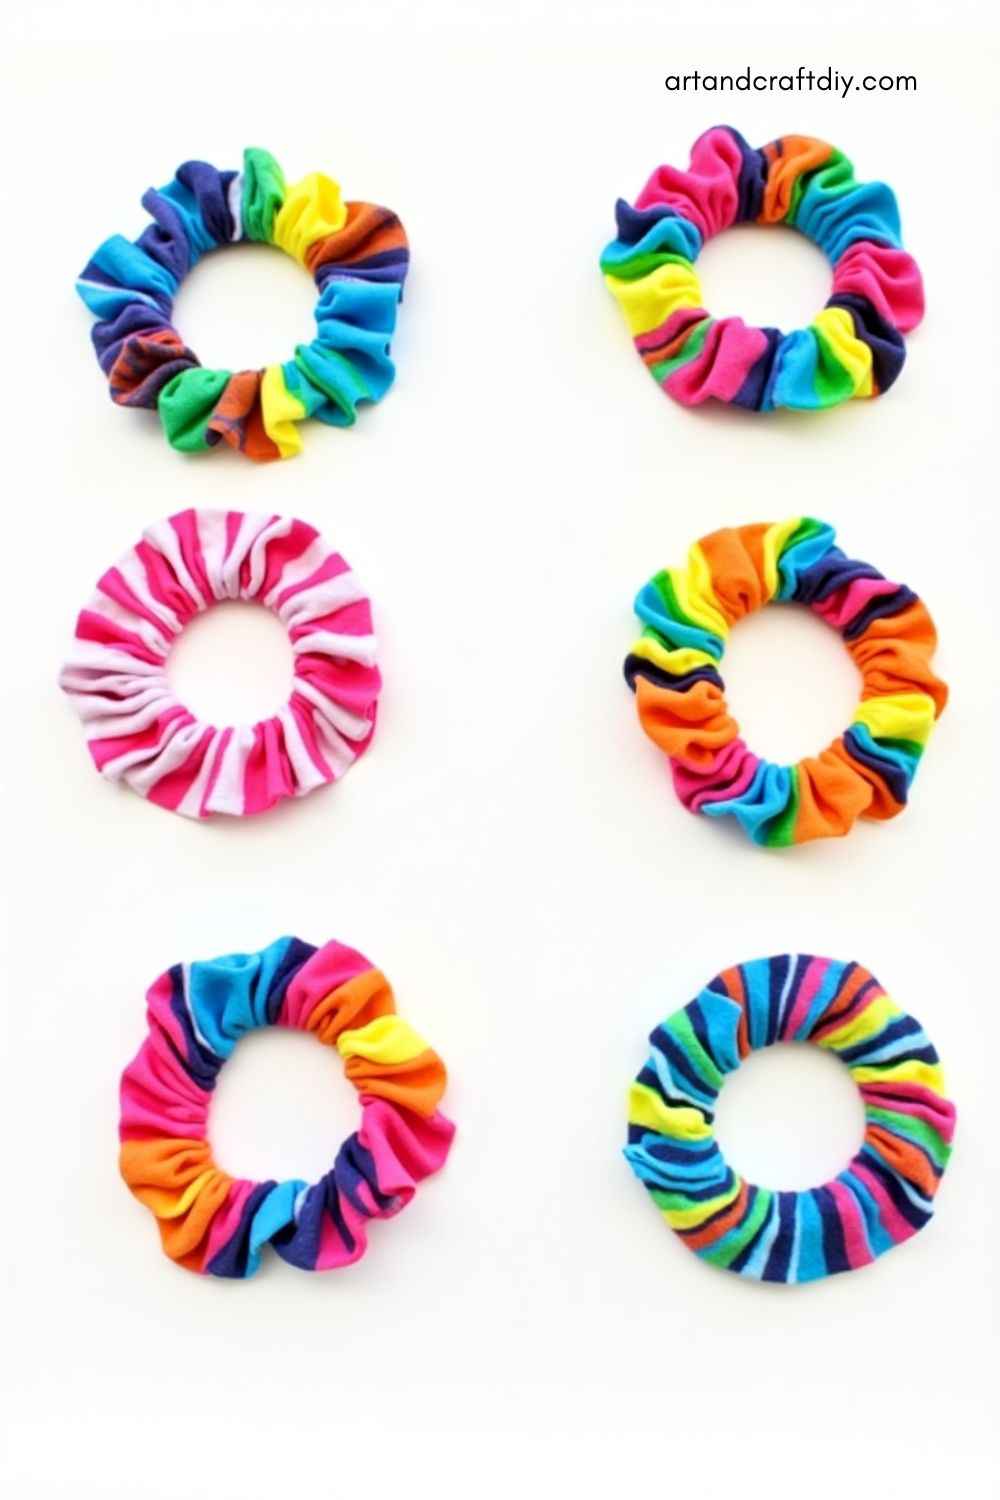
Tie-Dye Hair Ties
Kids can make their own tie-dye hair ties, adding a fun pop of color to their hairstyles. These are easy to make and can be used for everyday wear or special occasions.
Tips:
-
Use soft elastic hair ties as the base for tie-dye.
-
Use light, pastel colors for a soft, subtle effect.
-
Keep rubber bands on the hair tie while dyeing to control the spread of color.
-
Let them dry completely before use to avoid smearing the dye.
-
Experiment with ombre techniques by using one color that fades into another.
Tie-Dye Scarves
Tie-dye scarves are great fashion accessories for kids, providing them with a chance to design their own pieces of wearable art. These scarves can also be used for costumes or gifts.
Tips:
-
Use a lightweight fabric like cotton or silk for a soft, flowing scarf.
-
Fold the fabric in an accordion or fan pattern for an elegant design.
-
Let the dye sit for at least 8 hours for vibrant, lasting colors.
-
For extra flair, add sequins or fabric paint after the dyeing process.
-
Wash the scarf separately to set the colors before wearing.
Tie-Dye Keychains
Make tie-dye keychains that kids can add to their backpacks, bags, or keys. This small project lets children practice their dyeing skills on a smaller, more manageable canvas.
Tips:
-
Use fabric scraps or felt for keychain bases.
-
Incorporate beads or charms for extra flair and personalization.
-
Make sure to tie the fabric tightly for more defined patterns.
-
Let the keychain dry fully before attaching it to a keyring.
-
Encourage your child to make a matching set of keychains to gift friends.
Tie-Dye Picture Frames
Kids can create colorful, custom picture frames by adding tie-dye designs. This craft is perfect for displaying photos of their favorite memories in a creative way.
Tips:
-
Use wooden or cardboard frames for easy customization.
-
Apply rubber bands or clips to the frame to create geometric patterns.
-
Allow the frame to dry thoroughly before inserting photos.
-
Use complementary colors for the best visual impact.
-
Add buttons, beads, or stickers to further personalize the frame.
Tie-Dye Hats
Tie-dye hats are a fun way for kids to make their own fashion statements. This easy craft allows children to design hats they’ll love wearing for outdoor activities or special events.
Tips:
-
Opt for cotton or cotton-blend hats for the best dye results.
-
Create bold, colorful stripes or go for a more subtle pattern.
-
Use spray bottles for a less intense but still vibrant tie-dye effect.
-
Ensure the hat is completely dry before wearing to avoid transferring dye.
-
Let kids design matching hats for a fun family or group activity.
Tie-Dye Paper
For a mess-free alternative, tie-dye paper can also be a great activity for younger children. This craft can be used for greeting cards, scrapbooking, or fun decorations.
Tips:
-
Use thick, high-quality paper to prevent it from tearing.
-
Place the paper on a protective surface before spraying with dye.
-
Experiment with spraying or blotting dye for different effects.
-
Allow the paper to dry before using it for crafting or card making.
-
Encourage kids to make matching paper designs for a set of personalized cards.
Tie-dye crafts are an exciting and educational activity that allows kids to engage their creativity while learning new skills. Each project provides endless possibilities for design and color experimentation, making it a favorite for many.
Additional Fun Tie-Dye Tips
Tie-dye is a versatile craft that offers endless possibilities for creativity. While the basic techniques are simple and fun, there are several ways to elevate your designs and expand the tie-dye experience. From using multiple colors for vibrant designs to incorporating tie-dye into other craft projects, these tips can take your tie-dye creations to the next level.
Use of Multiple Colors:
Tie-dyeing with multiple colors can make your projects more dynamic and eye-catching. Mixing and blending colors offers opportunities to explore new patterns and gradients, adding depth and vibrancy to your designs.
-
Experiment with complementary colors (like red and green or blue and orange) to create bold, contrasting patterns.
-
Use a squirt bottle to apply colors individually, or blend colors together using a sponge or brush for a more subtle gradient effect.
-
For a smoother transition, work in small sections and blend the colors where they meet to create a seamless flow.
-
Avoid over-saturating the fabric to keep colors from becoming muddy. Start with lighter shades and add darker ones for depth.
-
Be sure to allow the dye to sit long enough for colors to fully develop, as this helps the hues blend without becoming too faint.
Creating Custom Stencils or Patterns:
Custom stencils or patterns can add an extra layer of creativity to tie-dye projects. Using masking tape or pre-made stencils, you can achieve sharp, clean edges and unique designs, allowing for more intricate and personalized patterns.
-
Use masking tape to create geometric shapes or lines on your fabric before dyeing it. Once the dye is applied, remove the tape to reveal the design underneath.
-
Create stencils using paper, plastic, or even cardboard. Trace out your desired design, place it on the fabric, and then apply dye around it.
-
To add texture, consider crumpling fabric into small sections and securing it with rubber bands or clips before applying dye.
-
For more control, use small paintbrushes to apply dye inside the stencil for detailed patterns.
-
Experiment with both positive and negative designs, where dye covers areas or leaves them untouched, to create contrast and texture.
Using Tie-Dye with Other Crafts:
Tie-dye isn’t just limited to clothing—there are countless ways to incorporate it into other craft projects. From home decor to accessories, tie-dye can be used to create personalized and colorful items that add a fun, handmade touch to any space.
-
Decorative Pillows: Use tie-dye to create custom pillow covers for a vibrant addition to your home. Choose coordinating colors to match your room decor.
-
Wall Hangings: Tie-dye fabric can be turned into unique wall art by stretching it over a frame or hanging it as a tapestry for an artistic touch.
-
Blankets and Throws: Make a cozy, colorful blanket by tie-dyeing a large piece of fabric, or create smaller throws for a playful touch to any room.
-
Gift Wrap: Use tie-dye on fabric or paper to create unique, eco-friendly gift wrap. It adds an extra personalized element to your presents.
-
Bookmarks: Tie-dye small pieces of fabric or cardstock to make one-of-a-kind bookmarks that are both practical and decorative.
These tips show just how adaptable and creative tie-dye can be, transforming simple fabric into beautiful, custom-crafted projects. Whether working with multiple colors, experimenting with patterns, or blending tie-dye into other crafts, there are endless opportunities to unleash your artistic potential.
FAQ
What materials do I need for tie-dye crafts for kids?
To get started with tie-dye, you’ll need:
-
White cotton or cotton-blend fabric (t-shirts, socks, bags, etc.)
-
Fabric dye in various colors
-
Rubber bands
-
Plastic squeeze bottles or spray bottles for applying dye
-
Plastic or disposable gloves
-
Plastic bags or plastic wrap for setting the dye
-
Plastic tablecloth or newspaper to protect your work surface
Can I use any fabric for Tie-dye crafts for kids?
It’s best to use natural fibers like cotton, linen, or rayon for tie-dye because they absorb dye well. Synthetic fabrics like polyester don’t take fabric dye as effectively, so they may not produce as vibrant results.
How do I make sure my tie-dye doesn’t bleed?
To prevent bleeding, allow the dyed fabric to set in a plastic bag for several hours (usually 6-8 hours) to let the colors fully bond. After the waiting period, rinse the fabric in cold water until the water runs clear, then wash it separately from other clothes to avoid color transfer.
What types of designs can I create with tie-dye?
You can create various patterns with tie-dye, including:
-
Spiral: Twist the fabric into a spiral shape and secure it with rubber bands.
-
Bullseye: Fold the fabric like an accordion, then dye each section in different colors.
-
Crumple: Scrunch the fabric randomly and tie it with rubber bands for a more abstract design.
-
Stripes: Fold fabric in strips and apply dye in different sections for striped patterns.

Hi, I’m Victoria, an art and craft teacher at Newark City Schools, where I have the joy of working with middle school students to help them explore their creativity and develop their artistic talents. I believe that art is a powerful way for students to express themselves, and I strive to make every lesson a fun, engaging, and inspiring experience.
I created this website to share the art and craft projects, techniques, and resources that I use in my classroom, hoping to inspire both educators and young artists alike. Whether you’re a teacher looking for new ideas or a student eager to try something new, I’m excited to provide creative tools and projects that anyone can enjoy.
When I’m not in the classroom, I love experimenting with different art forms and learning new crafting techniques. My goal is to help others discover the joy of making things with their hands, and I hope my website serves as a space for everyone to explore their creative potential.