
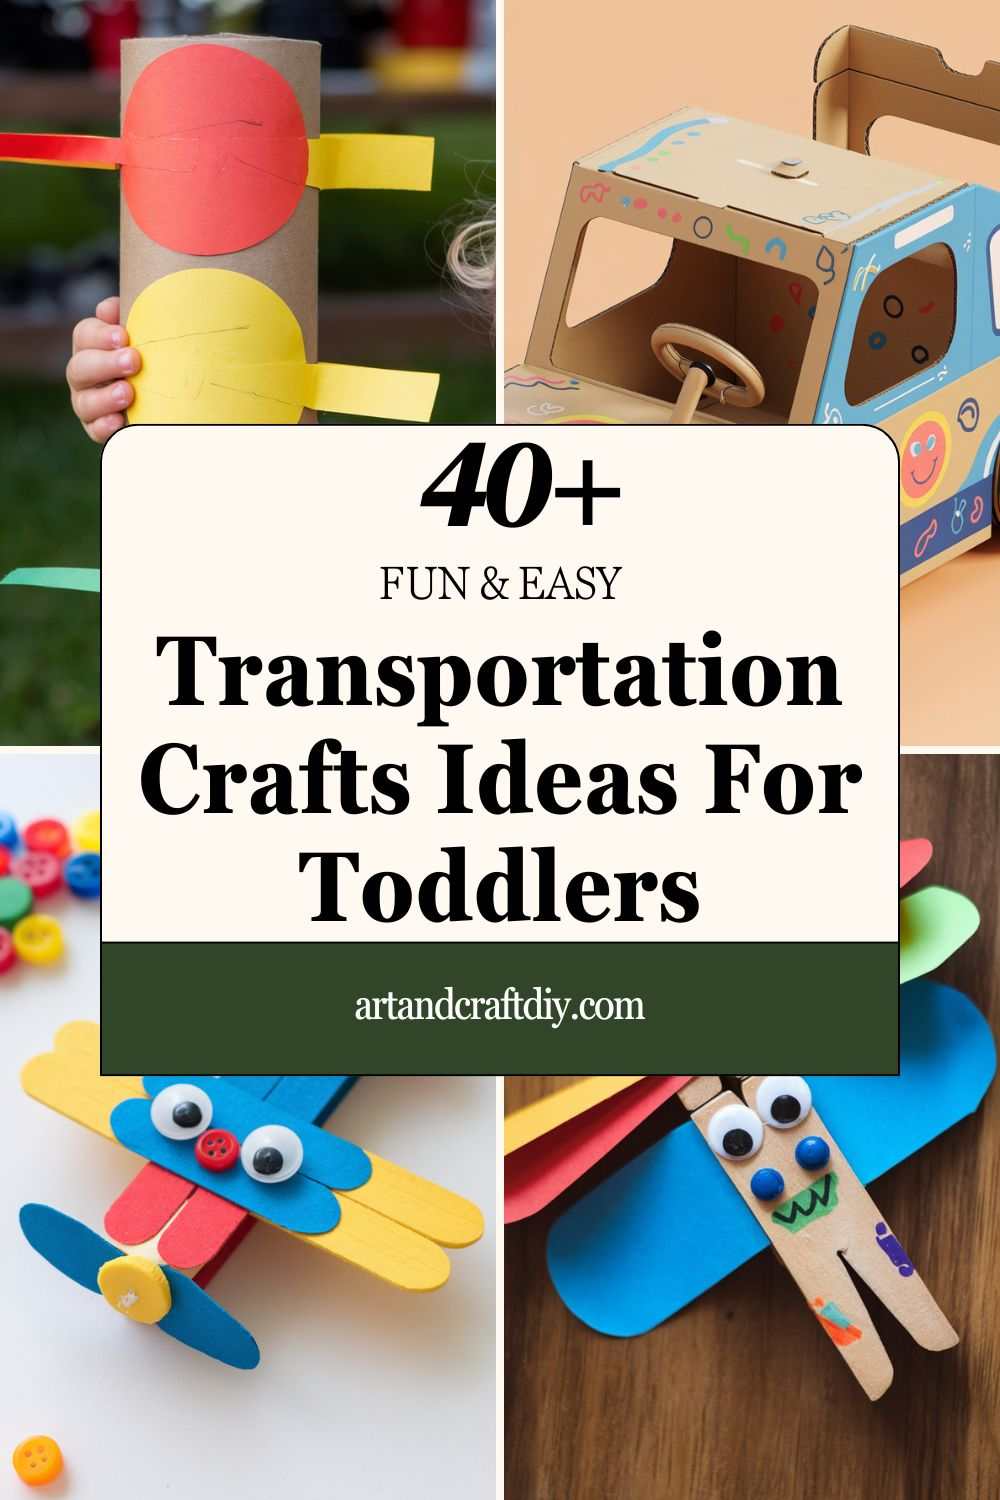
Transportation Crafts Ideas For Toddlers
Transportation crafts ideas for toddlers are a fantastic way to engage little ones in creative, hands-on activities while introducing them to the fascinating world of vehicle.
Paper Plate Cars
Honestly, paper plate cars are one of my absolute favorites to do with toddlers. I remember the first time I tried this, my niece was so excited to pick the colors for her “race car” that she refused to wait for me to help her glue the wheels. You basically take a paper plate, fold it a little in the middle if you want a car shape, and attach bottle caps or cardboard circles as wheels. Then, the fun begins with decorating—markers, paints, stickers… anything goes!
To be fair, the best part is watching the little ones push them around and make engine sounds. In my opinion, it’s not just a craft, it’s a mini imagination exercise. I’ve found that even simple plates can turn into taxis, trucks, or fancy race cars. Sometimes I even add straws as little exhaust pipes—it cracks the kids up every time.
Sponge Boats
Sponge boats are messy but so fun. I honestly didn’t expect my toddler to enjoy dipping them in water and seeing them float around, but he couldn’t stop giggling. You just take a kitchen sponge, cut it into a small boat shape, and poke a little hole for a paper sail. I’ve found that decorating the sail with crayons or stickers makes the boat feel “real” to them.
In my opinion, the coolest part is watching them experiment—blowing the boats, using straws as oars, even racing them across the sink. To be fair, water can get everywhere, but it’s part of the fun. Sometimes I add little clay people or animals to the boats, and it becomes a full-on tiny adventure on the water. It’s honestly one of those crafts that keeps them busy for ages without needing much adult supervision.
Toilet Paper Roll Cars
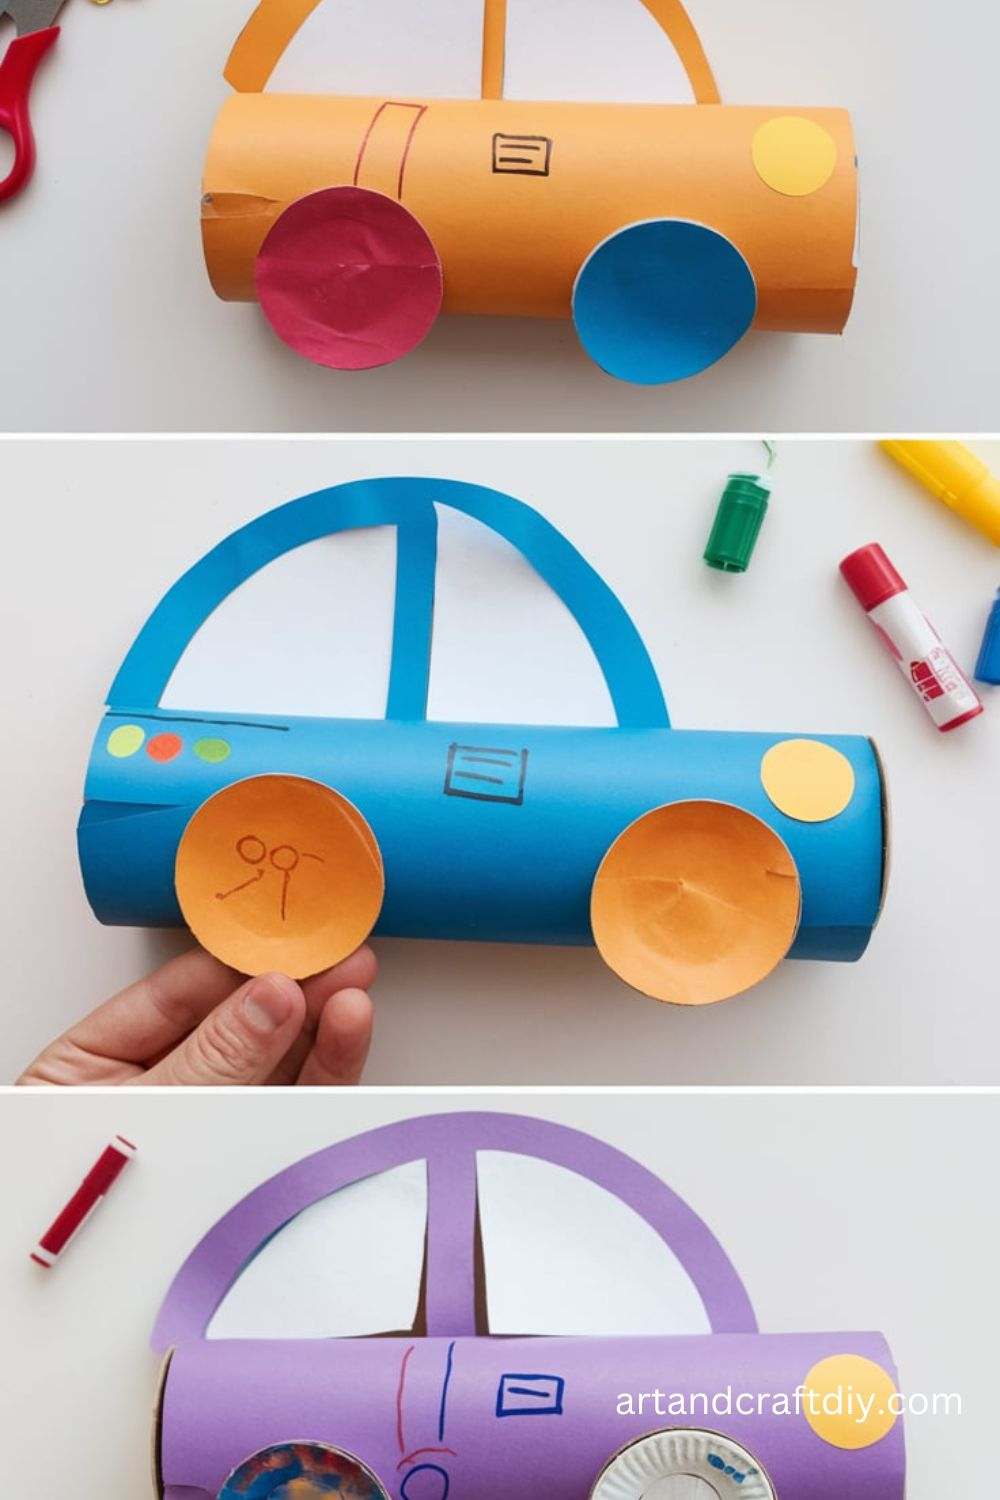
Toilet paper roll cars are super simple but honestly so satisfying. I love keeping rolls from the recycling bin for this—zero waste and full creativity. My niece once decorated hers as a fire truck with glitter and googly eyes, and honestly, I couldn’t stop laughing at how proud she was. You just need the roll, some paper or paint for decoration, and bottle caps or buttons for wheels.
To be fair, attaching the wheels can get a bit tricky, but I’ve found that using straws as axles works perfectly. In my opinion, toddlers love pushing them around as much as they love making them. Honestly, it’s amazing how a simple roll can turn into a car, truck, or even a monster vehicle with a little imagination. It’s cheap, easy, and totally toddler-friendly.
DIY Traffic Light
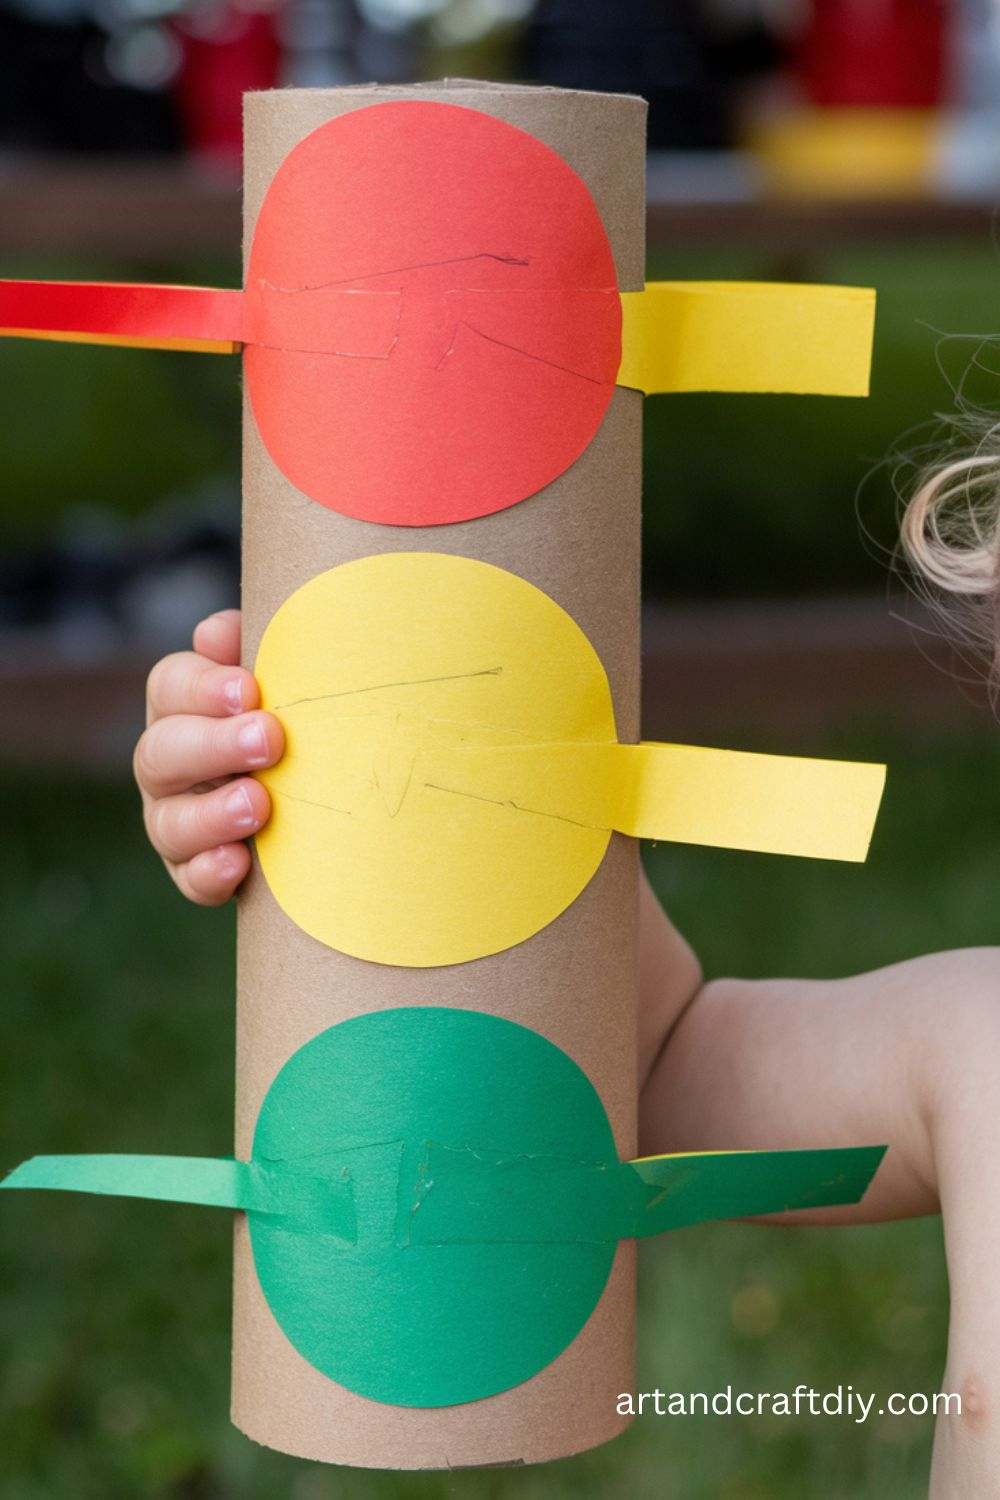
I’ve tried making DIY traffic lights with toddlers, and honestly, it’s chaotic but adorable. You need cardboard, colored paper, and a bit of patience. I usually make three circles—red, yellow, green—and attach them vertically to a strip of cardboard. Then we stick it on a wall or even a cardboard stand. My nephew once got so excited, he made all the toy cars stop and go like a real driver.
To be fair, the coloring part takes ages, but in my opinion, it’s worth it. You can even make a game out of it—teach kids “stop, slow, go” while they decorate. Honestly, it’s a sneaky way to introduce basic traffic rules while doing something fun. I’ve found that toddlers love pretending with their toy cars afterward—it becomes an entire mini city in our living room
Paper Bag Hot Air Balloon
Paper bag hot air balloons are honestly one of my most favorite crafts for a cozy afternoon. I just love the look on kids’ faces when we hang them from the ceiling and they feel like they’re floating in the sky. You take a paper bag, open it up, and decorate it like a balloon. Then attach a little basket at the bottom—usually a small box or cup works perfectly.
To be fair, I’ve found that toddlers enjoy tearing up leftover paper to make little clouds around the balloon. Honestly, it’s messy but magical. In my opinion, it’s less about perfection and more about seeing them use their imagination. My niece once made her balloon pink with rainbow stripes and proudly flew it around like it was actually floating. It’s hands-on, creative, and somehow calming at the same time.
Egg Carton Train
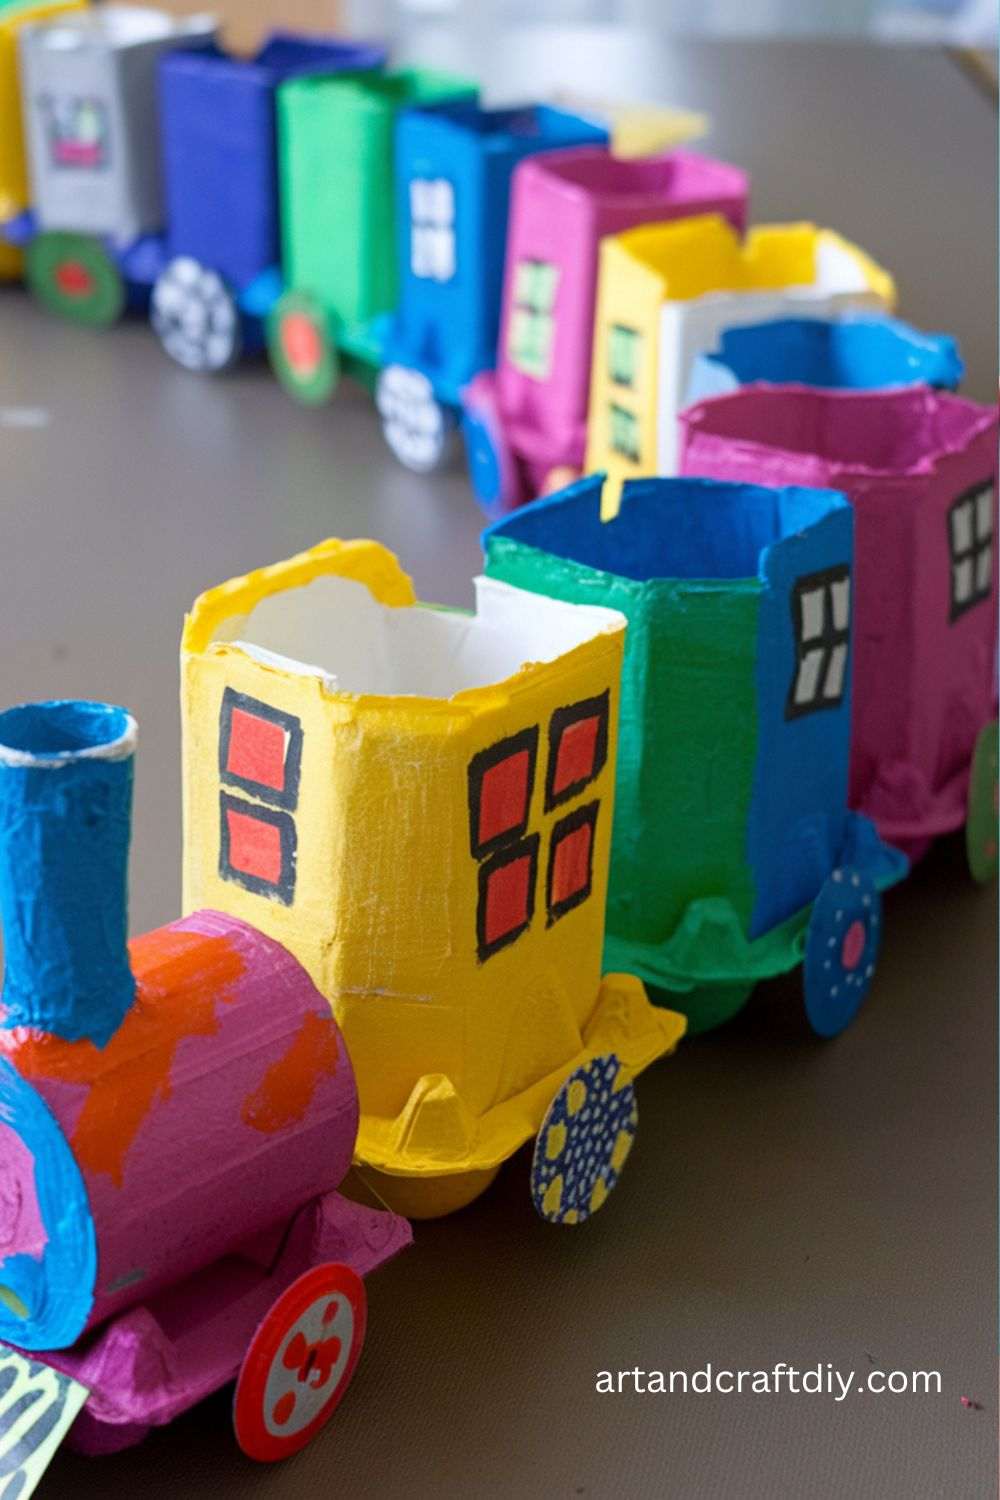
Egg carton trains are honestly a classic, but I still love them. I usually save my egg cartons for weeks, and once we’re ready, we cut them into train car sections. My nephew insists on painting each car a different color—it’s hilarious how serious he gets about “matching” the wheels. I’ve found that gluing or taping bottle caps as wheels works best, and stringing them together turns it into a pull-along toy instantly.
To be fair, toddlers might need help with cutting, but honestly, the decorating part is the best. In my opinion, it’s fun to add little clay or paper people as passengers. I remember my niece putting tiny animals in each car and calling it a zoo train—it totally made me laugh. It’s cheap, reusable, and honestly, one of the crafts that keeps toddlers engaged for hours.
Felt train tracks
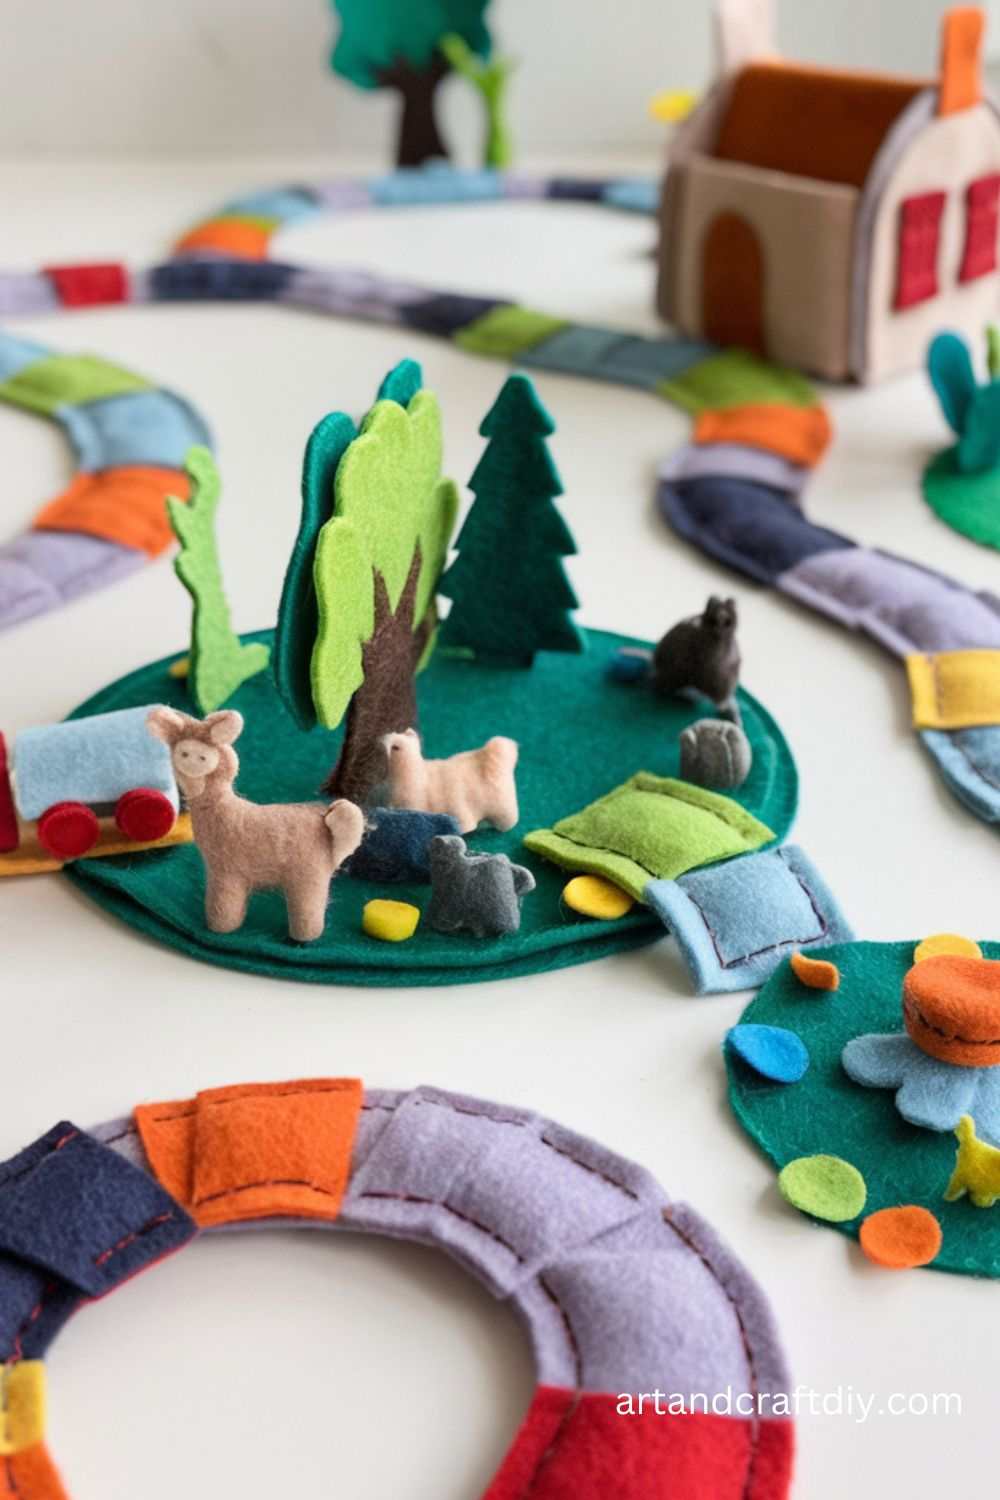
Felt train tracks are honestly a lifesaver when you want a quiet craft with toddlers. I cut out strips of felt in track shapes and stitch or glue little felt rails onto a base piece. My nephew loves connecting them in endless loops. Honestly, it’s fascinating watching him experiment with layouts—sometimes the tracks twist in ways I never imagined!
To be fair, it’s a little more time-consuming than some other crafts, but in my opinion, the payoff is huge. You can even add felt trains, houses, and trees for a full little playset. Honestly, toddlers love moving their toy trains over the soft tracks—it’s quiet and mess-free. I’ve found it’s perfect for rainy days when we can’t go outside, but still want a fun, hands-on activity.
Clothes Pin Helicopter

Clothes pin helicopters are honestly such a quirky little craft, but toddlers love them. I usually attach a popsicle stick or a straw as the rotor and decorate with bright paint or markers. Honestly, seeing my niece spin it around and make helicopter noises cracks me up every time. To be fair, it can get a bit fiddly attaching the blades, but I’ve found that using tape works perfectly.
In my opinion, it’s a simple craft that also teaches balance and coordination. Honestly, toddlers love testing them on different surfaces—my nephew kept dropping his helicopter from the couch just to see it “fly.” I’ve found it’s a craft that sparks so much imaginative play after it’s made, and honestly, it never fails to bring a smile.
Popsicle stick Airplanes
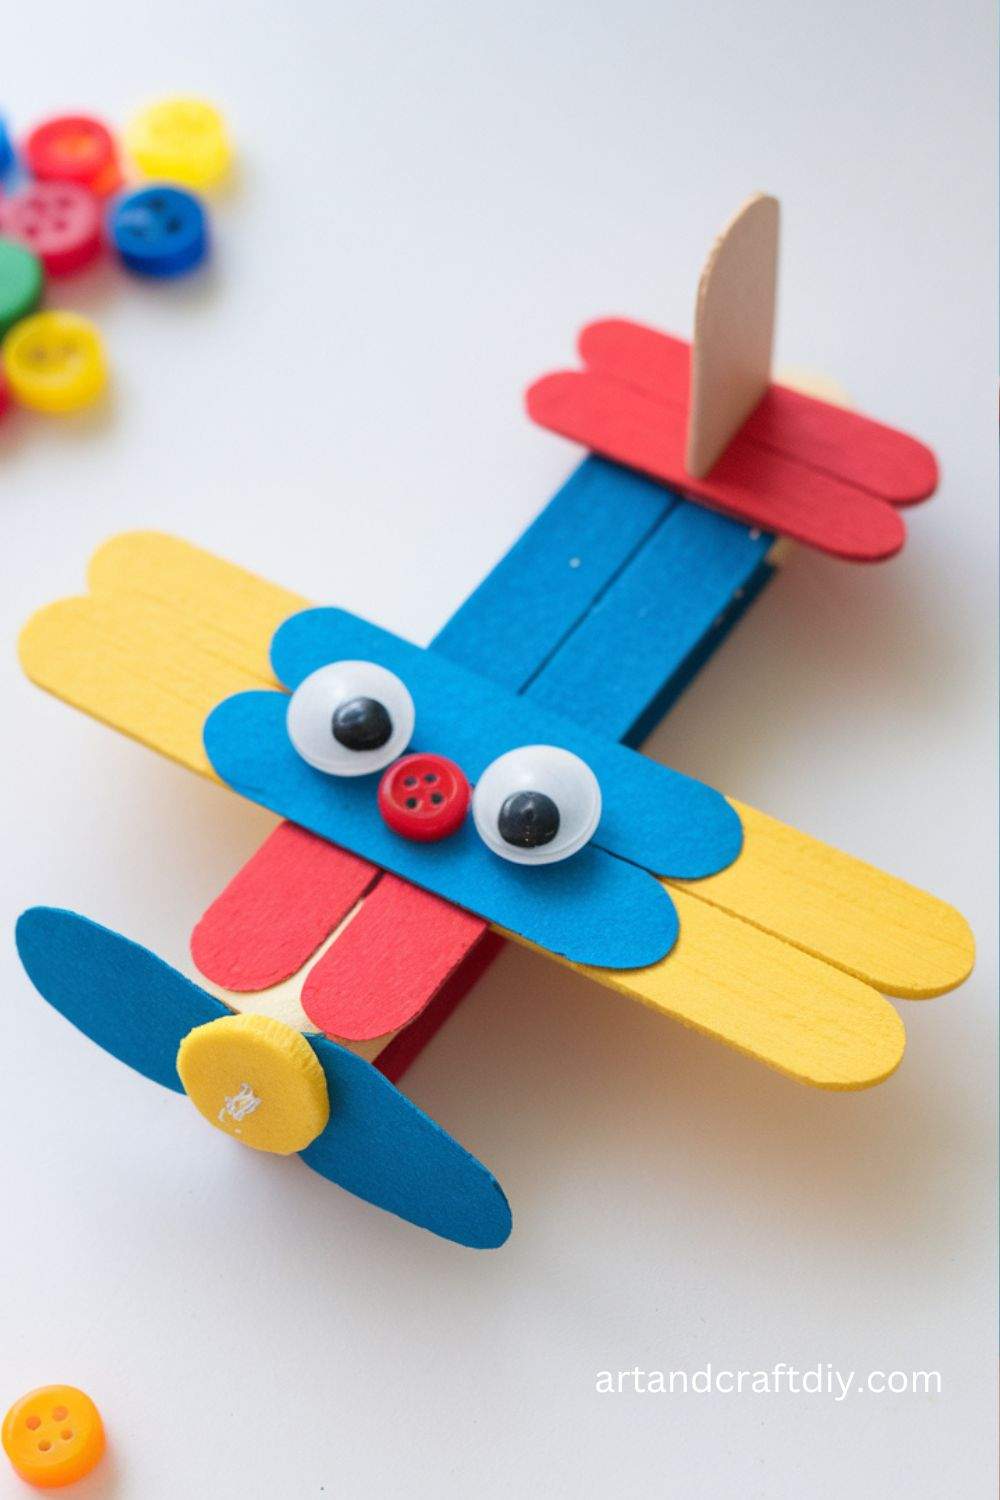
Popsicle stick airplanes are honestly classic and reliable. I usually glue three sticks together to form a simple plane shape and then let toddlers paint and decorate them however they like. Honestly, I’ve seen kids take this super seriously, adding wings, tails, and even little paper passengers. To be fair, drying time can test your patience, but in my opinion, the decorating part is the most fun anyway.
Honestly, the real joy comes when they “fly” them across the room—it’s chaotic, but adorable. I’ve found that sometimes adding a straw as a tail or extra support makes it sturdier. Toddlers love experimenting with designs and colors, and honestly, it’s a craft that blends creativity with a bit of physics without them even realizing it.
Sponge Paint Trucks
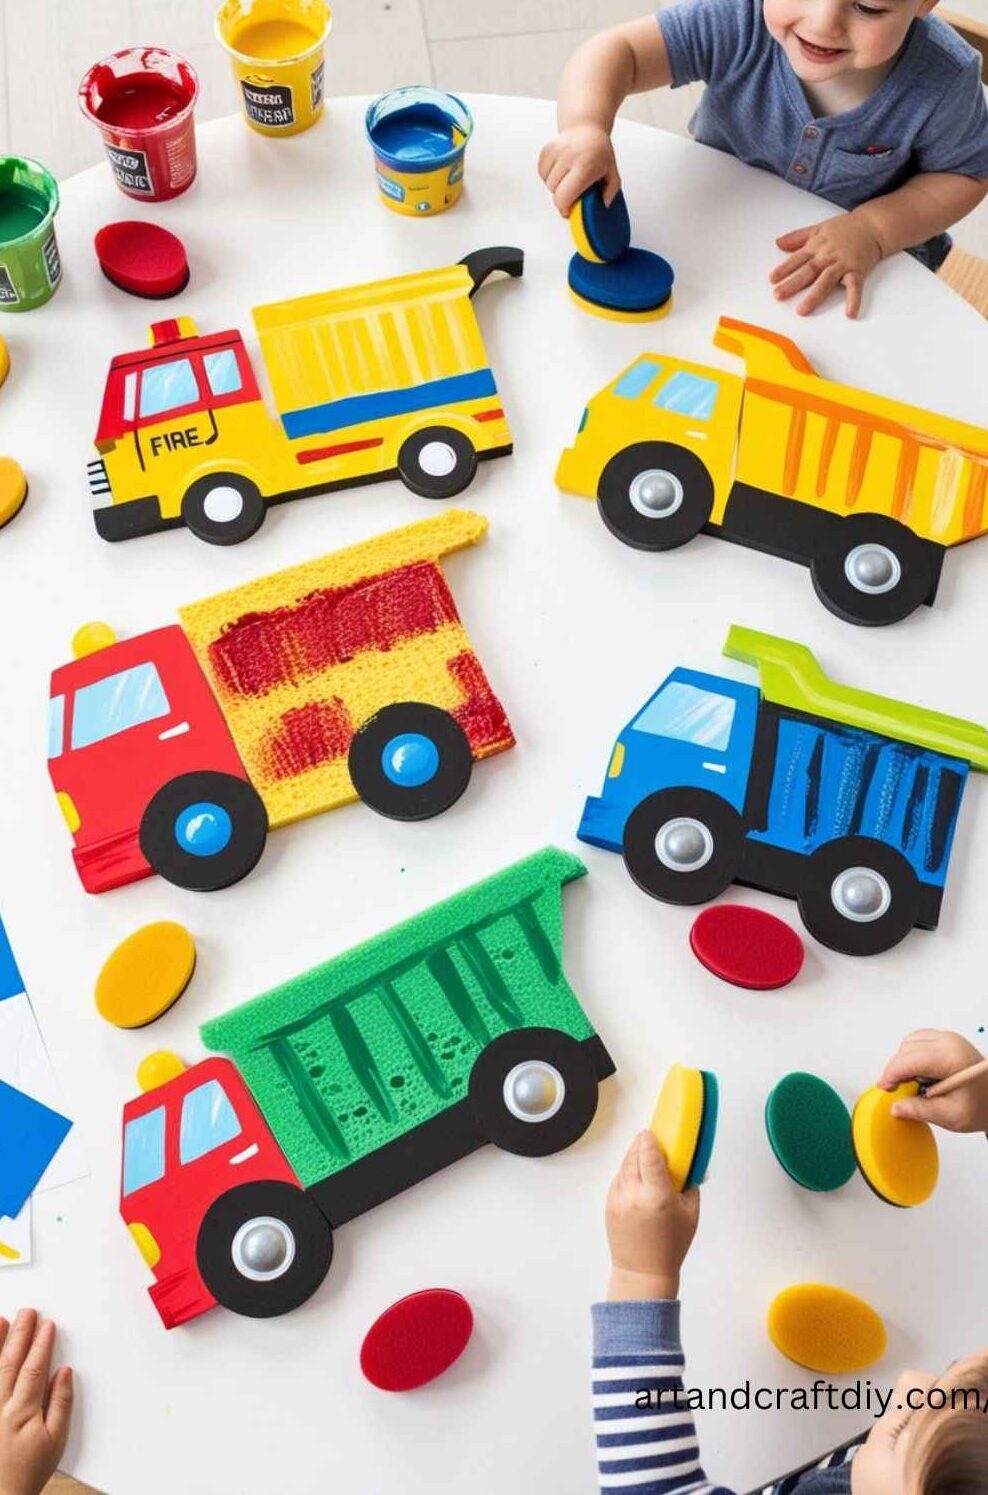
Sponge paint trucks are honestly messy but magical. I usually cut sponges into truck shapes, dip them in paint, and let toddlers stamp them onto paper. Honestly, the first time we did this, my niece ended up painting half the table, but she was so proud of her “truck highway.” To be fair, it’s a bit chaotic, but I’ve found that covering the area with newspaper solves most problems.
In my opinion, the real fun is experimenting with different colors and sponge shapes. Honestly, toddlers love making patterns, racing the “trucks” across the page, and adding wheels with stamps or fingerprints. I’ve found that this craft is both artistic and playful, and honestly, it’s one of those projects where you just sit back and watch the kids’ imagination explode.
Button Cars
Use buttons to create fun, colorful cars! This craft introduces the concept of wheels and can be a great way to enhance your toddler’s motor skills through simple glue and decoration.
Materials Needed:
- Cardstock paper
- Buttons (for wheels)
- Glue
- Markers
Steps:
- Cut a car shape out of cardstock paper.
- Glue two large buttons at the bottom of the car to act as the wheels.
- Have your toddler decorate the rest of the car using markers, adding windows, headlights, or even a roof.
- Once everything is dry, your toddler can push the car around!
Paper Plate Bus
This fun and easy craft uses a paper plate to make a bus. It’s perfect for toddlers who are fascinated with buses and will love decorating their own transportation vehicle.
Materials Needed:
- Paper plate
- Black construction paper
- Glue
- Markers
Steps:
- Cut out a rectangle from the black construction paper and glue it to the bottom of the paper plate to form the bus body.
- Cut out small circles from black paper to make wheels and glue them onto the plate.
- Use markers to draw windows and other details on the bus.
- Once the bus is dry, it’s ready to go!
Construction Paper Boats
This simple and colorful craft is perfect for toddlers to learn about boats. The hands-on experience of folding and decorating the paper adds to the fun!
Materials Needed:
- Construction paper
- Glue or tape
- Crayons or markers
Steps:
- Cut the construction paper into a boat shape.
- Fold the paper to form the boat, using glue or tape to hold it in place.
- Have your toddler color the boat and add decorative details like waves or a sail.
- Once dry, let the boat “float” on a pretend ocean made of blue paper.
Paper Roll Airplanes
Turn a simple paper roll into a fun flying airplane in this easy-to-make craft. This project helps toddlers use their creativity to decorate and pretend-play with their homemade airplanes.
Materials Needed:
- Empty paper rolls
- Craft paper
- Scissors
- Markers
Steps:
- Cover the empty paper rolls with craft paper to make the body of the airplane.
- Cut out wings and tail pieces from paper, and glue them onto the roll.
- Decorate the airplane with fun colors, patterns, and designs.
- Once finished, your toddler can pretend to fly their airplane all around the house.
Coffee Filter Hot Air Balloon
Turn a coffee filter into a colorful hot air balloon that’s sure to brighten up your toddler’s day. This craft is simple, yet fun, and introduces your child to the concept of hot air balloons.
Materials Needed:
- Coffee filter
- Construction paper
- String
- Glue
Steps:
- Flatten out the coffee filter and decorate it with markers or paint.
- Cut out a basket from construction paper and glue it to the bottom of the coffee filter.
- Attach string to the top of the filter and tie it to a small piece of craft paper to complete the hot air balloon.
- Let it hang for a colorful decoration!
Cupcake Liner Cars
This simple craft uses cupcake liners to create a cute car shape. It’s a great way for toddlers to engage with different textures and get creative with their vehicle designs.
Materials Needed:
- Cupcake liners
- Markers or paint
- Construction paper
- Glue
Steps:
- Flatten the cupcake liner to make the car’s body.
- Glue small paper circles to the liner’s edge to make the wheels.
- Use markers or paint to decorate the rest of the car with windows, headlights, and other features.
- Once it’s all dry, your toddler can race their little cupcake liner cars around.
Engaging Toddlers in the Creative Process
Engaging toddlers in creative activities not only fosters their imagination but also helps them develop essential skills. Transportation Crafts Ideas For Toddlers projects focus on vehicles can be a fantastic way to introduce little ones to basic concepts about transportation while nurturing their artistic talents. Here are some tips to make the Transportation Crafts Ideas For Toddlers enjoyable and educational:
1. Encouraging Color Choices and Vehicle Design
- Let them lead: Offer toddlers a variety of colored papers, paints, or markers and encourage them to pick their favorites. This allows them to express their individuality while learning about colors.
- Simple designs: Provide pre-cut vehicle shapes (cars, trucks, airplanes) or assist them in drawing basic outlines. Let them decide how they want to decorate or “customize” their vehicles.
- Stickers and patterns: Incorporate stickers, washi tape, or simple patterns they can apply to their vehicle creations. This adds texture and fun, keeping them engaged.
2. Teaching Basic Concepts About Vehicles and Transportation
- Talk about vehicle types: Use the crafting session to introduce different kinds of vehicles (e.g., cars, buses, trains) and their roles in transportation. For instance, “This is a fire truck. It helps firefighters get to emergencies!”
- Explore shapes and functions: Highlight the shapes involved in vehicles, such as circles for wheels or rectangles for buses. This helps toddlers recognize basic shapes while associating them with real-world objects.
- Introduce new words: Use terms like “engine,” “wings,” or “road” to build their vocabulary and understanding of transportation systems.
3. Incorporating Storytelling or Play with the Crafts
- Create a narrative: Once the vehicles are decorated, invent a story with your toddler about where the vehicle is going. For example, “Your red car is driving to the zoo. What animals will it see there?”
- Interactive play: Use the crafted vehicles in pretend play. Build a road with tape on the floor or use blocks to create a town for their vehicles to navigate.
- Encourage role-play: Give toddlers roles like a pilot, driver, or conductor to let them explore transportation from a different perspective.
By involving toddlers in these steps, you’ll not only boost their creativity but also introduce valuable lessons in an interactive and enjoyable way. These moments of learning and play help build their confidence and curiosity about the world around them.
Storage and Display Ideas
Crafting is a wonderful way to spark creativity, and when paired with a transportation theme, it becomes even more exciting! Whether you’re focusing on trains, planes, cars, or boats, finding innovative ways to store, display, and preserve your creations ensures they remain a source of pride and inspiration. Here’s how you can create a stunning transportation-themed display and keep your crafts in great condition.
- Create a Dedicated Display Corner: Set up a small area to showcase your transportation crafts, such as a shelf or a corner of a room.
- Choose a Sub-theme: Focus on a specific transportation theme like vintage cars, airplanes, or boats to maintain cohesion in the display.
- Use a Coordinated Color Palette: Match the colors of your display items to the theme (e.g., metallic for vehicles, blues and whites for nautical crafts).
- Incorporate Wall Décor: Add world maps, road or railroad decals, or cloud designs to enhance the theme.
- Add Floating Shelves: Display model trains, planes, or cars on shelves, creating a dynamic and organized display.
- Use Hanging Displays: Suspend lightweight crafts, such as paper airplanes or hot air balloons, from the ceiling for a 3D effect.
- Interactive Elements: Include toy tracks, roads, or magnetic boards to engage visitors and allow rearranging crafts.
- Lighting: Highlight crafts with spotlights or LED strips to bring attention to your creations, and use themed light fixtures like traffic lights for added flair.
Tips for Preserving Crafts
- Use High-Quality Materials: Choose acid-free paper, strong adhesives, and non-toxic paints to ensure your crafts last.
- Apply Protective Coatings: Use varnishes or clear acrylic sealants to protect painted or fabric crafts from damage and fading.
- Store Properly: Keep crafts in airtight containers or display cases to protect them from dust, moisture, and physical damage.
- Maintain a Stable Environment: Store crafts in a climate-controlled area to prevent warping or mold. Avoid direct sunlight to prevent fading.
- Regular Maintenance: Clean crafts gently with a soft brush or microfiber cloth to remove dust, and repair any damage immediately.
- Use Archival Products: For paper-based crafts, use archival sprays to prevent yellowing and brittleness.
By following these ideas for displaying and preserving your Transportation Crafts Ideas For Toddlers, you can keep them looking great and make them an exciting part of your home or classroom décor.
FAQ
What are some easy Transportation Crafts Ideas For Toddlers?
Some simple Transportation Crafts Ideas For Toddlers include creating paper plate cars, cardboard box trains, or using bottle caps to make wheels for DIY cars. You can also try coloring or painting pictures of buses, planes, or boats.
How can I make a simple car craft with a toddler?
To make a basic car craft, you can use a paper plate as the body, and add four bottle caps or paper circles for wheels. Let your toddler decorate with crayons or paint, and glue them together. It’s a fun and hands-on craft for developing fine motor skills!
What materials are best for Transportation Crafts Ideas For Toddlers?
Common materials for Transportation Crafts Ideas For Toddlers include construction paper, cardstock, foam sheets, bottle caps, paper plates, glue, scissors (with supervision), markers, and crayons. These materials are easy to handle for little hands and allow for creative expression.
How can I make a bus craft with my toddler?
To make a bus craft, start with a rectangular piece of yellow construction paper. Have your toddler glue on black circles for the wheels, and add windows with smaller pieces of paper. You can also cut out shapes for doors and headlights to add extra details.
Are there any Transportation Crafts Ideas For Toddlers that involve recycling?
Yes! You can repurpose items like cardboard tubes (to create cars or trucks), cereal boxes (to make a bus or airplane), and bottle caps (for wheels). Recycling materials is a great way to teach toddlers about sustainability while crafting.
Can toddlers make transportation crafts on their own?
While toddlers may need help with cutting and gluing, they can participate by choosing colors, decorating, and arranging parts of the craft. It’s a great opportunity for guided creativity and learning!

Hi, I’m Victoria, an art and craft teacher at Newark City Schools, where I have the joy of working with middle school students to help them explore their creativity and develop their artistic talents. I believe that art is a powerful way for students to express themselves, and I strive to make every lesson a fun, engaging, and inspiring experience.
I created this website to share the art and craft projects, techniques, and resources that I use in my classroom, hoping to inspire both educators and young artists alike. Whether you’re a teacher looking for new ideas or a student eager to try something new, I’m excited to provide creative tools and projects that anyone can enjoy.
When I’m not in the classroom, I love experimenting with different art forms and learning new crafting techniques. My goal is to help others discover the joy of making things with their hands, and I hope my website serves as a space for everyone to explore their creative potential.