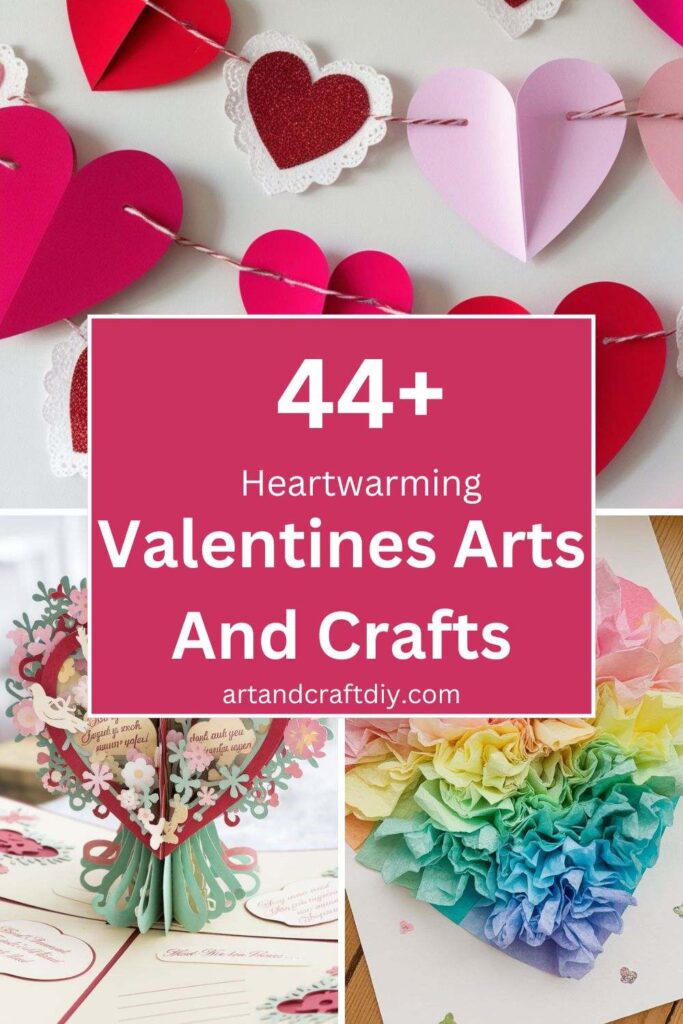
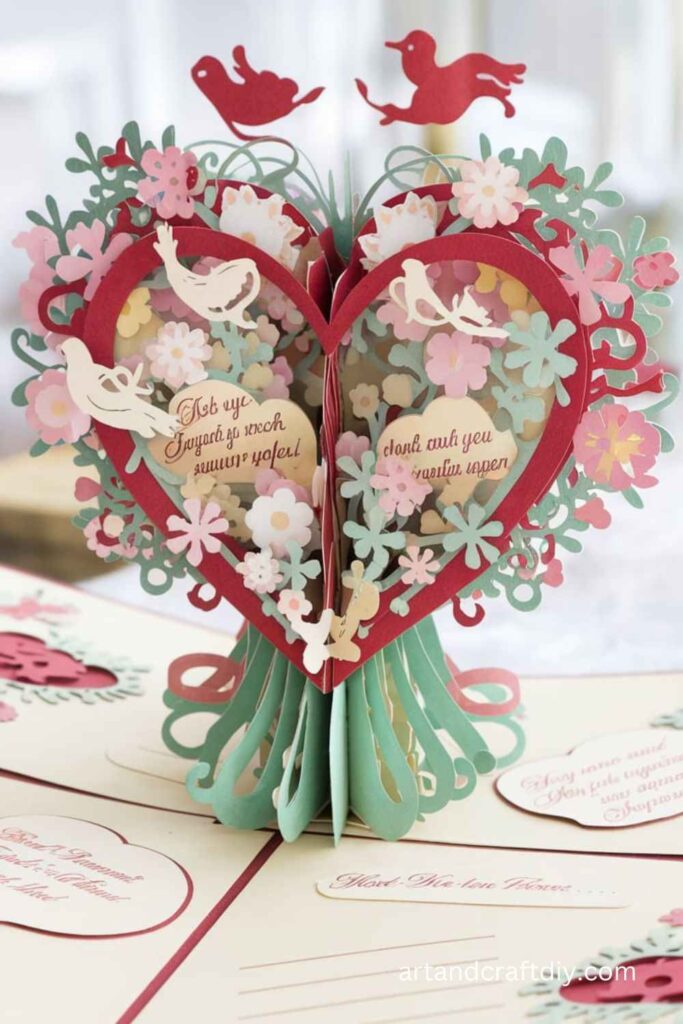
Valentine’s Day is a special celebration dedicated to expressing love and affection, often shared between couples, friends, and family. The day has evolved beyond just romantic gestures to include heartfelt exchanges of appreciation for all kinds of relationships. One of the most cherished ways to celebrate is through personal, handcrafted gifts and decorations that add a unique, meaningful touch to the occasion. Valentines Arts And Crafts have become increasingly popular as they allow individuals to put their creativity to work while crafting one-of-a-kind items that reflect their affection. In this article, we will explore various DIY craft ideas that range from simple and quick to more intricate designs. Whether you’re looking to make personalized cards, decorations, or gifts, this guide will provide easy-to-follow steps to help you create memorable Valentine’s Day treasures.
This article will delve into a range of easy-to-follow ideas for creating your own Valentines Arts And Crafts. From hand-made greeting cards to customized home décor, we will guide you through crafting projects that are perfect for both beginners and seasoned crafters. Whether you want to make a heartfelt gift for someone special or decorate your space to celebrate the occasion, you’ll find inspiration and step-by-step instructions to bring your vision to life. With a little creativity and effort, you can create beautiful, one-of-a-kind treasures that will be treasured for years to come.
Valentines Arts And Crafts
Valentine’s Arts and Crafts is a delightful way to celebrate love and creativity. It involves making handmade items like cards, decorations, gifts, and keepsakes that reflect personal thought and care. From intricate paper crafts and heart-shaped ornaments to personalized photo frames and painted artwork, Valentines Arts And Crafts offer a heartfelt expression of affection. Perfect for kids, adults, and couples alike, Valentines Arts And Crafts foster bonding, creativity, and the joy of giving during this romantic season.
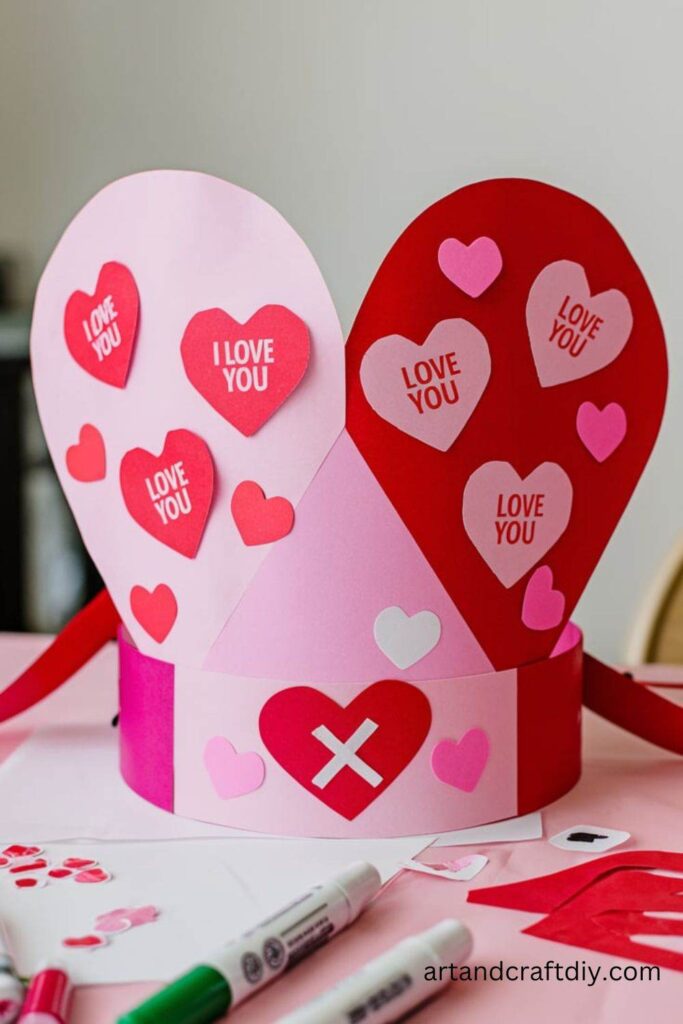
DIY Valentine’s Day Crown
Let kids feel royal with this fun Valentine’s Day crown craft.
Materials Used:
- Colored paper
- Scissors
- Glue or tape
- Heart stickers or cutouts
- Glitter (optional)
Steps:
- Cut the Base: Cut a strip of paper long enough to wrap around the head as the base of the crown.
- Add Hearts: Cut out heart shapes or use stickers to decorate the crown.
- Attach Decorations: Glue the hearts and other embellishments like glitter or small gems onto the base.
- Assemble the Crown: Tape or glue the ends of the strip together to fit the head.
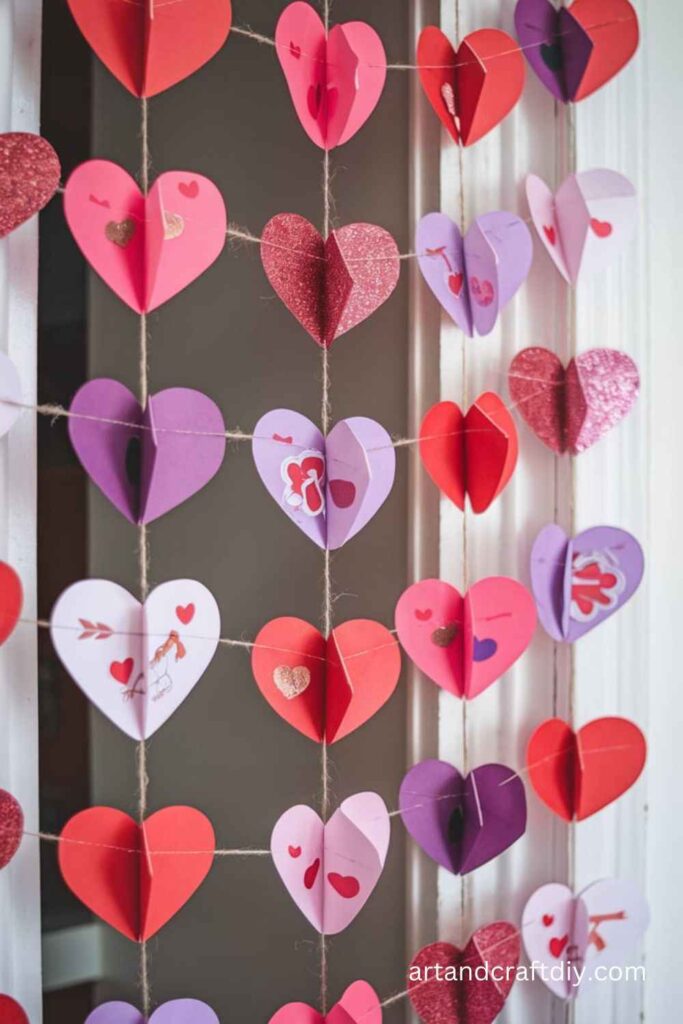
Heart-Shaped Paper Garland Art
Celebrate Valentine’s Day with a beautiful heart-shaped paper garland that’s easy to make and perfect for decorating your home or classroom.
Materials Used:
- Colored paper (red, pink, and white)
- Scissors
- Glue or double-sided tape
- String or ribbon
Steps:
- Cut the Paper: Start by cutting the colored paper into strips, about 1 inch wide and 6 inches long.
- Shape the Hearts: Take one strip, fold it in half, and then curl the two loose ends inward to meet at the fold, forming a heart shape.
- Secure the Heart: Use glue or double-sided tape to stick the loose ends together.
- Create More Hearts: Repeat the process with different colors to create multiple hearts.
- Assemble the Garland: Thread the hearts onto a piece of string or ribbon, securing them in place with small pieces of tape or glue.
- Hang the Garland: Display your garland on walls, doors, or mantels to add a festive touch.
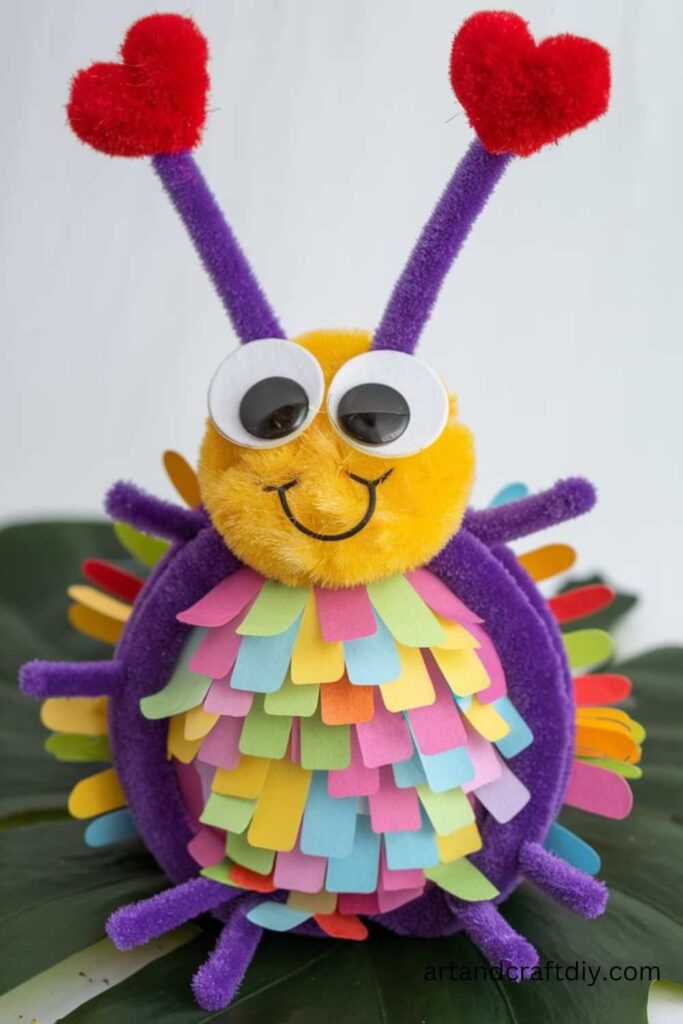
Love Bug Paper Crafts
These adorable love bugs make perfect Valentine’s Day gifts or decorations.
Explore more: Preschool Valentine Crafts
Materials Used:
- Colored cardstock or construction paper
- Pipe cleaners
- Googly eyes
- Glue stick
- Scissors
- Markers
Steps:
- Create the Body: Cut out oval shapes from colored paper to serve as the body of the bug.
- Add Wings: Cut out heart shapes to attach as wings. Glue them to the back of the oval shape.
- Attach Antennae: Twist pipe cleaners into small spirals and glue them to the top of the body.
- Add Eyes and Details: Glue googly eyes to the front and draw a smile or other details using markers.
- Decorate: Add glitter, stickers, or messages to personalize your love bugs.
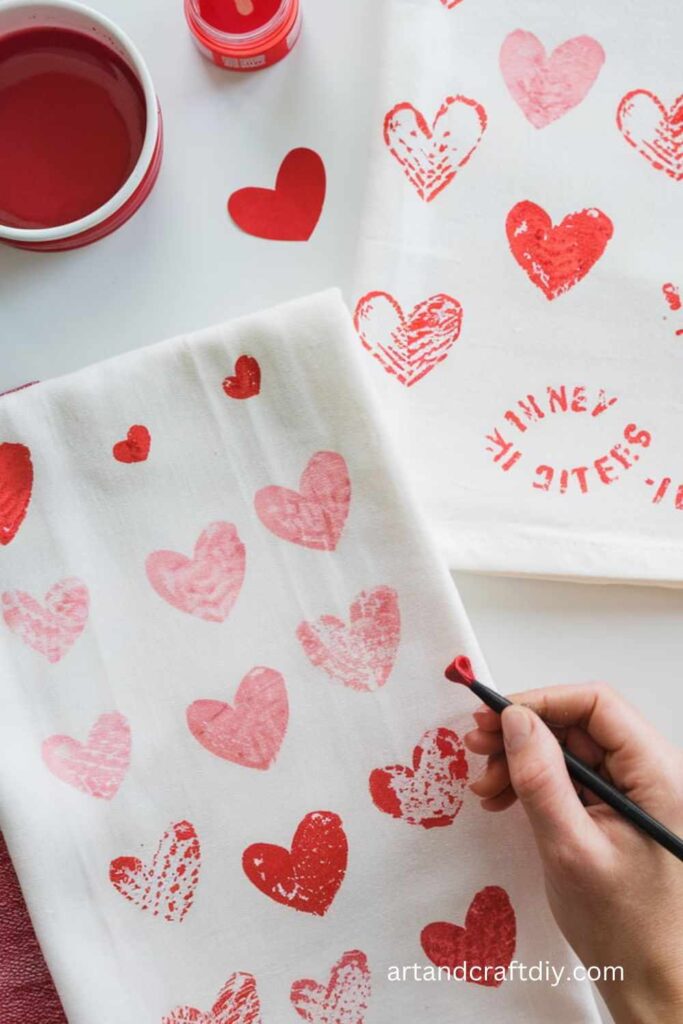
DIY Heart Stamps
Turn everyday materials into creative heart stamps for Valentine’s Day cards or gift wrap.
Materials Used:
- Toilet paper rolls
- Paint (red, pink, and purple)
- Paper or fabric
- A plate or palette for paint
Steps:
- Shape the Stamp: Take a toilet paper roll and press one side into a heart shape. Secure the shape by taping the roll.
- Prepare the Paint: Pour paint onto a plate or palette.
- Stamp the Hearts: Dip the heart-shaped end of the roll into the paint and stamp it onto paper or fabric.
- Repeat and Decorate: Continue stamping to create patterns or designs. Let the paint dry completely.
Valentine’s Day Photo Frame
Create a personalized photo frame to capture and display your favorite memories.
Explore more: Valentines Day Crafts Ideas
Materials Used:
- Cardboard
- Colored paper
- Glue
- Scissors
- Stickers, glitter, and other decorations
Steps:
- Cut the Frame: Cut a rectangular frame from cardboard. Make sure to leave a smaller rectangle in the center for the photo.
- Cover the Frame: Glue colored paper to cover the cardboard, folding the edges neatly.
- Decorate: Add stickers, glitter, or write messages around the frame.
- Add a Stand or Hanger: Attach a cardboard stand or a piece of string to the back for displaying the frame.
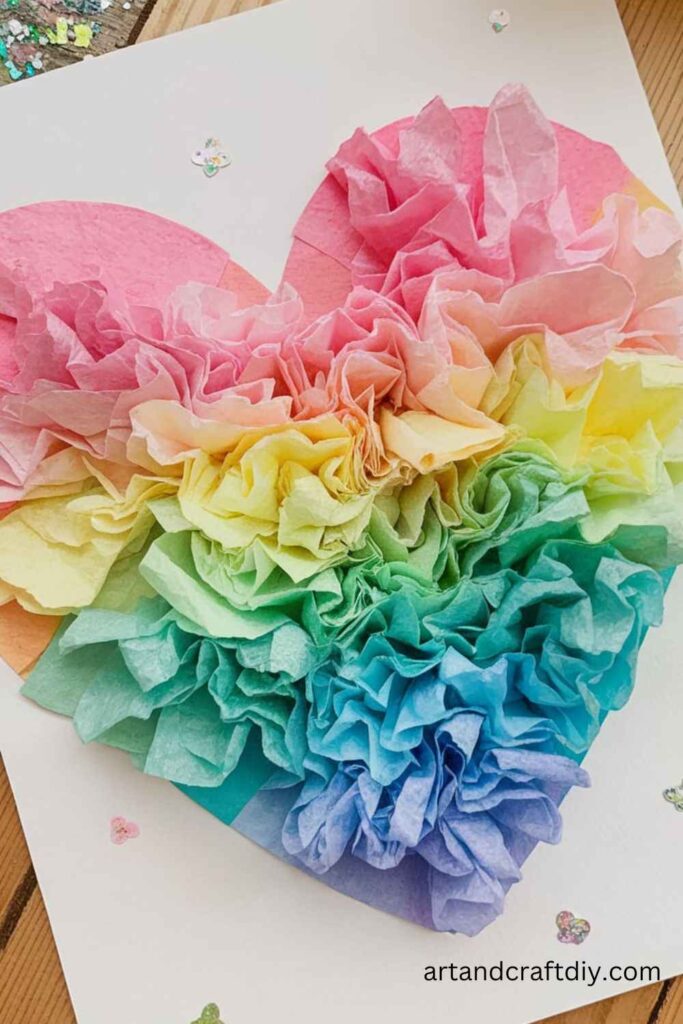
Tissue Paper Heart Art
This craft creates a stunning mosaic effect using tissue paper.
Materials Used:
- Tissue paper in various colors
- White cardstock
- Glue stick or liquid glue
- Scissors
Steps:
- Cut Tissue Paper: Tear or cut tissue paper into small squares.
- Draw a Heart Shape: Use a pencil to lightly draw a heart shape on the cardstock.
- Fill the Heart: Apply glue inside the heart outline and stick the tissue paper pieces onto the glue, overlapping them slightly.
- Trim the Edges: Once dry, trim any excess tissue paper from the edges of the heart shape.
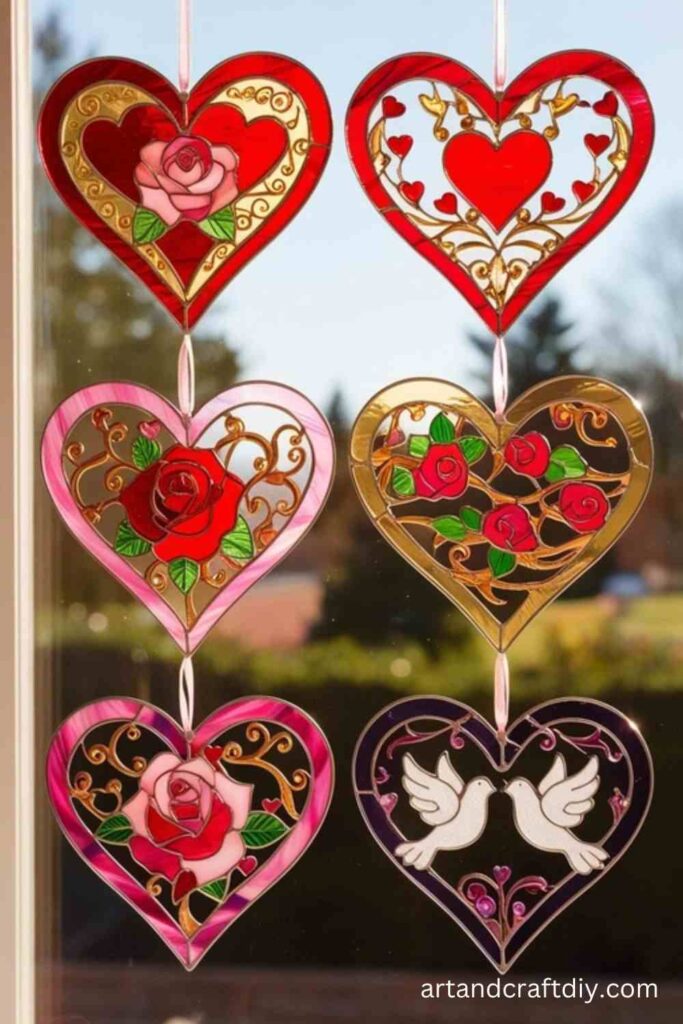
Heart-Shaped Suncatchers
Add a splash of color to your windows with these beautiful suncatchers.
Materials Used:
- Wax paper
- Crayons
- Pencil sharpener or grater
- Iron
- Scissors
- String
Steps:
- Prepare the Crayons: Use a pencil sharpener or grater to create small crayon shavings in various colors.
- Assemble the Suncatcher: Sprinkle crayon shavings between two sheets of wax paper.
- Melt the Crayons: Use a warm iron (set to low heat) to gently press the wax paper, melting the crayons inside.
- Cut Heart Shapes: Once cooled, cut the wax paper into heart shapes.
- Hang the Suncatchers: Punch a hole at the top of each heart and thread string through for hanging.
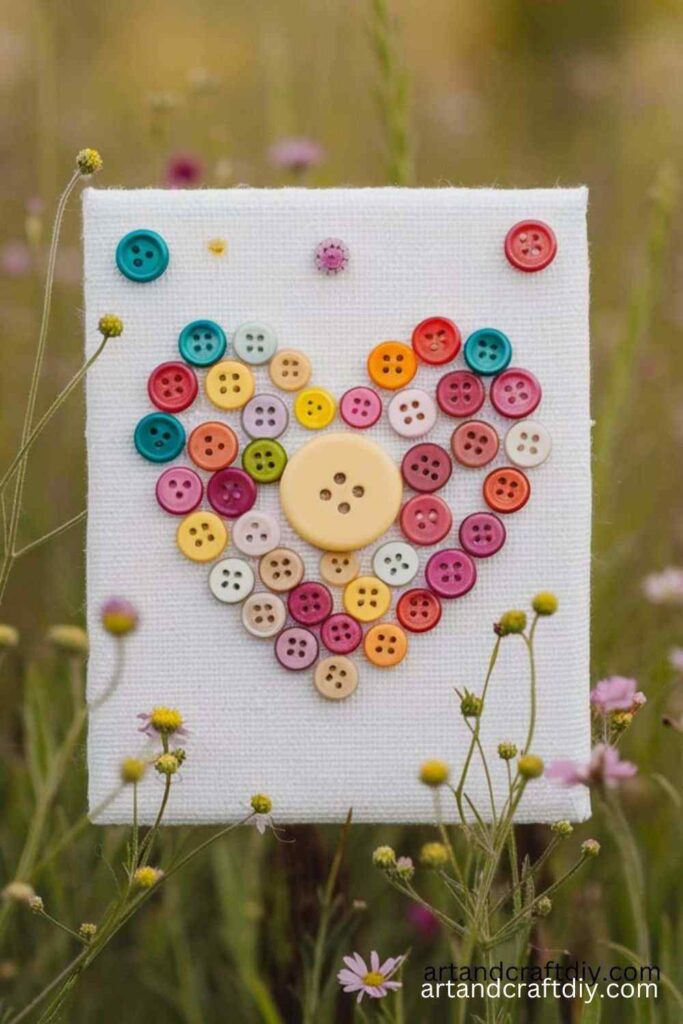
Button Heart Canvas
Create a stunning wall decoration with buttons arranged into a heart shape.
Materials Used:
- Canvas or sturdy cardboard
- Buttons (various sizes and colors)
- Hot glue gun
- Paint (optional)
Steps:
- Prepare the Canvas: Paint the canvas a solid color if desired and let it dry.
- Draw a Heart Outline: Lightly sketch a heart shape on the canvas.
- Glue the Buttons: Arrange buttons within the heart outline and glue them down. Use varying sizes and colors for a textured look.
- Let It Dry: Allow the glue to set before hanging the canvas.
Valentine’s Day Pop-Up Card
Surprise someone with a handmade pop-up card that adds a playful element to your Valentine’s greetings.
Materials Used:
- Cardstock
- Scissors
- Glue stick
- Markers
- Decorative stickers or embellishments
Steps:
- Fold the Card: Take a piece of cardstock and fold it in half to form the base of the card.
- Cut the Pop-Up: On the inside of the card, cut two parallel slits near the center to create a small tab. Push the tab inward to form the pop-up.
- Decorate the Pop-Up: Attach a heart or other design to the pop-up tab using glue.
- Add Details: Write a message and decorate the rest of the card with markers and stickers.
Yarn-Wrapped Hearts
These textured hearts make great ornaments or Valentine’s gifts.
Materials Used:
- Cardboard
- Yarn (red, pink, or white)
- Scissors
- Tape
Steps:
- Cut the Heart Shapes: Cut heart shapes out of cardboard.
- Attach Yarn: Tape the end of a piece of yarn to the back of the heart.
- Wrap the Yarn: Wrap the yarn tightly around the heart, covering the cardboard completely.
- Secure the End: Once covered, tuck or tape the loose end of the yarn to the back of the heart.
Beaded Friendship Bracelets
Celebrate love and friendship with these colorful beaded bracelets.
Materials Used:
- Elastic string or thread
- Assorted beads (heart-shaped or regular)
- Scissors
Steps:
- Cut the String: Measure and cut a piece of elastic string to fit around the wrist.
- Thread the Beads: Thread beads onto the string, creating a pattern or random design.
- Tie the Bracelet: Once the string is full, tie a secure knot to close the bracelet. Trim excess string
Painted Rock Love Messages
Turn ordinary rocks into lovely keepsakes with painted Valentine’s messages.
Materials Used:
- Smooth rocks
- Acrylic paints
- Paintbrushes
- Permanent markers
Steps:
- Prepare the Rocks: Wash and dry the rocks to ensure a clean surface.
- Paint the Base: Paint the entire surface of each rock in a base color, such as red, pink, or white. Let it dry.
- Add Designs: Use a smaller brush to paint hearts, patterns, or write messages like “Be Mine” or “Love.”
- Outline and Detail: Use permanent markers to outline designs or add finer details.
Love Tree Fingerprint Art
Create a beautiful tree with fingerprints as leaves to symbolize love.
Materials Used:
- White cardstock
- Brown marker or paint
- Non-toxic paints (red, pink, purple)
- Paintbrush
Steps:
- Draw the Tree: Use a brown marker or paint to draw a tree trunk and branches on the cardstock.
- Add Fingerprints: Dip your fingertip into paint and press it onto the branches to create leaves. Use different colors for variety.
- Personalize: Write a sweet message or names below the tree.
- Let It Dry: Allow the paint to dry before displaying.
Heart-Shaped Soap Bars
Create personalized soap bars in heart shapes, perfect for gifting.
Materials Used:
- Melt-and-pour soap base
- Soap molds (heart-shaped)
- Soap colorants
- Essential oils (optional)
Steps:
- Melt the Soap Base: Follow the instructions on the melt-and-pour soap base packaging to melt it in the microwave or on the stove.
- Add Color and Scent: Mix in a few drops of soap colorant and essential oils if desired.
- Pour into Molds: Pour the melted soap into the heart-shaped molds.
- Set and Remove: Let the soap harden completely before removing it from the molds.
Valentine’s Day Wreath
Welcome love with a handmade Valentine’s Day wreath for your door.
Materials Used:
- Foam wreath base or cardboard
- Felt or fabric (red and pink)
- Scissors
- Glue gun
Steps:
- Prepare the Base: If using cardboard, cut out a circular base with an inner circle removed to form a ring.
- Cut the Felt: Cut felt into heart shapes or small strips.
- Assemble the Wreath: Attach the felt pieces to the wreath base, overlapping them slightly for fullness.
- Decorate: Add bows, glitter, or other Valentine-themed embellishments.
Valentine’s Day Gift Bags
Personalize gift bags for your Valentine’s Day treats.
Materials Used:
- Plain paper bags
- Markers or paint
- Heart stickers
- Ribbon
Steps:
- Decorate the Bag: Use markers or paint to draw hearts, patterns, or messages on the bag.
- Add Stickers and Ribbon: Place heart stickers around the bag and tie a ribbon at the handles for extra flair.
- Fill the Bag: Add treats, small gifts, or cards inside the bag.
Heart-Shaped Crayon Melts
Recycle old crayons into colorful, heart-shaped gifts.
Materials Used:
- Broken crayons
- Silicone heart molds
- Oven
Steps:
- Prepare the Crayons: Peel and break old crayons into small pieces.
- Fill the Molds: Place the crayon pieces into the silicone molds, mixing colors for a marbled effect.
- Melt the Crayons: Bake the molds in the oven at 250°F (120°C) for about 10 minutes, or until melted.
- Cool and Remove: Let the molds cool completely before removing the crayon hearts.
Valentine’s Day Collage
Create a meaningful collage using magazine clippings and other materials.
Materials Used:
- Old magazines or printouts
- Glue stick
- Scissors
- Cardstock or poster board
Steps:
- Cut Out Images: Look for heart-shaped images, love-themed words, or Valentine’s colors in magazines. Cut them out.
- Arrange the Pieces: Arrange the cutouts on your cardstock to form a heart shape or any design you like.
- Glue Everything Down: Secure the pieces with a glue stick.
- Add Final Touches: Write or draw additional elements to personalize your collage.
Felt Heart Coasters
Hand-sew or glue felt hearts into coasters for a functional and decorative Valentine’s craft.
Materials Used:
- Felt sheets
- Scissors
- Needle and thread or fabric glue
- Fabric paint (optional)
Steps:
- Cut Heart Shapes: Cut two identical heart shapes for each coaster.
- Stitch or Glue: Sew the edges together, leaving a small gap, or glue the edges if sewing isn’t preferred.
- Fill (Optional): Add a thin layer of stuffing inside before closing the gap.
- Decorate: Use fabric paint to add designs or initials.
Valentine’s Day Candy Bouquets
Create a sweet bouquet filled with candies and treats, perfect as a gift for loved ones.
Materials Used:
- Assorted candy (chocolates, lollipops, etc.)
- Skewers or sticks
- Floral foam
- Tissue paper or cellophane
- Ribbon
- Small vase or container
Steps:
- Attach Candy to Skewers: Use tape or glue dots to secure each piece of candy to a skewer or stick.
- Prepare the Base: Place a piece of floral foam inside the vase or container.
- Assemble the Bouquet: Insert the candy skewers into the foam, arranging them like a bouquet.
- Add Tissue Paper: Fill gaps with tissue paper or cellophane for a fuller look.
- Decorate: Wrap the container with ribbon and add a tag or card.
Glittery Heart Mason Jars
Make sparkling mason jars to use as vases, candle holders, or decorative pieces.
Materials Used:
- Mason jars
- Mod Podge or clear glue
- Glitter
- Foam brush
- Ribbon (optional)
Steps:
- Apply Glue: Use a foam brush to apply Mod Podge or glue to the surface of the jar, focusing on specific areas or covering the entire jar.
- Add Glitter: Sprinkle glitter onto the glued areas, shaking off the excess.
- Let It Dry: Allow the jar to dry completely before handling.
- Decorate: Tie a ribbon around the neck of the jar or add a small tag for a finishing touch.
DIY Valentine’s Day Pins
Make wearable heart pins to spread Valentine’s cheer.
Materials Used:
- Felt or craft foam
- Pin backs
- Hot glue gun
- Scissors
- Decorations (sequins, buttons, glitter, etc.)
Steps:
- Cut Heart Shapes: Cut heart shapes out of felt or craft foam.
- Decorate the Hearts: Add sequins, glitter, or other embellishments to personalize the pins.
- Attach the Pin Back: Use a hot glue gun to attach a pin back to the reverse side of each heart.
- Wear or Gift: Pin them onto clothing or give them as gifts to friends and family.
Valentine’s Day Paper Fortune Cookies
These fun fortune cookies make great conversation starters or party favors.
Materials Used:
- Colored paper or cardstock
- Scissors
- Glue or double-sided tape
- Pen or printer for messages
Steps:
- Cut Circles: Cut out circles (about 4 inches in diameter) from colored paper.
- Write Messages: Write sweet or funny Valentine’s Day messages on small strips of paper.
- Form the Cookie: Fold a circle in half without creasing it completely. Place a message inside. Pinch the edges together to create the fortune cookie shape.
- Secure the Shape: Use glue or tape to keep the cookie in place.
Heart-Shaped Bird Feeders
Show love for wildlife with these adorable bird feeders.
Materials Used:
- Birdseed
- Gelatin
- Heart-shaped cookie cutters
- String
Steps:
- Mix Birdseed and Gelatin: Dissolve unflavored gelatin in warm water, then mix in birdseed until coated.
- Fill the Molds: Place heart-shaped cookie cutters on wax paper and fill them with the birdseed mixture.
- Insert String: Before the mixture sets, insert a loop of string at the top of each heart for hanging.
- Let It Harden: Allow the feeders to dry completely before removing them from the molds.
- Hang Outside: Place the feeders on tree branches or other outdoor spots.
Valentine’s Day Friendship Necklaces
Create matching necklaces for friends and loved ones to wear.
Materials Used:
- Polymer clay
- String or chain
- Heart-shaped cookie cutter
- Jump rings and clasps
Steps:
- Roll the Clay: Roll polymer clay into a flat sheet about ¼ inch thick.
- Cut the Heart Shapes: Use a cookie cutter to create heart shapes from the clay.
- Divide the Heart: Cut each heart in half or into puzzle-like shapes for matching pieces.
- Bake the Clay: Follow the instructions on the clay packaging to harden the pieces.
- Assemble the Necklace: Attach each clay piece to a string or chain using jump rings and clasps.
Valentine’s Day Candle Holders
Craft romantic candle holders to light up your Valentine’s evening.
Materials Used:
- Glass jars or votive holders
- Tissue paper or heart stickers
- Mod Podge or glue
- Tealight candles
Steps:
- Prepare the Jar: Clean and dry the jars or holders.
- Apply Decorations: Cover the outside with tissue paper or heart stickers. Use Mod Podge or glue to secure them.
- Seal with Mod Podge: Brush a layer of Mod Podge over the decorations for a smooth finish.
- Add a Candle: Place a tealight candle inside the holder and enjoy the warm glow.
Valentine’s Day Felt Envelope
Make a reusable felt envelope for delivering cards or small gifts.
Materials Used:
- Felt sheets
- Scissors
- Needle and thread or fabric glue
- Velcro or a button
Steps:
- Cut the Envelope Shape: Cut a large rectangle of felt. Fold it to form an envelope shape, leaving one flap for closing.
- Sew or Glue Edges: Stitch or glue the sides to hold the envelope together.
- Attach a Closure: Sew on a button or glue Velcro to keep the envelope closed.
- Decorate: Add felt hearts, sequins, or embroidery to personalize the envelope.
Valentine’s Day String Art
Create intricate string art in the shape of a heart for a unique decoration.
Materials Used:
- Wooden board
- Nails
- Hammer
- String or embroidery floss
- Heart template
Steps:
- Prepare the Board: Sand and paint the wooden board if desired.
- Mark the Design: Place a heart-shaped template on the board and mark nail positions around the outline.
- Hammer the Nails: Hammer nails into the marked spots, leaving some of the nail exposed.
- Weave the String: Tie the string to one nail and weave it around the others in a random or patterned way to fill the heart shape.
- Secure the String: Tie off the end and trim any excess.
Cupid’s Arrow Bookmark
This craft combines functionality and Valentine’s charm, making it a great gift for book lovers.
Materials Used:
- Craft sticks or wooden skewers
- Felt or colored paper
- Scissors
- Glue
Steps:
- Create the Arrowhead: Cut a triangle shape from felt or colored paper. Glue it to one end of the stick or skewer.
- Add the Tail: Cut small strips or triangles for the arrow’s tail and glue them to the opposite end.
- Decorate: Add glitter, stickers, or patterns to personalize the bookmark.
How to Incorporate Valentine’s Crafts into Party Decor ?
Valentine’s Day parties are all about celebrating love and creating an atmosphere of warmth and charm. Incorporating crafts into your party decor adds a personal, creative touch that guests will appreciate. Here are some fun and simple ways to integrate Valentines Arts And Crafts into your party decorations:
1. Crafting Balloon Bouquets with Paper Hearts
- Materials Needed: Balloons (pink, red, and white), cardstock, scissors, glue, and string.
- Steps:
- Inflate balloons and secure them in small clusters.
- Cut out paper hearts in various sizes and colors.
- Attach the hearts to strings and tie them to the balloons or glue them directly onto the balloons for a festive look.
- Tips: Use metallic or glittery paper for an extra glamorous touch. These bouquets can serve as centerpieces or be placed at the entrance for a welcoming vibe.
2. Table Setting Ideas
- Heart-Shaped Napkin Folds:
- Fold napkins into heart shapes and place them on plates for a romantic touch.
- Add a small tag with each guest’s name to personalize the setting.
- DIY Centerpieces:
- Use mason jars or vases filled with red and pink flowers.
- Add heart-shaped cutouts or tiny LED lights for added charm.
- Create “love notes” on small cards and stick them into the arrangements using skewers or decorative sticks.
3. Crafting Valentine’s Party Hats or Crowns
- Materials Needed: Cardstock, glitter, glue, scissors, and elastic string.
- Steps:
- Cut cardstock into crown or hat shapes.
- Decorate with glitter, sequins, and stickers in Valentine’s Day colors.
- Punch holes on the sides and attach an elastic string to secure the hats or crowns.
- Fun Variation: Let guests personalize their hats or crowns as a party activity. Provide markers, stickers, and embellishments for everyone to unleash their creativity.
Incorporating Valentines Arts And Crafts into your party decor not only enhances the ambiance but also gives your event a unique and heartfelt touch. Whether it’s through charming balloon bouquets, stylish table settings, or playful party hats, Valentines Arts And Crafts are sure to make your celebration memorable and full of love.
Tips for Hosting a Valentine’s Day Craft Party
Valentine’s Day is the perfect occasion to gather loved ones for a creative and heartwarming craft party. Whether you’re hosting kids, adults, or a mix of both, these tips will help you create a festive, fun, and memorable experience.
1. Set Up a Craft Station with Organized Supplies
- Designate a large, clean table or multiple smaller stations for crafting.
- Provide trays, baskets, or bins to neatly organize supplies like scissors, glue, markers, paints, and decorative items such as glitter, ribbons, and stickers.
- Label each container so participants can easily find what they need.
- Include plenty of disposable tablecloths or paper to protect surfaces and make cleanup easy.
2. Choose Crafting Activities Based on Age Groups
For Kids:
- Handprint Valentine Cards: Use washable paint to create adorable handprint designs.
- Paper Heart Garlands: Pre-cut paper hearts for stringing together.
- DIY Heart Wands: Combine foam hearts, glitter, and sticks for magical creations.
For Teens:
- Friendship Bracelets: Provide colorful threads, beads, and charms.
- Decorated Mason Jars: Use paint, stickers, and ribbons to create Valentine’s-themed jars.
- Photo Collage Frames: Supply wooden frames, craft paper, and embellishments for decorating.
For Adults:
- Candle Making: Offer kits with wax, scents, and molds.
- Floral Arrangements: Provide small vases, flowers, and ribbons for elegant bouquets.
- Paint-and-Sip: Set up an easy painting project paired with wine or non-alcoholic drinks.
FAQ
What are some easy Valentines Arts And Crafts for kids?
Some Valentines Arts And Crafts for kids include making heart-shaped cards, decorating mason jars for candy storage, creating paper garlands, or painting Valentine-themed rocks. Valentines Arts And Crafts are simple and fun!
What materials do I need for Valentines Arts And Crafts?
Common materials include construction paper, glue, scissors, markers, glitter, ribbon, and heart-shaped stickers. Additional items like paint, foam sheets, and lace can add variety.
How can I create personalized Valentine’s cards?
To make personalized cards, use blank cardstock and decorate with drawings, heartfelt messages, and embellishments like stickers, glitter, or dried flowers. Adding a photo or a handwritten note makes it extra special.
Are there eco-friendly options for Valentines Arts And Crafts?
Yes! Use recycled materials like old newspapers, magazines, or cardboard for your crafts. You can also use natural materials like dried flowers, twigs, or leaves for decoration.

Hi, I’m Victoria, an art and craft teacher at Newark City Schools, where I have the joy of working with middle school students to help them explore their creativity and develop their artistic talents. I believe that art is a powerful way for students to express themselves, and I strive to make every lesson a fun, engaging, and inspiring experience.
I created this website to share the art and craft projects, techniques, and resources that I use in my classroom, hoping to inspire both educators and young artists alike. Whether you’re a teacher looking for new ideas or a student eager to try something new, I’m excited to provide creative tools and projects that anyone can enjoy.
When I’m not in the classroom, I love experimenting with different art forms and learning new crafting techniques. My goal is to help others discover the joy of making things with their hands, and I hope my website serves as a space for everyone to explore their creative potential.

