
You know, I still remember the first time I tried making a witch hat craft—it was a total mess. I used way too much glue, the paper kept bending, and honestly, it looked more like a sad traffic cone than anything magical. But here’s the thing: even though it wasn’t perfect, it made everyone laugh, and that’s kind of the point of crafting, right? It doesn’t have to be Pinterest-perfect to be fun. If you’ve ever sat there with scissors in one hand and thought, “Why does this look nothing like the picture?”—trust me, you’re not alone. That’s why I wanted to share some super doable Witch Hat Craft Ideas with you. Whether you’re making them with kids, decorating for a party, or just feeling a little crafty, I’ve got some fun, simple ideas that actually work (and won’t drive you crazy). Ready to give it a try?
Witch Hat Craft Ideas
Witch hat crafts are a fun and easy way to get creative for Halloween or dress-up parties. Using simple materials, anyone can make a unique and spooky hat!

Classic Paper Witch Hat
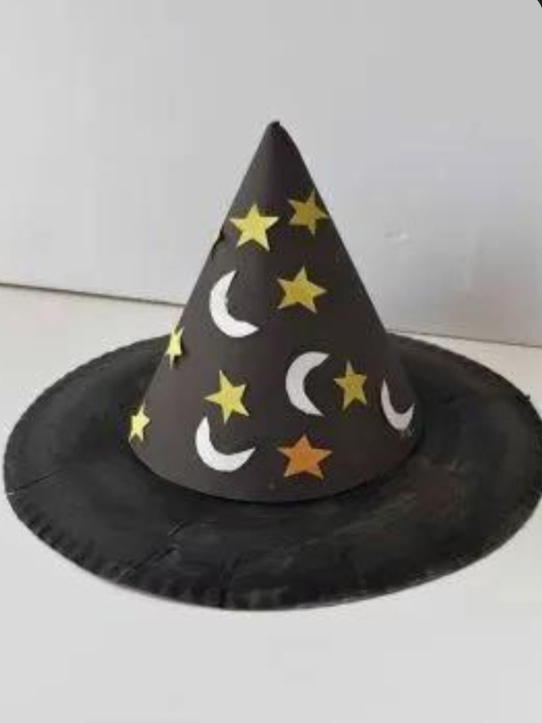
I don’t know about you, but every fall I end up making at least one paper witch hat. It’s the easiest craft to pull off, and honestly, it still gives me that fun “school project” nostalgia. All you need is some black construction paper, scissors, and tape. I’ve found that rolling the paper into a cone and trimming the bottom to sit flat is the trickiest part, but once you get it right, the rest feels like smooth sailing. When I was younger, I remember cutting the cone too short and ending up with something that looked more like a traffic cone than a witch hat. Lesson learned—measure twice, cut once!
To make it a little extra special, I sometimes let the kids paint stars or moons on theirs with white paint. If I’m in the mood for quick fun, I just stick on some gold star stickers. The best part? They’re lightweight, easy to wear, and if someone squishes it—no big deal, you can whip up another in ten minutes flat. For me, these hats are less about perfection and more about the fun of making them together.
Felt Witch Hat with Decorations
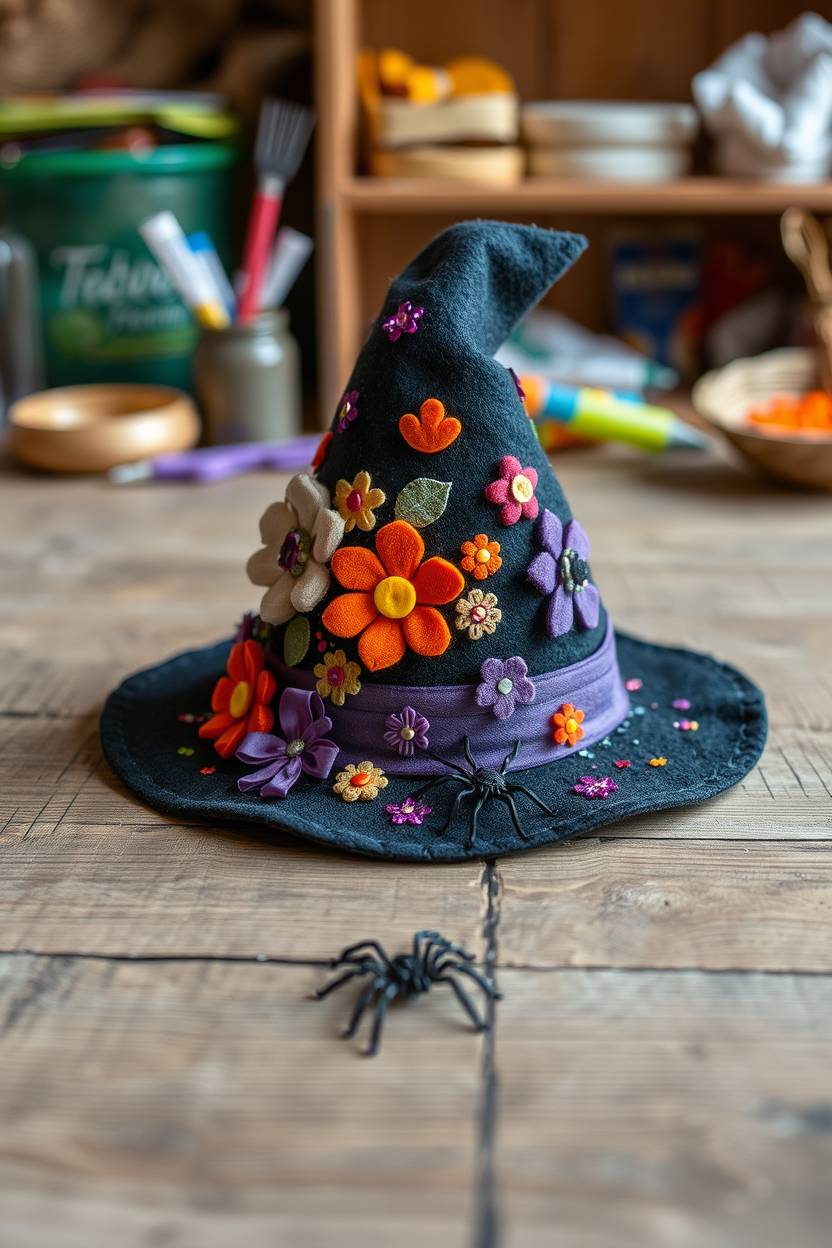
Now, if you want something that actually lasts, felt witch hats are my go-to. I’ve tried making them with stiff felt sheets, and to be fair, they look way more polished than the paper version. I usually stitch or hot glue the cone and brim together, which sounds like work, but I promise it’s not too bad. One time, I skipped the glue and just pinned it, and halfway through a party, the whole hat popped open—it was hilarious, but also a reminder that hot glue is your best friend here.
The decorations are where I let myself go wild. I love adding fake spiders, sparkly ribbon, or even a feather sticking out at a funny angle. My niece once glued a googly eye on hers and called it the “watchful hat.” It was ridiculous and brilliant at the same time. In my opinion, these felt hats really shine because you can reuse them year after year, unlike paper. Pull one out of the closet in October, and you’ve got instant witch vibes without even trying.
Glittery Witch Hat
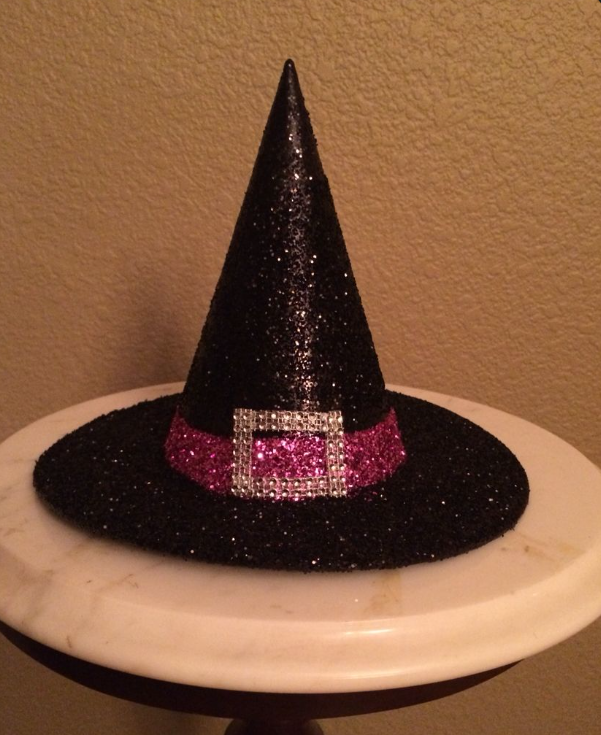
Okay, confession time: glitter drives me a little crazy, but every year I somehow end up making a glittery witch hat. The sparkle is just too tempting to resist. I usually start with a plain paper or felt hat and coat it in a mix of glue and glitter. Pro tip—do this outside if you can, unless you want your whole living room to sparkle like a disco ball for weeks. I once made the mistake of glittering indoors, and even months later, I’d catch stray glitter on my socks.
Still, the end result is so worth it. A black hat with purple or green glitter just screams Halloween magic. Sometimes I’ll go all out and cover the whole thing, and other times I just glitter the brim for a more subtle shimmer. The kids always love the full sparkle version, while I lean toward the “less is more” look. But honestly, no matter how messy it gets, a glittery witch hat never fails to steal the show at any fall gathering.
Upcycled Cardboard Witch Hat

-
Cut large pieces of cardboard for the cone and brim.
-
Use hot glue for strong attachment.
-
Paint the hat with acrylic or spray paint.
-
Decorate with recycled fabric scraps or paper cutouts.
-
Reinforce edges with extra cardboard for durability.
LED Light-Up Witch Hat
Add a magical touch to your witch hat by attaching small LED lights or glow sticks. This craft is perfect for nighttime events or parties where you want to shine. The lights can be battery-operated and safely attached without damaging the hat. This idea brings your witch costume to life with glowing effects.
-
Use lightweight battery-powered LED string lights.
-
Secure lights with hot glue or tape.
-
Place lights evenly around the brim or cone.
-
Use glow-in-the-dark paint to enhance the effect.
-
Ensure batteries are safely hidden and easy to switch on/off.
No-Sew Fabric Witch Hat
For a quick and easy project, create a no-sew witch hat using fabric and fabric glue or double-sided tape. This idea is great for beginners or kids who can’t use needles. Choose stretchy or felt fabric for easy shaping. You can decorate with stickers, ribbons, or fabric paint.
-
Use fabric glue designed for clothing for best hold.
-
Cut fabric slightly larger than your measurements for folding.
-
Shape the cone and secure edges with glue or tape.
-
Add elastic or ribbon ties to keep the hat on.
-
Decorate with fabric markers or iron-on patches.
Mini Witch Hat Headbands
Mini witch hats on headbands are cute and wearable for kids and adults. These small hats are easy to make and can be decorated with feathers, beads, or small flowers. They are comfortable to wear and great for parties or photo shoots. You can make several in different colors and styles.
-
Use felt or foam sheets for lightweight hats.
-
Glue hats securely to plain headbands.
-
Decorate with glitter, feathers, or mini spiders.
-
Use hot glue for quick assembly.
-
Add ribbons or tulle for a whimsical look.
Spider Web Witch Hat
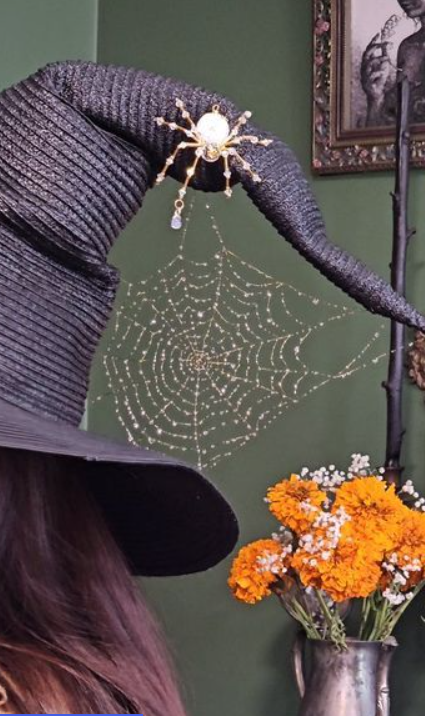
Give your witch hat a spooky look by adding spider web decorations made from yarn, string, or glue. This craft creates an eerie effect perfect for Halloween. You can also add plastic spiders or other creepy-crawlies for extra fright. This style is great for parties or haunted house costumes.
-
Use white yarn or string to create web patterns.
-
Attach small plastic spiders with glue.
-
Use hot glue carefully to avoid burns.
-
Paint the hat black or dark gray first for contrast.
-
Add glow-in-the-dark paint to spiders for nighttime effect.
Painted Witch Hat
Instead of using paper or fabric alone, try painting a plain witch hat with creative designs. Use acrylic paint to add moons, stars, bats, or mystical symbols. This craft lets you personalize your hat with your favorite colors and images. Painted hats make unique statement pieces.
-
Use a paintbrush with fine tips for detailed designs.
-
Let each layer of paint dry before adding more.
-
Seal the paint with clear spray for durability.
-
Use stencils for perfect shapes.
-
Combine metallic and matte paints for contrast.
Broomstick Witch Hat Combo
Combine your witch hat craft with a matching broomstick for a full costume effect. You can decorate the broomstick with ribbons, glitter, or fake leaves to match your hat’s style. This idea adds extra fun and detail to your witch look. It’s perfect for Halloween parades or plays.
-
Use a small wooden stick or dowel for the broom handle.
-
Attach yarn or raffia for the broom bristles.
-
Decorate broom handle with ribbons or paint.
-
Match colors and decorations with your hat.
-
Secure everything tightly with hot glue or tape.
Layered Tulle Witch Hat
Create a witch hat with layers of colorful tulle for a soft and magical appearance. This style is light and comfortable to wear, plus very pretty. You can mix colors like black, purple, and orange for a Halloween theme. Tulle adds volume and movement to the hat.
-
Cut tulle strips of varying lengths.
-
Attach layers to a simple cone base with glue or staples.
-
Use a contrasting ribbon to tie the base.
-
Add small fake spiders or glitter for detail.
-
Fluff the tulle for a fuller look.
Felt Witch Hat with Pom-Poms
Add a playful touch to your felt witch hat by gluing colorful pom-poms around the brim or tip. This craft is especially fun for kids and adds a soft texture to the design. Pom-poms come in many sizes and colors, so you can create any look you want.
-
Choose bright or neon pom-poms for contrast.
-
Use hot glue to attach pom-poms securely.
-
Place pom-poms evenly around the brim.
-
Combine with other decorations like ribbons or stickers.
-
Add a small bell inside a pom-pom for sound effects.
Glow-in-the-Dark Witch Hat
Make your witch hat glow in the dark using special paint or tape. This craft is perfect for evening Halloween parties or trick-or-treating. The glowing effect adds a spooky and magical vibe. It’s simple to do and can be combined with other decorations.
-
Use glow-in-the-dark paint designed for fabric or paper.
-
Paint stars, moons, or spider webs on the hat.
-
Charge the paint under bright light before wearing.
-
Add glow tape around the brim or edges.
-
Combine with LED lights for extra glow.
Spider Ring Witch Hat
Attach small plastic spider rings to your witch hat for a creepy and fun look. This craft adds 3D decorations that move when you do, making the hat more interactive. You can use real or fake spider rings from craft stores. It’s a simple way to boost your costume’s scare factor.
-
Choose spider rings that match your hat’s color.
-
Attach with hot glue or safety pins.
-
Spread spiders evenly around the hat.
-
Add spider web designs with yarn or paint.
-
Use spider rings with glitter for a festive look.
Personalized Name Witch Hat
Make your witch hat extra special by adding your name or a spooky nickname. Use fabric markers, glitter glue, or stickers to write your chosen name. This craft lets you show your personality and makes your hat one of a kind. Great for parties or group costumes.
-
Use bold, easy-to-read fonts.
-
Outline letters with glitter for visibility.
-
Place name on the brim or cone.
-
Add small decorations around the name.
-
Use washable markers if you want to change names later.
Witch Hat Accessories and Decorations
Adding accessories and decorations to your witch hat can turn a simple craft into a stunning, spooky masterpiece. Whether you want your hat to look elegant, creepy, or playful, the right decorations make all the difference. You can easily customize your witch hat to match your Halloween costume, party theme, or personal style. Here are some fun ideas and tips to help you decorate and personalize your witch hat:
-
Add Veils: Attach a sheer black or purple veil around the brim for a mysterious and elegant look. Use lightweight fabric and secure it with glue or stitches.
-
Use Feathers: Glue on black, purple, or green feathers to give the hat a dramatic, witchy flair. Arrange feathers in clusters for a bold statement or scatter them for a subtle effect.
-
Attach Spiders: Decorate your hat with plastic spiders or spider rings to add a creepy, Halloween vibe. You can place them crawling around the brim or dangling from the tip with clear thread.
-
Incorporate Halloween Charms: Add small pumpkins, bats, or skull charms using hot glue or by sewing them on. These little touches make your hat stand out.
-
Personalize with Names or Themes: Use fabric paint, glitter glue, or iron-on letters to write your name, a spooky phrase, or your witch persona’s nickname on the hat. This adds a unique, custom touch.
-
Add Ribbons and Bows: Wrap colorful or themed ribbons around the base of the cone and tie a bow for a finishing touch. You can also attach small bells or charms to the ribbons for extra detail.
-
Use Glow-in-the-Dark Paint: Highlight parts of your decorations with glow-in-the-dark paint for a magical effect that shows up in the dark.
-
Mix Textures: Combine different materials like lace, tulle, felt, and glitter for a rich, layered look that makes your hat visually interesting.
With these ideas, your witch hat will not only look amazing but also reflect your creativity and style perfectly!
FAQ
What materials do I need to make Witch Hat Craft Ideas?
Basic materials for Witch Hat Craft Ideas include black cardstock or felt, scissors, glue or a hot glue gun, and a ruler. You can also use elastic bands, ribbons, glitter, and Halloween decorations like spiders or feathers to personalize your hat.
Can kids make Witch Hat Craft Ideas too?
Yes! Witch Hat Craft Ideas are great for kids. Just use kid-safe scissors, non-toxic glue, and pre-cut shapes if needed. Let them decorate with stickers, pom-poms, or washable markers to keep it fun and safe.
How do I make my witch hat stay on my head?
You can attach an elastic band under the chin or use a headband inside the hat. For heavier hats, hair clips or bobby pins can help hold it in place.
Can I use fabric instead of paper for the hat?
Absolutely! Felt, foam sheets, or even old fabric scraps work well and give the hat more durability. Just be sure to use a strong glue or sew the pieces for better hold.

Hi, I’m Victoria, an art and craft teacher at Newark City Schools, where I have the joy of working with middle school students to help them explore their creativity and develop their artistic talents. I believe that art is a powerful way for students to express themselves, and I strive to make every lesson a fun, engaging, and inspiring experience.
I created this website to share the art and craft projects, techniques, and resources that I use in my classroom, hoping to inspire both educators and young artists alike. Whether you’re a teacher looking for new ideas or a student eager to try something new, I’m excited to provide creative tools and projects that anyone can enjoy.
When I’m not in the classroom, I love experimenting with different art forms and learning new crafting techniques. My goal is to help others discover the joy of making things with their hands, and I hope my website serves as a space for everyone to explore their creative potential.