
I still remember the first time I set up a little table at our neighborhood fair, loaded with my DIY crafts to sell. Honestly? I was terrified no one would even stop to look. But then, this sweet older lady picked up one of my handmade candles, smiled, and said, “This is lovely—I’ll take it.” That tiny sale felt like a huge win. Maybe you’ve been there too—wondering if people will actually buy what you’ve poured your time and heart into. It can feel scary putting your creations out there, right? But here’s the thing: handmade crafts aren’t just “stuff,” they’re little pieces of you—and people really do value that. In this post, I’m gonna share not just ideas but also tips I’ve learned (sometimes the hard way) to help your crafts stand out and actually sell. Ready to turn those hobbies into something more? Let’s dive in.
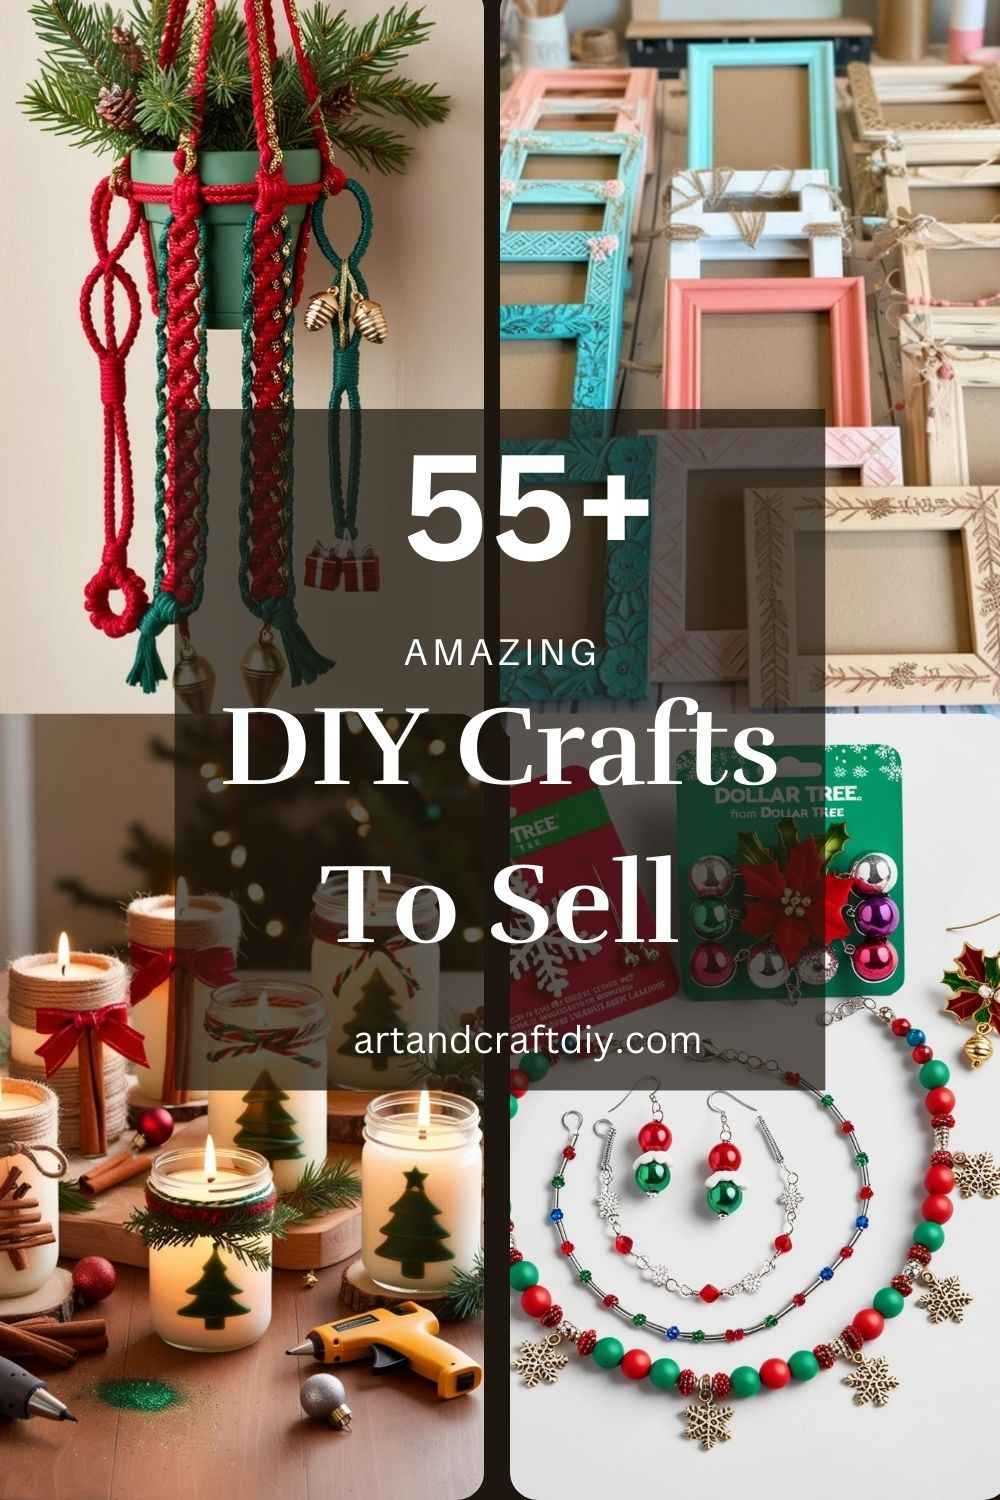
DIY Crafts To Sell
DIY crafts to sell refer to handmade items created by individuals for the purpose of selling them in various markets, both online and offline.
Handmade Candles
I still remember the first time I made candles at home—it was a total mess with wax spilling everywhere, but the smell of lavender filling the kitchen made it all worth it. Handmade candles have this charm because people love buying things that feel cozy and personal. You don’t need a big setup either, just some soy wax, wicks, a few jars, and scents that you like. Honestly, I’ve found that experimenting with different shapes and colors is half the fun. If you enjoy playing around with fragrance, candles are perfect because you can mix scents and create something completely unique.
When I started selling them, I noticed people preferred candles with calming scents like vanilla or lavender. To be fair, presentation matters a lot—tie a little ribbon on the jar or add a handwritten tag, and it suddenly looks boutique-style. In my opinion, candles are one of those crafts where the process is relaxing, and the end result can actually sell really well if you package it with some thought.
Personalized T-Shirts
One of the most fun crafts I got into was designing personalized T-shirts. I’ll be honest, I wasn’t sure if people would actually buy shirts with simple quotes or funky graphics, but it turns out they totally do. The best part is you don’t need to be a professional artist—there are plenty of heat transfer papers and vinyl cutters out there that make the job easy. You can even start with basic stencils and fabric paint if you’re on a budget.
I remember making a shirt for my cousin’s birthday that said “Coffee First, Everything Later,” and she wore it everywhere. That’s when it clicked for me—people love clothes that speak their personality. If you keep the designs trendy and relatable, selling them gets a lot easier. To be fair, you’ll need to focus on good quality shirts so they don’t shrink or fade, but once you figure that out, T-shirts are a really fun way to make some money while letting your creativity shine.
Handmade Jewelry
Jewelry making is something I got into kind of by accident. I picked up a bead kit on sale one day and thought I’d just try it for fun. Before I knew it, I was making bracelets and earrings for friends, and they started asking me to make more. Honestly, that’s how I realized there’s a real market for handmade jewelry. You don’t have to stick to beads either—wire wrapping, polymer clay, resin, and even recycled materials can make stunning pieces.
What I’ve noticed is people buy handmade jewelry because it feels personal and unique. To be fair, it does take a little patience to get the details right, but once you get the hang of it, it’s addictive. I once made a necklace out of seashells I collected on a trip, and it sold faster than I expected just because it had a “story.” In my opinion, that’s the magic of handmade jewelry—you’re not just selling an accessory, you’re selling something meaningful and crafted with care.
Macramé Plant Hangers
Macramé plant hangers is a amazing DIY craft to sell. They are easy to make, and their natural materials are perfect for selling in local craft markets or online.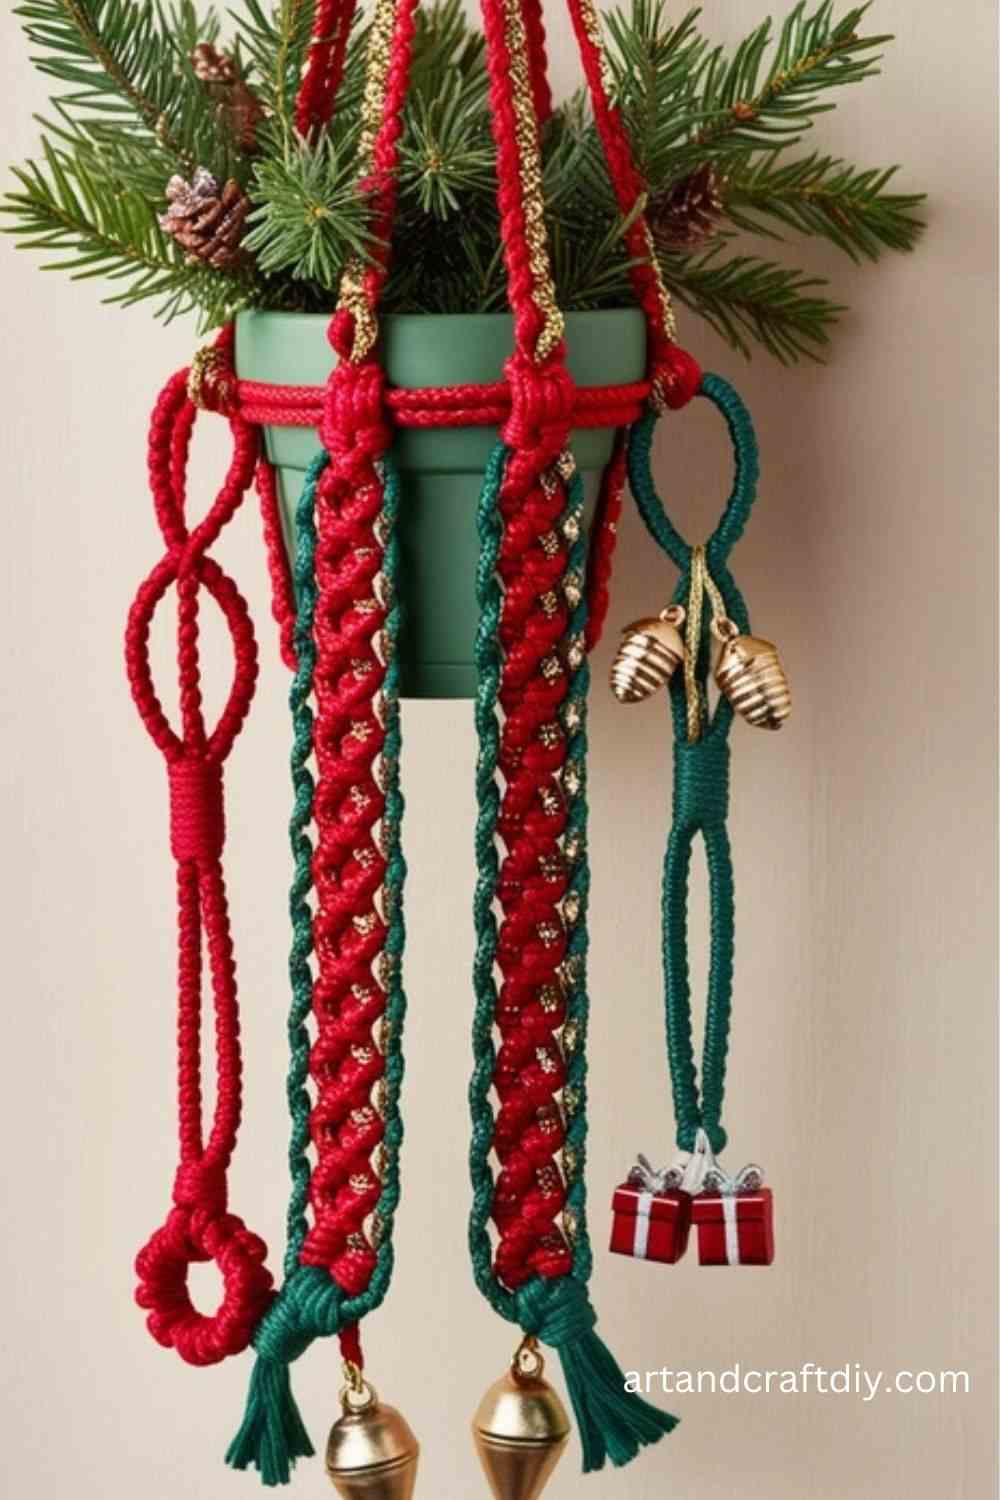
Materials Used
- Cotton cord
- Wooden rings
- Scissors
- Measuring tape
Steps
- Cut the cords: Cut several strands of cotton cord into even lengths.
- Attach cords to the ring: Fold the cords in half and attach them to the wooden ring using a lark’s head knot.
- Start knotting: Create basic macramé knots like square knots or half-hitch knots to form the desired pattern.
- Continue knotting: Work down the cords until you reach the desired length for your hanger.
- Add a decorative touch: Add a decorative knot or bead to the bottom for extra flair.
- Finish the piece: Tie all cords together securely and trim any excess.
- Package and sell: Roll up the plant hangers and package them for sale.
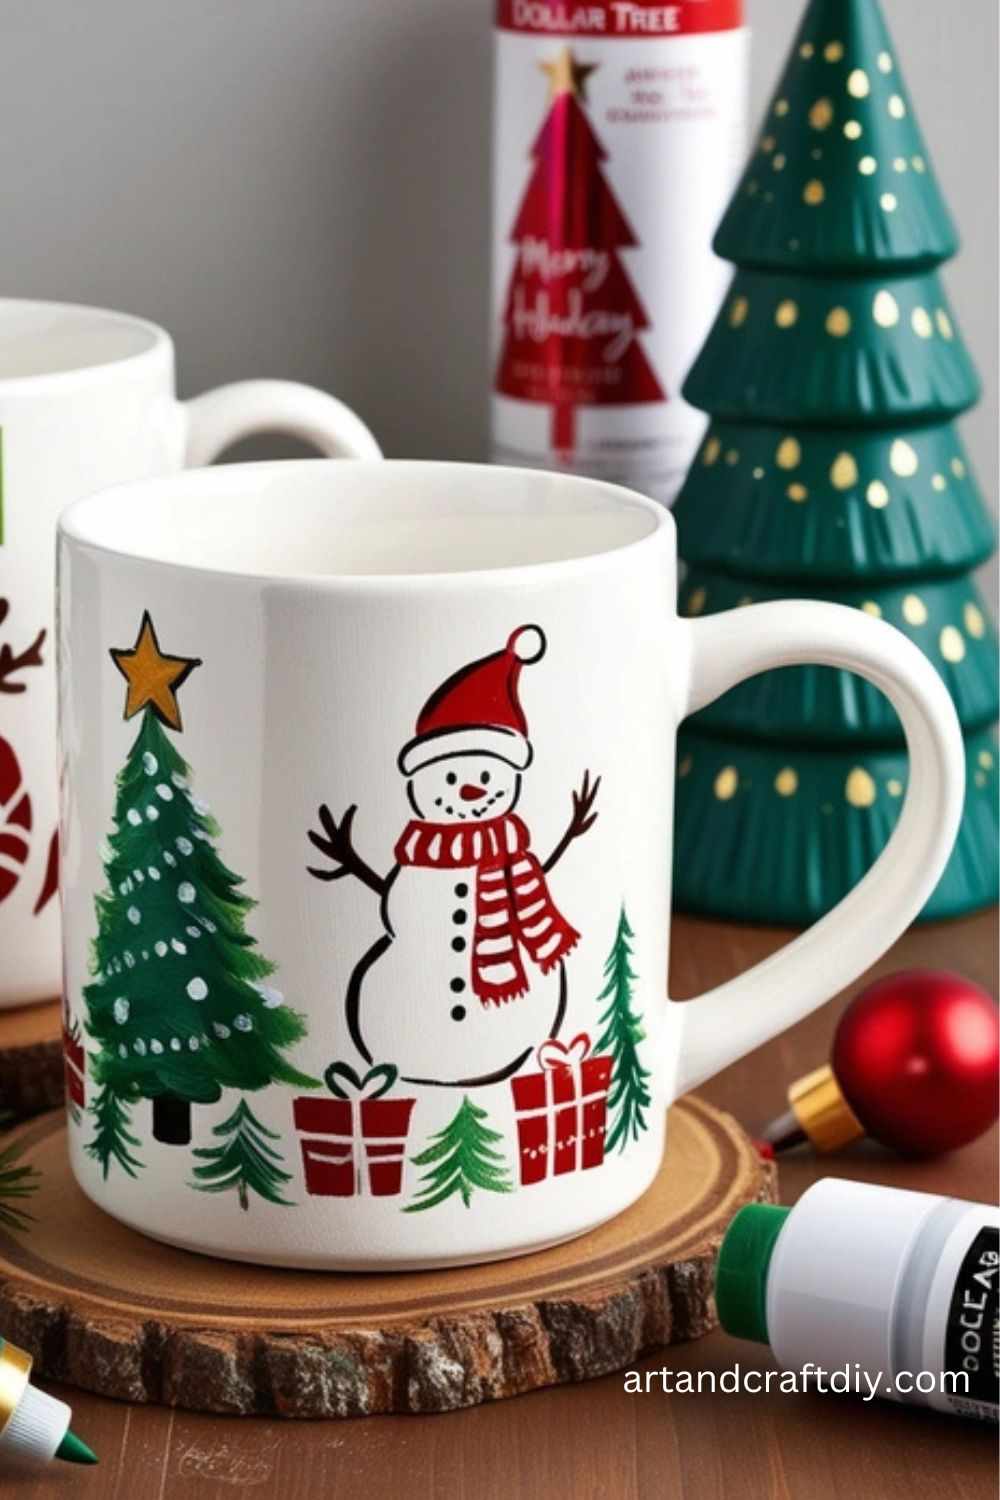
Hand-Painted Mugs
Hand-painted mugs are a popular and customizable item that people love to buy as gifts. You can create unique designs with paint markers or ceramics paint that will appeal to various tastes.
Materials Used
- Ceramic mugs
- Porcelain paint or paint markers
- Paintbrushes
- Oven (for curing the paint)
Steps
- Clean the mugs: Wash and dry the ceramic mugs thoroughly to ensure no dust or grease.
- Design the mug: Sketch out the design you want to paint using a pencil or freehand.
- Paint the design: Using porcelain paint or paint markers, carefully paint the design onto the mug.
- Cure the paint: Allow the paint to dry and then bake the mug in the oven according to the paint instructions to set the design.
- Let it cool: Once baked, let the mug cool completely.
- Package and sell: Package the mugs in protective boxes, and they are ready to be sold.
Custom Tote Bags
Tote bags are versatile and can be customized with fun designs, slogans, or artwork. Handmade tote bags are easy to make and serve as practical and stylish accessories.
Materials Used
- Blank cotton or canvas tote bags
- Fabric paint or markers
- Stencils (optional)
- Brushes or sponges
Steps
- Prepare the bag: Lay the tote bag flat and iron it to remove any wrinkles.
- Design your tote: Sketch your design or use stencils for a more uniform look.
- Paint the design: Use fabric paint or markers to apply the design to the tote bag.
- Let it dry: Allow the paint to dry completely, and if necessary, iron the design to set the paint.
- Package and sell: Package the totes neatly, either folded or in bags for easy transport.
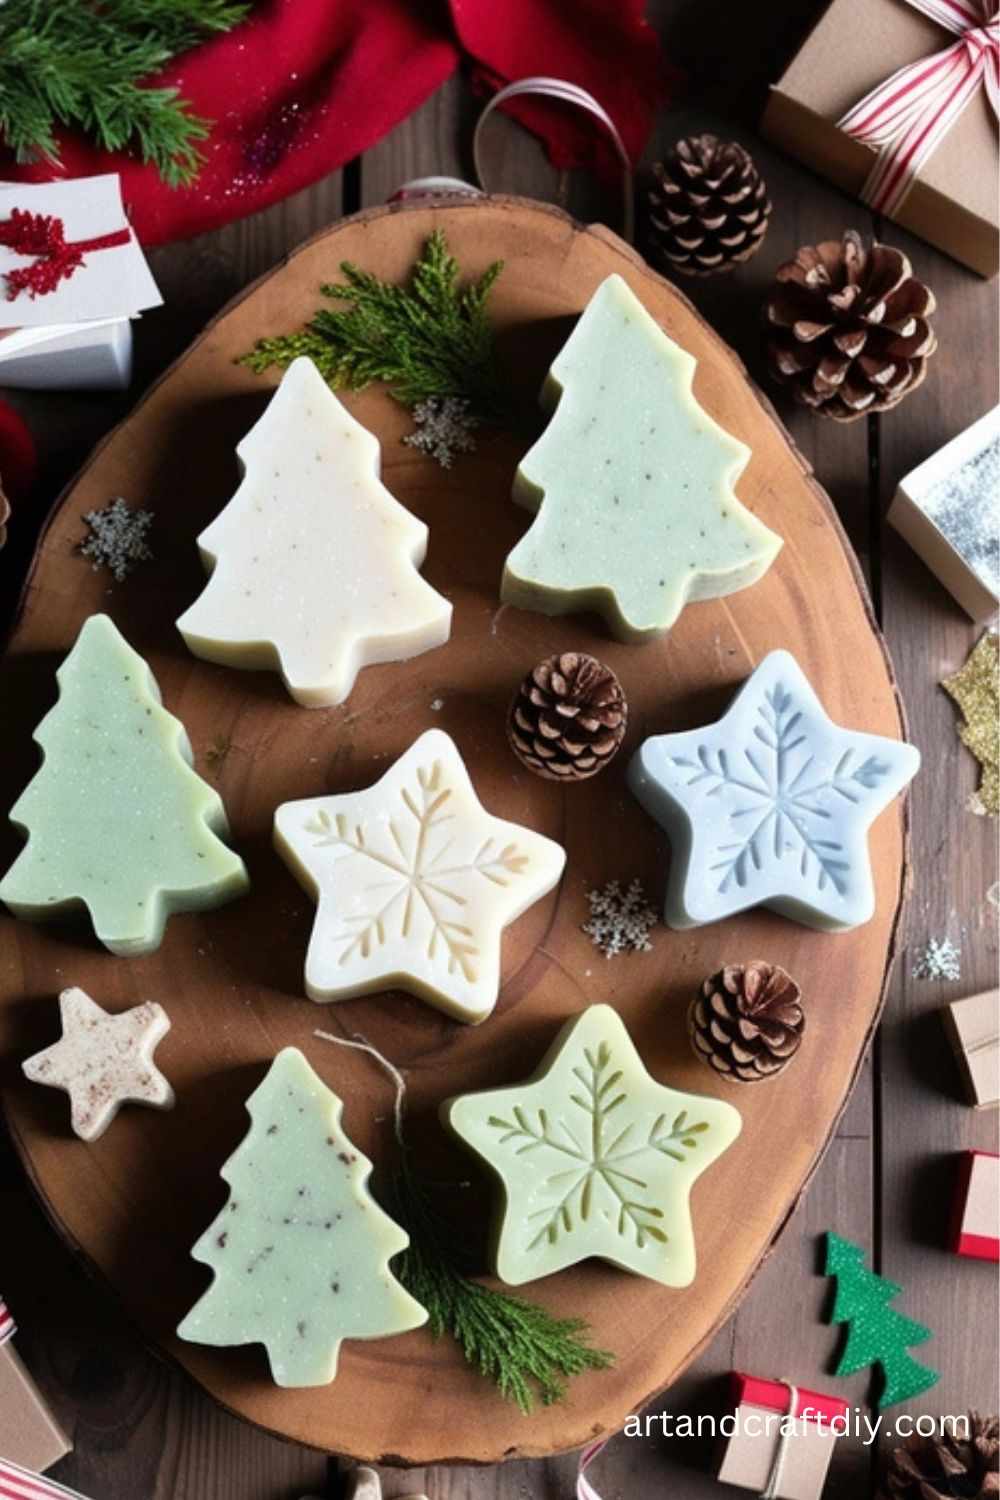
Handcrafted Soaps
Handmade soaps are a great product to sell as they are customizable, gentle on the skin, and eco-friendly. They can be crafted with natural ingredients like oils, herbs, and essential oils.
Materials Used
- Soap base (glycerin, goat’s milk, or shea butter)
- Essential oils
- Soap colorants
- Molds
- Dried herbs or flowers (optional)
Steps
- Melt the soap base: Cut the soap base into chunks and melt it in the microwave or using a double boiler.
- Add color and scent: Once melted, add your desired colorants and essential oils. Stir well.
- Pour into molds: Pour the soap mixture into molds of your choice.
- Add extras: If desired, sprinkle dried herbs or flowers into the soap for texture.
- Let it set: Allow the soap to cool and harden.
- Package and sell: Once solidified, remove the soap from the molds and package it for sale.
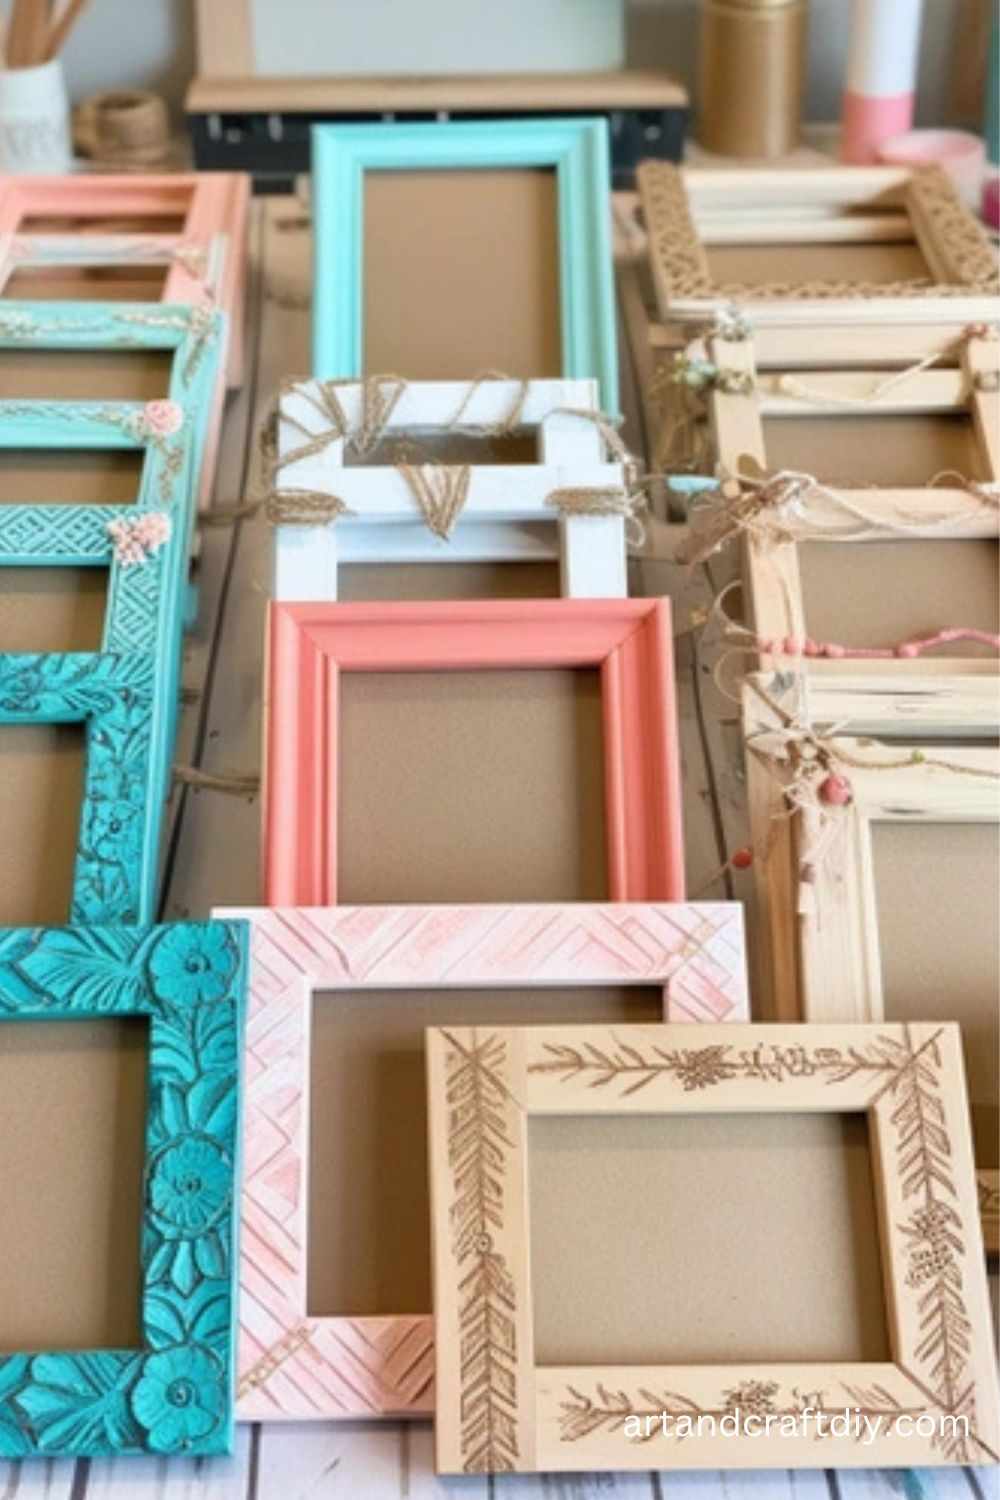
Customized Picture Frames
Handmade picture frames are a perfect way to showcase your creativity and are a highly sought-after item. You can personalize frames for customers by painting, decorating, or adding embellishments.
Materials Used
- Wooden frames
- Paint, glue, or decoupage supplies
- Decorative embellishments (buttons, flowers, ribbons)
- Paintbrushes
Steps
- Prepare the frame: Sand down the wooden frame and clean it to remove any dust or dirt.
- Paint the frame: Paint the frame in the desired color or apply decoupage techniques for added texture.
- Decorate: Use embellishments like buttons, ribbons, or flowers to add a personal touch.
- Seal the frame: After decorating, apply a clear sealant to protect the design.
- Package and sell: Place the frame in protective packaging and it’s ready to be sold.
Knit Scarves and Hats
Knitting scarves and hats is a relaxing and rewarding craft that can be turned into a profitable venture. Handmade knitwear is perfect for the colder months and is always in demand.
Materials Used
- Yarn (wool, cotton, or acrylic)
- Knitting needles
- Scissors
- Pattern (optional)
Steps
- Select your yarn: Choose a soft and durable yarn for the project.
- Cast on stitches: Cast on the number of stitches required for the scarf or hat.
- Knit the item: Follow the pattern or knit in a basic knit stitch until the desired length is reached.
- Finish the project: Bind off the stitches and weave in any loose ends.
- Package and sell: Fold the finished pieces neatly and package them for sale.
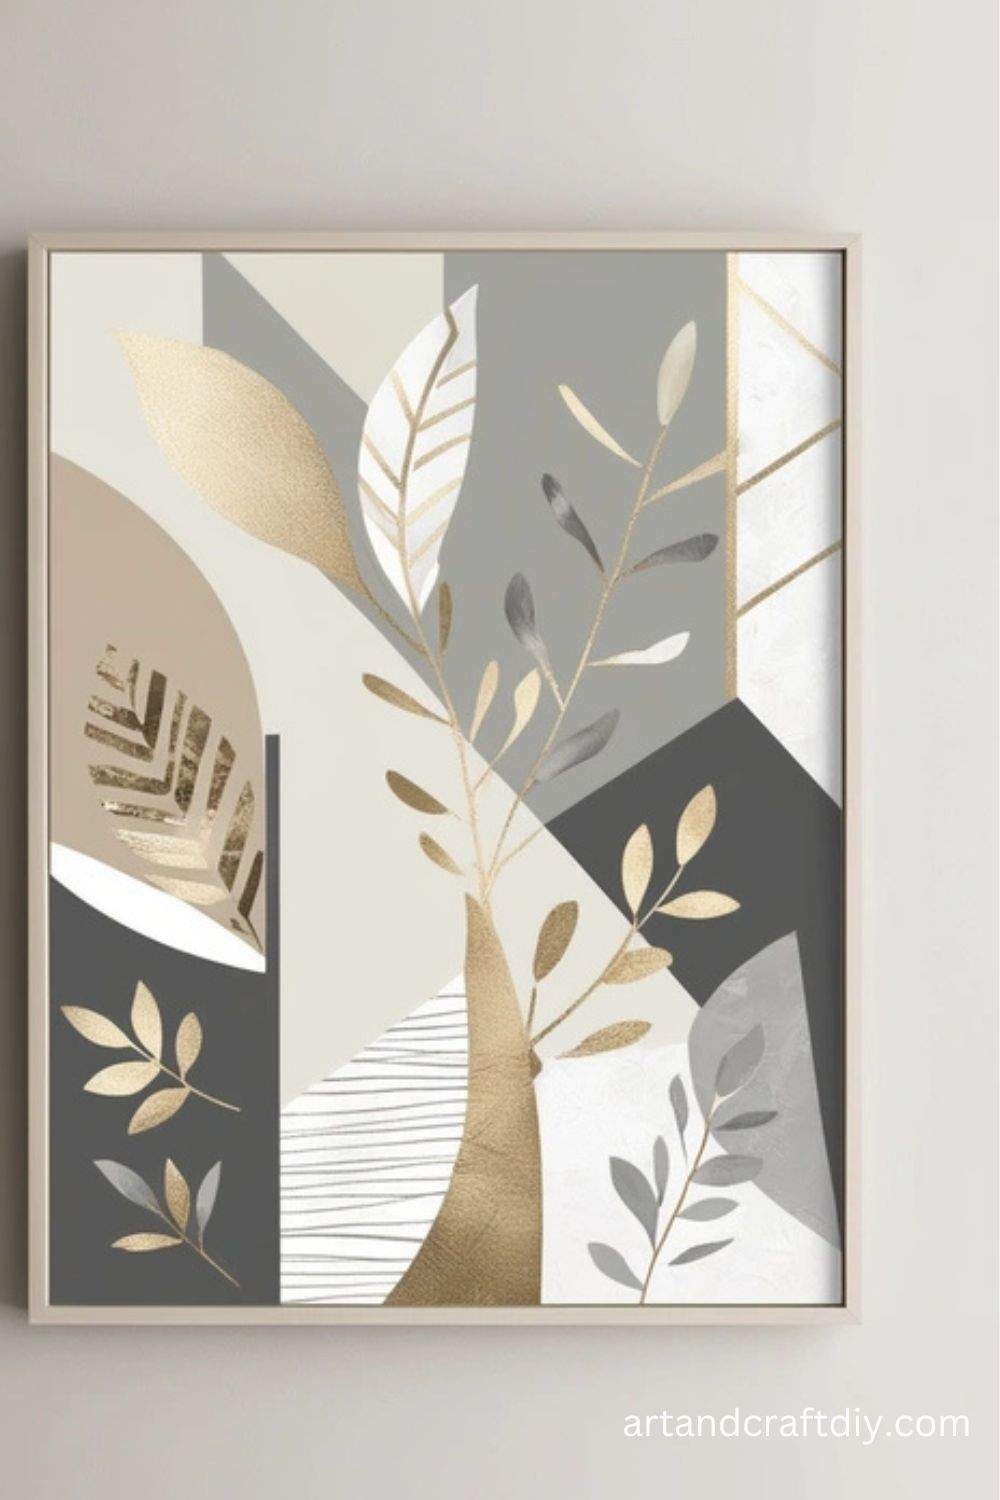
Decorative Wall Art
Handmade wall art is a trendy and timeless DIY project that appeals to people looking to decorate their homes. It can include anything from painted canvases to embroidery hoops, making it versatile and marketable.
Materials Used
- Canvas or wood panel
- Paints, markers, or embroidery thread
- Brushes or embroidery needles
Steps
- Prepare the surface: Paint or prime your canvas or wood panel.
- Create your design: Sketch the design onto the surface, then paint or embroider.
- Add finishing touches: Use details like gold leaf, beads, or text for a personalized touch.
- Let it dry: Allow the paint or thread to set and dry before handling.
- Package and sell: Frame the art or package it in a protective sleeve for customers.
Customized Keychains
Custom keychains are a small, affordable item that is always in demand. They make great gifts and souvenirs, and they can be personalized with names, initials, or designs. Keychains are versatile and can be made from various materials like wood, resin, or leather.
Materials Used
- Keychain blanks (wood, acrylic, resin, or leather)
- Paint, markers, or vinyl
- Key rings
- Glue
- Jump rings or connectors
Steps
- Design your keychain: Plan out the design, whether it’s a name, graphic, or shape.
- Prepare the base: Cut your keychain blank to size, or purchase pre-made keychain bases.
- Decorate: Paint, carve, or apply vinyl to the keychain blank. If using resin, pour the resin into molds and allow it to cure.
- Add the keyring: Once your design is dry or set, attach a jump ring or connector to the keychain base.
- Let it cure: If using resin, let it cure completely.
- Package and sell: Place the keychain in small bags or boxes and prepare for sale.
Decorative Coasters
Decorative coasters are a functional and stylish item that people love to use at home or as gifts. They can be made from wood, cork, or stone and can be customized with intricate designs, monograms, or inspirational quotes.
Materials Used
- Cork, wood, or stone coasters
- Paint, markers, or vinyl
- Resin (optional for a glossy finish)
- Mod Podge or sealant
Steps
- Prepare the surface: Sand down the coasters if they are rough.
- Design your coaster: Create a design using paint, markers, or vinyl. You can also decoupage or add photographs.
- Seal the coaster: Once the design is dry, seal the coaster with Mod Podge or a resin finish for protection.
- Add a backing (optional): If desired, add a felt or cork backing to protect furniture.
- Package and sell: Group the coasters in sets of four and package them with care.
Hand-Painted Plant Pots
Hand-painted plant pots are a popular home decor item. People love to personalize their plant pots with unique designs to match their home interiors. They can be sold individually or in sets, making them perfect for gardeners and home decorators.
Materials Used
- Clay or terracotta pots
- Paint (acrylic or ceramic paint)
- Paintbrushes
- Sealant
Steps
- Clean the pots: Make sure the pots are free of dirt and dust.
- Design the pot: Use acrylic or ceramic paint to decorate the pot with your desired pattern or design.
- Let it dry: Allow the painted pots to dry completely.
- Seal the pot: Apply a clear acrylic sealant to protect the design and make the pot waterproof.
- Package and sell: Sell the pots individually or in sets for a better deal.
Hand-Stamped Cards
Hand-stamped cards are a great DIY craft to sell for people looking for personalized greetings or occasion cards. They can be tailored for birthdays, weddings, or thank-you notes, and the hand-stamped elements add a unique touch.
Materials Used
- Blank cards
- Rubber stamps
- Ink pads
- Embellishments (ribbons, sequins, etc.)
- Markers (optional)
Steps
- Prepare the cards: Start with blank cards or pre-folded cardstock.
- Stamp the design: Use rubber stamps and ink pads to create the design on the card’s surface.
- Add embellishments: Once the stamping is done, you can add ribbons, sequins, or other decorative elements.
- Let it dry: Allow the ink to dry before handling or packaging.
- Package and sell: Bundle cards in sets of 5-10 or sell individually.
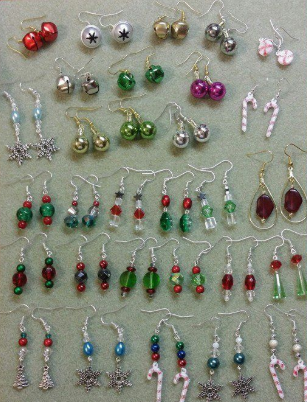
Beaded Bracelets
Beaded bracelets are another customizable jewelry item DIY craft to sell and can be made with various beads, including gemstones, glass beads, or wood. They are simple to create, making them a perfect item to sell at craft fairs or online.
Materials Used
- Beads (glass, gemstone, or wood)
- Stretch cord or jewelry wire
- Jewelry clasps (optional)
- Scissors
- Bead stopper (optional)
Steps
- Measure the wrist: Use a measuring tape to determine the length of the bracelet.
- String the beads: Start stringing beads onto the cord or wire in your desired pattern.
- Secure the ends: Tie knots at the ends of the bracelet, ensuring it’s tight and secure.
- Finish the bracelet: If using wire, add a clasp. If using stretch cord, tie the ends securely and trim excess cord.
- Package and sell: Package the bracelets in small bags or boxes for easy sale.
Painted Rocks
Painted rocks are a fun and relaxing DIY craft to sell as home decor, pet rocks, or inspirational gifts. They can feature positive messages, cute designs, or even small landscapes.
Materials Used
- Smooth rocks
- Acrylic paint
- Paintbrushes
- Sealant
Steps
- Clean the rocks: Wash and dry the rocks thoroughly before painting.
- Sketch the design: Lightly sketch your design on the rock with a pencil.
- Paint the rock: Use acrylic paint to fill in the design. Add layers if needed.
- Let it dry: Allow the paint to dry before handling or adding additional details.
- Seal the rock: Apply a clear acrylic sealant to protect the design.
- Package and sell: Group the rocks into sets or sell individually.
Leather Wallets
Leather wallets are a practical, elegant item that many people love to purchase. By creating your own handmade leather wallets, you can tap into the market of custom accessories that are both stylish and functional.
Materials Used
- Leather (vegetable-tanned or scrap leather)
- Leather dye
- Leather stitching thread
- Needles
- Scissors
Steps
- Cut the leather: Cut the leather into the desired shape for the wallet, ensuring you have sections for pockets and card slots.
- Dye the leather: If desired, apply a leather dye to color the material.
- Stitch the pieces: Use a leather needle and stitching thread to sew the pieces of the wallet together.
- Finish the edges: Burnish the edges of the leather to make them smooth and professional-looking.
- Package and sell: Package the wallet neatly, either with a simple box or wrapping.
Wooden Signs
Wooden signs are a charming DIY Crafts To Sell that can be customized for different occasions. You can make decorative signs for homes, weddings, or businesses, adding a personal touch with painted words or images.
Materials Used
- Wooden boards (plywood, MDF, or reclaimed wood)
- Paint or wood stain
- Stencils or hand-drawn designs
- Brushes
Steps
- Prepare the wood: Sand the surface of the wood to ensure smoothness.
- Design the sign: Sketch or stencil your design onto the wood.
- Paint the sign: Use acrylic paint or wood stain to complete the design.
- Seal the sign: Apply a sealant to protect the paint and preserve the design.
- Package and sell: Sell the signs either on their own or as part of a themed collection.
Upcycled Furniture
Upcycling old furniture into new, functional pieces is an eco-friendly craft that can be quite profitable. By painting, reupholstering, or adding unique finishes, you can transform old items into beautiful, one-of-a-kind pieces for sale.
Materials Used
- Old furniture (chairs, tables, etc.)
- Paint, primer, or stain
- Upholstery fabric (optional)
- Tools for sanding, scraping, or drilling
Steps
- Select the furniture: Choose an old piece of furniture that has potential.
- Prep the surface: Sand, scrape, and clean the furniture to prepare it for refinishing.
- Paint or stain: Apply paint or stain in your chosen color.
- Reupholster (optional): If reupholstering, remove the old fabric and replace it with new fabric.
- Seal and finish: Apply a protective finish or wax to preserve the look.
- Package and sell: Offer the upcycled furniture for sale locally or online.
Embroidered Patches
Embroidered patches are a trendy and customizable item DIY Crafts To Sell and can be attached to jackets, bags, hats, and more. These are easy to make and can feature unique designs, logos, or quotes.
Materials Used
- Embroidery thread
- Fabric or felt
- Needle
- Iron-on adhesive (optional)
Steps
- Design the patch: Sketch out your design for the patch, either freehand or using software.
- Prepare the fabric: Cut a piece of fabric or felt for the patch base.
- Embroider the design: Use embroidery thread to stitch the design onto the fabric.
- Apply adhesive (optional): If you want the patch to be iron-on, apply adhesive to the back.
- Cut the patch: Once the embroidery is complete, cut the patch into the desired shape.
- Package and sell: Package the patches individually or in sets, and sell them to customers.
Resin Art
Resin art is DIY Crafts To Sell and has become a popular trend for creating both functional and decorative items. You can make coasters, trays, jewelry, and more with resin, and it’s easy to customize with pigments, glitter, or embedded objects.
Materials Used
- Resin
- Resin hardener
- Silicone molds
- Pigments or glitter (optional)
- Stir sticks
Steps
- Prepare the mold: Choose a silicone mold for your project (coaster, tray, etc.).
- Mix the resin: Follow the manufacturer’s instructions to mix the resin and hardener.
- Add color: Add pigments or glitter to the resin mixture for a unique effect.
- Pour the resin: Carefully pour the resin into the mold.
- Let it cure: Allow the resin to set and cure according to the instructions.
- Finish the piece: Once cured, remove the item from the mold and finish any edges if needed.
- Package and sell: Package the resin art in protective packaging and offer it for sale.
Hand-Painted Furniture
Hand-painted furniture DIY Crafts To Sell and can transform old pieces into beautiful, personalized items for home décor. Custom-painted furniture is highly sought after for its unique, one-of-a-kind appeal, and it allows for artistic expression. Whether you’re painting tables, chairs, or cabinets, hand-painted furniture can add charm and character to any room.
Materials Used
- Wooden furniture pieces (tables, chairs, cabinets, etc.)
- Paint (chalk paint or acrylic)
- Paintbrushes
- Sandpaper
- Wax or varnish (optional)
Steps
- Prepare the furniture: Sand down the furniture to remove any rough patches or previous finishes.
- Prime the surface: Apply a primer coat to help the paint adhere better, especially if the furniture is dark or glossy.
- Paint the furniture: Apply your desired paint color in even strokes. Chalk paint is a popular choice for its matte finish and vintage look.
- Let it dry: Allow the first coat to dry completely before applying a second coat if necessary.
- Distress (optional): For a rustic, vintage look, lightly distress the edges with sandpaper after the paint dries.
- Seal the paint: Apply a wax or varnish for protection and to give the piece a polished look.
- Package and sell: Offer the hand-painted furniture for sale either locally or through online platforms.
Handmade Pillows
Handmade pillows are a great DIY Crafts To Sell and to create custom home décor that matches personal styles. By using unique fabrics and patterns, you can create pillows that make living spaces feel cozy and inviting. These can be sold in various sizes and designs for different types of customers.
Materials Used
- Fabric (cotton, linen, velvet, etc.)
- Pillow inserts
- Sewing machine or needle and thread
- Scissors
- Zippers or buttons (optional)
Steps
- Select your fabric: Choose a fabric that suits your style, whether it’s a vibrant print or a neutral tone.
- Cut the fabric: Measure and cut the fabric to the size of your desired pillow.
- Sew the pillow: With right sides facing each other, sew the edges of the fabric together, leaving an opening to insert the pillow.
- Insert the pillow: Place a pillow insert into the sewn cover. You can use a pre-made insert or stuff the pillow with filling.
- Close the opening: Hand-stitch or use a sewing machine to close the opening.
- Package and sell: Fold the pillows neatly and package them for sale.
Crocheted Items
Crocheting is a classic DIY Crafts To Sell and it allows you to make a variety of products such as scarves, blankets, hats, and more. The intricate designs and personalized touch make crocheted items highly desirable and sell well at craft fairs, online stores, and markets.
Materials Used
- Crochet hook
- Yarn (acrylic, cotton, or wool)
- Scissors
- Patterns (optional)
Steps
- Select your yarn: Choose the yarn based on the item you are making (e.g., thicker yarn for blankets or lighter yarn for scarves).
- Start crocheting: Follow a pattern or create your own design by chaining stitches and working through loops to create the desired piece.
- Work the project: Continue crocheting until you reach the size or design you want.
- Finish the piece: Tie off any loose ends and weave them into the project for a clean look.
- Package and sell: Fold the finished items neatly and package them for sale.
Handmade Bath Bombs
Bath bombs are a luxurious DIY Crafts To Sell and addition to any bath, and handmade bath bombs are a perfect product to sell. These colorful, fizzy bath products can be infused with essential oils and dried flowers to create a relaxing experience.
Materials Used
- Baking soda
- Citric acid
- Epsom salt
- Cornstarch
- Essential oils
- Food coloring
- Bath bomb molds
Steps
- Mix dry ingredients: In a large bowl, mix the baking soda, citric acid, Epsom salt, and cornstarch.
- Add wet ingredients: Slowly add essential oils and food coloring, mixing thoroughly.
- Spray with water: Lightly spray the mixture with water, just enough to make it hold together when squeezed.
- Mold the bath bombs: Pack the mixture tightly into bath bomb molds and let them sit for 24-48 hours to dry.
- Package and sell: Once dried, remove the bath bombs from the molds and package them in attractive boxes or bags for sale.
Stained Glass Suncatchers
Stained glass suncatchers are beautiful decorative DIY Crafts To Sell and they add color and charm to any window. They are popular as gifts or home décor items and can be made in a variety of shapes and designs.
Materials Used
- Stained glass sheets
- Glass cutter
- Lead came or copper foil
- Soldering iron
- Solder
- Hanging rings
Steps
- Design the suncatcher: Sketch your design on paper and transfer it to the glass.
- Cut the glass: Using a glass cutter, carefully cut out the pieces for your design.
- Wrap the edges: Use lead came or copper foil to wrap the edges of each glass piece.
- Solder the pieces: Use a soldering iron to melt solder over the seams where the glass pieces meet.
- Attach a hanging ring: Solder a ring to the top of the suncatcher for hanging.
- Package and sell: Clean the suncatcher and package it in a way that protects the delicate glass for sale.
Leather Keychains
Leather keychains are durable, stylish, and practical accessories that make excellent gifts or personal items. They can be easily customized with names, initials, or symbols and sold as personalized accessories.
Materials Used
- Leather strips or leather sheets
- Keychain rings
- Leather dye
- Rivets or snaps (optional)
- Stamps for embossing
Steps
- Cut the leather: Cut the leather into the desired shape for your keychain.
- Design the keychain: Use stamps or embossing tools to personalize the leather with initials, symbols, or designs.
- Dye the leather: Apply leather dye to the surface for a custom color.
- Attach the keychain ring: Use rivets or snaps to secure the keychain ring to the leather piece.
- Package and sell: Package the leather keychains in small bags or boxes for sale.
Upcycled Jewelry
Upcycled jewelry is made by repurposing old or unused materials into new, creative pieces. This is a great way to reduce waste and create unique, environmentally friendly products. Materials like old buttons, broken jewelry, and vintage items can all be transformed into fashionable accessories.
Materials Used
- Old jewelry parts (broken necklaces, buttons, etc.)
- Jewelry pliers
- Jump rings
- Earring hooks or necklace chains
Steps
- Collect materials: Gather old jewelry parts like broken necklaces, buttons, or pendants.
- Disassemble the jewelry: Use jewelry pliers to carefully remove parts from the old jewelry pieces.
- Design new pieces: Arrange the parts into new designs, such as earrings, necklaces, or bracelets.
- Assemble the jewelry: Use jump rings to connect pieces and attach earring hooks or necklace chains.
- Package and sell: Package the upcycled jewelry in small bags or boxes and sell them.
Paper Flowers
Paper flowers are a unique, long-lasting alternative to fresh flowers and make excellent gifts, decorations, or event centerpieces. They can be made from a variety of paper types, such as crepe paper, cardstock, or tissue paper.
Materials Used
- Colored paper (crepe paper, cardstock, or tissue paper)
- Scissors
- Floral wire
- Glue gun
Steps
- Cut the paper: Cut the paper into petals or shapes according to the type of flower you’re making.
- Shape the petals: Use your scissors or hands to curl, fold, or shape the paper petals.
- Assemble the flower: Glue the petals together around a floral wire stem to form the flower.
- Add leaves and details: Cut out and attach leaves, stems, or other details for realism.
- Package and sell: Bundle the paper flowers in sets or sell individually as a unique bouquet or decoration.
Felt Crafts
Felt is a versatile material for creating a wide range of DIY craft to sell, including toys, keychains, and home décor items. Felt crafts are easy to make and can be customized with various colors, patterns, and embellishments.
Materials Used
- Felt sheets
- Scissors
- Needle and thread
- Embellishments (buttons, ribbons, etc.)
Steps
- Cut the felt: Cut the felt into the desired shapes or patterns.
- Sew the pieces: Use a needle and thread to stitch the pieces together, either by hand or using a sewing machine.
- Add embellishments: Add buttons, ribbons, or other embellishments to personalize the piece.
- Finish the item: Complete the craft by stitching up any remaining openings and adding finishing touches.
- Package and sell: Package the felt crafts for sale, either individually or in sets.
Upcycled Candle Holders
Upcycling old items into candle holders is a fun and eco-friendly craft. You can transform objects like glass jars, wooden boxes, or tin cans into stylish, personalized candle holders.
Materials Used
- Old jars, cans, or other containers
- Paint, glue, or decorative paper
- Candles (tea lights or pillar candles)
- Sandpaper (optional)
Steps
- Prepare the container: Clean the container and remove any labels or stickers.
- Decorate the container: Paint or cover the container with decorative paper, fabric, or other materials.
- Add candles: Place candles into the containers, ensuring they fit securely.
- Seal the decoration: Apply a clear coat of sealant to protect the decoration and make it more durable.
- Package and sell: Package the candle holders carefully for sale.
Tips for Growing Your Craft Business
Growing a craft business requires a balance of creativity, strategy, and hard work. As you develop your craft and build a customer base, there are several key factors to consider to scale your business successfully. Here are some tips for growing your craft business while maintaining quality, expanding your offerings, collaborating with others, and staying on top of your finances:
1. Scaling Production Without Sacrificing Quality
- Streamline your process: Identify tasks that can be automated or simplified. This may include batch production, using tools that increase efficiency, or outsourcing repetitive tasks.
- Maintain consistency: Develop clear quality control standards to ensure every product meets your high expectations, even as production volume increases.
- Invest in better tools and materials: While it’s tempting to keep costs low, upgrading tools and sourcing better-quality materials can help you maintain quality as you scale.
- Outsource where necessary: If you’re at capacity, consider outsourcing certain aspects of production to trusted professionals who can help without compromising your standards.
2. Expanding Your Product Range
- Stay true to your brand: When expanding, ensure new products align with your brand’s values and aesthetics to keep your identity clear and attractive to your audience.
- Research market demand: Look for gaps in the market or areas where your current customers may be seeking more variety. Conduct surveys or engage with customers on social media to understand their needs.
- Test small batches: Before committing to a full-scale launch, test new products with a smaller audience to gauge interest and refine them based on feedback.
- Diversify, but don’t overextend: Expanding too quickly can stretch your resources. Focus on quality and carefully select new products that complement your existing offerings.
3. Collaborating with Other Creators or Businesses
- Identify complementary partners: Collaborate with other businesses or artists who share similar target audiences but don’t compete with your product. This can help you reach new customers and build mutually beneficial relationships.
- Joint marketing efforts: Cross-promote each other’s work through social media, events, or newsletters. Pooling resources can help increase exposure for both parties.
- Co-create new products: Consider working together to design limited-edition products or bundles, creating a unique offering that excites your audience.
- Attend events or markets together: Partnering at craft fairs or online events can increase your visibility and offer customers a diverse shopping experience.
FAQ
What are the best DIY crafts to sell?
The best DIY crafts to sell depend on your skills and interests, but popular items include handmade jewelry, candles, home decor, knitted or crocheted items, custom clothing, wooden signs, and personalized gifts. Research market trends and target audiences to determine which crafts are most likely to sell well.
How can I price my DIY crafts for sale?
Pricing your DIY crafts involves considering the cost of materials, the time spent creating each item, and any overhead costs (e.g., shipping, packaging). It’s important to research similar products on the market to ensure your pricing is competitive, while also accounting for your profit margin.
Where can I sell my DIY crafts?
You can sell your DIY crafts on online marketplaces like Etsy, eBay, or Amazon Handmade. Alternatively, you can sell them at local craft fairs, pop-up shops, or through your own website or social media accounts. Setting up an online store or using platforms designed for handmade goods is a popular way to reach a broader audience.
Do I need a business license to sell DIY crafts?
Depending on your location, you may need a business license or permit to sell DIY crafts. In many cases, selling online or at craft fairs does not require one, but it’s important to check your local regulations to ensure you’re compliant with any tax or business requirements.

Hi, I’m Victoria, an art and craft teacher at Newark City Schools, where I have the joy of working with middle school students to help them explore their creativity and develop their artistic talents. I believe that art is a powerful way for students to express themselves, and I strive to make every lesson a fun, engaging, and inspiring experience.
I created this website to share the art and craft projects, techniques, and resources that I use in my classroom, hoping to inspire both educators and young artists alike. Whether you’re a teacher looking for new ideas or a student eager to try something new, I’m excited to provide creative tools and projects that anyone can enjoy.
When I’m not in the classroom, I love experimenting with different art forms and learning new crafting techniques. My goal is to help others discover the joy of making things with their hands, and I hope my website serves as a space for everyone to explore their creative potential.