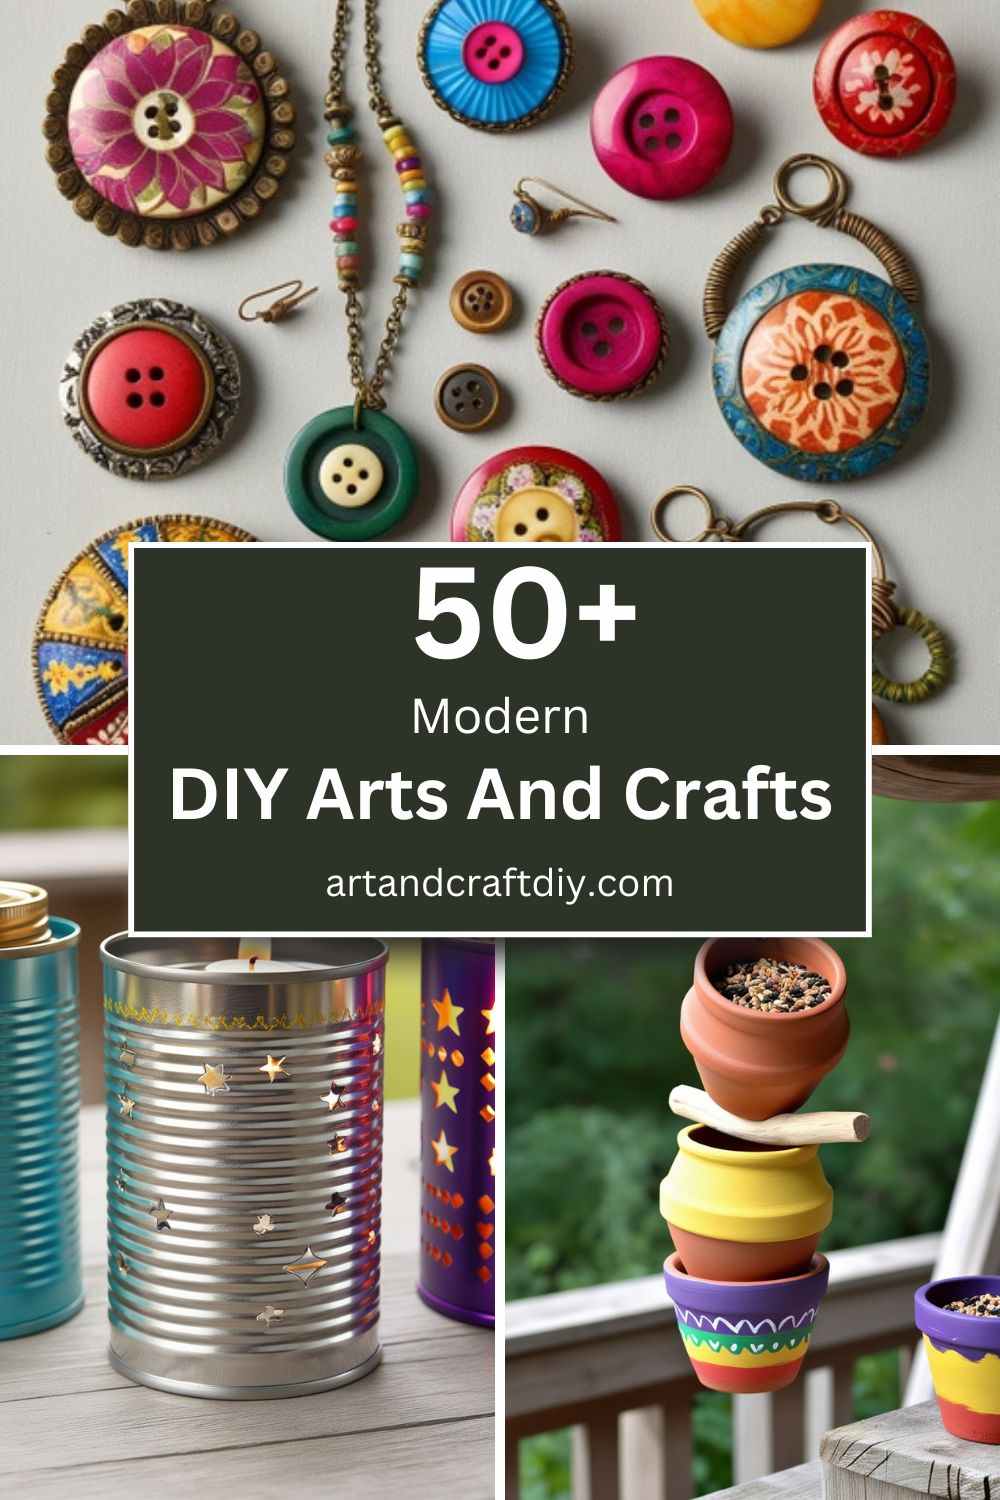
You know, the first time I tried a DIY arts and crafts project, it was honestly a bit of a disaster. I thought making a “simple” photo frame would be easy… turns out, hot glue has a mind of its own (and yes, I burnt my fingers more than once). But here’s the thing—I ended up loving the process anyway. There’s something oddly comforting about sitting down with a mess of paper, glue, and random supplies, even if the end result isn’t Pinterest-perfect. Maybe you’ve felt that too? That little spark of joy when you actually create something with your own hands? That’s what keeps me coming back. In this post, I want to share not just fun ideas, but also little tips to make your DIY arts and crafts projects easier and way more enjoyable. So, grab your coffee (or tea), and let’s dive in together.
DIY Arts and Crafts
DIY Arts and Crafts refer to the practice of creating decorative, functional, or artistic items by hand, using a variety of materials and techniques.
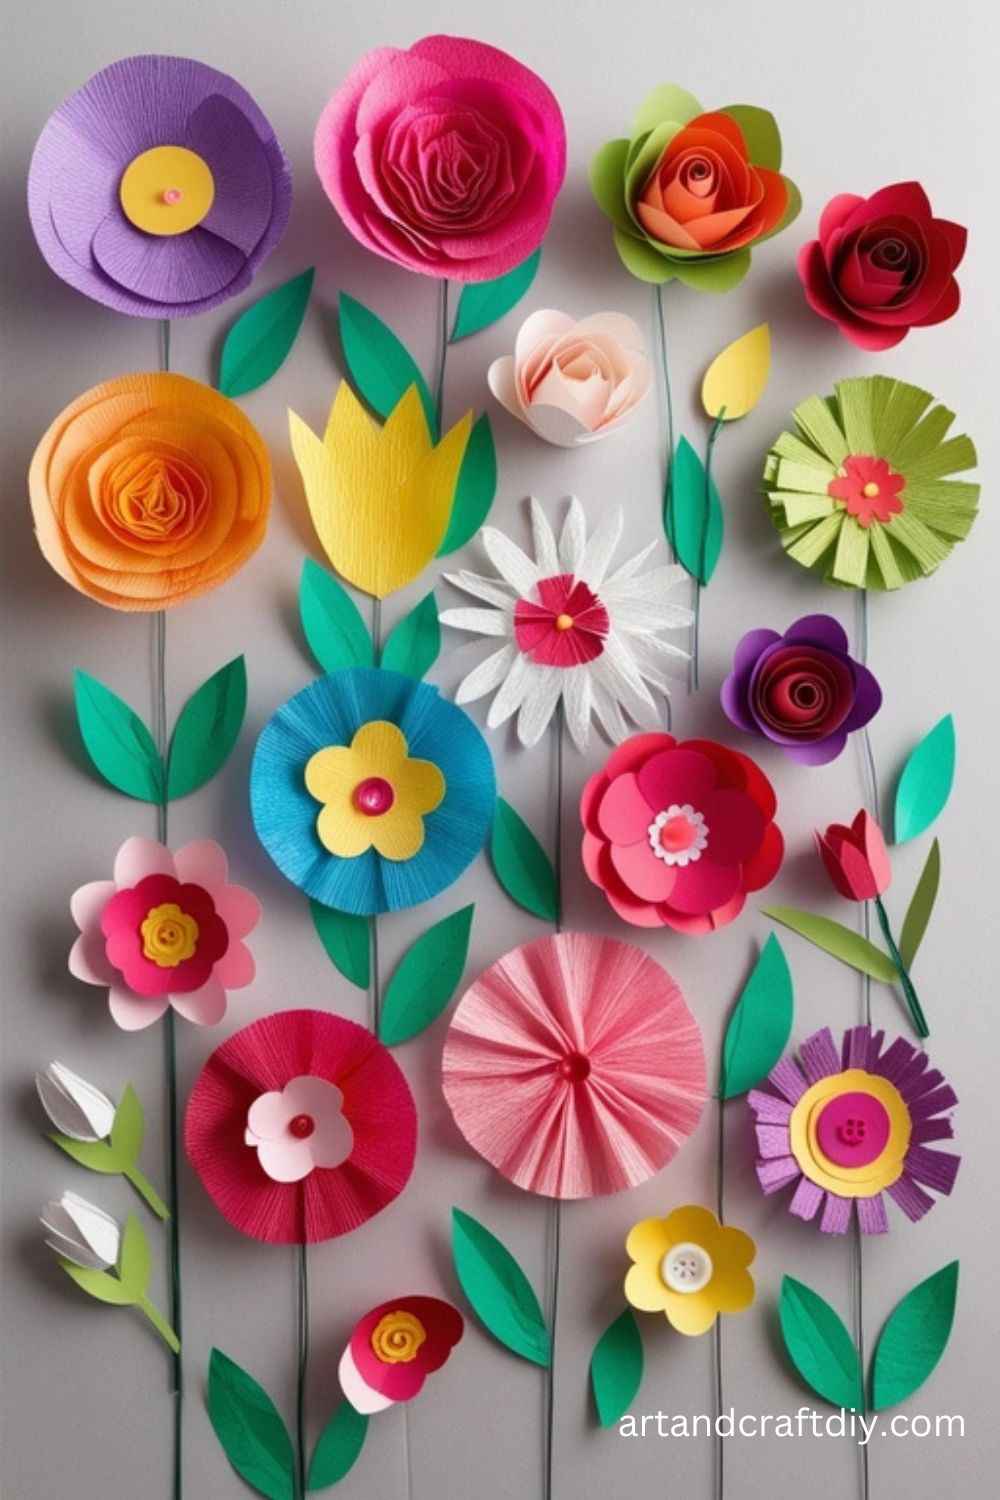
Paper Flowers
I’ve always had a soft spot for paper flowers because they bring such instant cheer without needing sunlight or water. Honestly, the first time I made one, it looked more like a crumpled ball than a rose, but over time I figured out that the trick is in layering and shaping. I usually grab old colored papers or even gift wraps lying around, cut them into petals, and then glue them one by one around a small rolled piece. Sometimes I even add a bit of green paper for leaves—it makes the whole thing look surprisingly real.
To be fair, paper flowers have saved me more than once. I remember decorating for a last-minute birthday party, and instead of stressing about real flowers, I made a whole bunch of these. They turned out so pretty that people actually asked me where I bought them. In my opinion, that’s the beauty of this craft—it’s simple, forgiving, and always looks thoughtful.
Clay Pot Bird Feeder
Now this one’s a project I adore because it connects crafting with a bit of nature. I took an old clay pot once, flipped it upside down, added a saucer on top, and suddenly—bam—a bird feeder! It was such a satisfying moment seeing sparrows nibble from something I made with my own hands. If you’ve got a spare pot, some rope, and a bit of paint, you’re basically good to go. I love painting mine in bright, bold colors so it adds a splash of charm to the garden.
Honestly, the best part is watching the birds come around every morning. I’ve found that placing the feeder near a quiet corner works best, so the birds feel safe. One time, I even spotted a tiny squirrel stealing seeds, and instead of being annoyed, I couldn’t stop laughing. These little moments make the clay pot feeder one of my favorite crafts—it feels alive.
Recycled Magazine Coasters
Recycled magazine coasters are my go-to craft when I want something fun but practical. I started making them one rainy afternoon when I had a stack of old magazines and nothing much to do. All I did was cut strips, roll them tightly, and glue them into little spirals. At first, they looked a bit wobbly, but once I layered on some varnish, they became sturdy and surprisingly stylish. Plus, I love that no two coasters ever look the same—the colors and prints always mix differently.
In my opinion, these coasters are such a conversation starter. I once gifted a set to a friend, and she kept showing them off whenever guests came over. To be fair, it’s such a budget-friendly craft too—literally free if you already have magazines lying around. And honestly, there’s something so satisfying about turning what would have been trash into something useful. It feels clever, creative, and eco-friendly all at once.
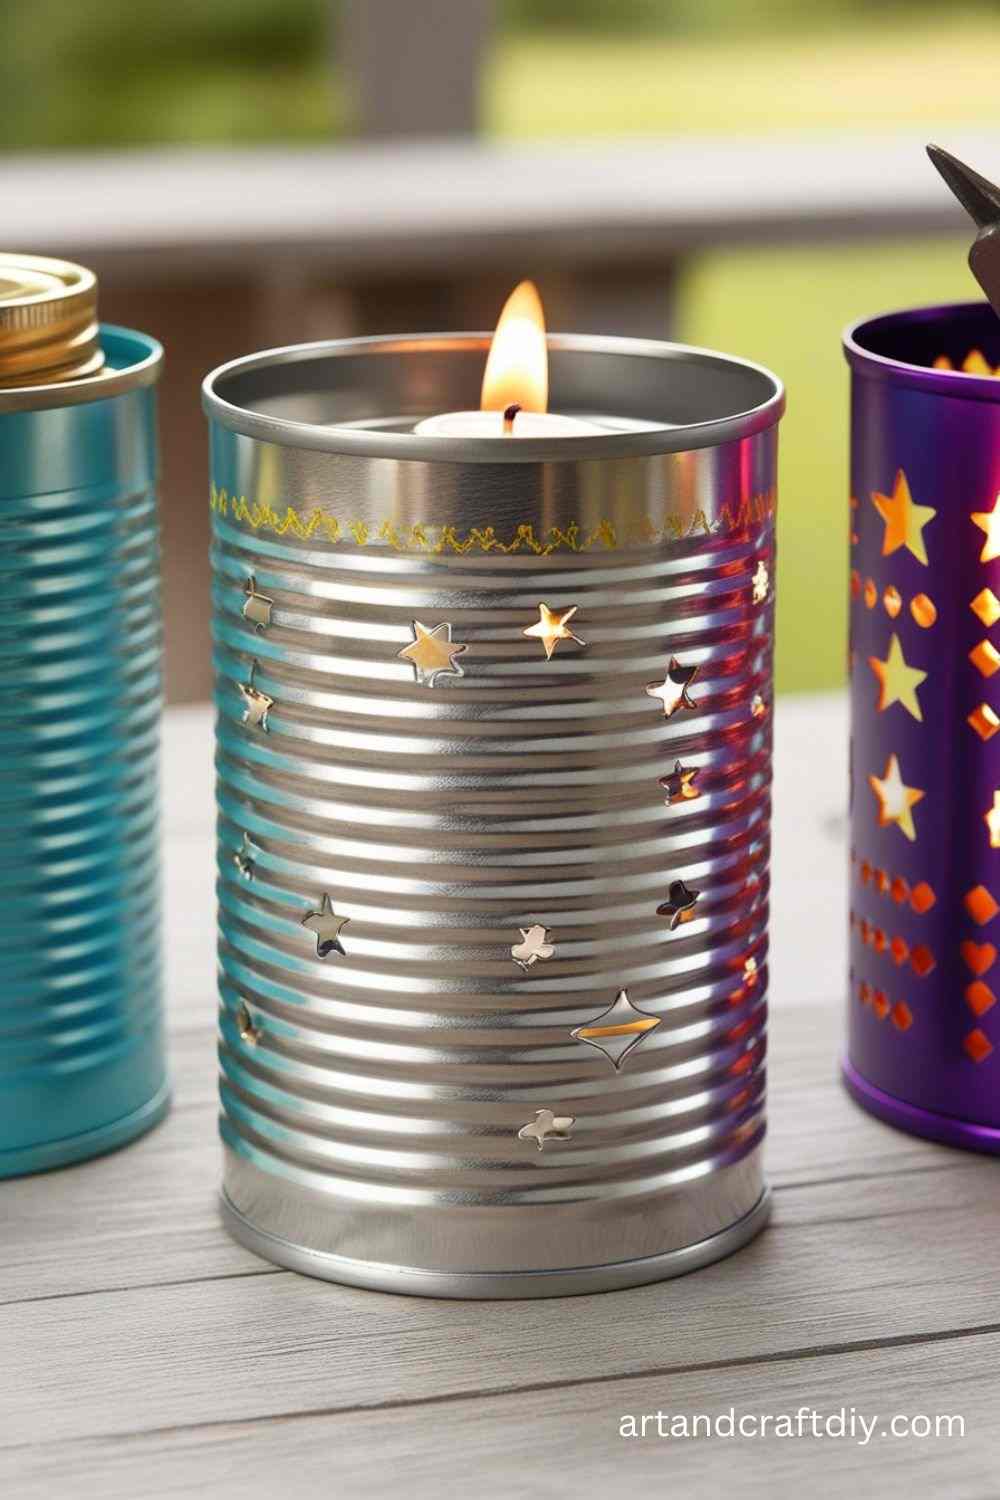
Tin Can Lanterns
These tin can lanterns make a beautiful addition to your home décor or outdoor garden, especially for evening gatherings.
Materials Used:
Empty tin cans
Hammer and nail
Tea light candles
Paint (optional)
Steps:
Clean and dry the tin can thoroughly.
Use a hammer and nail to create small holes in the can, forming a design or pattern of your choice.
If you want, paint the outside of the can to add color before adding the holes.
Place a small tea light candle inside the tin can and light it. The holes will let the light shine through, creating a lantern effect.
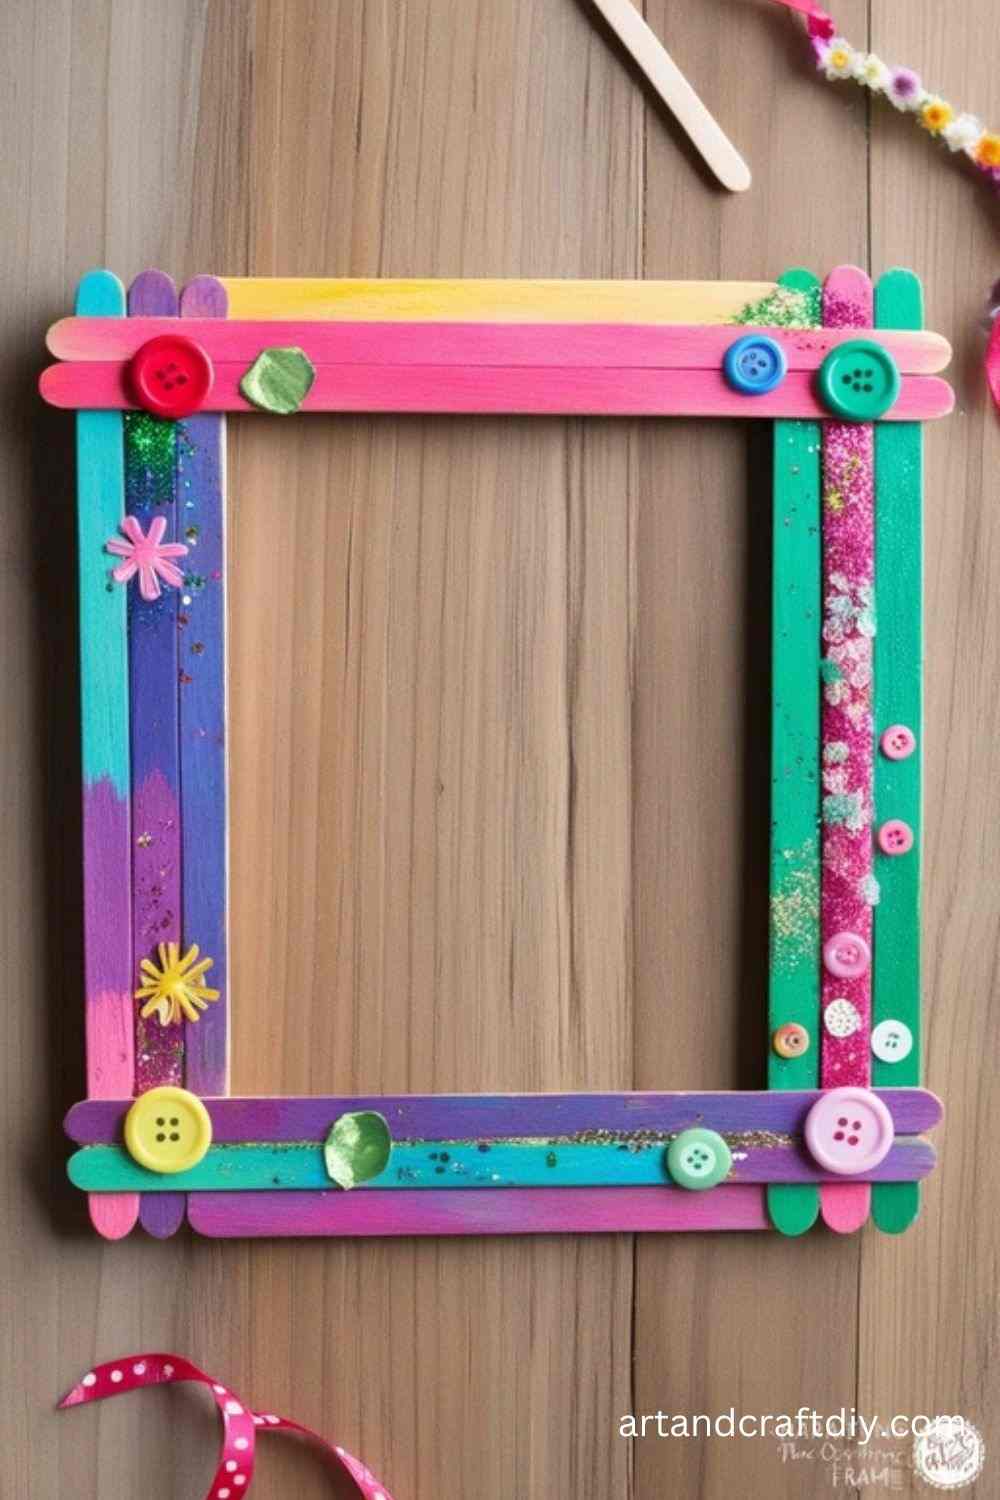
Popsicle Stick Photo Frame
Creating your own photo frame from popsicle sticks is a fun and easy craft project that can be customized to fit your style.
Materials Used:
Popsicle sticks
Hot glue gun or glue
Paint or markers
A photo to frame
Decorative items (ribbons, buttons, etc.)
Steps:
Lay out five popsicle sticks to form a rectangular shape. Glue them together at the edges.
Cut additional popsicle sticks to form the sides of the frame.
Once the basic frame is glued, paint or decorate it with markers, buttons, or any other embellishments you prefer.
Once the frame is dry, attach your photo to the back of the frame using glue or tape.
You can also create a stand by gluing a popsicle stick at the back in an “L” shape.
Paper Mâché Bowls
Paper mâché bowls are versatile and can be used for storage or as a decorative piece for your home.
Materials Used:
Newspaper or tissue paper
Flour and water (for paste)
Balloon
Paint (optional)
Steps:
Inflate a balloon to your desired size to form the base of your bowl.
Tear newspaper or tissue paper into strips.
Mix flour and water to create a paste. Dip the paper strips into the paste and apply them over the balloon, layering until you have a thick coat.
Allow the paper mâché to dry completely (overnight is ideal).
Once dry, pop the balloon and remove it from the bowl.
Paint and decorate the bowl as desired.
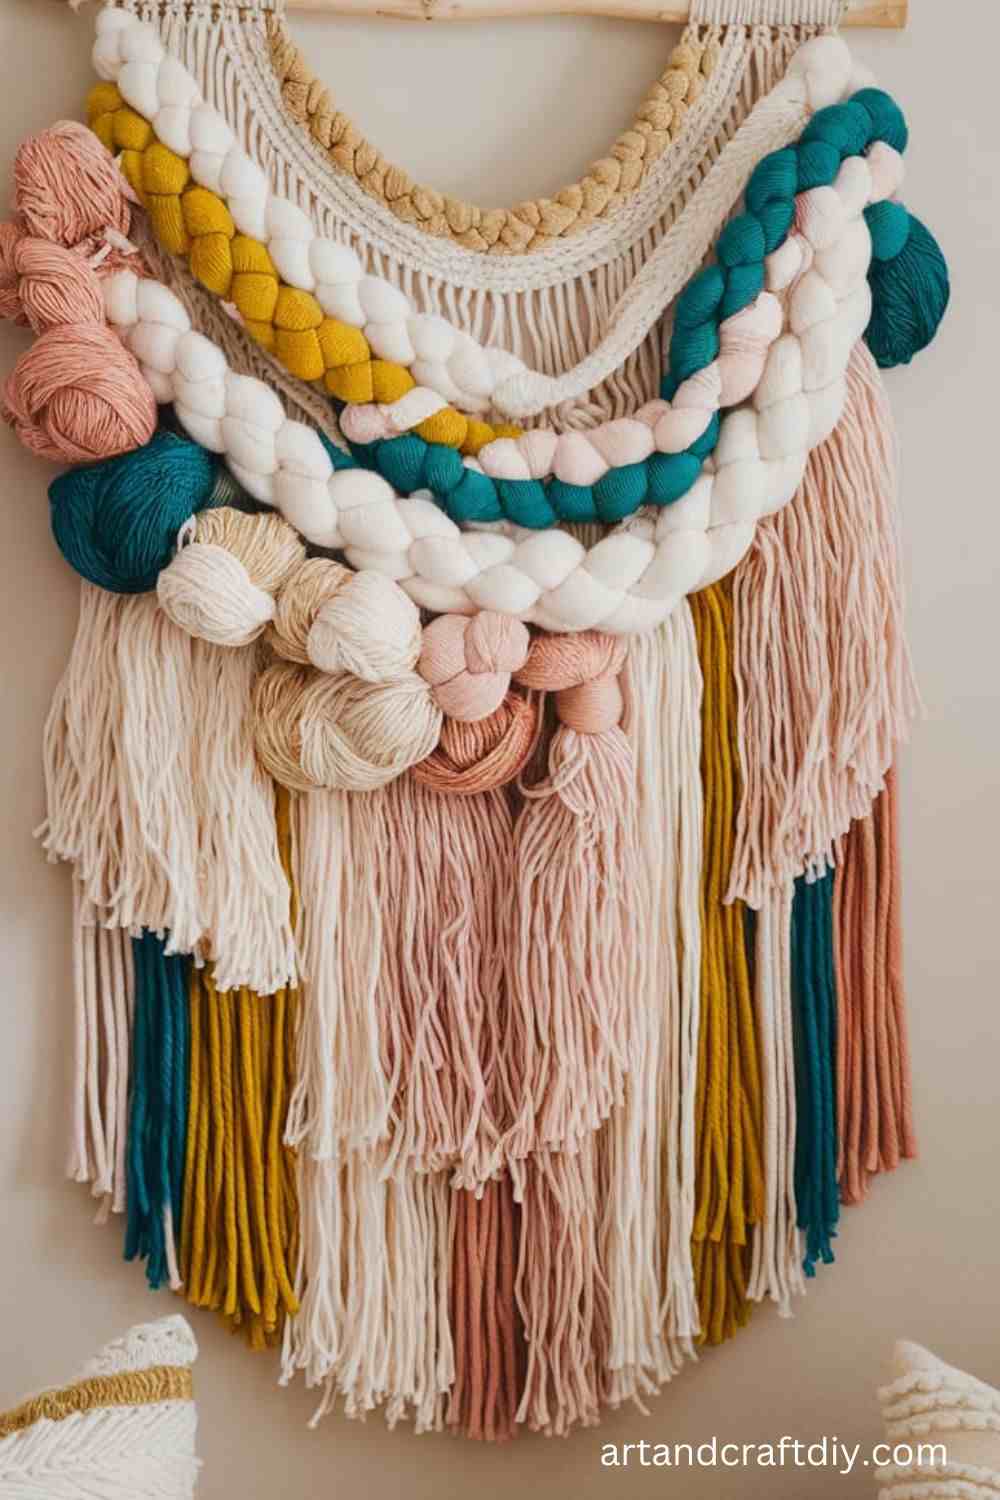
Yarn Wall Hanging
A yarn wall hanging can add a cozy and colorful vibe to any room. This craft is perfect for beginners and those looking for a quick, decorative project.
Materials Used:
Yarn in different colors
Wooden dowel or stick
Scissors
Steps:
Cut several strands of yarn to your desired length.
Tie the yarn to a wooden dowel using a simple knot, ensuring the strands hang evenly.
Continue tying additional strands of yarn to the dowel, layering colors and lengths to create a pattern or texture.
Once all yarn is tied, trim the ends evenly to create a neat, uniform look.
Hang your yarn wall hanging on the wall using string or hooks.
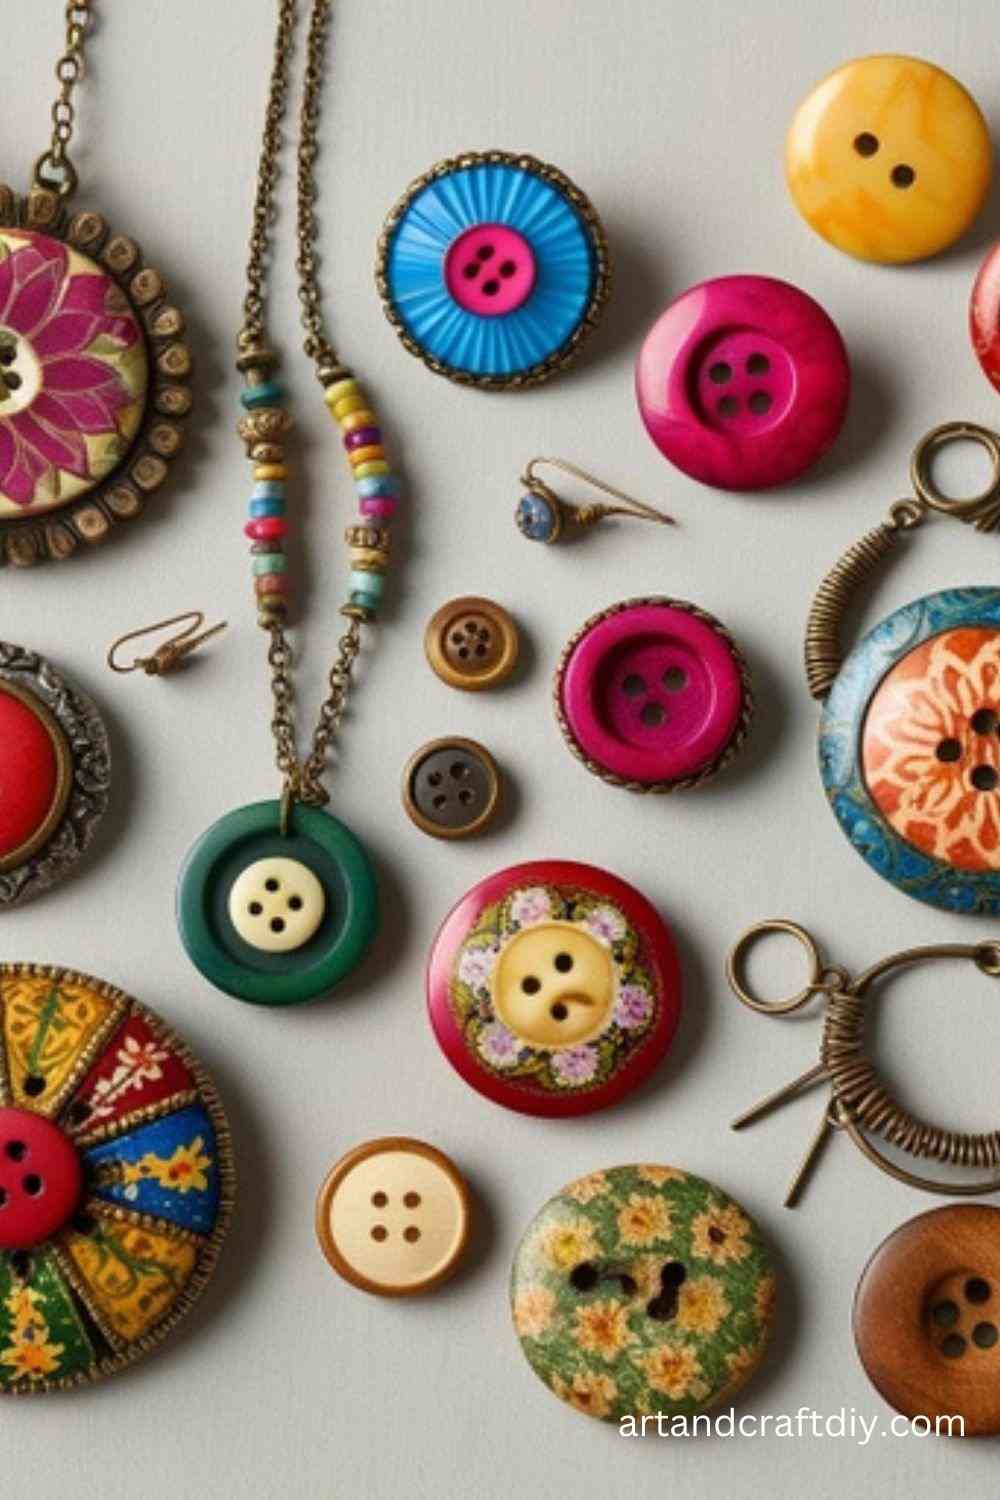
Button Jewelry
Button jewelry, including necklaces, bracelets, and earrings, is an eco-friendly craft using buttons that can give you unique, handmade accessories.
Materials Used:
Assorted buttons
Jewelry wire
Earring hooks or bracelet clasps
Needle and thread
Steps:
Choose buttons of various sizes and colors to create your desired design.
Thread the buttons onto the jewelry wire, layering them to form a necklace or bracelet.
Use needle and thread to attach smaller buttons to earring hooks for unique button earrings.
Secure the ends of the wire with clasps or loops as needed for bracelets and necklaces.
Fabric Scrap Bookmark
Using fabric scraps to create a bookmark is a quick and easy craft that can also serve as a lovely gift.
Materials Used:
Fabric scraps
Scissors
Ribbon or string
Glue or sewing machine
Steps:
Cut the fabric scraps into a rectangular shape, the size of a standard bookmark.
Fold the edges of the fabric to prevent fraying, then glue or sew them down.
Add a small piece of ribbon or string at the top for a decorative touch.
If desired, you can add embellishments like buttons, embroidery, or appliqué designs.
Upcycled T-Shirt Tote Bag
Transform an old t-shirt into a stylish and reusable tote bag with this easy DIY craft.
Materials Used:
Old t-shirt
Scissors
Needle and thread (optional)
Steps:
Lay the t-shirt flat and cut off the sleeves and neckline to create the bag’s opening.
Cut the bottom of the t-shirt to your desired bag size.
Turn the t-shirt inside out and sew the bottom together, leaving a small seam.
You can also use fabric glue if you don’t want to sew. Once the seams are secured, turn the t-shirt right-side out.
Your tote bag is now ready to use!
Salt Dough Ornaments
Salt dough ornaments are easy to make and perfect for gifts or holiday decorations.
Materials Used:
1 cup of flour
1/2 cup of salt
1/4 cup of water
Rolling pin
Cookie cutters
Paint (optional)
Steps:
Mix the flour, salt, and water in a bowl to form a dough.
Roll out the dough with a rolling pin to your desired thickness.
Use cookie cutters to shape the dough into ornaments.
Use a straw or toothpick to make a hole at the top of each ornament for hanging.
Bake the ornaments at 250°F (120°C) for about 2 hours until hard.
Once cooled, you can paint and decorate your ornaments.
Rock Painting
Rock painting is a simple yet creative way to turn everyday stones into little works of art, perfect for gift-giving or decoration.
Materials Used:
Smooth rocks
Acrylic paints
Brushes
Clear acrylic sealer
Steps:
Wash and dry the rocks thoroughly.
Paint the rocks with acrylic paints, creating any design or pattern you like.
Allow the paint to dry completely.
Optionally, add a layer of clear acrylic sealer to make the design more durable.
Embroidery Hoop Art
Embroidery hoop art is a lovely way to display handmade designs on fabric, creating beautiful and personalized wall art.
Materials Used:
Embroidery hoop
Fabric
Embroidery thread
Needle
Steps:
Place the fabric into the embroidery hoop and tighten it.
Use embroidery thread to create a design or pattern on the fabric.
Once you’ve completed the embroidery, trim any excess fabric and secure the edges to the back of the hoop.
Hang the hoop on the wall or display it as desired.
Macramé Plant Hangers
Macramé plant hangers are a trendy and functional way to display your plants, all while adding a touch of boho style to your space.
Materials Used:
Macramé cord
Scissors
Wooden ring (optional)
Steps:
Cut several lengths of macramé cord.
Fold the cords in half and attach them to the wooden ring (if using).
Begin knotting the cords together using various macramé knots to form a decorative hanger for your plant.
Once the hanger is complete, attach a pot and hang your plant.
Button Art
Button art is a creative and easy way to use up leftover buttons and create a decorative piece of art.
Materials Used:
Assorted buttons
Canvas or sturdy cardboard
Glue
Paint (optional)
Steps:
Start by sketching the design you want to create on the canvas or cardboard.
Begin gluing the buttons to the surface, filling in your design with different colored buttons.
Once dry, frame the artwork or hang it as-is on the wall.
Paper Plate Masks
Create fun, custom masks for kids or costumes using simple materials like paper plates and craft supplies.
Materials Used:
Paper plates
Scissors
Paint, markers, or crayons
String
Glue
Steps:
Cut out eye holes in the paper plate to fit your face.
Paint or decorate the mask with markers, paint, or crayons.
Once the decoration is complete, punch holes on either side of the mask and tie string through them.
Wear the mask and enjoy!
Pom Pom Garland
Pom pom garlands are a fun and colorful decoration for parties, birthdays, or just to brighten up your space.
Materials Used:
Yarn in various colors
Scissors
Needle and thread
Steps:
Make pom poms by wrapping yarn around your fingers, tying the center with a string, and cutting the loops.
Trim the pom poms to your desired shape and size.
Thread a needle with a long piece of string, and attach the pom poms to it, spacing them out evenly.
Hang the garland wherever you need some color!
Milk Carton Birdhouse
Transform an old milk carton into a birdhouse, creating a fun way to attract birds to your yard.
Materials Used:
Empty milk carton
Paint
Scissors
String
Steps:
Rinse and dry the milk carton thoroughly.
Cut out a small hole on the side of the carton for the birds to enter.
Decorate the birdhouse with paint or markers.
Punch a hole at the top of the carton and attach a string to hang it outside.
Fabric Scrap Pillow
Upcycle fabric scraps to create a unique, cozy pillow that adds character to any room.
Materials Used:
Fabric scraps
Needle and thread or sewing machine
Pillow stuffing
Steps:
Cut fabric scraps into squares or shapes.
Arrange the pieces in a patchwork pattern.
Sew the fabric pieces together to create one large piece.
Fold the fabric into a pillow shape, leaving one side open.
Stuff the pillow with stuffing and sew the final side closed.
Painted Rock Magnets
Create personalized magnets from painted rocks to add color to your refrigerator or magnetic boards.
Materials Used:
Small smooth rocks
Paint
Magnets
Hot glue gun
Steps:
Paint your rocks with unique designs, patterns, or even simple pictures.
Let the paint dry completely.
Glue a small magnet to the back of each rock.
Stick your new rock magnets to any magnetic surface.
Mason Jar Snow Globe
Turn a mason jar into a charming snow globe, a perfect holiday or wintertime decoration.
Materials Used:
Mason jar with lid
Small figurines
Glitter or fake snow
Hot glue gun
Water
Steps:
Glue your figurine(s) to the inside of the mason jar lid.
Fill the jar with water and glitter (or fake snow).
Screw the lid onto the jar tightly.
Shake the jar gently to see the snow fall around the figurine.
Paper Straws Wreath
A paper straw wreath is a festive and colorful way to decorate for holidays or special occasions.
Materials Used:
Paper straws
Wreath form (foam or cardboard)
Hot glue gun
Steps:
Cut the paper straws into small pieces, if necessary.
Attach the pieces to the wreath form with hot glue, layering them to cover the form entirely.
Decorate with other embellishments, such as ribbons or small ornaments.
T-shirt Rug
A t-shirt rug is a great way to upcycle old shirts into a cozy and practical mat for your home.
Materials Used:
Old t-shirts
Scissors
Crochet hook
Steps:
Cut the t-shirts into long strips.
Use a crochet hook to weave the strips together into a rug.
Keep adding strips and crocheting until the rug is the desired size.
Snowman Sock
Make a cute snowman using an old sock! It’s a perfect craft to do with kids during the winter months.
Materials Used:
White sock
Rice or cotton stuffing
Ribbon, buttons, and felt (for decoration)
Steps:
Fill the sock with rice or cotton to form the snowman’s body.
Tie off the top to create a head and use a ribbon to tie around the neck.
Use buttons to create eyes and buttons on the body, and felt for the nose and scarf.
Wooden Spoon Puppets
Wooden spoon puppets are a simple and imaginative way to create characters for storytelling.
Materials Used:
Wooden spoons
Paint, markers, or fabric
Glue
Yarn or string for hair
Steps:
Paint the wooden spoons with faces or characters.
Add yarn or string for hair, and use fabric or felt to make clothes.
Once decorated, use the puppets in a show or as fun props.
Flower Pressing
Flower pressing is an ancient craft that preserves the beauty of flowers and can be used to create beautiful art.
Materials Used:
Fresh flowers
Heavy books
Parchment paper
Steps:
Place the flowers between two pieces of parchment paper.
Put the paper with flowers in between heavy books to press the flowers flat.
Leave them for a few days or until the flowers are fully pressed.
Use the pressed flowers for greeting cards, frames, or scrapbooks.
Bubble Wrap Prints
Bubble wrap prints are a fun way to create textured artwork that is both fun and tactile.
Materials Used:
Bubble wrap
Paint
Paper
Steps:
Cut a piece of bubble wrap to the size of your paper.
Paint the bubble wrap with bright colors.
Press the painted bubble wrap onto a piece of paper to make prints, and then peel it off for a textured effect.
Recycled Bottle Planter
Turn an old plastic bottle into a planter for small plants or herbs.
Materials Used:
Plastic bottles
Scissors
Soil and small plant or seeds
Paint or decorative tape
Steps:
Cut the plastic bottle in half to form a planter.
Paint or decorate the outside of the bottle to make it more attractive.
Add soil and plant your small plant or seeds in the bottle.
Water and place in a sunny location for growth.
Decorative Pencil Holder
Transform a tin can or other container into a beautiful pencil holder for your desk or workspace.
Materials Used:
Empty tin can or container
Decorative paper or fabric
Glue
Steps:
Clean the tin can thoroughly.
Cut decorative paper or fabric to fit around the can.
Glue the paper or fabric to the can, making sure it’s snug and secure.
Use the holder for pencils, pens, or other small items.
Recycled CD Mosaics
Recycled CDs can be used to create a shiny, colorful mosaic piece of art.
Materials Used:
Old CDs
Scissors
Glue
Cardboard or canvas for the base
Steps:
Cut the CDs into small pieces using scissors.
Arrange the pieces on a piece of cardboard or canvas, creating a mosaic design.
Glue the pieces down once you’re happy with the layout.
Allow the glue to dry, and display your shiny art
Seasonal and Holiday Craft Ideas
Crafting is a wonderful way to connect with the seasons and celebrate holidays. Whether you’re creating something to adorn your home or a handmade gift for a loved one, seasonal and holiday crafts are a great way to express creativity. Each time of year offers unique inspiration, from bright and cheerful spring and summer projects to cozy and festive fall and winter crafts. Here are some ideas for both warmer and colder months.
Spring/Summer Craft Ideas
As the days get longer and the weather warms up, embrace the beauty of nature with crafts that highlight vibrant colors, fresh flowers, and the outdoor lifestyle.
Flower Crowns: A popular spring accessory, flower crowns can be made with fresh or artificial flowers. Crafting a crown is an easy and fun way to embrace the beauty of blooming flowers, perfect for outdoor festivals or photo sessions.
Beach-Themed Projects: Use seashells, sand, and driftwood to create fun crafts like personalized photo frames, beach-themed jewelry, or decorative jars filled with beach treasures. These make great souvenirs for vacations or beach days.
Outdoor Crafts (e.g., Bird Feeders): Bring wildlife into your yard with homemade bird feeders. Simple options like pine cones rolled in peanut butter and bird seed, or hanging fruit slices, are easy to create and enjoyable for nature lovers.
Fall/Winter Craft Ideas
As the temperatures drop, cozy up indoors and celebrate the rich, warm tones of fall and the magical spirit of winter. From knitting to festive decorations, there are plenty of creative ways to embrace the season.
DIY Scarves, Mittens, and Hats: Whether you’re a beginner or an experienced knitter, creating your own cozy accessories is a rewarding craft. Soft yarns in autumn colors or winter shades can be used to create scarves, mittens, and hats that keep you warm while expressing your style.
Winter Holiday Decorations: The holiday season is the perfect time for crafting, from handmade wreaths and stockings to personalized ornaments and garlands. Crafting your own decorations can add a special touch to your home, making the season even more memorable. Consider using natural materials, like pinecones, twigs, and holly, for a rustic holiday look.
Crafting throughout the year lets you embrace the changing seasons and holidays while adding a personal touch to your celebrations. Whether you’re decorating for a summer party or preparing for winter festivities, seasonal crafts are an enjoyable way to mark the passage of time.
FAQ
What is DIY arts and crafts?
DIY arts and crafts refer to creative projects or activities that you can make by hand. DIY Arts and Crafts often use various materials such as paper, fabric, clay, wood, and other supplies. DIY allows you to express your creativity and make personalized items for home decor, gifts, or just for fun.
What are the essential supplies for DIY arts and crafts?
Essential supplies depend on the type of project, but generally, you will need basic tools like scissors, glue, paint, brushes, markers, yarn, and various craft papers. Other common supplies include fabric, beads, thread, and ribbons. It’s always a good idea to start with basic supplies and expand as you explore different crafts.
How do I get started with DIY arts and crafts if I’m a beginner?
To get started, choose a simple project that matches your interests, such as making greeting cards, simple jewelry, or a painted canvas. Gather the necessary materials, find tutorials or guides online, and take it step by step. The more you practice, the better your skills will become!
Where can I find inspiration for DIY arts and crafts projects?
You can find inspiration on websites like Pinterest, YouTube, and various craft blogs. Many craft stores also display sample projects that can help spark your creativity. Additionally, books and magazines dedicated to arts and crafts are great resources for unique ideas.
Hi, I’m Victoria, an art and craft teacher at Newark City Schools, where I have the joy of working with middle school students to help them explore their creativity and develop their artistic talents. I believe that art is a powerful way for students to express themselves, and I strive to make every lesson a fun, engaging, and inspiring experience.
I created this website to share the art and craft projects, techniques, and resources that I use in my classroom, hoping to inspire both educators and young artists alike. Whether you’re a teacher looking for new ideas or a student eager to try something new, I’m excited to provide creative tools and projects that anyone can enjoy.
When I’m not in the classroom, I love experimenting with different art forms and learning new crafting techniques. My goal is to help others discover the joy of making things with their hands, and I hope my website serves as a space for everyone to explore their creative potential.