
The other day I was sitting by the window with a cup of tea, watching the leaves tumble down in that slow, dramatic way they always do in September, and it hit me—autumn just begs for a little creativity, doesn’t it? There’s something about the crisp air, the pumpkin spice (yes, I’m that person), and those fiery fall colors that make me want to pull out my glue gun and lose myself in a cozy mess of craft supplies. Maybe you feel that, too? Like, you want your home to look warm and welcoming, but without spending a fortune at those pricey décor shops. That’s exactly where DIY crafts for autumn come in. In this article, I’ll share easy, fun, and budget-friendly ideas you can actually enjoy making—whether you’re a pro with a paintbrush or just winging it with some twine and a mason jar. Trust me, you’ll love these.
DIY Crafts For Autumn
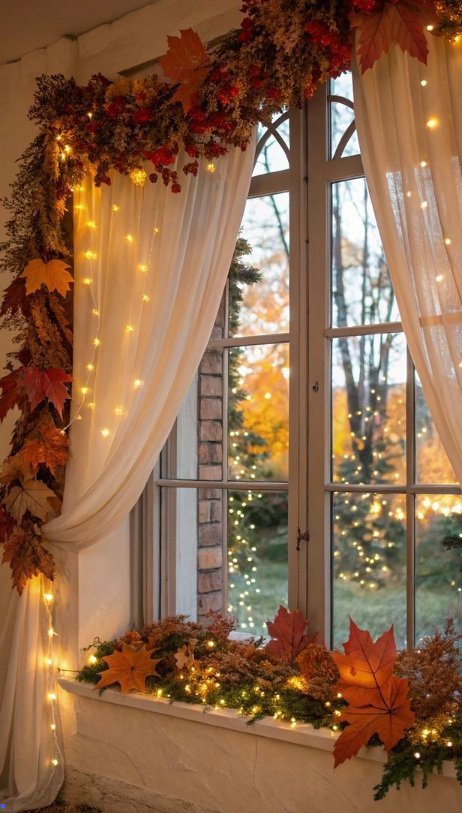
DIY crafts for autumn are a wonderful way to embrace the cozy, seasonal vibes of fall.

Pumpkin Mason Jar Lanterns
I don’t know about you, but the second autumn hits, I get this urge to turn every corner of my home into something warm and glowy. That’s why I swear by pumpkin mason jar lanterns. They’re ridiculously simple, and yet, every time I light one up, I feel like I’ve done something magical. I usually grab some old jars from my kitchen, paint them in a cozy orange shade, and then tie a little green ribbon on top. Honestly, the ribbon part makes it feel extra cute, almost like the jar is wearing a tiny scarf.
What I love most is how these jars look when you drop in an LED candle and place them by a window or on the porch. To be fair, they don’t just look pretty, they make the whole space feel festive. I’ve even given them as little gifts to friends, and every time, they end up asking me how to make more. Trust me, once you start, you’ll want a whole collection glowing around your house.
Fall Leaf Wreath

Making a fall leaf wreath is one of those crafts that just feels like autumn in your hands. I remember one year I walked through my neighborhood, picked up the prettiest golden and red leaves, and thought, “Why not turn these into something?” That’s how my very first wreath happened. In my opinion, the best part is that you don’t have to buy anything fancy—some leaves, a wire base, and maybe a hot glue gun if you want to be extra secure.
Every time I hang one on my front door, it’s like announcing to the world, “Yep, fall is here, and I’m fully embracing it.” I’ve found that mixing in a few pinecones or berries makes it pop even more. And honestly, guests always notice it first. It’s such a simple project, but it has this way of making your home feel so welcoming without trying too hard.
Pinecone Decor

Pinecones are hands down my favorite autumn treasure. To be fair, I used to overlook them when I saw them scattered in the park, but now I scoop them up like free craft supplies. I remember the first time I sprayed them with a bit of gold paint, and wow—it looked like I’d bought fancy décor from a store. It still makes me laugh how something so ordinary can turn into something so festive with just a quick DIY touch.
I usually pile them up in a bowl as a centerpiece, or sometimes string them together for garlands. If you’re into cozy vibes (and honestly, who isn’t in autumn?), you can even mix them with cinnamon sticks for a natural, warm scent. In my opinion, pinecone décor is the kind of thing that proves you don’t need to spend a lot to get that seasonal charm. A few cones, a dash of creativity, and you’ve got instant autumn magic.
Autumn Candle Holders
These DIY candle holders will add a rustic charm to your fall decor and create a warm, inviting atmosphere.
Materials Used:
- Empty toilet paper rolls
- Hot glue gun
- Fall-themed embellishments (such as mini pumpkins, acorns, or leaves)
- Candles
Steps:
- Cut the toilet paper rolls into sections that are about 2-3 inches tall.
- Glue fall-themed embellishments around the outside of the toilet paper roll.
- Place a small candle (such as a tea light) inside the roll.
- Arrange them in clusters to create a lovely, autumn-inspired centerpiece for your table.
Fabric Pumpkin Ornaments
Fabric pumpkins are an easy and charming craft to make for autumn. They’re soft, cute, and can be used to decorate any space.

Materials Used:
- Fabric (in autumn colors like orange, brown, and yellow)
- Needle and thread
- Scissors
- Cinnamon sticks (for stems)
- Hot glue gun
Steps:
- Cut a circular piece of fabric.
- Sew a running stitch around the edge of the fabric and pull the thread to gather the fabric into a pouch.
- Fill the pouch with cotton or fabric scraps to give it a pumpkin shape.
- Use a cinnamon stick for the pumpkin stem and glue it to the top.
- Tie a piece of twine around the base to complete the look.
Autumn Garland
This simple yet stunning autumn garland can be hung anywhere in your home to add a touch of the season’s colors.
Materials Used:
- Paper leaves (real or template)
- Twine
- Hole puncher
- Scissors
Steps:
- Cut out several paper leaves from construction paper or use a leaf template.
- Punch small holes at the top of each leaf.
- Thread the leaves onto twine, spacing them out evenly.
- Hang your garland across a mantle, window, or along a staircase.
Corn Husk Dolls
Create these adorable corn husk dolls to decorate your home or gift to friends.
Materials Used:
- Dried corn husks
- Twine or thread
- Fabric scraps for clothing
- Hot glue gun
Steps:
- Soak the corn husks in warm water for about 15 minutes to soften them.
- Shape the husks into a doll body by folding and tying the ends with twine.
- Use fabric scraps to create clothing for your doll, gluing them onto the body.
- Add details like facial features using markers or embroidery.
Acorn Painted Animals
Turn those fall acorns into adorable creatures with this simple craft.
Materials Used:
- Acorns
- Paint
- Paintbrushes
- Googly eyes
- Hot glue gun
Steps:
- Paint the acorns in colors to create the animals’ bodies (such as brown for bears, orange for foxes, etc.).
- Once the paint dries, glue googly eyes onto the acorn.
- Use additional paint to add details like noses or ears.
- Display your little painted animals as part of your fall decor.
Leaf-Stamped Tea Towels
Autumn leaves can be used to make beautiful, natural prints on fabric. These hand-stamped tea towels make lovely gifts or additions to your kitchen.

Materials Used:
- White or light-colored tea towels
- Fall leaves
- Fabric paint
- Paintbrush
Steps:
- Collect leaves with interesting shapes.
- Apply fabric paint to the back of the leaf using a paintbrush.
- Press the leaf onto the tea towel and carefully peel it off.
- Repeat the process, filling the towel with beautiful leaf prints.
- Let the towels dry completely before using them.
Autumn-Themed Coasters
These rustic coasters are both functional and decorative for your fall gatherings.

Materials Used:
- Cork coasters
- Stamps or stencils
- Fall-themed paints
- Mod Podge
Steps:
- Use stamps or stencils to create designs on the cork coasters with fall-themed paints.
- Allow the paint to dry before applying a coat of Mod Podge to seal the design.
- Let the Mod Podge dry and your coasters are ready to use!
Sweater Sleeve Pumpkins
Repurpose old sweater sleeves into charming pumpkin decorations.
Materials Used:
- Old sweater sleeves
- Fiberfill or cotton batting
- Twine
- Cinnamon sticks
Steps:
- Cut off the sleeves of an old sweater.
- Stuff them with fiberfill or cotton batting until they are plump and pumpkin-like.
- Tie off one end with twine and gather the other end to form a pumpkin shape.
- Attach a cinnamon stick to the top as a stem.
Autumn Leaf Mobile
Create a beautiful, hanging mobile using real or fake autumn leaves.
Materials Used:
- Autumn leaves
- String or fishing wire
- Small sticks
- Hot glue gun
Steps:
- Attach string or fishing wire to the leaves and tie them at different lengths.
- Glue the ends of the strings to small sticks, making sure the leaves hang evenly.
- Hang the mobile from the ceiling or a window to capture the essence of fall.
DIY Fall Sign
A rustic fall sign is a great addition to any room or porch to display your autumn spirit.
Materials Used:
- Wooden board
- Stencils or freehand markers
- Paint
- Sandpaper
Steps:
- Sand the wooden board to smooth the surface.
- Using stencils or freehand, paint fall words or phrases like “Harvest” or “Give Thanks” onto the board.
- Let the paint dry, then distress the edges with sandpaper to give it a rustic feel.
Fall Leaf Print Art
Capture the beauty of fall leaves with a simple leaf print art project.
Materials Used:
- Fall leaves
- Watercolor paper
- Paint
- Brushes
Steps:
- Lay out your leaves on the watercolor paper.
- Paint the back of each leaf with a watercolor paint and press it onto the paper to transfer the print.
- Allow the prints to dry, then frame the artwork.
Pumpkin Spice Soap
Make your own pumpkin spice-scented soap for fall-themed gifts or self-care.
Materials Used:
- Glycerin soap base
- Pumpkin spice fragrance oil
- Orange soap dye
- Molds
Steps:
- Melt the glycerin soap base in the microwave.
- Add a few drops of pumpkin spice fragrance oil and orange soap dye.
- Pour the mixture into molds and let it harden before removing the soap.
Autumn Candle Jars
Repurpose old jars into autumn-themed candle holders.
Materials Used:
- Old glass jars
- Fall-themed ribbons
- Candle wax
- Wick
Steps:
- Clean the glass jars and add a wick to the bottom.
- Melt candle wax and pour it into the jar, securing the wick in the center.
- Once the wax hardens, tie a fall-themed ribbon around the top of the jar.
Burlap Fall Banner
Create a rustic banner to add to your home or party space.
Materials Used:
- Burlap fabric
- Scissors
- Paint or fabric markers
- Twine
Steps:
- Cut the burlap into triangular banner shapes.
- Paint or draw fall words or symbols (like pumpkins or acorns) onto each piece of burlap.
- Attach the banners to twine and hang them in your space.
Autumn Potpourri
Make a fragrant autumn potpourri to fill your home with fall scents.
Materials Used:
- Dried leaves, flowers, and herbs
- Cinnamon sticks
- Whole cloves
- Essential oils
Steps:
- Mix dried leaves, flowers, and cinnamon sticks in a bowl.
- Add a few drops of essential oils, such as cinnamon or clove.
- Place the potpourri in small bowls around your home for a lovely autumn fragrance.
DIY Autumn Lanterns
Create lanterns from mason jars to add a cozy glow to your fall nights.
Materials Used:
- Mason jars
- Burlap
- Battery-operated lights
- Hot glue gun
Steps:
- Wrap burlap around the outside of the mason jars and secure it with hot glue.
- Place battery-operated lights inside the jars.
- Turn the lights on to create a warm, ambient glow in your space.
Pinecone Garland
Create a beautiful fall garland by stringing pinecones together.
Materials Used:
- Pinecones
- Twine
- Hot glue gun
- Scissors
Steps:
- Attach a piece of twine to each pinecone using hot glue.
- Arrange the pinecones on the twine in a pattern you like.
- Hang the garland over a mantel or along a window for a rustic, autumn look.
Gourd Painting
Paint small gourds to make them into fun fall decorations.
Materials Used:
- Small gourds
- Paint
- Paintbrushes
- Mod Podge
Steps:
- Clean the gourds and let them dry completely.
- Paint the gourds with autumn-themed designs.
- Seal the paint with a layer of Mod Podge to protect the design.
Pumpkin Spice Bath Salts
Create homemade pumpkin spice bath salts for a relaxing, fall-inspired bath experience.
Materials Used:
- Epsom salt
- Baking soda
- Pumpkin spice essential oil
- Food coloring
Steps:
- Mix Epsom salt and baking soda in a bowl.
- Add a few drops of pumpkin spice essential oil and a bit of food coloring to achieve a fall color.
- Store the bath salts in a jar and use them in your next bath.
Wooden Leaf Wall Art
Create a striking wall piece by painting leaves on wood panels.
Materials Used:
- Wood panels
- Paint
- Brushes
Steps:
- Sand the wood panels to smooth the surface.
- Paint leaf shapes onto the wood using bright autumn colors.
- Let the paint dry before hanging the art on the wall.
Fall Sweater Throws
Transform an old sweater into a cozy throw for fall.
Materials Used:
- Old sweater
- Scissors
- Needle and thread
Steps:
- Cut the sweater into a size that fits your couch or bed.
- Fold the edges and sew them to prevent fraying.
- Enjoy a new, cozy fall throw.
Fall-Themed Mugs
Personalize plain mugs to make them perfect for fall beverages.
Materials Used:
- Plain ceramic mugs
- Paint pens
- Stencils
Steps:
- Use paint pens to add autumn-themed designs, like pumpkins or leaves, to the mugs.
- Follow the instructions on the paint pen for curing the design.
- Your fall mugs are now ready for cozy hot drinks.
DIY Autumn Doormat
Create a festive welcome mat to greet guests with a fall vibe.
Materials Used:
- Blank doormat
- Stencils or freehand design
- Paint
Steps:
- Use stencils or freehand your desired fall design (such as pumpkins or leaves) onto the doormat.
- Paint the design and allow it to dry.
- Place the doormat at your doorstep for a warm welcome.
Apple Cider Soap
Create apple cider-scented soap to embrace the autumn fragrance.
Materials Used:
- Glycerin soap base
- Apple cider fragrance oil
- Molds
- Red or orange soap dye
Steps:
- Melt the glycerin soap base and add a few drops of apple cider fragrance oil.
- Add the dye for a fall color.
- Pour the soap into molds and allow it to harden before use.
DIY Fall Clocks
Transform old clock faces with a fall design.
Materials Used:
- Old clock
- Paint
- Fall leaves or other decorations
Steps:
- Paint the clock face with fall colors and patterns.
- Glue on small fall decorations like leaves or acorns.
- Reassemble the clock and hang it as part of your autumn decor.
Acorn Garland
Create a festive garland using real or faux acorns.
Materials Used:
- Acorns
- Twine
- Hot glue gun
Steps:
- String the acorns onto twine.
- Tie knots between each acorn to secure them in place.
- Hang the garland across your mantel or along a wall for a natural touch.
Autumn Picture Frame
Create a rustic picture frame with autumn leaves and acorns.
Materials Used:
- Plain wooden picture frame
- Fall leaves and acorns
- Hot glue gun
Steps:
- Attach the fall leaves and acorns to the wooden frame with hot glue.
- Let the glue dry, then insert your favorite autumn photo into the frame.
- Display the frame on a table or shelf
Fall-Themed Gifts: Creative and Cozy DIY crafts for autumn
Fall is the perfect time to create and gift personalized, cozy presents that capture the essence of the season. Whether you’re looking for something homemade to give to friends and family or ideas for a seasonal business, these fall-themed gifts are sure to warm hearts and add a personal touch to the autumn celebrations.
Here are two creative fall-themed gifts you can make at home: Handmade Fall Soaps and Autumn Cookies in a Jar.
1. Handmade Fall Soaps
Handmade soaps with fall-inspired scents are an excellent gift idea for autumn. The rich, spicy aromas of cinnamon, clove, and pumpkin can transport anyone into the spirit of the season. Here’s how you can make these delightful soaps:
Materials Needed:
- Soap base (glycerin, shea butter, or goat’s milk)
- Essential oils (cinnamon, clove, nutmeg, orange, or pumpkin)
- Soap molds (silicone or plastic)
- Dried fall herbs (optional for decoration, e.g., dried lavender, rose petals)
Step-by-Step Instructions:
- Melt the Soap Base: Cut the soap base into cubes and place them in a microwave-safe bowl. Microwave in short intervals (20-30 seconds), stirring in between, until fully melted.
- Add Fragrance: Once the soap is melted, add a few drops of your chosen essential oils. For a fall scent, try a combination of cinnamon, clove, and orange.
- Customize (Optional): If you’d like to add dried herbs or a little color, mix them into the melted soap. Dried lavender or rosemary works well for a rustic touch.
- Pour into Molds: Carefully pour the soap mixture into molds. You can use traditional rectangular soap molds or fall-themed molds like pumpkins or leaves.
- Let It Set: Allow the soaps to cool and harden for 2-3 hours. If you’re in a hurry, you can refrigerate them for about 30 minutes to speed up the process.
- Wrap and Gift: Once the soaps are set, remove them from the molds and wrap them in clear cellophane or place them in a small gift box.
2. Autumn Cookies in a Jar
A mason jar filled with the dry ingredients for a delicious autumn cookie mix makes a thoughtful and easy gift. The recipient simply needs to add wet ingredients, mix, and bake the cookies to enjoy the fall flavors.
Materials Needed:
- Mason jars (quart size for larger batches or pint for smaller ones)
- Layered cookie ingredients (flour, sugar, baking soda, spices like cinnamon, nutmeg, chocolate chips, oats, etc.)
- Recipe card (to include instructions on what to add)
- Decorative ribbons, tags, or fabric (for a festive look)
Step-by-Step Instructions:
- Prepare Ingredients: Gather all the dry ingredients for your cookie recipe. Common fall cookie ingredients include:
- 1 ½ cups all-purpose flour
- ½ teaspoon baking soda
- 1 teaspoon cinnamon
- ½ teaspoon nutmeg
- 1 cup rolled oats
- ¾ cup brown sugar
- ½ cup chocolate chips (or cranberries, or both)
- Layer Ingredients in the Jar: Start with the dry ingredients that will settle at the bottom of the jar and work your way up in layers:
- First, layer the flour and baking soda.
- Then add the spices (cinnamon and nutmeg).
- Next, layer the oats and brown sugar.
- Finish with the chocolate chips or any other mix-ins like chopped nuts or dried fruit. Be sure to press down each layer to make it compact and neat.
- Add a Recipe Card: Write out the baking instructions and attach the card to the jar with a ribbon or twine. A simple recipe might look like:
- Preheat the oven to 350°F.
- Add 1 egg and ½ cup of melted butter to the jar’s contents.
- Mix until combined and drop spoonfuls onto a baking sheet.
- Bake for 8-10 minutes.
- Decorate the Jar: Use fabric to cover the lid of the mason jar, and tie a decorative ribbon around the neck of the jar. Add a cute tag that says “Autumn Cookies” or “Fall Treats.”
Outdoor DIY crafts for autumn
Crafting outdoors is a wonderful way to connect with nature, enjoy the changing seasons, and create beautiful DIY crafts for autumn . Whether you’re in your backyard, at a park, or on a nature walk, there are plenty of ways to bring the beauty of the outdoors into your craft projects. Here are two fun outdoor DIY crafts for autumn that can be enjoyed alone or with family and friends.
1. Autumn Leaf Garland
This colorful garland is a perfect way to celebrate the fall season. Using natural elements like vibrant autumn leaves, you can create a beautiful decoration to hang inside or outside. It’s a simple yet delightful craft that adds warmth and color to any space.
Materials:
- Twine
- Needle and thread
- Autumn leaves (preferably those with bright colors like red, orange, and yellow)
Instructions:
- Step 1: Gather a variety of colorful autumn leaves. Choose ones that are still in good condition, without too many tears or brown spots.
- Step 2: Lay the leaves out and decide on their placement. You can either arrange them in a random order or go for a specific pattern.
- Step 3: Using a needle and thread, carefully thread the leaves onto the twine. You can puncture the leaves’ stems to make it easier to string them.
- Step 4: Space the leaves evenly along the twine or place them closer together for a fuller effect.
- Step 5: Once finished, hang the garland across a mantel, on a fence, or along a porch railing to add some seasonal charm.
2. Bird Feeder Crafts
Bird feeders are a great way to help wildlife, and making them can be a fun and educational activity. A simple pinecone bird feeder attracts all kinds of birds, allowing you to observe them up close while enjoying your handiwork.
Materials:
- Pinecones
- Peanut butter (ensure it’s safe for birds, no added sugar or salt)
- Birdseed
Instructions:
- Step 1: Collect pinecones from your yard or a nearby park. Look for larger pinecones, as they will hold more birdseed.
- Step 2: Using a butter knife or spoon, spread a generous amount of peanut butter all over the pinecone. Make sure to cover every crevice.
- Step 3: Roll the peanut-butter-coated pinecone in birdseed. Press lightly to ensure the seeds stick.
- Step 4: Once the pinecone is fully covered in seeds, tie a piece of twine or string to the top.
- Step 5: Hang the bird feeders from tree branches or hooks around your yard. Watch as birds come to feast on the seeds!
FAQ
What materials do I need for DIY crafts for autumn ?
For most autumn crafts, you’ll need items like fallen leaves, pinecones, twigs, burlap, acorns, colored paper, glue, scissors, string, yarn, and paint. Seasonal items like mini pumpkins, cinnamon sticks, and fabric can also be used for added creativity.
What are some easy DIY crafts for autumn for beginners?
Simple autumn crafts for beginners include leaf rubbings, painted pinecones, burlap wreaths, and paper pumpkin decorations. These crafts don’t require many materials and can be completed in a short time.
How can I make an autumn wreath?
To make an autumn wreath, you’ll need a wreath base (foam, grapevine, or wire), autumn-colored fabric or felt leaves, small pumpkins, acorns, and other natural elements. Attach everything to the base with glue, arranging it in a balanced pattern.
What are some DIY crafts for autumn my home ?
You can create DIY autumn garlands using leaves, fabric, or even popcorn. Craft mason jar centerpieces filled with seasonal items like cinnamon sticks, acorns, or small pumpkins. You can also use autumn-themed stencils to paint designs on pillows or tablecloths.

Hi, I’m Victoria, an art and craft teacher at Newark City Schools, where I have the joy of working with middle school students to help them explore their creativity and develop their artistic talents. I believe that art is a powerful way for students to express themselves, and I strive to make every lesson a fun, engaging, and inspiring experience.
I created this website to share the art and craft projects, techniques, and resources that I use in my classroom, hoping to inspire both educators and young artists alike. Whether you’re a teacher looking for new ideas or a student eager to try something new, I’m excited to provide creative tools and projects that anyone can enjoy.
When I’m not in the classroom, I love experimenting with different art forms and learning new crafting techniques. My goal is to help others discover the joy of making things with their hands, and I hope my website serves as a space for everyone to explore their creative potential.