
I still remember the first time I sat down with a little block of clay and decided to make a mushroom. It was supposed to look “cute and whimsical,” but honestly, it came out looking more like a squished cupcake. Still, I couldn’t stop smiling at it. There’s just something about Mushroom Clay Crafts that makes you feel playful and creative, even if the end result isn’t perfect. And that’s the beauty of it, right? You don’t need to be a professional artist—just a little clay, some paint, and an idea in your head are enough to make something magical.
Maybe you’ve been scrolling for new craft ideas, or maybe you just want a simple project to relax with after a long day. Either way, I’ve got you covered. In this article, I’ll share fun mushroom-inspired clay projects that are easy, relaxing, and surprisingly beautiful.
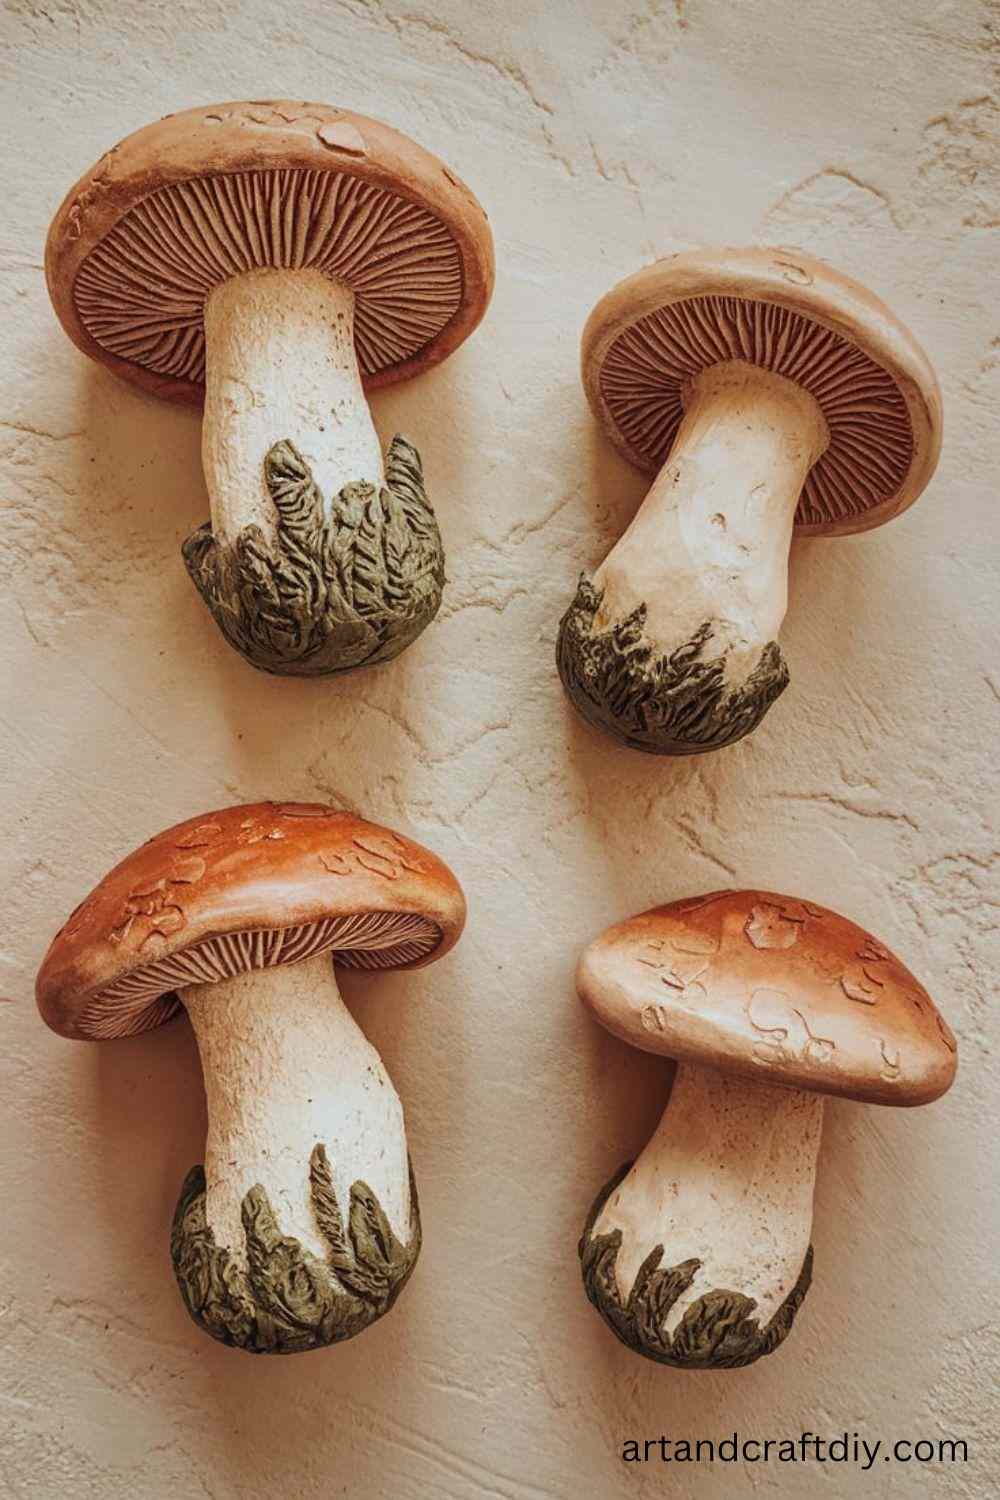
Mushroom Clay Crafts
Mushroom clay crafts involve creating artistic and functional items inspired by mushrooms using clay as the medium. 
Mushroom Trinket Dish

I’ll be honest, the very first mushroom clay project I tried was a trinket dish, and I still use it today for my rings and tiny earrings. There’s something magical about shaping clay into a little dish and then topping it with a mushroom cap design. I remember messing up the first one because I painted the red cap too quickly before it dried, and it smudged—but honestly, that smudge gave it character. That’s the thing with handmade crafts: imperfections can make them even cuter.
The trick I’ve learned is to use air-dry clay, roll it evenly, and mold it around a small bowl for that perfect curve. Once it’s dry, painting is the fun part—you can stick to the classic red-and-white spots, or go pastel for a dreamy vibe. I’ve gifted these to friends, and every single time, they say, “Oh my gosh, this is adorable!”
Miniature Mushroom Garden
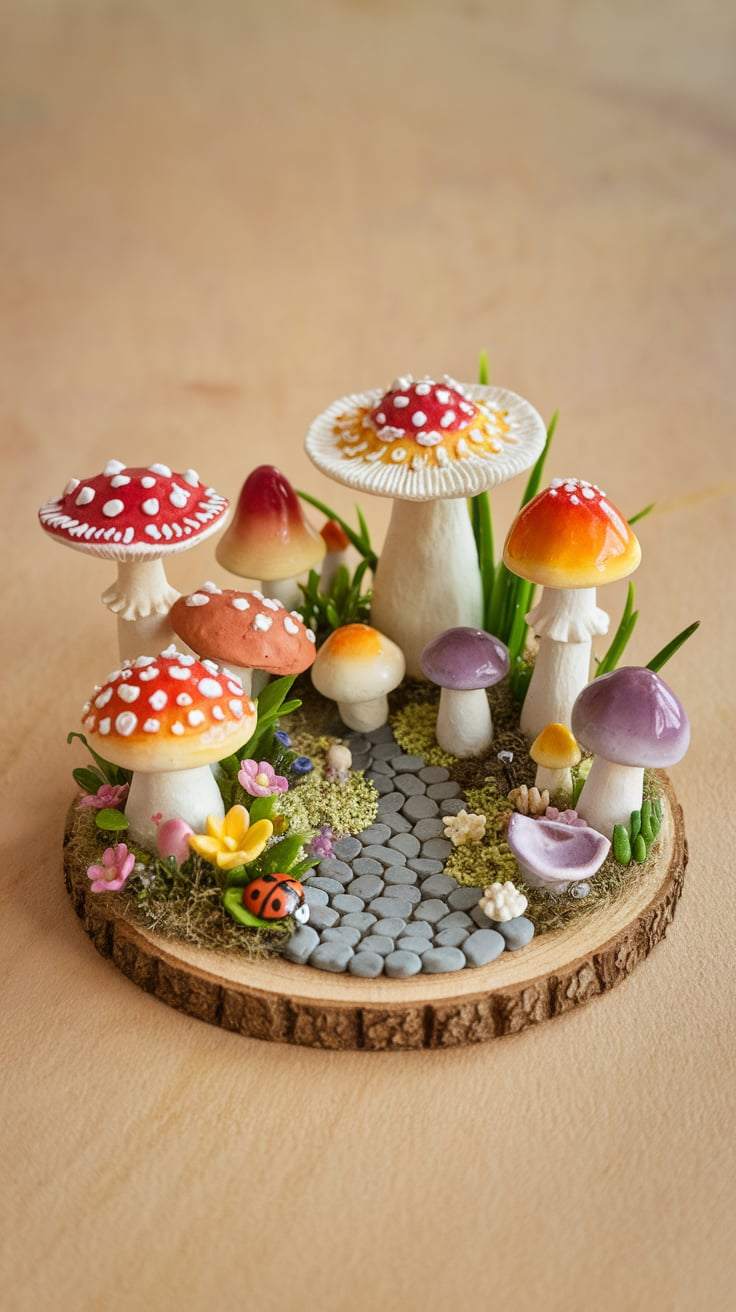
Now, this one feels like stepping into a fairy tale. I made a tiny mushroom garden in a shallow dish, and to be fair, I couldn’t stop smiling at how whimsical it looked. I added moss, pebbles, and even a little clay snail—suddenly, it felt like a fairy village had come to life on my desk. It’s funny how just a few mushroom shapes can transform plain clay into something enchanting.
What I love most is the freedom. You can make tall, thin mushrooms, chubby little ones, or even rainbow-colored caps if you want to go wild. I once tried glow-in-the-dark paint, and at night, the mushrooms softly glowed—it was magical. If you’ve got kids around, this is a brilliant craft to do together because they can make their own quirky mushrooms, and honestly, no two ever look the same.
Mushroom Keychains
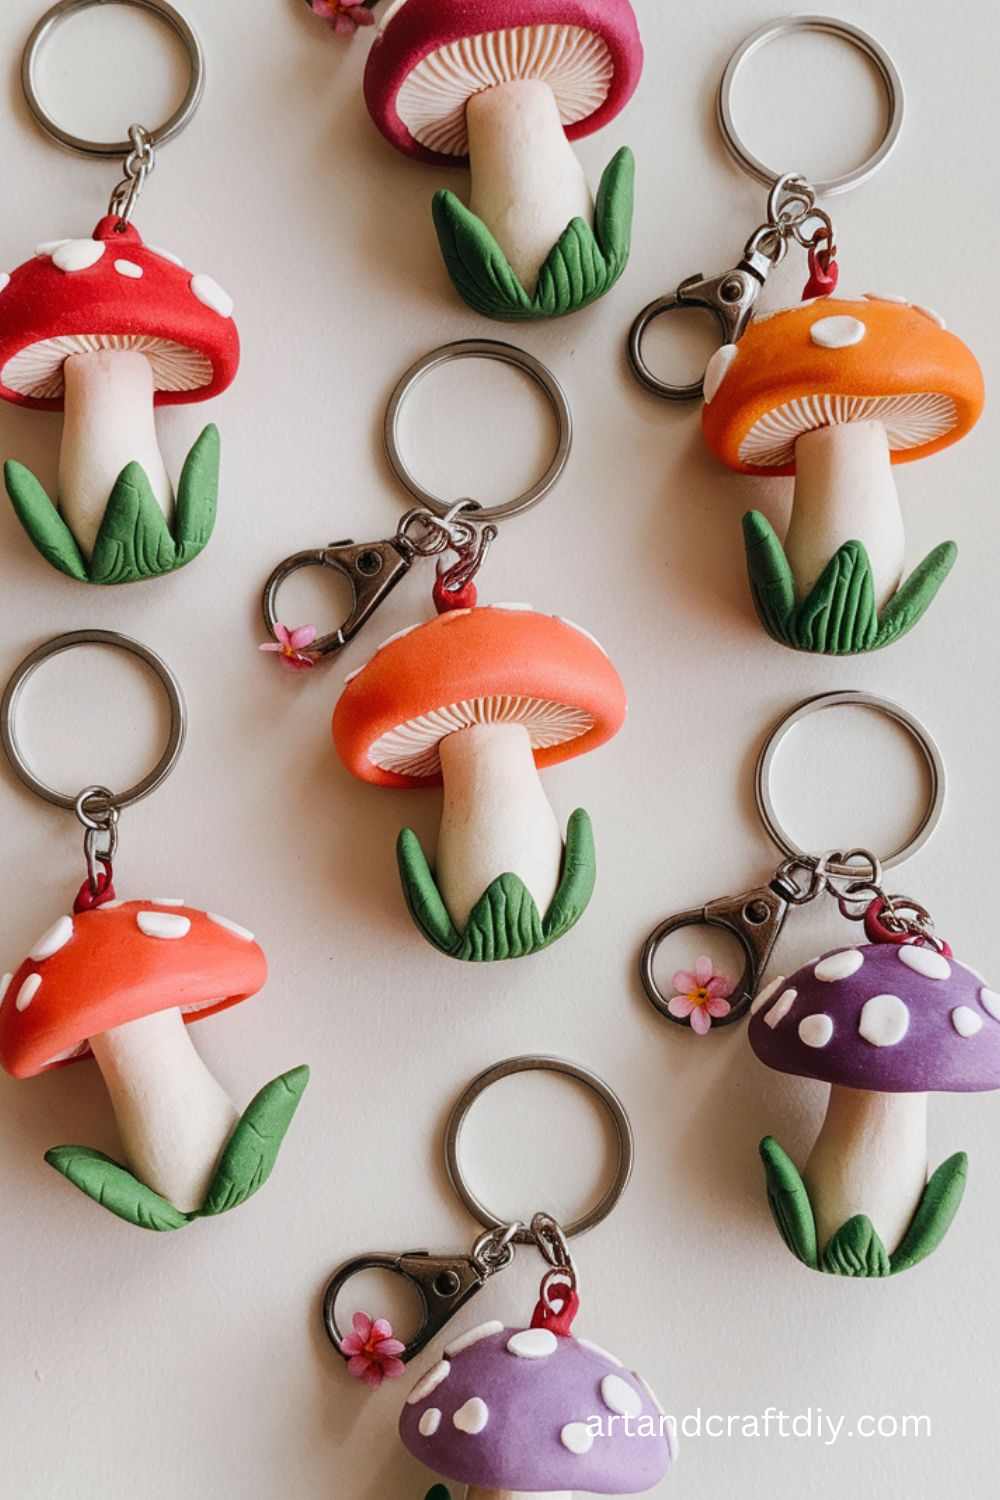
Keychains are my go-to whenever I’ve got leftover clay from bigger projects. I started making mushroom keychains by accident when I rolled a tiny clay mushroom and thought, “This could hang from my bag.” And I wasn’t wrong—it looked quirky and got so many compliments. Honestly, it’s a fun way to carry a piece of your craft with you everywhere.
I usually poke a small hole at the top before baking or drying the clay, then add a metal loop and keyring. Painting them is where I get playful: metallic gold mushrooms, pastel pink ones, even galaxy-themed caps with tiny stars. To be fair, these make such cute gifts too. One of my friends still has hers hanging on her car keys and swears people always ask about it. It’s those little personal crafts that bring joy every single day
Mushroom Wall Art Tiles
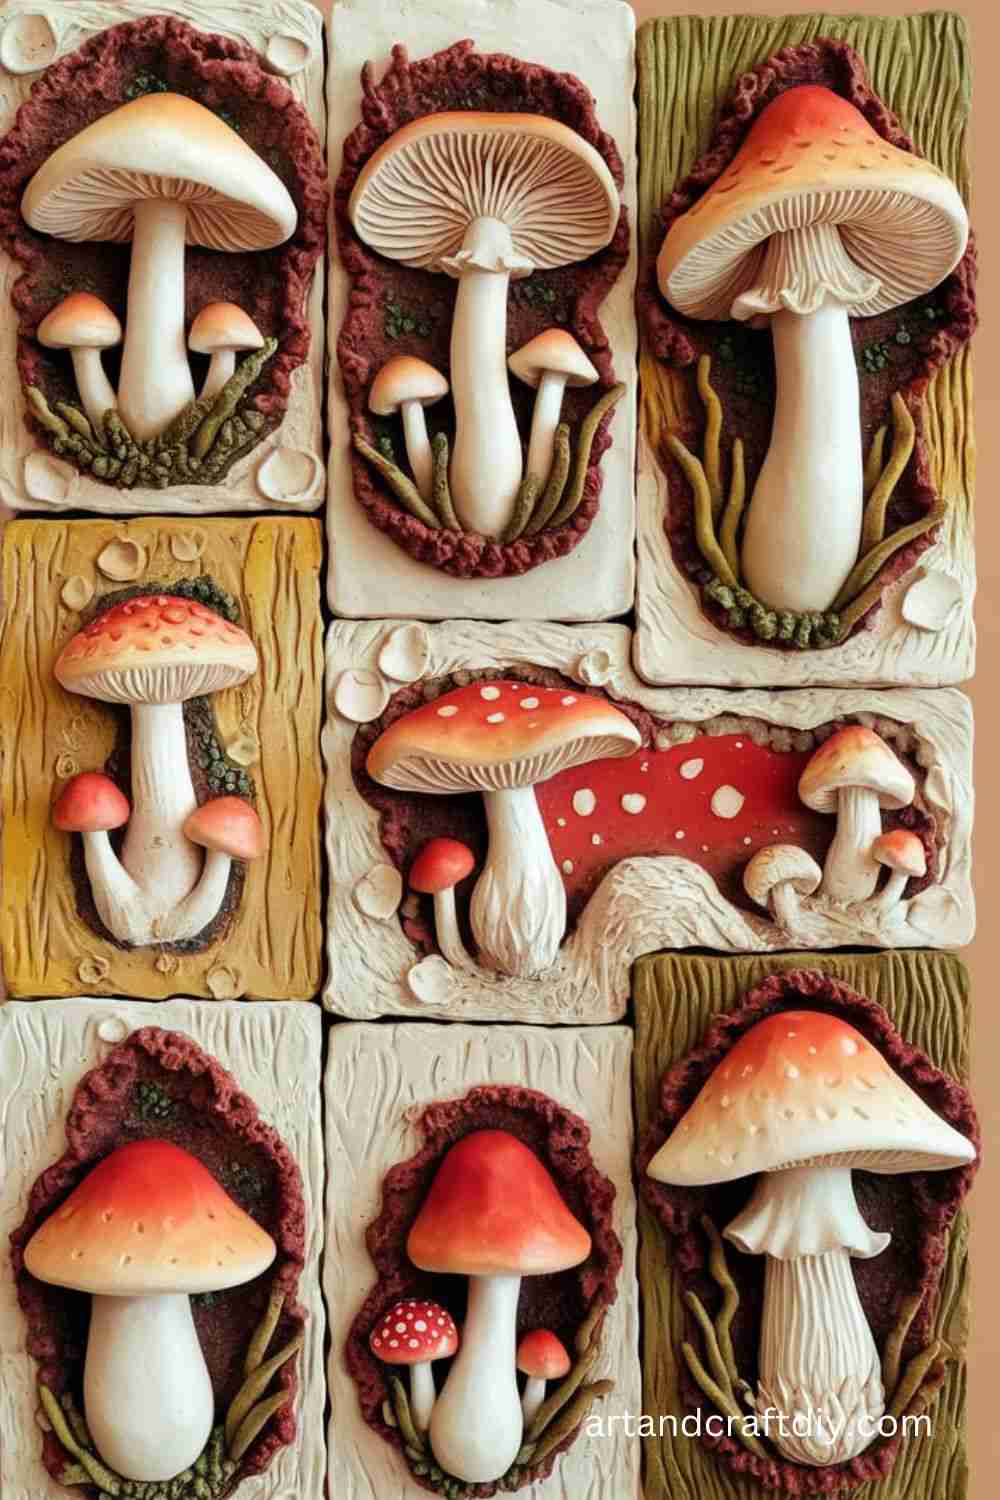
This project felt ambitious the first time I tried it, but oh boy, was it worth it. I made a set of square clay tiles and pressed little mushroom shapes into them before baking. Once painted, they turned into the sweetest wall art pieces. It’s one of those things that instantly brightens up a dull wall. Honestly, it’s not hard—just takes patience.
What I really like is how customizable it is. You could make a single big mushroom per tile or a cluster of mini ones. Once, I tried mixing clay colors before shaping, and the swirled effect gave the mushrooms a marble look. Hung them in my craft room, and they always make me happy when I glance at them. If you’re someone who loves earthy, cottage-core vibes, this is the kind of clay project you’ll adore.
Mushroom Magnets
Magnets are such underrated crafts, but honestly, they’re one of my favorites because they’re small, quick, and super practical. I made mushroom magnets for my fridge, and every time I walk into the kitchen, they give me this cozy woodland vibe. They’re also perfect for experimenting with new paint styles since they don’t take much clay.
I usually shape them flat so they stick better, and I glue strong magnets at the back once they’re done. One time, I made a whole set in different colors—red, yellow, even purple—and arranged them in a little “mushroom family” scene on my fridge. To be fair, these also make really affordable and thoughtful gifts. Everyone loves cute magnets, and when they’re handmade mushrooms? Double the charm.
Mushroom Pen Holder
This mushroom-themed pen holder adds a quirky touch to your desk.
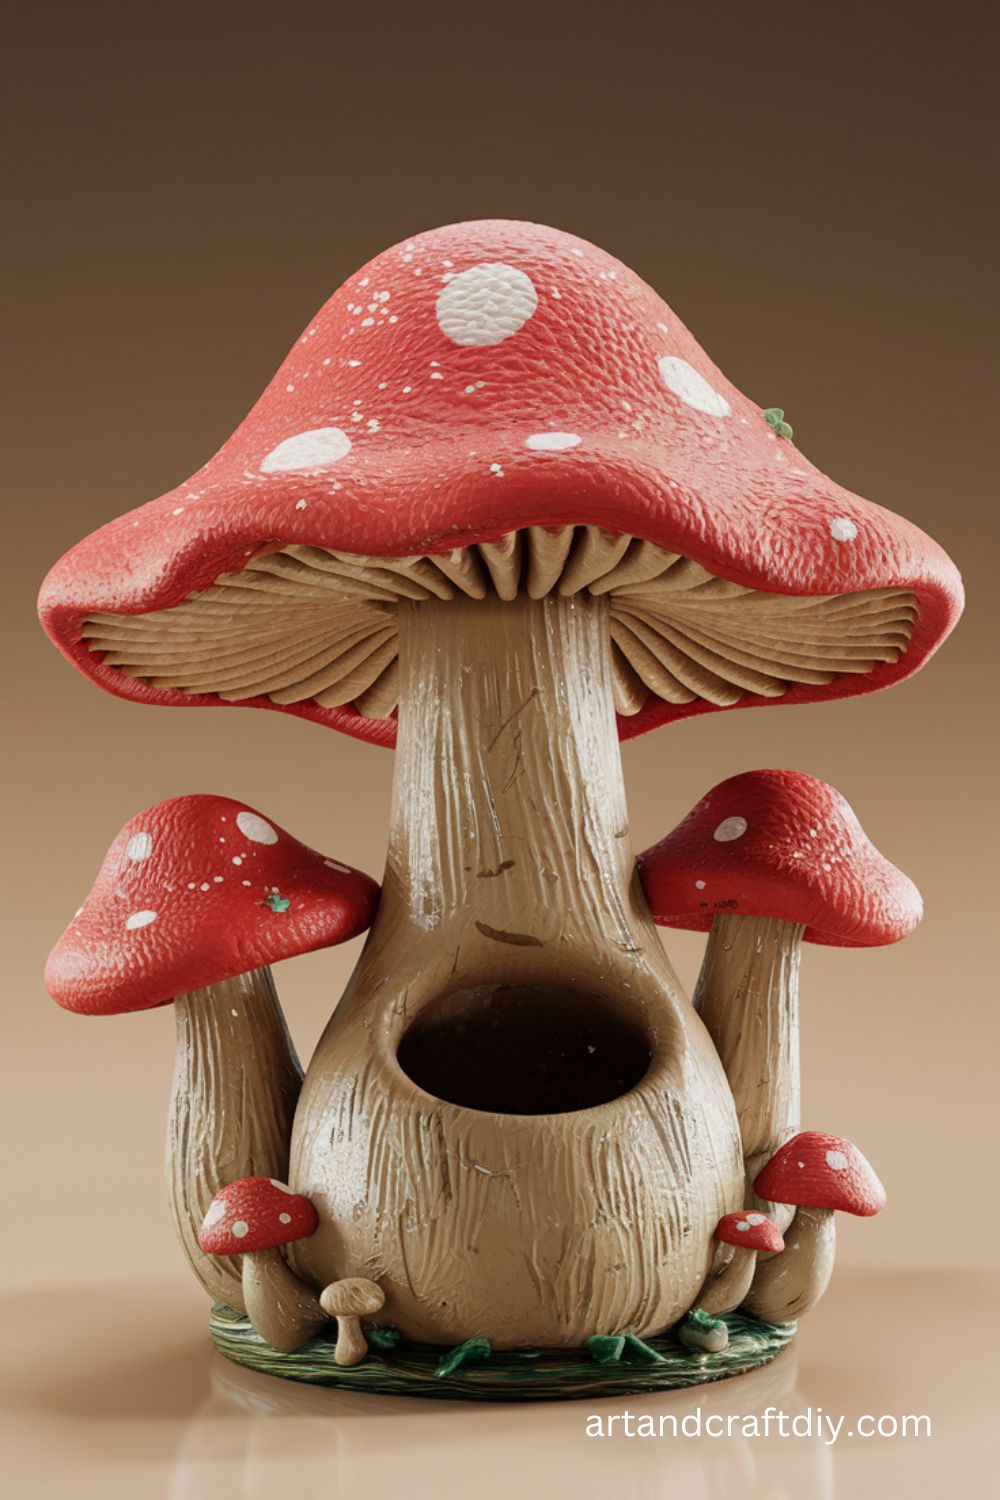
This one was a bit of a challenge but also such a rewarding craft. I molded a hollow clay cylinder and then added mushroom decorations climbing up the sides. When it dried and I placed my pens inside, I couldn’t believe how whimsical it looked on my desk. It’s like my stationery got its own little fairy home.
I’ll admit, the first one I made tipped over because I made the base too thin, so here’s my tip: always keep the base nice and thick for sturdiness. I painted mine with earthy tones—greens and browns with red mushrooms—and honestly, it brightened up my workspace instantly. If you’re someone who loves practical crafts with a magical twist, this one is totally worth trying
Mushroom Garden Stakes
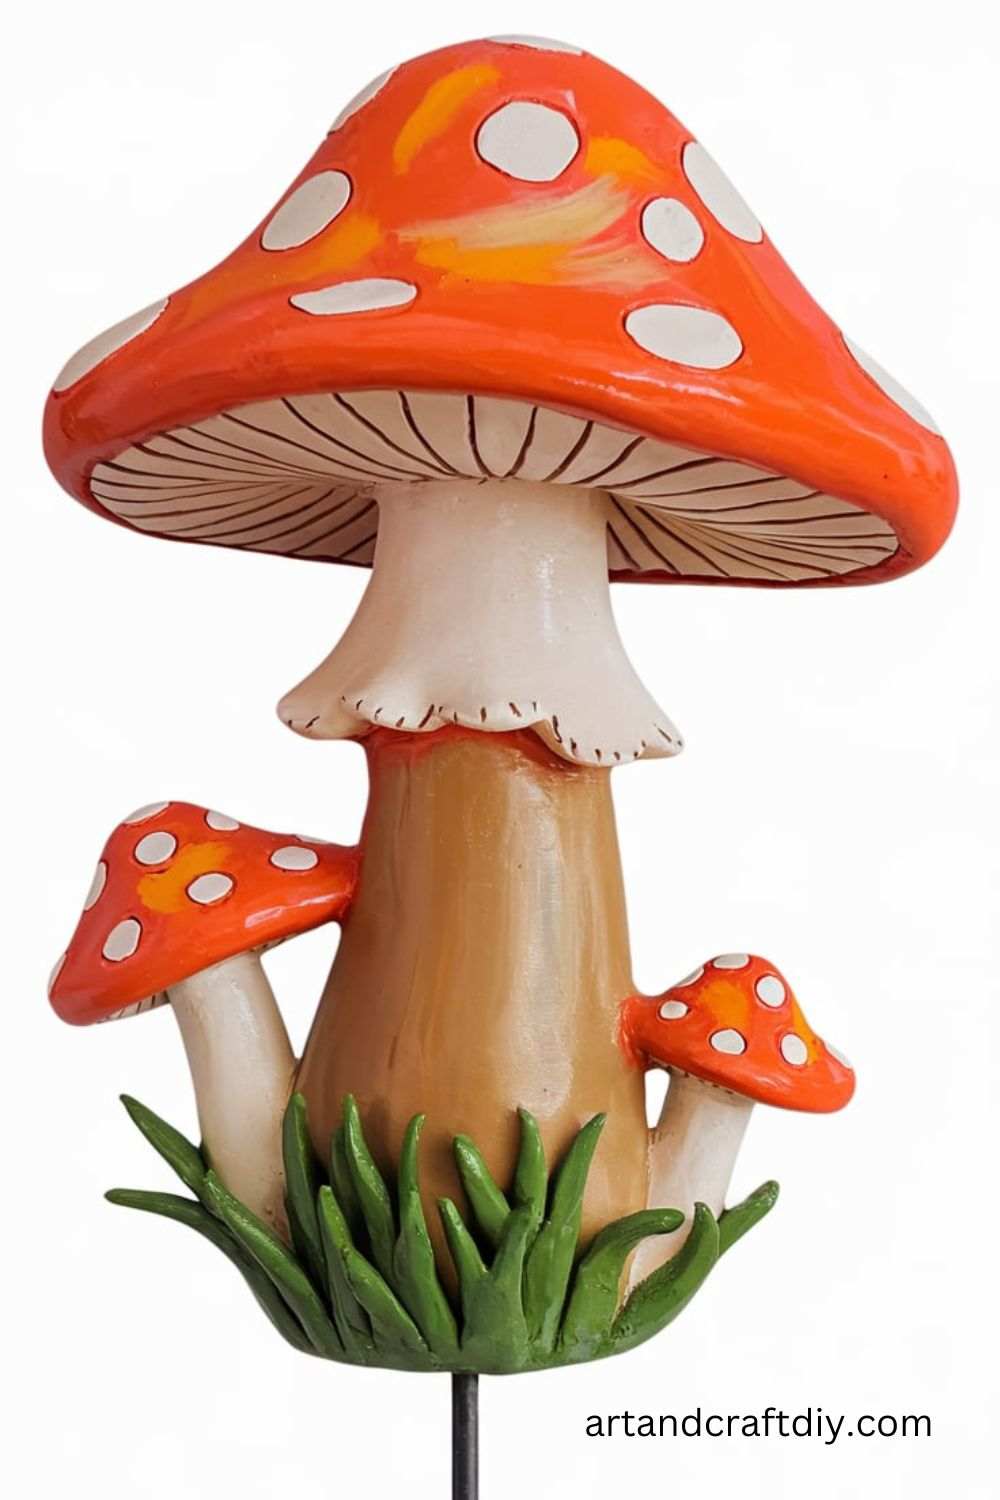
Oh, I had the most fun with these! Garden stakes are basically little mushroom decorations you stick into your plant pots, and they’re ridiculously adorable. The first time I tried, I used air-dry clay shaped into mushrooms, attached them to wooden sticks, and painted them bright red. Suddenly, my plain pothos looked like it belonged in a fairytale forest.
I’ve since made different versions—some tall, some stubby, even glittery ones. To be fair, they’re also surprisingly sturdy if you seal them with a protective varnish. I had a friend who doesn’t care much for crafts, but when she saw one of my mushroom stakes, she said, “Okay, that’s actually cute, make me one.” If your plants feel a bit boring, these little mushrooms will absolutely transform them.
Mushroom Candle Holder
Create a cozy ambiance with mushroom candle holders.
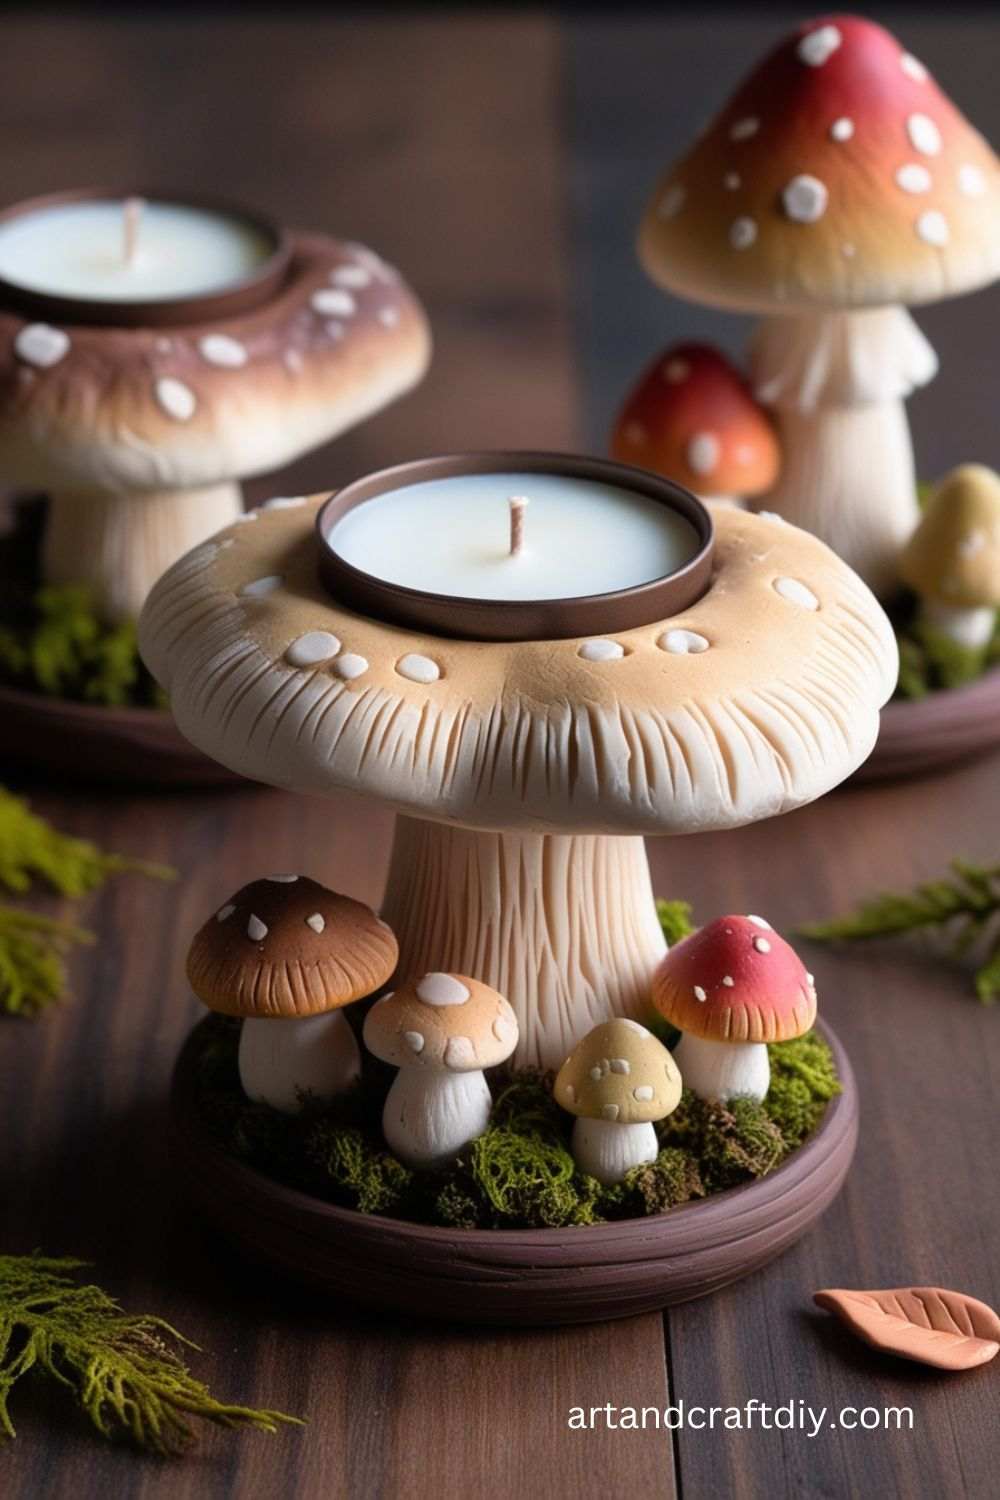
This project honestly gave me the coziest vibes. I shaped a little clay base with mushroom figures around it and made sure there was enough space in the middle for a tealight. When the candle flickered, the mushrooms glowed softly, and it felt so magical. It reminded me of sitting around a woodland campfire, even though I was just in my living room.
The only tricky part is making sure the holder is wide and safe enough so the candle doesn’t tip over. I painted mine with muted earthy tones and sealed it for durability. In my opinion, this is one of those crafts that doubles as both decoration and atmosphere. Light it up during a quiet evening, and you’ll see how much warmth it brings.
Mushroom Jewelry
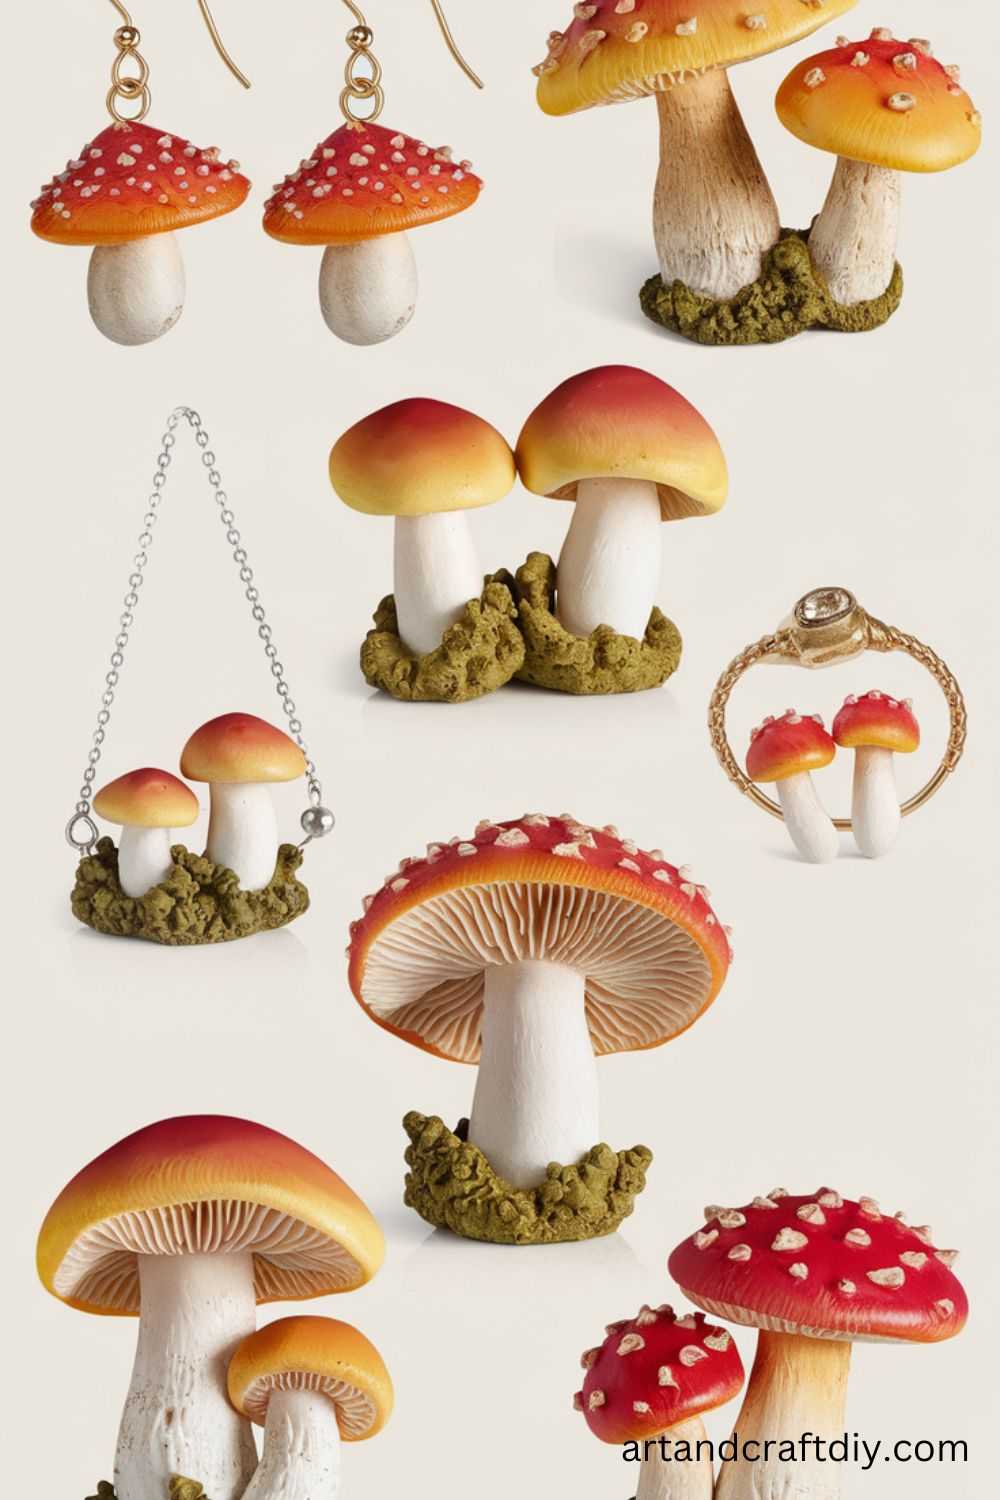
I’ll admit, I never thought I’d wear mushroom jewelry until I tried making it. Using polymer clay, I shaped tiny mushrooms into pendants and earrings, and to be fair, they turned out way better than expected. I wore the earrings to a craft fair once, and three different people asked where I bought them—when I said I made them, they were shocked.
The fun part is how creative you can get. Some days, I keep it simple with the classic red cap. Other times, I experiment with pastel rainbow caps or even metallic finishes. Honestly, making mushroom jewelry feels like carrying a little piece of whimsy with you. It’s lightweight, quirky, and always sparks conversations.
Mushroom Coasters
Coasters might sound boring, but mushroom-themed ones? Totally different story. I shaped round clay discs and pressed mushroom designs on them before painting. The result was both practical and ridiculously cute. Every time I set my coffee mug down, it feels like a mini woodland table scene.
One time, I gifted a set of these coasters to a friend who loves tea, and she was over the moon about them. To be fair, they’re easy enough to make but still feel like a thoughtful, handmade present. My tip: seal them well so they don’t get ruined by water rings. I’ve found that pairing earthy tones with bright red mushrooms gives the coziest aesthetic—like you’ve brought a little forest into your home.
Mushroom Plant Markers
Keep track of your plants with mushroom-shaped markers.
Materials Used: Polymer clay, acrylic paint, metal stakes.
Steps:
- Sculpt flat mushrooms with names carved into the caps.
- Bake the markers and paint them.
- Attach to metal stakes and place them in your pots.
Mushroom Napkin Rings
Add charm to your dining table with mushroom napkin rings.
Materials Used: Polymer clay, ring bases, acrylic paint.
Steps:
- Create small mushroom shapes and attach them to clay rings.
- Bake the rings, then paint them in your desired colors.
- Seal with varnish for longevity
Mushroom Hanging Ornament
Perfect for festive decor or adding a whimsical touch to your space.
Materials Used: Air-dry clay, string, acrylic paints, sculpting tools, varnish.
Steps:
- Sculpt a mushroom with a hollow cap and a small loop at the top for the string.
- Let the clay dry completely.
- Paint the mushroom in vibrant colors, focusing on the cap for added detail.
- Apply a coat of varnish for a glossy finish.
- Thread the string through the loop and tie it securely.
Mushroom Ring Holder
A functional and aesthetic accessory for storing rings.
Materials Used: Air-dry clay, acrylic paints, sculpting tools, varnish.
Steps:
- Shape a flat base and a tall mushroom stem with a wide cap to hold rings.
- Attach the stem to the base, smoothing the edges for stability.
- Let the piece dry completely.
- Paint the mushroom in your desired color scheme.
- Apply varnish for durability and shine.
Mushroom Wind Chime
Create a melodic and decorative outdoor piece.
Materials Used: Polymer clay, string, metal chime pieces, acrylic paints.
Steps:
- Sculpt small mushrooms of various sizes and bake them as per instructions.
- Paint the mushrooms and let them dry.
- Attach each mushroom to a string with a chime piece at the bottom.
- Tie all strings to a circular or wooden frame.
Mushroom Photo Holder
A cute way to display photos or notes.
Materials Used: Polymer clay, metal wire, acrylic paint, varnish.
Steps:
- Sculpt a mushroom base with a small hole for the wire.
- Twist the wire into a spiral at one end for holding photos.
- Insert the wire into the hole and bake the clay.
- Paint and seal with varnish.
Mushroom Pin Cushion
A practical craft for sewing enthusiasts.
Materials Used: Air-dry clay, fabric, stuffing, glue, paint.
Steps:
- Create a mushroom base with clay and let it dry.
- Sew a round fabric piece, fill it with stuffing, and glue it onto the base as the mushroom cap.
- Paint the base to match the mushroom theme.
Mushroom Tea Light Shade
Add a cozy glow to your space with a mushroom-shaped shade.
Materials Used: Air-dry clay, tealight candle, paint, sculpting tools.
Steps:
- Sculpt a hollow mushroom with an open bottom to fit over a tealight.
- Add small cutouts in the cap for light to shine through.
- Let the clay dry and paint it.
- Place it over a battery-powered tealight.
Mushroom Bowl
A whimsical small bowl for snacks or trinkets.
Materials Used: Air-dry clay, a bowl mold, paints, varnish.
Steps:
- Press clay into a bowl mold to form the shape.
- Add a mushroom design to the exterior.
- Let it dry, then paint and varnish.
Mushroom Drawer Knobs
Upgrade furniture with mushroom-inspired knobs.
Materials Used: Polymer clay, screws, acrylic paint.
Steps:
- Sculpt mushroom shapes with a flat base for attaching to drawers.
- Insert a screw into the base and bake the clay.
- Paint and seal with varnish before attaching.
Mushroom Garland
A decorative garland perfect for parties or rooms.
Materials Used: Polymer clay, string, acrylic paints.
Steps:
- Sculpt several small mushrooms and bake them.
- Paint the mushrooms in various colors.
- Thread them onto a string, tying knots to secure each piece.
Mushroom Desk Organizer
A multi-purpose organizer with mushroom elements.
Materials Used: Air-dry clay, paint, a container base.
Steps:
- Cover a container with clay and sculpt mushroom decorations.
- Let it dry and paint in earthy tones.
- Use it to store stationery or craft tools.
Mushroom Earrings Display Stand
Showcase earrings with a mushroom-themed stand.
Materials Used: Air-dry clay, wire, paint.
Steps:
- Sculpt a mushroom base and insert wire loops for hanging earrings.
- Let the piece dry and paint it in your desired colors.
Mushroom Jewelry Box
A small storage box with mushroom motifs.
Materials Used: Air-dry clay, box base, paint, varnish.
Steps:
- Sculpt mushroom shapes and attach them to the lid of a small box.
- Paint and seal with varnish.
Mushroom Cupcake Toppers
A fun edible decoration for cupcakes.
Materials Used: Edible modeling clay or fondant, food coloring.
Steps:
- Sculpt small mushrooms using edible clay.
- Add details with food coloring.
- Place on cupcakes as decorations.
Mushroom Planter
A unique planter with mushroom elements.
Materials Used: Air-dry clay, paint, varnish.
Steps:
- Sculpt a planter with mushroom details around the edges.
- Let it dry, then paint and varnish.
- Use it to house small plants or succulents.
Mushroom Candle Topper
Add charm to candle jars with mushroom-themed toppers.
Materials Used: Air-dry clay, paint.
Steps:
- Sculpt a mushroom design that fits on top of a candle jar.
- Let it dry and paint it.
Mushroom Soap Dish
A whimsical soap dish for your bathroom.
Materials Used: Air-dry clay, sculpting tools, paint, varnish.
Steps:
- Sculpt a dish with mushroom details along the rim.
- Let it dry and paint with waterproof sealant.
Mushroom Key Holder
A functional wall piece for hanging keys.
Materials Used: Air-dry clay, hooks, paint.
Steps:
- Sculpt a mushroom-shaped plaque with hooks at the bottom.
- Paint it in vibrant tones and hang it on the wall.
Mushroom Mobile
A playful hanging decor for nurseries or rooms.
Materials Used: Polymer clay, string, frame.
Steps:
- Sculpt small mushrooms and bake them.
- Attach them to strings and tie them to a circular frame.
- Hang the mobile in your desired location.
Display and Uses
Decor and gift items have become a cornerstone of modern aesthetics, blending creativity with functionality. They offer endless possibilities for beautifying spaces and creating memorable presents. Here’s a guide to exploring some of the best decor ideas and gifting options:
Decor Ideas
- Tabletop Décor
- Add charm to your tables with decorative elements like vases, candles, or artistic figurines.
- Use seasonal themes for a fresh look, such as autumn leaves or winter-inspired arrangements.
- Incorporate natural textures, like wood or stone, for a rustic vibe.
- Planter Accents
- Brighten up spaces with decorative planters and creative plant holders.
- Combine plants with small figurines or stones for an artistic touch.
- Opt for vertical or hanging planters to save space while adding greenery.
- Wall Hangings
- Elevate your walls with tapestries, photo collages, or minimalist art.
- Use handmade items, like macramé or woven décor, for a personal touch.
- Play with shapes and materials—geometric metal pieces or wooden carvings can create stunning focal points.
Gift Ideas
- Personalized Mushroom Crafts as Unique Presents
- Surprise loved ones with whimsical, mushroom-themed crafts.
- Personalize items like keychains, ornaments, or miniature sculptures.
- Mushroom-inspired décor can appeal to nature lovers or fans of magical themes.
- Packaging Tips for Handmade Items
- Wrap gifts in eco-friendly materials, like kraft paper and jute twine, for a sustainable touch.
- Use custom tags, stickers, or stamps to add a personalized note to your gifts.
- Incorporate decorative elements, like dried flowers or ribbons, to enhance the unboxing experience.
By thoughtfully combining these decor and gifting ideas, you can transform any space or occasion into something extraordinary, ensuring your creativity and effort leave a lasting impression.
Tips and Tricks for Working with Clay
Clay art is a rewarding and versatile craft, allowing creators to transform a lump of earth into intricate, functional, or decorative objects. Whether you’re a beginner or experienced artist, mastering certain techniques can elevate your clay projects. Here are some tips and tricks, common pitfalls to avoid, and guidance for care and inspiration to keep your clay journey exciting.
Tips and Tricks for Working with Clay
- Keep Your Clay Hydrated:
Always keep your clay wrapped in plastic or damp cloth when not in use to prevent it from drying out prematurely. Use a spray bottle to lightly mist it if needed. - Use Proper Tools:
Invest in basic tools like wire cutters, rolling pins, modeling tools, and sponges. Improvised tools, such as forks or old toothbrushes, can also add unique textures. - Wedge Your Clay Properly:
Kneading or wedging clay removes air bubbles, ensuring a smoother surface and reducing the risk of cracking during drying or firing. - Score and Slip for Strong Joints:
When attaching two pieces, always score (scratch) the surfaces and apply slip (watery clay) to create a strong bond. - Dry Slowly:
Let your project dry evenly and slowly to minimize cracking. Cover it loosely with plastic to control the drying process.
Common Mistakes to Avoid
- Cracking During Drying:
- Cause: Uneven drying or excess water in the clay.
- Solution: Dry your clay pieces in a consistent environment and avoid over-saturating it while working.
- Weak Joins Between Pieces:
- Cause: Failing to score and slip properly.
- Solution: Always roughen and wet the surfaces before joining.
- Not Testing Your Glaze:
- Cause: Applying an unfamiliar glaze without testing.
- Solution: Test glazes on sample pieces to ensure they work as desired.
- Overworking the Clay:
- Cause: Repeatedly handling and reshaping.
- Solution: Avoid over-kneading or reshaping as it can weaken the clay structure.
Care and Maintenance
- Cleaning and Storing Clay Items:
- Clean clay tools and workspace with water after each use to avoid dried clay buildup.
- Store leftover clay in an airtight container or wrapped in plastic to retain moisture.
- Repairing Small Damages:
- For cracks or chips, use a mixture of slip and finely powdered clay to fill and smooth the area.
- Sand lightly after drying to ensure a seamless finish.
Inspiration Sources for Clay Art
- Nature Walks and Photos:
Observe textures, patterns, and shapes in nature. Leaves, rocks, and flowers are excellent sources for imprinting or designing motifs. - Art Communities and Social Media:
Join pottery or clay art communities to share ideas and techniques. Platforms like Instagram, Pinterest, and YouTube are brimming with inspiration and tutorials.
By following these tips and avoiding common mistakes, you can improve your clay art skills and create beautiful, durable pieces. Regular maintenance and exploring new inspirations will keep your creative journey fulfilling and enjoyable. Happy crafting!
FAQ
What is Mushroom Clay Craft?
Mushroom clay craft is an art form where clay is used to create decorative or functional items inspired by the shapes and aesthetics of mushrooms. These crafts can include ornaments, jewelry, figurines, and other creative pieces.
What type of clay is best for mushroom clay crafts?
Air-dry clay and polymer clay are the most commonly used materials. Polymer clay is ideal for detailed designs as it hardens after baking, while air-dry clay is convenient for those without access to an oven.
Do I need special tools for making mushroom clay crafts?
No special tools are required for beginners. Basic sculpting tools like toothpicks, shaping tools, and a rolling pin are sufficient. Advanced artists may use specialty clay tools for intricate details.
Can I paint my mushroom clay crafts?
Yes! Acrylic paints work well for painting dried clay. Make sure the clay is fully dry or baked before painting, and seal the craft with a clear varnish for durability and a polished finish.
How long does it take for mushroom clay crafts to dry?
Air-dry clay usually takes 24-72 hours to dry completely, depending on the size and thickness of the piece. Polymer clay, on the other hand, needs to be baked, which typically takes 15-30 minutes depending on the brand and thickness.

Hi, I’m Victoria, an art and craft teacher at Newark City Schools, where I have the joy of working with middle school students to help them explore their creativity and develop their artistic talents. I believe that art is a powerful way for students to express themselves, and I strive to make every lesson a fun, engaging, and inspiring experience.
I created this website to share the art and craft projects, techniques, and resources that I use in my classroom, hoping to inspire both educators and young artists alike. Whether you’re a teacher looking for new ideas or a student eager to try something new, I’m excited to provide creative tools and projects that anyone can enjoy.
When I’m not in the classroom, I love experimenting with different art forms and learning new crafting techniques. My goal is to help others discover the joy of making things with their hands, and I hope my website serves as a space for everyone to explore their creative potential.