
Polymer clay jewelry offers endless creative possibilities, making it a popular choice for crafters and artists alike. From elegant earrings to statement necklaces, this versatile material allows you to shape, texture, and color your designs with ease. Whether you’re interested in bold, modern aesthetics or delicate, intricate details, polymer clay jewelry ideas are limitless.
One of the biggest advantages of using polymer clay is its lightweight nature, which makes it comfortable to wear. It’s also highly customizable—you can mix colors, create patterns, or even embed textures for a unique look. Additionally, polymer clay is an affordable option compared to other jewelry-making materials, making it perfect for beginners and small-scale creators.
Polymer Clay Jewelry
Polymer Clay Jewelry Ideas are fun and versatile crafts that allows you to create unique, colorful, and stylish accessories. From earrings and pendants to rings and bracelets, polymer clay can be molded, shaped, and baked into stunning designs. Popular ideas include marbled patterns, terrazzo effects, floral motifs, and geometric shapes. With endless color combinations and texture techniques, polymer clay jewelry is perfect for both beginners and experienced crafters looking to make personalized, handcrafted pieces.

Marbled Stud Earrings
Marbling is a simple yet elegant technique that creates a swirling blend of colors.

Materials:
- Polymer clay in two or more colors
- Earring posts and backings
- Roller or acrylic rolling pin
- Craft knife or clay cutter
- E6000 glue or liquid polymer clay
Steps:
- Roll out two or more clay colors into thin logs and twist them together.
- Fold and twist the clay multiple times to create a marbled effect.
- Roll into a smooth sheet and cut small circles using a cutter or bottle cap.
- Bake according to package instructions.
- Once cooled, attach earring posts using E6000 glue or bake with liquid clay.
Faux Terrazzo Earrings
Inspired by terrazzo flooring, these earrings mimic the colorful speckled look.
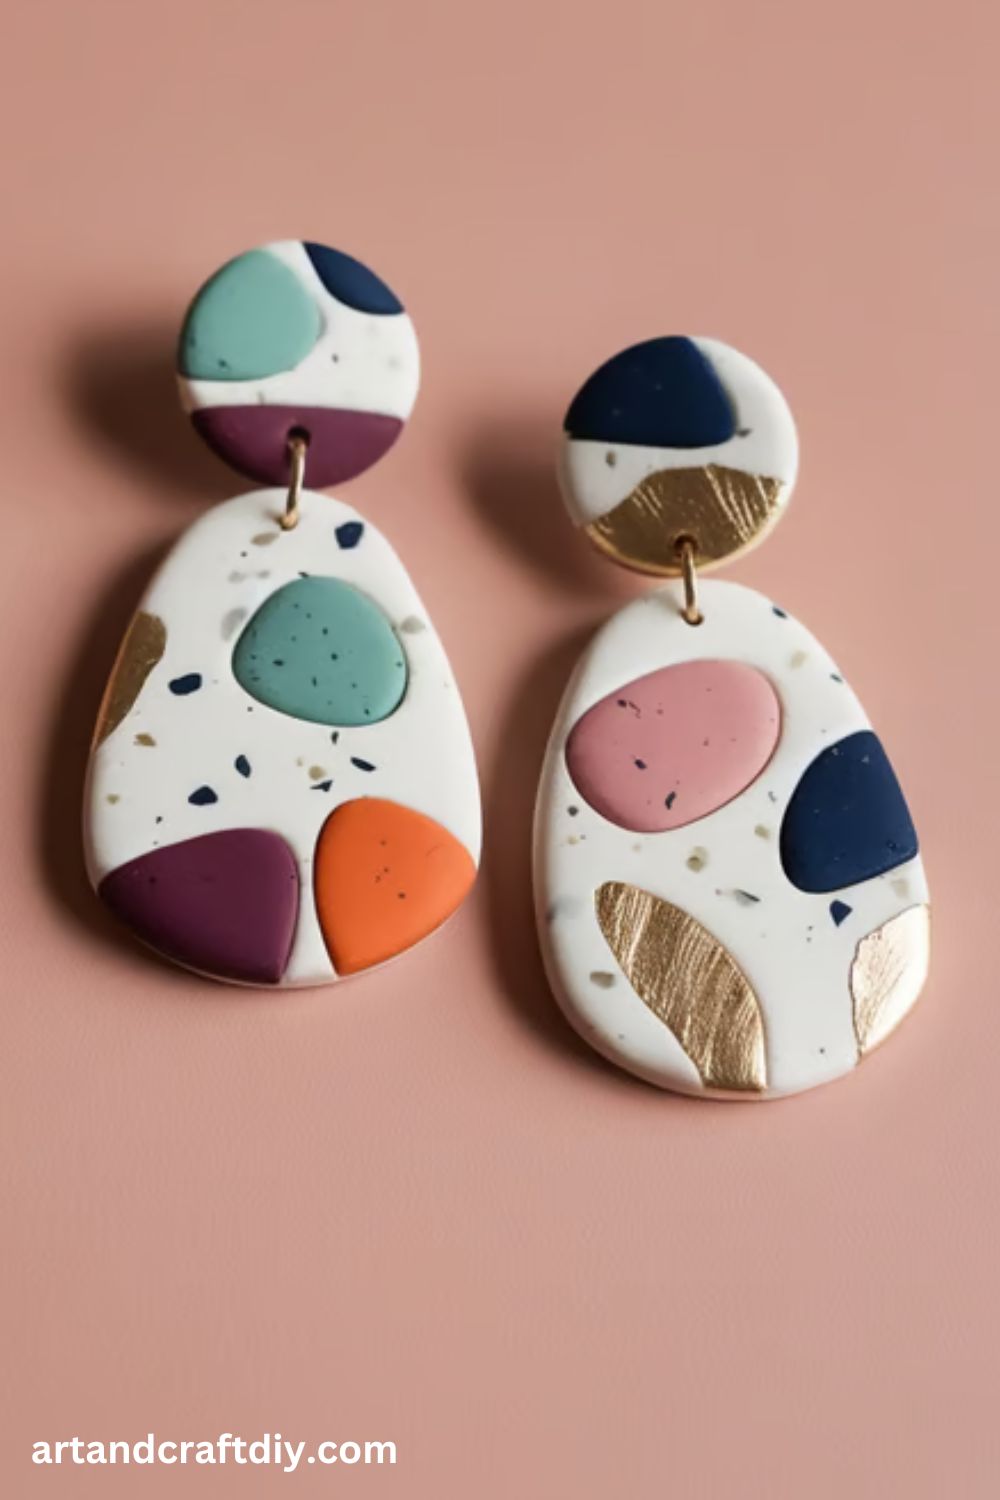
Materials:
- White polymer clay (base)
- Colored polymer clay scraps
- Roller
- Clay cutter
- Sandpaper
- Earring hooks
Steps:
- Roll out white clay as the base layer.
- Take small bits of colored clay and press them onto the base.
- Roll over to flatten and blend the pieces.
- Cut into desired shapes and bake.
- Once cooled, sand lightly for a polished terrazzo effect and attach hooks.
Embossed Floral Pendant
Create intricate floral textures on a pendant using stamps or lace.
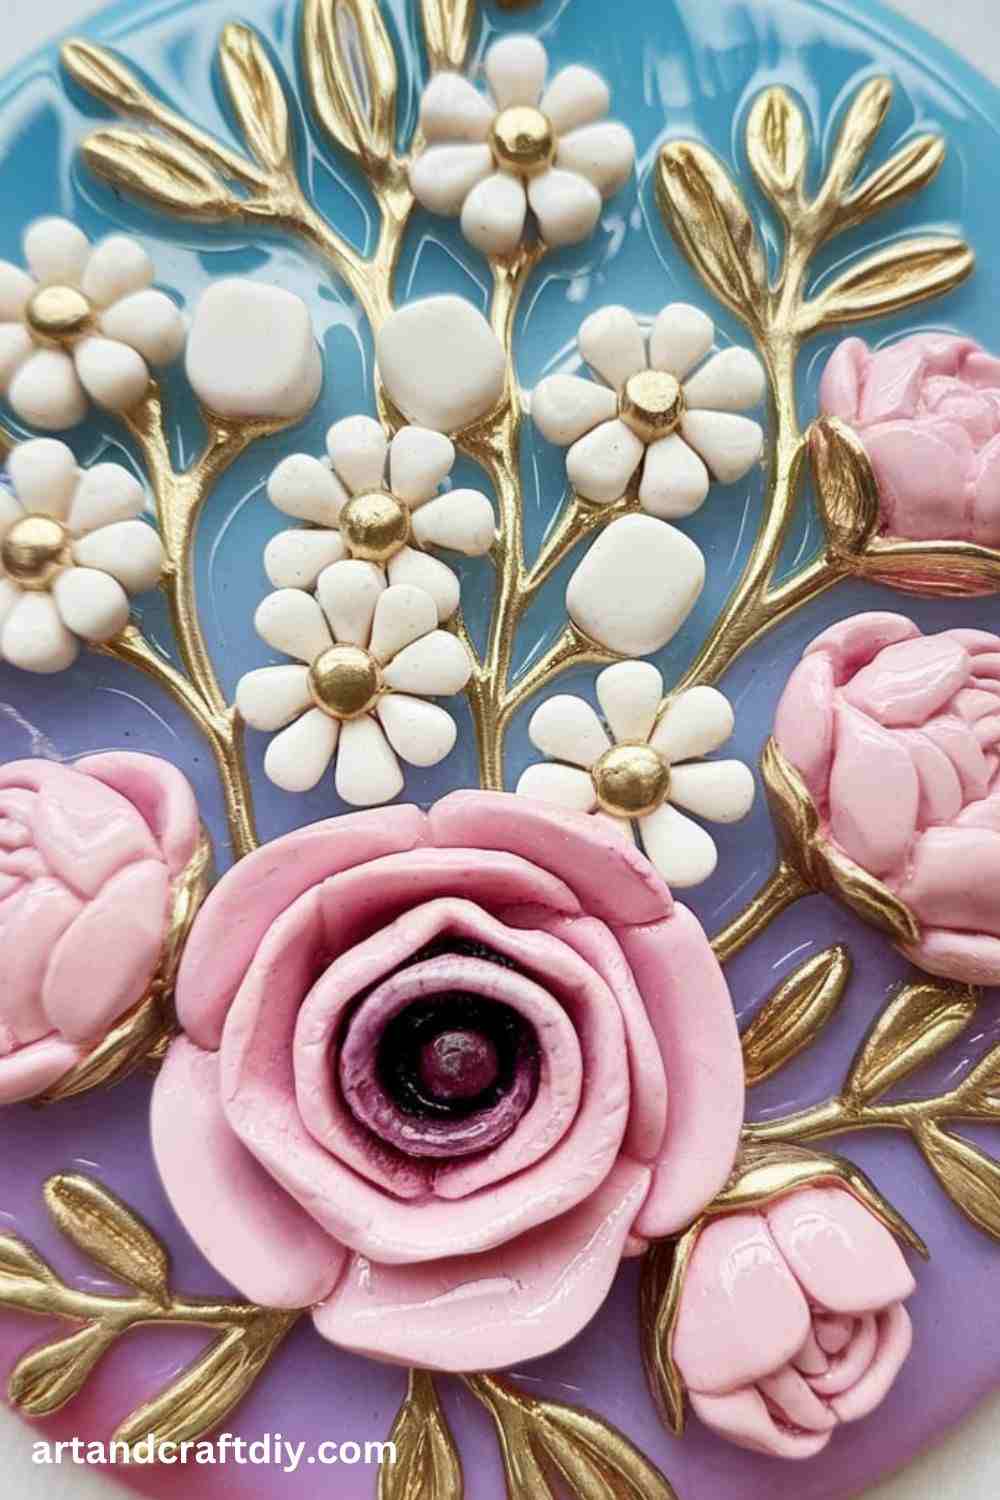
Materials:
- Polymer clay in your preferred color
- Roller
- Flower stamps or lace fabric
- Circle cutter
- Jump rings and chain
Steps:
- Roll out the clay to a medium thickness.
- Press stamps or lace onto the clay to imprint the texture.
- Cut out a circular or oval pendant shape.
- Make a small hole for the jump ring.
- Bake and attach to a necklace chain.
Minimalist Geometric Necklace
Perfect for modern jewelry lovers, geometric shapes add a contemporary touch.
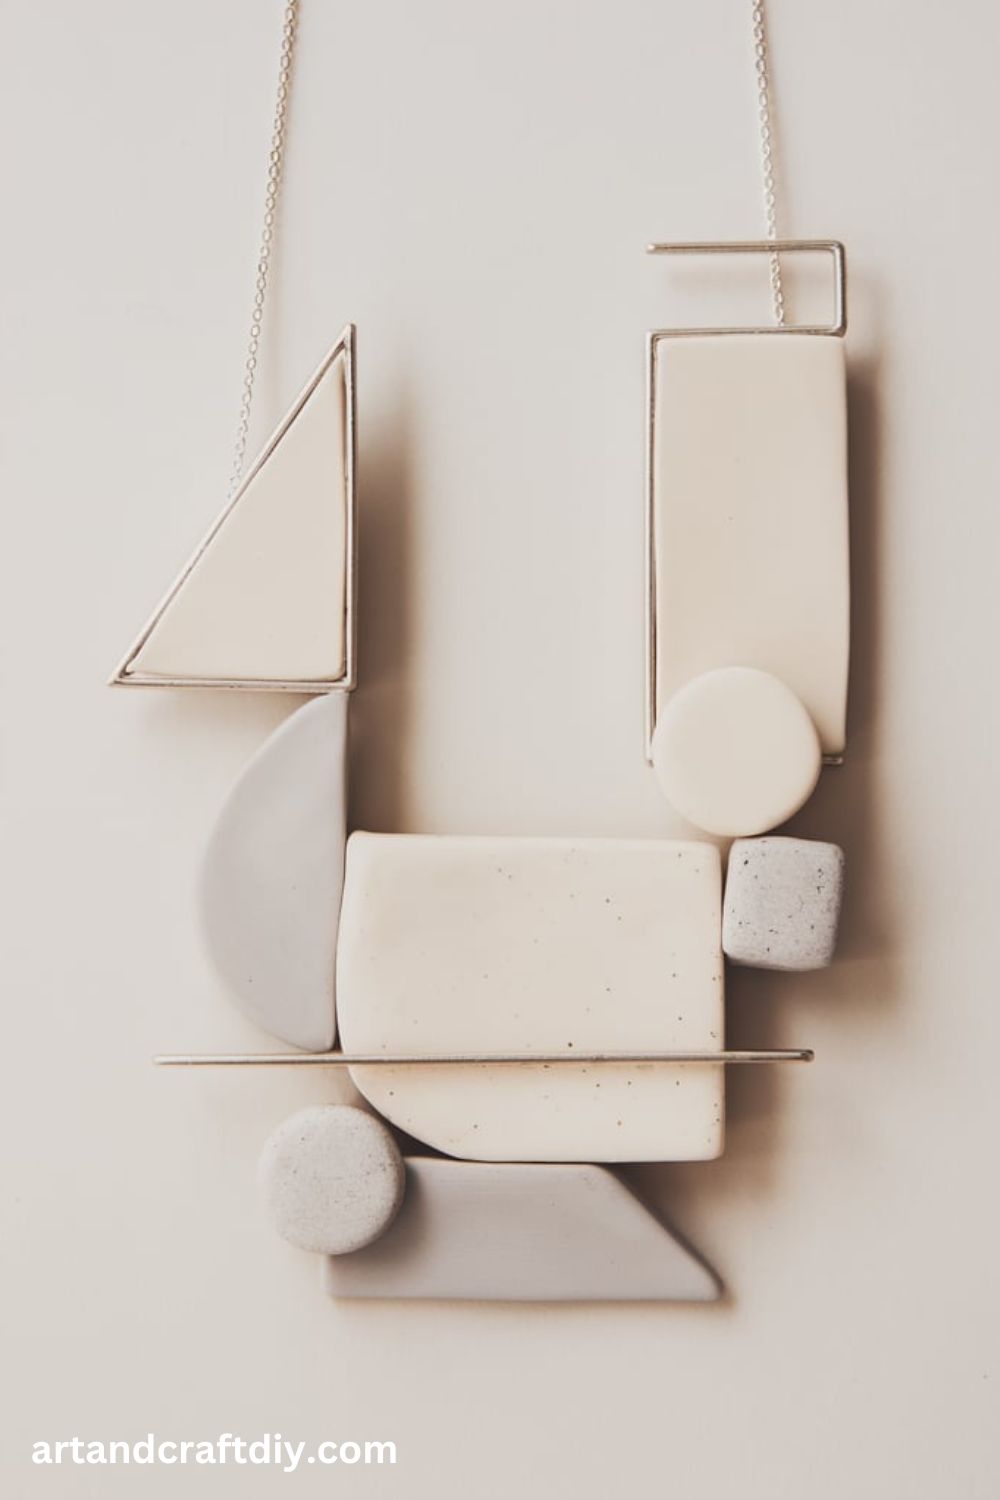
Materials:
- Polymer clay in neutral tones
- Clay cutters or craft knife
- Roller
- Jump rings and chain
Steps:
- Roll out clay and cut out different geometric shapes (circles, triangles, squares).
- Make small holes for jump rings.
- Bake and assemble using jump rings to create a layered necklace.
Speckled Egg Earrings
A fun design that resembles speckled eggs, great for nature-inspired jewelry.
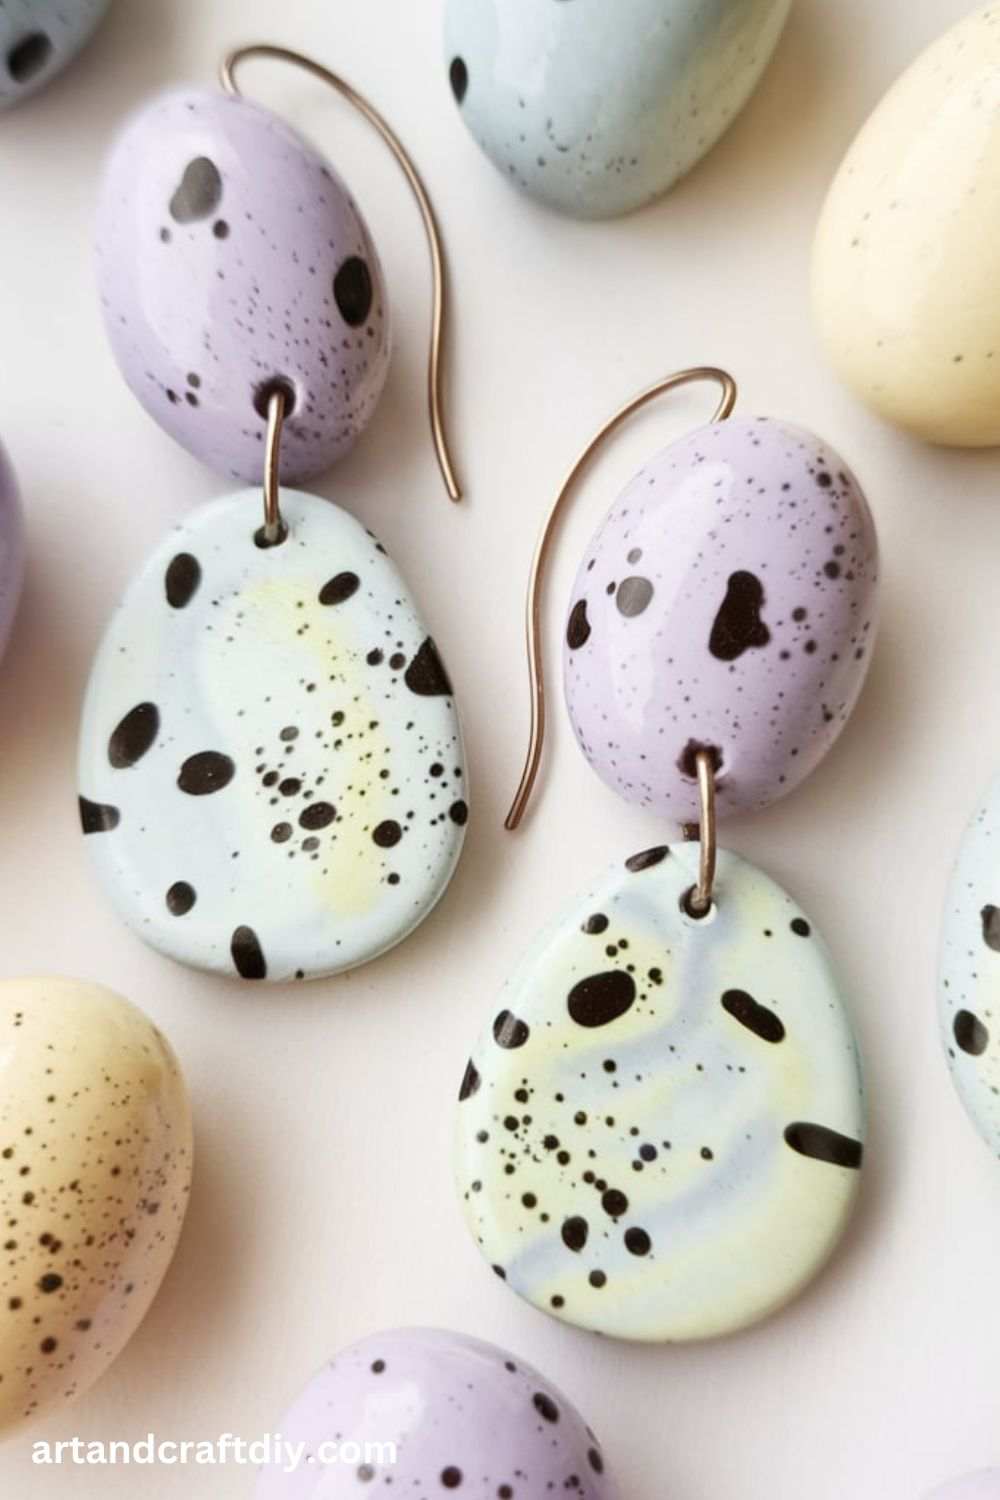
Materials:
- Pastel polymer clay
- Black acrylic paint or fine black clay
- Paintbrush
- Earring hooks
Steps:
- Shape pastel clay into small ovals.
- Use a fine paintbrush to add black speckles or mix fine black clay into the base.
- Bake and attach hooks.
Swirl Hoop Earrings
A playful, twisted design for statement hoops.

Materials:
- Two or more clay colors
- Hoop earring bases
- Roller
Steps:
- Roll out two clay colors into thin logs and twist them together.
- Wrap around a hoop earring base.
- Bake and let cool before wearing.
Gradient Ombré Pendant
Create a smooth gradient effect in a pendant using color blending.
Materials:
- Two or three shades of polymer clay
- Roller
- Cutter
- Necklace chain
Steps:
- Roll out different shades and slightly overlap them.
- Blend by rolling over the seams.
- Cut into desired pendant shape and bake.
- Attach to a chain.
Faux Jade Beads
Mimic the elegant look of jade without real stone.
Materials:
- Green polymer clay
- White chalk pastel
- Varnish
- String for beading
Steps:
- Mix green clay with a small amount of white pastel powder for a natural look.
- Shape into small beads and bake.
- Glaze with varnish for a polished stone effect.
- String onto a necklace or bracelet.
Moon Phase Necklace
A celestial-themed necklace featuring moon phases.
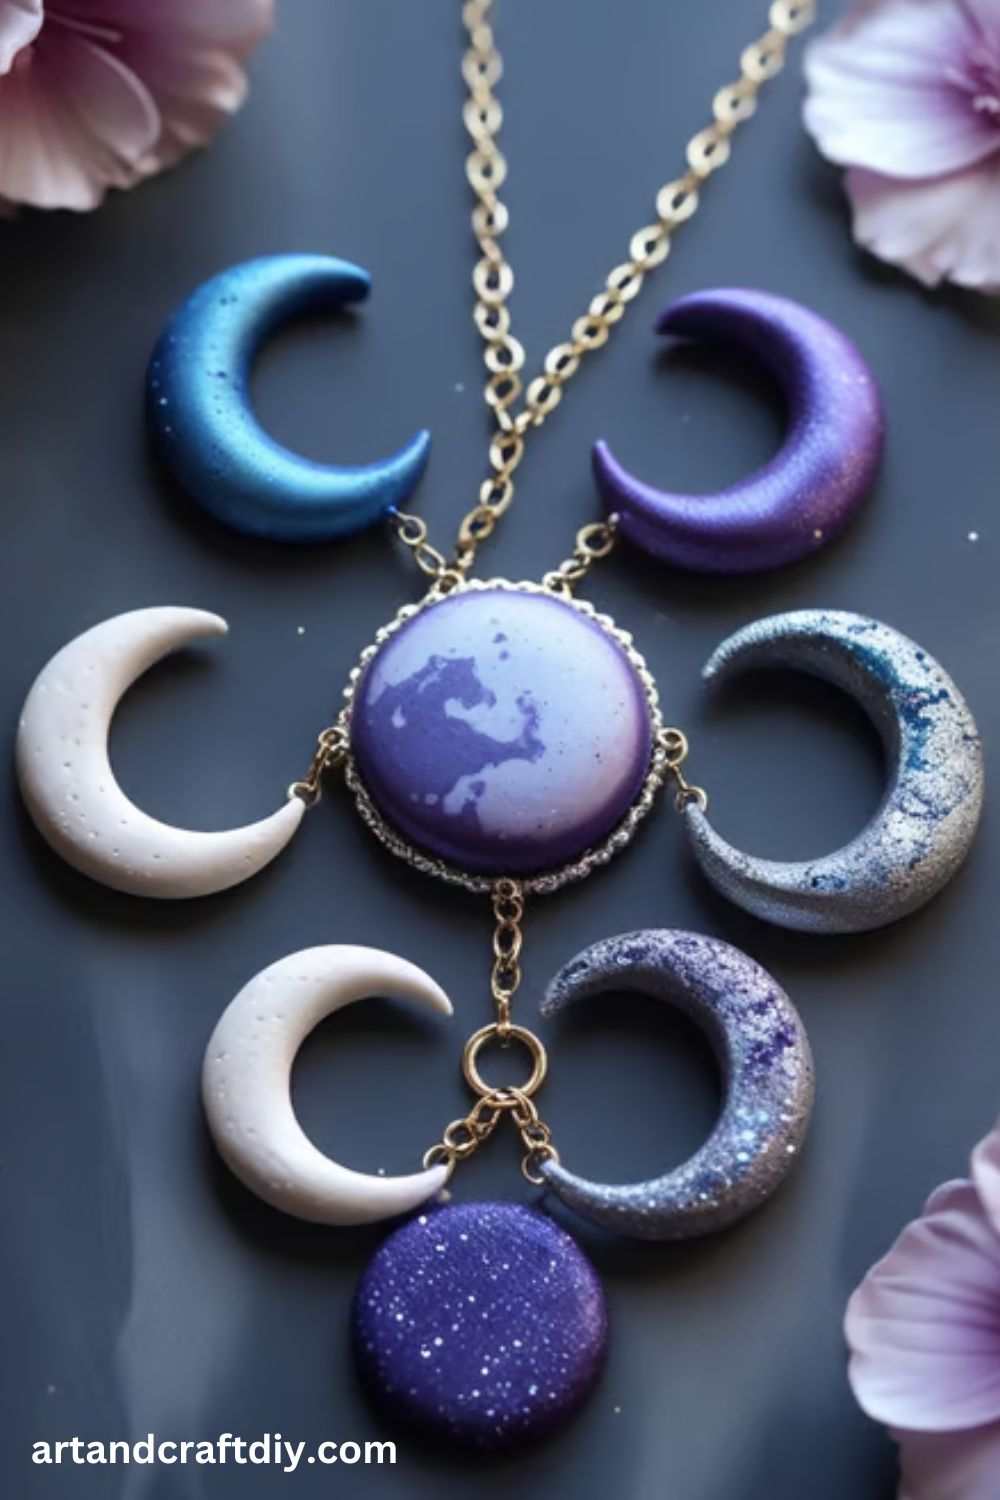
Materials:
- Black, white, and gray clay
- Cutter
- Chain
Steps:
- Roll out black clay for a night-sky effect.
- Cut different moon phase shapes.
- Bake and attach to a chain.
Abstract Face Earrings
Trendy and artistic, these earrings feature Picasso-style abstract faces.
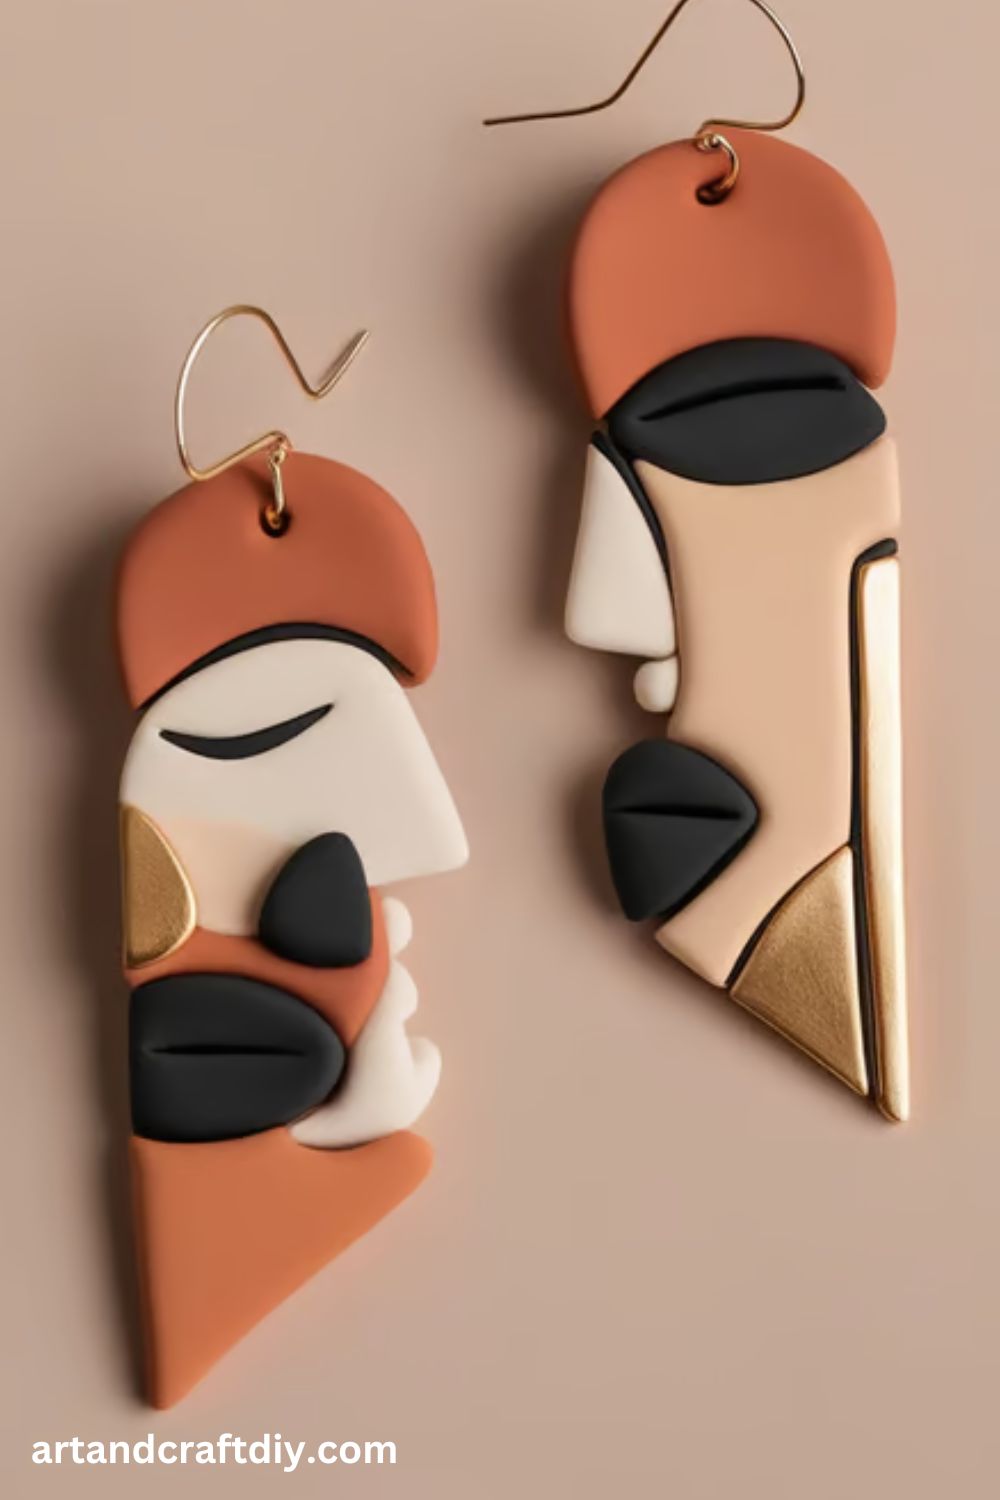
Materials:
- Black polymer clay
- Craft knife
- Earring hooks
Steps:
- Roll out black clay into a thin sheet.
- Use a craft knife to cut abstract face designs.
- Bake and attach hooks.
Faux Wood Grain Bracelet
Mimic a wood texture for a rustic charm.
Materials:
- Brown and tan clay
- Toothpick
- Roller
- Bracelet base
Steps:
- Mix brown and tan clay slightly to create a wood effect.
- Roll out and texture with a toothpick.
- Wrap around a bracelet base and bake.
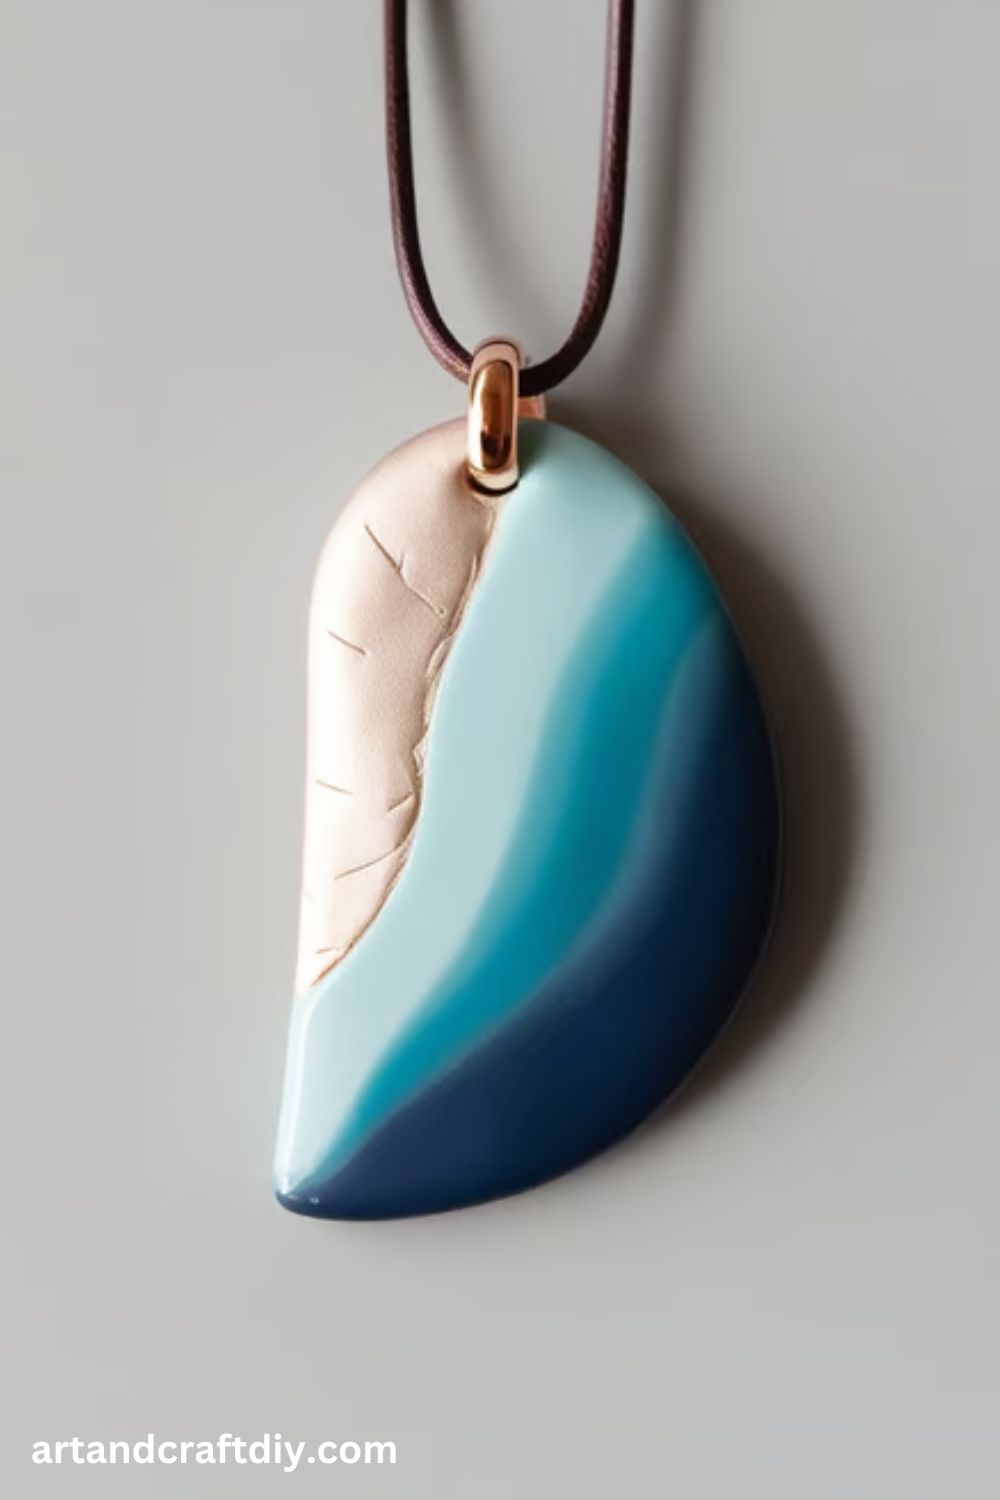
Ocean Wave Pendant
A beautiful ocean-inspired pendant using a water effect.
Materials:
- Blue, white, and translucent clay
- Roller
- Necklace chain
Steps:
- Blend blue and white clay to create wave patterns.
- Shape into a pendant and bake.
- Glaze for a glossy water-like finish.
Mini Donut Earrings
Cute, tiny donuts for a fun jewelry piece.
Materials:
- Brown and pastel clay
- Craft knife
- Earring posts
Steps:
- Shape brown clay into a donut.
- Add pastel-colored “icing” on top.
- Bake and attach earring posts.
Pressed Flower Resin Pendant
Combine polymer clay with resin for a stunning botanical piece.
Materials:
- White polymer clay
- Pressed flowers
- Resin and mold
- Necklace chain
Steps:
- Roll out white clay and bake into a flat pendant base.
- Place pressed flowers on top and cover with resin.
- Let cure and attach to a chain.
Rose Bouquet Studs
These tiny rose earrings add an elegant floral touch to any outfit.
Materials:
- Red, pink, and green polymer clay
- Earring posts and glue
- Toothpick
Steps:
- Roll red or pink clay into tiny coils and swirl them to form roses.
- Shape green clay into tiny leaves and attach them to the roses.
- Flatten the base slightly and bake.
- Glue onto earring posts.
Textured Boho Dangle Earrings
Create unique bohemian-style earrings with stamped textures.
Materials:
- Earth-toned polymer clay
- Roller
- Textured stamps or lace fabric
- Cutter
- Jump rings and hooks
Steps:
- Roll out clay and press textures using stamps or lace.
- Cut out shapes like semicircles, arches, or rectangles.
- Make small holes for jump rings.
- Bake, assemble, and attach earring hooks.
Galaxy Swirl Pendant
A cosmic, dreamy design that mimics a galaxy.
Materials:
- Black, purple, blue, and white polymer clay
- Glitter or mica powder
- Cutter
- Chain
Steps:
- Blend black, blue, and purple clay slightly to create a cosmic swirl.
- Roll into a sheet and cut into a pendant shape.
- Dust with glitter or mica for a starry effect.
- Bake and attach to a chain.
Faux Turquoise Ring
Create a realistic turquoise gemstone effect with polymer clay.
Materials:
- Blue polymer clay
- Black acrylic paint
- Varnish
- Adjustable ring base
Steps:
- Mix blue clay with small black veins for a stone-like appearance.
- Shape into a cabochon (rounded oval shape).
- Bake and paint thin cracks with black paint for added realism.
- Glaze with varnish and attach to a ring base.
Mismatched Abstract Earrings
A fun, artsy design with asymmetrical shapes.
Materials:
- Various colored polymer clay
- Cutter
- Earring hooks
Steps:
- Cut different abstract shapes in mismatched styles.
- Add texture or contrasting clay details.
- Bake and assemble using jump rings and hooks.
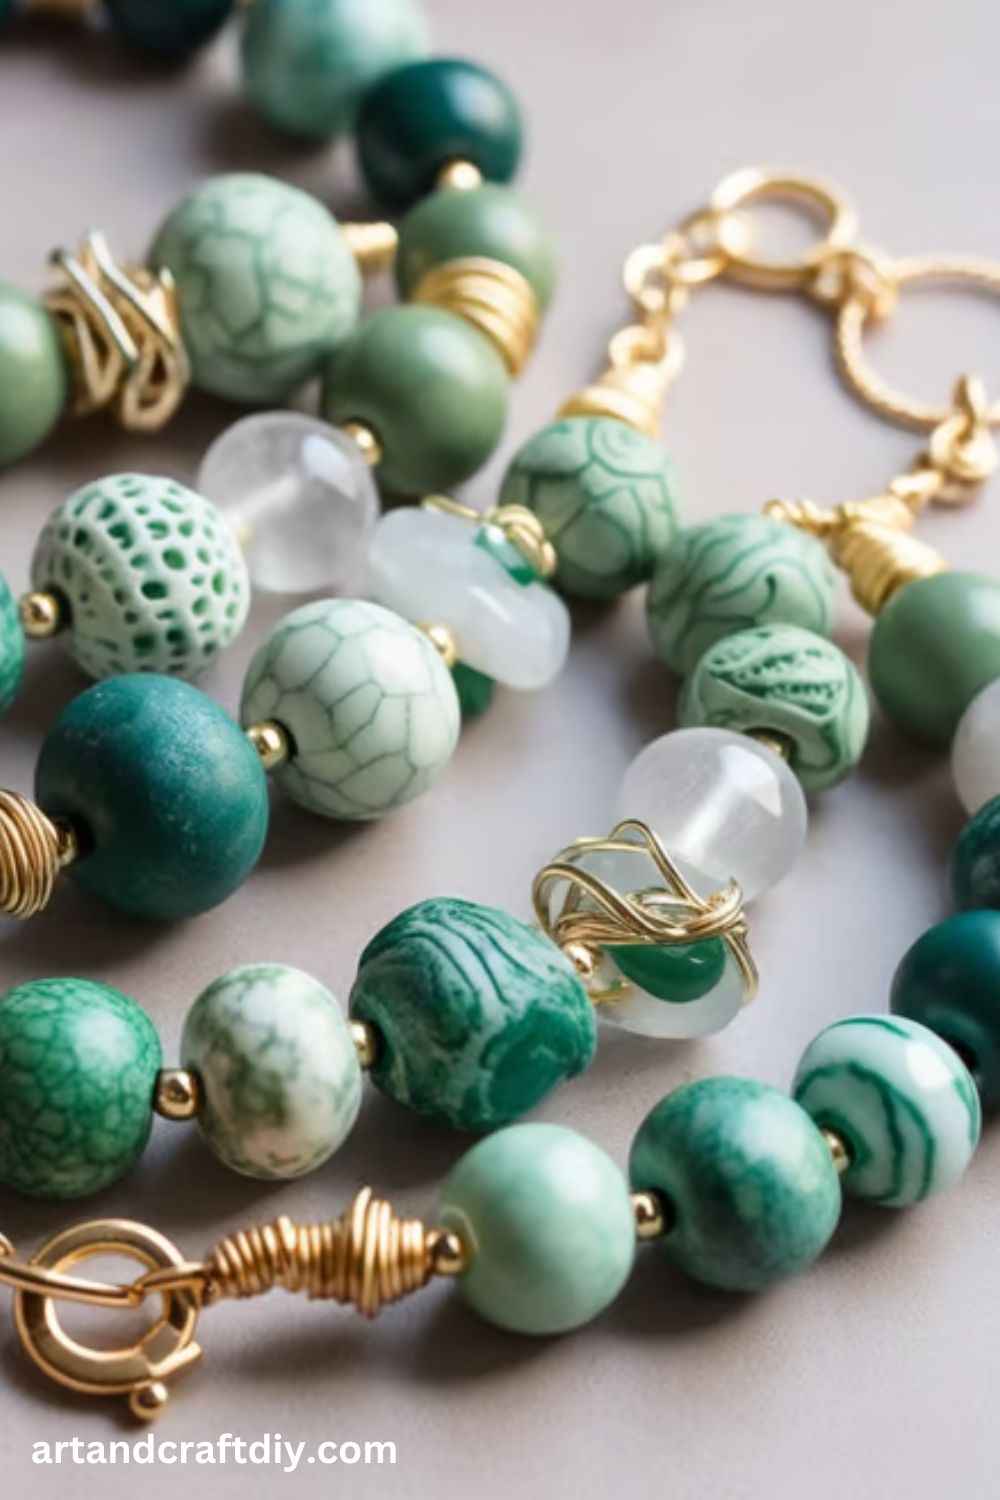
Beaded Polymer Clay Bracelet
Customize a bracelet with handmade polymer beads.
Materials:
- Multiple polymer clay colors
- Needle or skewer
- String or elastic
Steps:
- Roll small clay balls and poke a hole in each using a needle.
- Bake and string them onto an elastic cord.
Faux Leather Feather Earrings
Mimic the texture of leather feathers with polymer clay.
Materials:
- Brown or tan polymer clay
- Craft knife
- Earring hooks
Steps:
- Roll out clay into a thin sheet.
- Cut into feather shapes and add texture with a craft knife.
- Bake and attach to earring hooks.
Citrus Slice Necklace
A bright and fresh fruit-inspired necklace.
Materials:
- Orange, lemon, or lime polymer clay
- Craft knife
- Roller
- Chain
Steps:
- Roll out colored clay and create a citrus pattern.
- Cut into slices and bake.
- Attach to a chain.
Macaron Charm Bracelet
Cute and colorful macarons made from clay.
Materials:
- Pastel-colored polymer clay
- Roller
- Charm bracelet chain
- Jump rings
Steps:
- Shape two small circles and add texture to mimic macaron shells.
- Add a thin clay layer in between for “filling.”
- Bake and attach to a charm bracelet.
Checkerboard Earrings
Trendy checkered designs in bold colors.
Materials:
- Two contrasting polymer clay colors
- Roller
- Cutter
Steps:
- Roll out two colors and cut into small squares.
- Arrange in a checkerboard pattern and roll flat.
- Cut into earring shapes, bake, and attach hooks.
Floral Embellished Hoop Earrings
A unique design combining clay flowers with hoops.
Materials:
- Gold hoop earrings
- Polymer clay (pink, red, green)
- Roller
Steps:
- Create tiny flowers and leaves with polymer clay.
- Attach them to the front of hoop earrings.
- Bake and seal with varnish.
Yin-Yang Pendant
A balanced and meaningful yin-yang design.
Materials:
- Black and white polymer clay
- Cutter
- Chain
Steps:
- Shape black and white clay into a yin-yang symbol.
- Add small white and black dots for contrast.
- Bake and attach to a necklace chain.
Vintage Cameo Brooch
A classic, antique-inspired jewelry piece.
Materials:
- Beige and pastel polymer clay
- Cameo mold
- Brooch pin
Steps:
- Press beige clay into a cameo mold.
- Attach to an oval-shaped pastel clay base.
- Bake and glue onto a brooch pin.
Mini Avocado Earrings
Adorable avocado halves for a cute jewelry design.
Materials:
- Green, brown, and black polymer clay
- Craft knife
- Earring hooks
Steps:
- Shape green clay into an avocado half.
- Add a brown clay ball as the “pit.”
- Bake and attach to earring hooks.
Clay and Wood Hybrid Necklace
A rustic and modern combination of materials.
Materials:
- Neutral-colored polymer clay
- Wooden beads
- String or chain
Steps:
- Shape polymer clay into modern geometric pieces.
- Bake and combine with wooden beads on a string.
Tips for Success & Troubleshooting with Polymer Clay
Polymer clay is a versatile and fun medium for crafting, but achieving smooth, durable, and professional-looking results requires some key techniques. Whether you’re a beginner or an experienced artist, these tips will help you avoid common mistakes and create long-lasting pieces.
1. Avoiding Air Bubbles and Cracks
✅ Condition the Clay Properly – Knead and roll the clay thoroughly to remove trapped air. A pasta machine helps.
✅ Roll and Fold Carefully – Avoid folding clay in a way that traps air; instead, roll it flat and fold gently.
✅ Pierce Air Bubbles – If you spot bubbles, use a needle or blade to pop them before smoothing the surface.
✅ Slow Cooling – Avoid sudden temperature changes after baking to prevent cracks. Let pieces cool gradually.
2. Proper Baking Times and Temperatures
✅ Follow Manufacturer’s Instructions – Different brands require different temperatures, usually between 265°F – 275°F (129°C – 135°C).
✅ Use an Oven Thermometer – Many ovens are inaccurate, leading to underbaking or burning.
✅ Tent with Foil – Place a foil tent over your piece to prevent scorching.
✅ Longer Baking is Better – Underbaked clay is brittle. Baking for 45-60 minutes (instead of the minimum time) ensures strength.
Selling & Showcasing Polymer Clay Jewelry
Polymer clay jewelry is a growing trend in the handmade accessories market. Whether you’re a hobbyist or planning to turn your craft into a business, knowing how to present, price, and sell your pieces effectively is essential. This guide covers professional product photography, pricing strategies, the best online platforms, and branding ideas to help you succeed.
📸 How to Take Professional-Looking Product Photos
High-quality images make your jewelry more appealing and increase sales. Here’s how to achieve professional-looking product photos:
- Use Natural Light or Softbox Lighting – Avoid harsh shadows by photographing near a window or using a lightbox.
- Choose a Clean Background – White, neutral, or minimalistic backgrounds work best to highlight your jewelry.
- Invest in a Tripod – Prevents shaky hands and ensures sharp, clear images.
- Use a Macro Lens or Good Camera – A smartphone with portrait mode or a DSLR camera captures details beautifully.
- Show Different Angles & Close-ups – Highlight textures, colors, and intricate designs.
- Include Lifestyle Shots – Photograph jewelry being worn to help customers visualize scale and style.
- Edit Your Photos – Use apps like Lightroom, Snapseed, or Canva for color correction and brightness adjustments.
💰 Pricing Strategies & Cost Considerations
Proper pricing ensures profitability while keeping your products competitive. Consider these factors:
- Material Costs – Include clay, tools, glazes, earring hooks, and packaging.
- Time & Labor – Pay yourself fairly for your time spent designing, sculpting, baking, sanding, and assembling.
- Overhead Expenses – Factor in electricity, photography equipment, website fees, and other business costs.
- Competitor Research – Compare prices of similar handmade jewelry to find a competitive range.
- Perceived Value – Unique designs and premium branding allow you to price higher.
- Pricing Formula: (Material Cost + Time) × 2 or 3=Retail Price\text{(Material Cost + Time) × 2 or 3} = \text{Retail Price}(Material Cost + Time) × 2 or 3=Retail Price Add a profit margin that accounts for selling fees and potential discounts.
FAQ
What is polymer clay, and why is it popular for jewelry?
Polymer clay is a versatile, oven-bake modeling material used to create intricate and colorful jewelry. It’s popular because it’s lightweight, durable, and allows for endless creative possibilities.
What types of jewelry can I make with polymer clay?
You can create earrings, necklaces, bracelets, rings, pendants, and even hair accessories using polymer clay.
Do I need special tools to make polymer clay jewelry?
Basic tools include a rolling pin, cutters, sculpting tools, sandpaper, and an oven for baking. Optional tools like texture mats, molds, and resin can enhance your designs.
How do I bake polymer clay jewelry?
Bake polymer clay in a conventional oven at the temperature specified on the package (usually around 265–275°F or 130°C). Use a baking tray with parchment paper to prevent sticking or scorching.

Hi, I’m Victoria, an art and craft teacher at Newark City Schools, where I have the joy of working with middle school students to help them explore their creativity and develop their artistic talents. I believe that art is a powerful way for students to express themselves, and I strive to make every lesson a fun, engaging, and inspiring experience.
I created this website to share the art and craft projects, techniques, and resources that I use in my classroom, hoping to inspire both educators and young artists alike. Whether you’re a teacher looking for new ideas or a student eager to try something new, I’m excited to provide creative tools and projects that anyone can enjoy.
When I’m not in the classroom, I love experimenting with different art forms and learning new crafting techniques. My goal is to help others discover the joy of making things with their hands, and I hope my website serves as a space for everyone to explore their creative potential.