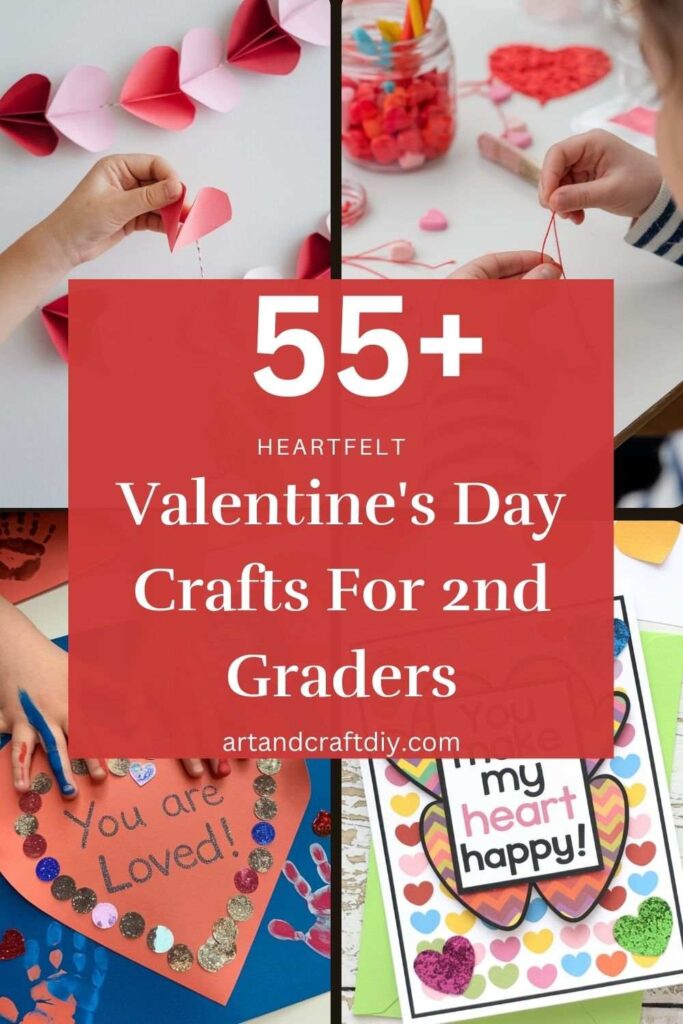
Valentine’s Day is a special occasion celebrated worldwide as a day to express love, friendship, and appreciation for others. For young children, this day offers an exciting opportunity to create and share meaningful gifts with family and friends. Engaging in Valentine’s Day Crafts For 2nd Graders can make the celebration even more memorable, as these activities combine creativity with the joy of giving.
Crafts play a vital role in fostering creativity, fine motor skills, and teamwork among 2nd graders. When children work on projects together, they learn valuable skills like sharing ideas, problem-solving, and collaborating to achieve a common goal. Furthermore, crafting allows them to express their individuality while building a sense of accomplishment.]
Valentine’s Day Crafts For 2nd Graders
Valentine’s Day crafts for 2nd graders are a fun and creative way to celebrate the holiday while engaging young minds. Valentine’s Day Crafts For 2nd Graders typically focus on simple, hands-on activities that allow children to express their love and appreciation for family, friends, and classmates. From making colorful heart-shaped cards and paper garlands to creating personalized gifts like friendship bracelets or DIY bookmarks, these projects help develop fine motor skills, encourage creativity, and promote a sense of community and kindness.
Heart-Shaped Paper Weaving
Introduce young learners to weaving techniques with this simple and colorful project. It helps develop fine motor skills and creates a beautiful decoration.
Materials Needed:
- Colored construction paper (two colors)
- Scissors
- Glue stick
Steps:
- Cut one piece of construction paper into a heart shape.
- Fold the heart in half and cut slits along the fold, ensuring not to cut all the way through.
- Cut the second piece of paper into long strips.
- Weave the strips through the slits in the heart, alternating over and under.
- Secure the ends with glue.
- Decorate as desired and display.
Personalized Cupid’s Arrow Pencil Toppers
Turn ordinary pencils into Valentine’s Day gifts with these adorable arrow toppers.
Materials Needed:
- Pencils
- Foam sheets or felt (red and pink)
- Scissors
- Hot glue (with adult supervision)
Steps:
- Cut out arrowheads and feather shapes from the foam sheets.
- Attach the arrowhead to one end of the pencil with glue.
- Glue the feather shapes to the opposite end, fanning them out slightly.
- Personalize with glitter or stickers for added charm.
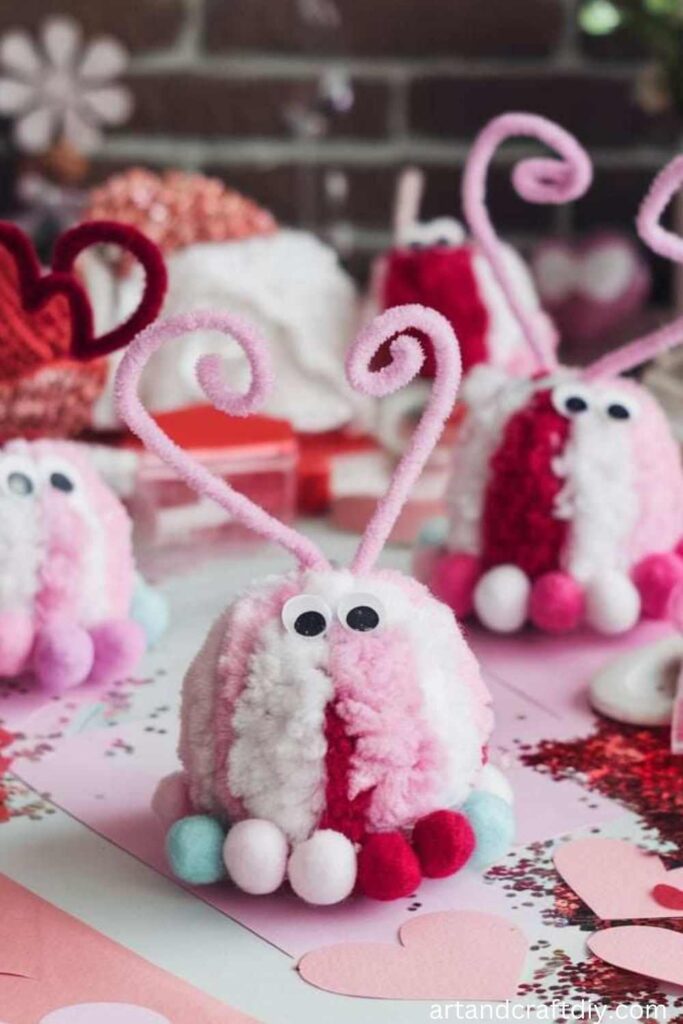
DIY Pom -Pom Love Bug
These fuzzy little bugs make a delightful Valentine’s Day keepsake.
Materials Needed:
- Yarn (pink, red, or white)
- Googly eyes
- Pipe cleaners
- Glue
- Scissors
Steps:
- Wrap yarn around your fingers or a small cardboard rectangle about 50 times.
- Slide the yarn off carefully and tie it tightly in the center.
- Cut the loops to form a pom-pom.
- Attach googly eyes and pipe cleaner antennae with glue.
- Let the love bug dry and give it as a sweet gift.
Handmade Heart-Shaped Sun Catchers
Brighten windows with these colorful heart sun catchers.
Materials Needed:
- Wax paper
- Crayons
- Pencil sharpener
- Iron (used by an adult)
- Heart-shaped template
Steps:
- Shave crayons into small pieces using a sharpener.
- Arrange the crayon shavings between two sheets of wax paper.
- Place a cloth over the wax paper and iron gently until the crayons melt.
- Let cool, then trace and cut out heart shapes.
- Hang them in the window to catch the light.
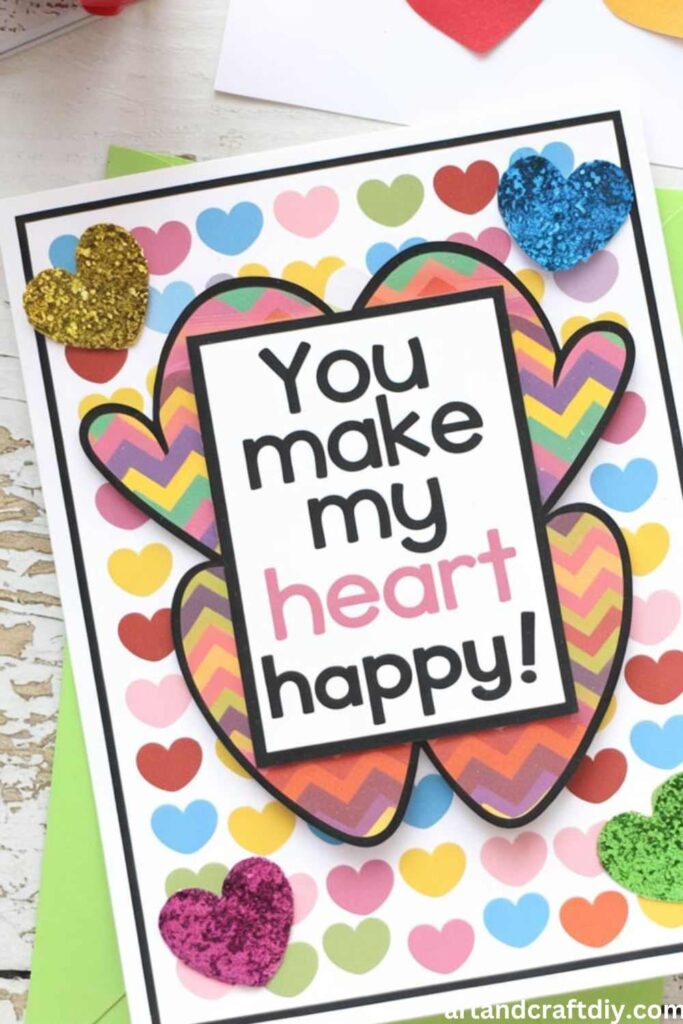
Valentine’s Day Greeting Cards
Teach kids to craft personalized cards for friends and family.
Materials Needed:
- Cardstock
- Markers
- Stickers
- Glitter glue
- Heart-shaped templates
Steps:
- Fold a piece of cardstock in half to create a card.
- Use heart templates to trace shapes on the front.
- Decorate the card with markers, stickers, and glitter glue.
- Write a heartfelt message inside.
- Seal it in an envelope for delivery.
Paper Plate Love Birds
Craft adorable love birds using paper plates.
Materials Needed:
- Paper plates
- Paint and brushes
- Colored paper
- Scissors
- Glue
Steps:
- Paint a paper plate in a bright color and let it dry.
- Fold the plate in half to form the bird’s body.
- Cut out wings, beaks, and feet from colored paper.
- Glue the pieces onto the plate.
- Add googly eyes or draw eyes with markers.
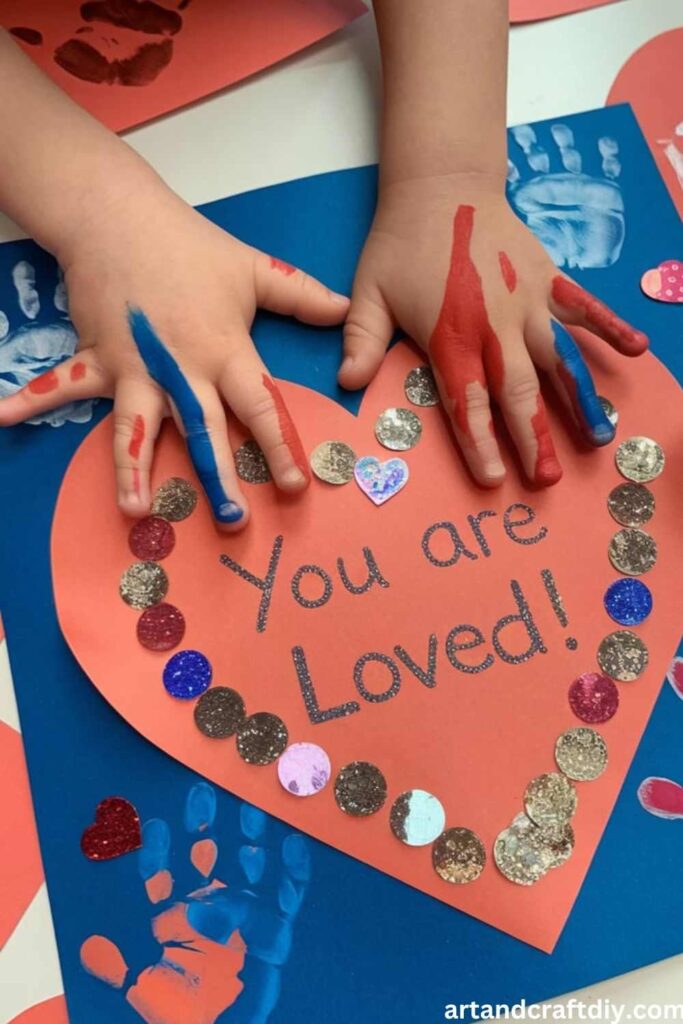
Handprint Heart Keepsakes
Create a memorable keepsake with handprint hearts.
Materials Needed:
- Construction paper
- Paint
- Paintbrushes
- Marker
Steps:
- Paint the child’s hands with a color of their choice.
- Press the hands onto a piece of paper in a heart shape.
- Allow the paint to dry completely.
- Write a special Valentine’s message around the handprint heart.
- Frame or gift the keepsake.
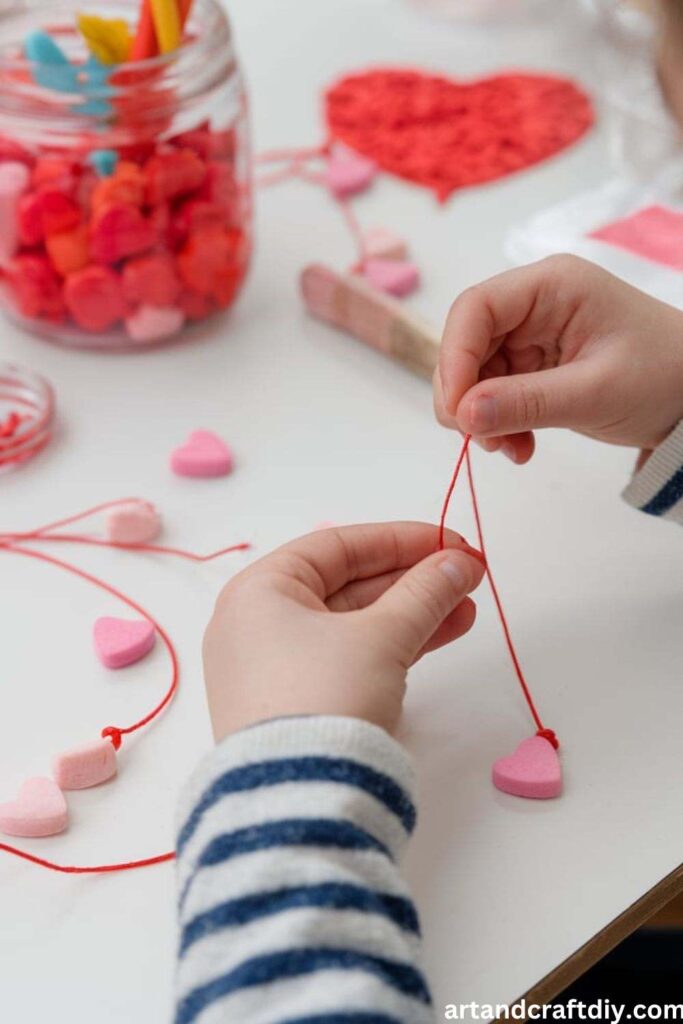
Candy Heart Necklaces
Kids will love wearing and sharing these candy necklaces.
Materials Needed:
- Candy hearts with holes
- Elastic string
- Scissors
Steps:
- Cut a piece of elastic string to the desired length.
- Thread the candy hearts onto the string.
- Tie the ends securely to form a necklace.
- Wear or gift the necklace as a sweet Valentine’s accessory.
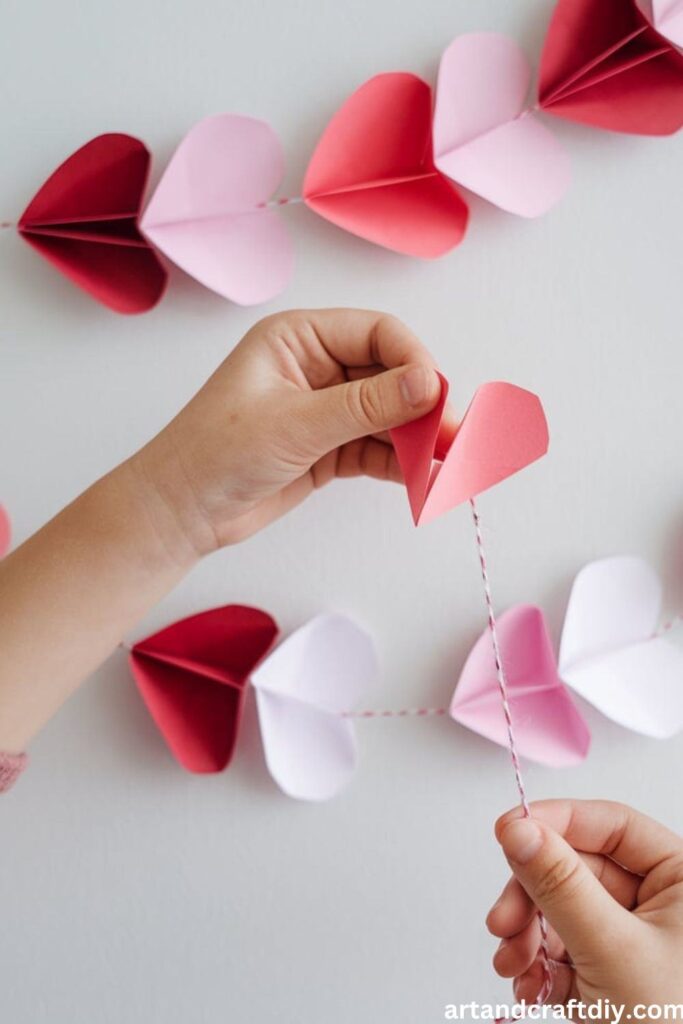
3D Heart Garland
Decorate classrooms or homes with this eye-catching garland.
Materials Needed:
- Colored paper
- Scissors
- Stapler or glue
- String
Steps:
- Cut strips of colored paper.
- Fold each strip in half and staple the open ends together to form a heart.
- Link additional hearts by stapling them together at the points.
- Attach the garland to a string and hang it up.
Valentine’s Day Wreath
Adorn doors with a festive wreath made from paper hearts.
Materials Needed:
- Cardboard (for the base)
- Construction paper
- Scissors
- Glue
- Ribbon
Steps:
- Cut a circular base out of cardboard.
- Cut hearts from construction paper in various sizes and colors.
- Glue the hearts onto the cardboard base, overlapping them.
- Add a ribbon bow for decoration.
- Hang the wreath on a door or wall.
Stained Glass Hearts
Mimic the look of stained glass with this vibrant craft.
Materials Needed:
- Black construction paper
- Tissue paper in assorted colors
- Glue stick
- Scissors
Steps:
- Fold black construction paper in half and cut out a heart frame.
- Glue pieces of tissue paper onto the back of the frame.
- Trim the excess tissue paper.
- Display the hearts on windows to catch the light.
Button Heart Art
Design unique artwork using colorful buttons.
Materials Needed:
- Cardstock
- Buttons in various colors and sizes
- Glue
Steps:
- Draw a heart shape on cardstock.
- Fill the heart with buttons, arranging them creatively.
- Glue each button in place.
- Frame the artwork or gift it as a special token.
Valentine’s Day Fortune Tellers
Make playful fortune-telling cootie catchers with a Valentine’s twist.
Materials Needed:
- Paper
- Markers or crayons
Steps:
- Fold a square piece of paper into a fortune teller.
- Write Valentine’s messages inside each flap.
- Decorate the outside with hearts and drawings.
- Share and play with friends.
Pinecone Bird Feeders
Feed the birds while adding a natural touch to your garden with these simple pinecone feeders.
Materials Used:
- Large pinecones
- Peanut butter (or a nut-free alternative)
- Birdseed
- String or ribbon
Steps:
- Tie a piece of string or ribbon around the top of the pinecone to create a loop for hanging.
- Spread peanut butter over the surface of the pinecone using a spoon or spatula.
- Roll the pinecone in birdseed until it is fully covered.
- Hang the finished feeder on a tree branch and watch the birds enjoy!
Cotton Ball Polar Bears
Transform cotton balls into cute, fluffy polar bears perfect for a winter-themed display.
Materials Used:
- Cotton balls
- White construction paper
- Googly eyes
- Black marker
- Glue
Steps:
- Cut out the shape of a polar bear from white construction paper.
- Cover the body of the bear with glue.
- Stick cotton balls all over the glued area to create a fluffy texture.
- Add googly eyes and draw the nose and mouth with a black marker.
Paper Plate Penguins
Make charming penguins from simple paper plates and craft materials.
Materials Used:
- Paper plates
- Black and orange construction paper
- White paint
- Googly eyes
- Glue and scissors
Steps:
- Paint the center of a paper plate white to represent the penguin’s belly.
- Cut out flippers and a head from black construction paper and a beak and feet from orange construction paper.
- Attach the flippers, head, and feet to the plate using glue.
- Add googly eyes and the beak to the head.
Mitten Garland
Create a cozy mitten garland to decorate your home with a wintery touch.
Materials Used:
- Construction paper
- Yarn
- Hole punch
- Markers or crayons
- Glue
Steps:
- Cut mitten shapes from construction paper in different colors.
- Decorate the mittens with patterns using markers or crayons.
- Punch a hole at the top of each mitten.
- Thread yarn through the holes and secure the mittens evenly spaced on the yarn.
- Hang your garland across a mantle or window.
Popsicle Stick Snowflakes
Craft intricate snowflakes using popsicle sticks and simple materials.
Materials Used:
- Popsicle sticks
- White paint
- Glitter
- Glue
- String
Steps:
- Arrange popsicle sticks into a snowflake pattern and glue them together.
- Paint the snowflake white and sprinkle glitter onto the wet paint for a frosty look.
- Let the snowflake dry completely.
- Attach a piece of string to hang it on a tree or in a window.
Salt Dough Ornaments
Make personalized winter ornaments from salt dough for your tree or as keepsakes.
Materials Used:
- Salt dough (made from salt, flour, and water)
- Rolling pin
- Cookie cutters (winter shapes)
- Paint
- String
Steps:
- Roll out the salt dough to about 1/4-inch thickness.
- Use cookie cutters to create shapes like snowflakes, stars, or mittens.
- Poke a hole near the top of each shape for hanging.
- Bake the ornaments in a low-temperature oven until hard.
- Once cooled, paint and decorate them as desired.
- Thread string through the holes and hang them on the tree.
Snow Globe Jars
Capture the magic of snowfall in a DIY snow globe made from a mason jar.
Materials Used:
- Mason jar with a lid
- Small figurines or mini trees
- Glitter
- Glycerin
- Water
- Glue
Steps:
- Glue the figurine or mini tree to the inside of the mason jar lid.
- Fill the jar with water, a few drops of glycerin, and glitter.
- Screw the lid tightly onto the jar.
- Turn the jar upside down and shake to watch the snow fall.
Winter Pinecone Bird Feeders
This simple craft helps feed birds during winter while teaching kids about nature and responsibility.
Materials Used:
- Pinecones
- Peanut butter or sunflower seed butter
- Birdseed
- String
Steps:
- Tie a string securely to the top of each pinecone to create a hanging loop.
- Spread peanut butter or sunflower seed butter all over the pinecone’s surface using a plastic knife or spoon.
- Roll the sticky pinecone in birdseed until it’s fully coated.
- Hang the bird feeder on a tree branch outside and watch for birds to visit.
Cotton Ball Snowy Landscapes
Kids can create a snowy scene with fluffy cotton balls and a bit of imagination.
Materials Used:
- Blue construction paper
- Cotton balls
- Glue
- Markers or crayons
- Small craft sticks
Steps:
- Use markers or crayons to draw a wintery landscape on blue construction paper, such as trees, mountains, or houses.
- Glue cotton balls onto the paper to create snow piles, snowmen, or clouds.
- Use craft sticks to make fences or add texture to the scene.
- Let the artwork dry before displaying it.
Mitten Garland
Brighten up a room with a colorful mitten garland that kids can personalize.
Materials Used:
- Colored cardstock
- Scissors
- Yarn
- Markers
- Hole punch
Steps:
- Draw mitten shapes on the cardstock and cut them out.
- Use markers to decorate each mitten with patterns, stripes, or drawings.
- Punch two holes at the top of each mitten and string them together with yarn.
- Hang the garland on a wall, mantel, or window.
Ice Lanterns
Create stunning ice lanterns to light up cold evenings outdoors.
Materials Used:
- Balloons
- Water
- Small battery-operated tea lights
- Food coloring (optional)
Steps:
- Fill a balloon with water, adding a drop of food coloring for extra vibrancy if desired.
- Tie the balloon and place it outside (or in the freezer) until it freezes solid.
- Carefully cut and remove the balloon.
- Create a flat base by melting one side slightly.
- Place a tea light inside the ice lantern and watch it glow beautifully at night.
Handprint Penguins
Turn little handprints into adorable penguin characters.
Materials Used:
- Black, white, and orange construction paper
- Glue
- Scissors
- Googly eyes
Steps:
- Trace the child’s hand onto black construction paper and cut it out.
- Cut an oval shape from white paper and glue it onto the palm area for the penguin’s belly.
- Add googly eyes, an orange triangle beak, and orange feet cut from construction paper.
- Let the penguin dry and display your creation.
Marshmallow Snowman
Build an edible snowman craft that doubles as a tasty treat.
Materials Used:
- Large marshmallows
- Pretzel sticks
- Candy eyes
- Orange candy (for the nose)
- Icing or melted chocolate
Steps:
- Stack three marshmallows vertically and secure them with a pretzel stick through the center.
- Use icing or melted chocolate to stick candy eyes onto the top marshmallow.
- Add an orange candy piece as the nose and draw a smile with icing.
- Insert pretzel sticks for arms and enjoy the snowman snack.
Paper Plate Snow Globe
A creative snow globe craft that doesn’t require any water!
Materials Used:
- Paper plates
- Plastic sandwich bags
- Glitter
- Winter-themed stickers or cutouts
- Tape
- Glue
Steps:
- Cut a circle out of the center of one paper plate to create the snow globe window.
- Tape a clear plastic sandwich bag to the back of the plate to cover the hole.
- Decorate the inside with stickers or winter cutouts and sprinkle glitter on top.
- Tape or glue another paper plate behind the first one to seal the globe.
- Shake gently for a snowy effect.
Felt Christmas Tree with Ornaments
A soft, reusable craft where kids can decorate their own tree.
Materials Used:
- Green felt
- Colored felt scraps
- Scissors
- Glue or Velcro dots
Steps:
- Cut a large triangle from green felt to make the tree.
- Use colored felt scraps to cut out ornaments, stars, and garlands.
- Glue or stick Velcro dots on the back of the decorations.
- Hang the felt tree on a wall and let kids decorate it as they please.
Fun and Learning Benefits of Valentine’s Day Crafts
Valentine’s Day crafts are a wonderful way to celebrate the season of love and creativity. They offer a delightful combination of fun and learning, making them perfect for kids and adults alike. Engaging in these crafts fosters self-expression, strengthens relationships, and provides opportunities for growth in a variety of skills. Here’s a look at how Valentine’s Day crafts can be both enjoyable and educational:
1. Encourages Creativity and Imagination
- Crafting allows individuals to explore their creative side by designing unique Valentine’s cards, decorations, or gifts.
- Using different materials like paper, paint, glitter, and glue encourages out-of-the-box thinking.
2. Strengthens Fine Motor Skills
- Activities like cutting, folding, gluing, and drawing help improve dexterity and hand-eye coordination, especially for children.
3. Teaches Emotional Expression
- Crafting Valentine’s projects provides a way to express love and appreciation for others, fostering emotional awareness and connection.
- Writing heartfelt messages or creating personalized gifts helps kids and adults articulate their feelings.
4. Promotes Teamwork and Social Interaction
- Group crafting sessions offer opportunities for collaboration, whether at school, home, or community events.
- Working together on a shared project can strengthen friendships and family bonds.
5. Introduces Budget-Friendly Fun
- Valentine’s crafts often use inexpensive materials, making them a cost-effective way to celebrate.
- Repurposing household items for crafts teaches resourcefulness and eco-friendly practices.
Cleanup and Display in Craft Activities
Encouraging responsibility for cleaning up and displaying crafts plays a vital role in fostering a positive and organized environment, whether in the classroom or at home. It teaches children accountability, respect for shared spaces, and the value of their own work. Along with cleaning up, showcasing the crafts gives them a sense of pride and accomplishment. Here are some effective ideas for encouraging both cleanup and display:
Encouraging Responsibility for Cleaning Up
- Establish Clear Cleanup Routines:
- Set specific times for cleanup, such as after each activity or at the end of the day.
- Break the cleaning process into smaller tasks to make it more manageable for younger children (e.g., put away brushes, wipe tables, organize materials).
- Assign Roles:
- Give children specific roles, such as being responsible for collecting leftover scraps, wiping surfaces, or sorting supplies. This fosters a sense of responsibility.
- Make It Fun:
- Turn cleanup into a game or competition by timing how quickly the space can be cleaned or playing upbeat music while they tidy up.
- Use visual or auditory cues to indicate when cleanup should start (like a bell or a specific song).
- Model Cleaning Behavior:
- Set an example by cleaning up with the children. Demonstrating how to clean up efficiently encourages them to follow suit.
- Teach children how to properly care for materials and explain the importance of keeping the workspace neat.
- Praise and Positive Reinforcement:
- Offer praise and encouragement when children complete their cleanup tasks. Acknowledge their hard work to help them associate cleaning with positive feelings.
Ideas for Showcasing Crafts
- Classroom or Home Displays:
- Create a designated “art wall” where children can proudly hang their crafts for others to admire. This can be a bulletin board, a section of a wall with frames, or a clothesline with clips.
- Display the projects in a gallery-style arrangement to make each piece stand out.
- Take-Home Gifts:
- Turn crafts into special gifts for parents or friends. Have children make items like greeting cards, handmade jewelry, or pottery that they can take home as keepsakes.
- Provide a small, decorated gift bag for each child to place their craft in, making it feel like a personal gift.
- Craft Exchange:
- Organize a craft exchange among students, where each child can give their creation to someone else. This teaches generosity and provides an opportunity to appreciate others’ work.
- A theme-based exchange (e.g., holiday crafts or friendship-themed projects) can add an extra element of fun.
- Portfolio or Scrapbook:
- Encourage children to keep a personal portfolio or scrapbook of their crafts. This can be a great way to track progress over time and celebrate their creative growth.
- Allow children to choose their favorite pieces to add to their portfolio, reinforcing their involvement in the selection process.
- Celebrate with Exhibitions:
- Host an “art show” where children’s crafts are displayed for the class, school, or family. It could be a simple exhibition in the classroom or a larger event in the school.
- Use labels or name tags for each project to add a professional touch and give each child credit for their work.
FAQ
What are some easy Valentine’s Day crafts for 2nd graders?
Some easy Valentine’s Day Crafts For 2nd Graders include making heart-shaped cards, decorating paper bags for love letters, creating paper plate love bugs, or making friendship bracelets. These crafts are simple, fun, and allow for creativity.
How can I make a Valentine’s Day card with 2nd graders?
To make a simple Valentine’s Day card, provide construction paper, crayons, markers, and stickers. Fold the paper in half, and let the children decorate the front with hearts, their names, and special messages for their friends or family.
Are there any group Valentine’s Day Crafts For 2nd Graders?
Group Valentine’s Day Crafts For 2nd Graders include creating a big heart-shaped mural with each student adding their own decoration, making a love tree where each student adds a paper heart with a kind message, or assembling a class Valentine’s Day banner.
What materials are needed for Valentine’s Day crafts for 2nd graders?
You can use construction paper, markers, glue sticks, scissors, glitter, stickers, ribbons, fabric, buttons, and googly eyes. Simple craft kits or pre-cut shapes are also helpful for younger students.

Hi, I’m Victoria, an art and craft teacher at Newark City Schools, where I have the joy of working with middle school students to help them explore their creativity and develop their artistic talents. I believe that art is a powerful way for students to express themselves, and I strive to make every lesson a fun, engaging, and inspiring experience.
I created this website to share the art and craft projects, techniques, and resources that I use in my classroom, hoping to inspire both educators and young artists alike. Whether you’re a teacher looking for new ideas or a student eager to try something new, I’m excited to provide creative tools and projects that anyone can enjoy.
When I’m not in the classroom, I love experimenting with different art forms and learning new crafting techniques. My goal is to help others discover the joy of making things with their hands, and I hope my website serves as a space for everyone to explore their creative potential.

